It is the cold season, which means that we all need a lot of heat. In fact, man survived on earth due to the fact that he learned to control the fire, because the flame became a source of heat, as well as a way of cooking. But now we are not talking about evolution ...
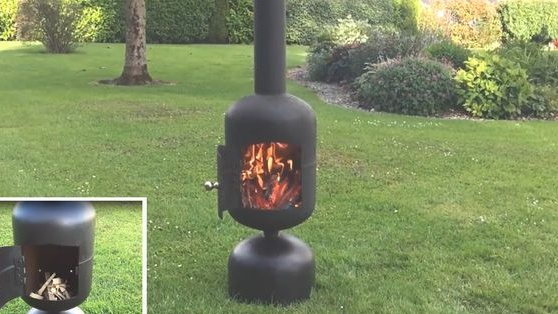
It will be about a very simple potbelly stove, which is made from a gas cylinder. The purpose of this stove is to heat during combustion, since there is nothing to accumulate heat here. The author decided to make such a potbelly stove for himself on the street in order to relax in nature on cool evenings with a cup of beer or wine. Of course, our man can easily make such a stove and use it to warm up the garage or other technical room. Everything is done simple and practical.
Materials and tools used by the author:
Material List:
- old gas bottle;
- door hinge;
- a piece of pipe for the chimney;
- bolts with nuts;
- a bolt with a nut or something else to make a door handle;
- some scrap metal for the manufacture of a furnace support (or another gas cylinder).
Tool List:
- with cutting and grinding disks;
- ;
- ;
- refractory paint;
- wrenches, pliers and other little things;
- tape measure, marker.
The process of making potbelly stoves:
Step one. Balloon preparation
This is a very important step, your life and those around you may depend on it! Even empty at first glance cylinders probably contain residual gas that explodes when cutting the cylinder. In this regard, all cylinders must be cleaned before work. The easiest way is to pour water into the cylinder, preferably warm, and then pour it. We fill the balloon to the neck, repeat the procedure several times. To do this, unscrew the valve of the cylinder, and then turn the cylinder over to drain the remaining gas.
The most proven option to get rid of all gas residues is to warm it up. We wash the balloon, and then make a fire around it and move to a safe distance. After warming up, the cylinder will become completely safe for work.
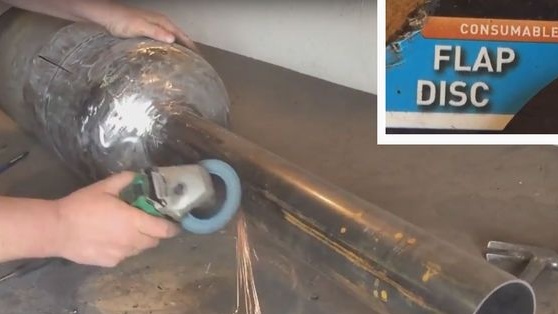
Step Two We cut the balloon
The author built this potbelly stove from two small gas cylinders. Half of one cylinder is used as a support for the entire furnace. Well, the second cylinder is the body of the furnace itself. But you can use one cylinder, most importantly, come up with a support for it. It can be easily made from a corner or pipes.
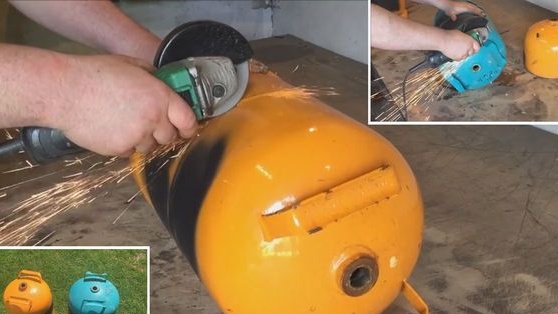
The author cuts the balloon for support in half into two parts. He focuses on the weld, which runs in the middle of the container.
Step Three Paint problem
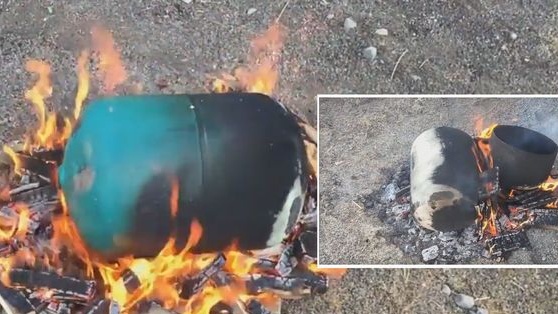
The paint from the tank must be removed, as it is not heat-resistant and after the kindling of the furnace will burn and smoke. Removing it mechanically is quite problematic, the author found a way out of the situation by throwing blanks into a fire. As a result, the paint was burnt, and the remnants were easily removed with a metal brush.
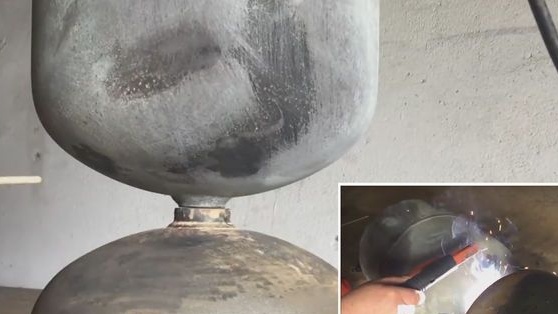
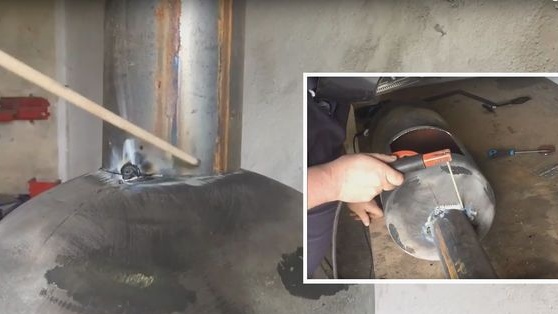
Step Four Component welding
Now we need to weld the whole cylinder to the half that we cut earlier. For this, the author joins the cylinders at the place of installation of the cranes and seizes them by welding. After making sure that everything connects smoothly, the author finally welds these parts.
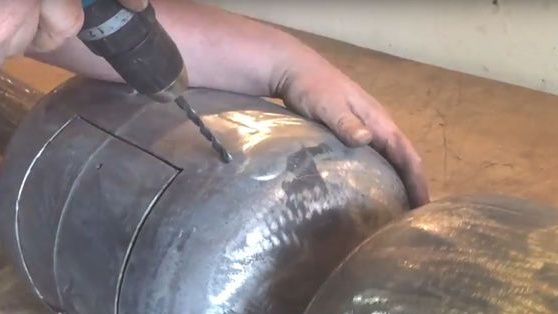
Step Five We make a hole for the chimney and cut out the door
At the top of the furnace you need to cut a hole for the pipe. It is not necessary to make it perfectly round, as this is a rather difficult task if you use a grinder. In principle, nothing prevents you from making it square, just smaller than your pipe. In any case, the author then welds the pipe butt.
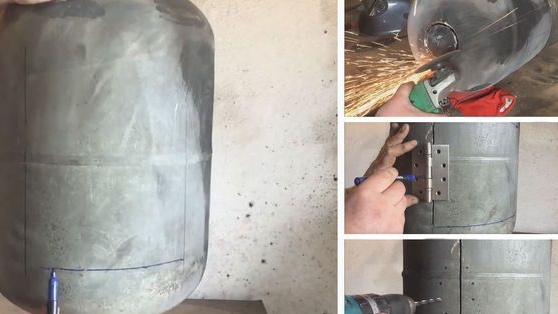
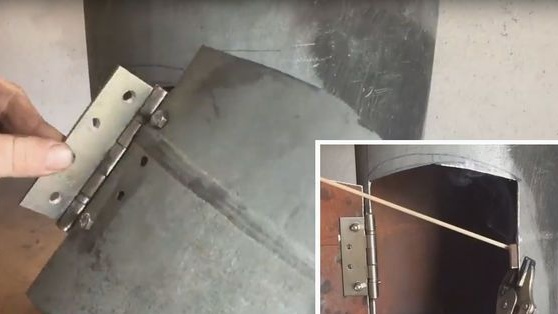
You will also need to cut out the door. First mark its location with a marker, and then make one vertical slot on the side where the loop will be attached. Do not cut the door completely yet, take a drill and drill holes for the bolts with which you will fasten the loop. Now it is much easier to do this, since you do not need to measure, hold anything, and so on.
Well, only after that finally cut the door.
Step Six We put the chimney
Already now you can weld the chimney. Use the length and diameter of the pipe at your discretion, the longer and thicker it is, the stronger the draft will be. But with strong traction, fuel burns quickly, so find the best option. Grab the pipe first, make sure it is installed vertically, and then weld well so that there are no large gaps.
Seventh step. Fasten the door
The author hangs the door on hinges. Earlier, we already drilled holes for this business. Now we take small bolts with nuts and wrenches. Easily and simply fasten the door to its place. The author decided to fasten the loops from the inside, but this is already a matter of aesthetics.
Step Eight. Handle Installation
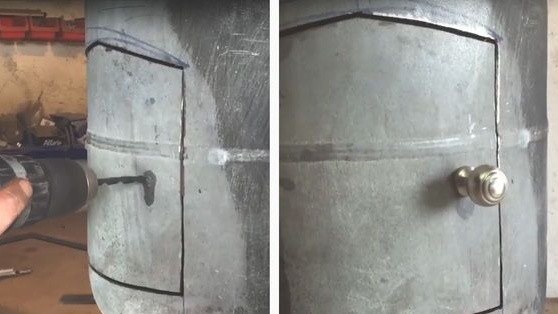
The handle here is a rather important element, as you will quite often open and close the door. The handle should be made so that it does not get very hot, since the metal surface of the furnace will heat up very much. It’s better to make the handle as long as possible, use some kind of insulating materials, and so on.
We drill a hole in the door and fasten the handle.
Step nine Surface preparation for painting
In order for the paint to adhere well to the metal, it must be carefully cleaned. To do this, you can use a grinder with various nozzles. A wire brush head or a grinding head is suitable. All metal should shine. After machining, it would be nice to wipe the surface with a rag soaked in acetone, this will permanently remove all fat deposits and so on.
Step Ten Air supply
Any furnace needs oxygen, since combustion is impossible without it. For air to enter the furnace, the author drills a series of holes in the lower part. Their diameter and quantity are selected experimentally. Ideally, for long burning it would be necessary to make a blower with an adjustable window, that is, a door, but all this complicates the design.
In principle, the burning rate can be limited by installing a valve on the pipe.
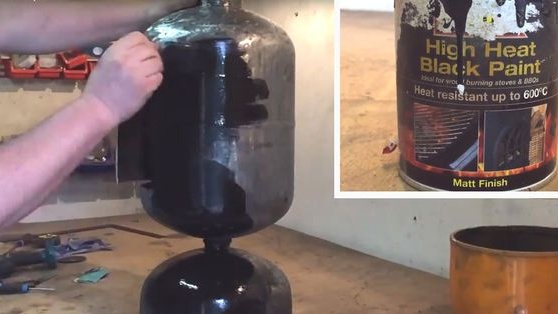
Step 11. Painting the oven
The furnace needs to be painted, because when heated, ordinary steel is strongly oxidized. This will lead to an ugly appearance, and the metal is destroyed quite actively.First of all, it is advisable to cover the oven with soil, so that then the paint goes well, but this is not necessary. You will definitely need a heat-resistant paint, since any friend will instantly burn, since the oven heats up to several hundred degrees (sometimes red). The author paints with a brush.
After the first fire, such a paint may smell a little at first, but this is normal.
Step 12. Conclusions
According to the author, the furnace turned out to be quite successful and he is pleased with it. Thanks to the unique support from the half of the cylinder, the heat from the stove does not spread to the ground, which means that the risk of a fire is small, the stove does not spoil even green grass.
Due to the fact that the metal heats up quite strongly, a high temperature is obtained in the furnace, it is somewhat reminiscent of a rocket furnace. If desired, this stove can be upgraded so that it can cook food, or at least reheat.
It will not be superfluous to make a good blower and grate. It is highly advisable to make a latch on the door, as it can easily open if the tree “shoots”, and this threatens with a burn or fire.