
Probably, for a good knife you can’t find a better workpiece than a file. This is a high carbon steel that can be hardened. This means that you can first heat the metal and let it cool in the air. After that, the file will remain soft and you can easily cut the knife out of it. And when the work is finished, the metal can be hardened again, for this we heat the metal to a bright glow and cool in oil.
For the manufacture of such a knife you do not need a large set of tools, everything can be done with a grinder or even a file. But it would be nice to have at least a small belt grinder, a grinder and another tool for metal processing. As a source material, the author used an old file, whose age is more than a hundred years old.
Materials and tools used by the author:
Material List:
- old file;
- wood (for the manufacture of pens);
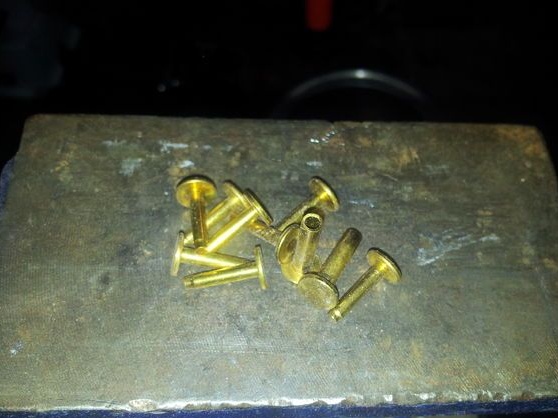
- brass rods (for the manufacture of pins);
- masking tape or other tape (for temporary sealing of the blade).
Tool List:
- different emery paper with grit from 60 to 600;
- ;
- with cutting and grinding disks;
- carbide tipped drills (optional);
- ;
- propane burner or other heat source;
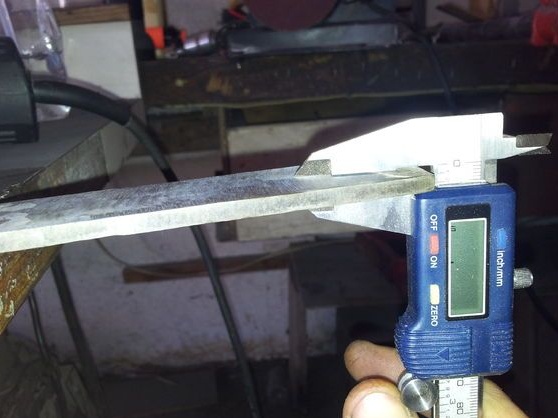
- vernier caliper;
- clamps;
- a container of water (for cooling the metal during operation).
The process of making a knife:
Step one. Preparation and verification of source material
First of all, you will like to choose the right file in size and it is still very important that it be made of high-quality metal. Some files can be made with a not very high carbon content, as a result, they are not very durable. To check this, you will need a piece of strong stone, for example, granite or the like. Hit the stone with a knife, a large number of sparks should appear immediately. If there are few of them, then steel is not high quality.
At the end, cut a piece of the desired length from the file.

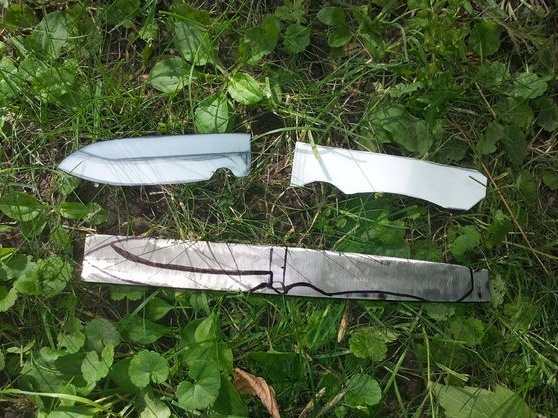
Step Two Making a template and transferring it to metal
You can come up with a knife profile as you like, it all depends on your imagination. The easiest way to find a finished profile on the Internet and just print it on a printer. You can draw a profile yourself if you have no problems with this. Next, you will need to cut out this template from paper, and preferably from thick cardboard, so it will be possible to hold it in your hands.
When making the knife, the author had one problem, the file metal turned out to be too thick. It was decided to polish it to make it thinner. For this, large sandpaper was used. This work is rather hard and lengthy, but quite feasible.
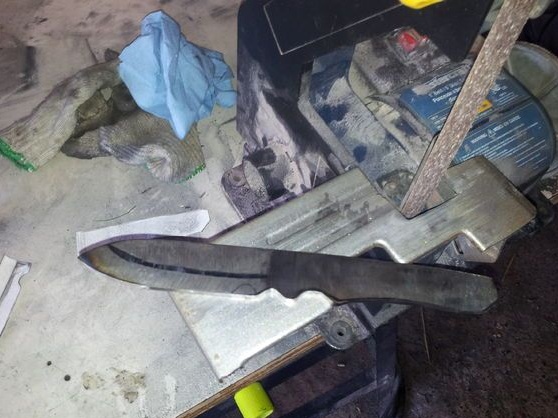
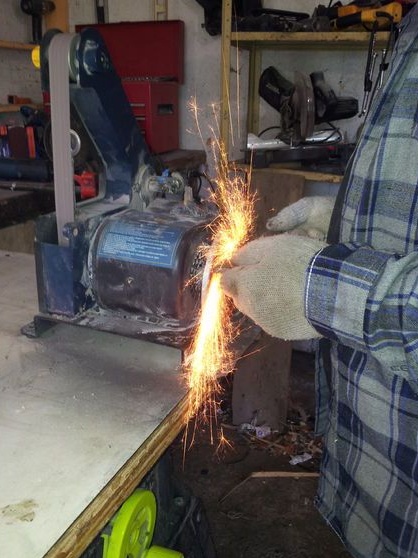
When you're done with all the work, you can cut the profile. In principle, here you can deal with an ordinary grinder, but band saws are better. If you will not temper steel again, try not to overheat during processing, since in this case the metal is tempered and the steel becomes soft. To avoid overheating, regularly cool the metal with water.
Step Three Grind the knife
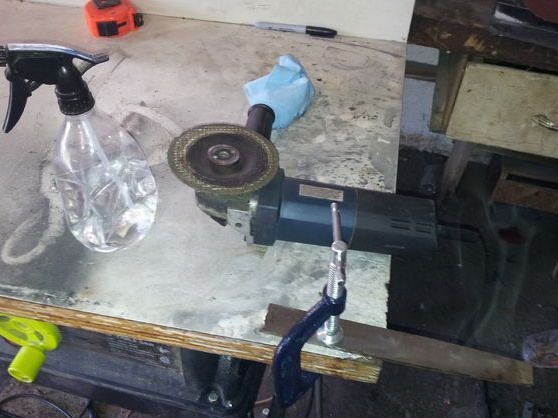
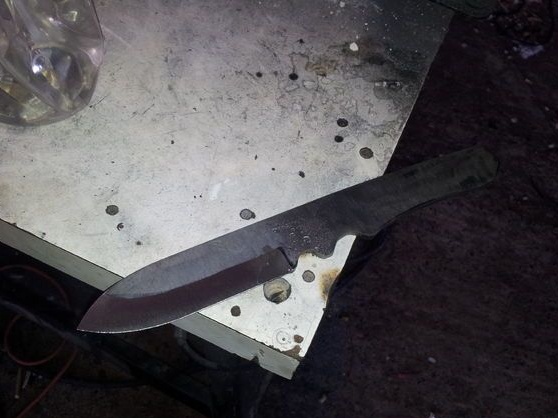
After you cut out the main profile, it is fashionable to start grinding the knife. A belt sander will help to do this quickly and efficiently. It is especially convenient to form bevels on the knife. If there is no such machine, it’s not scary, you can handle manual tools.
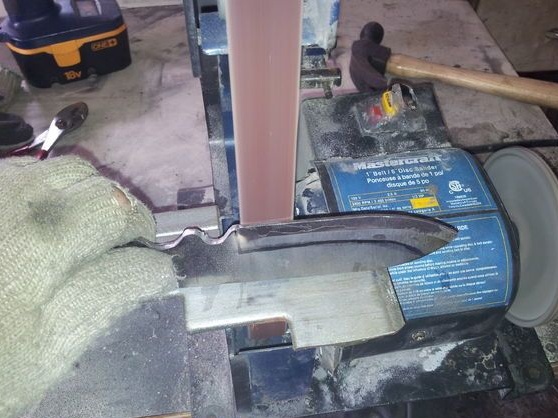
The most difficult will be to form the bevels, they must be smooth and symmetrical. If you are a professional in this matter, then this work can be done by eye. But it’s better to calculate everything first. Just draw a line on the blade, which will indicate the border of the bevel. You also need to divide the future blade into two parts. Typically, a drill of exactly the same diameter as the thickness of the workpiece is used for such purposes. Well, slowly we remove the metal, first one edge, then the second. If you didn’t let go of the metal, then it’s unlikely that you can do it manually;
Also grind the entire knife profile. It is necessary to smooth out all irregularities, remove excess, make the surface smooth.
Step Four Preparation for drilling
Since the metal of the file is very hard, it just cannot be drilled. Work can only be done with carbide-tipped drills, or metal can be released, as the author did.
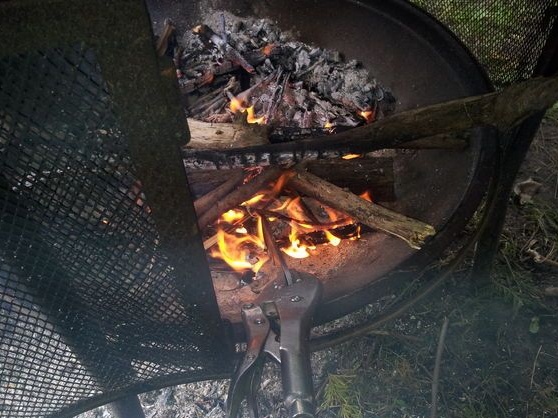
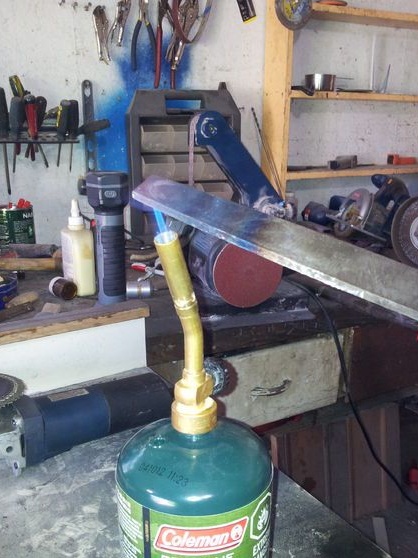
To make the metal softer, it must be heated red-hot, and then allowed to cool in air. The author heats only the tail, that is, where you need to drill holes. For heating, a propane burner is used. Coal is also suitable for this matter.
Step Five We drill holes for the pins
After annealing, the metal will be soft and can be easily drilled with a conventional drill. The diameter of the drill is selected in accordance with the used pins. The pins are most often used brass, they look beautiful. But if you don't give a damn about aesthetics, ordinary nails will do.
Step Six Final grinding
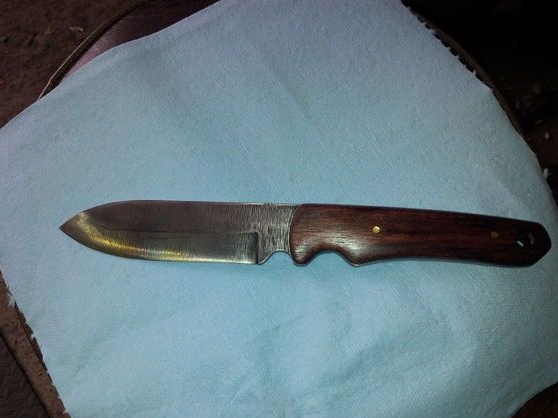
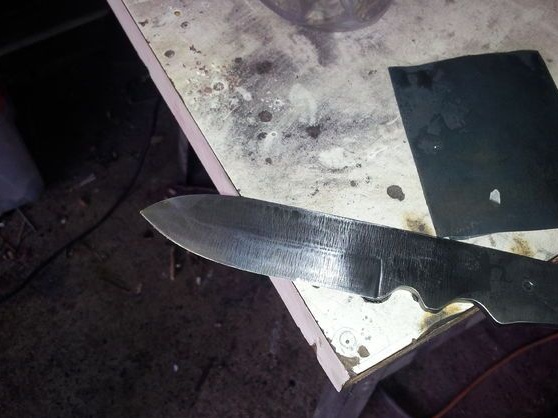
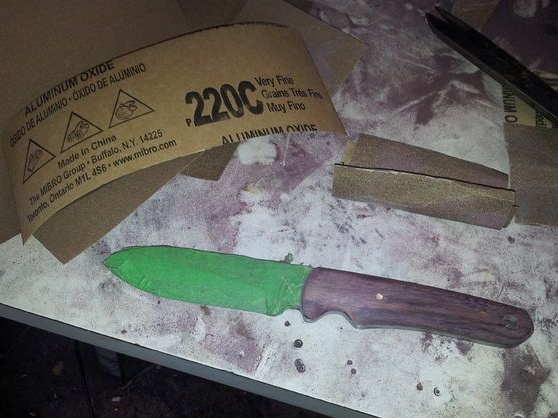
In the end, the author carefully polishes the surface of the knife, achieving the desired result. First, sandpaper with a grain size of 400, then 600, and at the very end 1000, is used. Grinding was not done to a mirror shine, since the task was to save the patina on the blade.
Using sandpaper, the knife can be sharpened pretty well. After sharpening, be careful when reassembling the knife. It is recommended to seal the blade with adhesive tape for the duration of the work, or you can use paper and scotch tape, or tape.
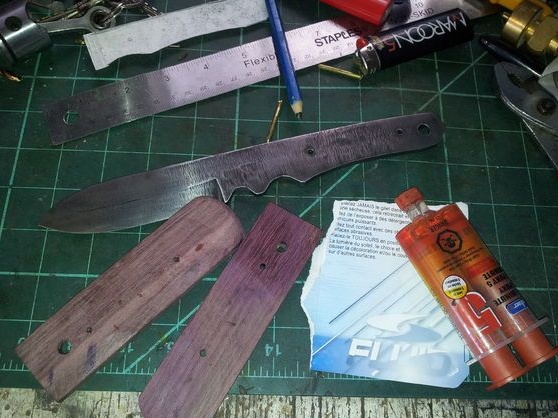
Seventh step. We prepare the blank for the handle
To make a pen, you will need two thick dostochki, select wood at your discretion. Of course, it is more promising to use walnut, beech and other valuable species. First, cut two pieces of the right size. Then attach one of them to the handle of the knife and drill holes for the pins. Similar holes are drilled in the second half.
[
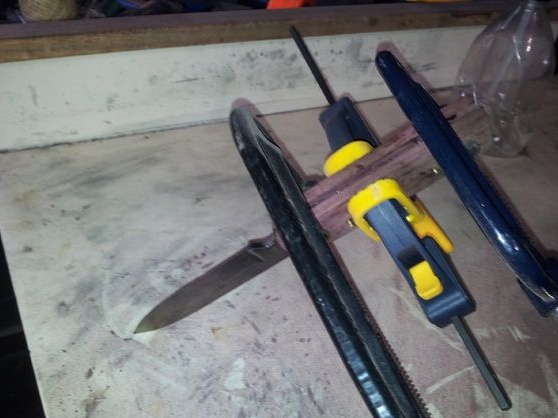
The adjacent planes must be even and smooth so that they lie flat on the handle and are firmly glued. Sand the tail of the knife with sandpaper and wipe with acetone so that the glue adheres securely to the metal. As an adhesive in the manufacture of knives, it is customary to use epoxy.Mix the resin with the hardener in the required proportions and apply on both halves. Then we assemble this whole thing so that the holes for the pins match. At the end, we insert the pins and tighten the handle with a clamp, and preferably two. The glue dries usually a day, so for now leave the handle to dry.
Step Eight. We form the handle
When the glue dries, you can start grinding your hands. First of all, we need to form the desired shape. For rough processing we use files on wood. Further, when you form the desired shape, you can switch to sandpaper, removes all the bumps, and make the pen absolutely smooth. Of course, to quickly do all this work would be simple with a belt sander.
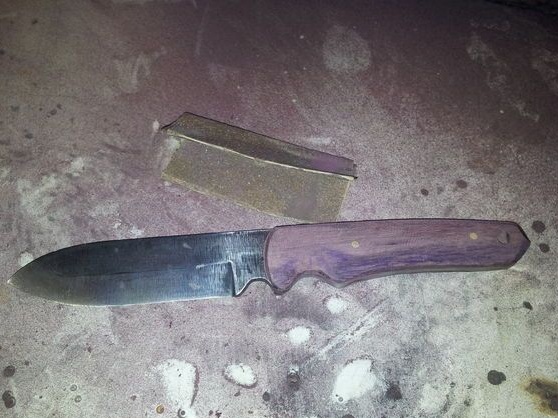
To make a pen, the author used a tree of the Peltogyne breed. After grinding, this wood oxidizes after a while and turns purple. Pretty interesting material for such things.
Step Nine. Finishing touches
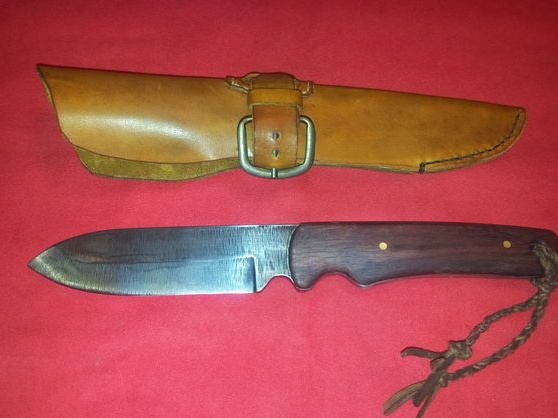
The knife is ready! It remains to protect the wood from moisture, otherwise it will crack, and generally will not last long. The author recommends applying a layer of epoxy on the wood, but in this case the pen will not look very natural. Beeswax also works well, we apply several layers with aging so that the wax has time to absorb. You can also use linseed oil.
When done with the pen, apply a thin layer of wax or linseed oil on the blade so that it does not rust during long-term storage. That's all, if you wish, you can sharpen the knife to the state of the blade. Wear this tool only in its scabbard!