
A drilling machine is a very convenient thing when drilling vertical holes. Firstly, it is much safer than a hand drill, and secondly, drills do not break so often. Such machines are quite expensive, and they are bulky, as a rule.
You can make a drilling machine for your small needs using a conventional drill, the author used a cordless one. But personally, I am not a connoisseur of battery technology, so it would be better to use a conventional power drill, it is more powerful, and it does not need to be charged.
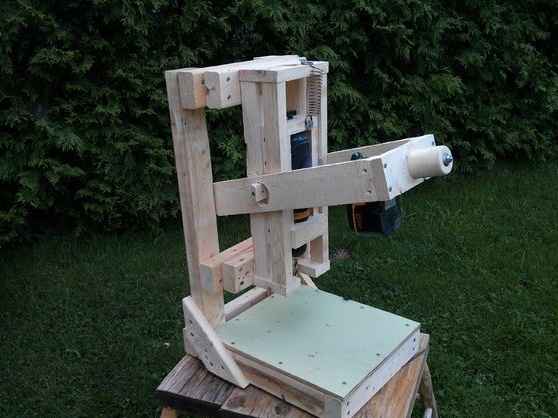
The author makes the whole machine of wood. The good thing is that such material is lightweight and can be found everywhere. Also, the tree is perfectly cut, drilled and so on. The whole structure consists of a simple frame on which the drill is mounted, as well as a guide and a lever, thanks to which the drill falls down.
The only difficulty in making the machine is that you have to individually come up with an arm (fixing frame) to fit your drill.
Materials and tools used by the author:
Material List:
- wooden trims;
- plywood;
- glue for wood;
- screws for wood;
- spring.
Tool List:
- ;
- a tool for cutting wood (, hacksaw and so on);
- sandpaper (optional).
The manufacturing process of the drilling machine:
Step one. Drill clamp
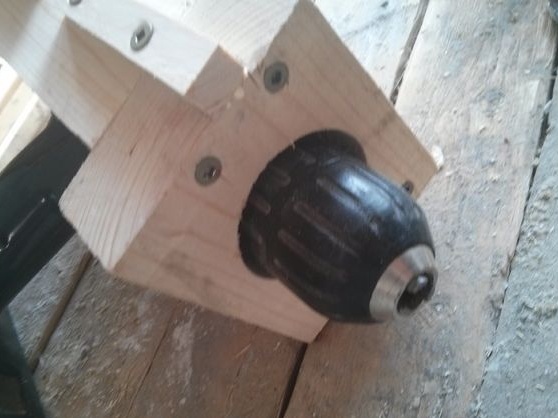
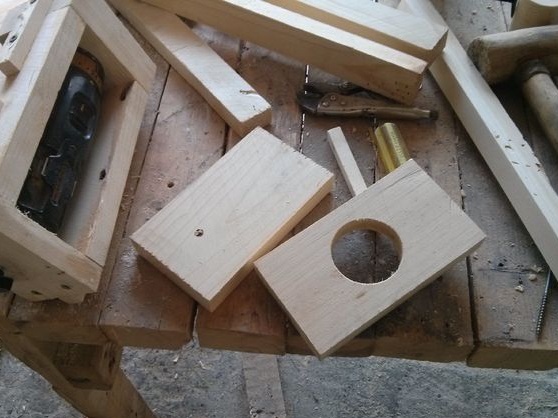
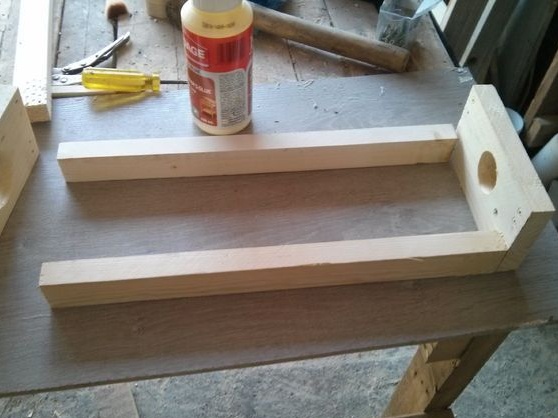
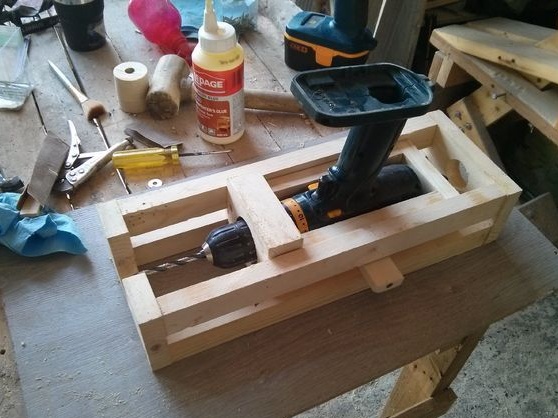
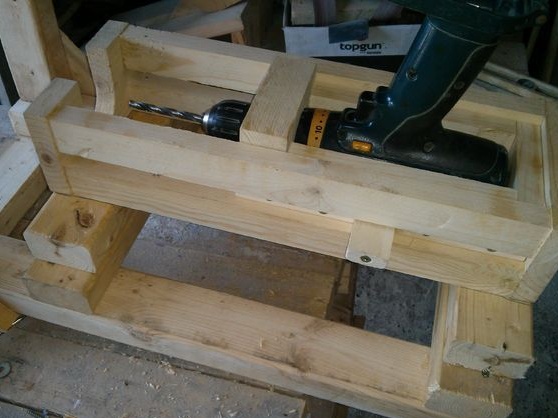
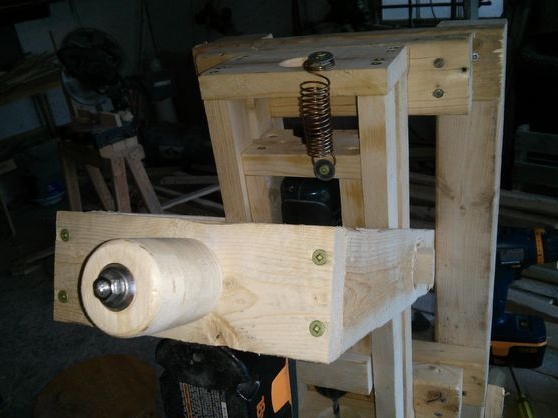
First of all, you need to make a retainer for the drill. It is done very simply, it is a rectangle that stray from the boards. First of all, grab a piece of wood that is as wide as the widest part of your drill. Add here the thickness of two more stitches and cut. In total you will need two such boards.
Then, in one board, drill a hole of such a diameter so that the nose of the drill and the chuck come into it. You can also cut a groove for this. The second short flap will be the back wall.
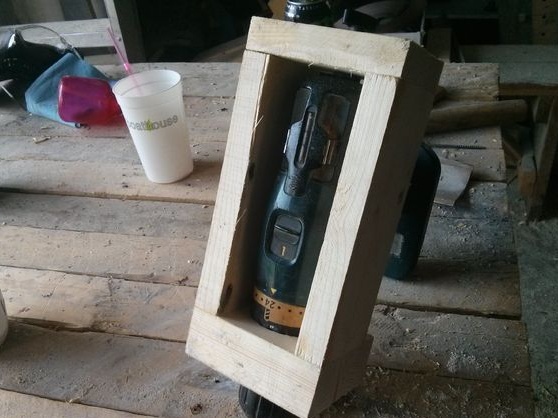
Also measure the length of your drill and cut off two more spans. Now you can assemble the case. We use self-tapping screws or screws for wood and assemble the structure. That's all, now the drill is securely fixed.
Step Two We fix the guides
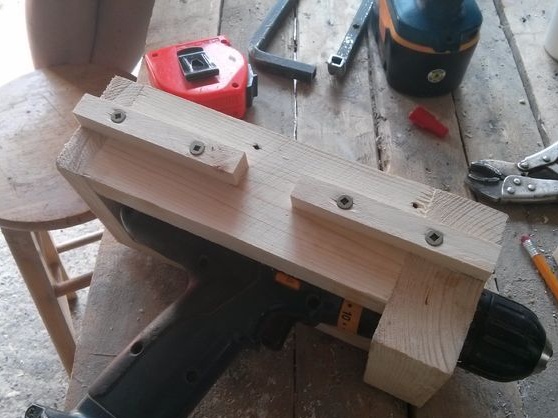
So that the drill can move clearly up / down, the guides must be screwed onto the retaining frame. They are attached along the frame, and are thin cubes. We fasten them with screws.
Also, from two sides you will need to fix one small lever, for which the main lever will cling.
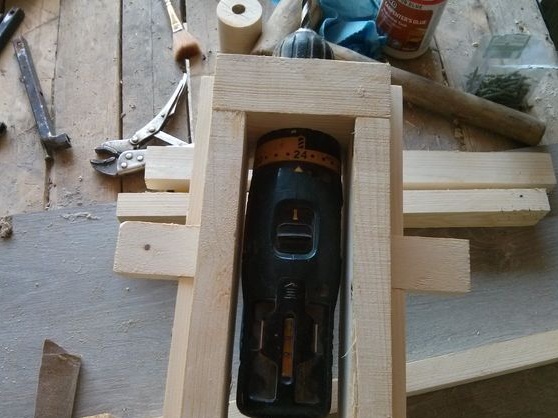
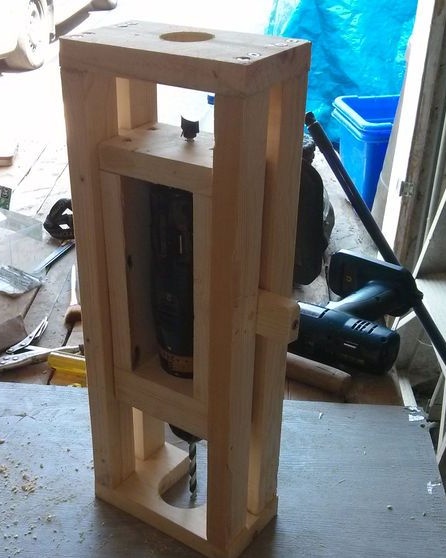
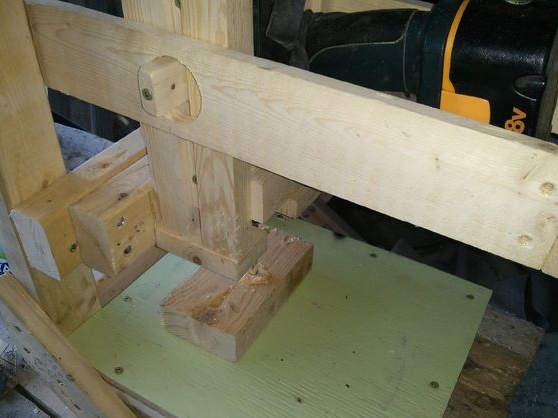
Step Three Assembling the guide frame
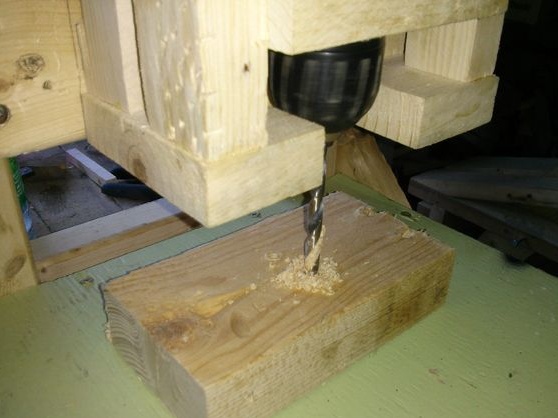
The drill mount we made earlier is located in the guide frame and moves along it. This frame is also made quadrangular. For her, you need two pieces and four bars. In the bottom board you need to drill a large hole or make a groove so that the drill chuck can come out. In general, there is nothing complicated in this matter, look at the photo, as the author did.
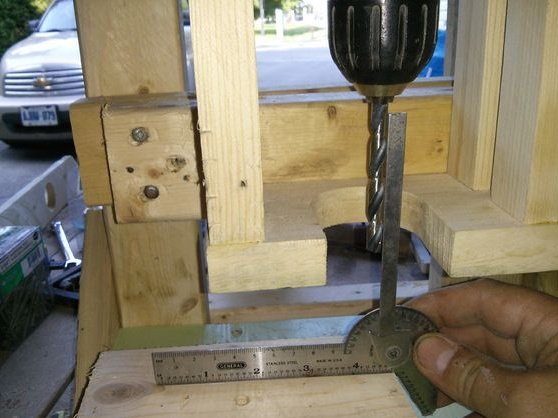
The most important thing is that all wooden parts are well sanded, in the places of friction they should be smooth. This is the guarantee that the design will not wedge. In the end, install the rectangular drill retainer in the guide and try to see if the inside moves easily. Set the minimum clearance between the rails, but only so that the structure does not wedge.
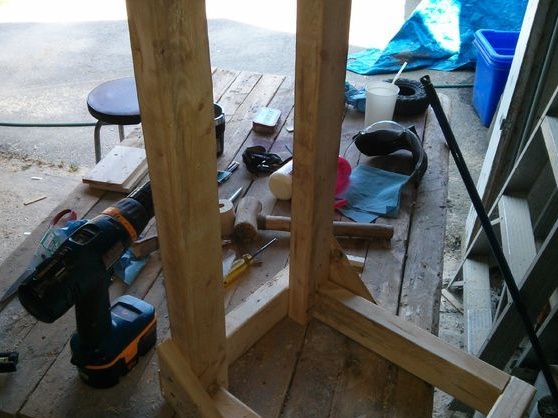
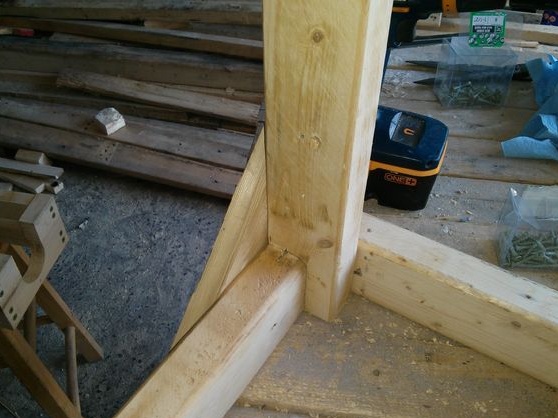
Step Four Frame manufacturing
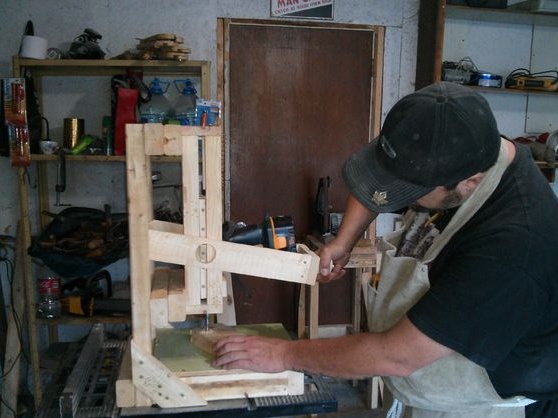
To make a frame, you will need a wooden beam. We make a structure out of it, as the author did. You can collect everything on the screws. At the bottom you should get a rectangle, it will work as a support and at the same time it will serve as a frame for your desktop.
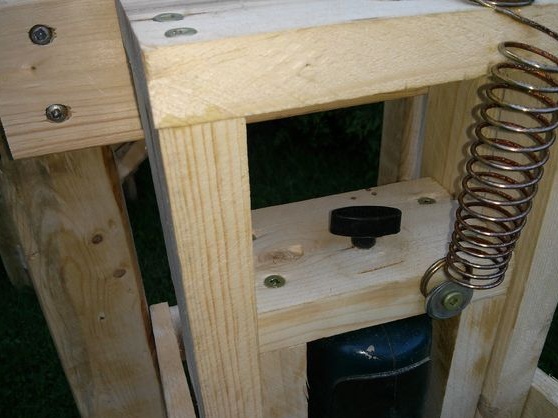
To fasten the guide frame, you need to fix two blocks in an upright position. The author strengthened them with two pieces, screwed on the sides with self-tapping screws.
Step Five Fasten the guide frame
Now you can assemble the whole structure, you will need four pieces or two thick bars. First we fasten the abilities to the vertical bars at the right distance from each other. Thanks to this, we retreat from the edge to the center so that the drill is placed with a drill in the center of the desktop. This distance is adjustable by fixing the desired number of boards or beams.
Well, now screw the guide frame with the screws strictly upright.
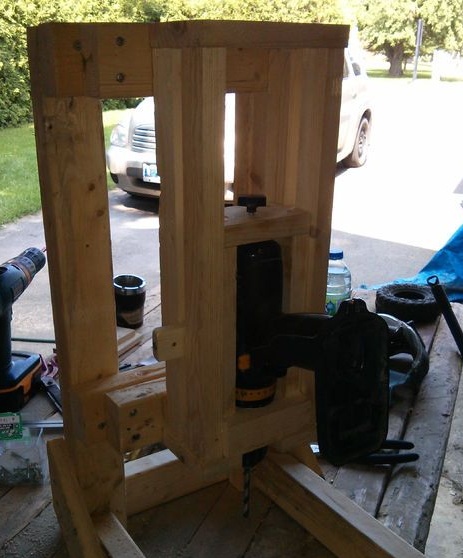

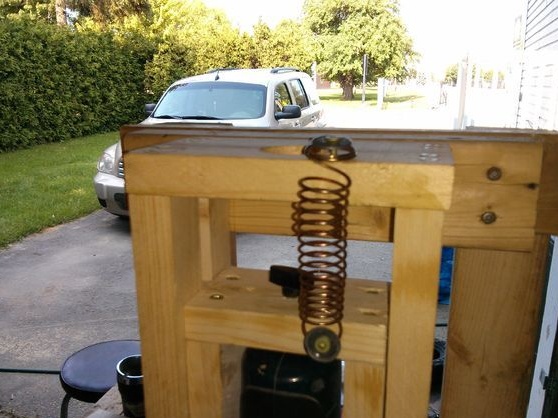
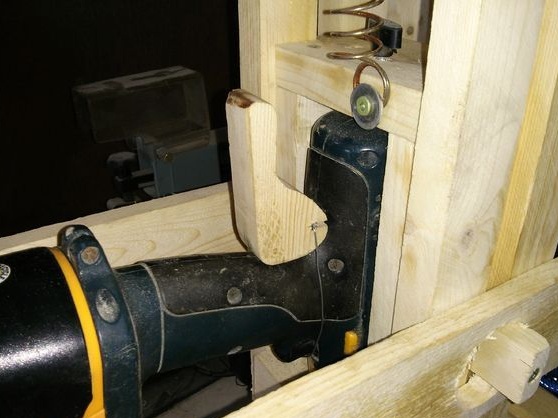
The inner movable part with the drill is suspended on a spring. This is to ensure that the drill returns to its original position when you release the lever.
As you can see in the photo, the author fixes the drill with a special screw. Tighten the screw, it presses the drill, and it is securely fixed in place. And if you want, you can unscrew the screw and easily pull it out. At the end, check all moving nodes so that there are no skews or wedges.
Step Six We make a lever
The lever is used to control the machine, it raises or lowers the drill. A lever is made of boards, it must be made in the form of the letter "P". You will need only three boards, two long and one short. The short one is on the front side, a handle is attached to it. In two other, long boards, we drill holes of large diameter. The levers that are bolted to the bracket holding the drill should go into these holes.
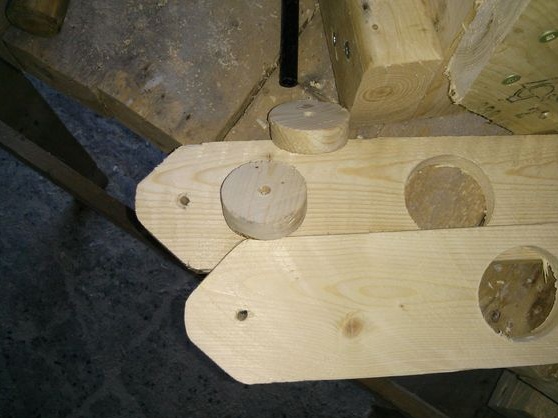

After you make the lever, fix it in two places to the frame. The lever should move, so it is better to drill holes in the mounting points and insert the bolts with nuts. When you raise the lever, the drill will also rise, and vice versa. Screw a convenient handle to a short piece, it can be turned out of wood.
When assembling the structure, always remember that you must have access to the battery, as you will have to charge it. But with a conventional network drill, everything is much simpler.
Seventh step. Machine adjustment
Adjust the spring stiffness as you like. Ideally, the spring should return the drill to its highest point every time you use the drill.
You must also set the drill to the desired depth so that it does not drill the table and at the same time reaches the right place.
Step Eight. Quick switch
To control the drill you will need to make a switch, but if you do not think forever to secure the door to the machine, then you do not need to disassemble it. To press the button and fix it in the pressed position, the author made a special “trigger” from wood. This part is made in the form of the letter "b". We fix this matter with a piece of wire. When turning the part, they rotate the wider part and pulls the trigger on the wire.
The design is simple, however, you will not be able to quickly turn off the drill if something happens.Yes, it's not scary, because a cordless drill is not very powerful.
Step Nine. Finishing touches
At the end, you will need to make and fix the desktop. To do this, you will need a piece of plywood, fiberboard or even sheet metal. We cut out the desired piece and fasten it to the bars using self-tapping screws.

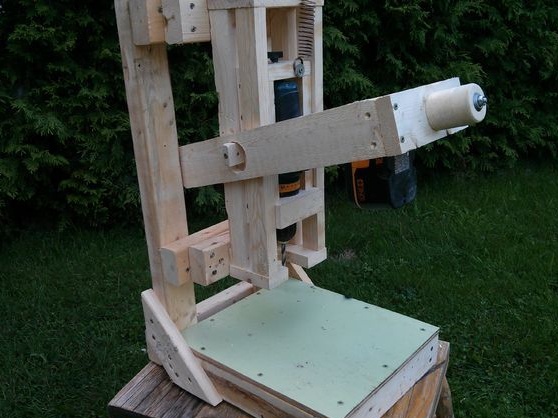
That's all, the machine is ready! It is lightweight, it can be moved to the street and in good weather with pleasure to carry out the necessary work. In conclusion, it can be noted that it is still desirable to protect the tree from water, otherwise it will change in size, crack, rot, and so on. You can soak it with linseed oil, or you can just dye it.