
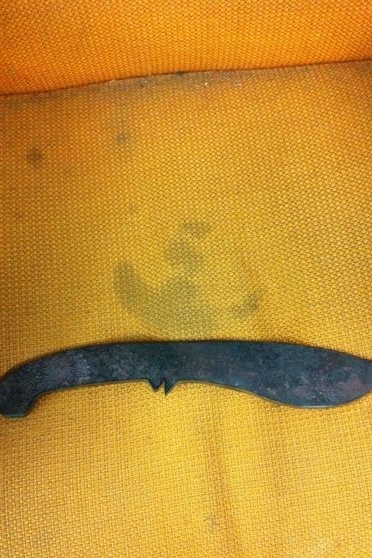
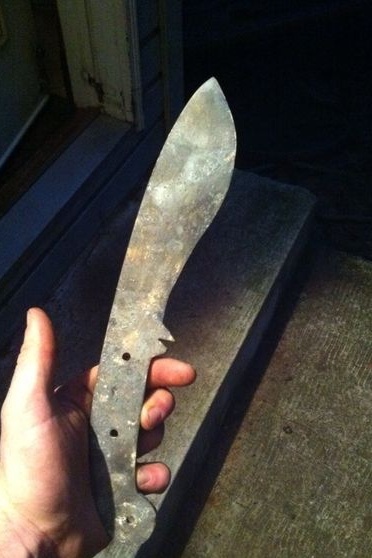
If you have access to old car springs, you are lucky because it is a source of high-quality high-carbon steel from which you can make great knives. You can harden such a knife, it will be strong and will become slightly dull if they cut even fairly hard substances.
All work with such metal is carried out exclusively during its tempering, so that the steel becomes soft and can be easily processed even with hand tools. Of course, it would be nice to have a band cutter and a belt grinder for such purposes. But all this is more likely to be useful for mass production of a knife, but for a single, in principle, it will not be needed.
Materials and tools used by the author:
- band saw (optional);
- car spring;
- a set of files (for wood and metal);
- sandpaper of different grain size;
- (a hand drill is also suitable);
- oven (or good coals + hair dryer);
- wood for finishing the handle;
- ;
- bolts (used as pins).
The process of making a knife:
Step one. Design a knife design
First of all, draw a knife template on paper. In this case, immediately draw a knife on a scale, proceed from the dimensions of the workpiece. If you have problems with drawing, you can easily download the finished knife template from the Internet. Of course, the knife in this case will not be unique, but it will not be difficult for you to make it such by changing the details.
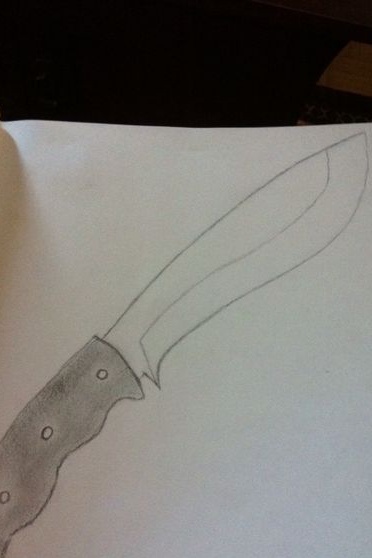
When the drawing is ready, just cut it. It would be nice if the template was cut out of thick cardboard. This will allow you to hold the profile in your hand and figure out whether the knife will be convenient.
Step Two Metal heat treatment
Before working with such metal, it is tedious to let it go. Firstly, this way metal will be much easier to process. And secondly, only in this case can you straighten it. You need to heat the steel to red, which is not so simple. Here you need a good bunch of coals, which you need to inflate with air. For air supply, you can use a regular household hair dryer, vacuum cleaner and other similar fixtures.
You can also make a simple stove from a gas burner.
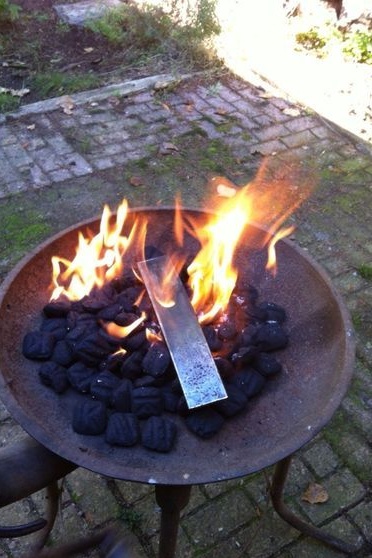
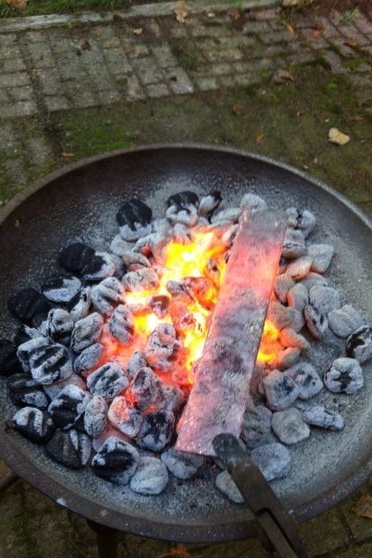
When the metal becomes hot, put it on a rail or anvil and slowly straighten it with blows of a hammer. However, you can smooth it without any problems even after complete cooling.
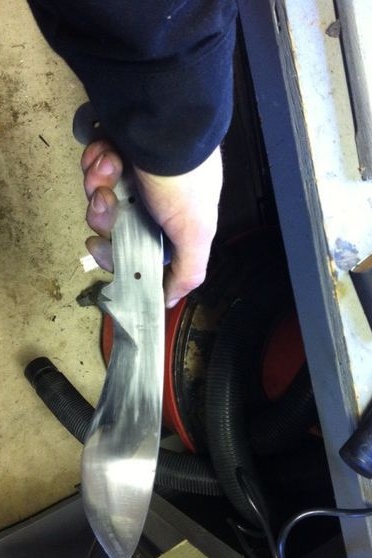
Step Three Cut steel profile
We take the blank and apply a profile made of paper to it. Circle the profile with a sharp object or marker. That's all, now we just have to cut the profile. The easiest way to do this is with a metal band saw. The worst case is a grinder, but in a hopeless situation, we use a hacksaw for metal. Avoid those cases when the metal changes its color from overheating, as it becomes soft and even hardening may not save it.
Step Four Grind the knife and make a bevel
In the next step, we carefully grind the surface of the knife. If you use an electric tool, then a belt sander is very suitable. If there is no such device, we clamp the workpiece in a vice and slowly process the files. For finer work we use sandpaper. We bring the profile to the ideal.
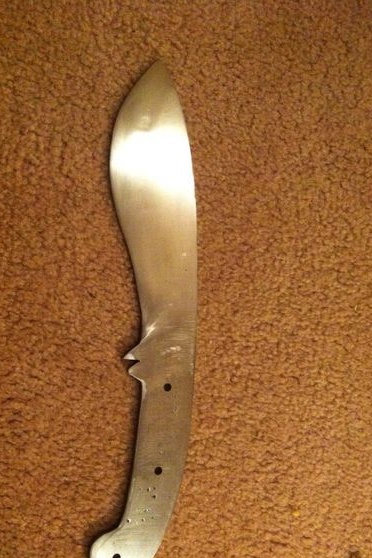
Then you need to form the bevels, the smoother they are, the better it will be to cut the knife. The bevels must be even and symmetrical. To do this, take a marker and draw a line of bevel border on the blade. You also need to draw a center line along the blade to divide it into two parts. Well, now we start grinding, it’s convenient to work with a belt grinder. If it is not, work can be done with a regular grinder. As a last resort, use files, it is not difficult. We bring the bevels to the ideal with sandpaper.
Step Five We drill holes for the pins
At this step, the author drills holes for the pins. This step can be performed at any time, most importantly, do not forget to do it before quenching, since then it will be extremely problematic. To securely fasten the linings of the holes, there must be at least two pieces; more are drilled more for aesthetic purposes.
The next step will be hardening, so try to finish all the basic work with metal. But fine grinding is not necessary, since after hardening the knife will be dirty.
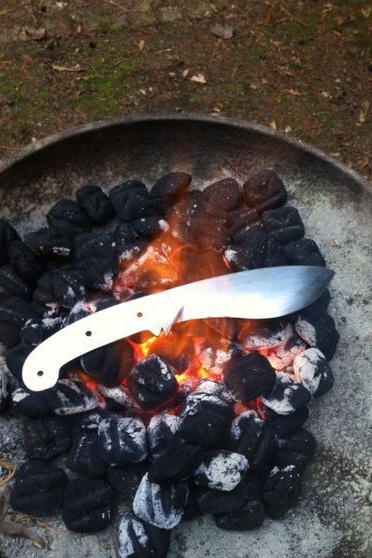
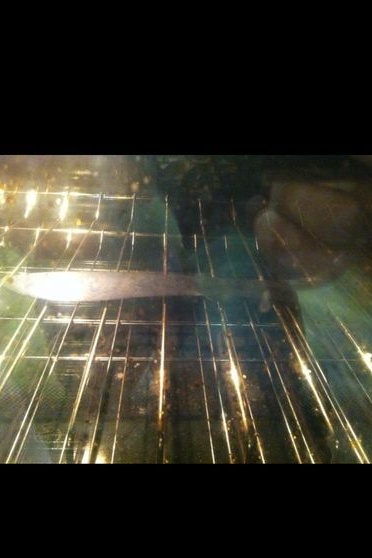
Step Six Knife hardening
Now you can proceed to hardening the blade. To do this, we again need a powerful heat source. We kindle the coals and heat the metal to a bright red yellowish glow. After that, we cool the steel in oil, the author uses vegetable, as she worries that the automobile "mining" contains a lot of contaminants and destroys the metal. But quite a few masters quite successfully use old engine oil.
After cooling, there will be a lot of contaminants on the metal, this is mainly scale and burnt oil. First, wash the knife, and then slightly clean the surface with sandpaper. We have one more step ahead - this is the release of metal. This procedure will make the metal a little softer, but it will spring and will not fly apart when dropped. Vacation is usually done in a domestic oven. Heat it to a temperature of 200-210aboutC and put the knife on the watch. The more massive the knife will be, the more it must lie in the oven for complete heating.
At the end of the set time, do not open the oven, just turn it off and let cool with the knife in the closed state.
Vacation metal is crucial. Once, the author simply tempered a knife and did not take a vacation. The knife was launched in a stump, as a result of which it scattered (knife) into seven parts.
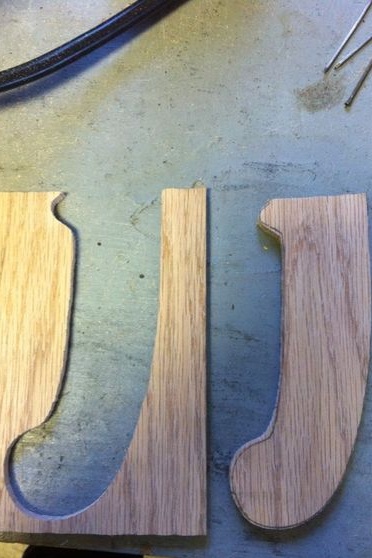
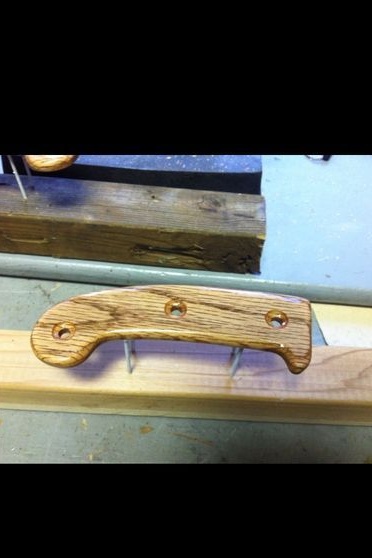
Seventh step. Cut out the handle
The author makes a pen according to a simplified scheme; he cuts it out with a band saw. The result is a neat, almost finished piece. But not everyone has such a tool.
For the pen you will need two thick slugs, attach the tail part to them and circle with a pencil. In total, you will need two such blanks.
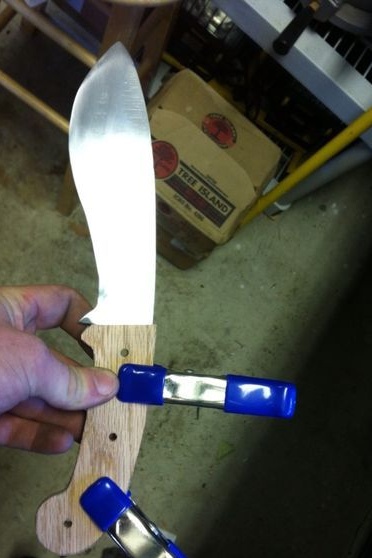
Step Eight. We drill holes for the pins in the handle
We attach both halves as evenly as possible to the knife shank and clamp with a clamp. Next, take a drill and drill through holes for the pins.However, it will be easier to drill holes in each pad separately.
Step Nine. Handle revision
The handle will need to be properly sanded, made smooth. Hold the knife in your hand and make sure that the handle is comfortable. Further, the author impregnates the pen with oil, linseed oil is well suited. Due to this, the wood will not absorb moisture and as a result crack. In addition, the oil will make the pen more beautiful. As a protective coating, beeswax or a mixture thereof with linseed oil can also be used.
Step Ten Set the handle
At the end, the author fastens the handle to the knife. Usually for such purposes it is customary to use epoxy glue and pins. But the author decided to choose another option, he just screwed the screws into the handle, thereby pulling together the two halves. This approach is not very professional, but simple. However, this can also be called some kind of manufacturing style, to each his own.

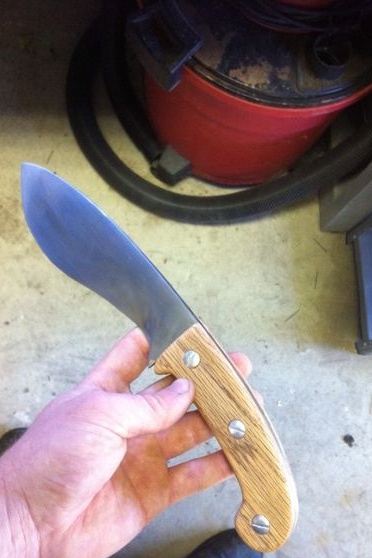
That's all, the knife is completely ready. At the end, sharpen it well, this can be done with fine sandpaper. Grinding stones and other sharpening accessories are also suitable. To carry such a knife, be sure to make a sheath, as otherwise it is very unsafe for you and others.