
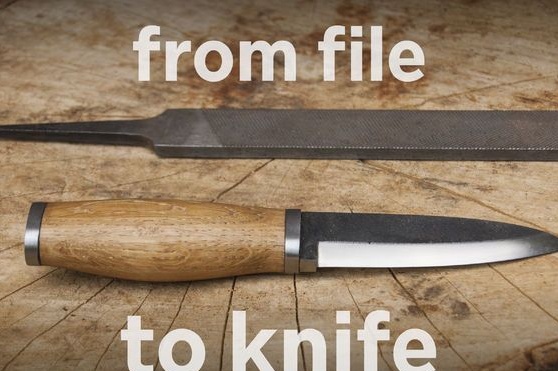
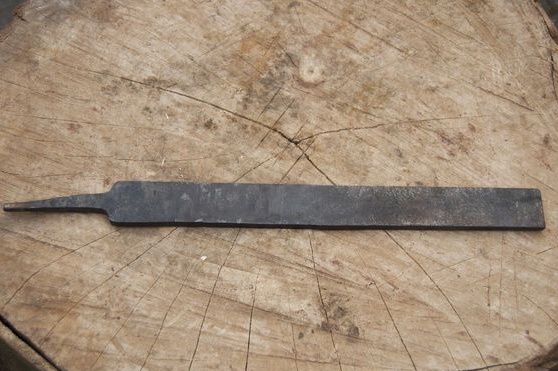
Many metalworkers often buy expensive blanks for their products. But it is often not difficult to find good metal, and it can even wallow in your workshop. For example, a good old file is suitable for making a good knife. It is made of steel with a high carbon content, which allows it to harden. In addition, the file has an excellent shape for the manufacture of a knife profile.
In this manual, we will look at how to make a good knife from a file using simple tools. Such a knife will be very sharp, will keep sharpening for a long time, they can even cut the wire, and it will still remain sharp for a long time.
Materials and tools used by the author:
Material List:
- old file;
- wood for the handle.
Tool List:
- epoxy adhesive;
- ;
- vise;
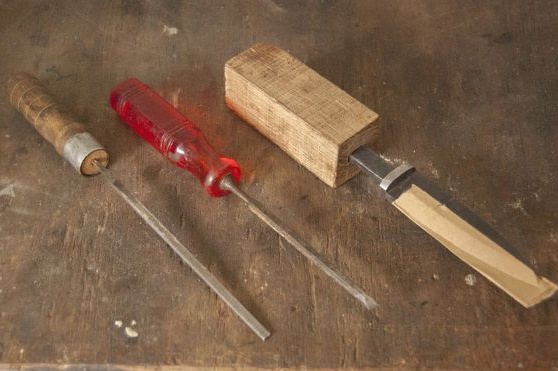
- screwdrivers, awl and other "picks";
- sandpaper;
- oil for wood impregnation;
- paper, pencil, scissors, etc. (for the manufacture of the template);
- marker;
- heat source for metal processing;
- vernier caliper;
- a set of files;
- clamps;
- a piece of steel plate;
- desirable (not necessary);
- A good helper in the manufacture of knives is.
The process of making a knife:
Step one. Choosing the right file
Not every file is suitable for making a quality knife. The thing is that before files were made of good high-carbon steel as a whole. Now manufacturers are trying to save money in every way, as a result, softer metal can easily hide in the center of a new file than outside, and this is very unpleasant.
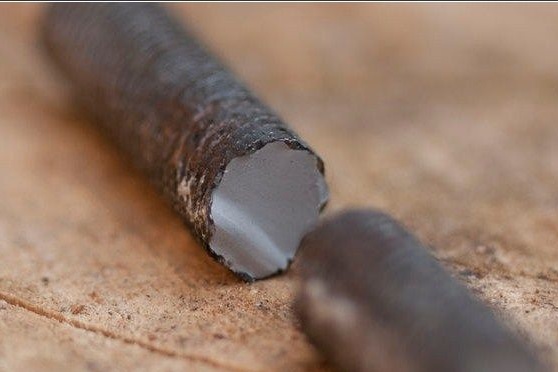
There are many ways to check such a file. First of all, check the metal for kink. Clamp the file in a vice and try to beat off a small edge with a hammer. A piece of file should fly off without any bending of the core, the cleavage should have a uniform gray color.
You can also check the file with a grinder or a sharpener, cut a little from the file and then try to grind the central part. In this case, thick sparks should pour in, this indicates the presence of carbon.
Another metal file can be scratched both outside and in the center. If the file is scratched more easily in the center, then its core is not made of high-carbon steel.
However, if you find a file from the times of the USSR, you should not have any problems.
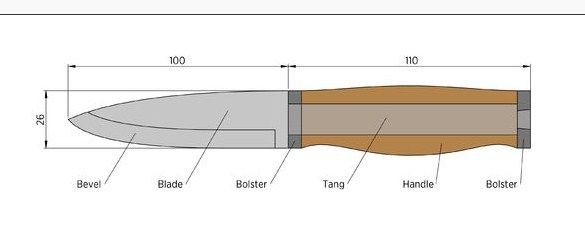
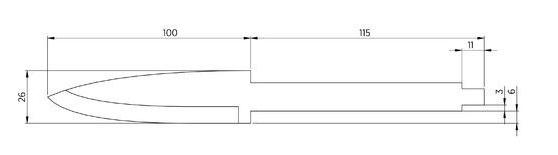
Step Two Knife design
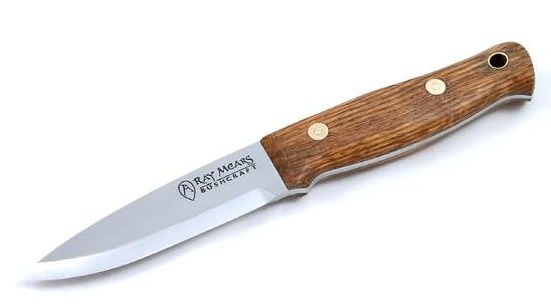
Next, you should come up with the design of your knife, here already come from the size of the file that you selected. The finished design can be downloaded from the Internet, and then printed on a printer and cut with scissors. If you wish, you can use the design that the author came up with or upgrade it. There is nothing complicated in this, it is just a creative moment.

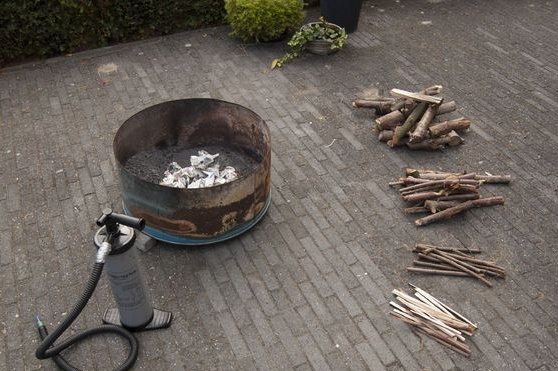
Step Three Annealing metal
The whole secret of processing hard metals manually is their preliminary annealing. If you heat the hard metal and let it cool in the open, it will become soft, like plasticine. After that, it can be easily sharpened with a file, cut with a hacksaw, drill and so on. And when you do all the work, the steel hardens again and becomes solid.

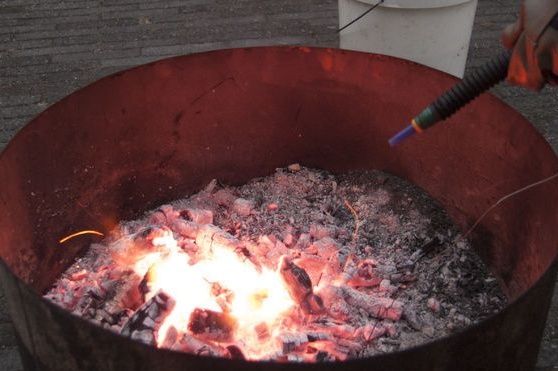
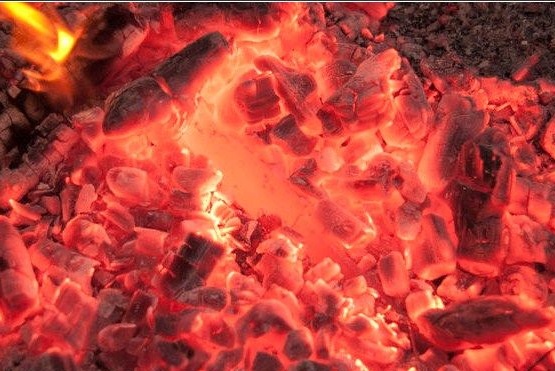
For annealing, you will need a primitive furnace, it can even be made from an old barrel or several refractory bricks. For high temperature, you need coal, you can buy it ready or just light a fire with good logs. Coals will need to be inflated with air, because of the supply of oxygen, they begin to burn more actively and emit more heat.
You can inflate the coals with a household hairdryer, vacuum cleaner, hot air gun or even a regular pump.
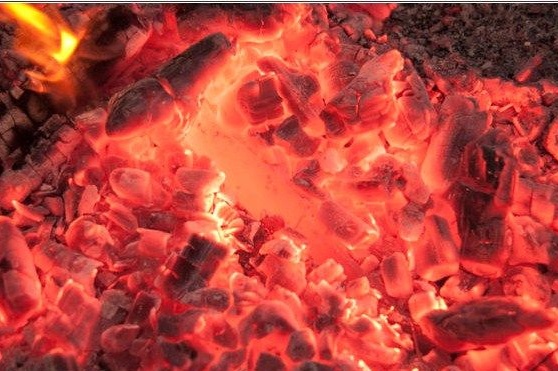
The metal must be heated until it turns evenly red. You can determine the desired temperature with a permanent magnet; it will not be attracted to steel heated to a “critical” temperature. When you reach the desired value, let the file cool in the air, and preferably with the coals.
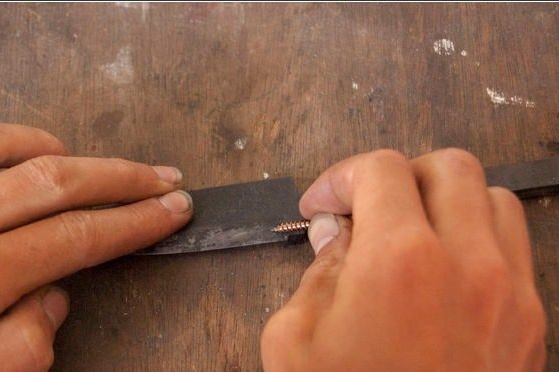
Step Four Cut a rough profile
Transfer the knife template to the workpiece. To do this, apply a paper template to the file and draw a marker around it. To make it easier to see, the author paints all over the profile with chalk.
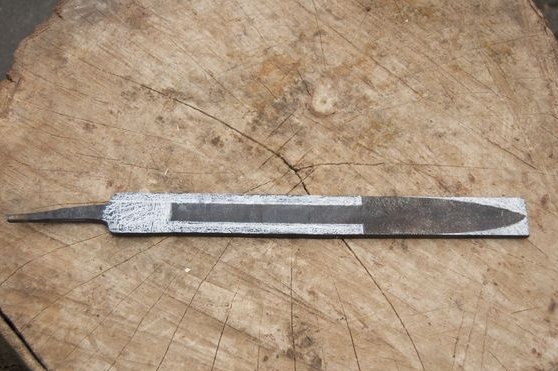
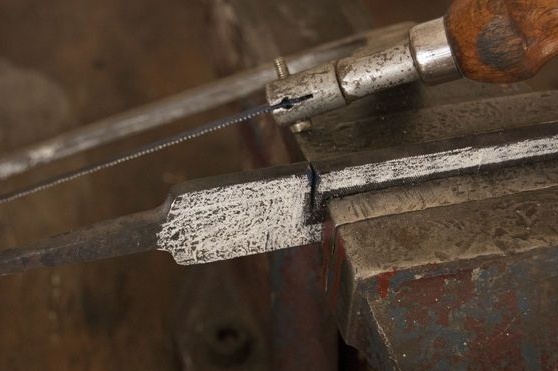

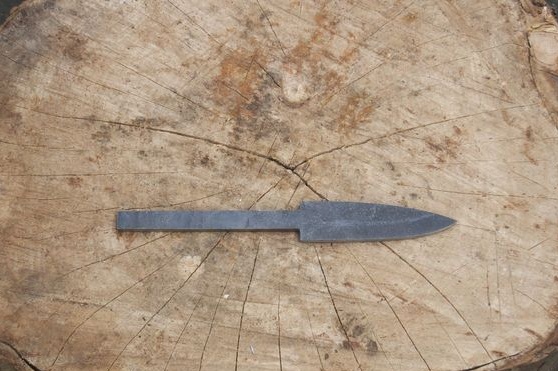
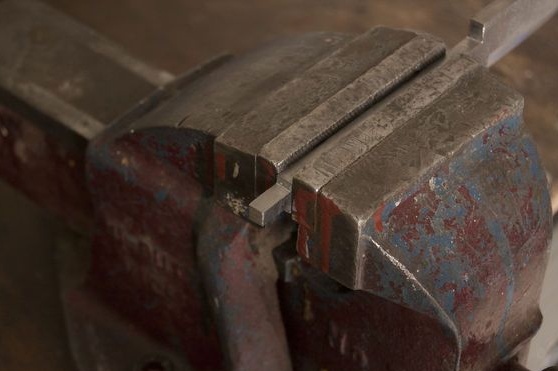
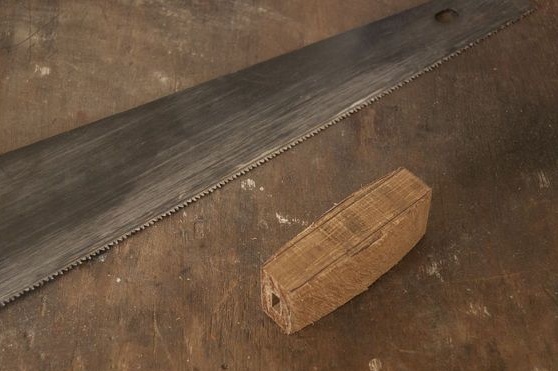
Well, now we clamp the file in a vise and slowly cut off all the excess. Here you need a hacksaw for metal. You can use a grinder, if available. In general, any metal band saws are good.
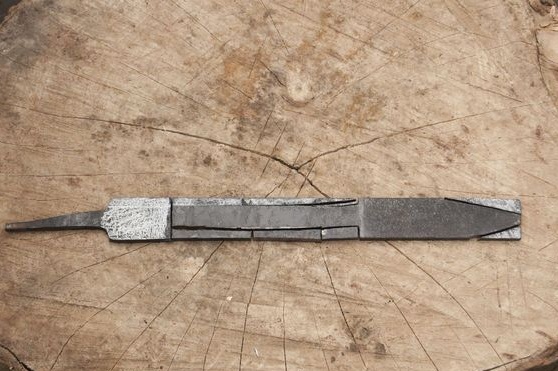
Having cut a rough profile, now refine it. Use files for metal, clamp the workpiece in a vice. All this work is not difficult. For finer processing, use sandpaper.
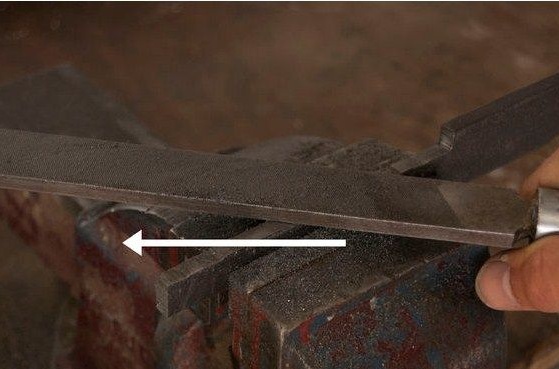
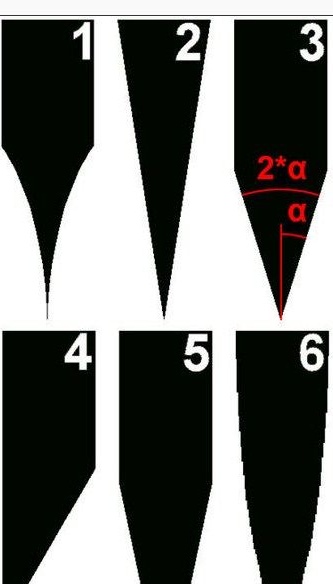
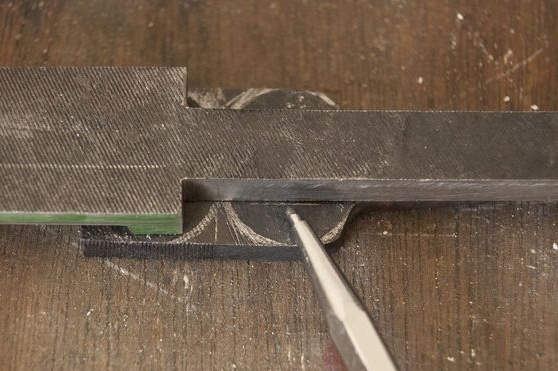
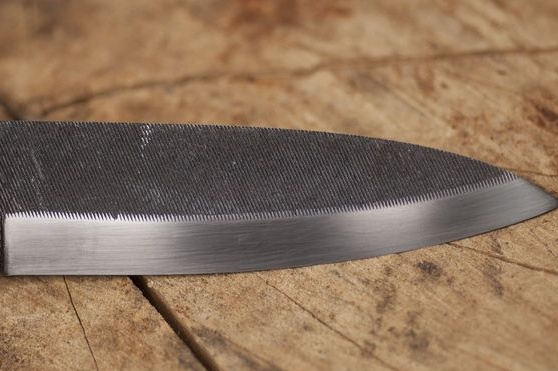
Step Five We form bevels
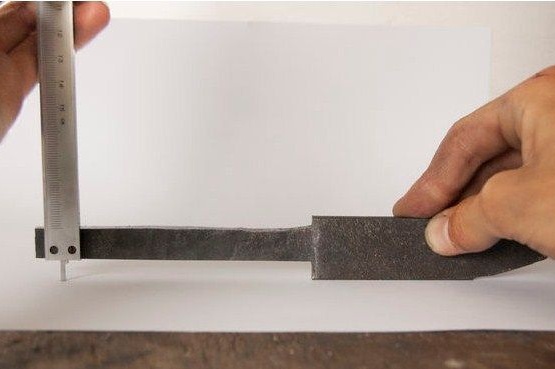
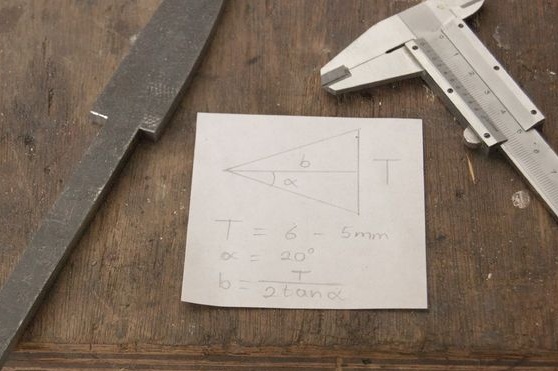
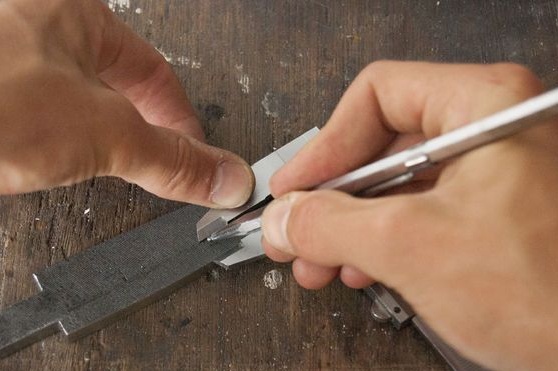
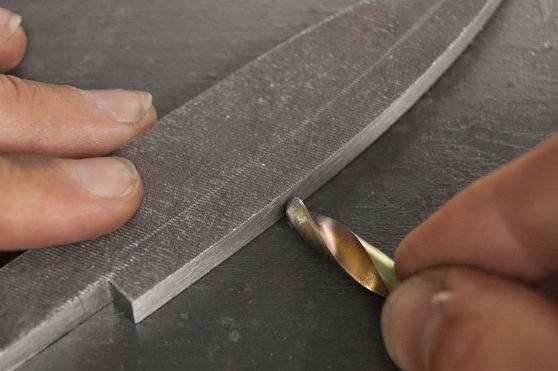
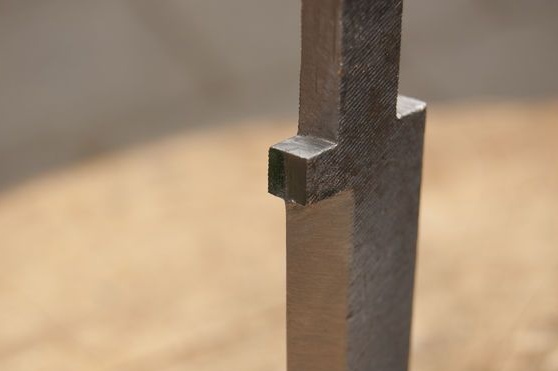
Bevels are a very important thing in a knife. What do you make them, so the knife will cut. The bevels should have a smooth angle as possible, then the blade will be thin and the knife will cut well. To make high-quality bevels, first carefully mark out everything. Decide on their width and draw a bounding line on both sides.
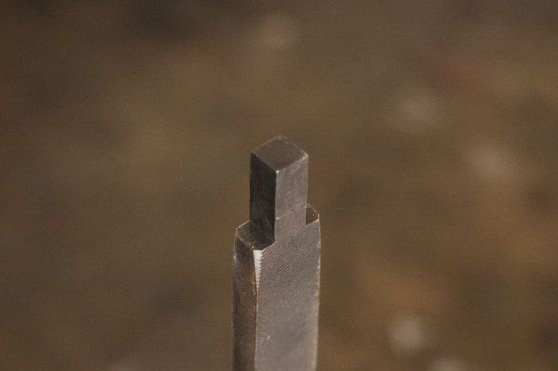
In addition, you have to draw a centering line that will divide your future blade into two parts. In fact, this line will be the blade. To draw such a line, select the drill exactly the same diameter as the thickness of the workpiece. We attach the blade and drill to a flat surface and draw a line.
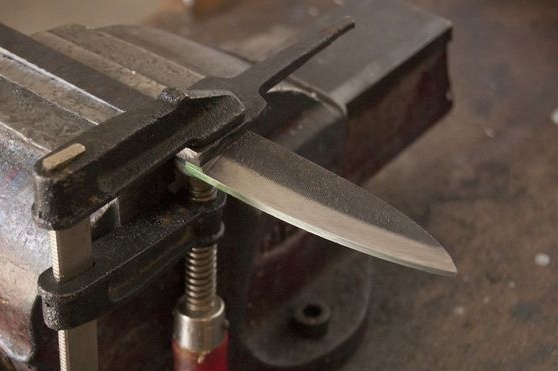
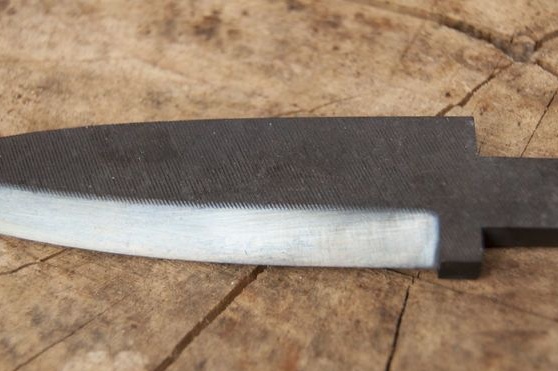
The next step will be hardening, which will make the metal hard. In this regard, complete the basic work with metal at this step. Do not sharpen the knife, as during heating and hardening it can easily be carried on. In addition, the thin metal overheats.
Step Six Quenching and vacation
First, the metal must be hardened, but after hardening it will be too fragile, and the knife cannot be used. After hardening, a tempering of metal is necessarily done.
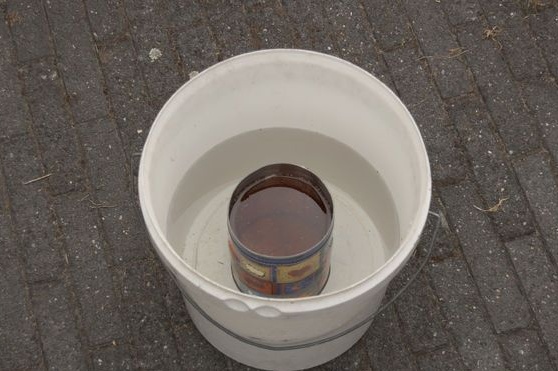
For hardening, we heat steel until it loses its magnetic properties. The color of the metal should be uniform. Then we put on good gloves, take the workpiece with claws and dip in oil, the author used two liters of sunflower in the volume, but the more the better. We wait until the knife cools to the desired temperature and remove.
Pass the knife with a sharp object, for example, a file.If it is well hardened, no scratches should remain on it. If the steel does not harden, try cooling it more intensely. First try in water, and if that doesn’t help, add salt to the water at the rate of 7-10% salt for the water used by weight. Salt water is the most active cooler for this.

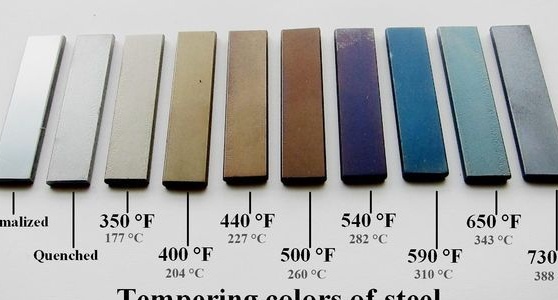
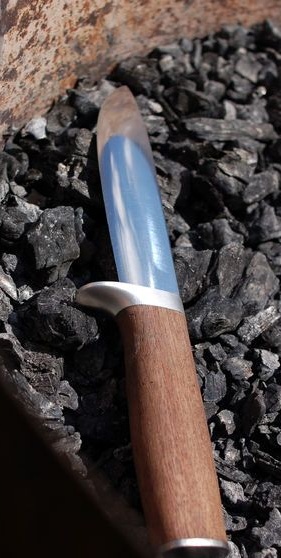
After hardening, place the knife in a household oven, heated to a temperature of 175-350oC. You must heat the workpiece for an hour or two. At the right temperature, the metal should turn a light brown. Let the oven cool with the knife without opening it. That's all, now we got the workpiece we need in hardness.
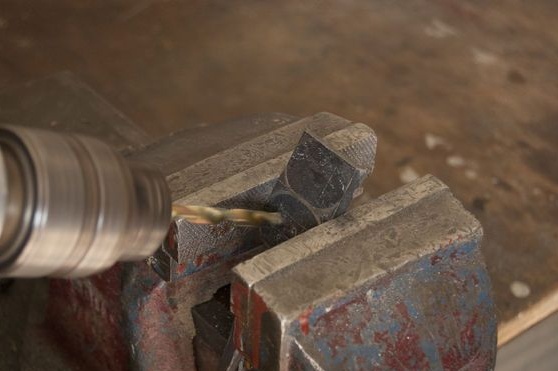
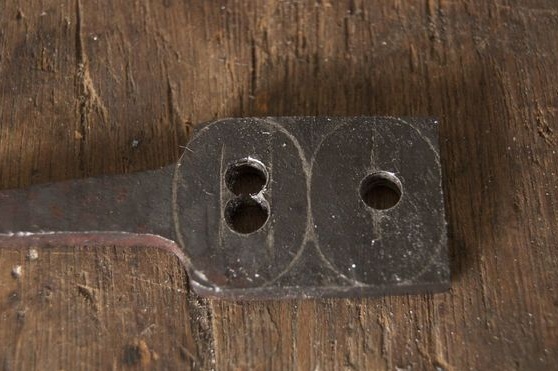
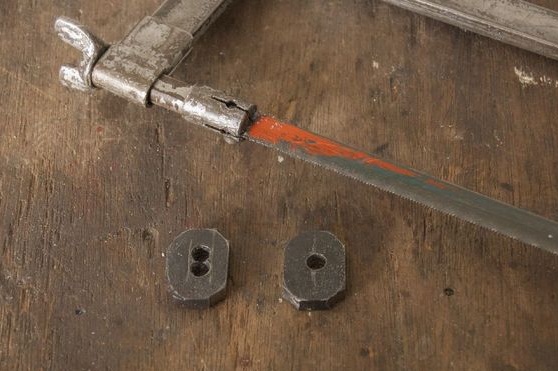
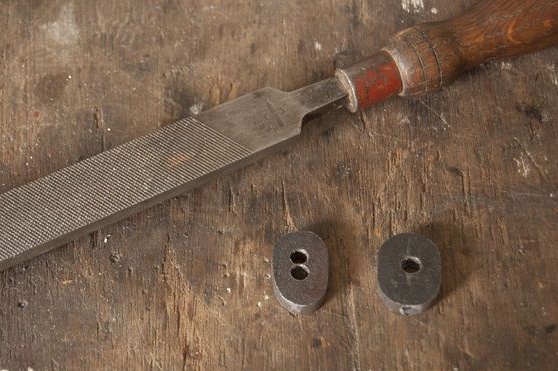
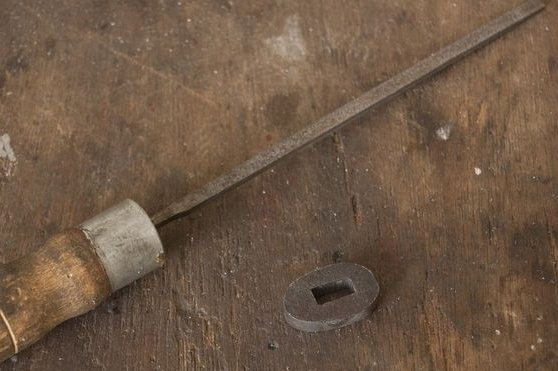
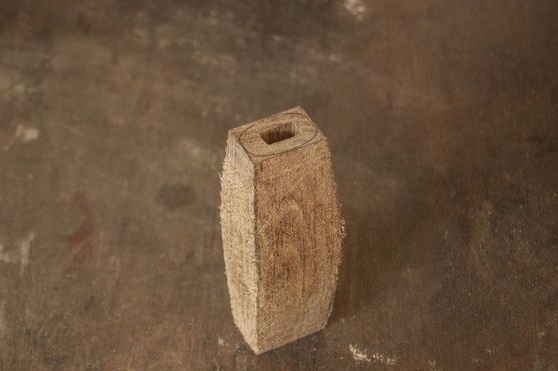
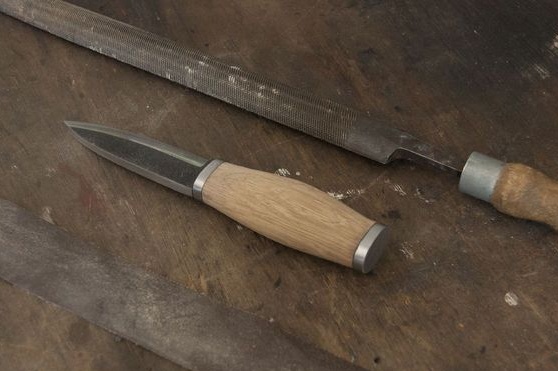
Seventh step. Handle Parts
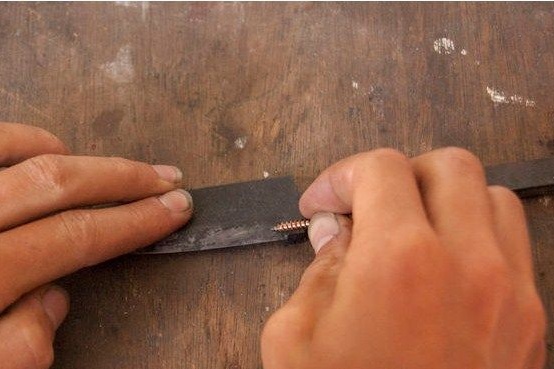
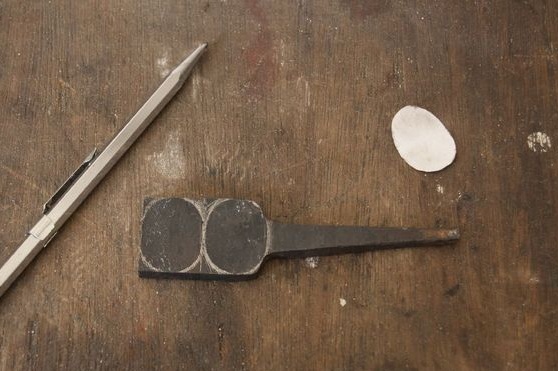
To fasten the handle and its decoration, you will need to make two oval-shaped parts (according to the shape of the handle). They can be cut out of sheet metal or made from the rest of the file. Drill holes in the center and then bore them with files so that the shape and size of the part can be worn on the shank. The author's oval size was approximately 26 by 19 mm.
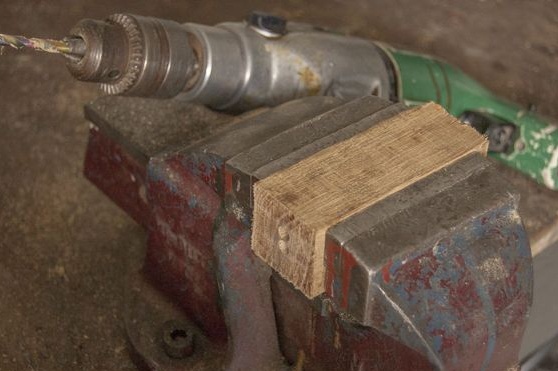
Step Eight. Putting a pen and knife
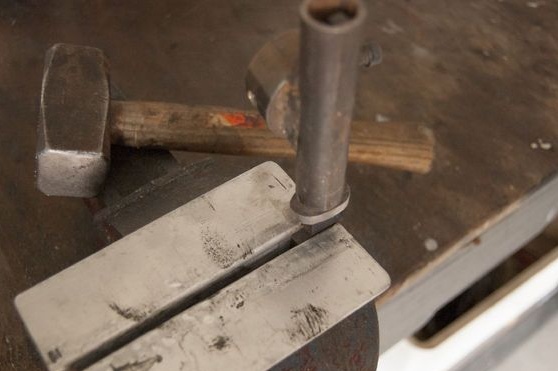
The handle is made of a wooden beam, carve it to a suitable shape, and drill a hole in the center along the diameter of the shank. First we put the first oval on the shank, and then the handle. At the very end we put the second oval. The shank is pre-lubricated with epoxy glue, and the glue must be applied to those places where ovals made of steel adhere to the wooden handle.


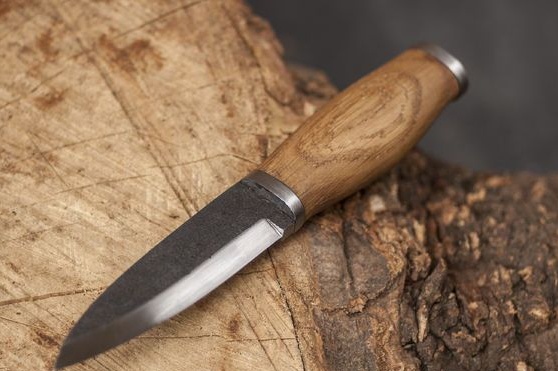
We wait until the glue dries. After that, we carefully grind the handle to a smooth state with sandpaper. At the end, soak the pen with oil or polish with beeswax so that it does not absorb moisture.