

The author homemade there was a problem where to install the aquarium, which he loves. A large aquarium requires a good, strong support, as you yourself understand, this is quite a lot of weight. In the store, such a table would cost the author from 75 to 300 dollars or more. In this regard, it was decided to make it do it yourself from practically waste, free materials.
The material was old wooden pallets. In most countries, they can be obtained for free. As a rule, in such pallets there are a lot of boards, sticks and other useful material. The most important thing is to choose such pallets so that they are not rotten, broken so on.
Materials and tools used by the author:
Material List:
- wooden pallets;
- door hinges;
- handles for doors;
- wood screws and stuff;
- strong wooden bars for the manufacture of frames.
Tool List:
-
- roulette;
- marker;
- screwdrivers, pliers and other hand tools;
- oil for impregnation (or paint if desired).
The process of making a table:
Step one. We make a table frame
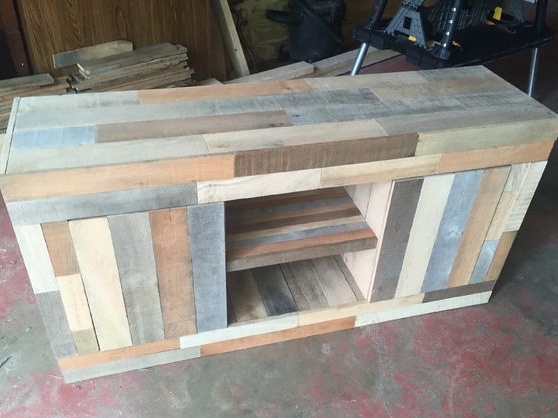
Unfortunately, the author did not take a large number of photos of the manufacture of his table. But this is not so scary, because the design is quite simple. The first step is to make the frame, it must be very strong, since the table must support a weight of more than 200 kilograms, this is how much the aquarium weighs from the author.
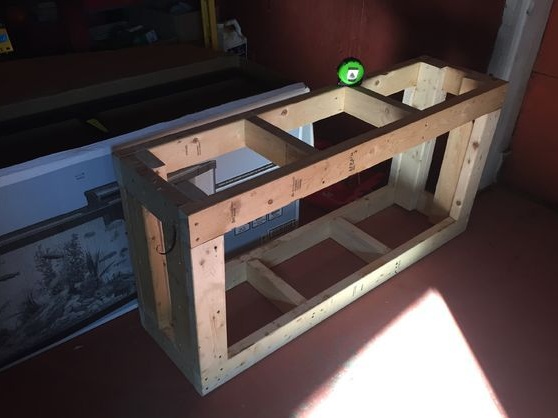
For the manufacture of frames, boards from wooden pallets will not work, here you will need strong bars. First of all, estimate how long and wide your table should be, well, and then cut the desired number of pieces. In fact, you have to collect two rectangles, one located at the bottom, and the other at the top. Well, and still need four bars to connect them. These are the main parts of the design.
Still, for additional strengthening, it is possible to cut off transverse short whetstones.
As soon as you cut the number of blanks you need, start assembling the frame. Everything is assembled on wood screws. We drill holes for them and then wrap it with a screwdriver. In principle, this is the easiest and most reliable way to connect. After assembly, check the level to see if everything is level, otherwise the table will be crooked, and most importantly, so that it does not stagger with the aquarium.
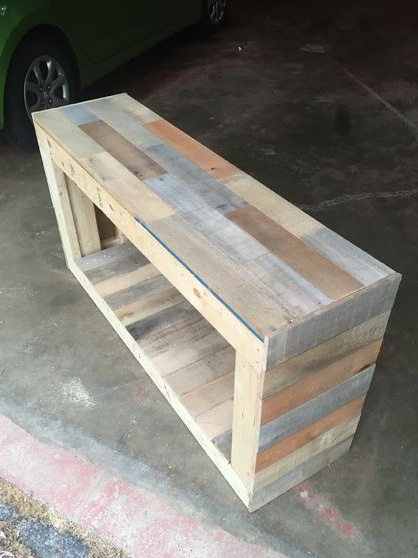
Step Two Countertop Making
The table top should also be as strong as possible. For these purposes, the author makes it two-layer. The first layer is made of plywood. We find the desired piece and cut out a rectangle from it in the form of a table. Well, then we fix the plywood to the frame. Here you will need screws and a screwdriver. Do not spare the number of screws, thanks to them, not only plywood will hold well, but the frame will become even stronger due to the rigidity of plywood. Tighten the screws well so that the caps do not stick out.
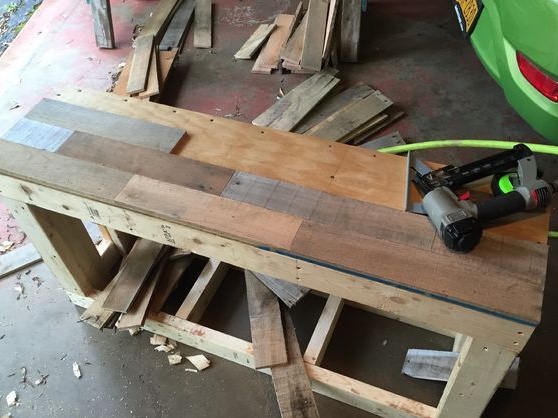
Next, we make the second layer for the countertop. It is made of boards. This layer also gives rigidity, but it also carries an aesthetic meaning. The second layer is made from boards of pallets. If you wish, you can pick up a variety of color boards and form a beautiful pattern. Boards must be the same thickness, otherwise you will have to cut them.
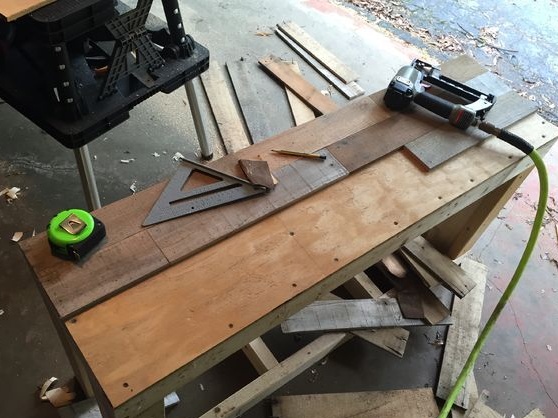
We align the edges of the boards with the help of them so that they fit well and do not form cracks. On both sides of the board we grind to a smooth state.
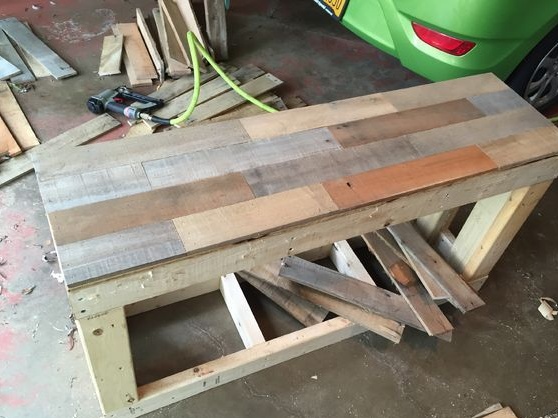
When you prepare the boards, you can fix them in their place. The easiest way to put them on glue, as the heads of the screws will spoil the whole aesthetics. Apply glue to the wood, press and leave to dry.
When the glue dries, sand the surface thoroughly. It should become absolutely smooth and even.
Step Three Making side walls and bottom shelf
The lower shelf and side walls are made approximately the same as the countertop, though the requirements here are not so severe in terms of the same thickness and so on. But it is desirable that everything be smooth. Cut the right amount of stitching, grind, align and sheathe the side parts. For fastening, you can also use glue, well, or self-tapping screws.
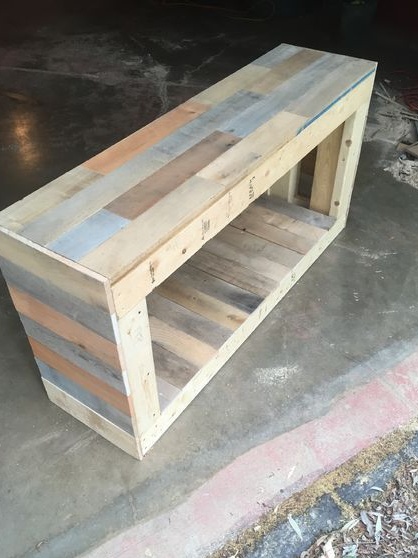
As for the lower shelf, then for its formation we fix the boards from the inside of the frame. All this business is made in a similar way. At the end, we polish the shelf so that it is even and smooth.
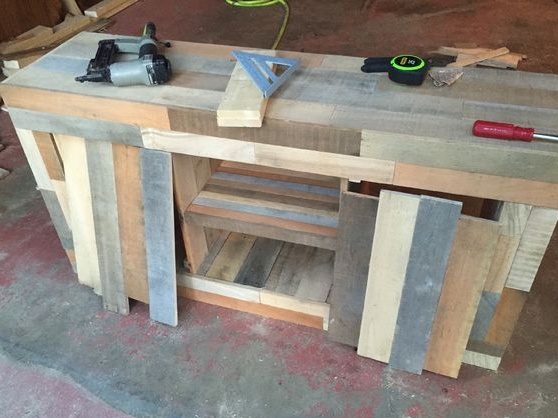
Step Four Finishing the front and installing the middle shelf
According to the author’s idea, there will be lockers with doors on the sides of the table, and in the center there is an open shelf.
First of all, we install two partitions, they will simultaneously divide the inside of the table into three compartments, and the central shelf will also be mounted on them. The partitions themselves are made of boards, for their fastening you will need four bars. We fasten the bars at the top and bottom, each wall is held by two bars. For reliability, the bars can be screwed with screws, moreover, they will not be visible. Well, the walls themselves can be glued.
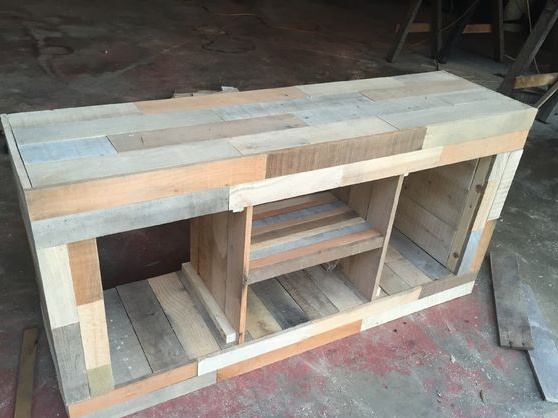
For the manufacture of the central shelf boards are used. Select the desired number of boards by color, cut and glue to the partitions. However, the glue will not be a reliable fastener, it is better to fasten the blocks to the partitions and install a shelf on them.
In the end, you will have to sheathe the multi-colored boards on the table from the front. I think that in this regard you will not have any difficulties. The most important thing is to do everything smoothly and accurately. Boards can be glued.
Step Five We make and fasten the doors
In total, two doors will be needed, they are made of boards and it is not difficult to make them. First we prepare the boards, grind, align, and then connect. In principle, if you have a good glue for wood, then the boards can simply be glued butt. But it is best to stick or fasten the blocks from the inside, this will make the doors guaranteed to be reliable.
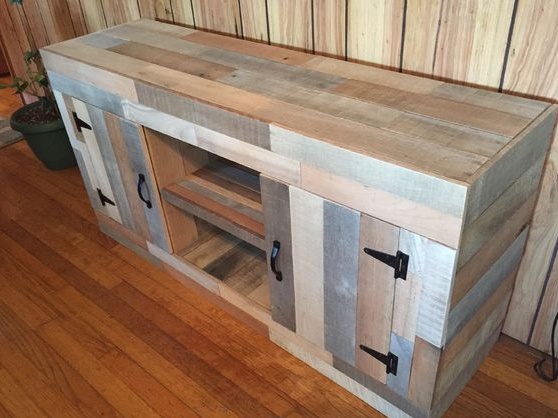
To fix the doors you will need four door hinges. When choosing hinges, consider the weight of the doors so that the hinges do not bend. For convenient use, install handles on the door. Fasten the door to its place using self-tapping screws.
Step Six Finishing touches
In the end, you can sew up the back with boards, but the author did not need to do this, since his adjoining wall is finished with boards.
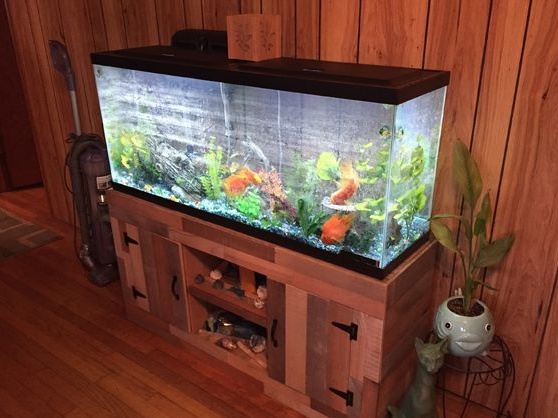
It is also extremely important to protect the wood from moisture, which is very much near the aquarium. Moisture can cause serious harm to wood, such as deformation, cracking, and so on. To protect the tree, it will have to be soaked with oil, oils are now varied in color, so you can choose any suitable one for yourself. In general, it is customary to use linseed oil to impregnate the tree, and it is best that it be boiled, that is, natural drying oil. It is better not to use artificial drying oils, as they are harmful, they stink, and are expensive.
Instead of oil, you can cover the table with colorless varnish or even paint, though the paint will hide the wood pattern that the author so diligently formed.
Seventh step. Conclusion
That's all, the table is completely ready! As you have noticed, it’s not going to be difficult to assemble, though you need a certain set of tools. This is especially true, since it is thanks to it that you can align the edges of the boards so that they fit snugly together. You will also need a tool for grinding wood, because if you manually grind every board with emery cloth, all this venture will turn into hellish labor.