

Hello. In my previous publication, I talked about how I made a hard drive from a computer Pizza knife.
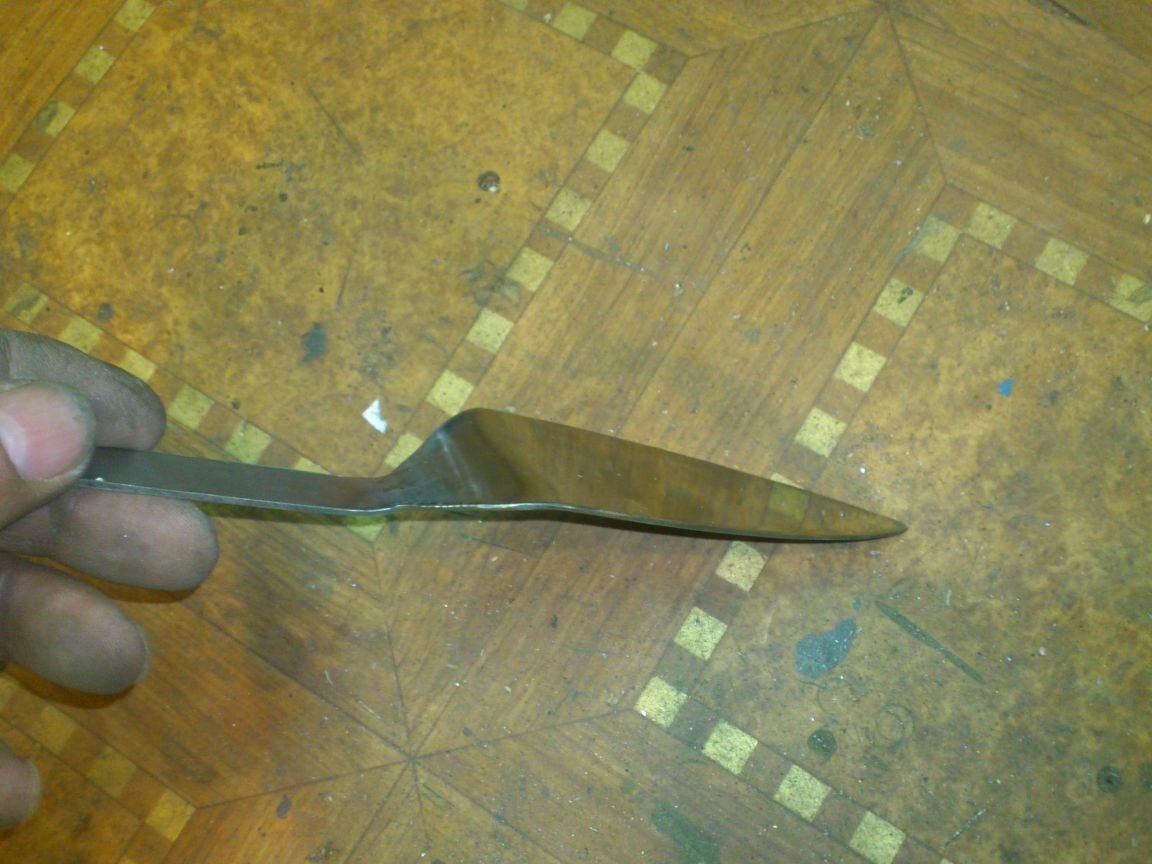
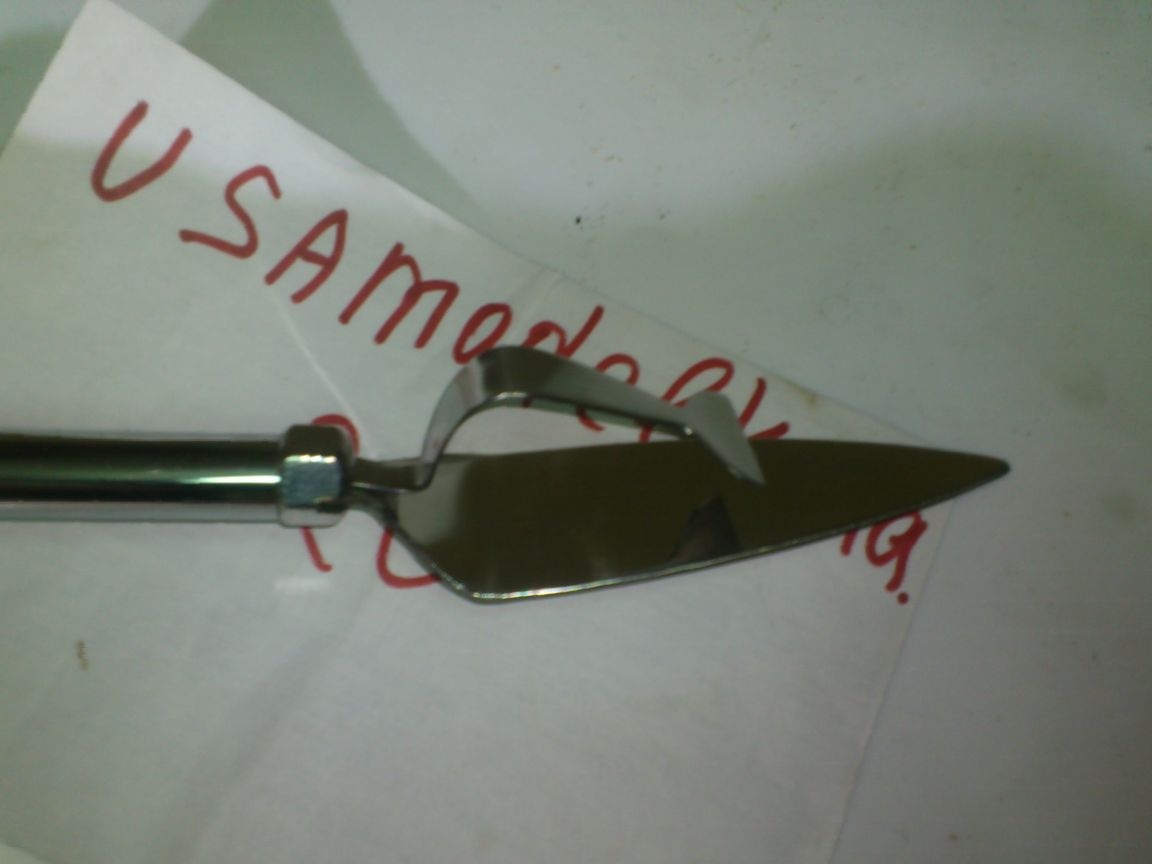
Here is a disk knife I got:
After thinking a bit, I decided to supplement it with some other tool that could arrange the pizza for guests on plates. And at the same time come up with some kind of stand for these items.
As I said, my daughter often cooks this dish. Often "pizza" friends come to us. And, according to my idea, it would be convenient to take hot pizza from the oven onto the table, put a set of tools nearby to cut it with a knife into "segments", and then put the hot one on plates.
So far, a cake spatula has been used for this. But to lay pizza with a spatula is not convenient - the pieces are wide and flexible, and therefore strive to slip off the scapula.
That is why I decided to “invent” a shovel with a clip, which could grab a piece of pizza, tear it off (if it’s not cut to the bottom)))) and easily put it on plates.
Here is what I needed for this (materials and tools):
1. 1mm thick stainless steel sheet.
2. Hairpin construction M10
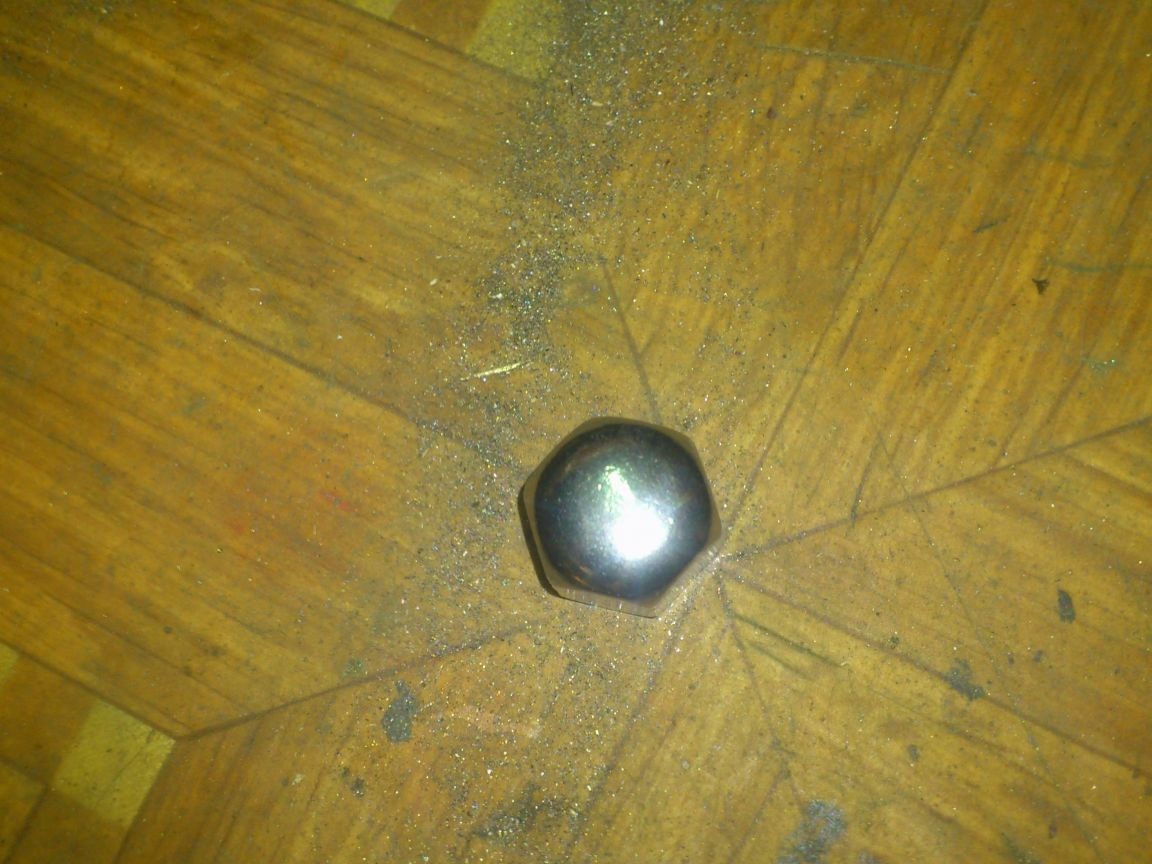
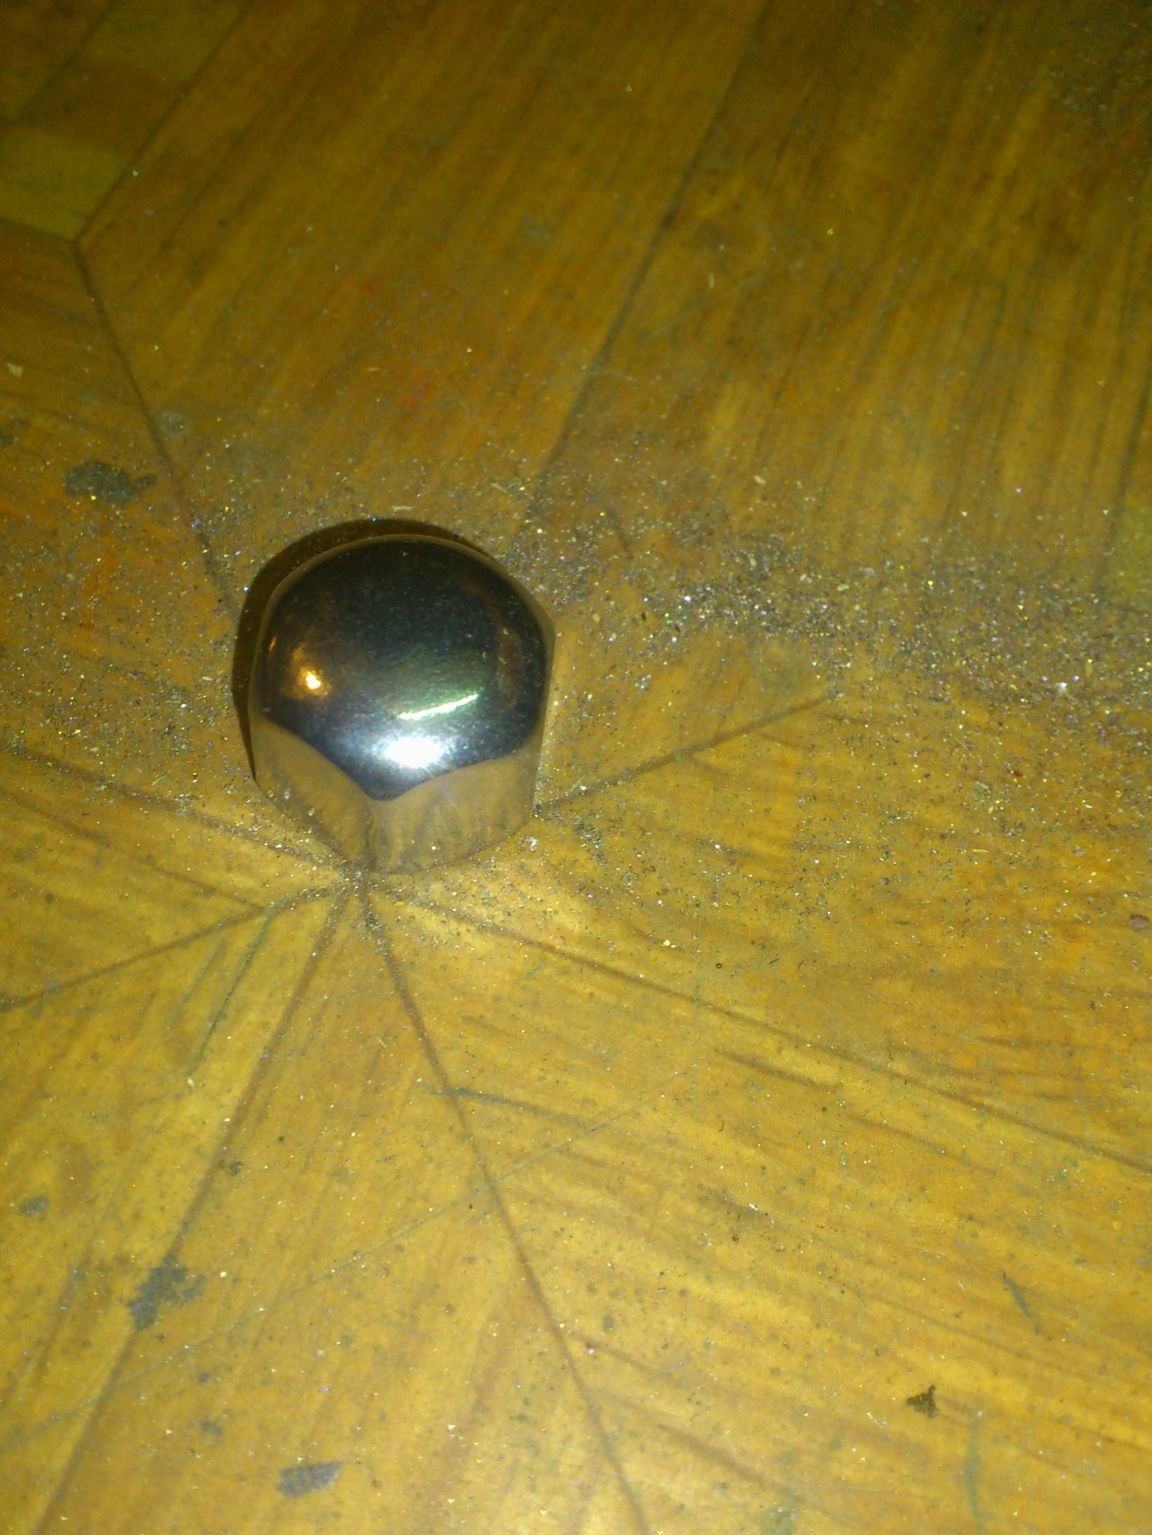
3. Cap nuts (blind) made of stainless steel. (3 pcs.)
4. "Furniture" (railing) chrome pipe with a diameter of 16 mm.
5. The nut M10 is galvanized.
6. The washer M10 increased.
7. Washer M10 increased (stainless.).
8. "Bulgarian" (angle grinder) with cutting, cleaning and emery-petal circles.
9. Extraction rivets and riveter.
10. Emery with a polishing (felt) circle.
11. Sandpaper of various grain sizes.
12. Pasta GOI.
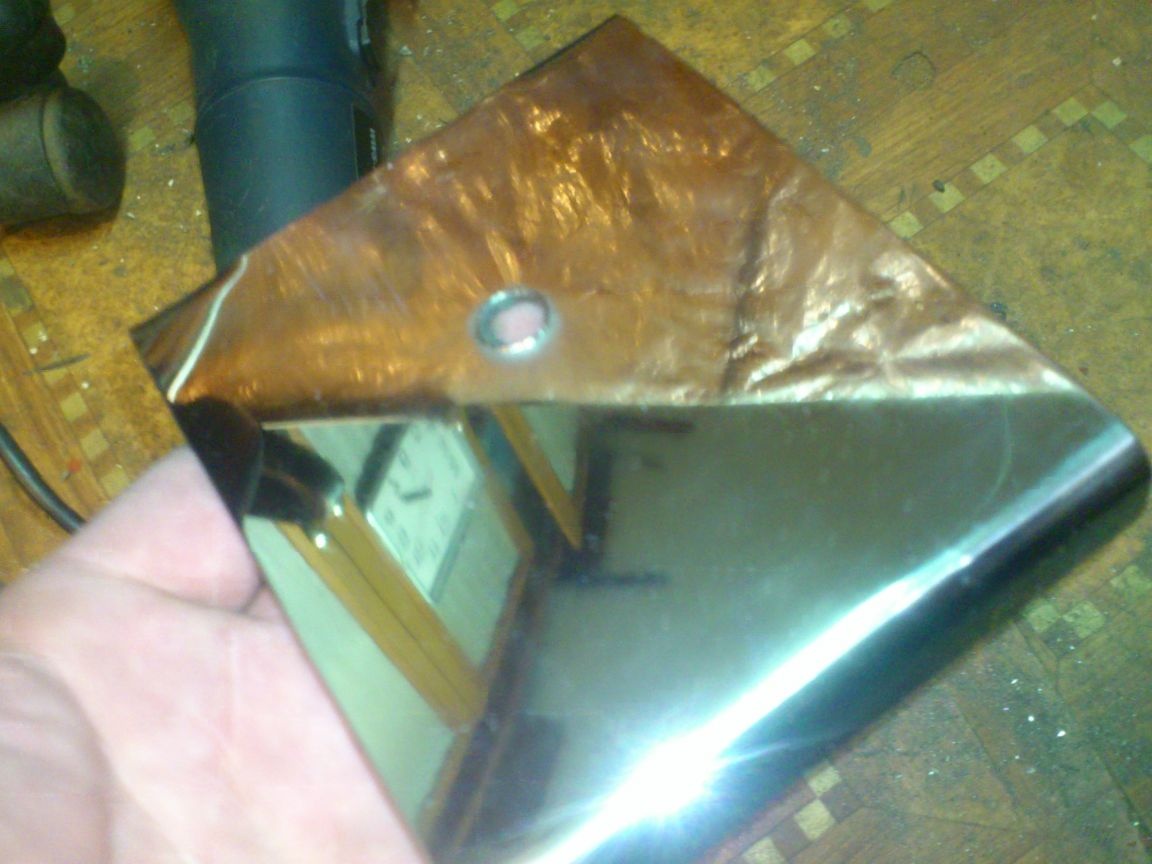
I began with the manufacture of .... the shoulder blades. (We will call her that!))))
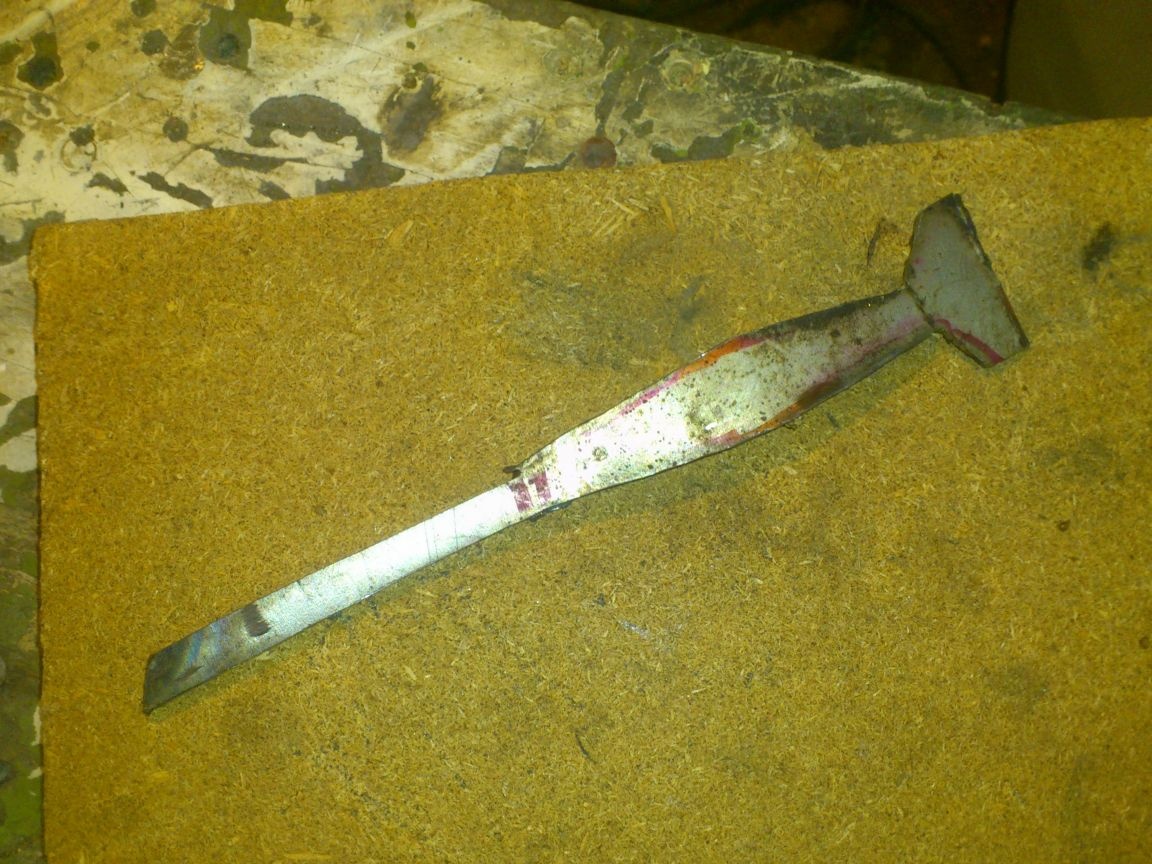
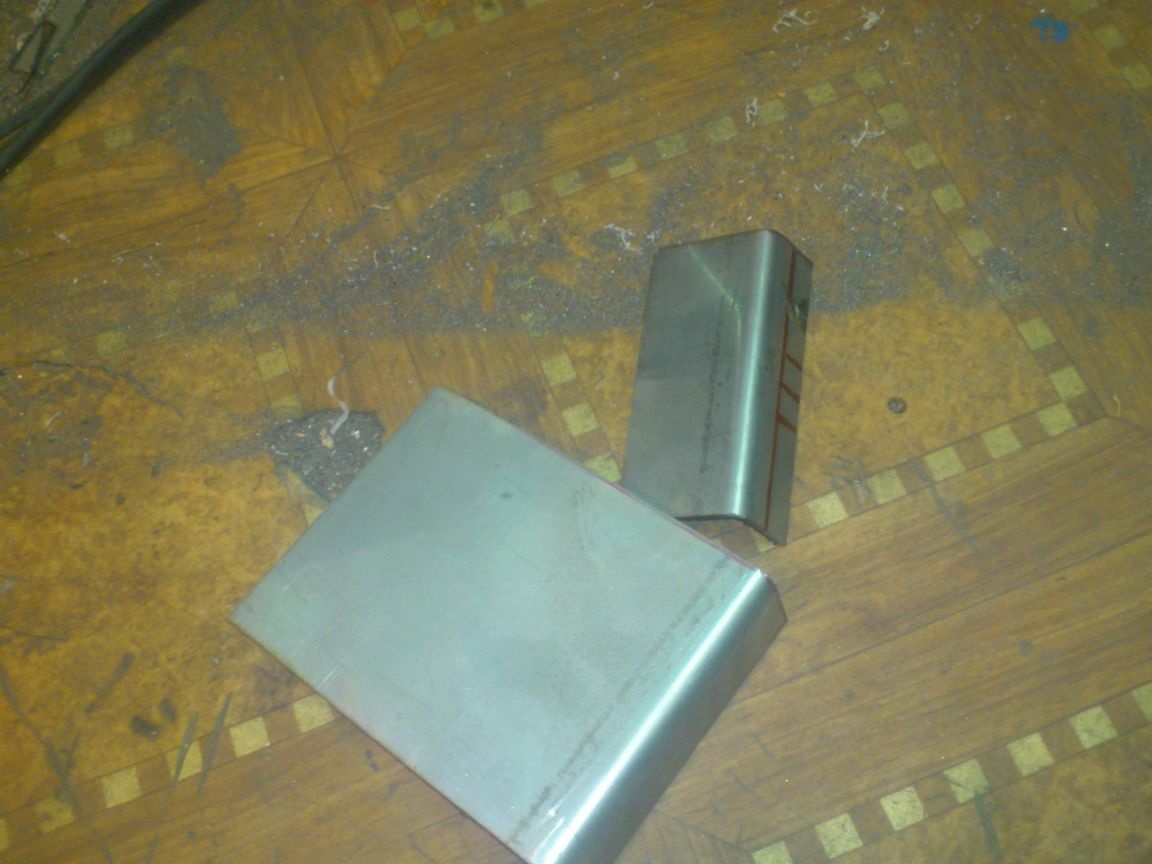
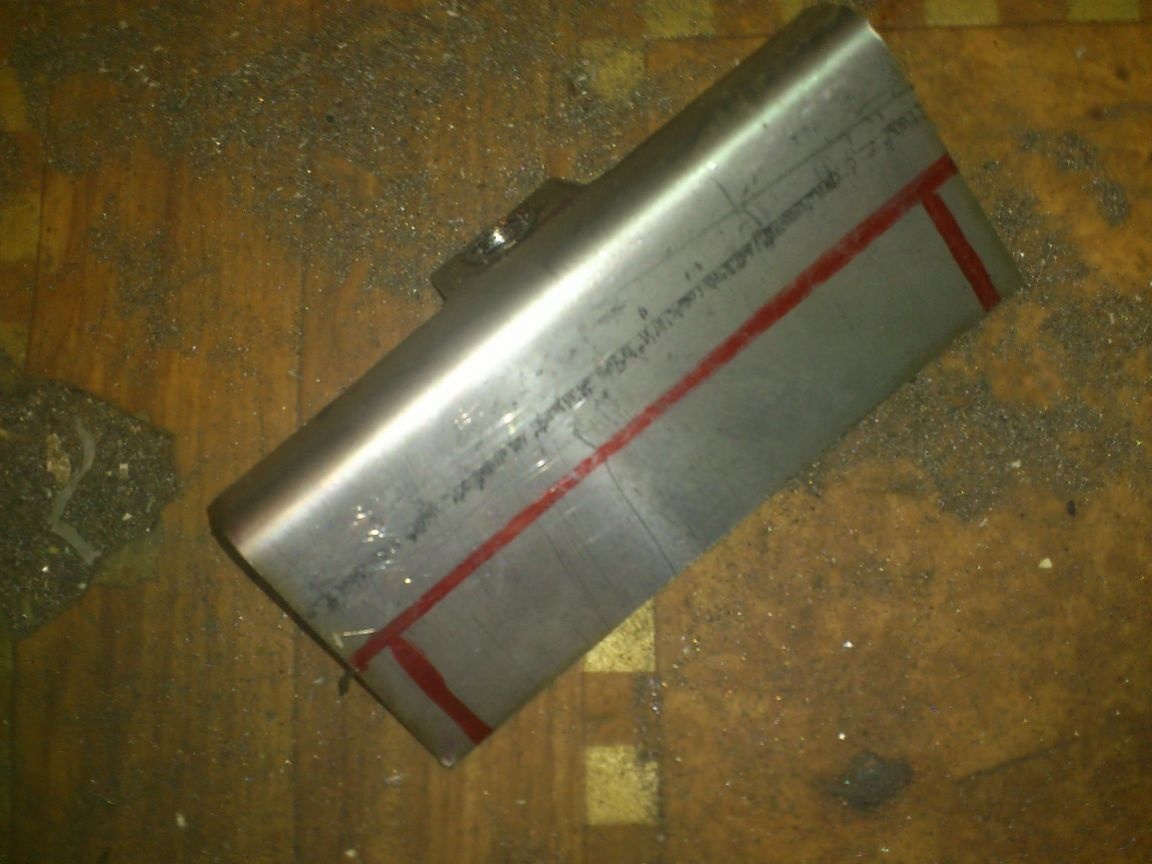
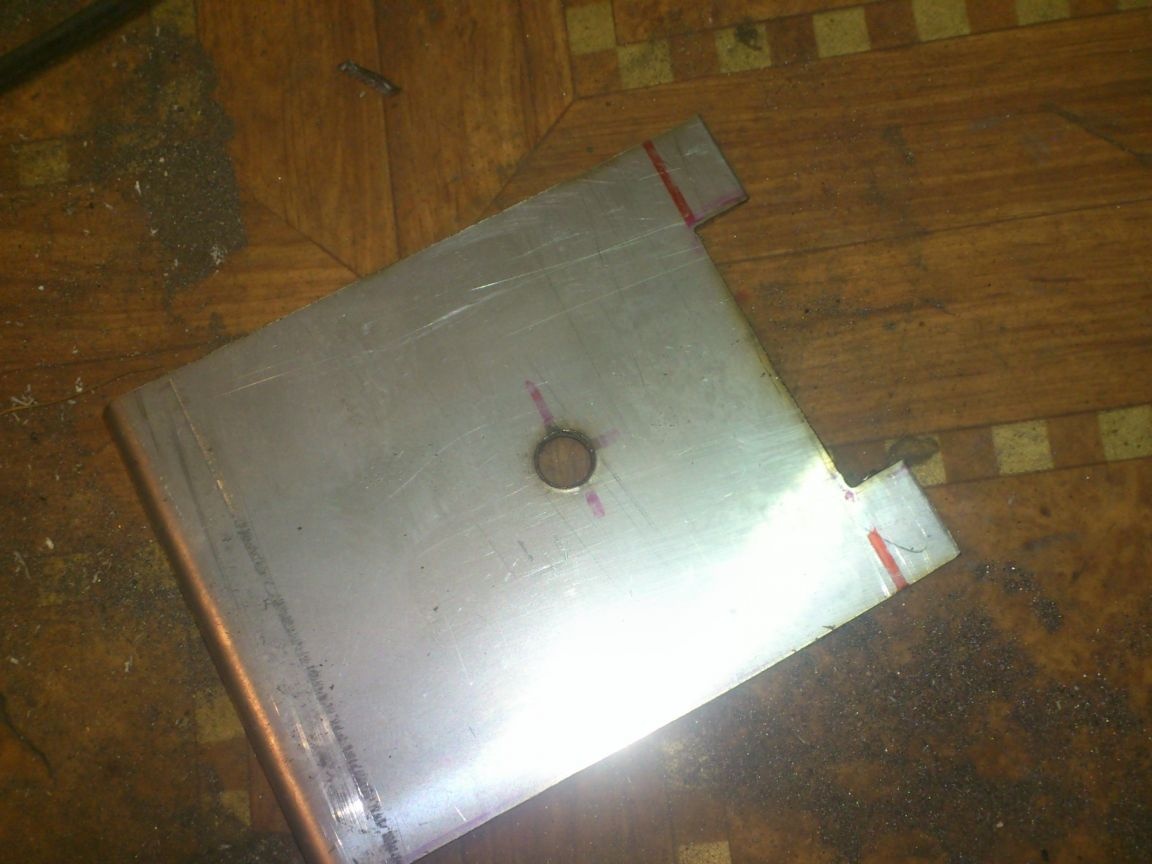
I had this piece of stainless steel lying around, picked up on scrap metal:
Apparently, it was the building of some kind of production mechanism. He didn’t get to me completely - someone cut pieces out of him for his needs.
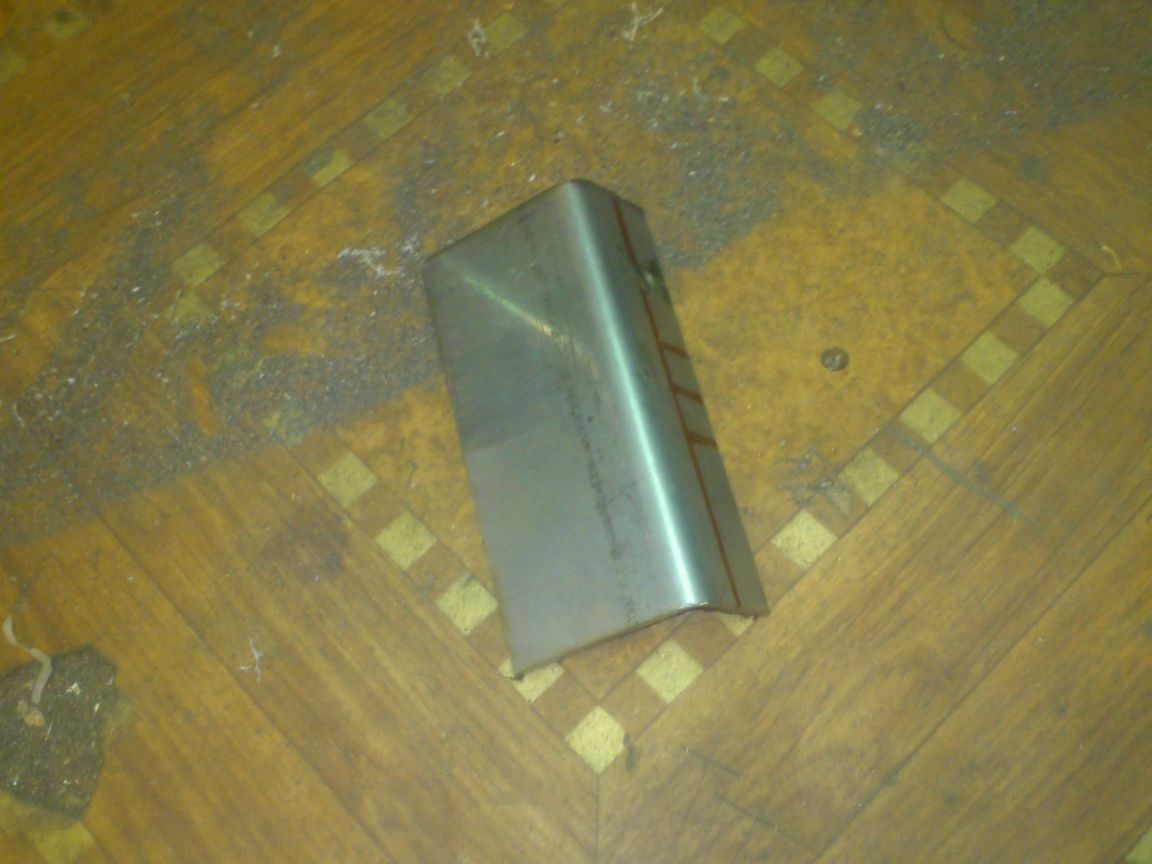
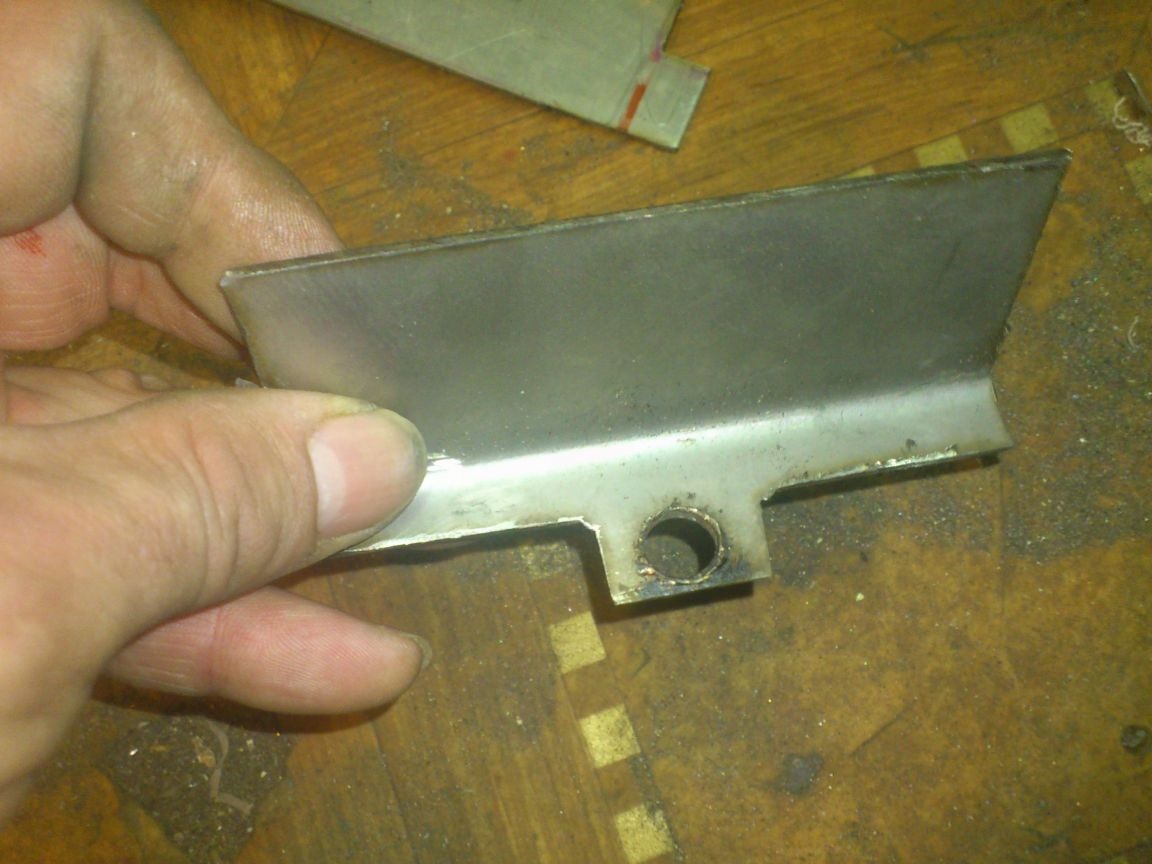
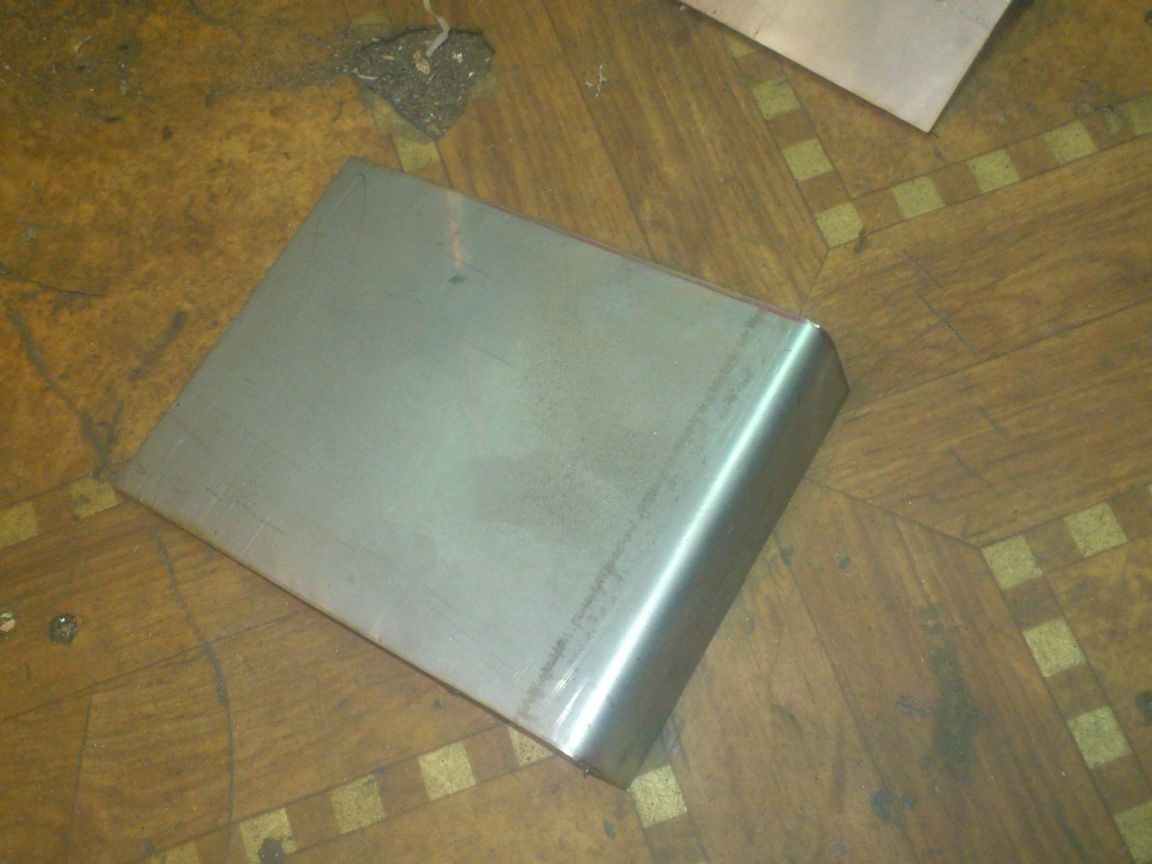
So from it I decided to cut the base of the scapula:
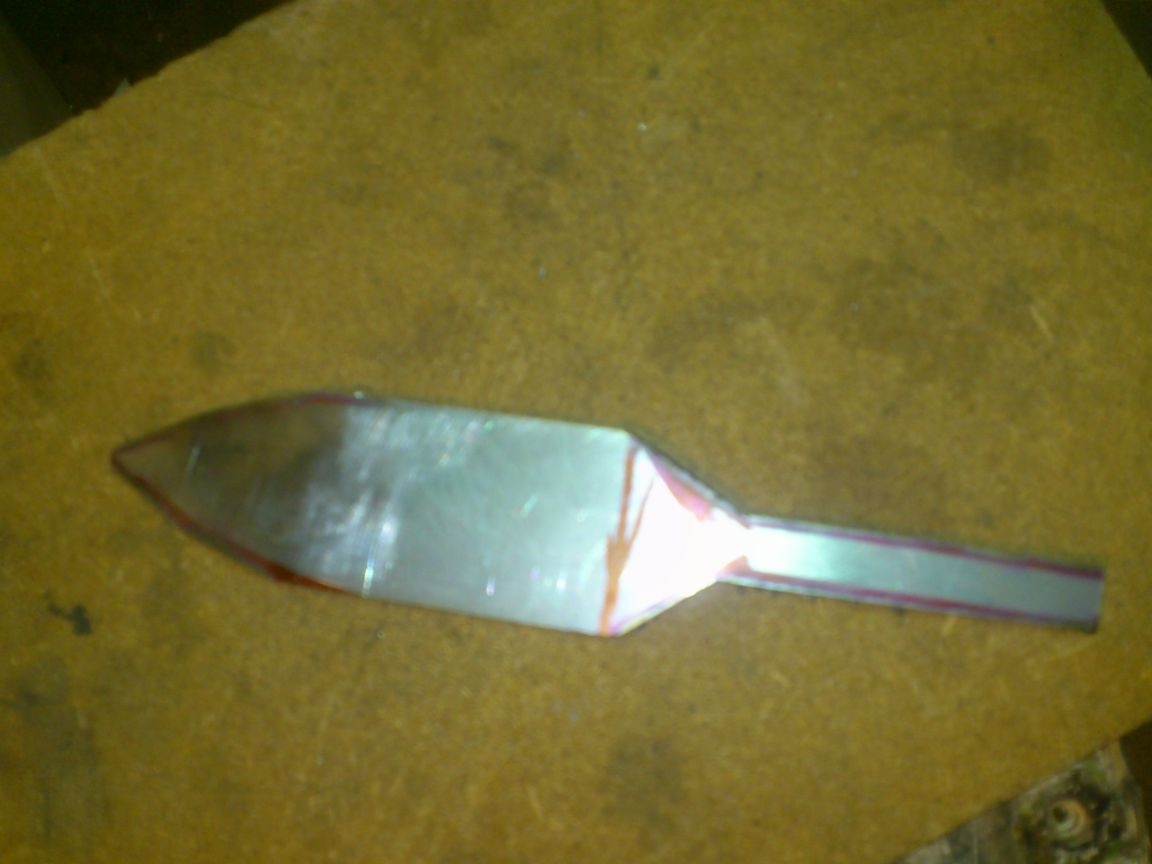
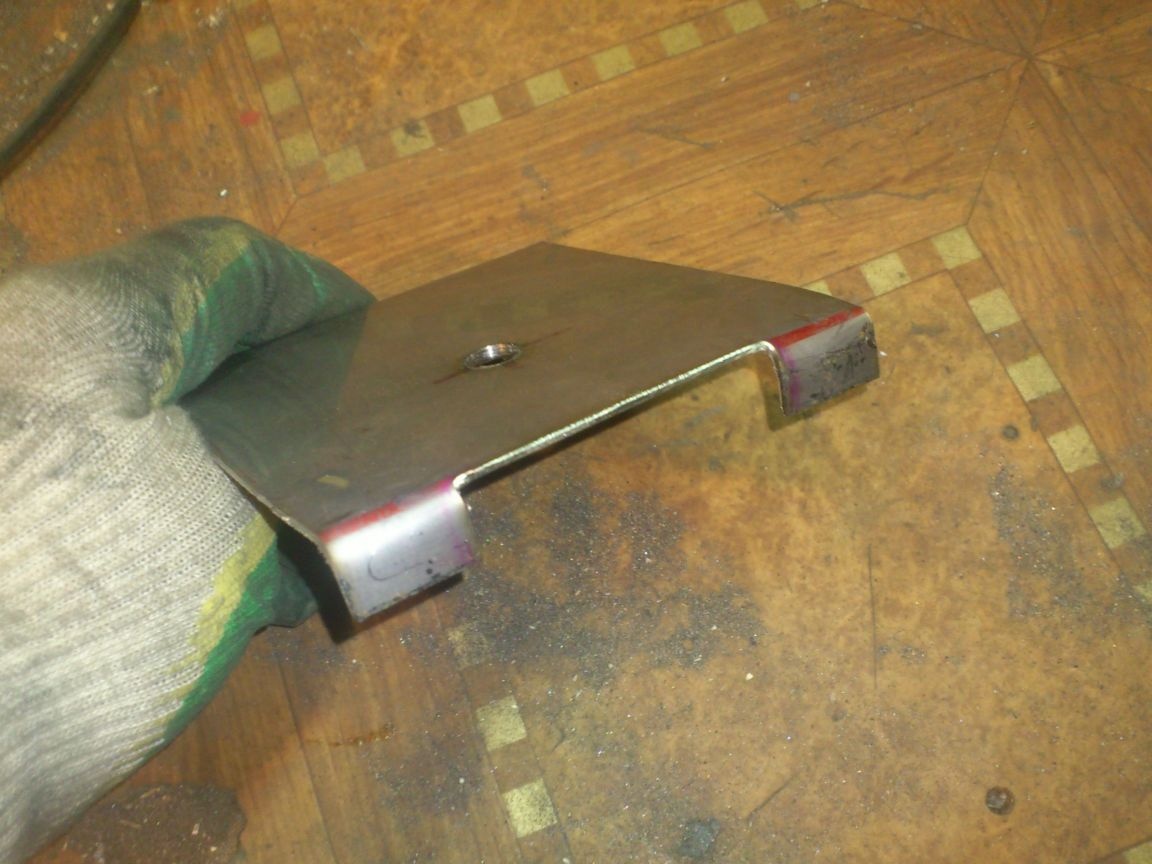
After that, I processed the workpiece with an emery-petal circle, rounding the edges and removing burrs:

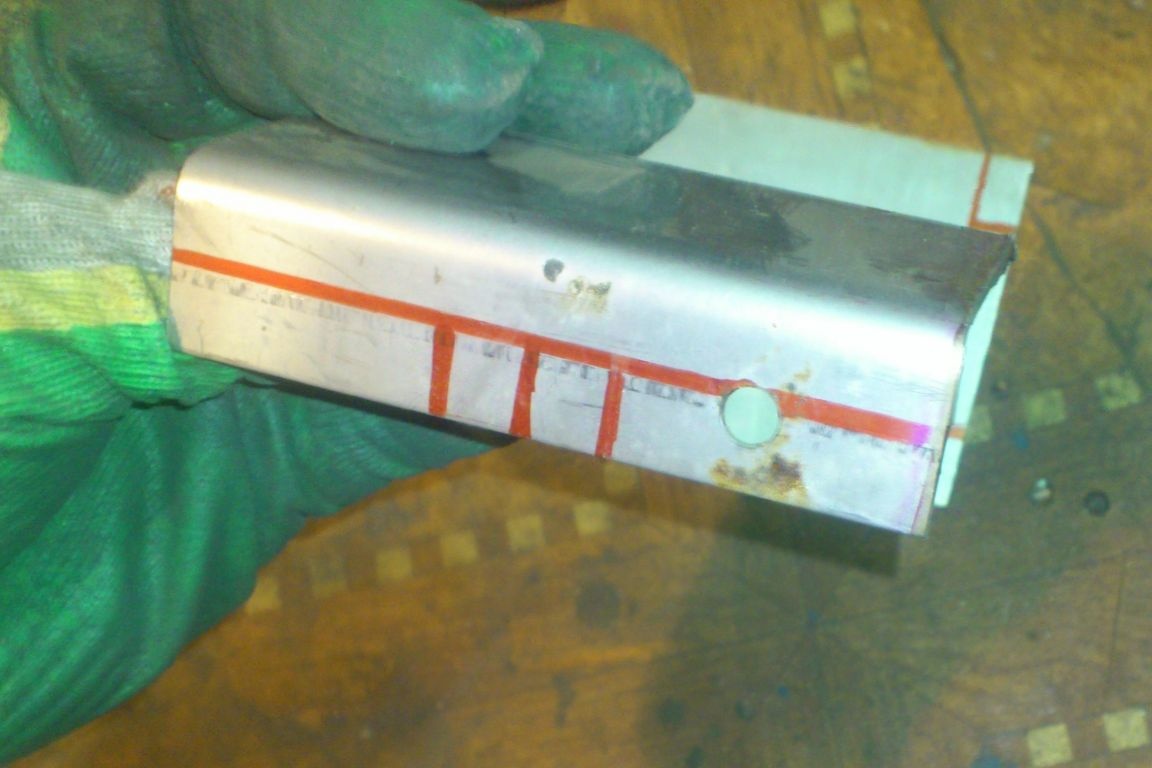
From the same metal, I also cut a blank of the “clamping tongue”:
The surface of my piece of iron had to be sanded first with sandpaper, because, firstly, it was made of “rolled” steel (which itself has a fine-humped surface), and secondly, after it fell through a pile of scrap metal , numerous scratches remained on it.
I did not photograph the grinding process, so I’ll just describe it. I started with rough sandpaper (100).Grinded in one direction, pressing the skin tightly. After he went through the entire plane, he repeated again, working this time perpendicular to the first. Thor until the scratches from my first pass ceased to be visible. He carefully examined for the presence of "not mine" scratches. (Those that were on steel before processing). Having discovered that they are visible, I repeated the procedure twice more, each time changing the direction of the passages by 90 degrees.
When the scratches were not visible, I walked across the last passage with the hundred and eightieth skin. (Again, until the scratches from the previous sandpaper ceased to be visible. Then - two hundred-forty. Then - four-hundredth. Then - six hundredth ... And finally, the thousandth! (It’s not necessary to work with such numbers ... Simply, this was I have in stock).
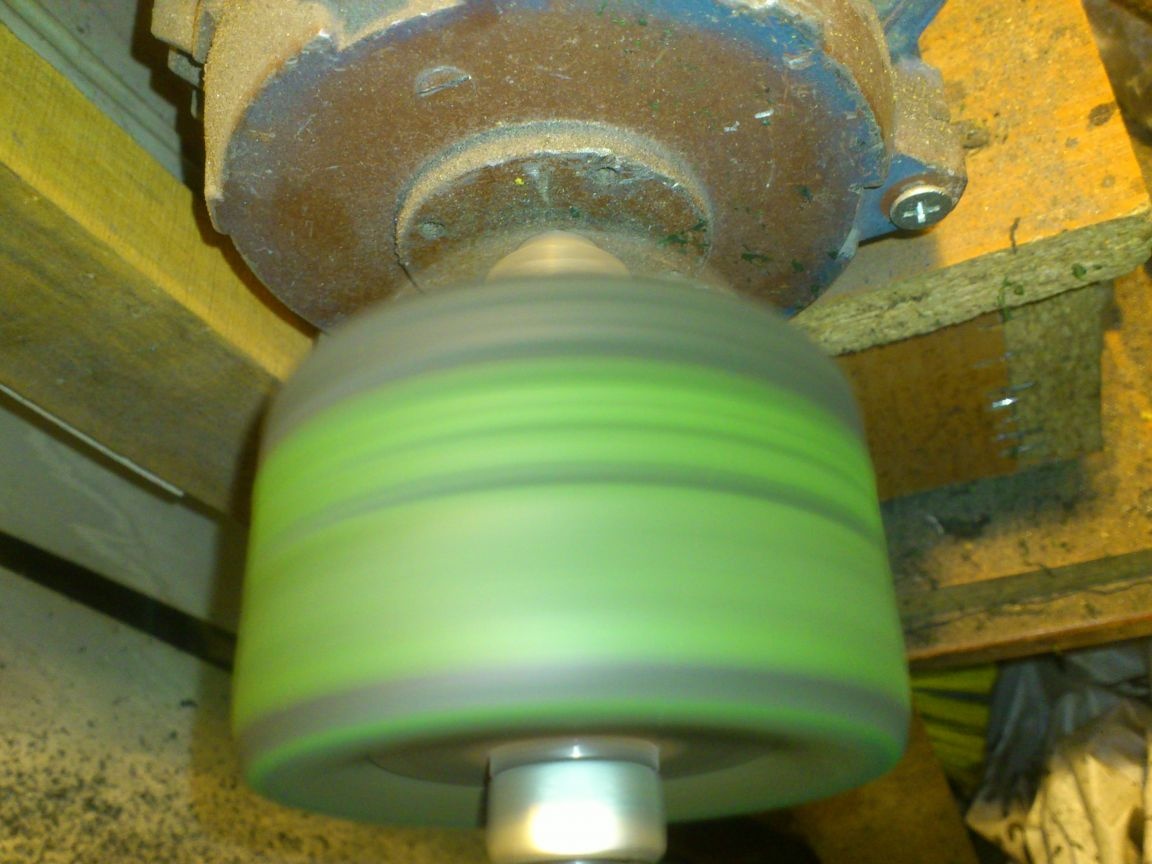
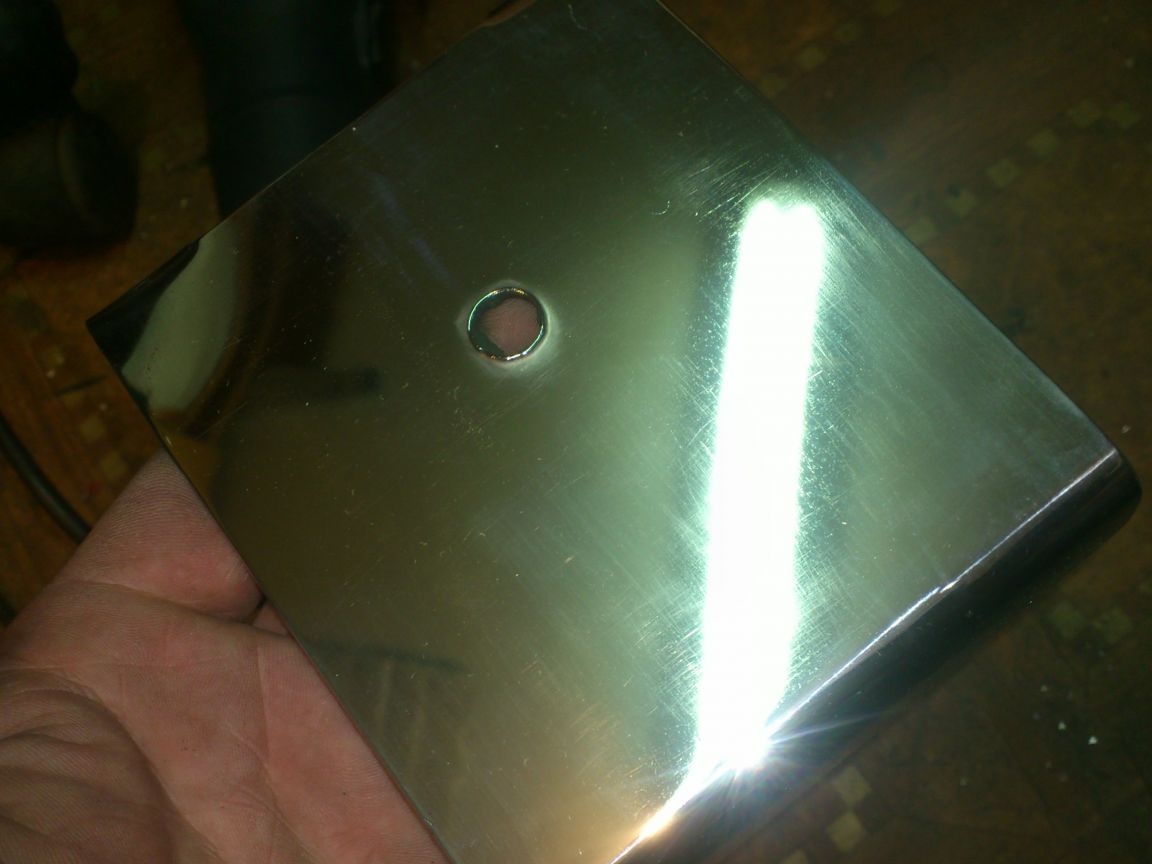
All. Grinding is finished. We proceed to polishing. I worked with GOI paste, using a felt polishing wheel for emery:
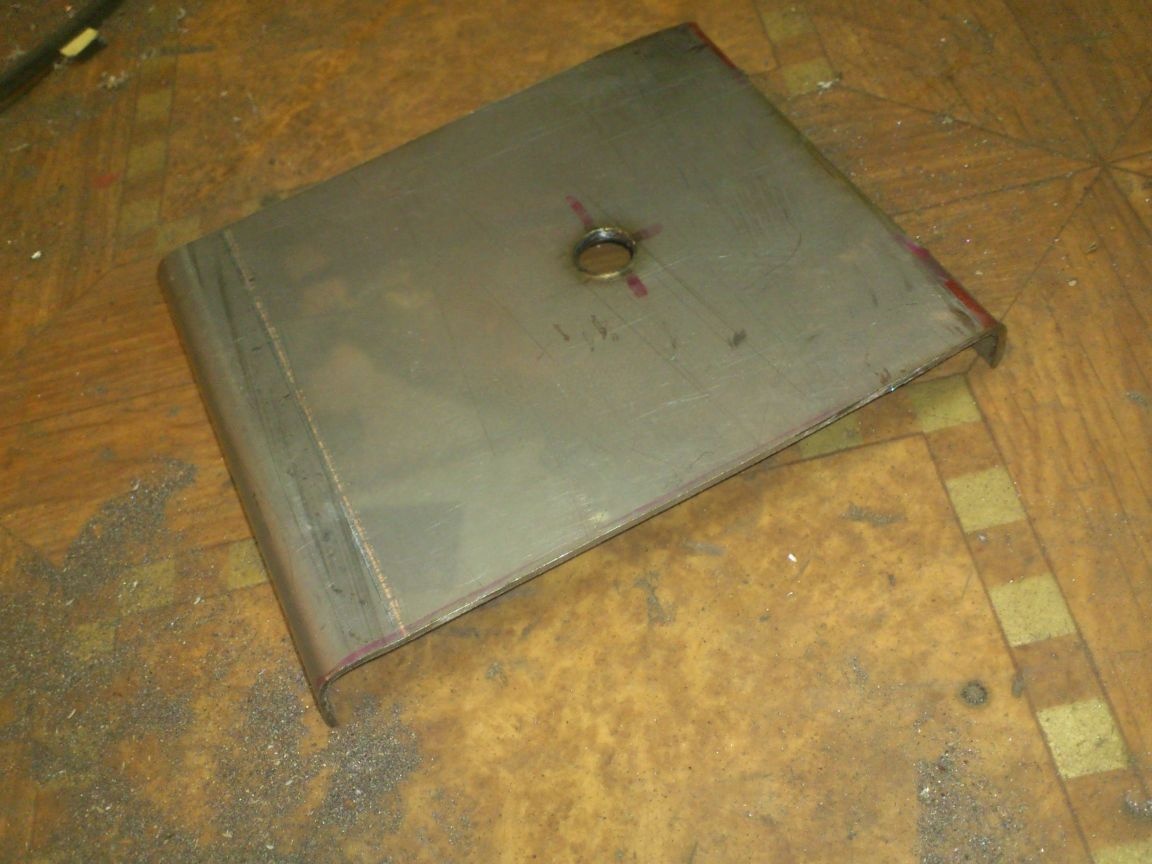
Yes ... I forgot to say. After grinding, I bent the blade at the right angles:
I polished and polished the clamping tongue:
Now you need to make a handle and connect these elements together ...
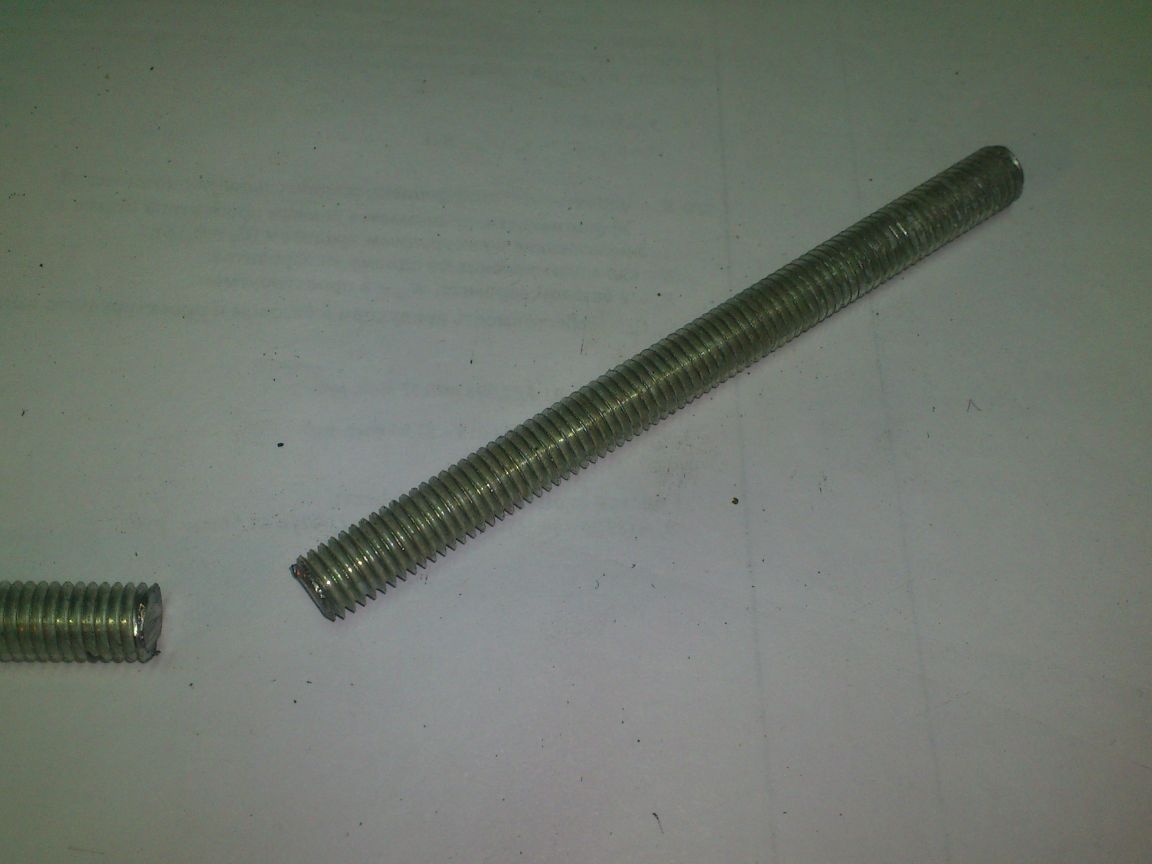
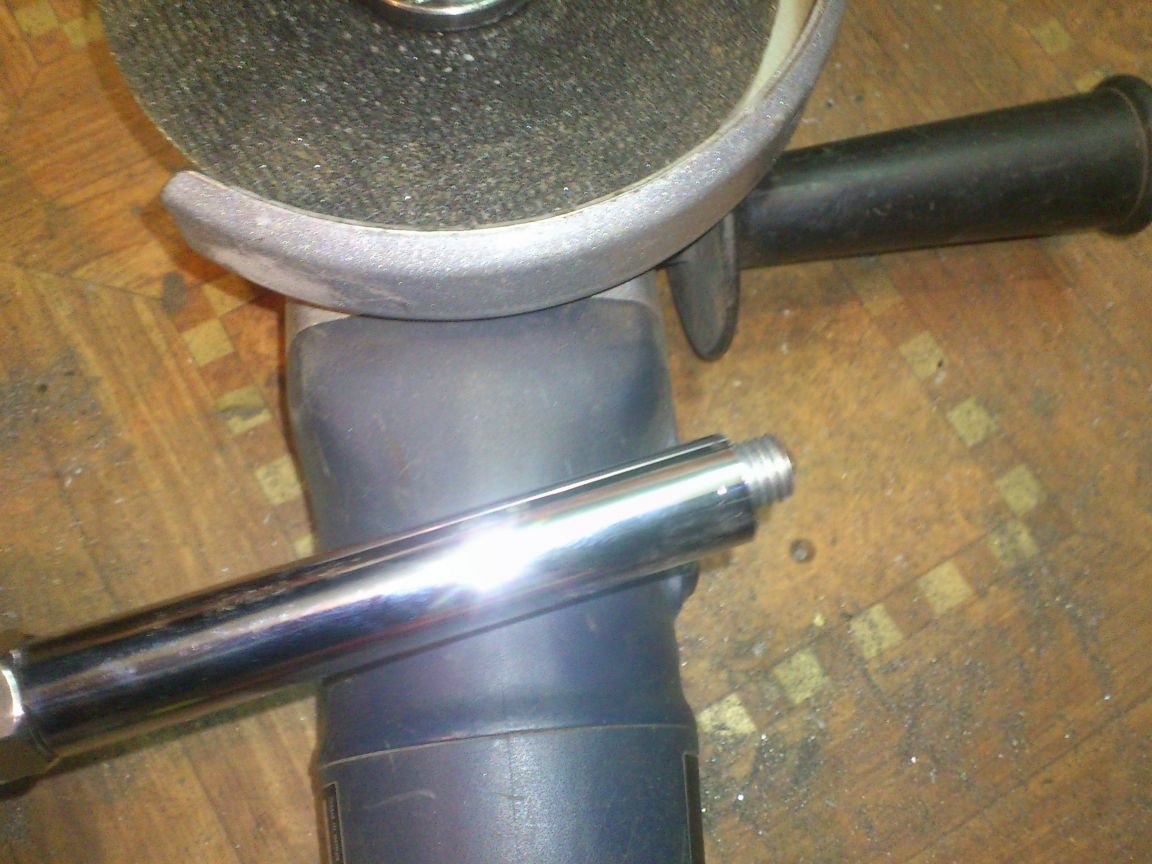
Since I decided to make the blade “under the circular knife”, that is, in the same style, I have to make the handle out of the “furniture” chrome tube. Therefore, as a supporting element, I also used the M10 stud trim. Fortunately, I have a lot of scraps left at the construction site:
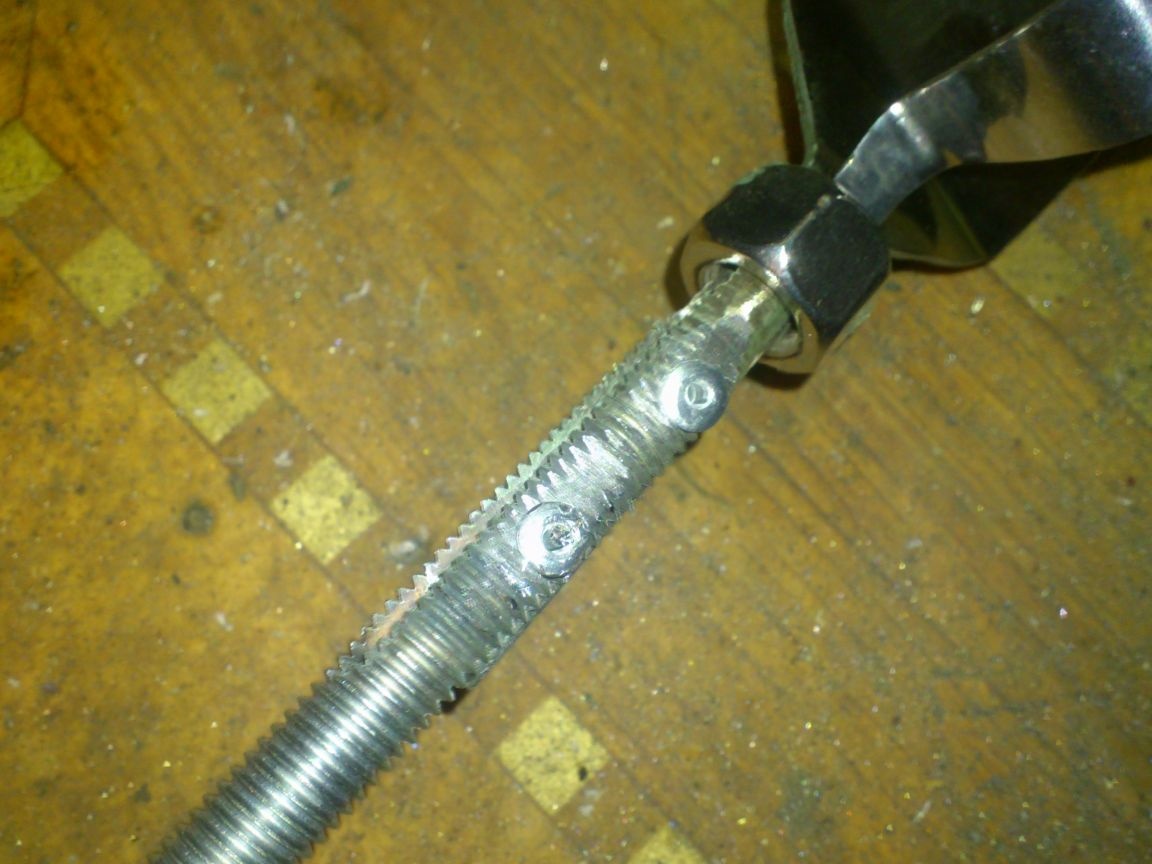
On a hairpin with a grinder, I made a longitudinal incision:
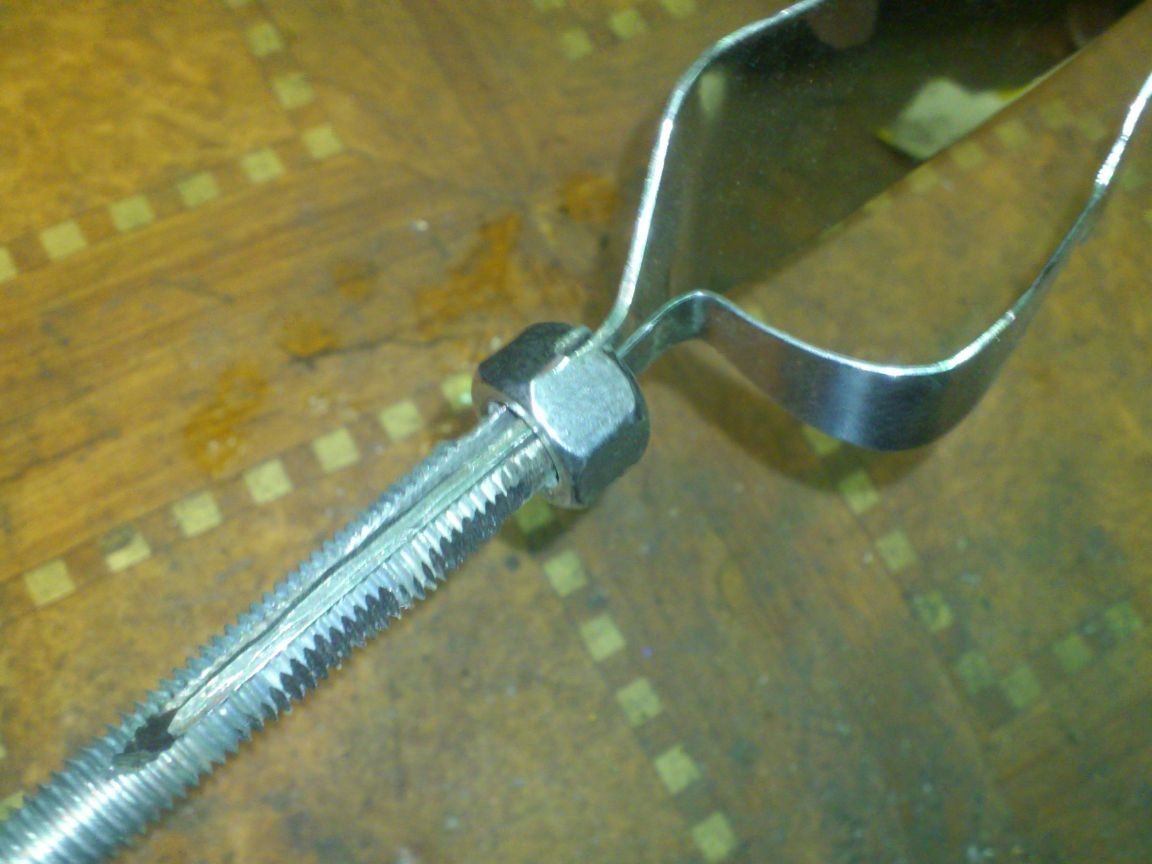
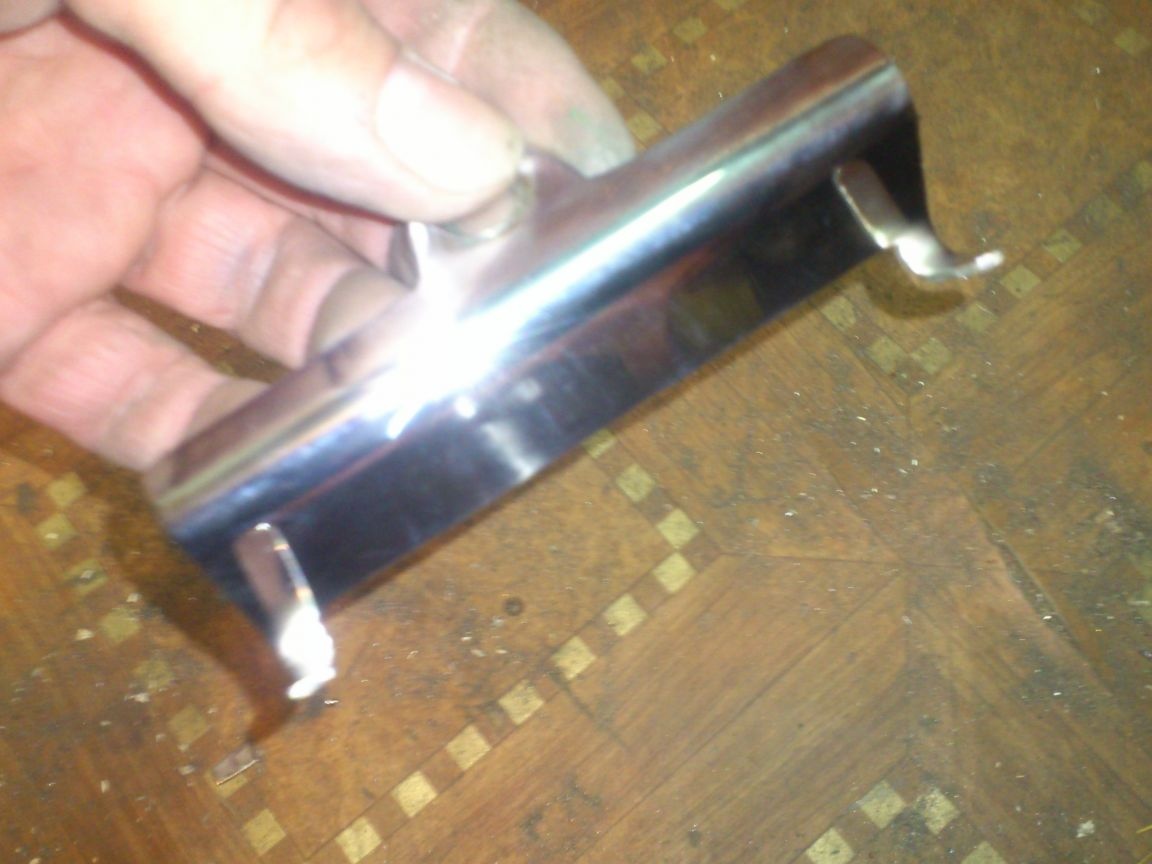
I decided to insert brags of both elements into this notch, rivet everything together with exhaust rivets, put the tube on top and fix it on top with a “blind” nut. It became clear that in the front part you need emphasis for the tube ... A sort of "guard")))). I also decided to make it from a "blind" nut:
I made a slot in it enough to fit the shanks of the shank, folded together:
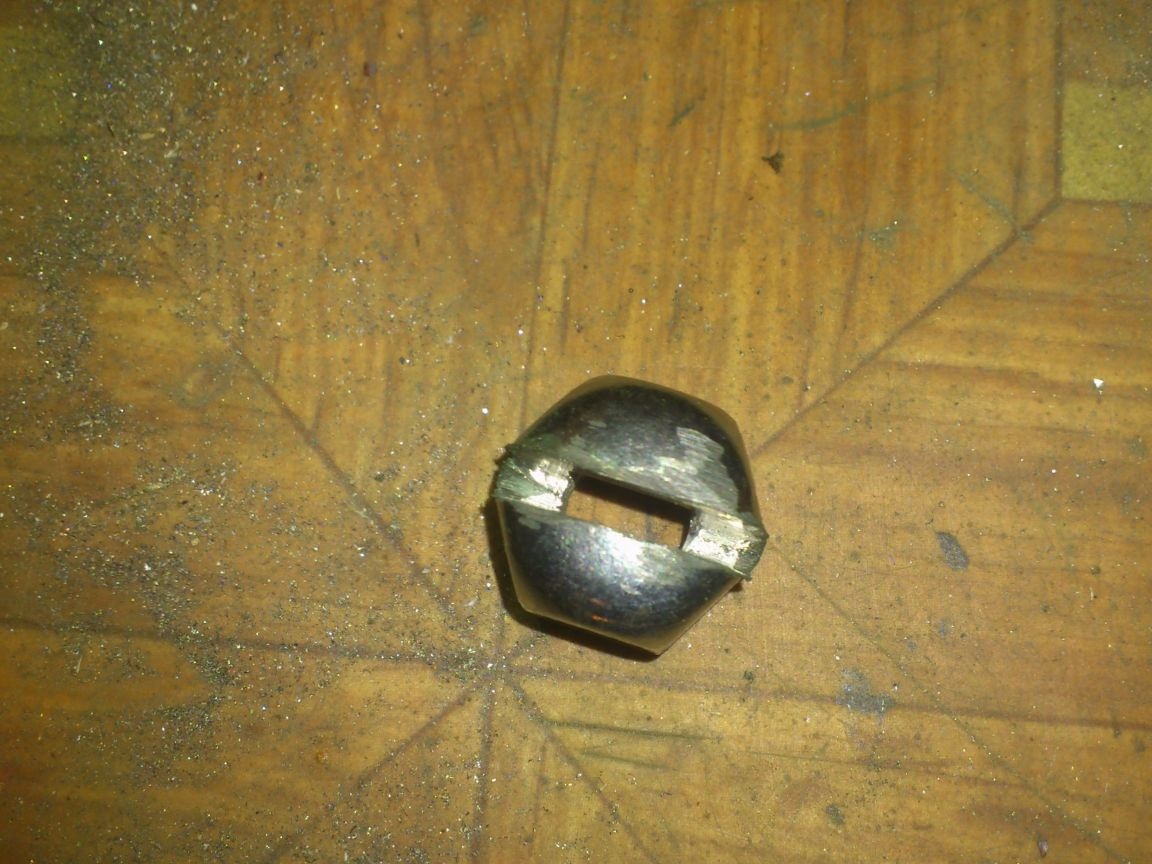
And the shanks themselves turned it so that their width was 9.5 mm (inner diameter of the nut):
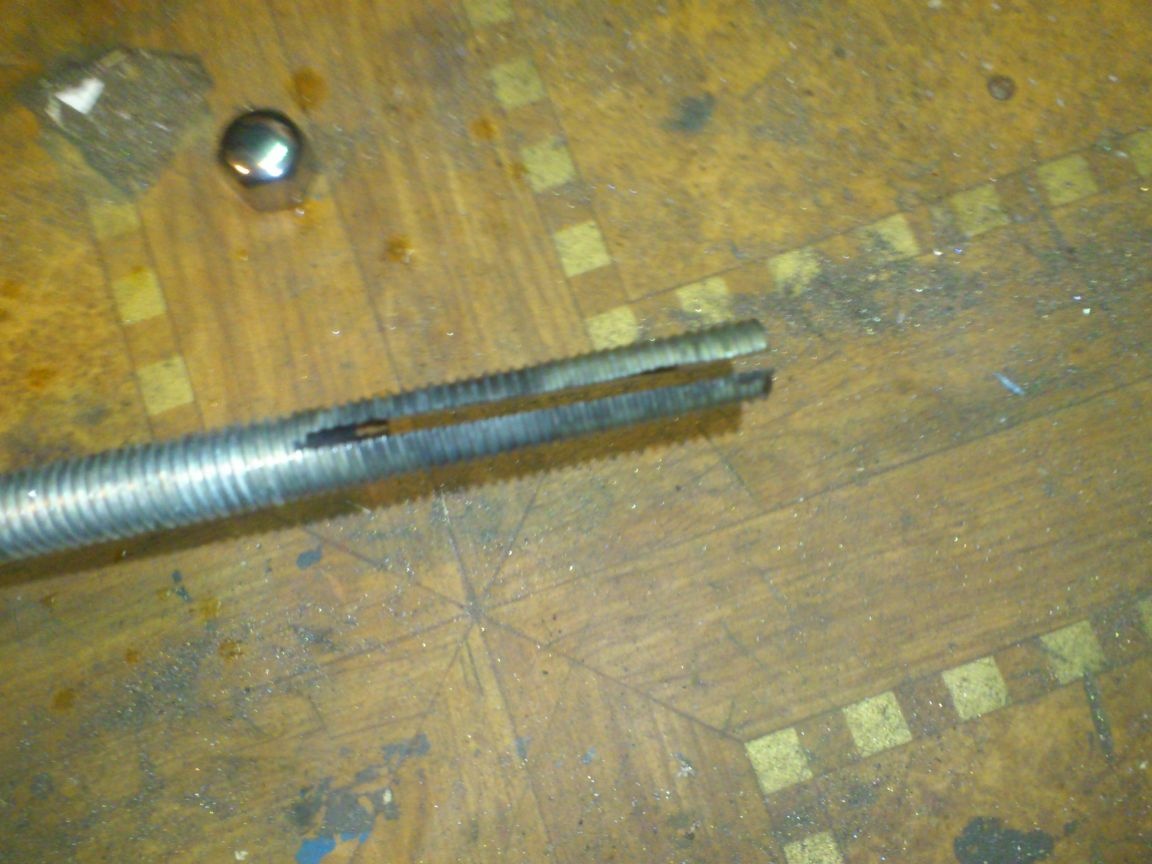
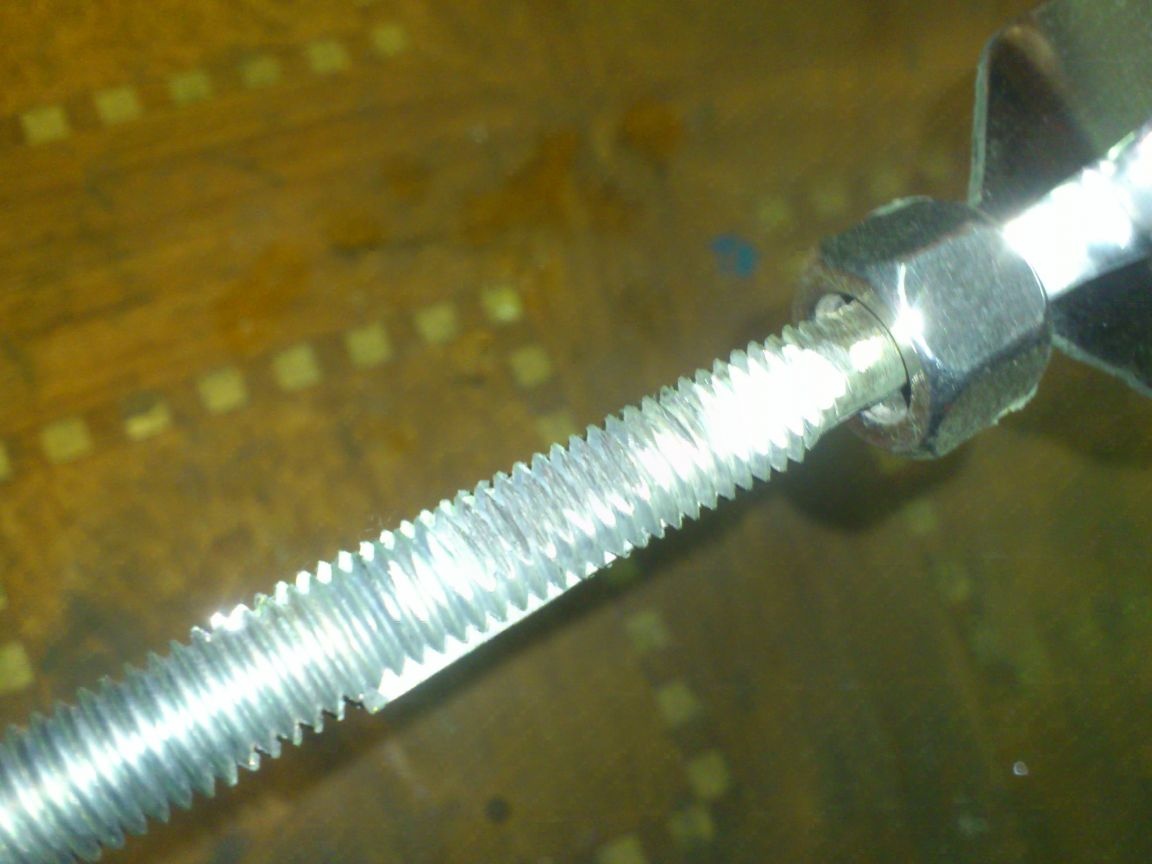
So that the lower slotted nut does not dangle after tightening the upper, I sharpened the thread at the end of the stud so it will go inside the nut. (After all, it will not work to wind it up anymore)))). After that, I put together the whole structure:
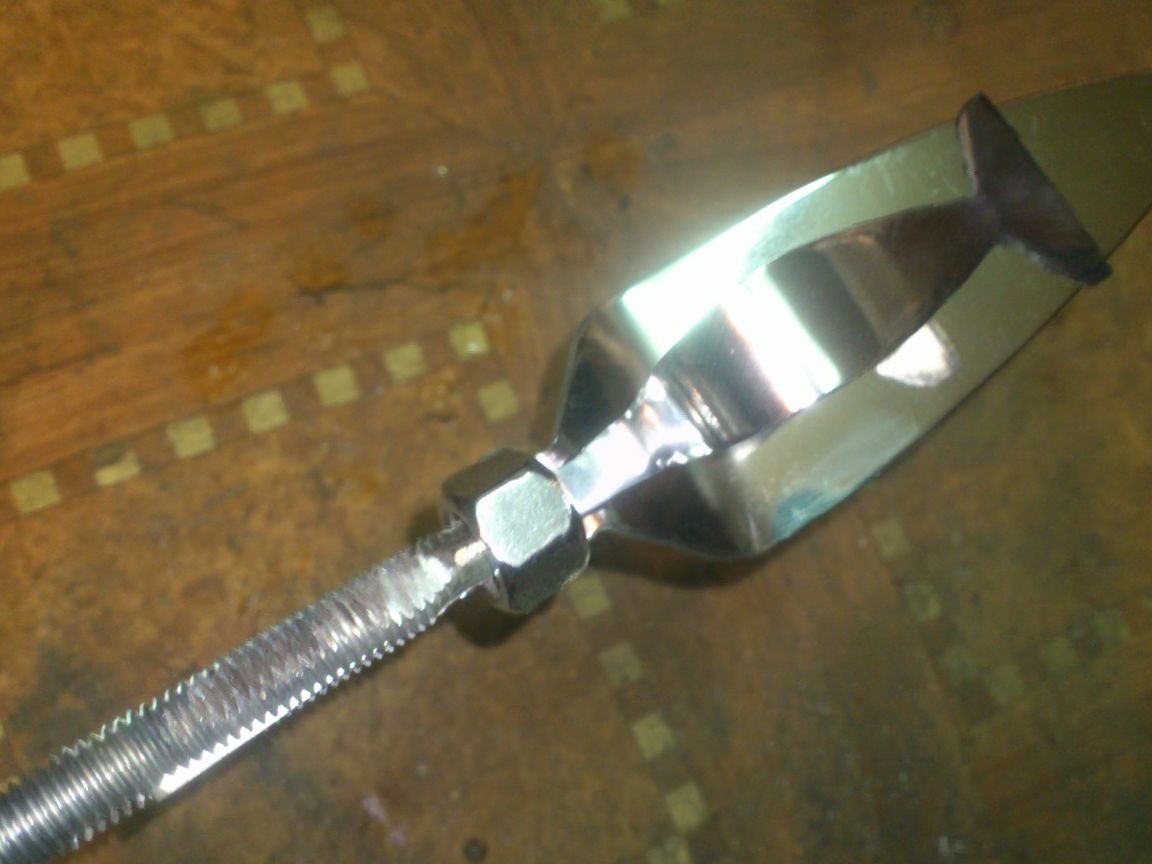
After that, I drilled two holes with a 3.5 mm drill (pre-sharpening the thread at the start of drilling) and fastened the structure with two exhaust rivets:
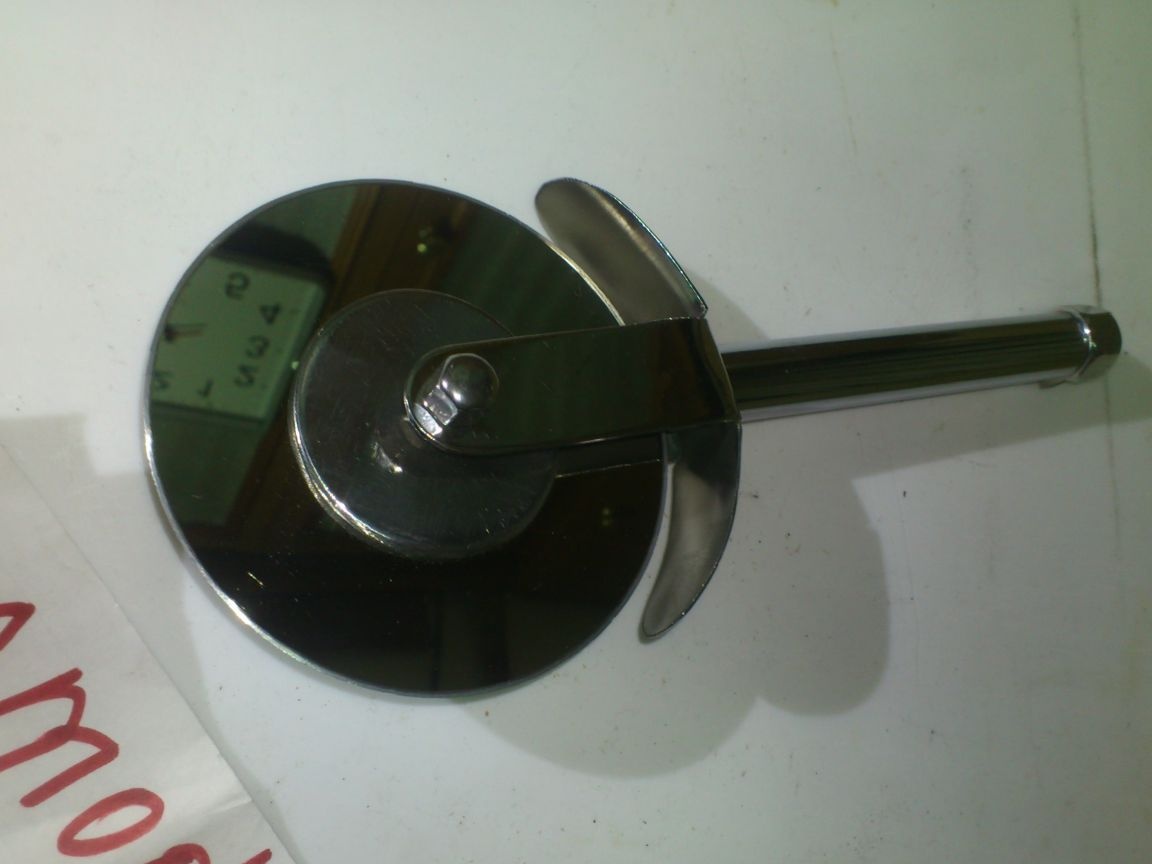
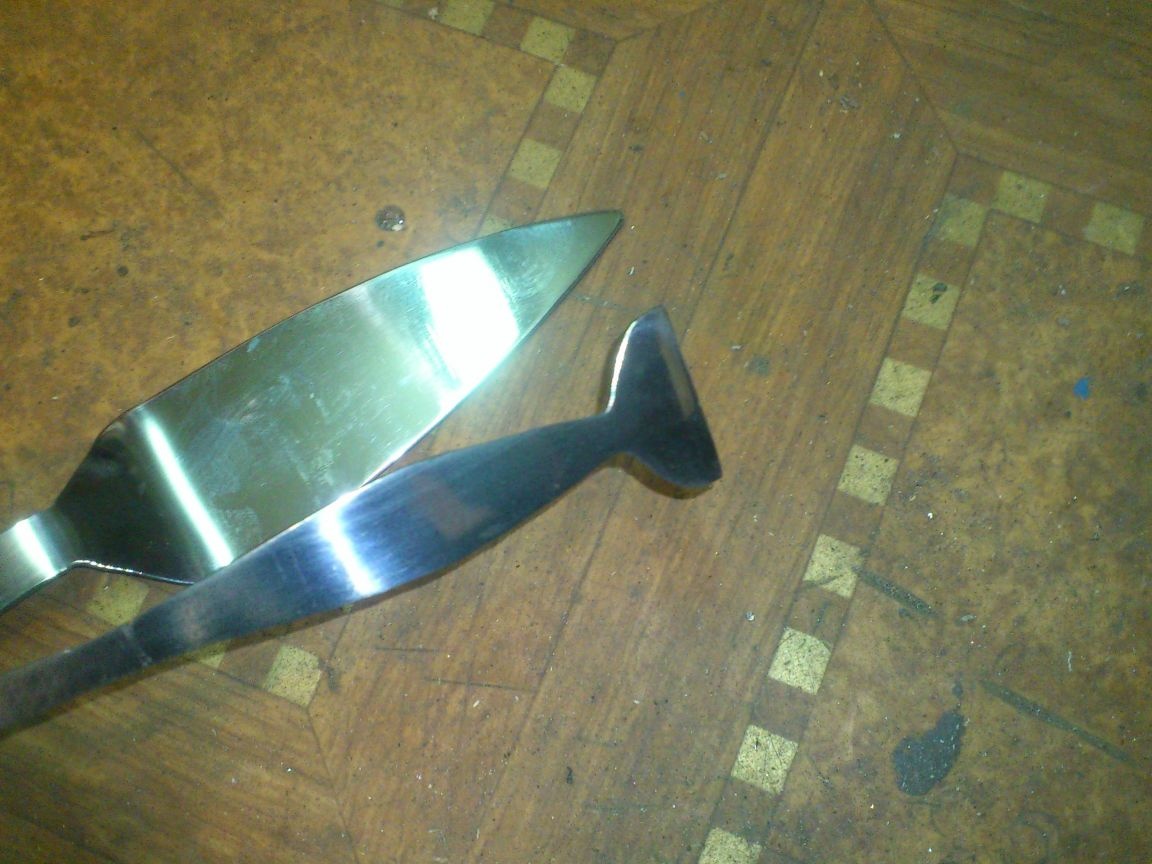
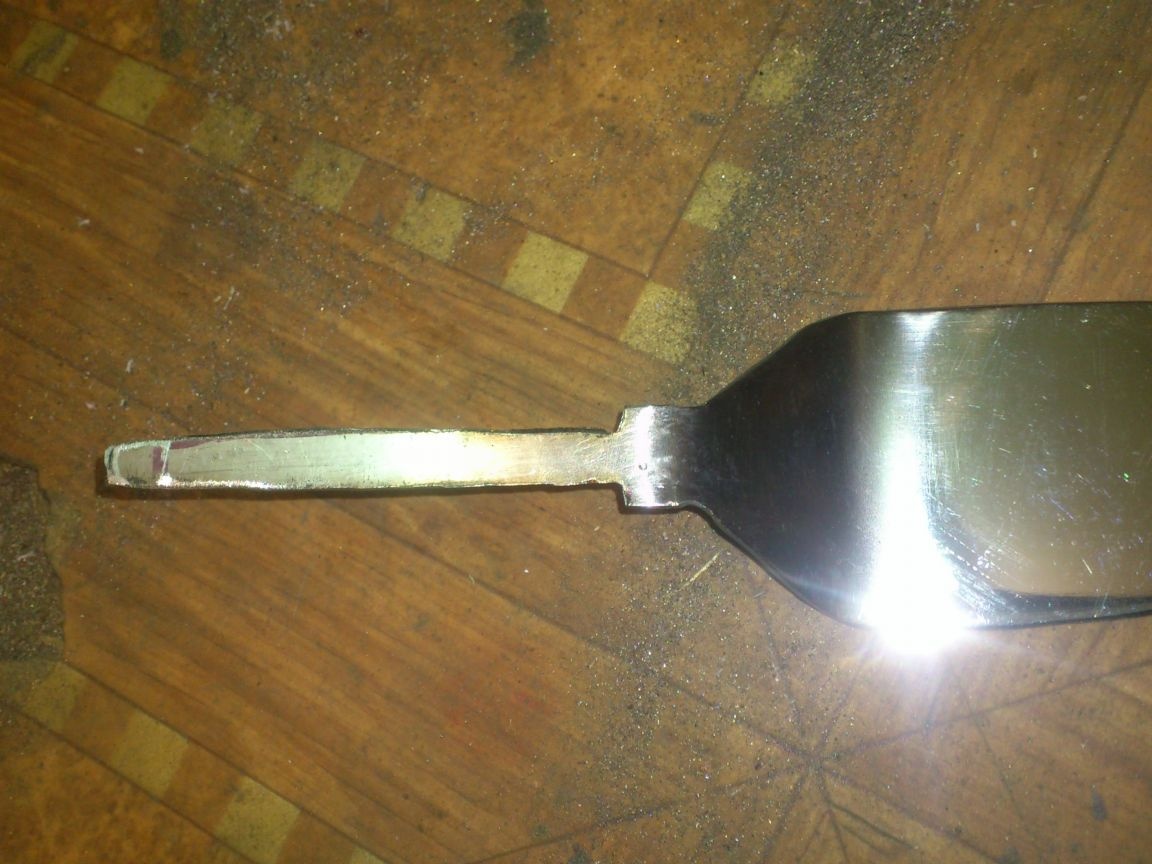
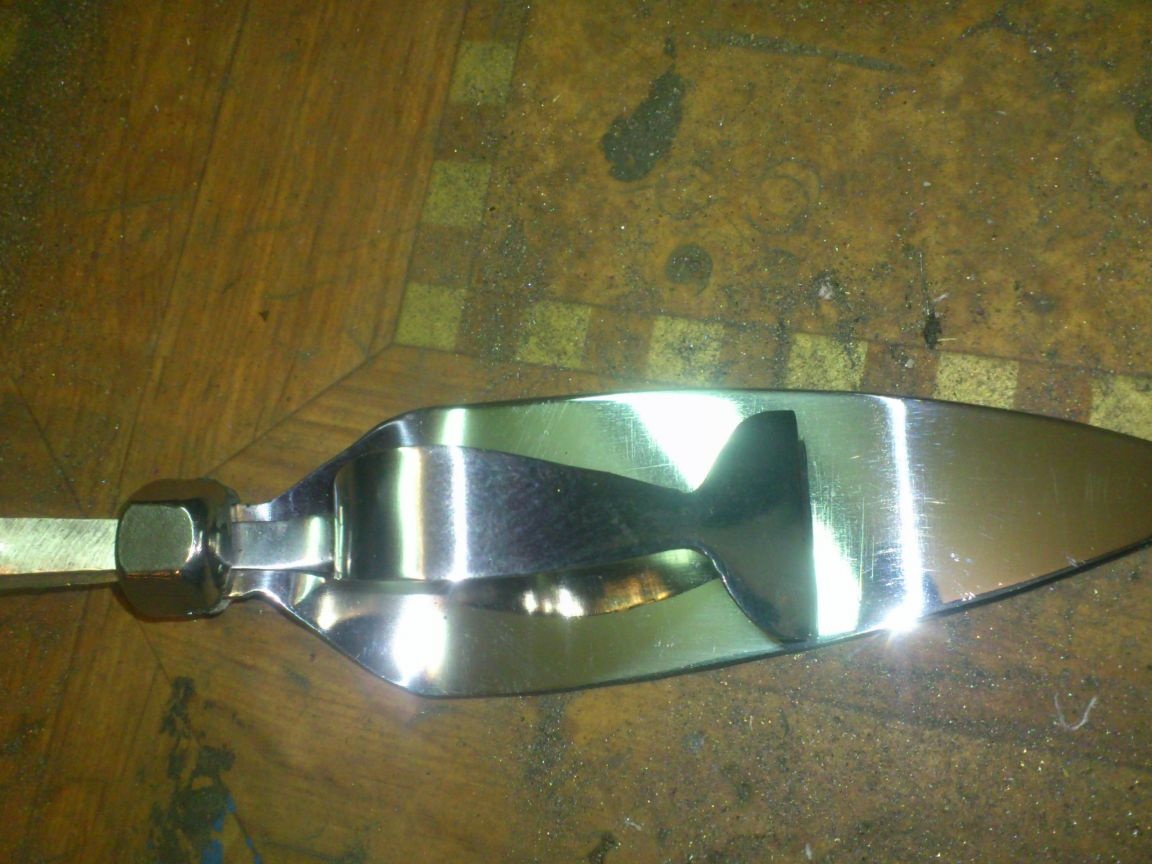
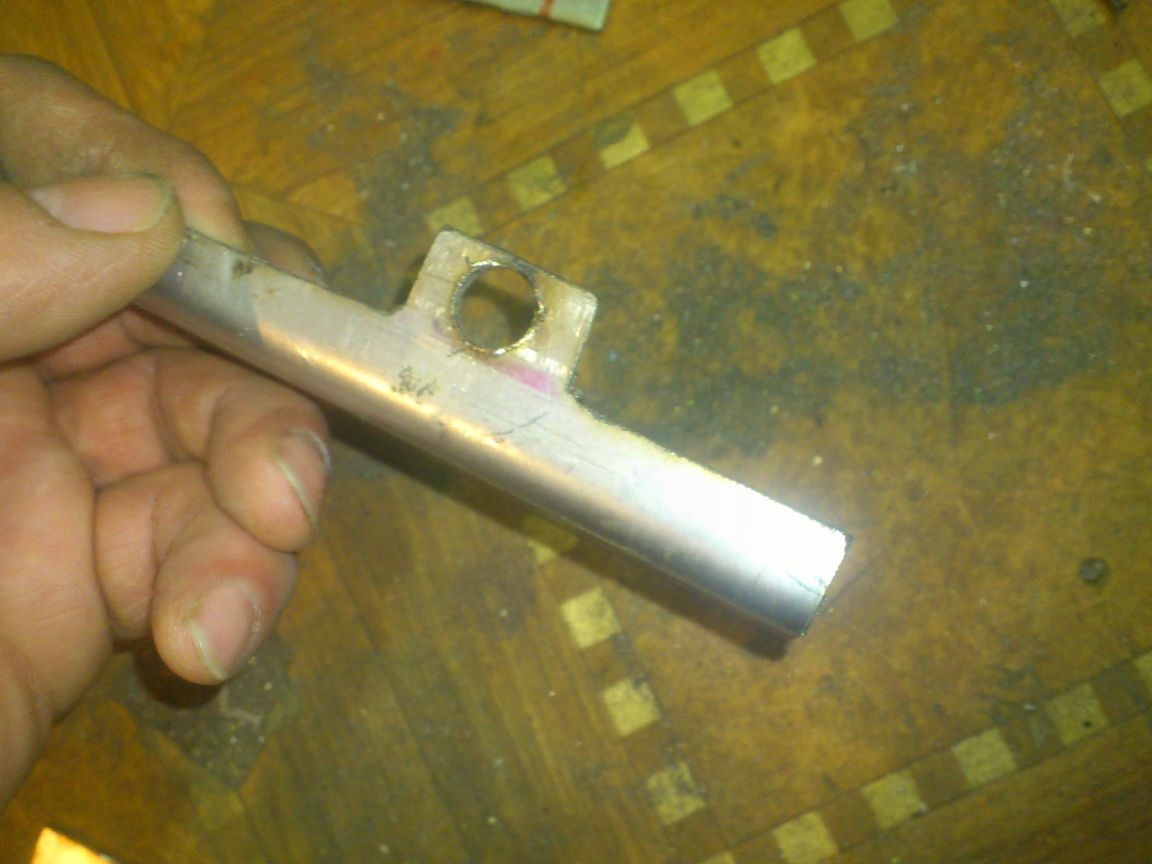
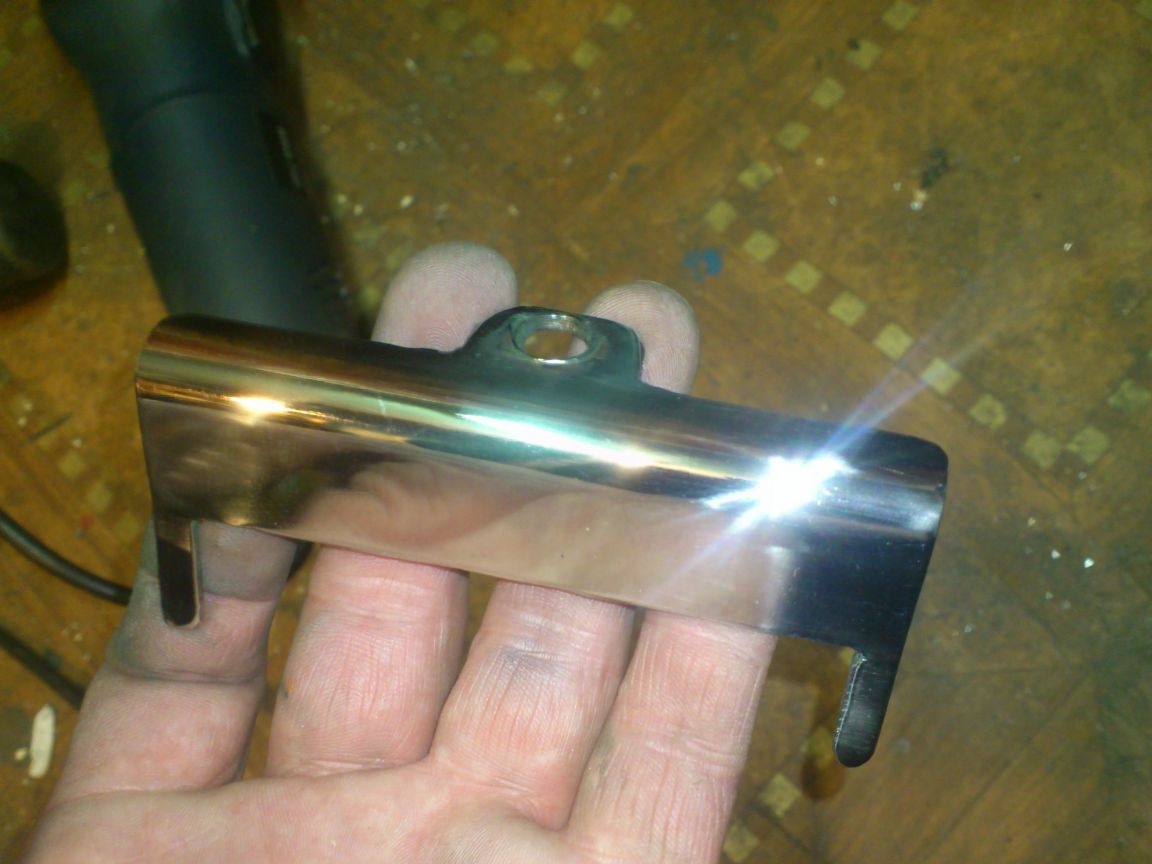
The tongue is in place. When you press it forward with your thumb, it will securely hold a piece of pizza and will not allow it to slip off the shoulder blade:
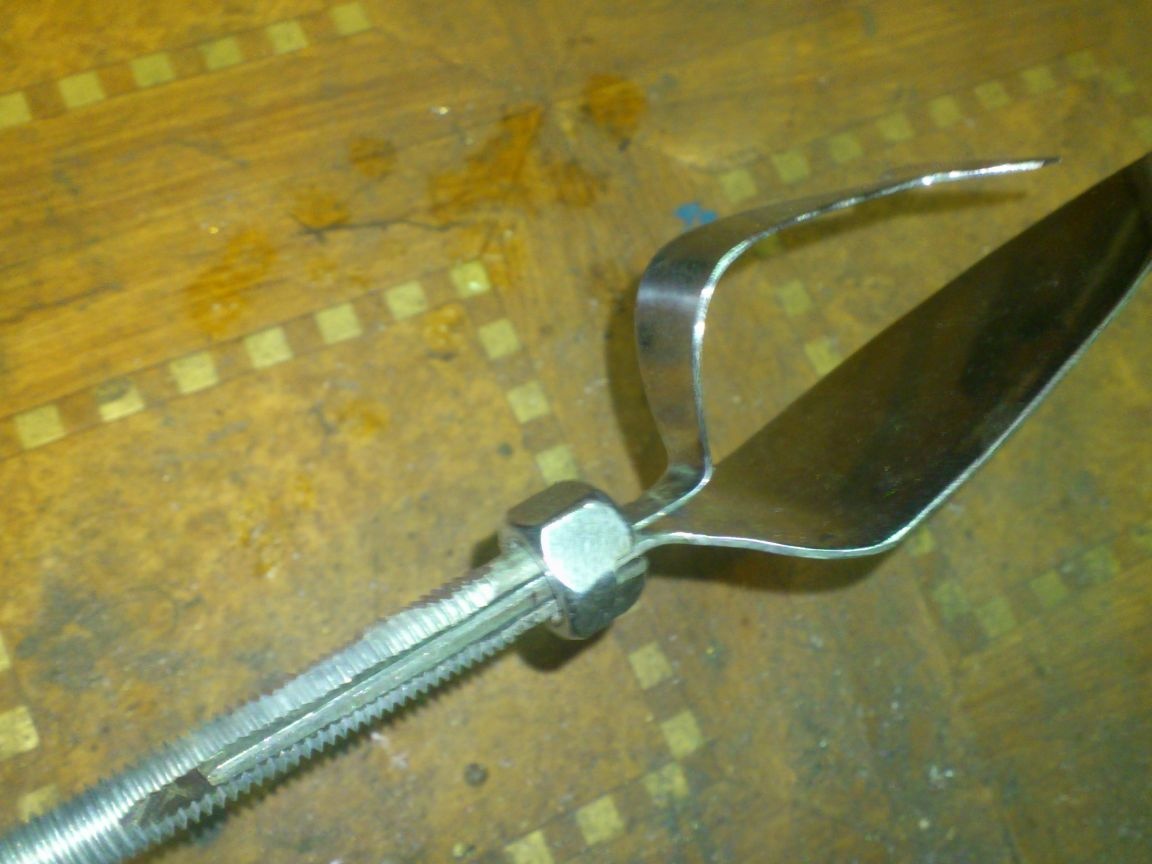
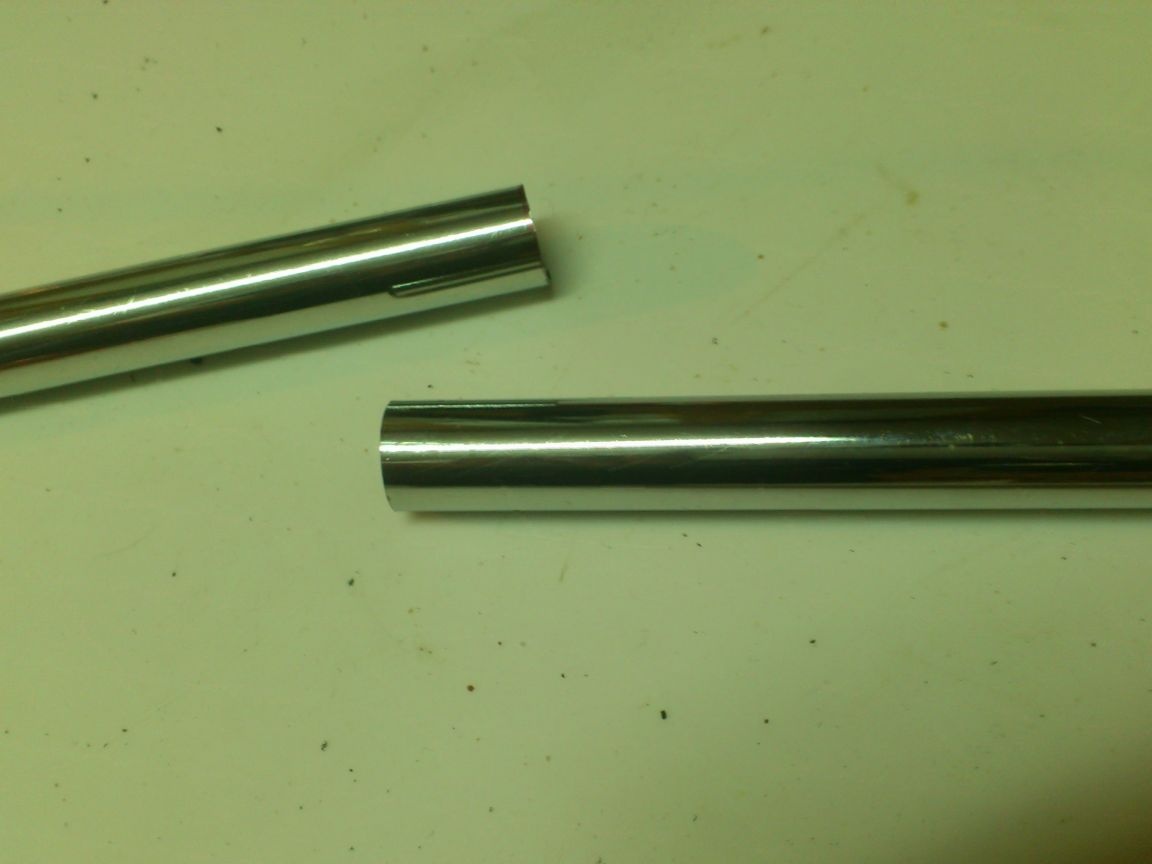
Cutting off a piece of chrome tube of the desired length, I put it on a hairpin and cut off its extra length, leaving it to stick out about eight millimeters:
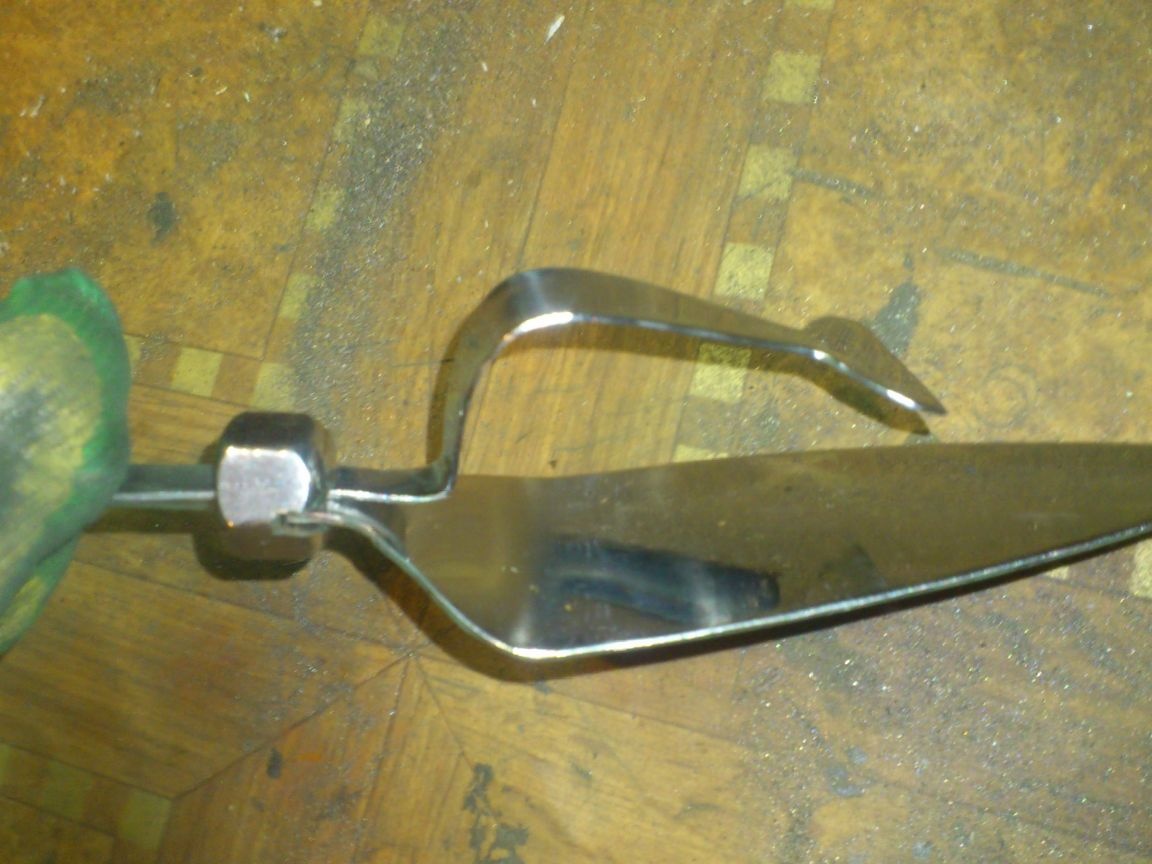
In order for the blade to be hung, I made this element from stainless steel:
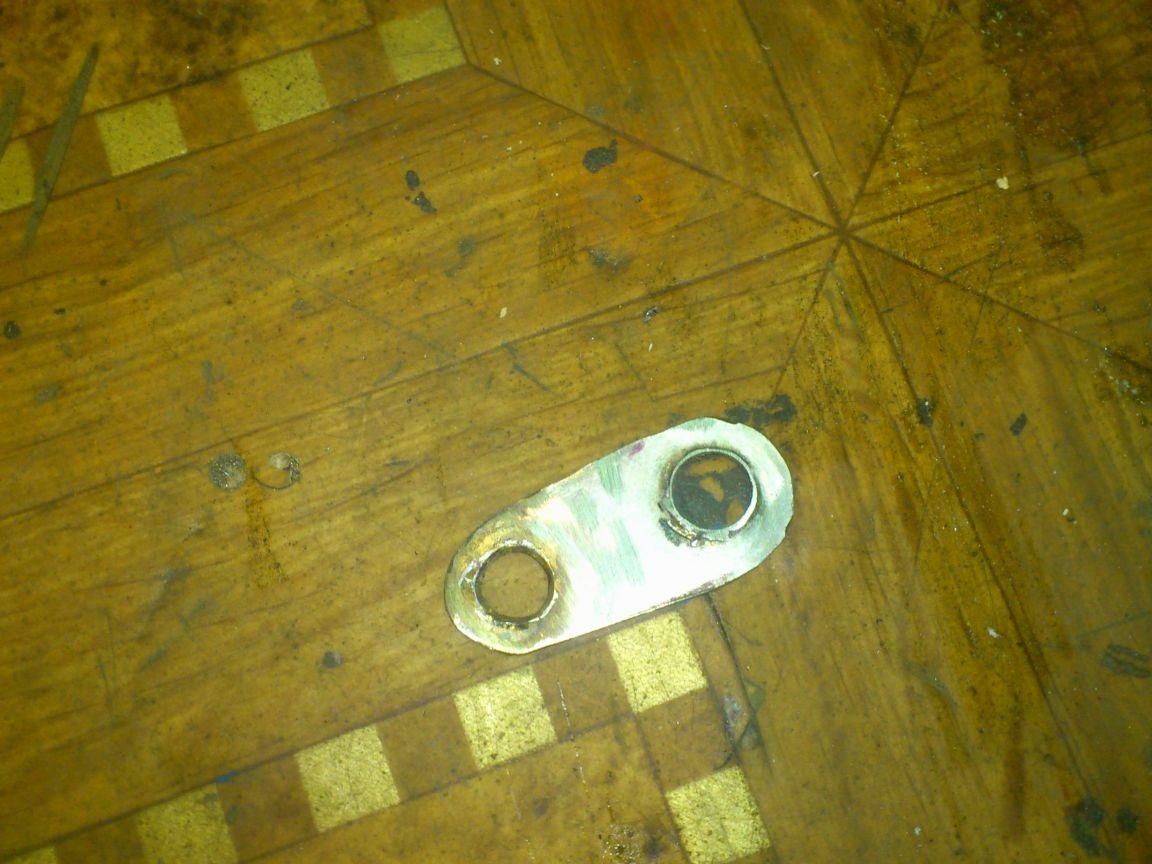
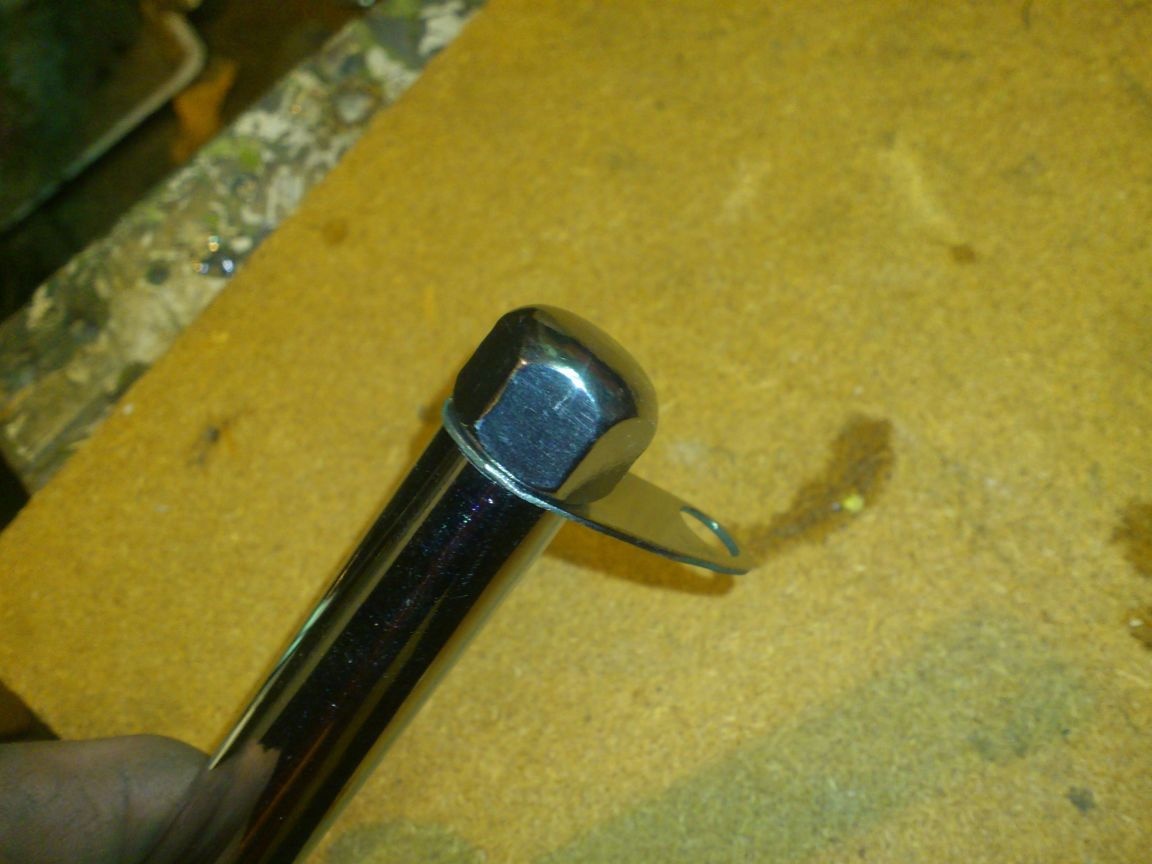
One hole in it is 10 millimeters (for a hairpin), the other is 8 (to hang on a hook). Putting it on a hairpin, I twisted and tightened the nut, after which I bent my "suspension" up:

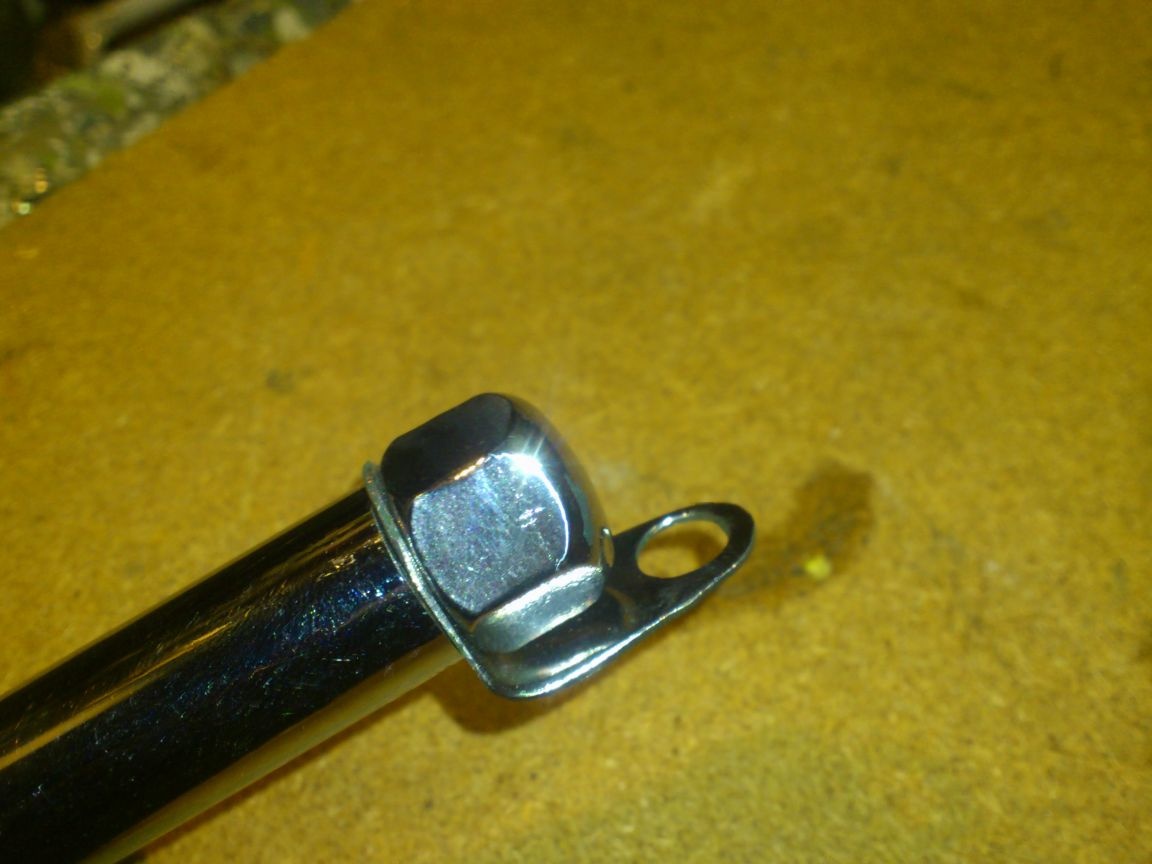
(I made the same element for a circular knife).
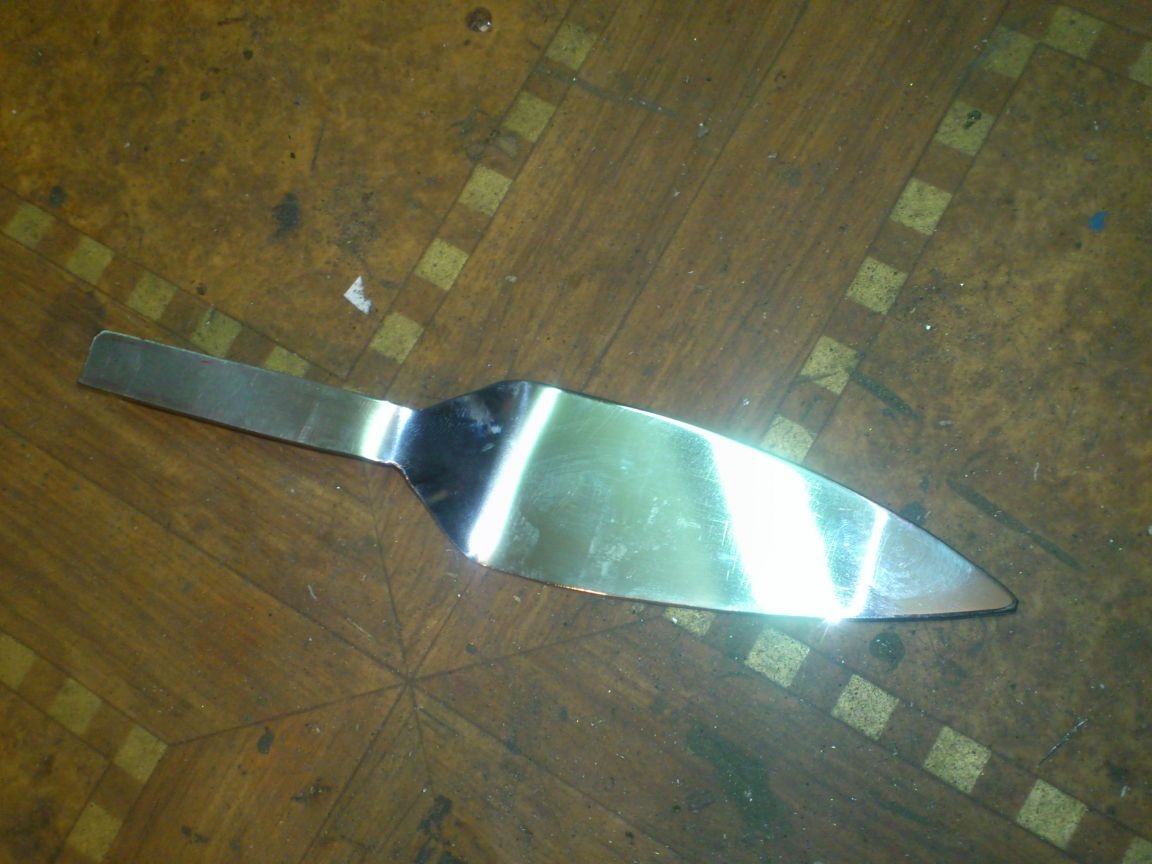
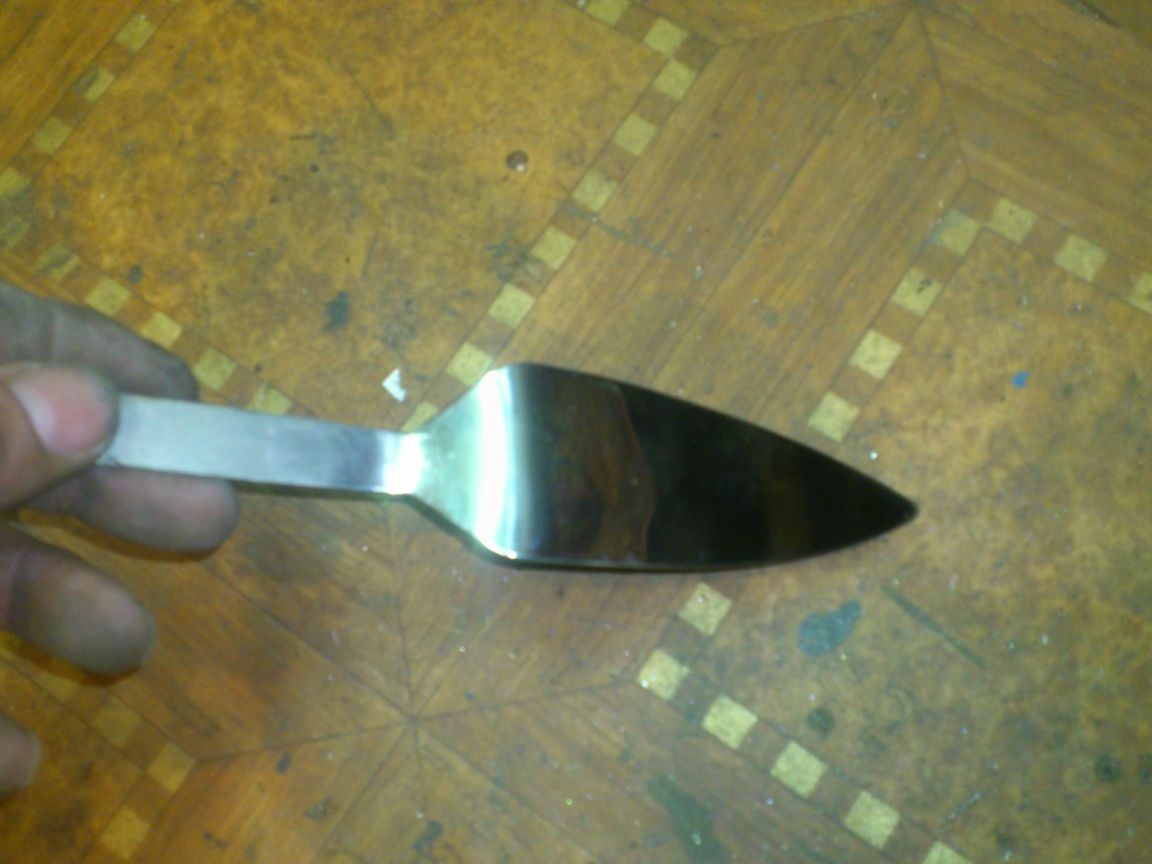
All! The blade is ready:
Now we begin to make a rack for her and a knife. After all, after cutting and unfolding, the tools can be greasy, and putting them on the table is not very convenient. It is better to hang them until next use. And when the guests leave, wash.
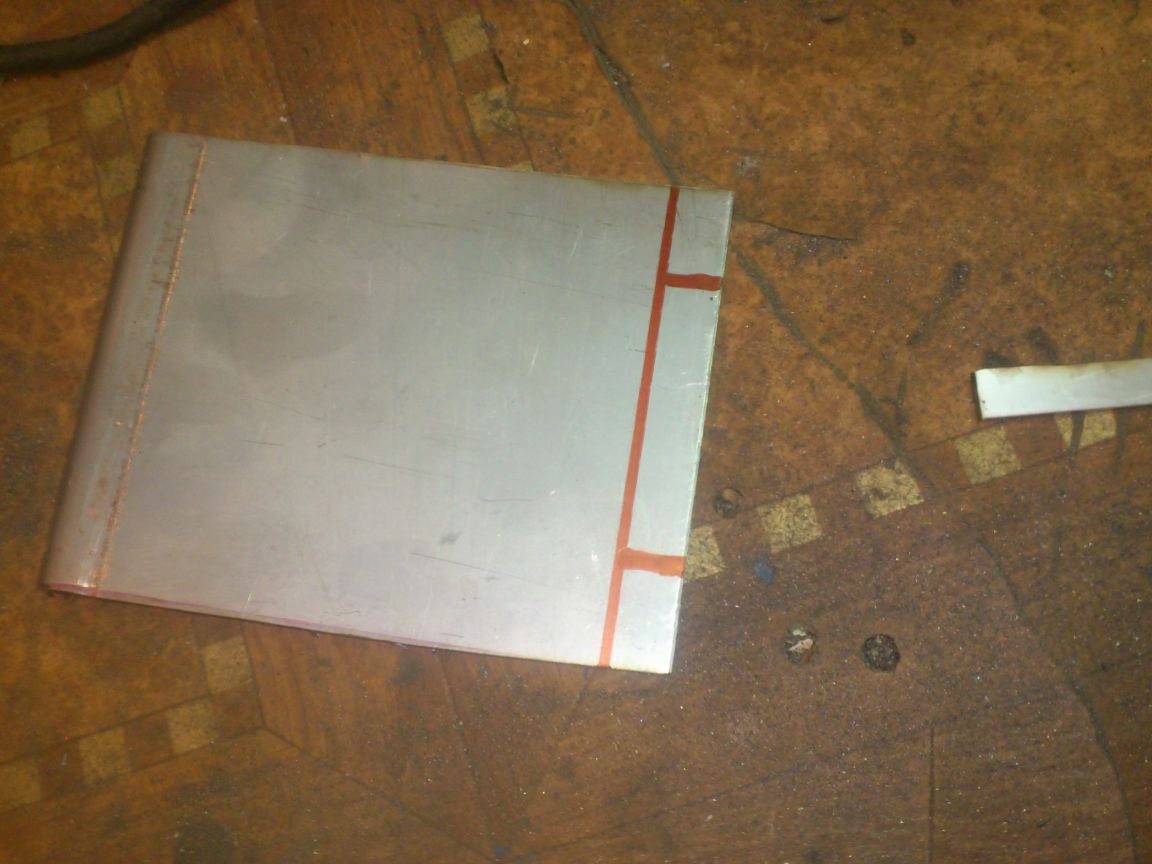
I decided to make a stand from the same stainless steel .. I determined the width by laying a knife and a shoulder blade nearby and measuring the distance between the holes in the suspensions.))). After that, I cut out two of these elements from stainless steel:
The larger one will subsequently become the “sole” - the bottom plate of the rack, which it will rest on the table. From the smaller, I will make the upper crossbar, on which, in fact, the kitchen appliances will be placed.
Now you need to drill a hole that will put the part on the rack. I marked his position ...
And then I discovered that there was an extra hole ... It was in a stainless steel, and I myself do not understand how I did not pay attention to it, cutting out an element!)))). Well ... Just cut off the excess ....
At its edges you need to make hooks. To do this, I marked and cut out the excess grinder:
Left tabs on the sides will then turn into hooks.
The item is ready. Roughly processed with an emery-petal wheel, we send it for grinding and polishing. (I described these processes in detail above). Here is the result:
It remains only to bend the hooks, which I did with pliers, after wrapping the hooks with rags. (so as not to scratch))))
Now let's take a “sole”. As you know, a plane on a plane is very unstable. There are practically no perfectly flat and even surfaces. And if they do, then just one grain of sand, or, in our case, crumbs, is enough for the stand to stagger. Therefore, I initially thought about making some kind of “legs” on which the “sole” would rise above the table plane. And then he decided that it would be most practical, technologically and aesthetically to simply bend down the front and rear edges of the platform at a right angle.
But I can’t bend such hard material as stainless steel with the tools I have at my disposal perfectly evenly and “cleanly”. If you do this with a hammer in a vice, the plane will surely get minor defects, which will very “manifest” during subsequent polishing. Therefore, I cut the workpiece using the existing ready-made bend:
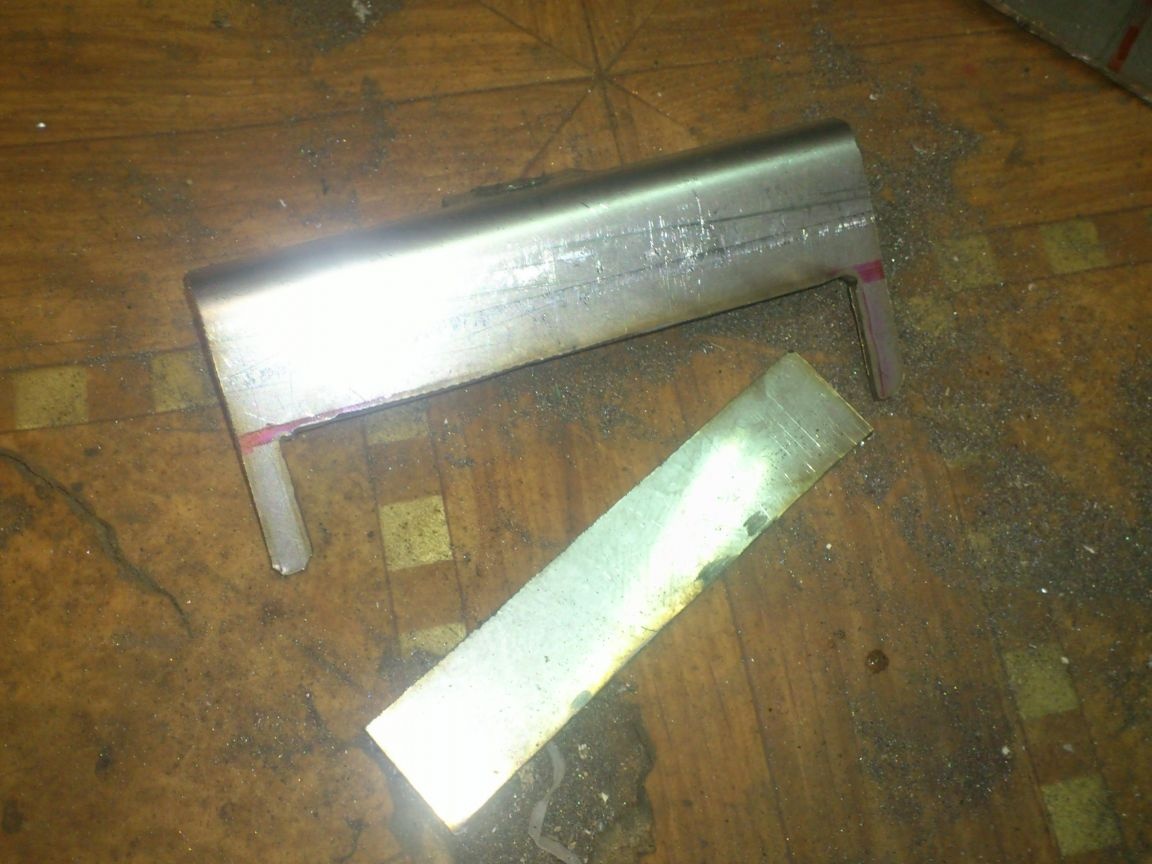
The back part already has to be bent by myself ... To facilitate the task, I decided not to bend the entire plane, but cut the middle, leaving only the “legs” at the edges for bending:
(These processes led me to the idea that it would be nice to put together a small bending machine that would allow smoothly bending metal sheets.)
To mount the rack, I drilled a hole in the site with a 10 mm drill. (His position was chosen "on a hunch")))). Displaced from the center to the rear, roughly estimating the center of gravity of the structure with tools suspended on it:
I would also like to dwell on the topic of drilling holes in stainless steel, because I was often asked the questions "Did you burn a lot of drills while drilling?". I will say right away - not a single one ...
Distracted ....
We drilled a hole, cut out the excess ... We bend the back “legs”. (I made it with a hammer in a vice, used a sandpaper on a fabric basis as a protective pad, which I will process later. It turned out here is such a platform:
Grind. Polish.
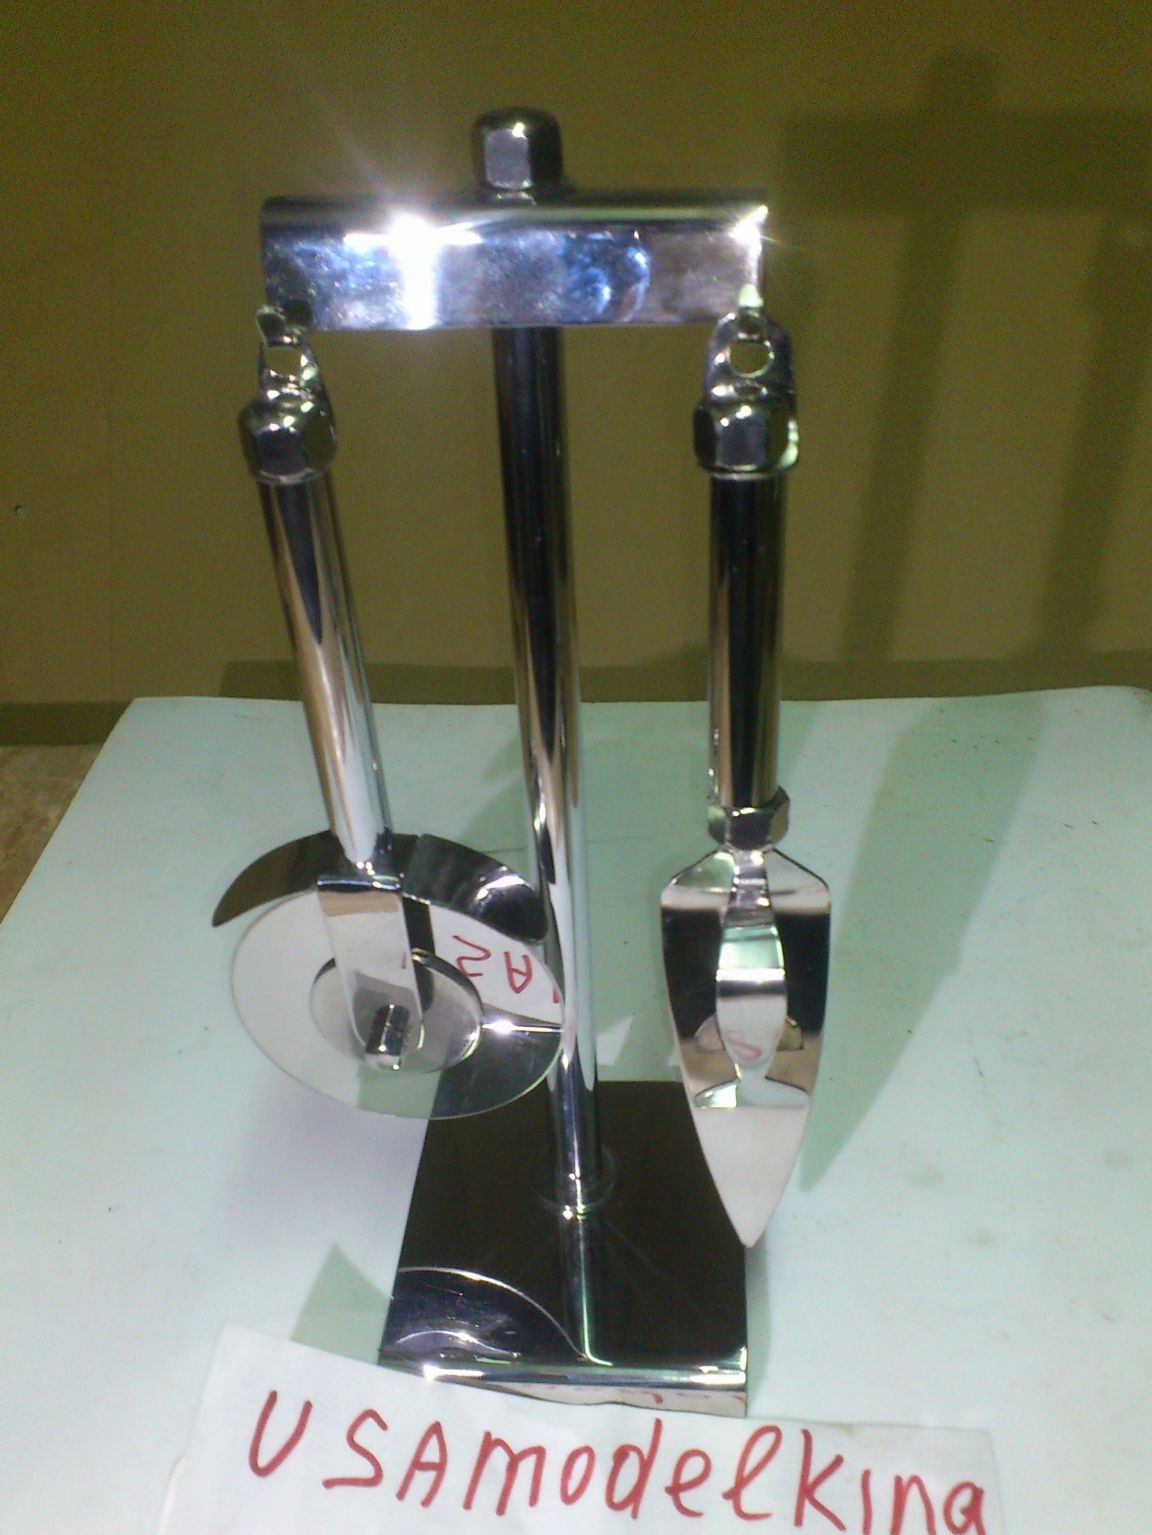
All. Getting to the assembly. I put it all together on the same M10 pin. He screwed a nut under the platform, placing an enlarged washer, put the same stainless steel washer (pre-polished) above it, then put on a chrome tube, a “hanger” above it and removed it with a cap nut. Here's a stand I got:
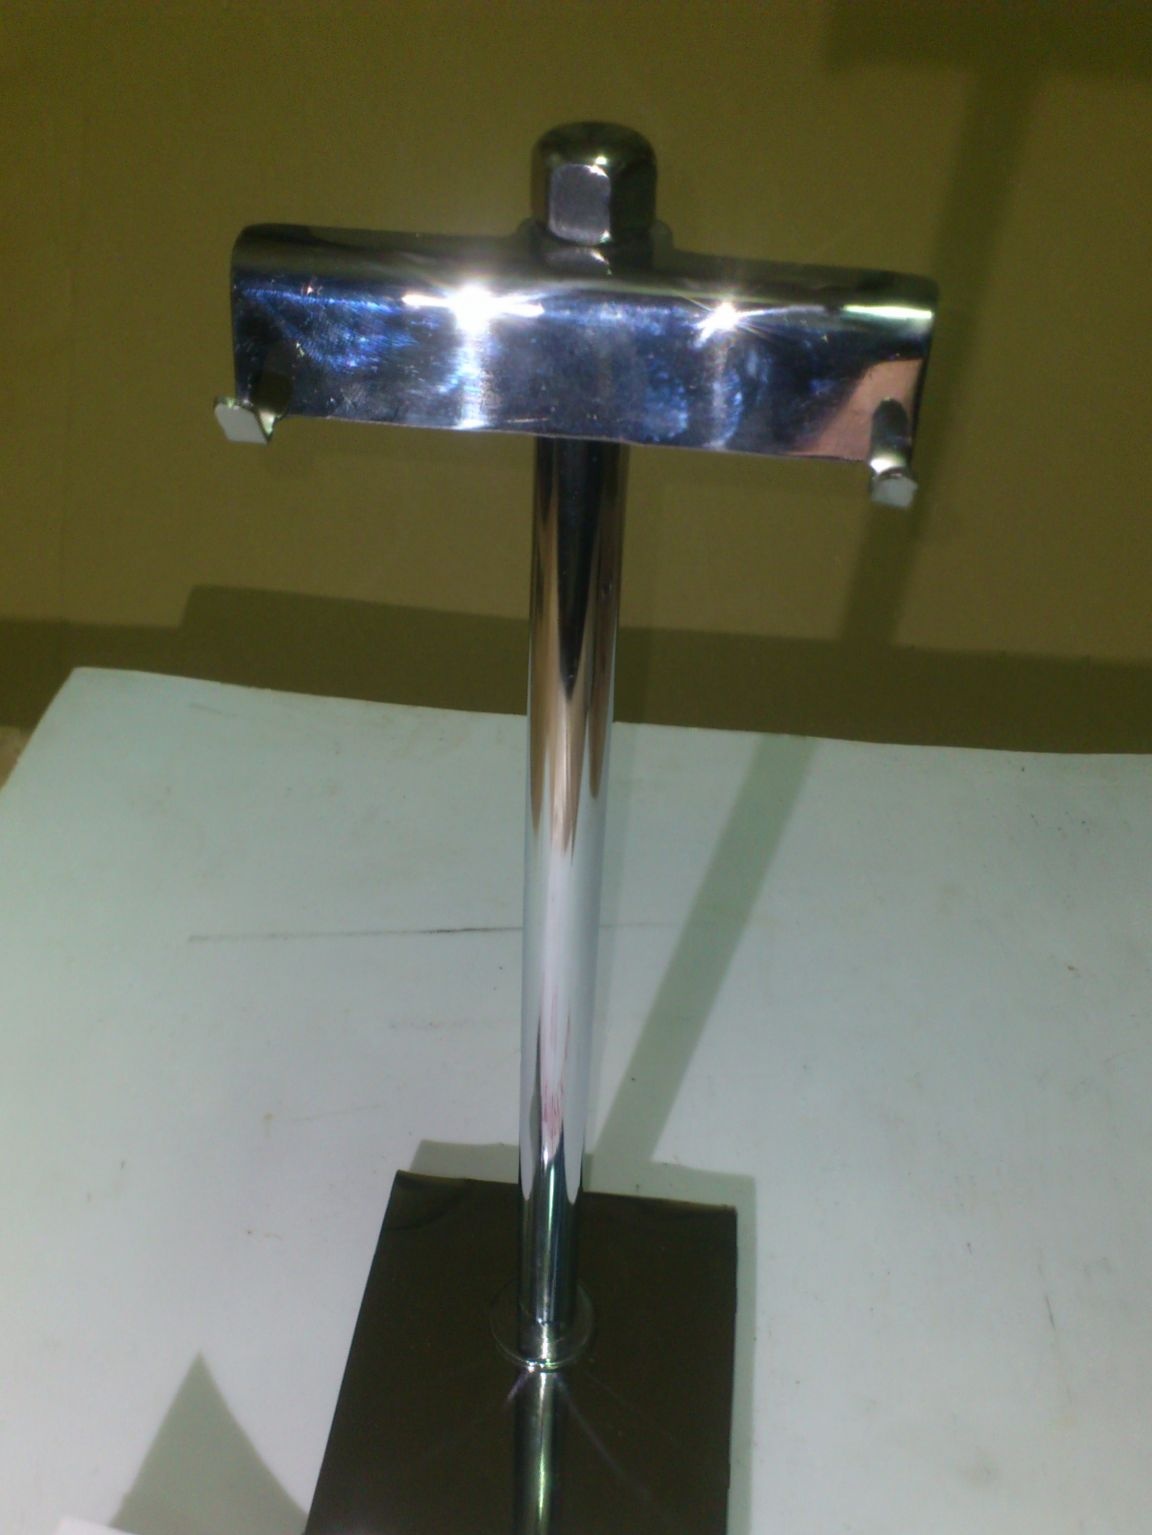
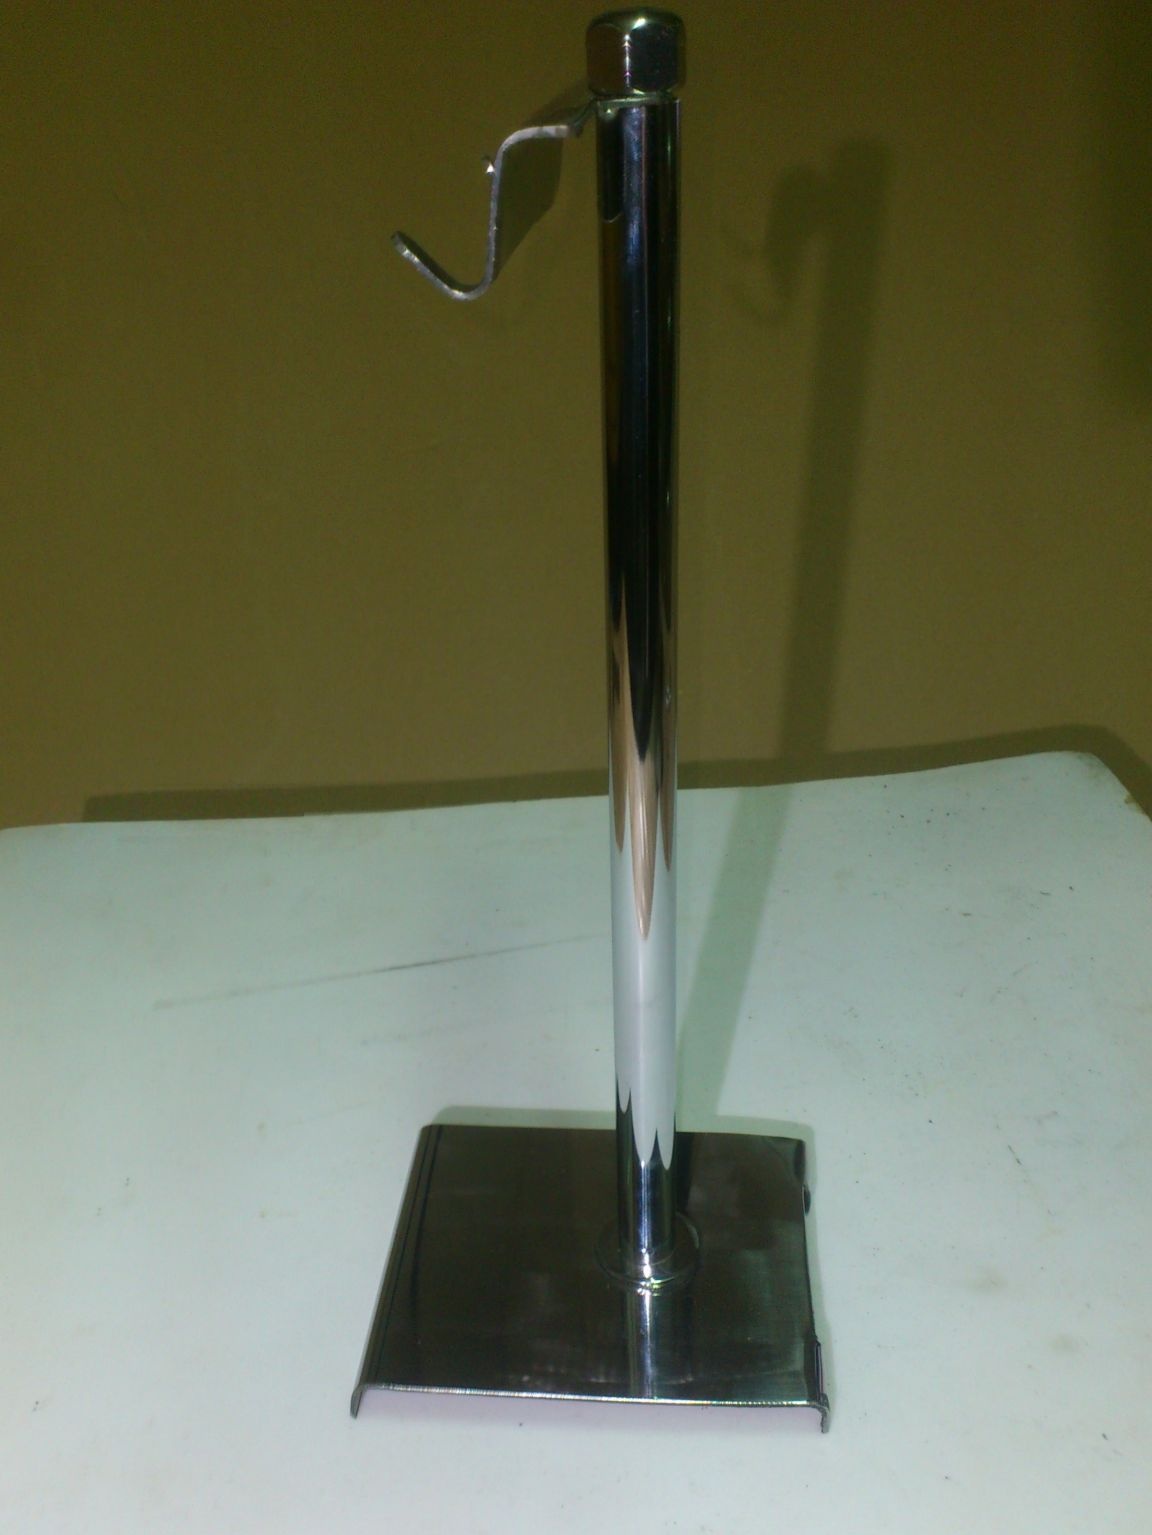
It remains only to hang a circular knife and a blade on it:
Here is a set for pizza I got.