
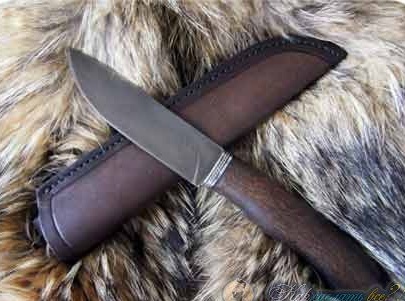
A knife is a useful thing in life, and sometimes a tool for survival, they can easily cook food and also protect themselves from enemies. Good knives are quite expensive, so it makes sense to learn how to make them do it yourselfIn addition, in this case, your knife will be unique, and you can always brag about it.
Of course, anyone can make a knife if there is a large arsenal of tools. For example, our foreign friends always have a cutting machine and other machines on the farm. But to make a knife completely by hand is only possible for a real master, but this is not scary if you want to become one.
Today we will look at how to make a quality knife with hand tools (not counting the sharpener and).
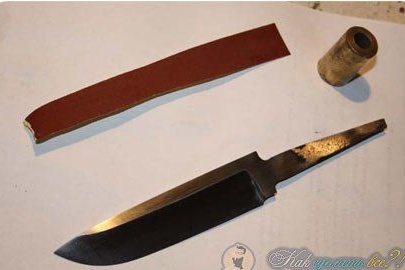
Materials and tools for making a knife that the author used:
Material List:
- steel for the blade (the author used X12MF);
- brass plate;
- a piece of the bar for making the handle;
- epoxy adhesive.
Tool List:
- sandpaper of different grain size;
- whetted;
- grinder;
- ;
- a hacksaw;
- polishing paste;
- paper, pen, ruler, scissors (for making a template).
The process of making a knife:
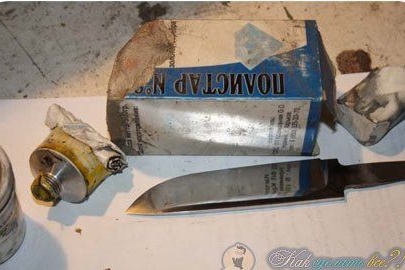
Step one. We select the workpiece
As the source material, the author served steel grade X12MF. This steel is used specifically in the manufacture of knives, especially hunting knives, as it has excellent characteristics for these purposes.
Judging by the instructions, the author uses a non-hardened billet, while the steel will be soft and can be handled well by hand tools. But the disadvantage here is that such steel still has to be tempered.
You can use a hardened billet, but it is very difficult to process, and the hardened metal is afraid of overheating.
For the manufacture of a knife, it is not necessary to use just such steel as that of the author. You can easily use a flat file or other source of steel. The most important thing is that the steel contains a lot of carbon, then it is durable and well hardened. Usually, when processing such steel, sparks are very abundant.
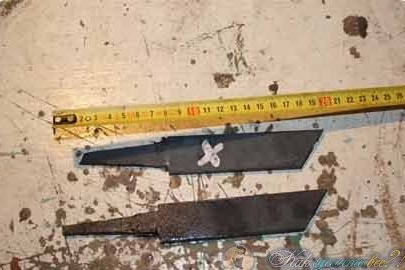
Step Two Prepare a template and cut a rough profile
Next, we take the workpiece and draw on it a rough profile of the future knife. Usually this is first done on paper using rulers and other drawing accessories. Our author, judging by everything from “our” masters, therefore takes a crayon and simply draws a knife profile on the workpiece.
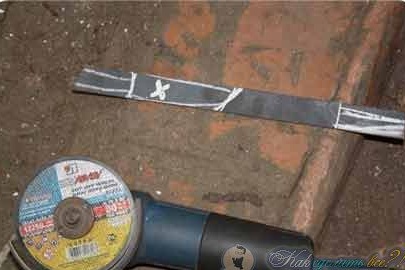
Now you can cut the main, rough profile.The author does this with the help of a grinder, but with this approach there is a big risk that you will overheat the workpiece and then it will have to be tempered. To prevent steel from overheating, constantly cool it in water and do not press hard on the cutting line with a grinder. A strong overheating is indicated by a change in the color of the metal, if this happened, the steel will have to be tempered.
If your workpiece is always wet, you will see that the metal is overheated if the water starts to evaporate quickly.
It is safest to cut a profile with a hacksaw for metal, and in general any metal band saw will do. True, only hardened steel can be cut with a hacksaw.
Step Three We process a profile
After cutting the profile will be a lot of notches and other irregularities. The whole thing needs to be removed and the profile made as it was originally intended. However, some authors here improvise and “sharpen” the profile as they simply like in the process.
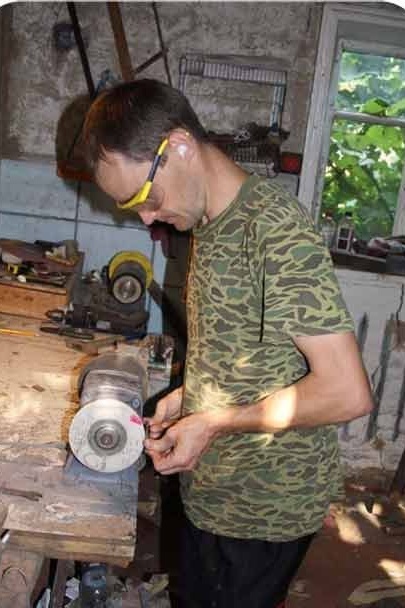
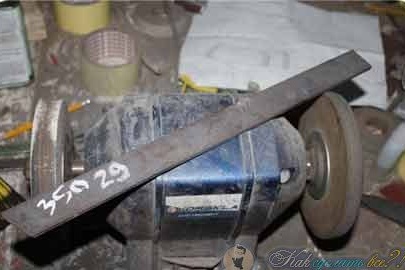
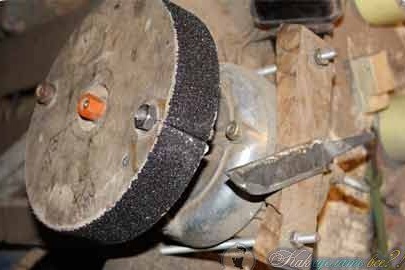
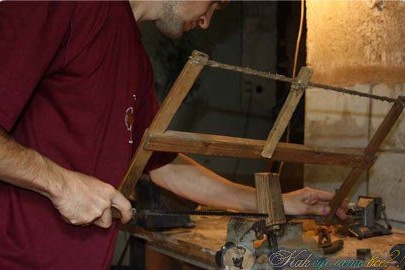
Step Four Help "grinders"
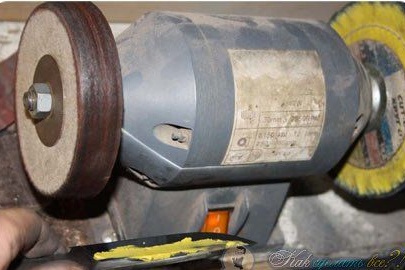
The author's grinding machine is not disk, not vibrational, and not tape ... it is improvised)) On the motor shaft (most likely from the washing machine) a homemade nozzle is fixed on which sandpaper is fixed. Using this machine, we grind the entire surface of the profile. We make it smooth.
Also using the same machine, we form the bevels on the knife. Here, the author also does not mark anything and does everything by sight. However, if the hands are already accustomed to such work, then marking up nothing is needed. The bevels should be as smooth as possible so that the knife cuts well. As a result, the blade will be thin and easy to sharpen.
Do not make the blade too thin, as further hardening still remains, which can lead to deformation of the blade. Before the next step, you must complete all basic metal work.
Step Five Hardening and subsequent cleaning
Now it is time to harden steel, here you will need a furnace or coals that are forced to swell with air. Steel will need to be heated to such a temperature when the entire workpiece becomes non-magnetic. We check this indicator with a permanent magnet. If we talk about numbers, then the grade X12MF steel is hardened at a temperature of 950oC, in the end, at this temperature, a hardness of 64 HRC units is achieved. The metal is cooled in oil.
Usually, after tempering, the metal is still tempered, as a result of which it becomes elastic and will not crack anymore. If you drop or drop the knife. Vacation is done in a household or other furnace, heating the metal for an hour at a temperature of 200-220oC.

After cooling in oil, wash the metal with washing powder in warm water. Then we use sandpaper and carefully grind the surface. It will have burnt oil and scale. We make the knife brilliant.
Step Six Further refinement
Now there is the final grinding of the knife. It is necessary to smooth out all scratches and other defects. First, the author takes sandpaper of 240 units, and then switches to the 400th. All this is done on his makeshift machine from a motor.

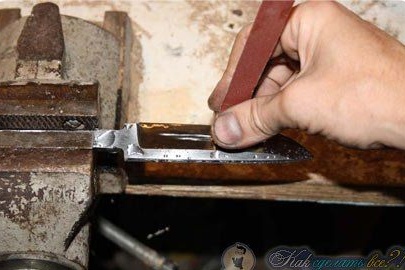
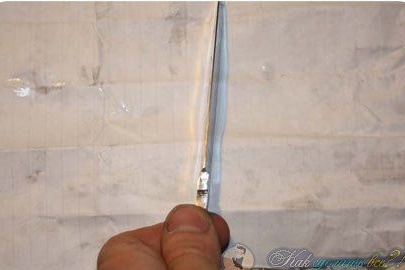
After that, you can do the final manual grinding. For this, the author uses a cylindrical lapping, fine sandpaper and water.
Clamp the workpiece in a vice, wet the sandpaper and grind the blade well. Thanks to the water, the chips are cleaned well.
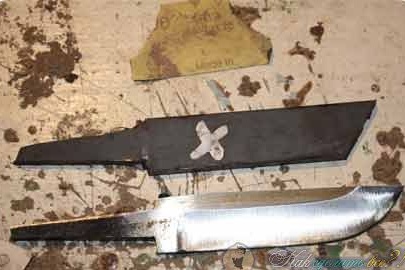
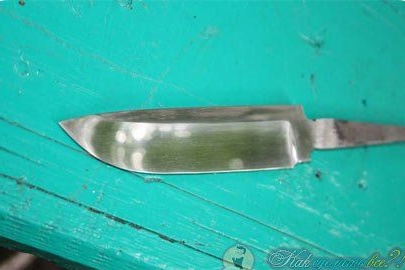
Seventh step. Blade polishing
To polish the blade, the author has adapted a special machine. For polishing, a 3/2 micron diamond paste was used. First, the paste is applied to the blade, and then the metal is processed on a feta wheel.
Then the author uses a different circle and paste 1/0, at the end polishing paste is used on the muslin circle. As a result, the metal is a mirror shine.
Step Eight. Handle manufacturing
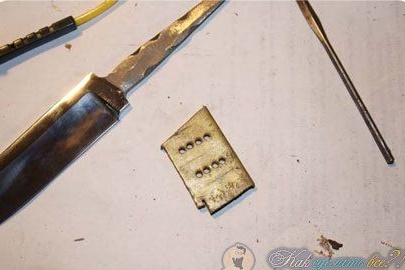
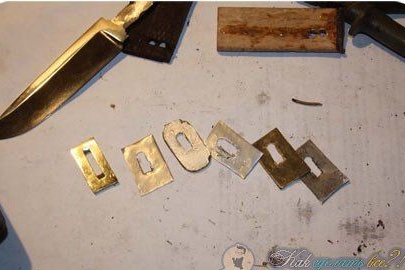
The blade is ready, now we just have to make a handle.First, the author takes a plate of brass and drills a series of holes in it. Then the jumpers can be removed with a file, and the slot can be adjusted across the width of the wide part of the knife shank. The author has several plates, put them on the shank, apply cyanoacrylate glue and clamp in a vice until the glue dries.
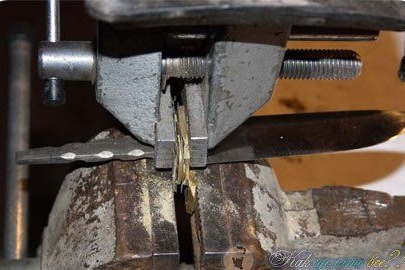

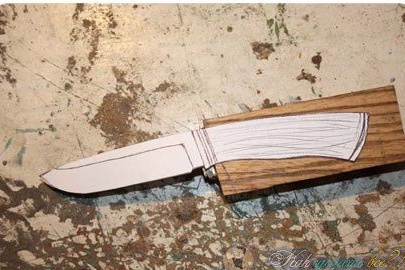
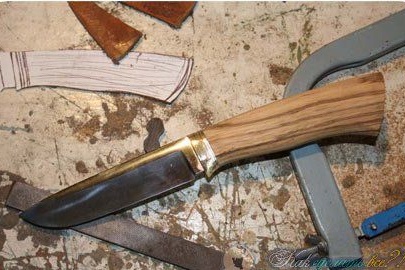
Now you need a wooden block of the right size to make the handle. We drill a hole in it, depending on the thickness of the shank and boring with files. Now we fasten the workpiece in a vice with the hole up and pour epoxy glue. Set the shank, fix and wait for complete drying.
When the glue is completely dry, take a jigsaw, a hacksaw and cut off the excess depending on the profile. When you cut off the excess, take the rasp and form the desired shape of the handle. This is done quite simply, the main thing is not to rush. You can also use a sharpener with a coarse circle.
In conclusion, we process the surface of the handle with sandpaper from the largest to the smallest. The handle should be perfectly smooth.
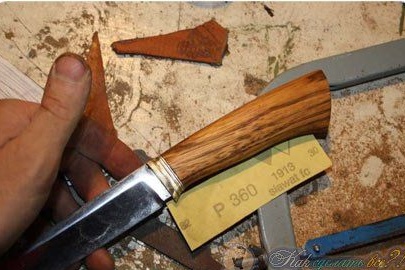
At the end, soak the handle with linseed oil, this will make it more beautiful and protect it from moisture. If desired, after soaking, you can polish the surface of the wood with wax. The knife is ready!