

A bathhouse, such as it should be in accordance with the charter, appeared stepwise with us. In the beginning, it was house heated by a simple stove with a jammed heating shield (guests were very surprised - where to lend?), I lived there. Then, after a few years, the completion of the foundation, the sewage system, the foundation for a solid stove. Then the thorough stove itself.
It was needed for the laying of the furnace.
Instruments.
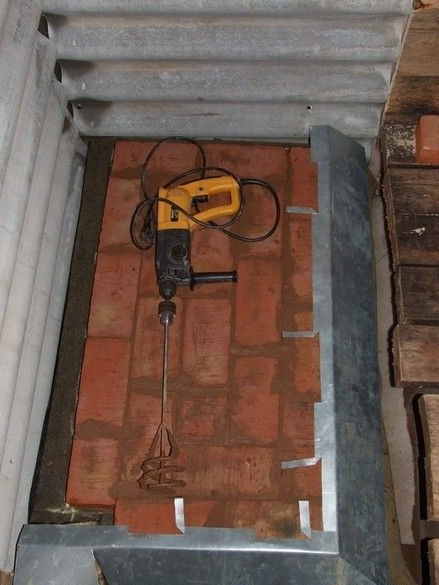
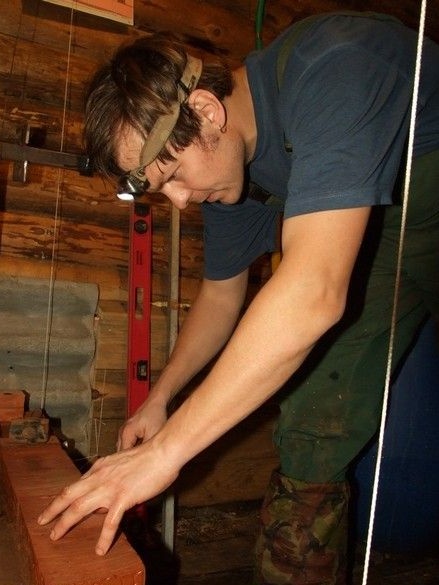
The stove's first tool is a trowel or trowel. There are different, really liked the small and narrow. Certainly a cutting machine (grinder) with a diamond disc, a rubber mallet, a rule or a good straight rail a meter and a half long. Protective transparent visor or glasses, headphones. A set of ordinary locksmith tools, marking tools, level, better short and long. Ropes A screwdriver came in handy. Used welding. To prepare the clay-sand mixture, it is convenient to use a powerful low-speed drill with a stirrer attachment. Tanks for soaking bricks, materials, water.
Materials
It is clear brick, clay and fireclay. Clay, sand, mortar or a special composition for laying refractory. Armature for grate and homemade grate. Asbestos cardboard. Steel annealed wire or thin perforated tape for laying in seams. Stove appliances (doors, gates). Galvanized steel for low tide. Some glands for fixing the tank, plus a rectangular pipe for the heat exchanger. Tank for boiling water. A little metal-plastic pipe and associated transition connectors. Two cranes. FUM tape.
This is an intermediate option. Quite temporary, so that your hands do not freeze during masonry - winter is in the yard. Well, with minus, they do not lead to masonry, everywhere the water will freeze, then everything will crack.

The floor was not strengthened, I had to put the heating shield on a shelf. The fasteners were then charred and the whole structure, almost collapsed, had to be strengthened with a metal strip to the ceiling. Lifting a magic jack.
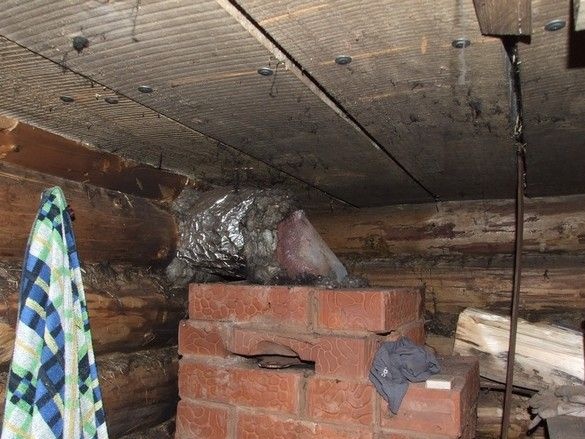
Looks like a stick burned. A box with stones around the pipe is a hint of banality. If, as it should be done, it was possible to succumb, but the pieces of wood during the furnace began to smoke, so I did not risk much.
Well, let's get down to the main furnace. There were several options, with an open heater, it was also slightly altered (a larger furnace, cleanings were carried out on one side, and something else).
Then I matured to what is now.We deal with blanks - materials, stoves, a heat exchanger. This is what he is talking about now.
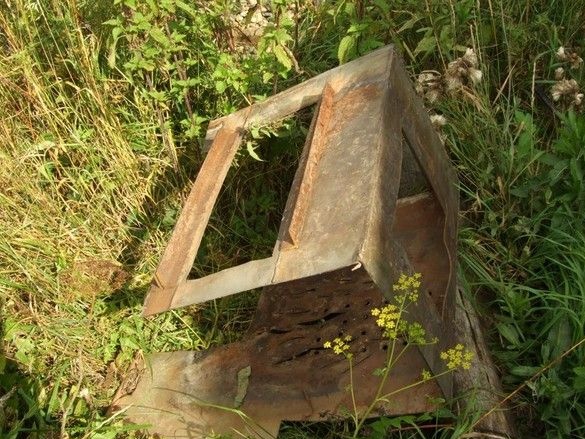
The piece of iron from which the first is cut. By the way, this disgrace also had to do with the bathhouse - the remains of the bathhouse stove from a grandmother in the private sector of the city. Firebox. It is noteworthy that stainless steel, and therefore stored.
Water box. Carved out of pieces.
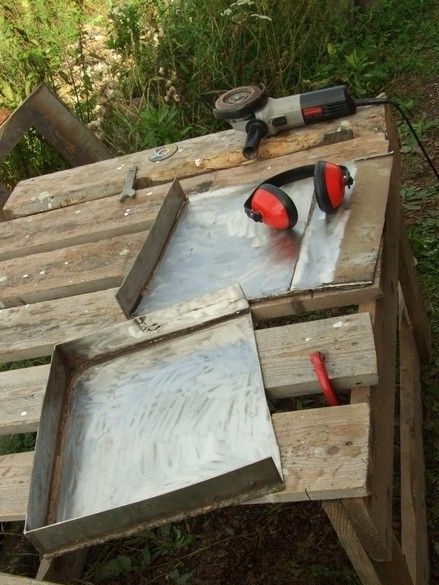
The partition, so that the water of thought moves, at an angle - so that an air bubble, if one is detected, floats through the pipe into the tank. The stainless steel that was cut from the grandmother’s furnace turned out to be of different grades, which is also very subject to temperature. It was disgustingly welded, and I am a welder, from the word "so-so." In a word, it was not possible to achieve tightness. He spat on stainless, rummaged through the glands, found suitable pieces of a rectangular pipe.
This is another matter.
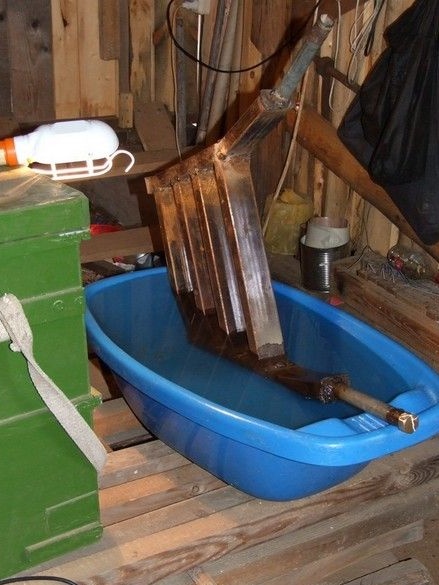
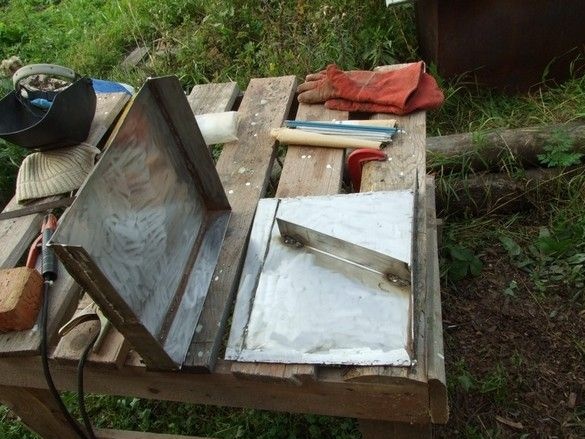
Checking for leaks, brewing holes.
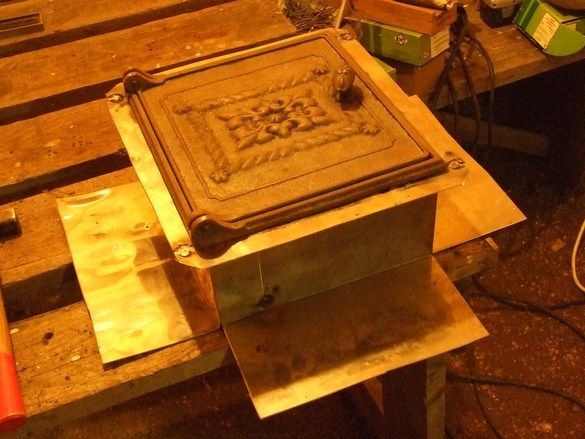
Did - well done. But here the following concept of the sauna stove was born, and the heat exchanger had to do another. For a mad dog ...
So simple, but with my experience ... ugh! One left.
The oven itself.
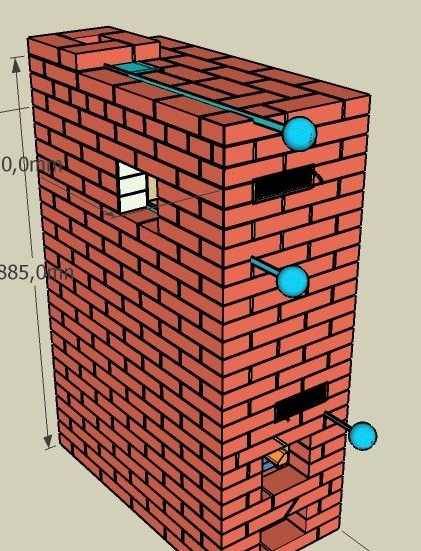
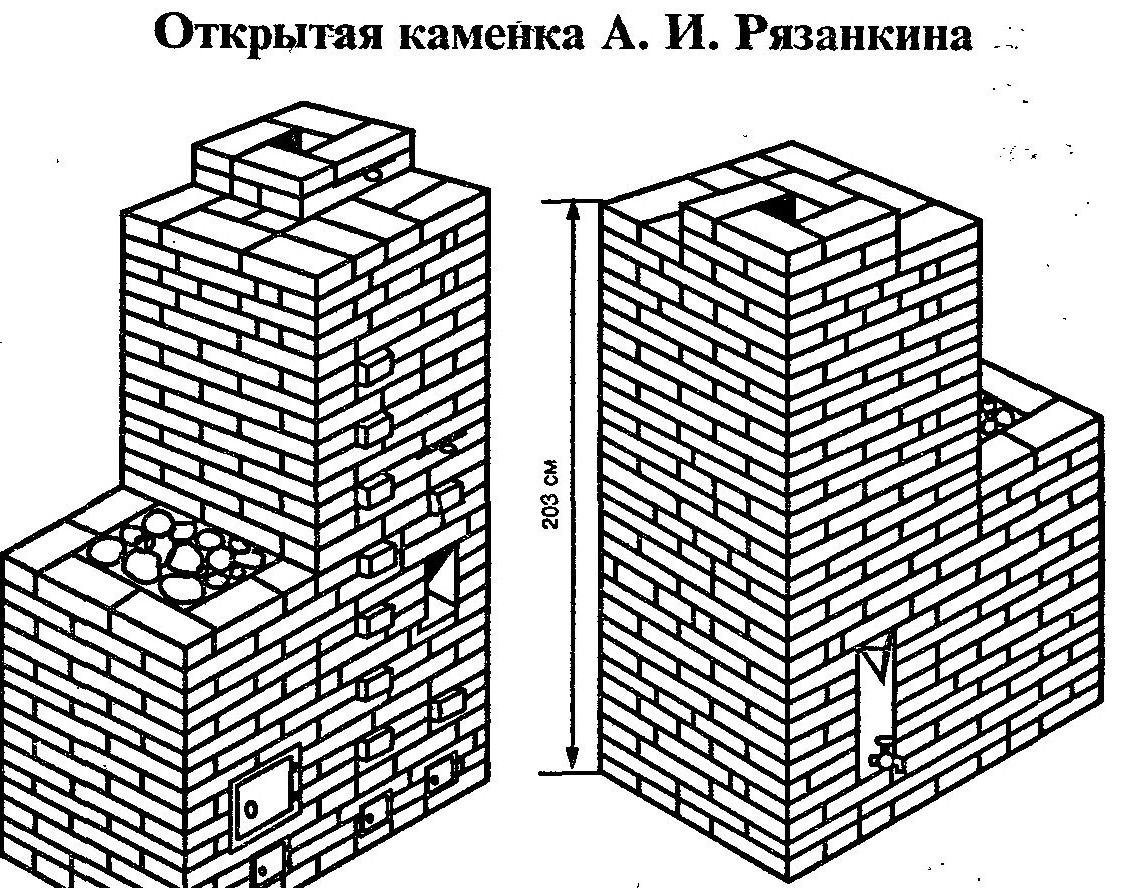
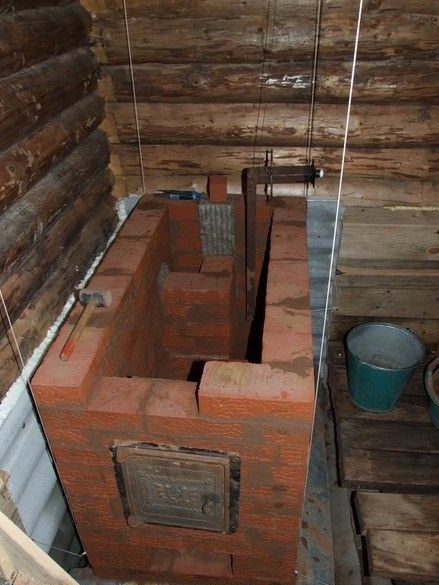
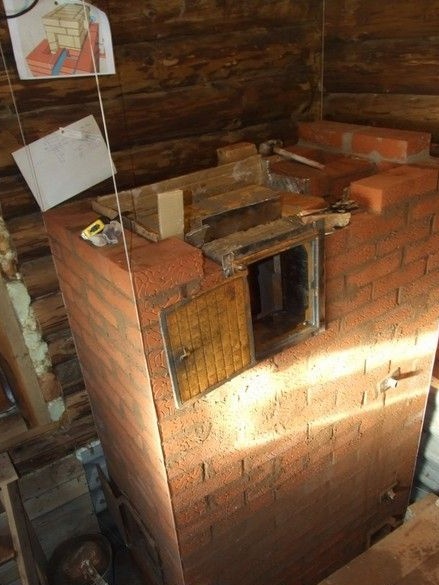
Bath stove, completely brick. With direct heating of the stones, that is, the flue gases pass through the nozzle from the cobblestones, warming it up, after the last coals have been completely burned, the door of the heater opens and then as usual. The furnace has a secondary air supply to the combustion zone of the flue gases; these are blackish rectangular lattices on the front of the furnace. Three gates allow - the lower one, this is a direct exit from the furnace to the pipe, is useful for kindling, when a cold nozzle made of stones cools the flue gases very much. The middle gate - the valve of the "summer stroke" - the exit of flue gases from the top of the stones into the pipe, bypassing the lowering channel. Well, the valve of the pipe.
Compared to the original, in its execution it lowered the supply of secondary air - there is too much fuss during the furnace, and the advantages are not too pronounced. There is also no lower gate for kindling - the reliable construct is too complicated, because the temperatures there under the curtain are such that the fireclay lining is lit. Well and on trifles - the cleaning was moved to a convenient place, the “tray” for laying stones was made of reinforcement (see below) to increase the volume of stones, the door of the heater was mirrored, the length of the furnace was reduced by one brick (could not fit).
Wow! I completely forgot to say - this stove, the design of a wonderful designer, engineer from Canada, Igor Vasiliev. You can read about it and related points on the Russian Bath forum.
Preparation of materials.
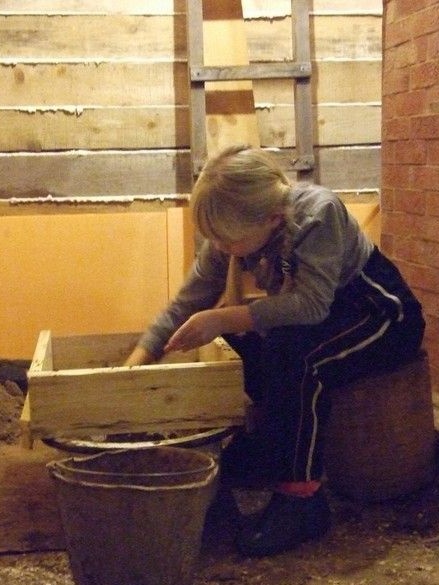
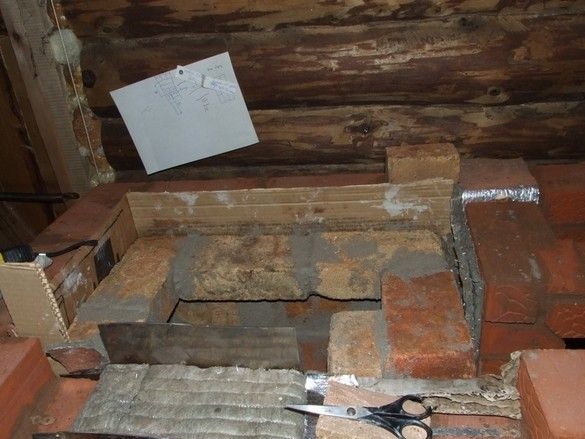
All that is possible - sifted! Somehow lazy, then tormented with pebbles in a clay mixture during masonry.
The door is furnace. Her oven masonry, it is worth paying the closest attention. The node is very responsible. Stressful in terms of temperatures and very different materials (brick-cast iron). The classical method with wire or kleimers (metal strips) is not so good, correctly made, they may not let the door fall out over time, but they do not protect the edges of the bricks inside the furnace. Around the door. From the inside out. And they crack from high temperatures, they are simply periodically snorted with logs in the firebox, especially when they put-firewood into the burning furnace. The author’s, one can say, technology of sealing, allowing to fix to death a standard cast-iron stove door in the wall of the furnace and protect the vulnerability of the furnace from chipping.
Roofing waterproofing, 1st row, low tint visor, notice how gracefully secured it in brick seams with "bends". Really well done?
Oh, and this is me.
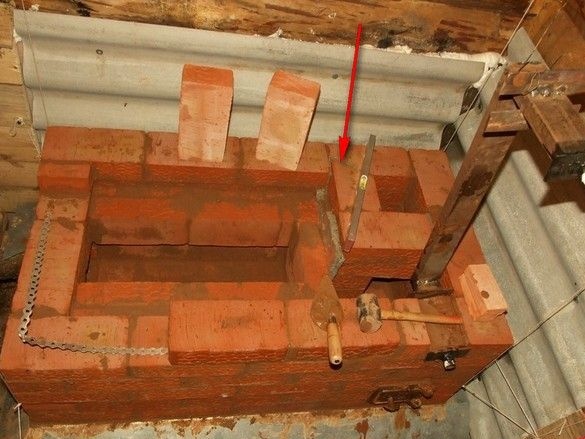
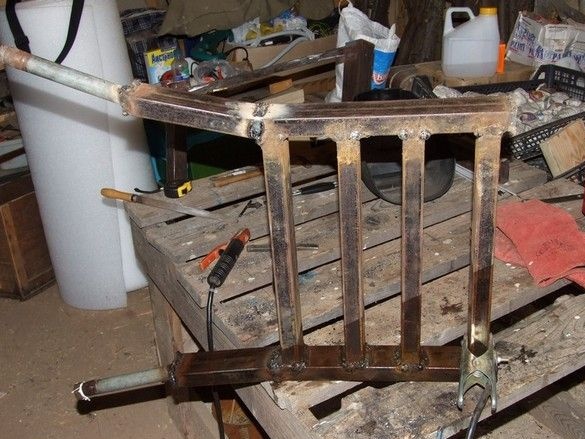
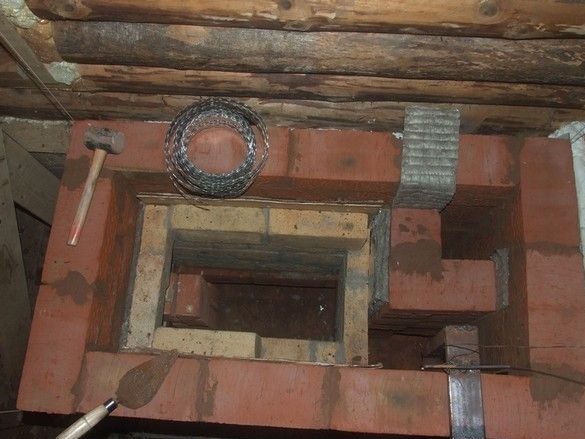
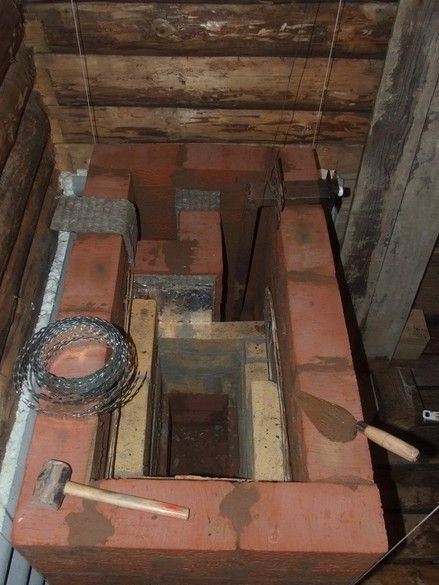
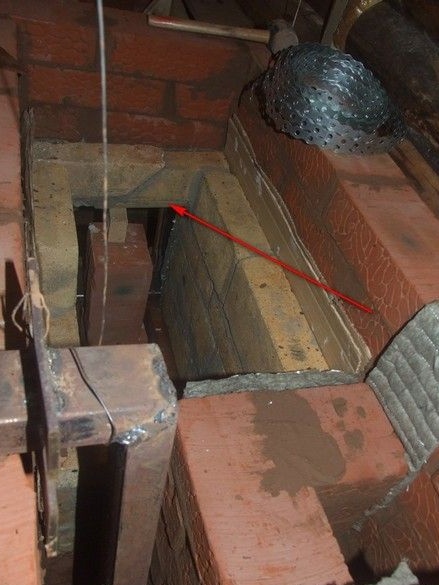
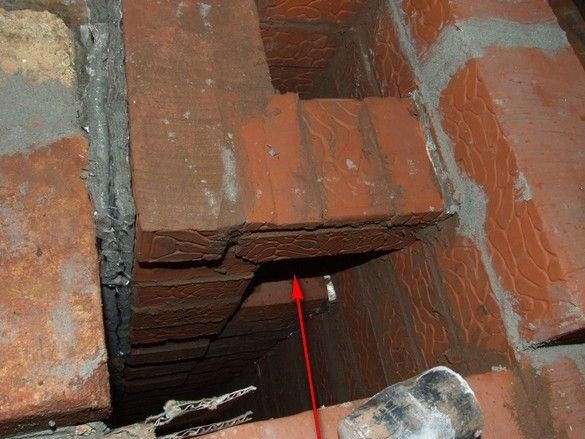
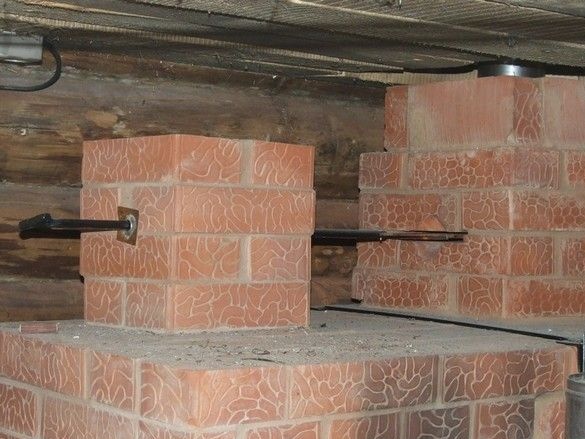
We lay a wire through a row or two, or such a holey tape (conveniently), we are not lazy. A sauna stove, unlike a heating stove in a house, experiences hefty loads and if we want it to serve longer, please be kind. The arrow shows the place of the "hole" in the outer wall. Through a layer of basalt wool. The heat exchanger is suspended on the wire in the desired position.
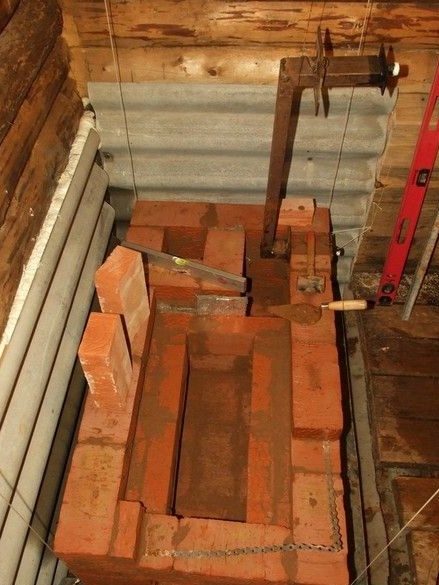
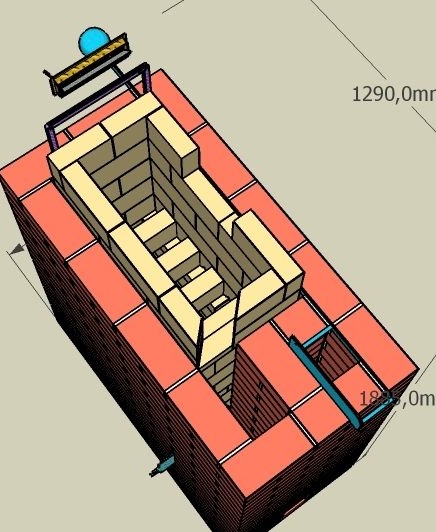
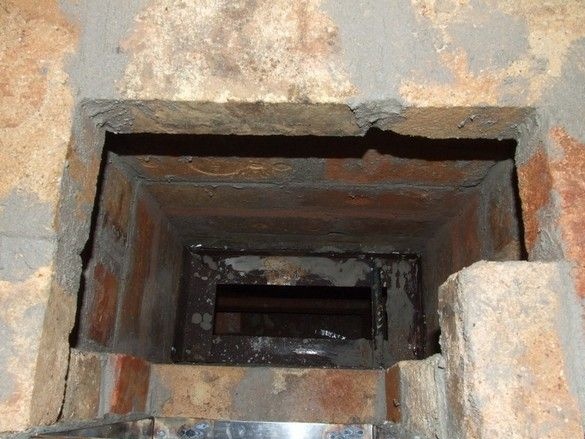
The ash pan is clearly visible here. Pay attention to the dimensions of the furnace. Like a steam locomotive. Less - I had to make a home-made grate. Although, you can try to make up of two standard ones, maybe the sizes will allow it, I have not tried it.By the way, the author’s design of the Motivated-Mini stove was reduced by another brick, because it did not fit into the existing bathhouse. It turned out "Motivated - micro." The furnace and, accordingly, the heater above it were shortened.
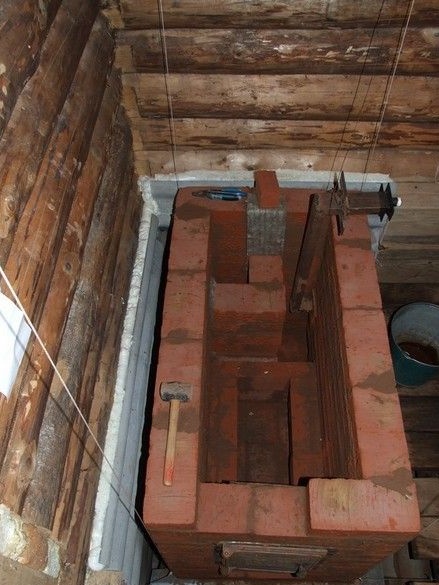
It can be seen how the bricks of the lifting channel in the far right corner are pressed against the outer wall. Through a strip of basalt cardboard - the temperature of the bricks inside and out is very different, if tightly knitted, there will be a crack. Every two rows, a brick on one side of the lifting channel cuts into the wall at half the thickness. Also through basalt cardboard. Well, all the iron is also through a layer of asbestos cord soaked in liquid clay or basalt cardboard.
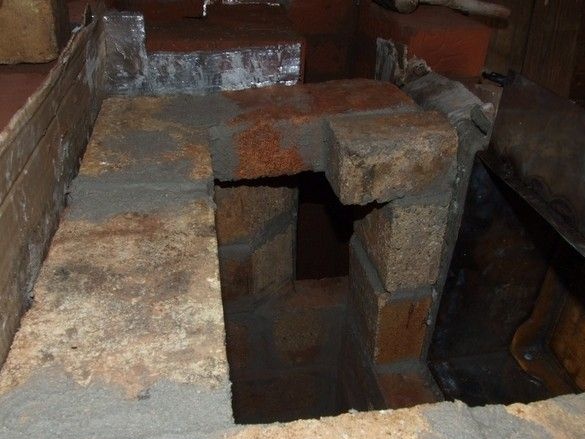
Oh, send refractory bricks. Lining. It’s a big mistake to connect refractory and ordinary clay bricks, they expand very differently when heated - inevitably there will be large cracks. Therefore, the fireclay core with the stove, like flies and cutlets, is separate, so that fireclay has room to expand. We fill the gap with either basalt cardboard or a simple "corrugation" from the refrigerator - so that during masonry large brick crumbs and clay would not attack there. Then the cardboard is removed or it will burn out. Yes, the refractory is added to special mastics, mixtures, mortar finally. Not for clay.
A photo of a responsible place is where it is supported by bricks. This is the ceiling above the combustion door. Its bricks should not rest on the furnace door or other metal elements - to fall out. Anything. Either the bricks on top, or, in the worst case, the whole door. I saw this. This applies mainly to the overlap of the exterior of red brick. Overlap of refractory, structurally somewhat deeper than the glands, but just in case. But what’s important in the last one is the bevel (marked by an arrow), from the top of the furnace door up and in, degrees that way ... by eye. This bevel, greatly reduces the likelihood of knocking out of refractory bricks when laying upper logs, especially when tossing firewood into a heating furnace, especially in a bathhouse (very hot, not before ceremonies).
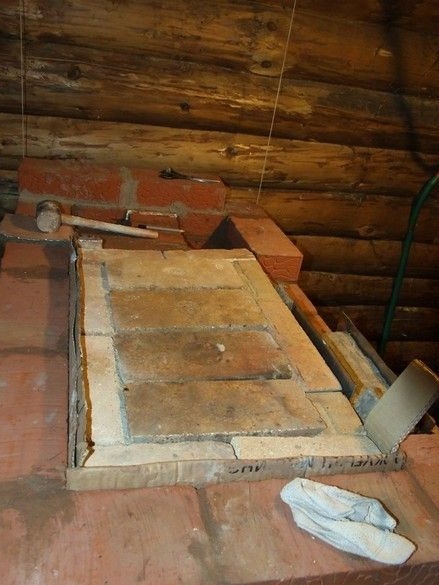
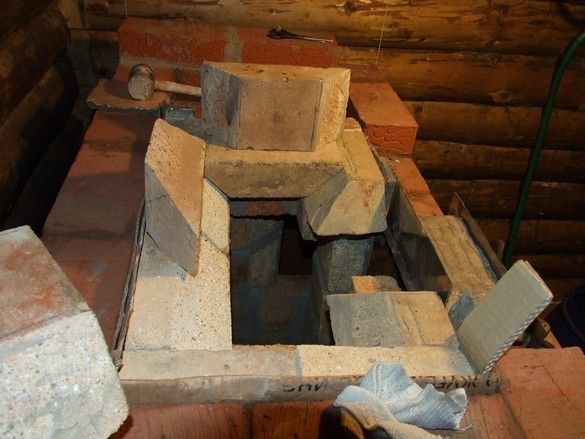
The top of the firebox is a heater, all of the refractory, exit to the lowering channel
Gate valve "forward stroke", is somewhat not characteristic, on the edge.
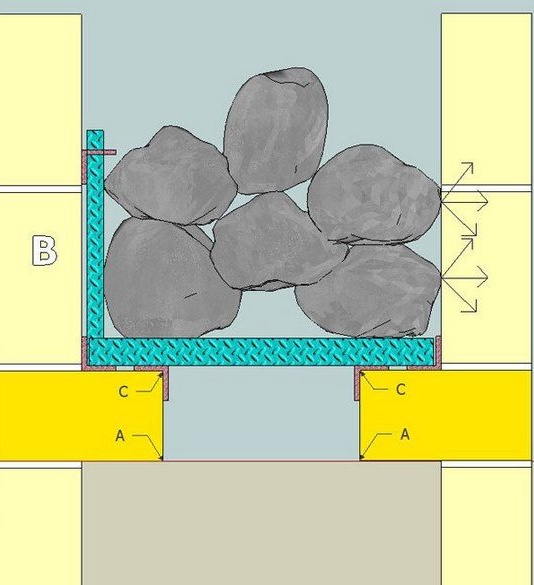
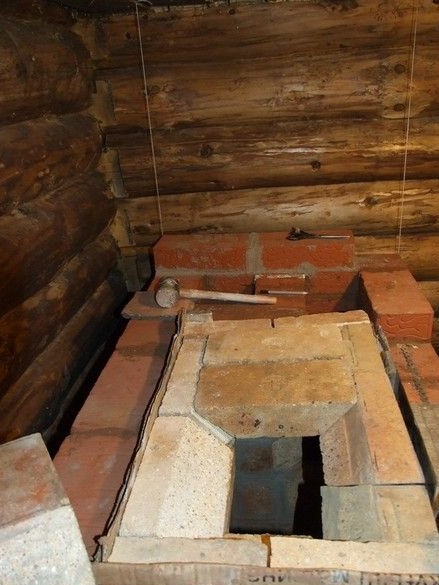
Kamenka, corners are placed on the ledges of the refractory bricks, on them an improvised lattice of pieces of thick reinforcement.
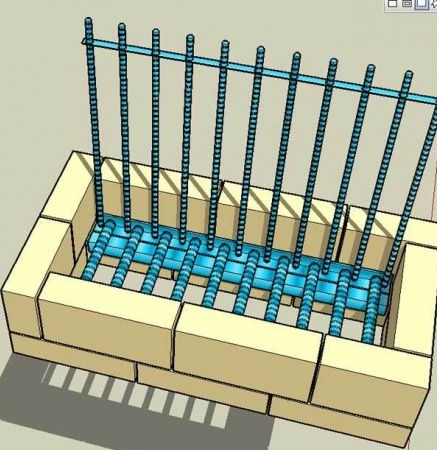
Vertical reinforcing bars are needed to relieve the point pressure of stones - they are distributed over a large area. Of course, it is better to line the side walls of the heater with cast-iron grates, but it turns out much cheaper.
You can see how the door of the heater in the stainless steel box is closed, everything, as in the furnace version.
Overlapping the lining, fitting bricks, they are there with bevels on all sides.
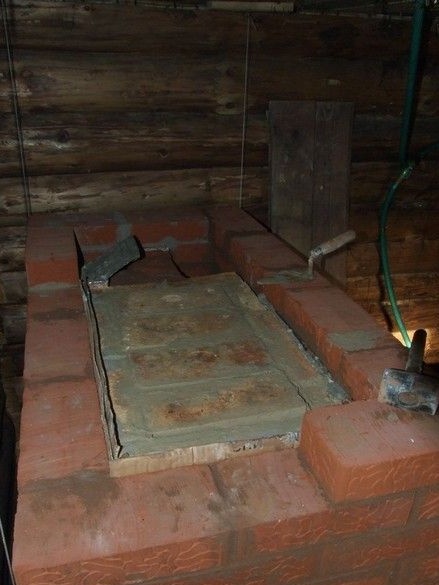
Embedded in solution.
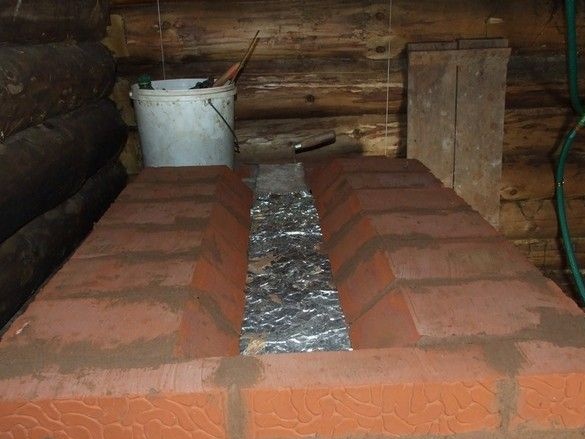
Basalt cotton pillow, so that the refractory core has where to expand and the external overlap. Two layers.
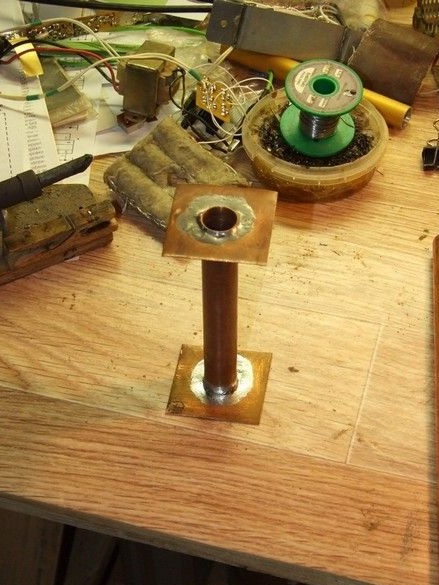
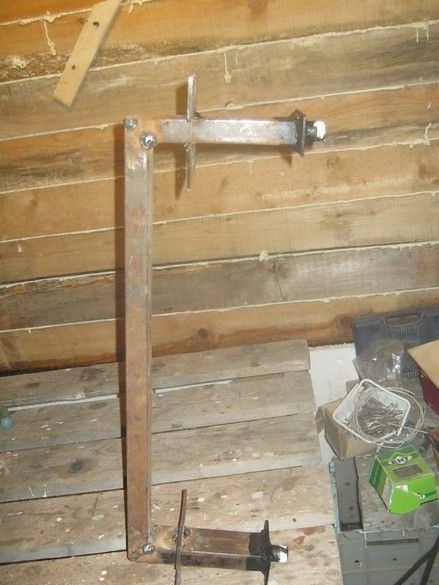
A sleeve from a copper tube, so that the extension rod does not jam in the brickwork. Further it will be clear.
Not a very good angle, but you can understand - the bar, so as not to reach on the tiptoe, trying to close the valve (-Do not curtsy, it’s very dangerous on the stairs!). To prevent the valve from pulling out of the frame, its stroke is limited by a nail stuck in the hole on the rod. Behind the "hemp" of bricks in which the copper sleeve is walled, heels of holes were drilled through the centimeter on the rod for "fine tuning and optimization."
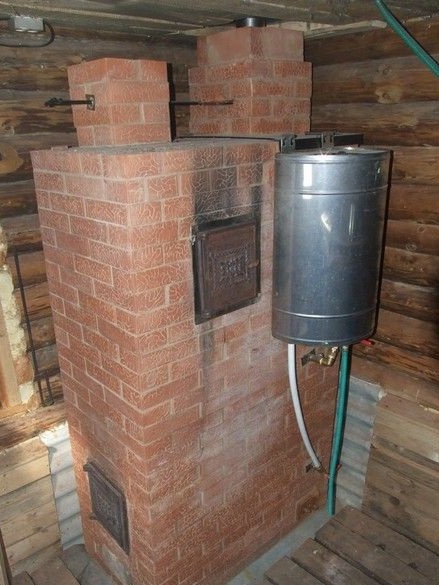
Well, come to godfather to admire. The masonry is washed, the oven is dried, the tank mount is made, the hot water tank itself is in place and connected.
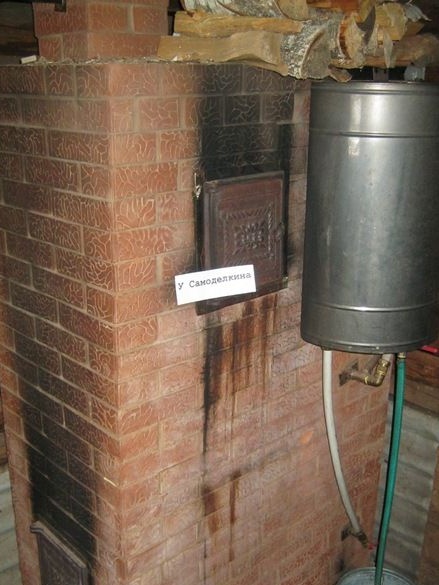
3.5 years of use. The bath is heated about 1 time in 4 ... 5 days.
Model stoves in the Sketch Up program.
This is the simplest and most informative presentation. You can parse layer by layer, turning layers on and off in the corresponding toolbar. Take a look, twist. Just lovely.