


Often a problem arises in life when you cannot quickly find the right tool in a workshop or house. The reason for this is often that it is impossible to remember where you left when the tool is plentiful and the search area is large. I'm not talking about those cases when one of the relatives took and shifted the instrument.
To avoid such problems, build yourself one good closet where everything you need will be stored. If you always return the tool to it when you use it, you will no longer have problems finding things.
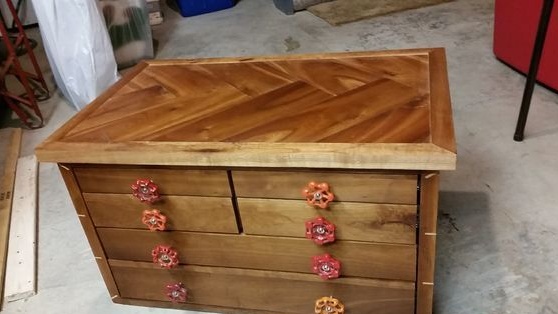
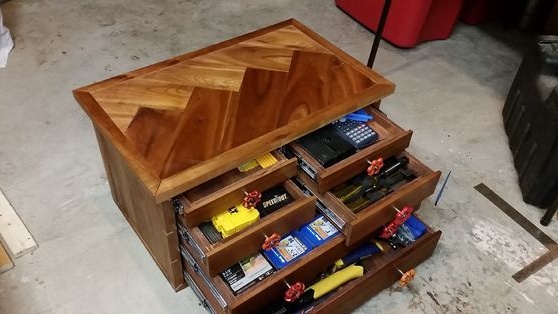
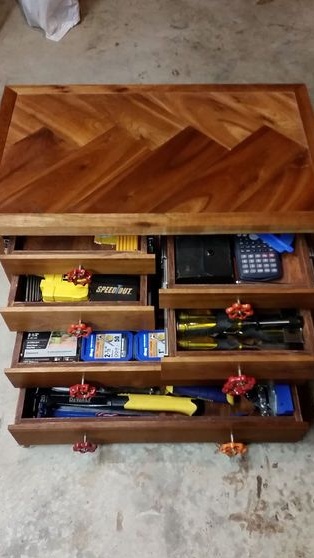
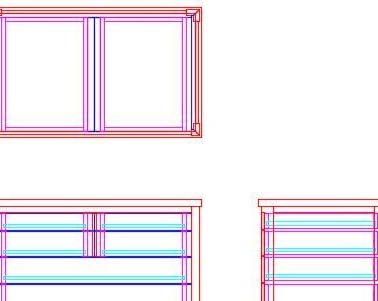
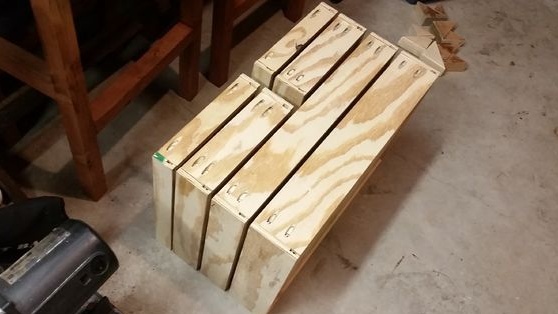
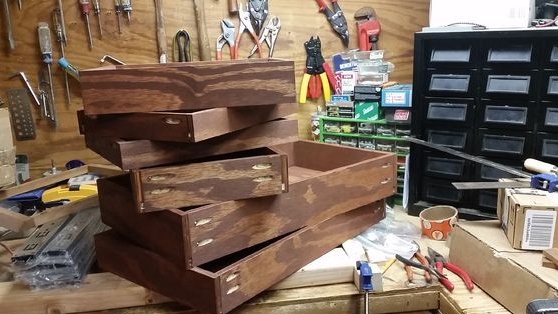
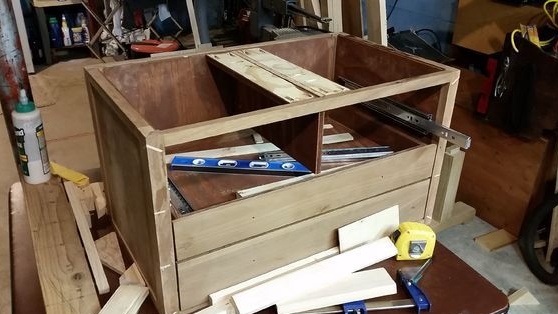
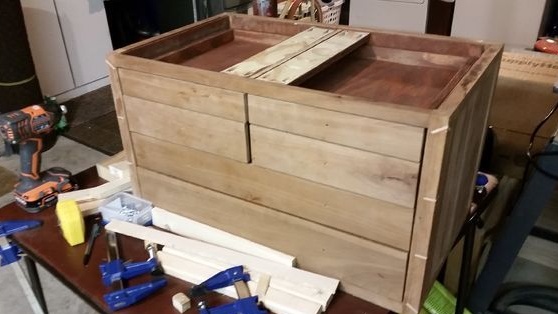
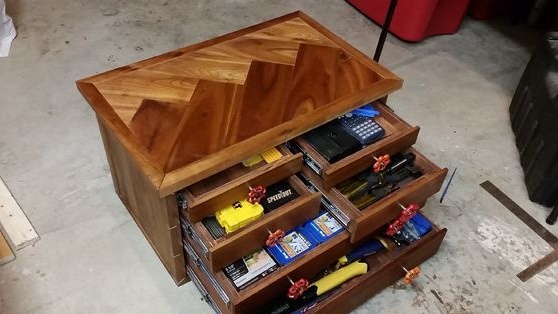
The author made himself such a cabinet, he has 6 drawers. Four of them are small in size and are used to store small items. And two drawers are large, they are located at the very bottom of the cabinet.
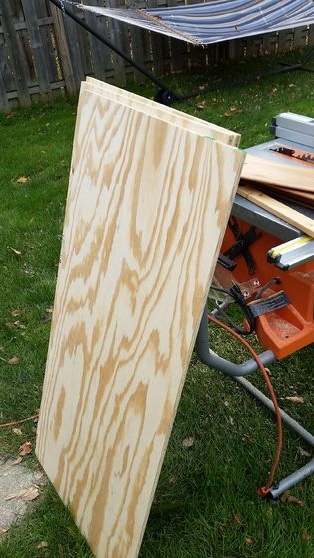
Everything is done simply, glue and screws are used on wood, and plywood and boards are used as material. It is not necessary that the material is new.
Materials and tools used by the author:
Material List:
- plywood sheet;
- boards;
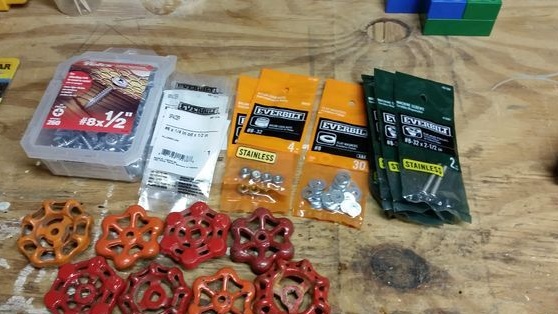
- handles for boxes (the author used parts from water taps);
- glue and screws for wood
- slider for shelves (guide).
Tool List:
- ;
- a screwdriver or screwdriver;
- clamps;
- oil for impregnation;
- pliers;
- ;
- building level;
- a pencil, ruler and other measuring tool.
Locker manufacturing process:
Step one. Cabinet design
First of all, the author made all the necessary measurements and developed the design of the cabinet. Furniture was made of practically waste materials that the author found on his site. For the most part, it was oak and cherry. Of course, materials should not be rotten, cracked, and so on.
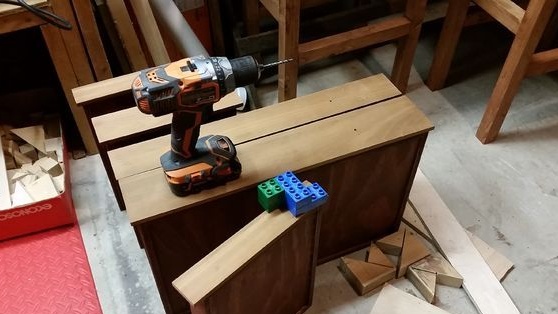
Step Two We make boxes
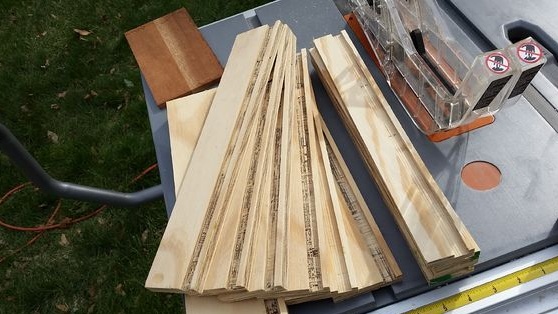
Boxes are made very simply, and the author decided to start with them. Here you need plywood, as well as boards.
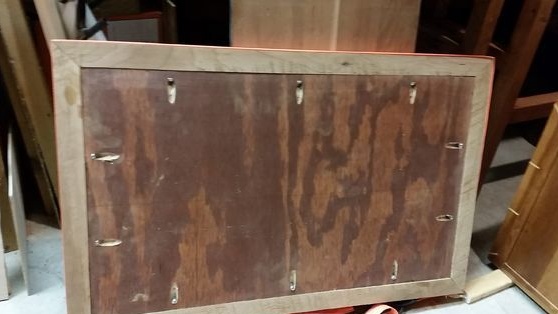
Dostochki need to be cut to the desired size, for each box you need four blanks. At the bottom of each board along the grooves need to be grooved, they will be needed in order to install plywood.
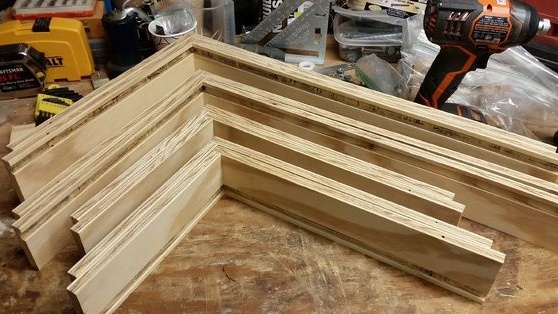
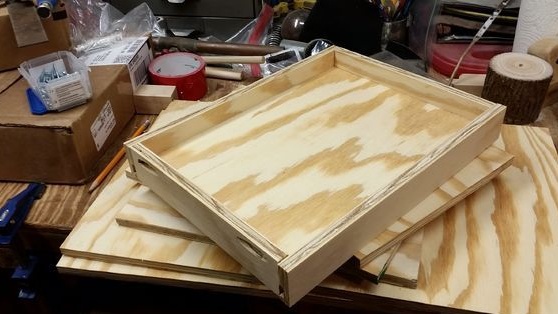
We cut the plywood to the desired size, and in the boards we drill holes for the screws. If desired, glue can be applied to the grooves, so plywood will hold more reliably, but this is not necessary. That's all, the shelf can be assembled, just screw the screws in the right places.
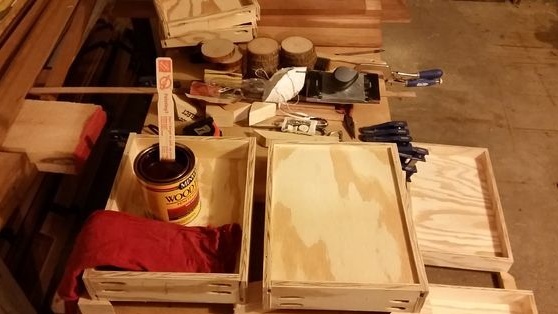
At the end we grind the boxes and paint. The author used a dye to match the cherry color.
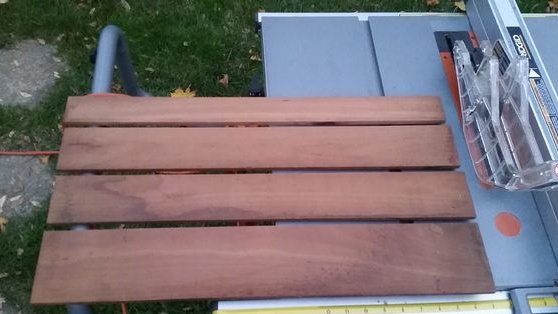
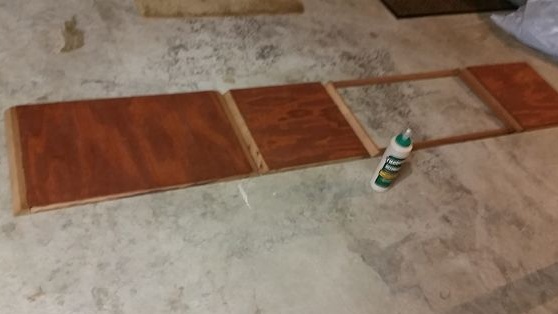
Step Three Front part of shelves
You will need some materials to decorate the outside of the shelves. The author used cherry boards for such purposes. We cut them to the desired size, grind, and then just glue them to the shelves. We clamp the whole thing with clamps and let it dry completely.
When the glue dries, you need a drill. Use it to drill a hole in the center of the faceplate. A bolt or screw will be inserted here with which a hand is screwed. Finish with 320 grit.
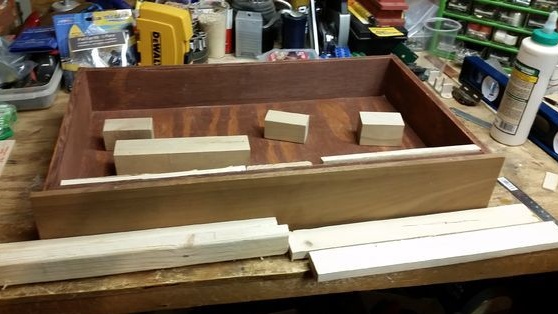
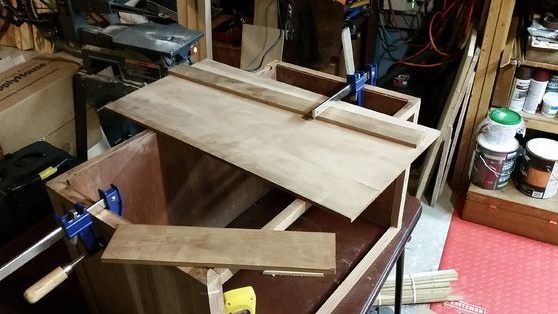
Step Four Assemble the frame
The author collects the frame practically all on glue, if desired, you can use dowels or screws. For the assembly, wood slabs of cherries, boards, and also non-thick cubes were used.


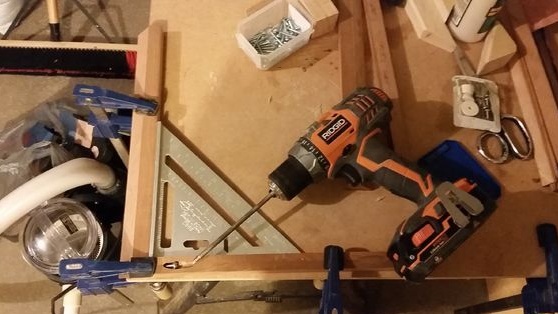
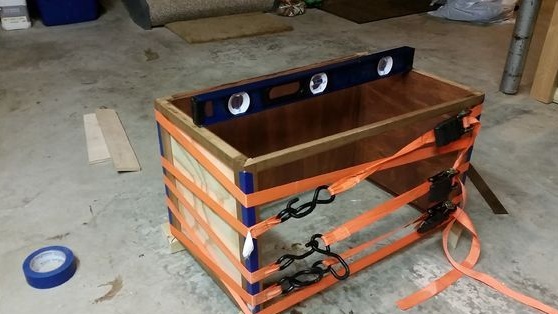

We cut wood boards, you will need three parts, the largest back and two smaller side. It is most convenient to cut on a circular saw. You will also need to cut all the necessary components for the frame from boards or bars.
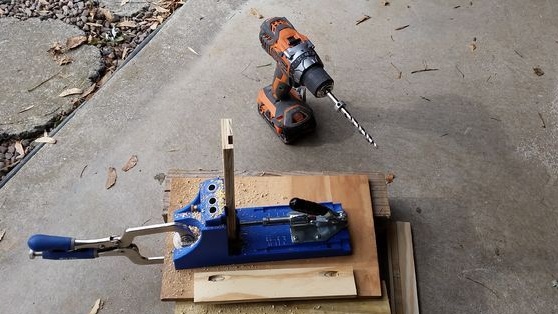
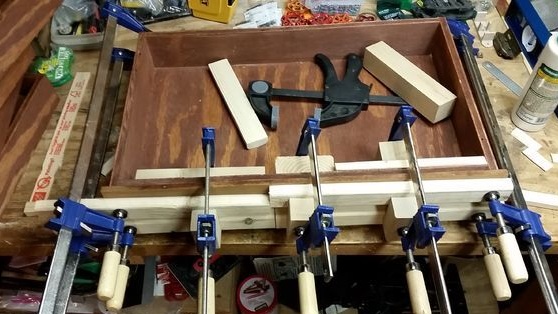
Next, you can begin to assemble the frame. The author drills holes in the right places and assembles the frame with screws on wood. For reliability, you can also combine this business with wood glue.
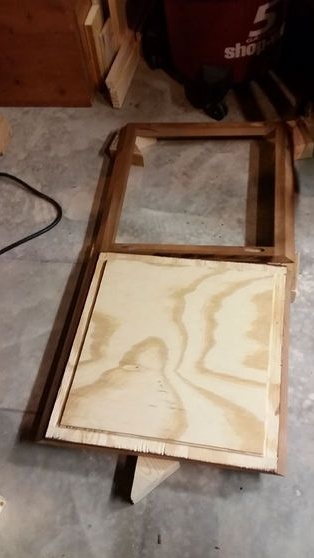
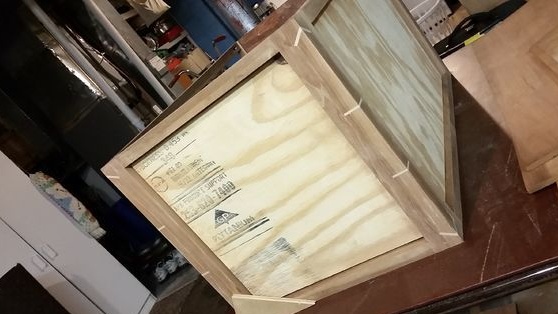
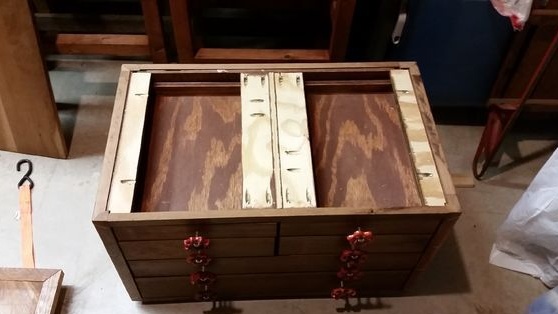
After assembling the frame, you can install the wall. We just put them in their places, and then make cuts at the corners of the frame. They should be so deep that they reach the wood boards. Plywood or pieces of wood boards can be inserted into these slots. Of course, these parts are well lubricated with glue and clogged into place.
When the glue dries, we cut off the protruding parts, and grind the entire structure. As an abrasive, the author used sandpaper with a grit of 320.
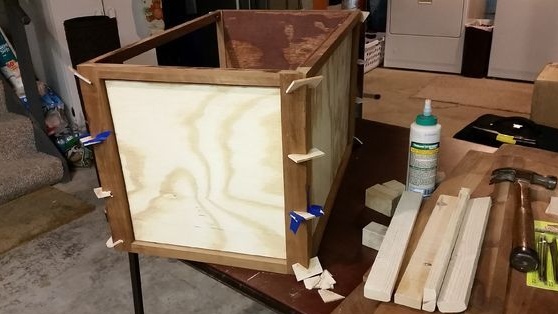
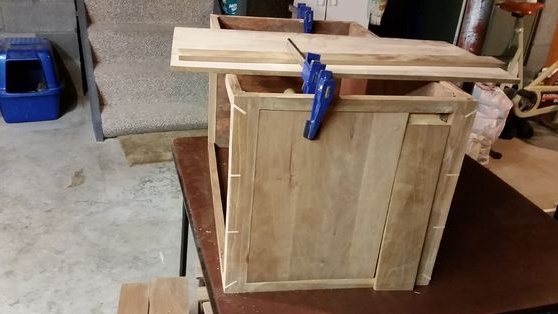
Step Five Cabinet finish
For the side and back walls, the author used not very high-quality materials. Plates absorbed moisture for a long time and did not look very visual. In this regard, it was decided to trim them outside. We take the finishing material, cut into the necessary pieces and glue the cabinet on the outside. We use good glue for wood and clamps.

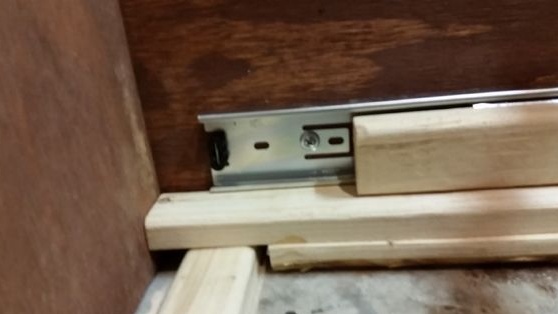
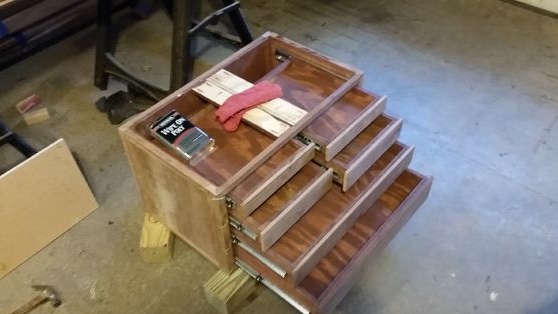
Step Six Install the sliders
Sliders (guides) purchased by the author, they are made of metal. Using a measuring tool, we fasten them to a box using wood screws. As for the moving part, we fasten a bar to it. Further, this block is screwed to the drawers themselves. holes, screw in, nothing complicated. The main thing is to do everything exactly, otherwise the boxes will wedge.

Seventh step. We assemble and install handles
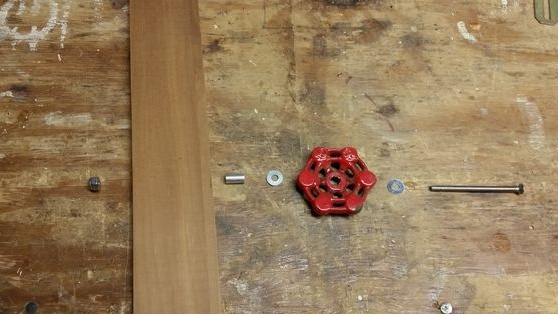
And now about the most important thing, about the pens. This is the main component of the cabinet, which at first glance says that it is a tool cabinet. As pens, the author decided to use pens from old taps. To assemble one handle, you will need a long bolt, nut, three washers and a piece of metal tube.
First, insert the bolt, then put the washer and tube on it, put the washer on top of the tube again. Now the crane handle is put on, the washer and nut are on top. That's all, the handle is installed, there are 5 more left.
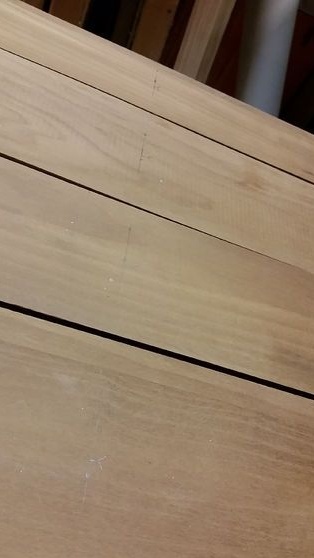
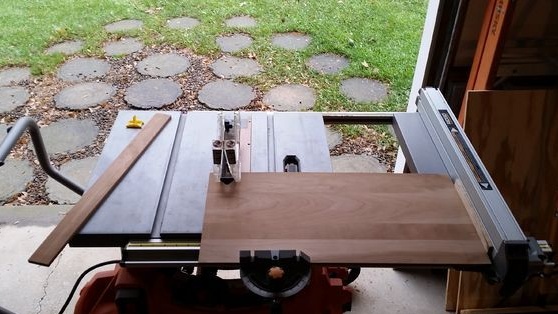
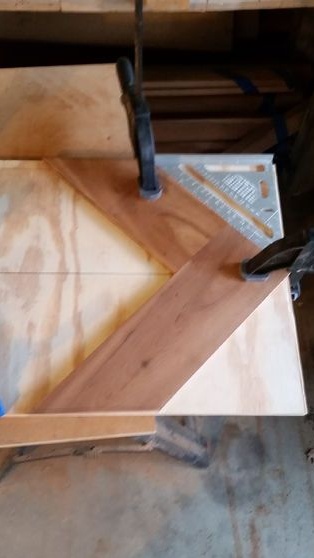
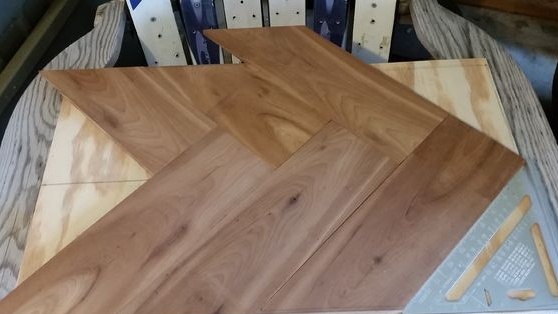
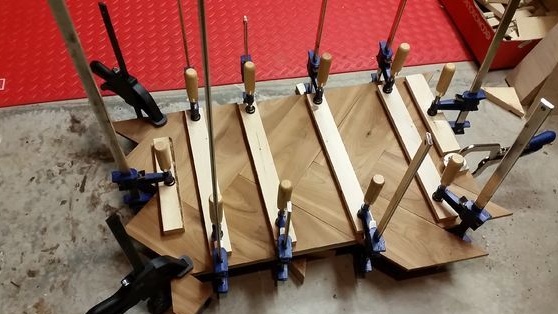
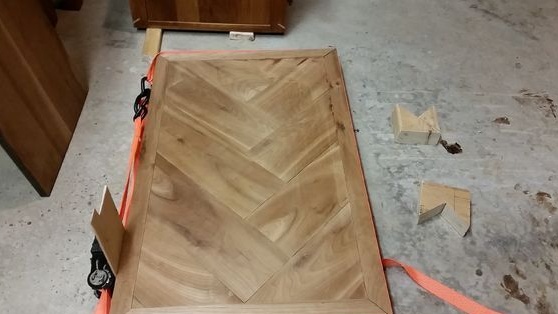
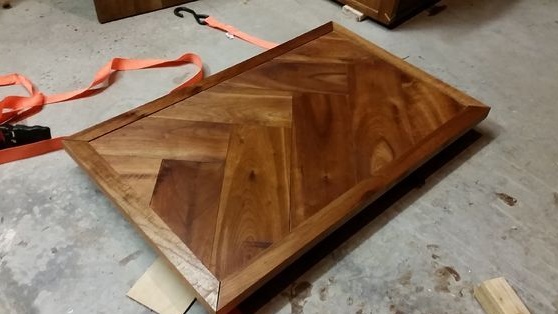
Step Eight. We make a countertop
The table top is made of boards, we cut them into pieces necessary for the length, and then glue them with a ladder, but this approach is not necessary. After the glue has dried, align the countertop on the circular.
In the end, you will need to make a border, it will emphasize the appearance and strengthen the countertop. Here you will need boards, cut them to size, and then fasten to the manufactured plate. As a fastener, the author uses wood screws. At the end, sand the countertop, make it absolutely smooth and even.


Step Nine. Final assembly and finishing touches
For the countertop to be securely fixed, it must have a reliable support. For these purposes, the author screws on the top of the table supports from the boards.Now the countertop can be installed, how to do it, you decide, it can simply be glued. The author screwed the countertop inside with screws to the frame, so securely.
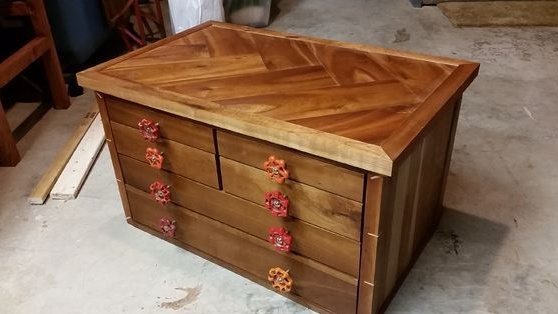


At the end, sand your offspring, if it has flaws, and then treat it with oil, varnish or another coating. Oil will make your cabinet as natural as possible. If the wood was used of poor quality and looks bad, the furniture can be painted and then varnished.
That's all, the cabinet is ready, now the author has a complete order on his desktop and you don’t have to constantly look for a tool.