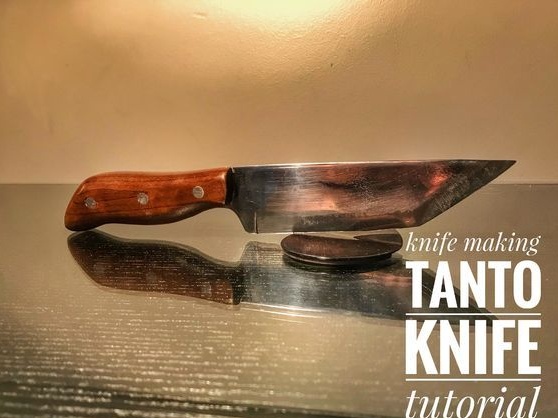
This style of knives like tanto is known to us from Japan, it is also called a short sword. The blade length of such a knife can vary from 30 to 50 cm. As a rule, sharpening is used one-sided, and sometimes two.
By tradition, metal has jamon, the handle is removable, and it also has a removable guard.
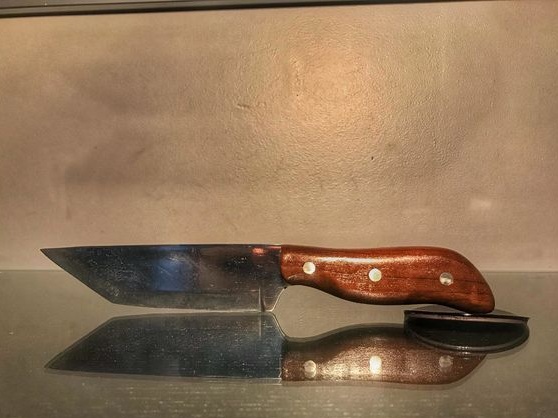
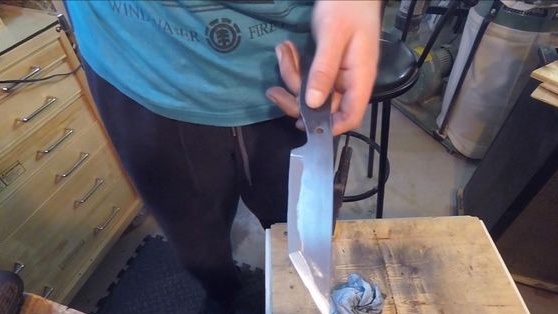
Of course, the knife made according to this instruction has little resemblance to tanto, the blade is clearly not 30 cm, there is no jamon, and the handle is mounted on pins. However, the knife turned out to be quite good, despite the fact that it falls poorly under its name. However, remotely, his profile is somewhat reminiscent of a saber.
Materials and tools that the author used to make the knife:
Material List:
- sheet steel with a high carbon content (this is precisely quenched);
- wood for the handle;
- brass rods, rivets (or other material for the manufacture of pins);
- epoxy glue.
Tool List:
- ;
- a good set of sandpaper;
- paper, pencil, scissors, drawing accessories (for making a template);
- ;
- glue;
- whetted;
- different grit sandpaper;
- a source of high temperature (for hardening) and oil;
- drill with drills;
- clamps;
- oil for wood impregnation.
The process of making a knife:
Step one. Draw a profile and cut out
First of all, you need to show all your creativity. It is necessary to make a template for the future knife, this is done first on paper. If you wish, you can download a ready-made template from the Internet and change it at your discretion.
Instead of paper, it is better to use thick cardboard, when you cut out the template, you can hold the future knife in your hands and make sure that it is convenient.
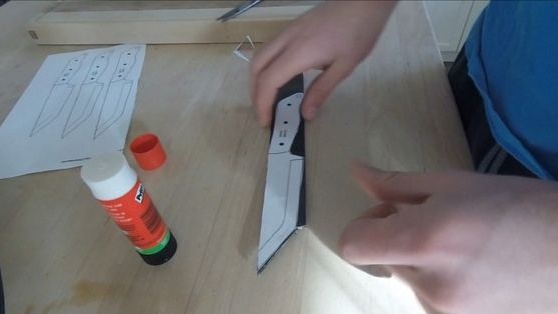
Next, attach the template to the workpiece and draw a marker. Now the template can be cut. For this difficult case, the author uses a grinder. Clamp the workpiece with a clamp or vice and cut it out slowly.
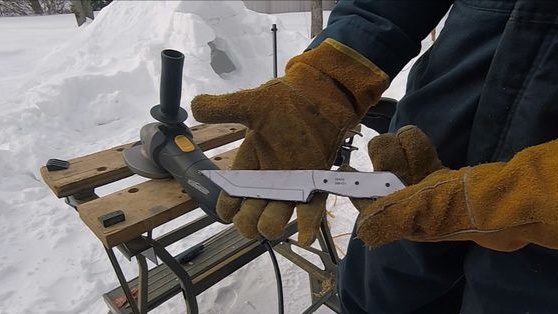
Step Two Grind
After cutting, the profile will be very rough, the edges will be uneven, they will have notches. The profile along the contour must be brought to the ideal. For this we need a grinder, or a grinder with a grinding disc. If there are problem areas on the blade, they can be processed manually using a file.
Step Three We form bevels
Making bevels is a very crucial moment, the cutting characteristics of the knife depend on them. The wider the bevel, that is, the smoother the sharpening angle, the sharper the knife will be, and the easier it will be sharpened.
But there are some nuances, a thin blade cuts well, but it does not withstand loads if cut with a knife. So you need to find some middle ground.
To make the bevels even and symmetrical, first mark everything out. Draw a line on both sides of the blade that the bevel will reach. You also need to divide the blade lengthwise into two parts so that you can see the centering line when grinding. Usually, a drill of the same diameter as the thickness of the workpiece is used for this.
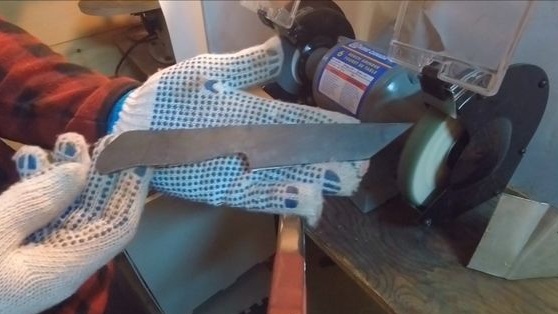
Getting to the grinding. Quickly and professionally perform this work will allow. But not everyone has such a device, in extreme cases, you will need a grinder with a grinding disc. We clamp the workpiece with a clamp and proceed to grinding.
Some craftsmen form excellent bevels using ordinary files. But all this is laborious and requires experience.
Step Four Metal grinding
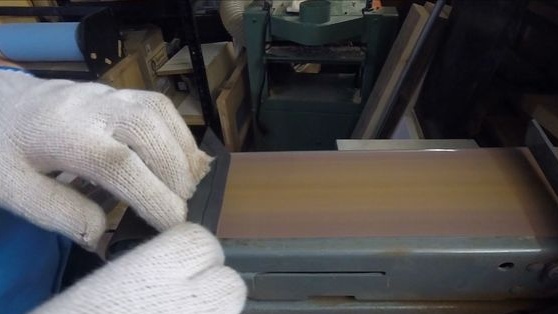
Now we start grinding metal, here you would again need a belt sander. If this is not the case, everything will have to be done manually. First we use large sandpaper to even out the planes, clean off the rust and remove other defects. Then we gradually take the emery paper smaller and smaller, and so on until the knife glistens like a mirror.
Many craftsmen recommend wetting sandpaper in water, so it is cleaned of chips.
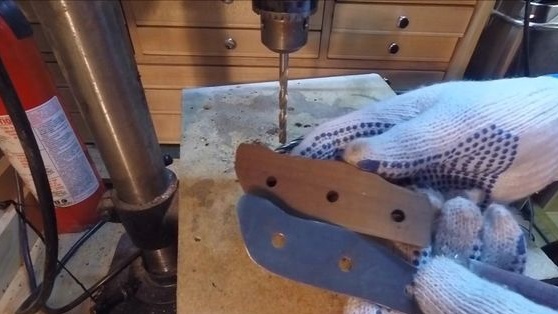
Step Five We drill holes for the pins
Be sure to complete this step before heat treatment, since then it will be extremely difficult to do this. Also, you must complete all basic metal work before hardening.
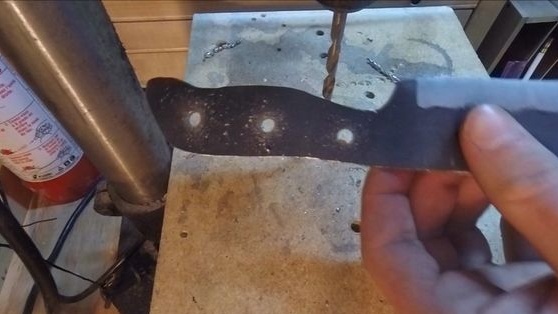
In the workpiece, you need to drill two holes in the place where the handle is. They are needed to install the pins, respectively, the diameter of the holes is selected depending on their thickness. There may be more pins, two are a classic option and this is enough for a reliable handle assembly. The author decided to drill three holes in the pen.
Step Six Metal hardening
If you used special steel for the manufacture of a knife, which incorporates a high amount of carbon, it can be hardened. For this, you will need a furnace and a permanent magnet. If you do not know the grade of steel used, then a permanent magnet will help determine the degree of heating for hardening. If a magnet is brought to hot steel, and it will not be attracted, it means that the metal is heated to the desired temperature.
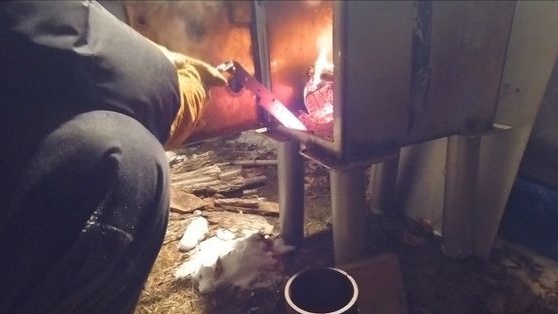
Steel is usually heated to a temperature of 700-900 degrees. In principle, it can be obtained in a small furnace and with the help of coal. You need to inflate the coals with a hairdryer, vacuum cleaner or other similar device.
As soon as the steel warms up, it is time to extinguish it. To do this, you will need oil, mono-motor or vegetable. In oil, the metal does not cool as fast as in water, therefore, the risk of preform deformation is reduced. The author immerses the billet for 15 seconds, while being careful, as the oil ignites and emits a strong odor. After quenching, handle the workpiece carefully, as the metal will be very brittle.
In the end, you need to make the release of metal, this will make it elastic and the knife will not fly apart. If you drop it or throw it into a tree. Vacation can be done in a conventional household oven. We warm it to a temperature of 200-215 degrees Celsius and put the workpiece for an hour and a half. After that, turn off the oven and let it cool with the knife in the closed state.
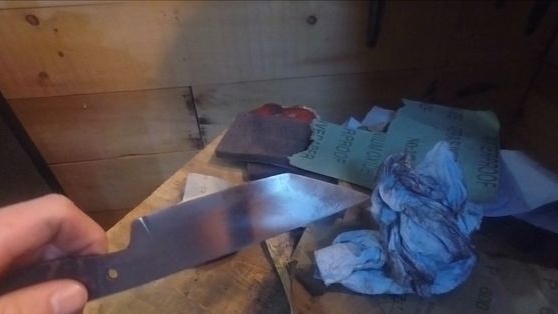
Seventh step. Knife cleaning and polishing
After hardening, the knife will have scale and traces of burnt oil. All this needs to be cleaned. We take a fine sandpaper, WD40 or ordinary water and proceed to cleaning. Gradually switch to the smallest paper and polish the metal if desired.
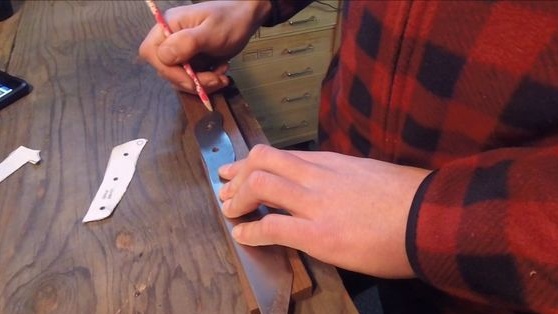
Step Eight. Pen assembly
Now we need to make blanks for the handle.We attach the knife with the tail to the props and circle with a pencil. We cut out two blanks with a jigsaw or other bandsaw. However, if you don’t have a jigsaw, it’s not scary, you can cut out the rough outlines of the handle, then it will still be sanded anyway. Billets can be easily turned to the desired profile on the grinder or with a file.
In the end, you have to drill holes for pins in the tree, exactly in those places as in the metal.
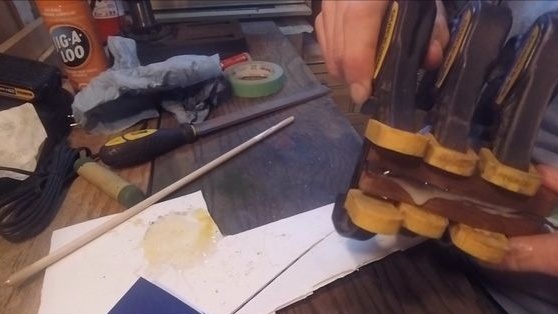
We take epoxy glue and apply to the workpiece. We install the pins and squeeze the handle well with clamps. For reliability, the author used three pieces. We are waiting for the glue to dry completely, it usually takes 24 hours.
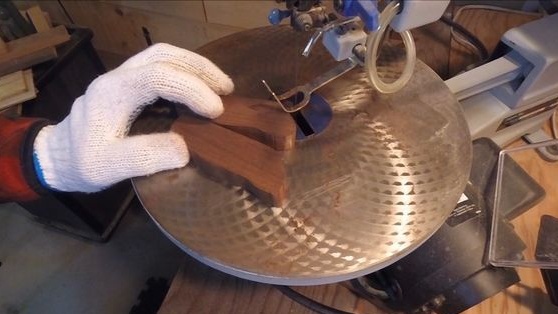
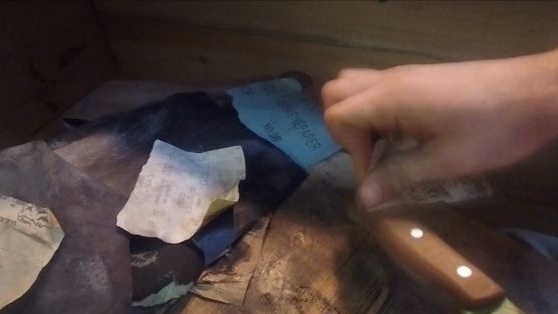
Step Nine. Final processing
Now the final step remains, we turn to the help of the belt sander and form the final profile of the handle. If there is no tape machine, it’s okay, you can do it with a grinder, on a sharpener or with ordinary files.
At the end we take fine sandpaper and grind the surface of the handle well, it needs to be made absolutely smooth.

Step Ten Tree protection
The knife is ready, now you must take care that the wood does not absorb moisture, as this will quickly render the knife unusable. Wood is usually impregnated with linseed oil, but there are many other types of woodworking oils. At the end, polish the handle with beeswax, and it will not be amiss to make scabbard for him, good luck!