

This article step by step describes the creation of the simplest glider for primary school children. You can make it in a couple of hours, and the materials used are the most affordable.
Materials:
- ceiling tile
- plywood 4 mm
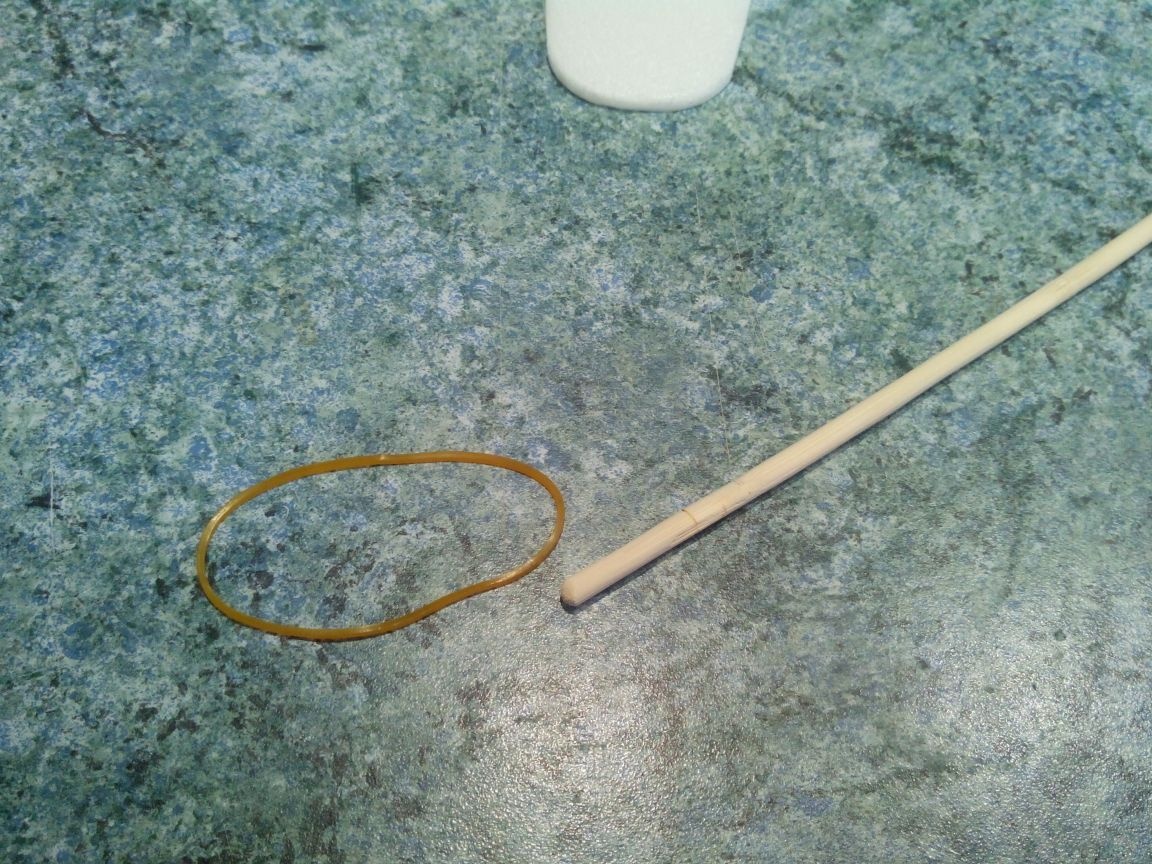
- bamboo skewer
- sushi stick
- elastic for money
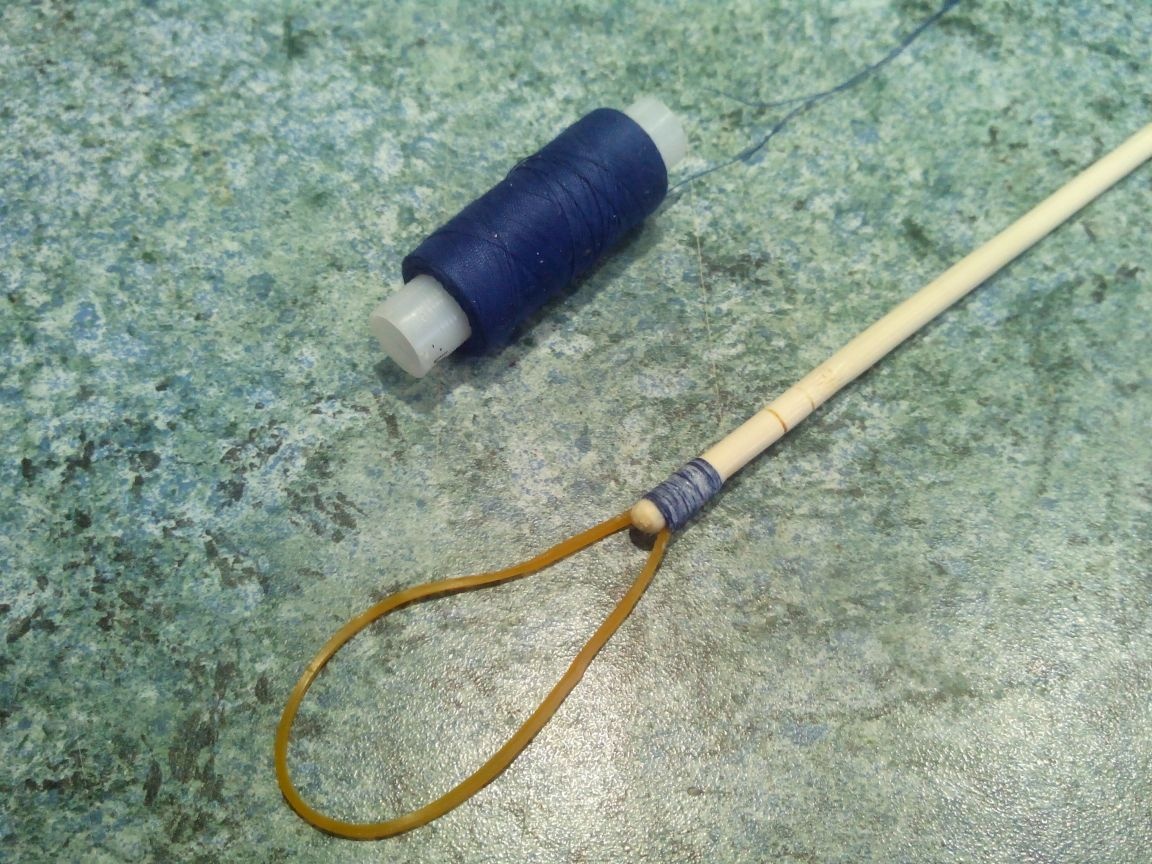
- threads
- cardboard
Instruments:
- cutter
- a pen
- ruler
- scissors
- adhesives for ceilings and PVA
- jigsaw
- sandpaper
- brushes and paints
Step 1. Drawing and templates.
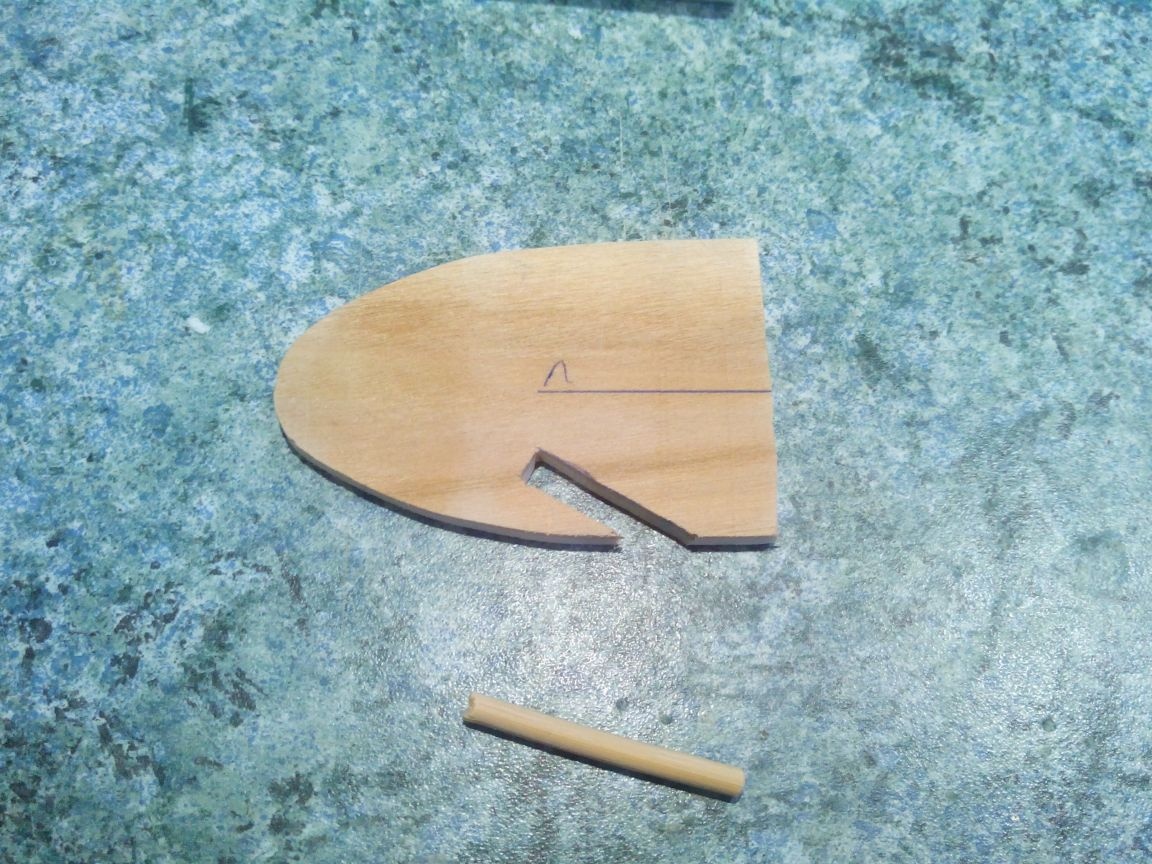
The drawing was made directly on a sheet of cardboard, so that later cut out patterns from it. All dimensions of the parts are indicated. From the nose, 75 mm is the distance to the leading edge of the wing and the border at which the nose piece from plywood will be measured.
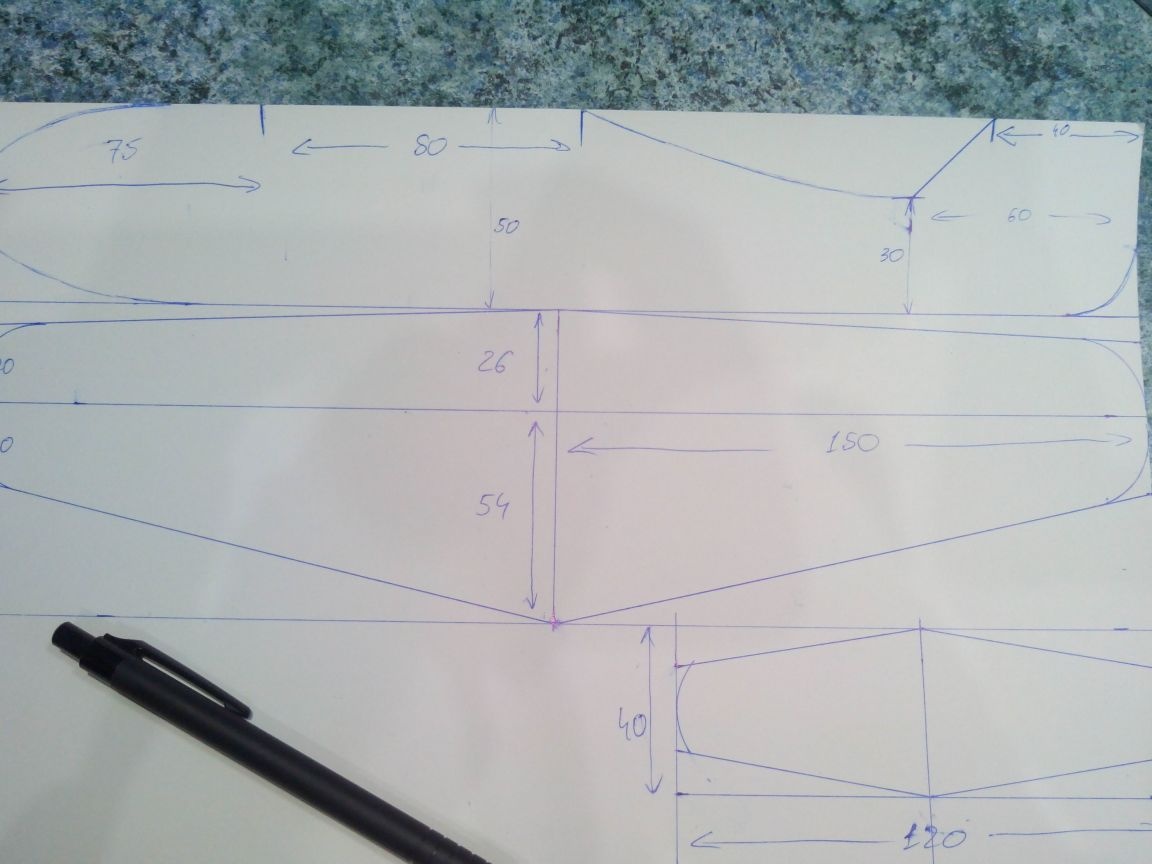
Scissor parts templates.
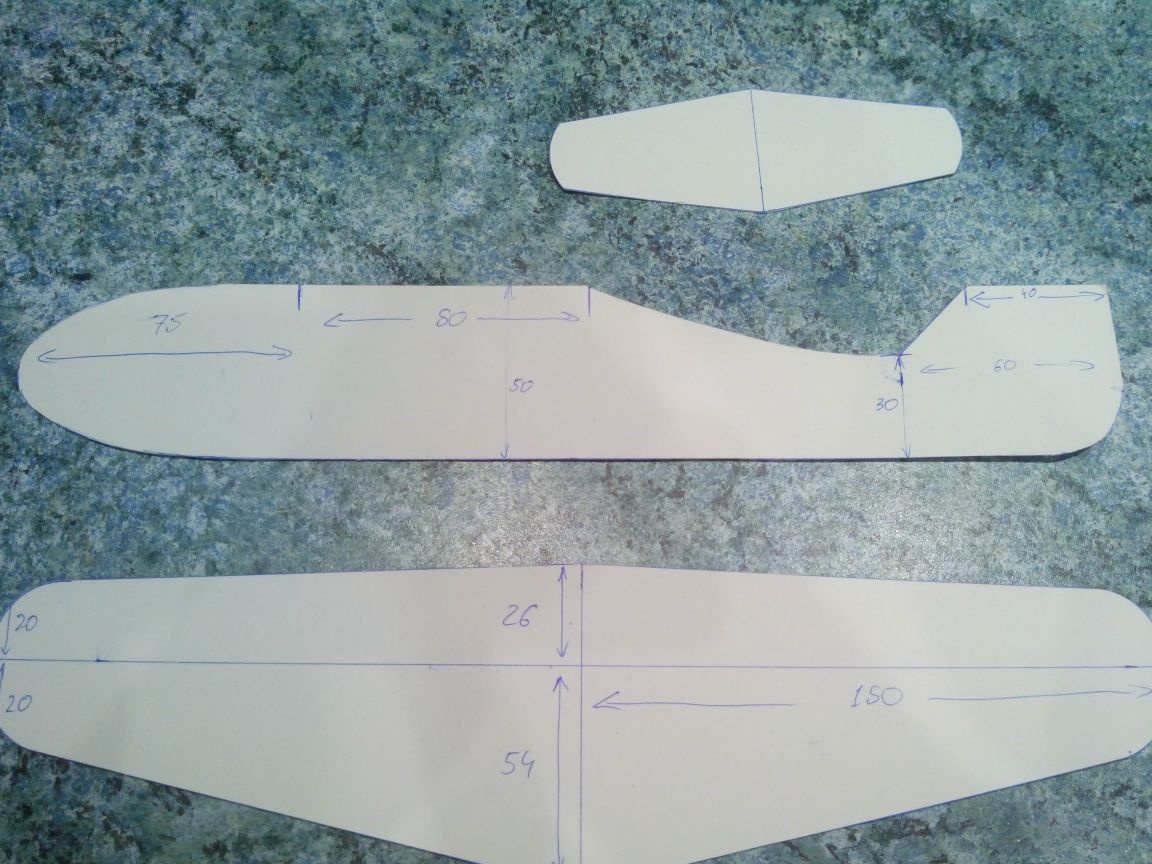
Step 2. Cut and glue model.
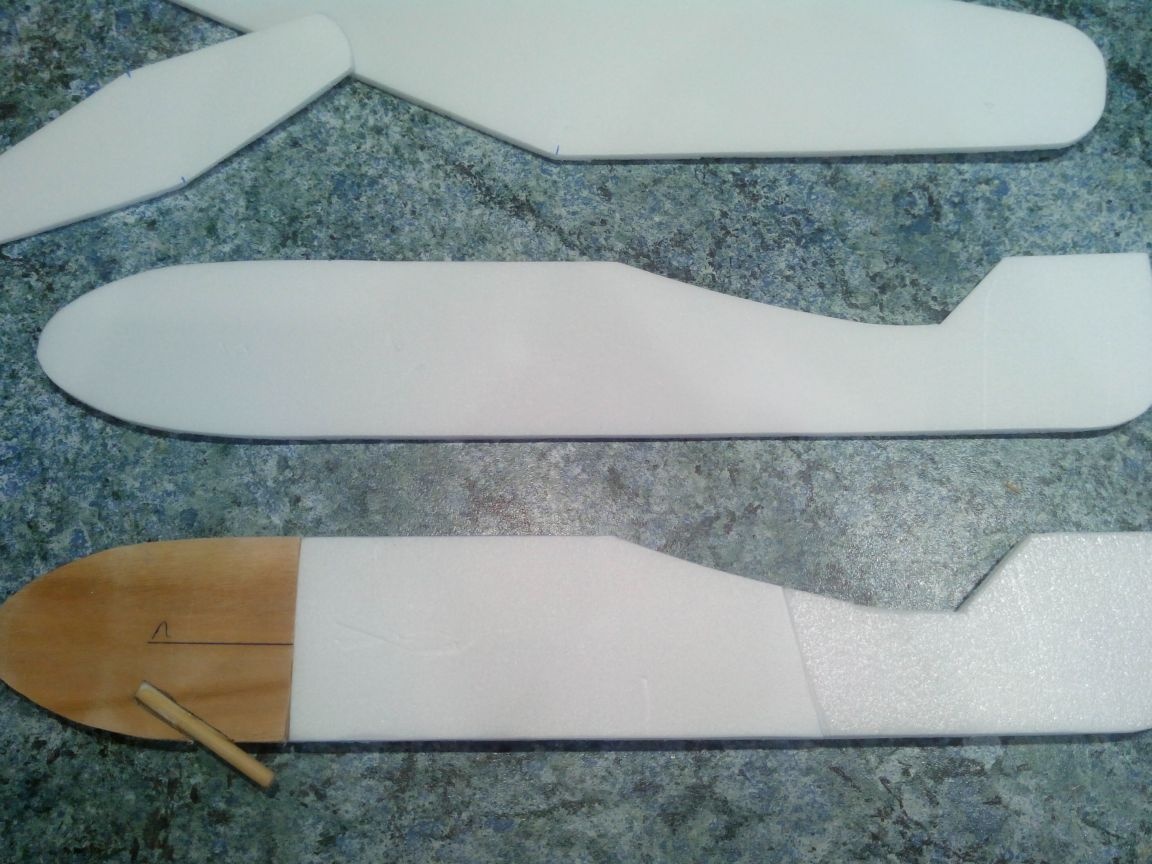
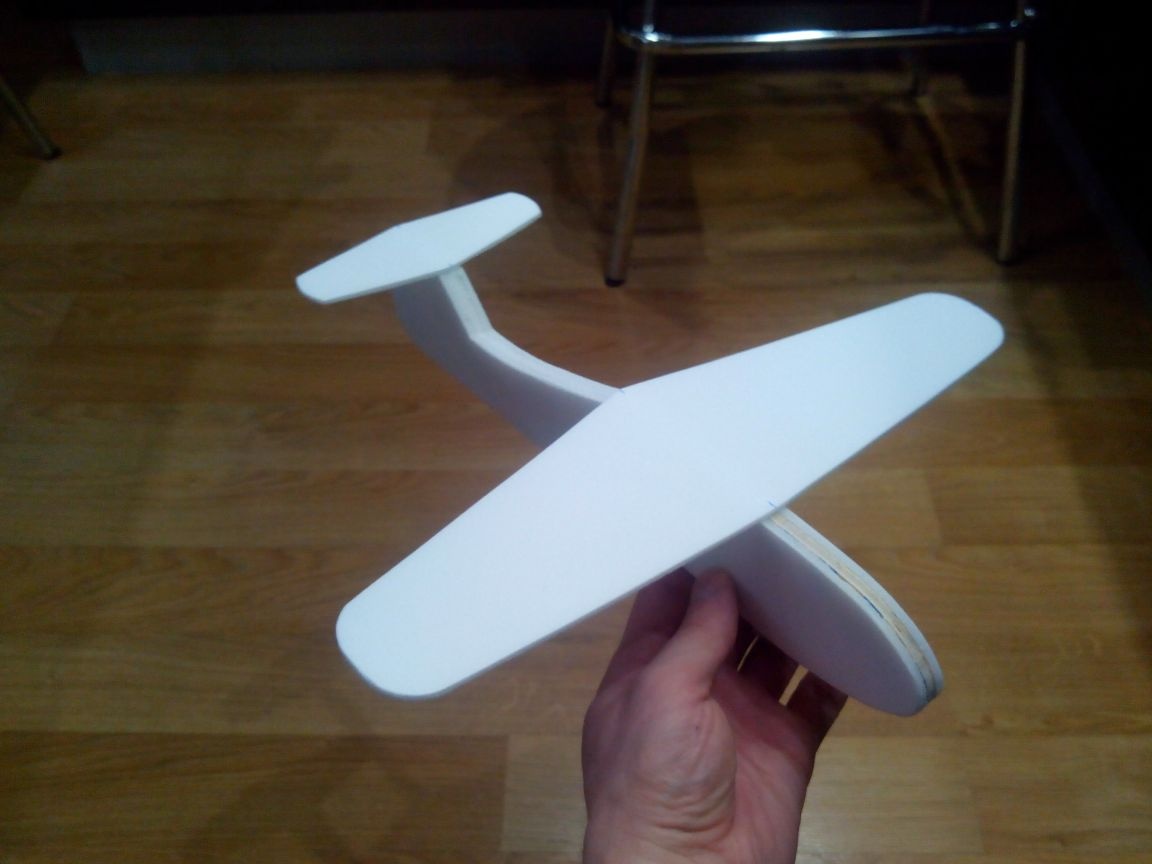
If the drawing was drawn on thick cardboard, then the details on the ceiling can not be drawn, but cut directly according to the templates. I cut the tail inner part from the remains of the ceiling, because it is of two parts, but you can also make it whole.
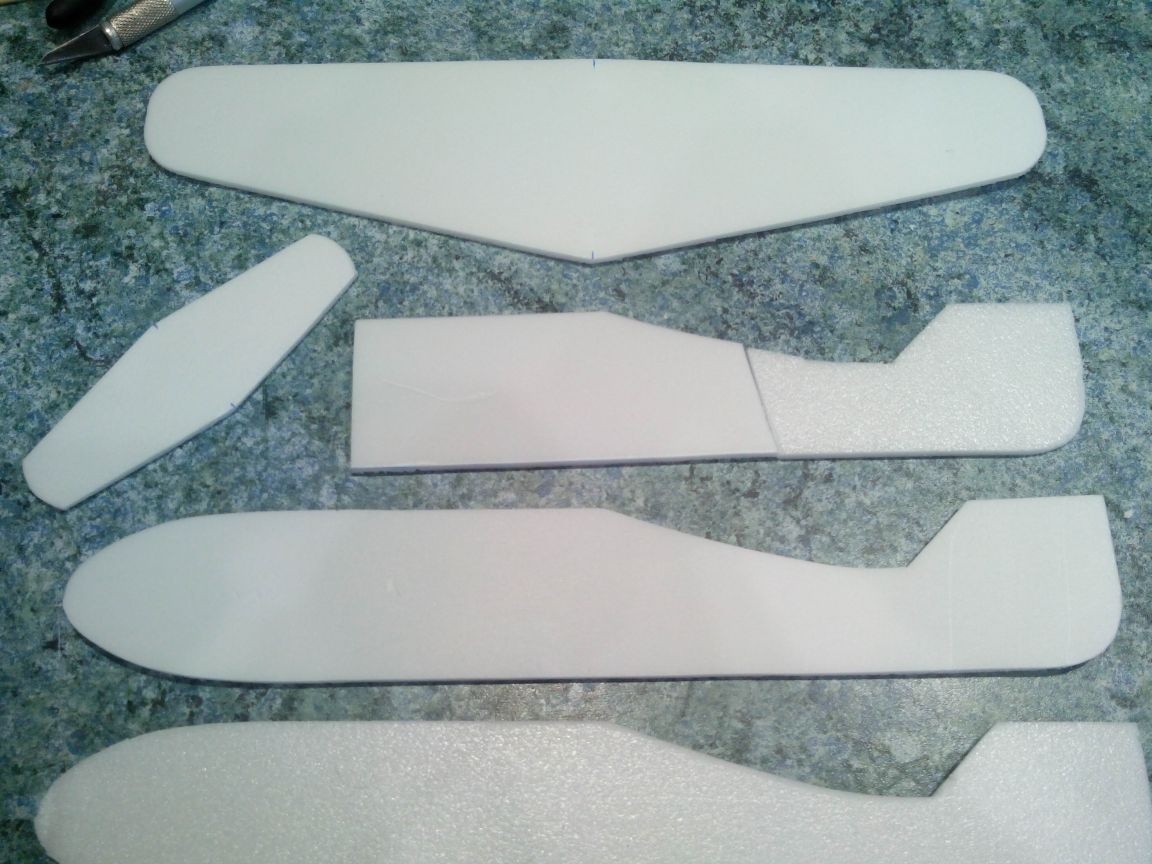
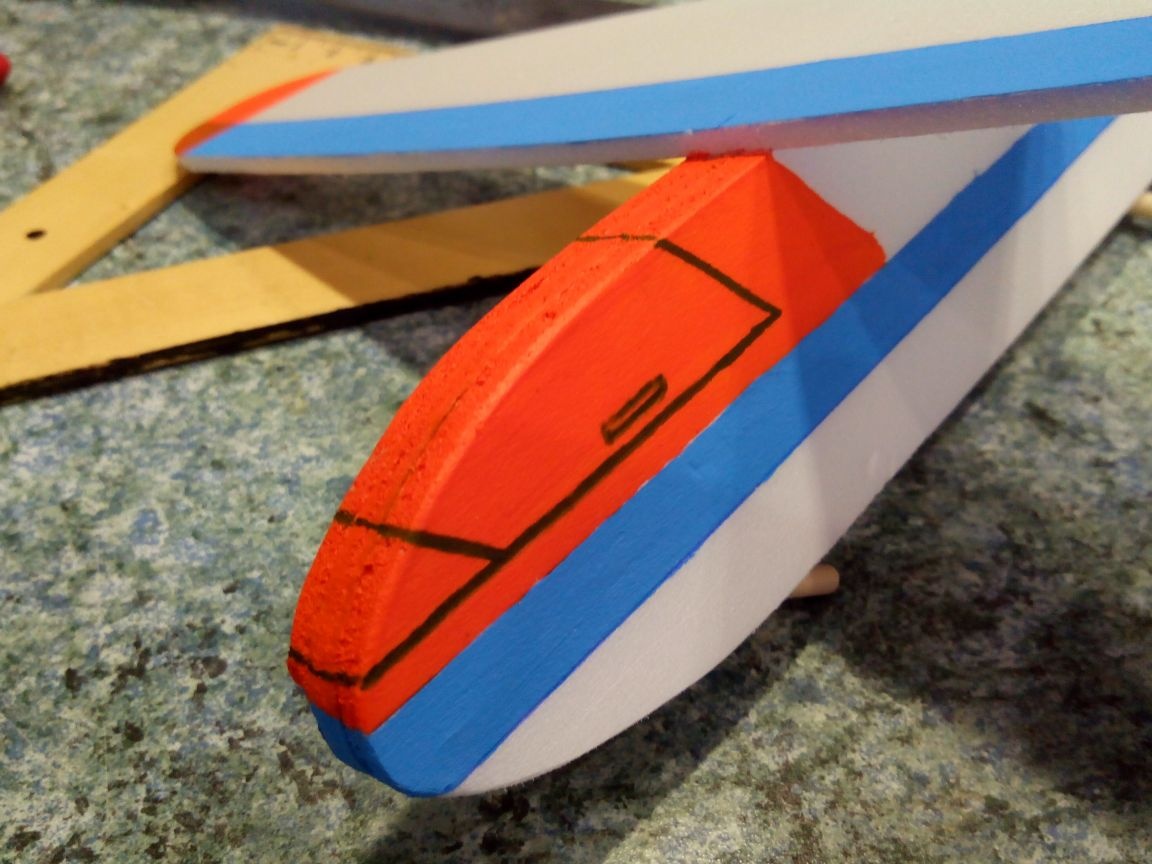
We cut the bow out of plywood and make a cutout for a bamboo stick in it, which will be a crochet for the elastic in the model.
We glue the parts of the fuselage together by gluing the plywood and tail parts between the whole sides of the fuselage.
If for some reason it is not possible to make a plywood part, the nose can be weighted with a coin by pasting it between the sidewalls, but you will have to select the weight so that the alignment is suitable.
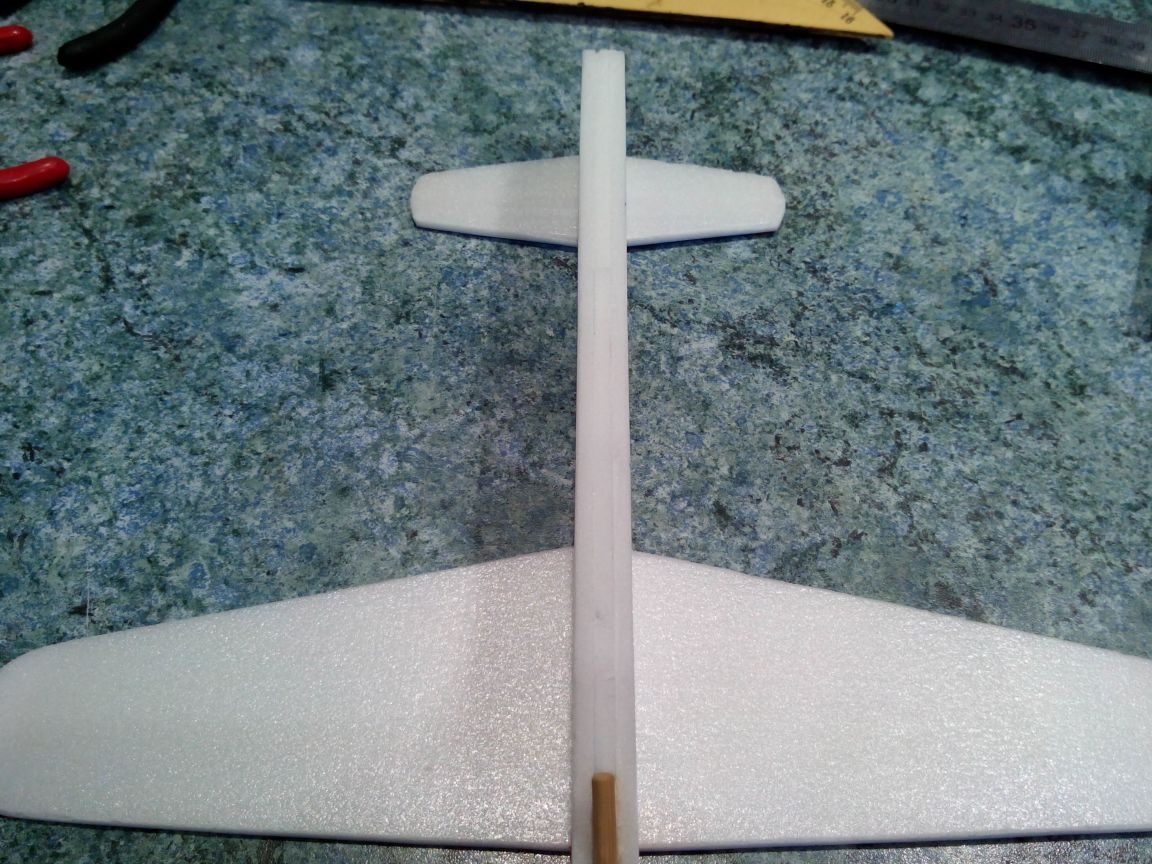
We process the edges of the fuselage with an emery cloth and glue the wing to it.
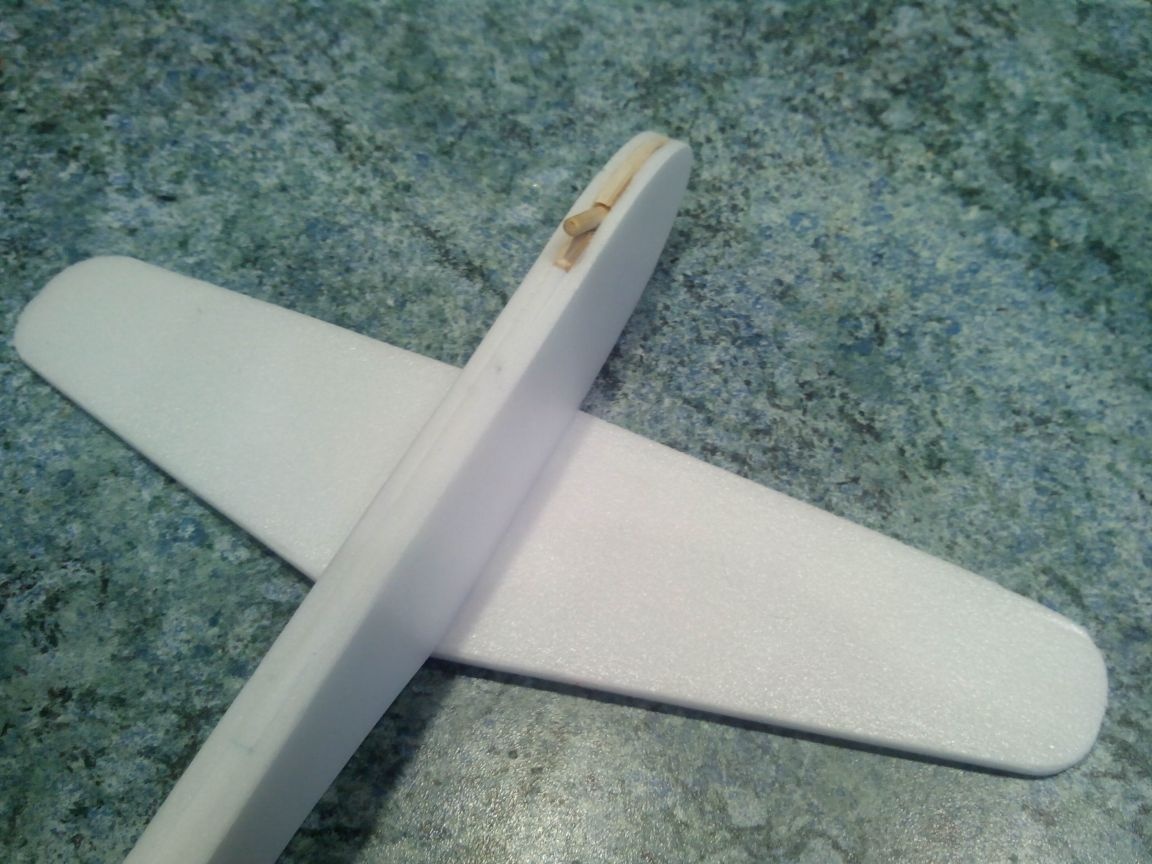
Then glue the stabilizer.
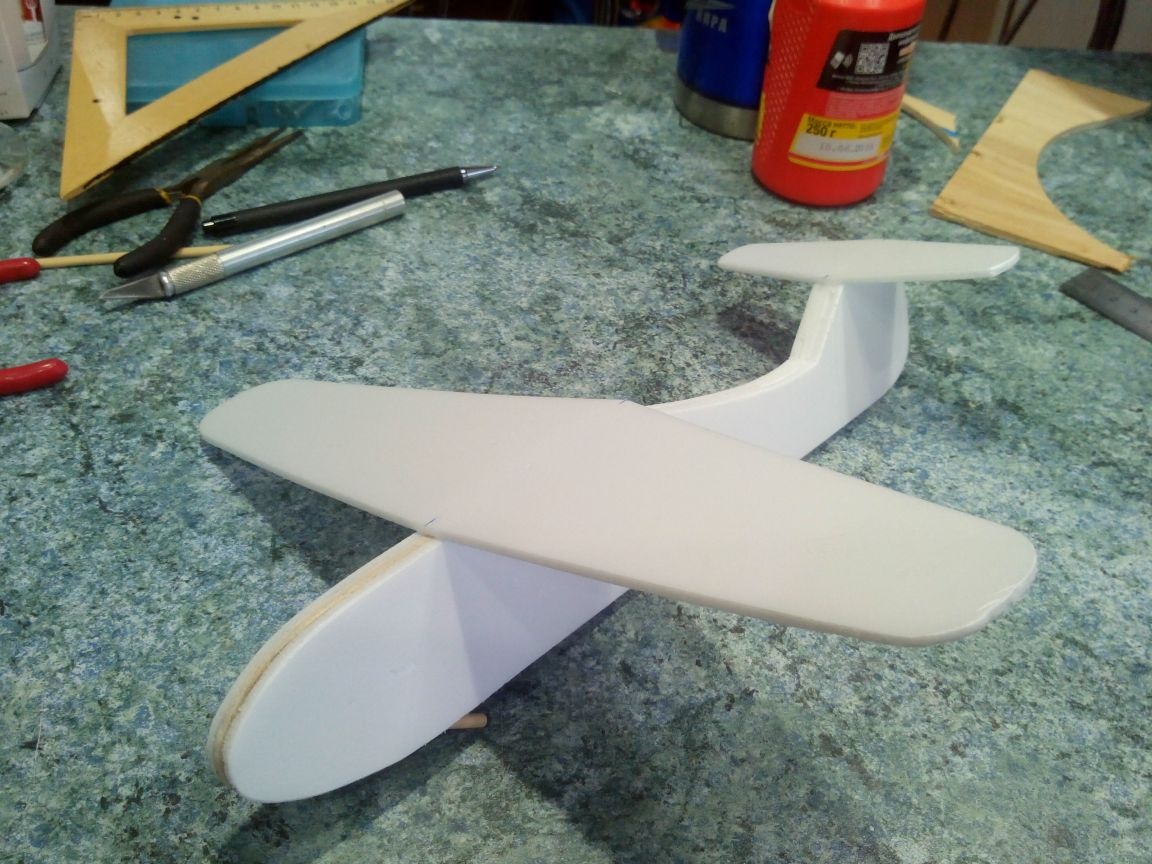
The model is ready for painting.
Step 3. Painting the model.
Before painting, it is better to first draw the contours with a pen for greater accuracy or generally paint the parts first, and only then glue them, but this is more convenient for anyone.
If there are no acrylics, you can paint the model with felt-tip pens and even paste over with colored tape.
In this case, we use acrylic paints - blue and orange.
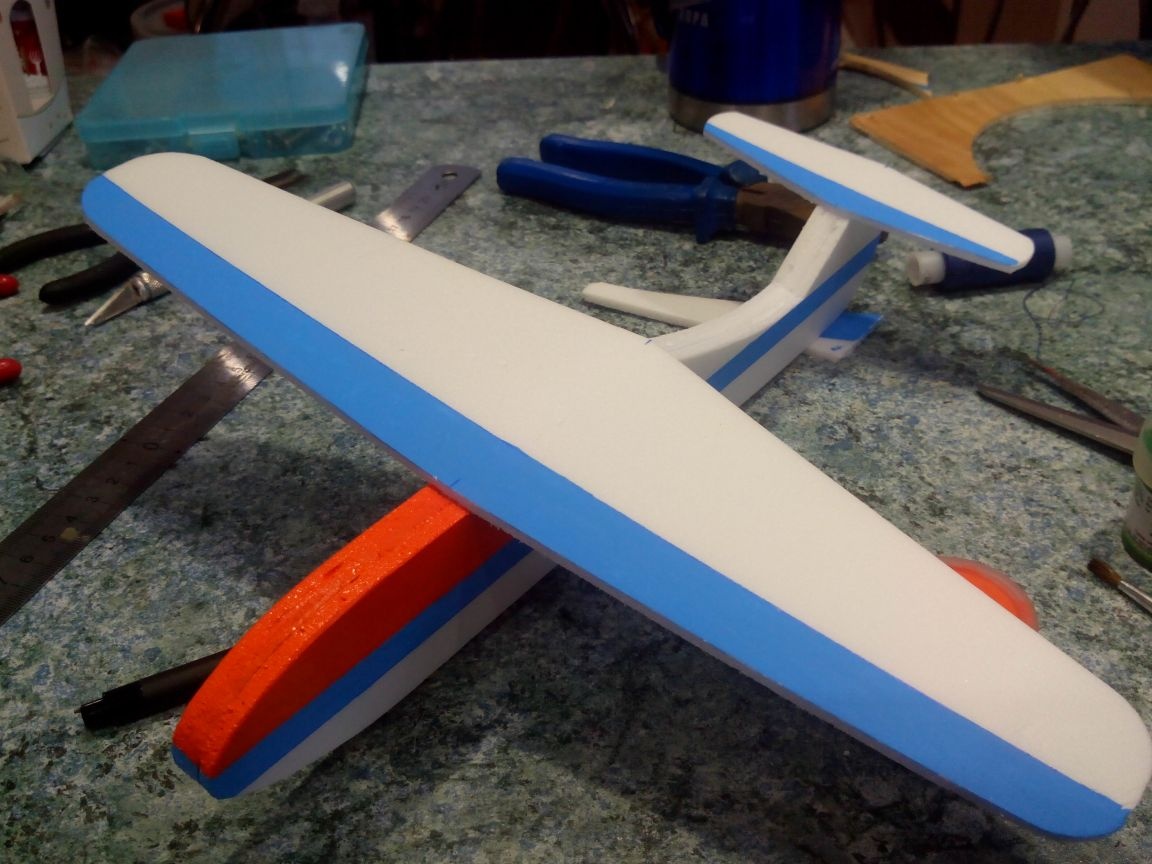
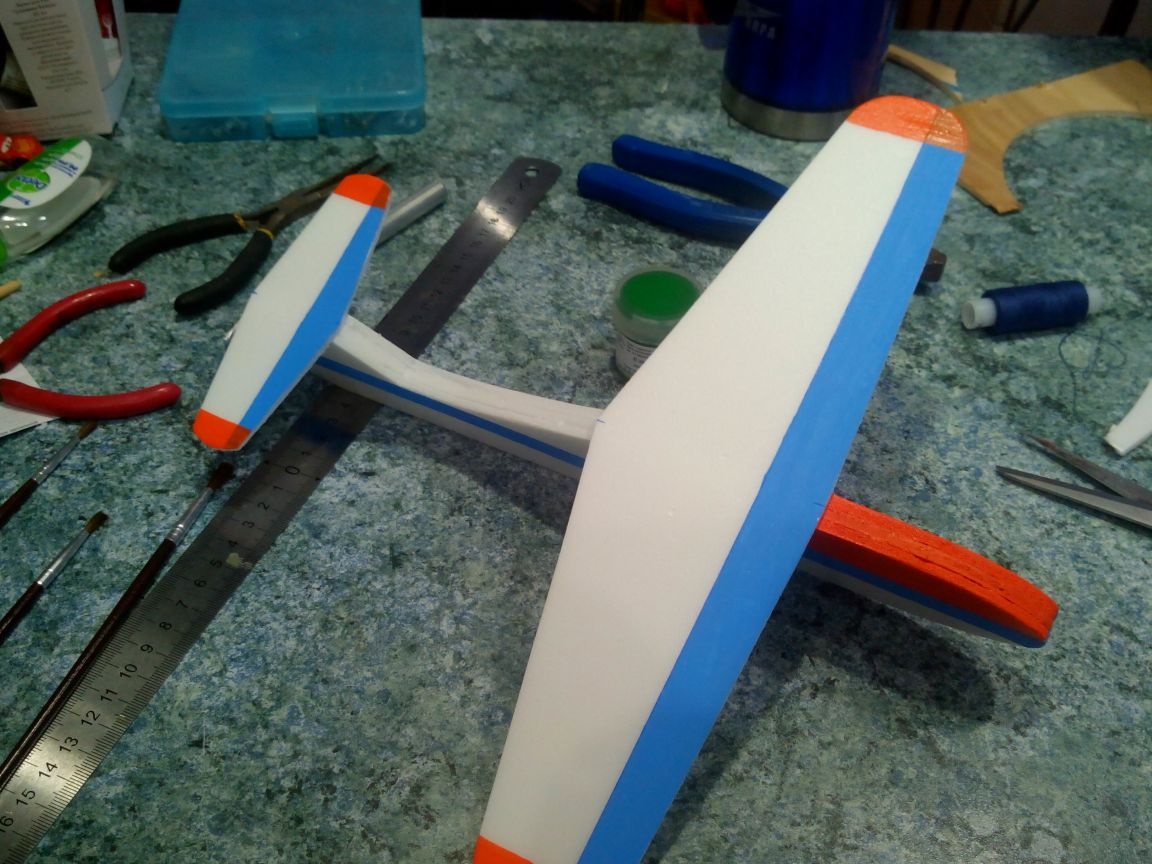
The wing and stabilizer can only be painted on top, leaving white below.
The contours of the cabin in the bow are drawn with a pen or felt-tip pen.
Step 4. Production of the starting device.
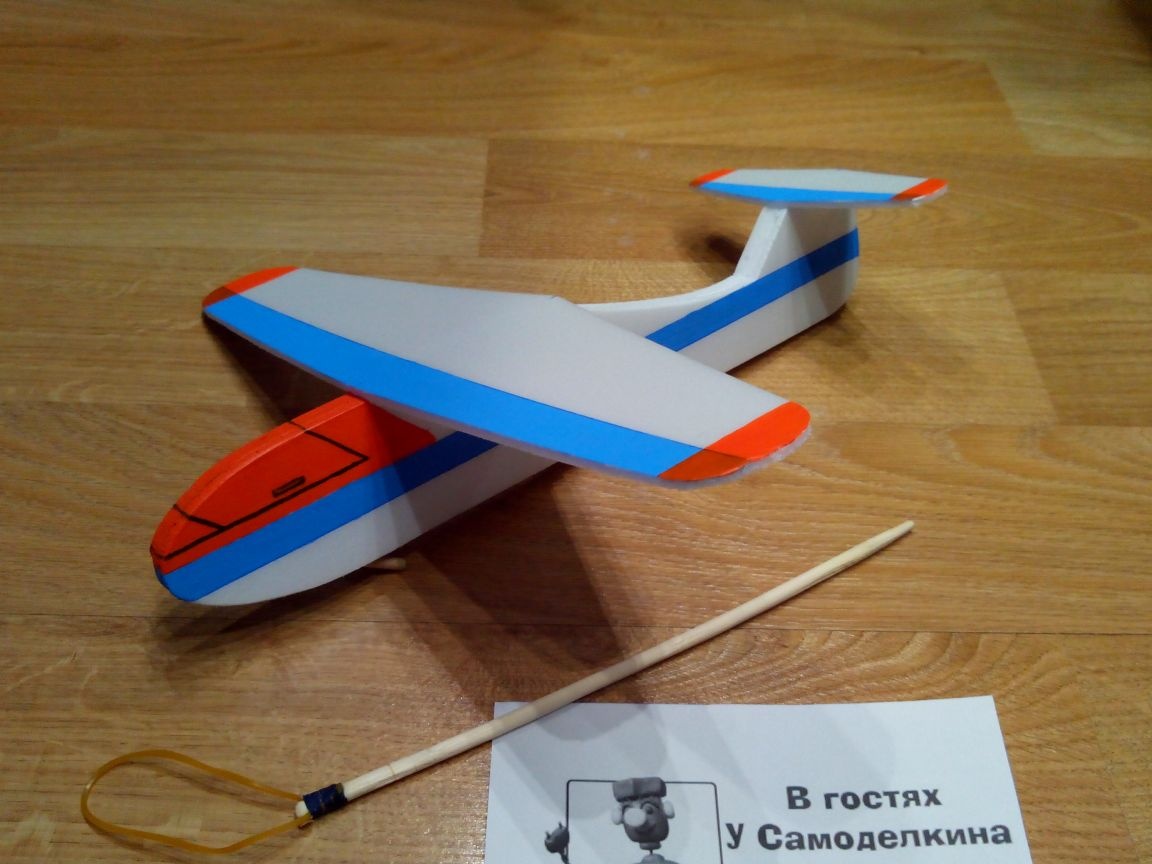
In fact, the launcher is a kind of slingshot to launch the model higher.
To make it, you will need an elastic band for money and a stick for sushi (or any other small stick).
We thread gum with PVA glue to the end of the stick.
Everything, the model is ready.
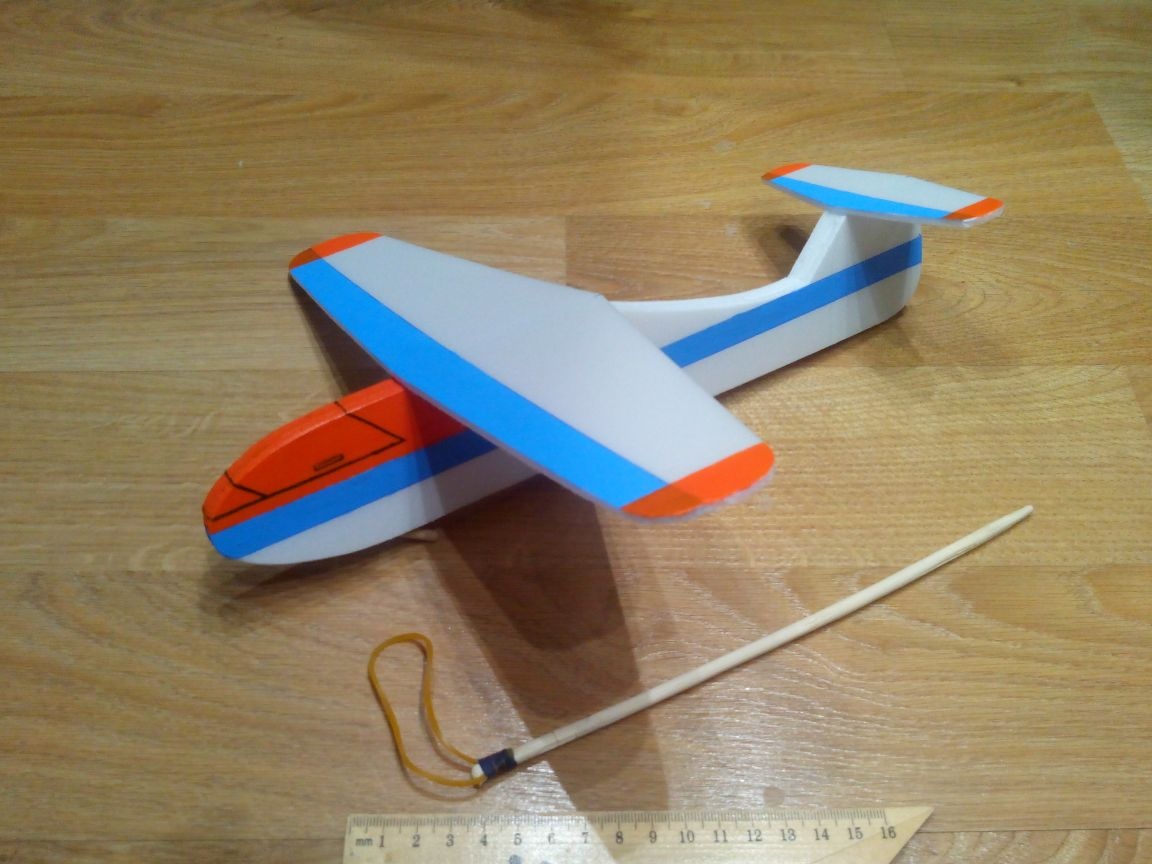
TTX models:
Length - 30 cm
Wingspan - 30 cm
Weight - 16 grams
Short video of flights:
Field tests showed that the nose of the model is a bit lightweight - the model is convertible, but this can easily be fixed by gluing a piece of lead (pellet) or a coin.