

A staircase to the second floor of a country house, made with the maximum use of gratuitous material and minimal manufacturing costs.
Materials and tools:
- drill,
- Bulgarian
- punch,
- Sander,
- a planer,
- 1.5 meter level,
- hammer,
- a hacksaw
- a chisel,
- a drill for wood 19mm. (gravel),
- step drill for metal,
- drill for concrete 10mm.,
- a sharp knife
- wrench.
- Board 40x200 (wider) mm.,
- a suitable tree,
- corner 40mm. (one iron bed is enough)
- hairpin with M16 thread,
- nuts and washers M16,
- pipe polypropylene sanitary 25mm.
- polypropylene caps on the 25th pipe,
- dowels 10x60,
- self-tapping screws 6x60 and 3.5x40,
- parquet or yacht varnish
The staircase of our house was made about a very long time ago, and rather resembled a ship ladder in the steepness of the steps, and on the step, a fire escape. My wife began to murmur slowly, it’s inconvenient to climb to the second floor, you need to hire someone to remake this misunderstanding. It was at this time that the neighbors were building a new house, well, and the stairs too. Having taken an interest in the price of this work, they began to strangle me on two sides — amphibian for money (25,000 rubles approximately, a considerable amount) on the one, and self-esteem (what can I do to myself to create?) On the other.
As a result, I shoveled mountains of information on various types of stairs - from simple folding and cleaning upstairs to super-smarted for rich mansions. I wanted to make a convenient, inexpensive, elegant staircase, preferably from improvised materials, which should fit into the limited space in the corner and, if possible, not touch the window, and also not rest against the wall on the second floor. The task, I must say, consisting of mutually exclusive elements.
1. Design So the task is set, began a journey on the Internet. I found a site with an online calculator and recommendations on the construction of stairs, it turned out for a relatively convenient step I need 12 steps, and not 9 as it was before. Further, the angle of inclination should be from 45 to 75 degrees, (preferably closer to 45). From here, the conclusion is that the ladder should be rotated 90 degrees (climbing ladder, well, or you can call it “spiral”), so that the straight section starts higher.The minimum width of the step is recommended 30 cm. This is because I could not get more than one straight initial step because of the choice of the width of the stairs of 70 cm, and the limited space from the doorway to the wall of one meter. The number of running steps was chosen as convenient as possible - 4 pieces.
Less- the angle of inclination will increase, more- there is little space for the foot during the descent. So, before the start of the straight section, we have 5 steps, which means it starts from a height of about a meter (I don’t specifically give the exact sizes, for those who want to repeat they will have their own), from here I started counting the angle of inclination, taking into account that I don’t really go into the window bowstring. And then I thought, why do you need to fence a garden with a bowstring here? I remembered the drawing of the stairs of the garden house from the journal "Science and Life" I don’t remember which years, but I found it on the Internet, here it is:
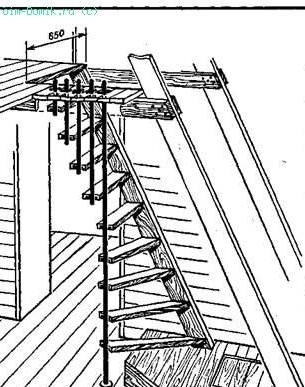
I liked the design, I decided to build on it, taking into account my Wishlist angle and the number of steps. I wanted to make the main support post from an inch pipe, cut the thread on it, and set the height of the steps with nuts. Then this disgrace was supposed to be closed by pieces of logs (decorate). I thought of attaching to the wall instead of a bowstring, as in the picture, horizontal bars of 30-40 mm. Having estimated the cost of materials and labor, I didn’t get excited, it turns out unprofitable, and it will look clumsy.
2. Swivel part “And then Ostap suffered” - why be wise with the counter, trim the pipe with scraps of logs, in which also make a recess under the pipe? It’s easier to just take the bar and use it as a stand, or even better, a clumsy log, and preferably with knots. Just at that time there was a strong wind that piled a lot of trees, and that was just the point. Of course I would like some more knots, but I managed to find what I could find. Further, the bars as a support for the steps seemed very unreliable, it is better to use the corners, since the old iron bed was on the site.
For the steps you need a 40mm board. thickness and about 30cm. width, and for four runners and even wider, which is problematic to find, I had to glue it, which is a little more detailed: There were boards 40X200 mm., which were cut into size with an allowance of 5 cm., in the amount of 12 pieces (for 8 straight steps), then 4 of them were dissolved along in half. In total, 8 sets of step blanks were obtained, at the ends of which I drilled two holes with a diameter of 19 and a depth of 30-35 mm, according to the marking. for dowels (see Fig. 1). He made dowels from 6 centimeter segments of the same board, which he split into 2x2cm blocks. and planed with a knife to the desired diameter. Then we grease the ends, holes and dowels with PVA glue, preferably the “STOLYAR” moment, insert the dowels into the holes, tighten them tightly with ropes (see Fig. 2) (who has large clamps with them), wait until it dries, and only then plan and crop to size.
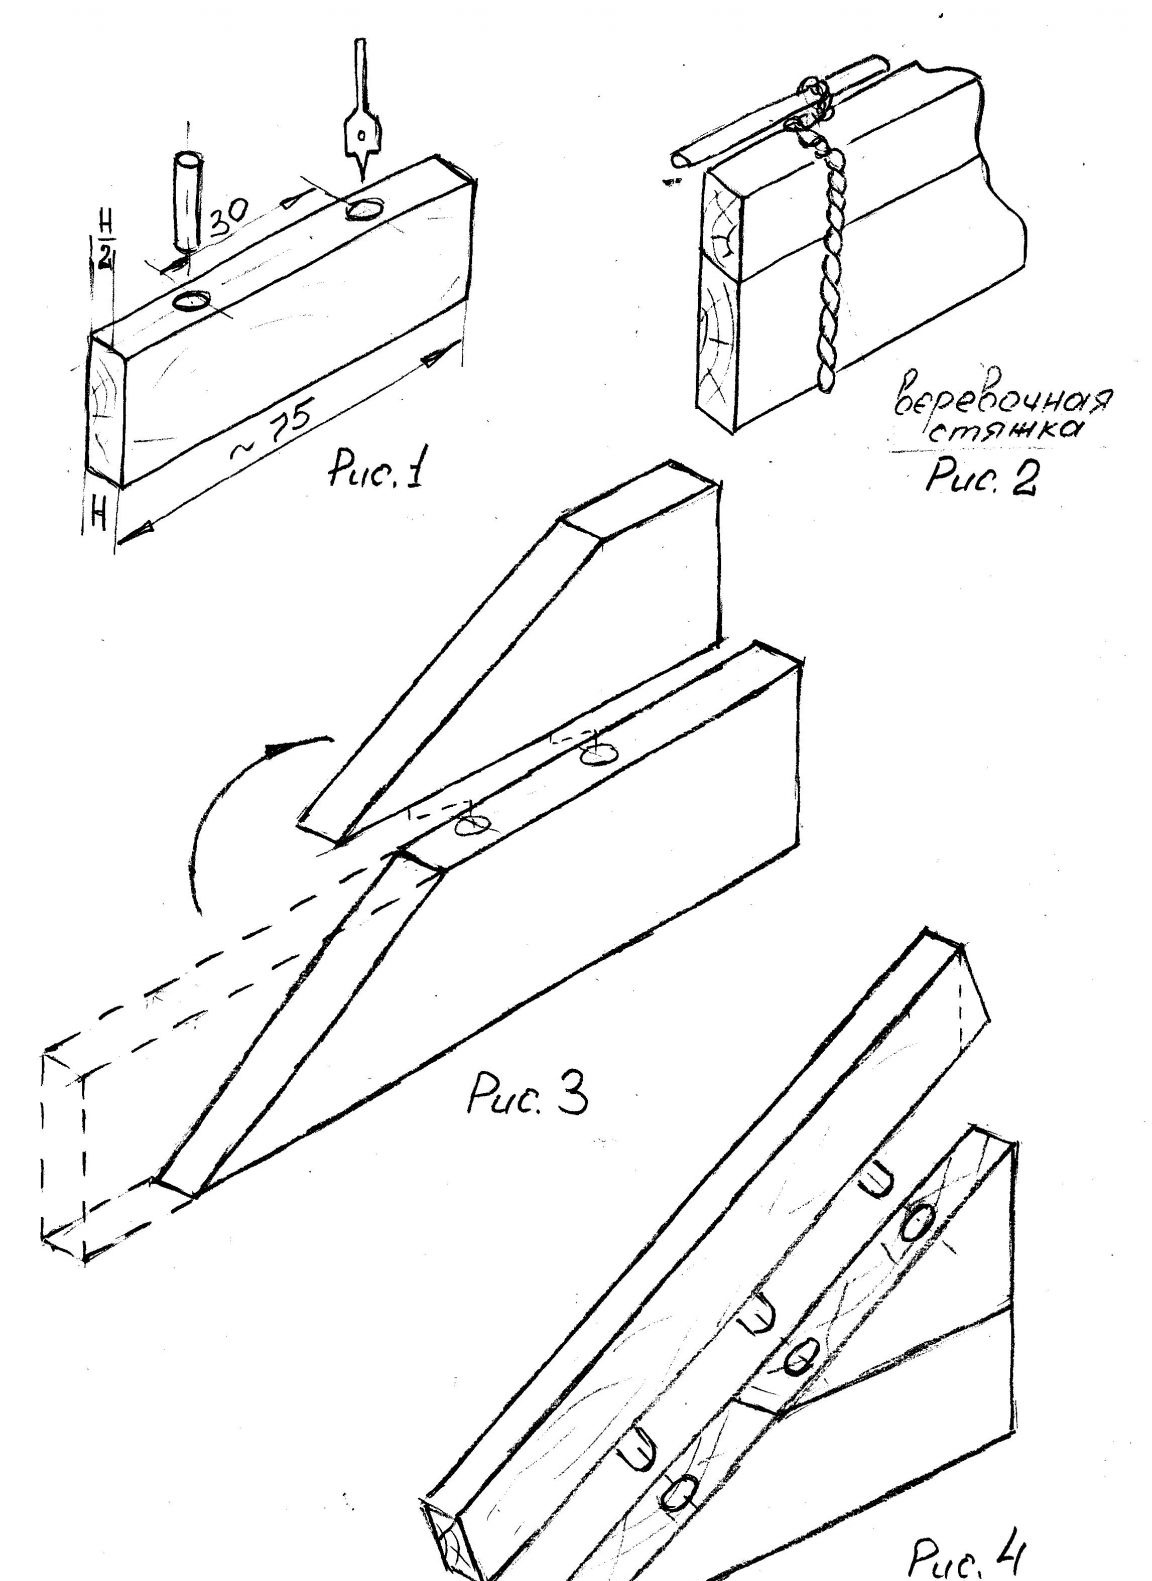
It’s a little more complicated with the production of running steps, firstly they are wider, secondly they are angular, thirdly they are all different, but there are only four of them. In general, it is better to make templates from packaging cardboard, and make them. Since these steps have the shape of triangles, the board is sawn diagonally and then glued together (see Fig. 3). To increase the width and increase the strength (will it suddenly crack along the fibers?), The third board is glued as shown in Fig. 4. The result is this:
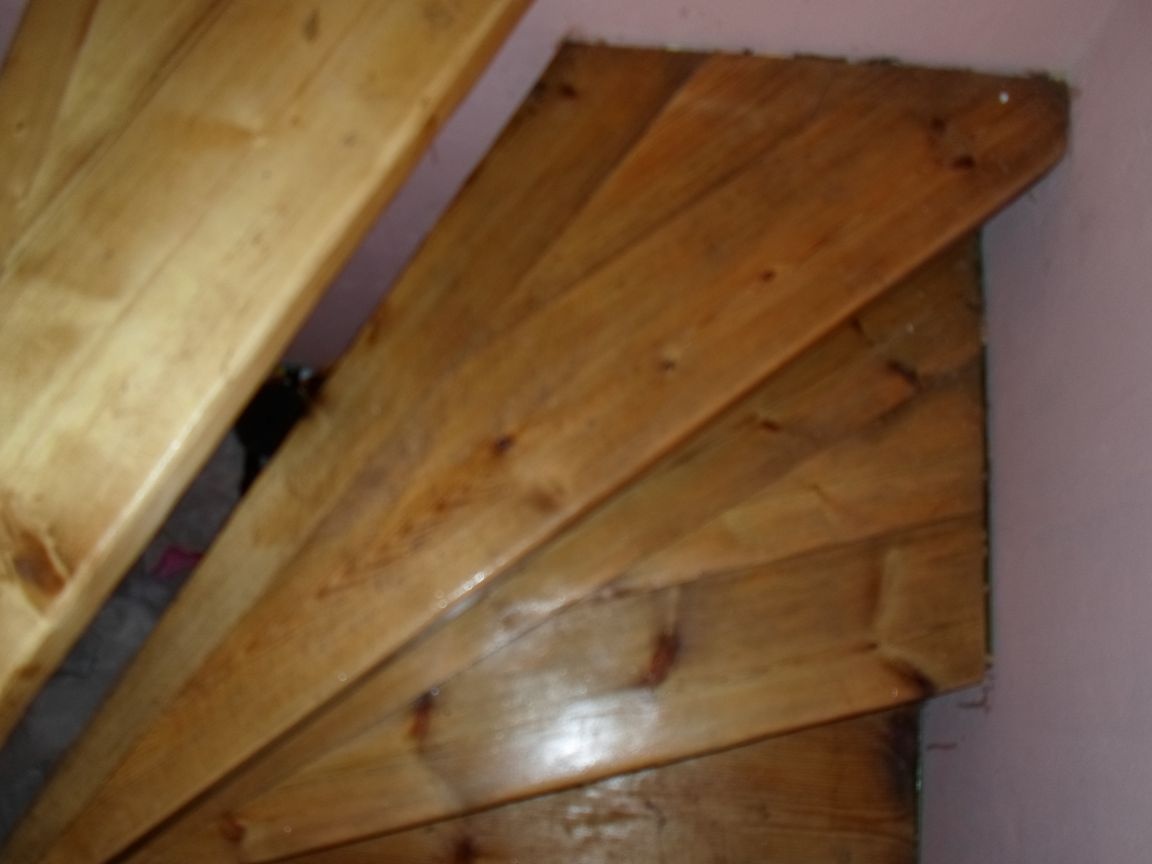
The photo shows the direction of the wood fibers and the adhesive joint, as well as the shape of the steps themselves.
So, closer to the point. The first step was to install a stand, preferably straight, preferably with the desired direction of the knots and preferably without gaps. It’s not worth describing “dancing with a tambourine” around a tree — for too long, everything turned out to be simpler, plotted angles and dimensions, using a square and a level I marked the comet and tree knots so that the cuts were parallel, cut them to the markings and set them in place. Komel and the top with knots were fixed to the floor and ceiling with self-tapping screws at several points, drowning them a little in the wood, and then smeared the indentations with putty and rubbed with emery so that they generally became invisible.
He made the layout of the stairs directly on the wall using a one and a half meter level, a ruler and a square, and then fixed corners on it, cut from the old bed to the size of the ends of the steps. Corners from the bed are good in that they have a smaller thickness of the shelf than the profile that is sold in the store (and got it for free). They drilled 6mm holes in them. for wall mount screws and 4mm. for the step, countersink them so that the head of the self-tapping screw is flush. I used a dowel for fastening 10x60, screws 6x60. He set the corners so that the shelf attached to the wall was closed by the end of the step and was not visible. After that, I transferred the marking of the first six steps to the rack, again using the level.
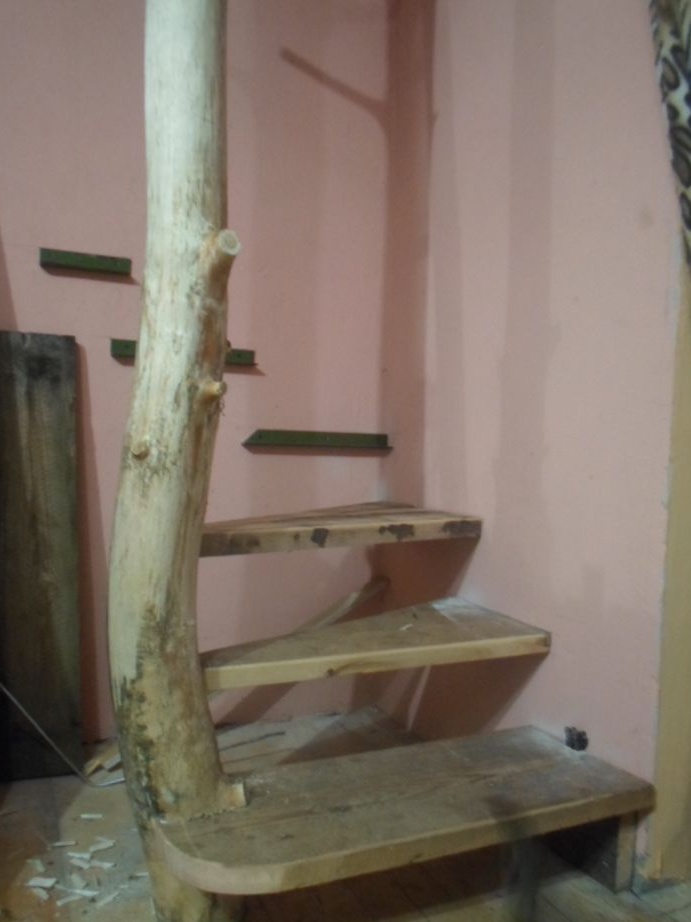
To cut the first six steps into the rack, I simply applied the board, and outlined the level (for verification), and then, with a hammer, chisel and hacksaw, I gradually drove the step into place. After the final fitting, assembly, bleaching and grinding, the steps were pinned with screws.
This ended the first part of the Marlezon Ballet built. The next step was the installation of suspensions, which consisted in marking, drilling holes in the ceiling, corners, cutting studs and pipes.
3.Straight section Initially, I wanted to make suspensions as in the first picture, one per step, and from a half-inch pipe, but after reading several articles about staircases on pedestals (these are the so-called suspensions and wall mounts) I decided to make two suspensions per step, each subsequent shorter than the previous one to the step of the stairs, and each goes through two steps. The design is more rigid and reliable. Instead of a pipe, three two-meter studs with M16 thread were bought, nuts of the same caliber of 14 pieces and wide washers for them - 7 pieces. From each hairpin, two suspensions were obtained, first the longest and shortest, then in the same order with a difference in the step of the ladder. Of the remaining scraps, one was used at the end (more precisely at the beginning, since you need to collect the second part of the stairs from above).
In the remaining seven corners cut into the size of the step (I have 30cm.) Corners, at a distance of 25mm. from the edge and along the center line of the inside of the shelf, drilled 18mm holes. (I drilled a stepped drill) for the studs. I cleaned the burrs and immediately painted white so that we don’t have to go back to this before assembling (there were problems immediately with those attached to the wall and not painted, so I advise you not to be lazy and take into account my bitter experience).
To decorate the studs, I first wanted to use a ¾ pipe, then paint it. The choice was made due to the fact that a noticeable load is applied to the area between the steps, but then he decided that a simple polypropylene plumbing 25th pipe would be suitable for these purposes. A hairpin is included in it exactly, and it’s not necessary to paint it well. I bought two pipes of three meters, cut them according to the example of the studs minus the thickness of the ceiling, two thicknesses of the steps and two nuts. The length of the short pipe (between steps) is the step minus the thickness of the step.
Further it is not particularly interesting - I marked the ceiling on the line of the length of the step (the width of the stairs) minus 25 mm. after 25 centimeters I drilled 7 holes and proceeded to assembly.
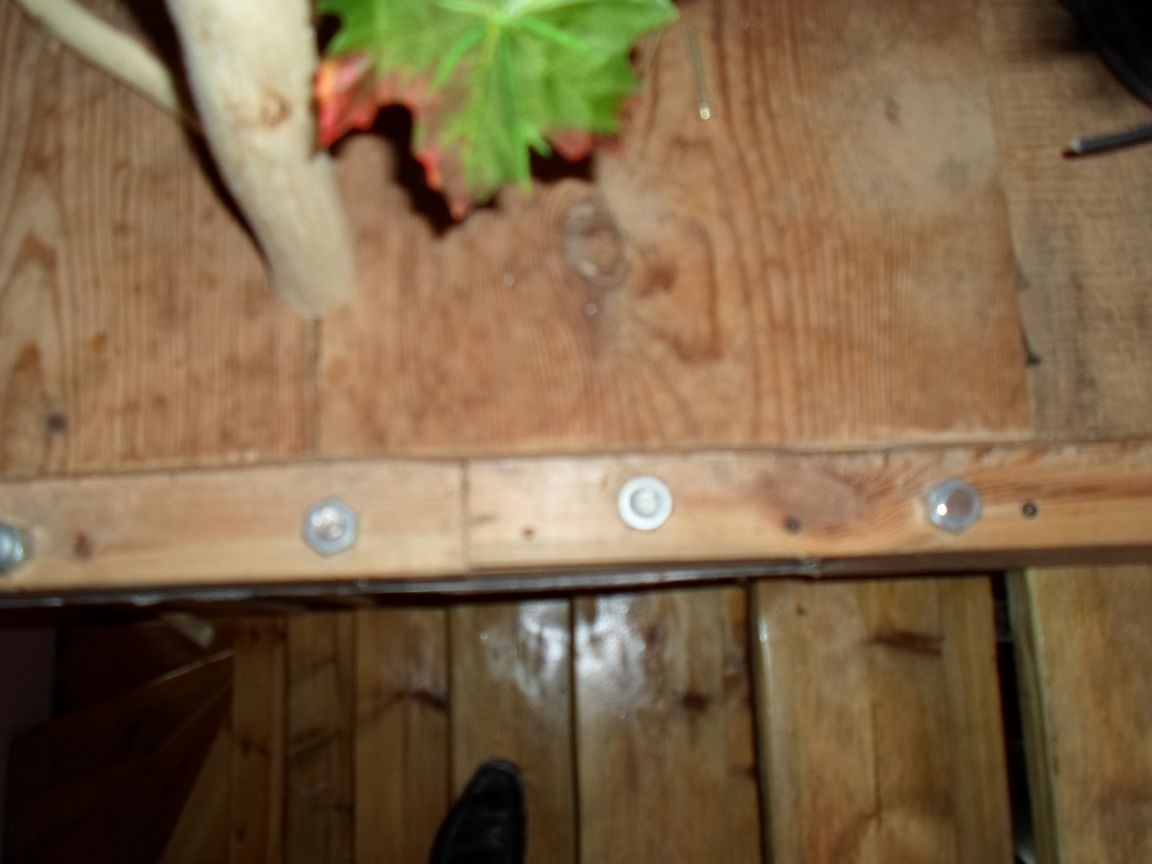
4.connection togetherThe assembly begins with the fastening of the last hole of the upper stage, the next hairpin is inserted through the ceiling, the first (more precisely, the last or previous) stage, corner, short pipe, next stage and corner. Screw the nut from below, screw through the washer from above. Further, similarly, to the stand, on which the end of the corner is first attached, a step is inserted and then a hairpin is inserted.
Here's how it looks from above:
In conclusion, tighten the bottom nuts, cut off the excess thread, bleach (my boards were old), grind, varnish, tint where necessary, and like a cherry on a cake, you can close the nuts with 25th pipe plugs: heat the inside of the plug with a gas burner to start melting and very quickly put on the nut.

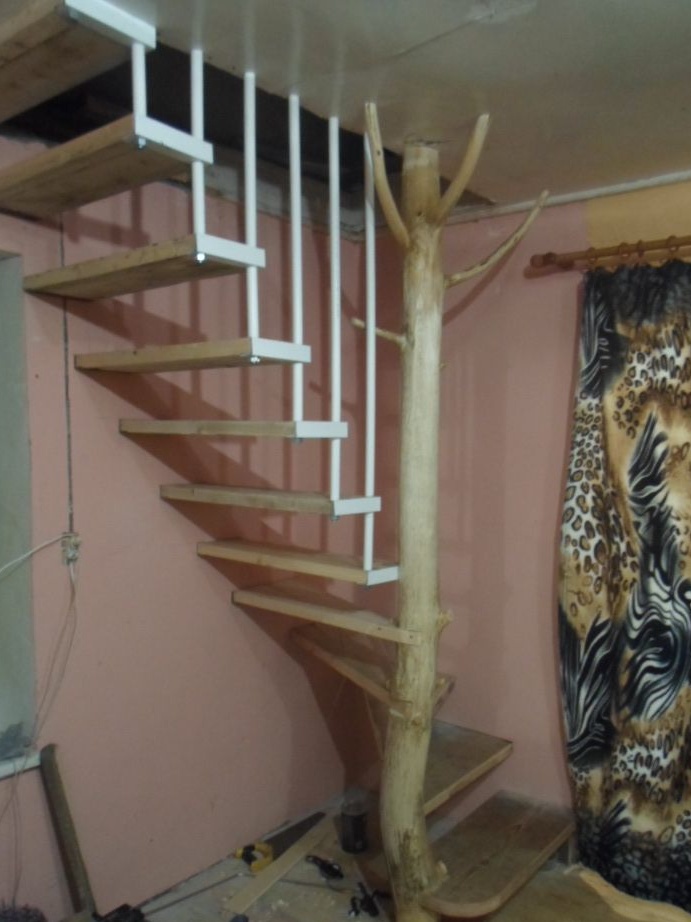
As a result, I got this product:
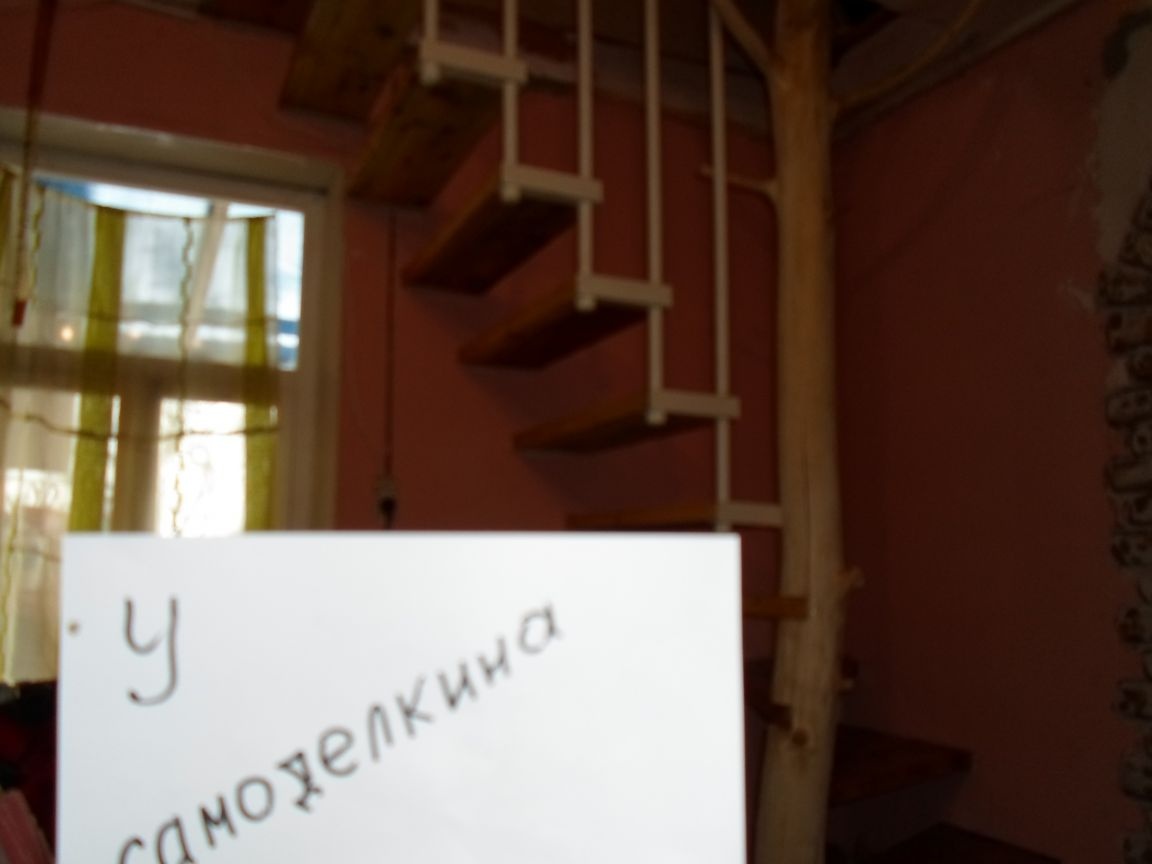
5. In conclusion, I can say: the staircase was built at the end of the summer season in 2016, over the past summer the tree dried up and cracked, which gave it a more original look.Of course, cracks can be repaired so that they will not be visible, but I’m so prettier. Everyone who saw this work was delighted. According to the load, each step can withstand two adults (more than 150 kg.). Here, on the advice of friends, I decided to share my homemade.