
Sometimes in life sooner or later there is a need to mix some substances, this is especially true for lovers of pimping. A very convenient thing for this business is a stirrer with a magnetic drive. When using such equipment, you will never leak anything, and it is very convenient to wash the dishes after work.
It is simple to assemble a magnetic stirrer, it is even easier than transmitting movement through a rotating axis, because there is no need to drill dishes, make a screw and so on. To make this dodgy fixtures, the author decided to use the old power supply from the computer. As a rule, a rather powerful fan is installed in them, the strength of which is quite enough to make the mixer. Magnets are simply glued onto the fan blades, thanks to this, movement is transmitted to another part placed in the container.
The selected power supply must be operational, as it is the fan that supplies it.
Materials and tools that the author used for homemade:
Material List:
- old power supply (choose one so that the fan is powerful);
- non-magnetic capacity (glass possible);
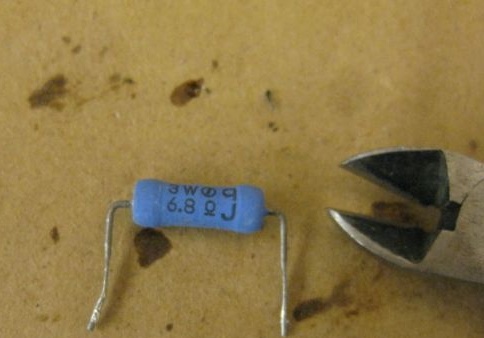
- 3W resistor;
- heat shrink;
- Light-emitting diode;
- (to adjust the speed);
- small neodymium magnets;
- wires;
- a controller for adjusting the speed and an adjustment knob to it;
- a steel rod, a tube with a magnet (or another component for making a “twist”).
Tool List:
- hot glue;
- screwdrivers;
- soldering iron with solder;
- nippers;
- dremel;
- marker;
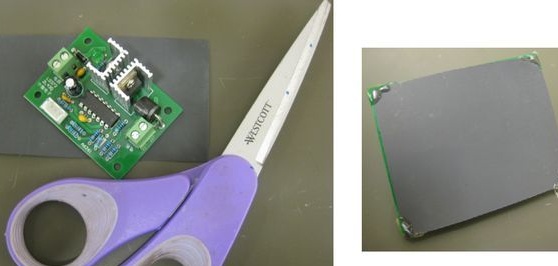
- scissors.
Mixer manufacturing process:
Step one. How does it work?
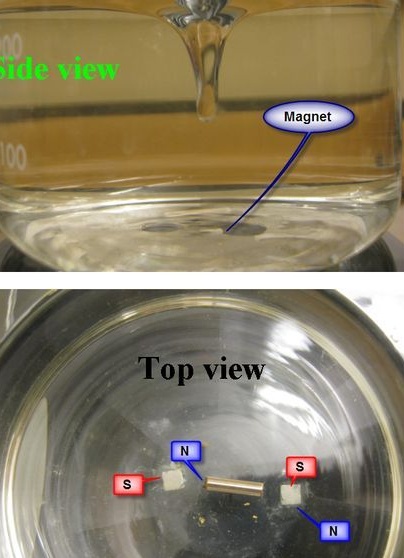
Two magnets are installed on the fan blades, if desired, more. At the top we put a container in which water or another substance for mixing is poured. Then we put in the container a metal rod or tube with which magnets are installed. The rod is attracted by magnets on the propeller and, after switching on, rotates with it.
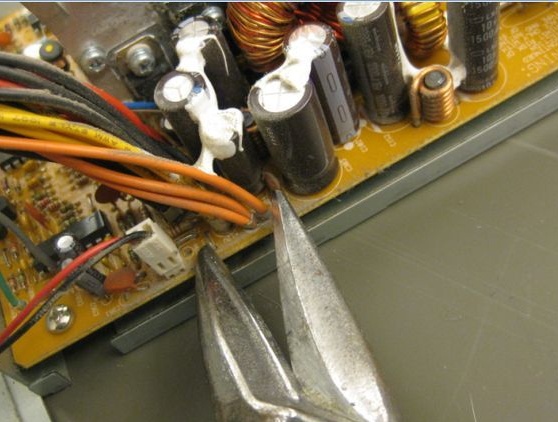
Step Two We remove excess from the power board
The author’s fan is powered directly from the power supply board. The fan is already connected to the corresponding connector.
Here we still need to find the output that gives out 5V, it is needed to connect the LED and start the power supply. Cut off all unnecessary.You need to leave the green, black and red wires. Red means 5V voltage source, black minus, green power supply. The author isolates the remaining pieces of wires by using hot glue so that nothing goes anywhere.
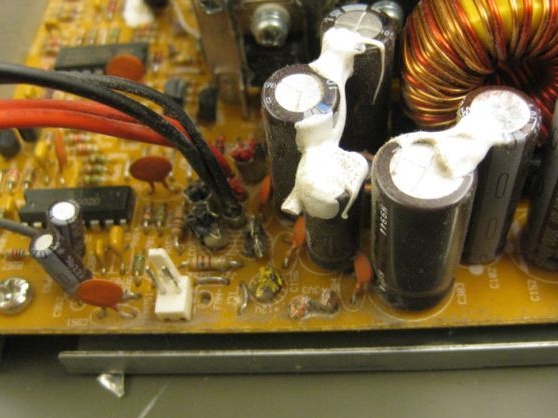
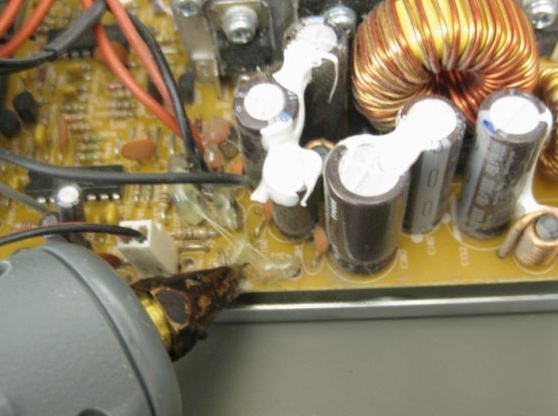
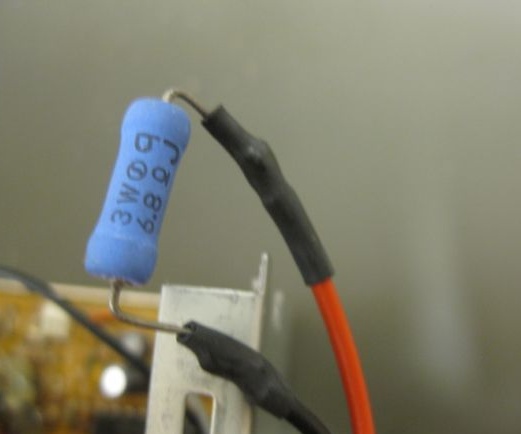
Step Three We put a "starting" resistor
The bulk of the power supplies are designed so that they do not start if there is no load. Usually this load is at least 3 watts. We select the desired resistor at the nominal value and install between the red and black wires. Solder the contacts well, and use heat shrink tubes for insulation.
Step Four Power button
In order to turn on the power supply, you will need to close the green and black wires. The author sets a switch between them for convenient control of the device. We mount the switch in the power supply housing. Cut the hole you need in size and firmly fix the whole thing with hot glue.
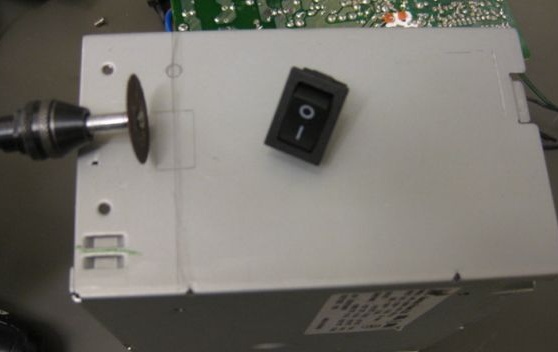
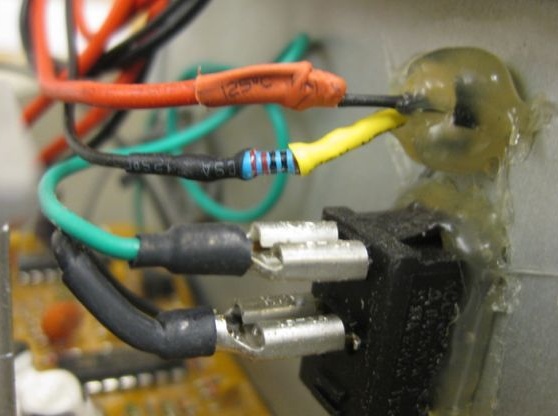
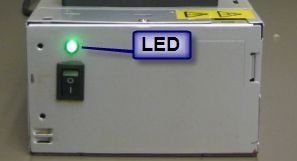
Step Five Power indicator
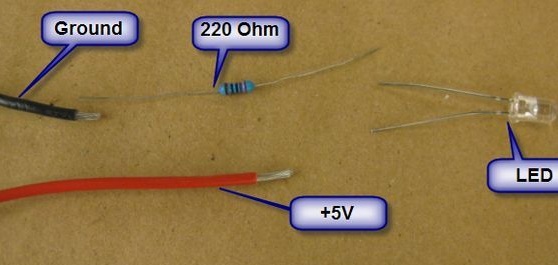
So that you have a clear idea of whether the power supply generates voltage, set a small 5-volt LED near the power button. It is installed between the red and black wires; for the LED, the author uses a 220 Ohm resistor. Solder the resistor and wires to the LED, and under the LED, drill a hole in the housing. Fix the LED on the other side with hot glue.
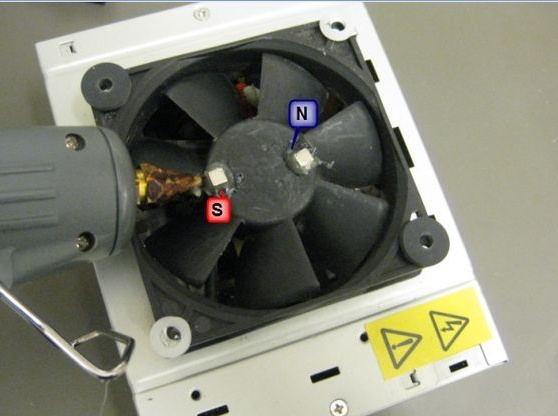
Step Six We install magnets on the fan
Glue two powerful magnets to the fan blades, neodymium will work well. Similar magnets can be found in old hard drives and other similar equipment. The author fastens magnets with hot glue. Try to mount the magnets at approximately the same distance from the center, as otherwise there may be strong vibrations. The author fixes one magnet up with the north pole, and the other with the south.
Seventh step. Making a table
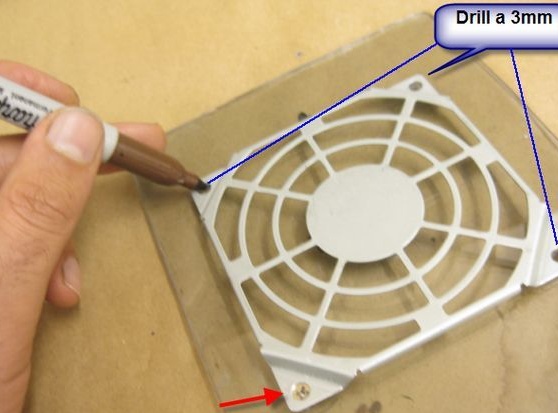
To conveniently place dishes on the fixture, you need to make a small table. The author makes it from plexiglass. We drill in it four holes for the screws with which it is screwed to the top of the fan. Attach the fan guard grill or the fan itself to the glass and mark the places for drilling holes.
Step Eight. Stirrer inside
Make the second part that is inside the dishes. It can be made from a piece of copper or plastic tube, inside which you can install small magnets. In principle, an ordinary metal object such as a steel rod will work no worse. Put a rubber tube or something similar on the part so that in an unforeseen situation, the internal rotating part does not come off the center and break the container.
Step Nine.
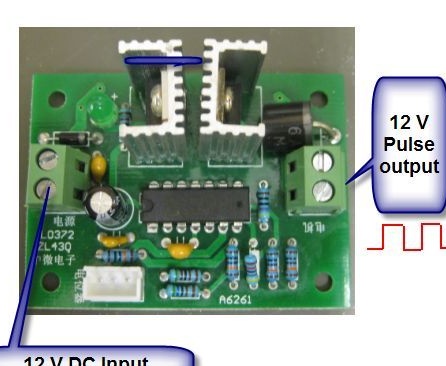
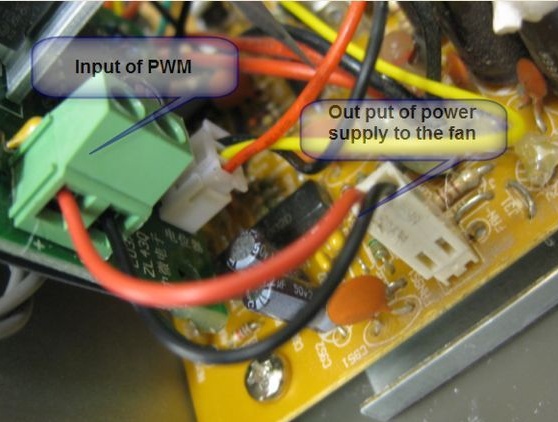
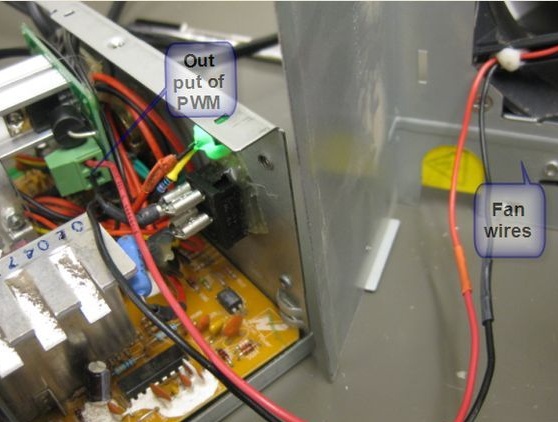
To adjust the engine speed, the author decided to use. Connect it between the motor and power in accordance with the diagram. The author had to pay for this controller only $ 4 on eBay.
In principle, the fan consumes little energy, so its speed can be regulated with a powerful variable resistor. You can also do several speeds, using all of the same resistors, the mass options, you decide.
Step Ten Electronics Installation
Install the controller inside the power supply, fix it to the wall with bolts or in another way. Under the controller, do not forget to make a gasket of cardboard or rubber, so that it does not short-circuit on a metal case. Connect all necessary wires in accordance with the diagram.
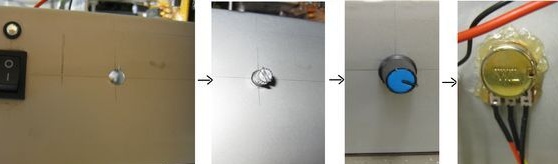
Now you have to take one more step - install the adjustment knob. Drill another hole under it in the housing and screw it on. Typically, these handles are attached with a nut. If not, use hot glue again.
Step eleven. Final touches and verification
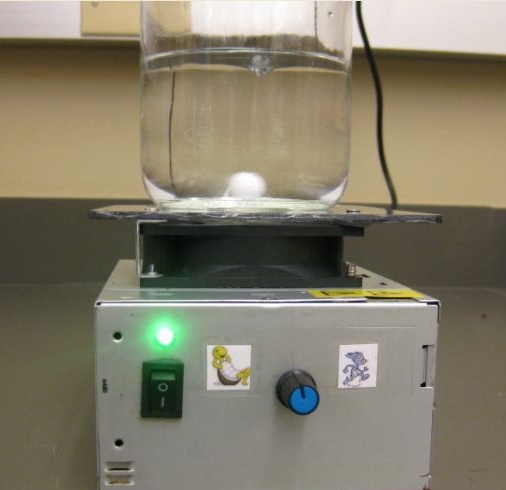
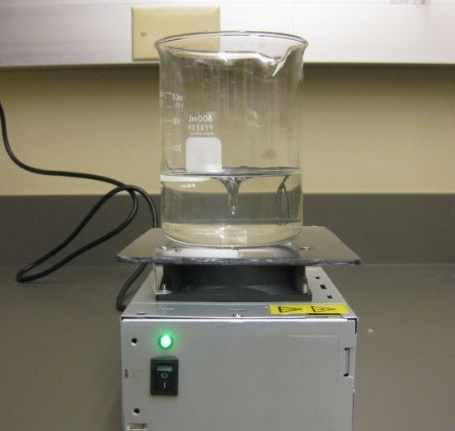
That's all, the device is ready to use.According to the author, it copes with its task perfectly when working with fluid substances, for example, with water. The only danger here is that the inner rotating part at high speeds does not come off the center and break the dishes with reagents. In this regard, she needs to wear something soft.
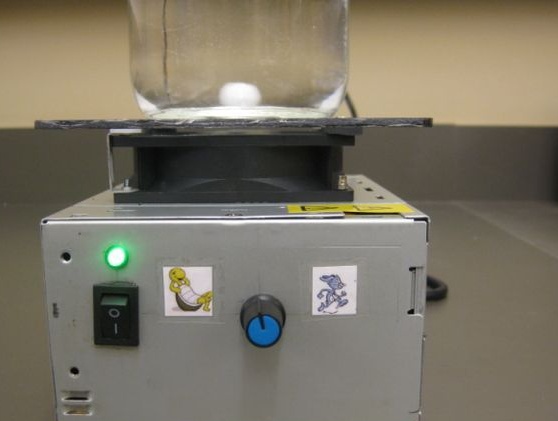
The finishing touch of the author was stickers on the homemade body. He glued pictures of a turtle and a hare near the regulator in order to visually quickly understand at what speed the mixer works.