
Winter is a great time of the year to make a large supply of gear for the summer. Indeed, when fishing for a predator, a rather large number of gears are often lost. Often the bait fisherman clings to the snag, and there are also cases when the tackle bites off a predator and swims away with it.
In order not to spend a lot of money on the purchase of gear, you can make them do it yourself. Today we will consider the manufacturing process of such interesting gear as.
This bait is a type of wobbler, only it does not swim on the surface, but sinks to a certain depth. In addition, when fishing with a jerk, the wiring of the gear is completely different. You need to make sharp jerks with the rod, in which the bait moves sharply in the water column in different directions. This game imitates a situation when a wounded fish dies and a predator simply can not resist to let it pass by itself.
made flat and well streamlined, thanks to this they quickly develop high speed during wiring. They are especially good when fishing at depths, where a large predator often lives.
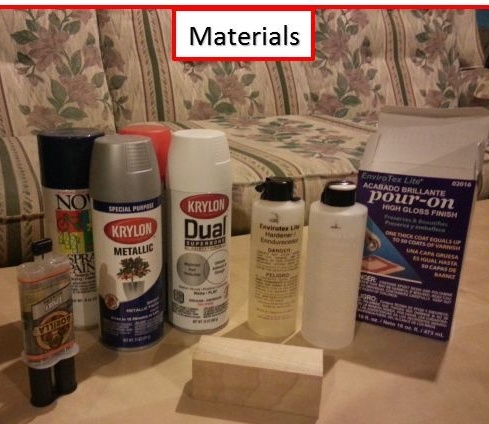
Materials and tools that the author used for homemade:
Material List:
- wooden beam or boards;
- paint;
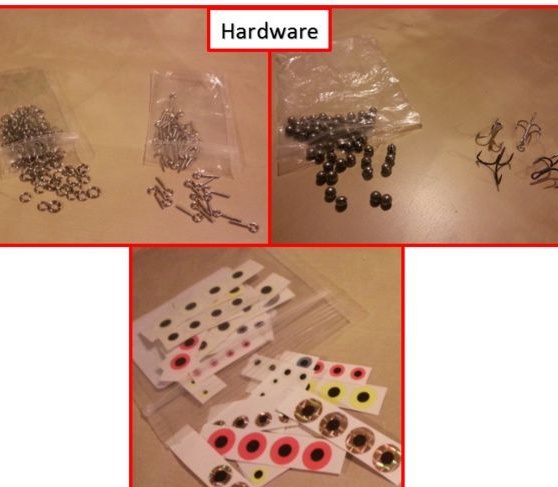
- all sorts of little things for making eyes;
- epoxy adhesive;
- lead weights or steel balls;
- metal loops for fastening hooks;
- fishing hooks with rings.
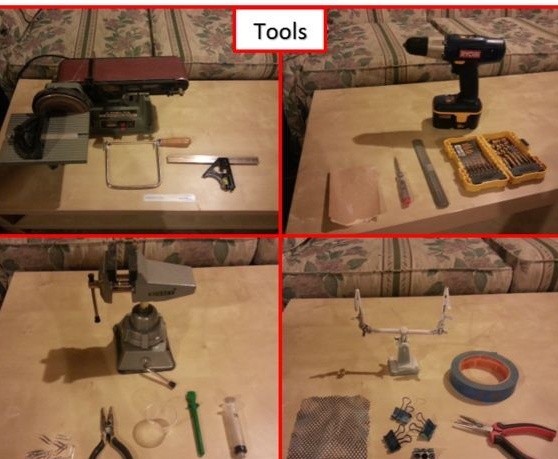
Tool List:
- rasp;
- sandpaper;
- belt sander (optional, but convenient);
- drill with drills;
- marker;
- ruler;
- brush;
- vice, clamps;
- pliers.
Jerk manufacturing process:
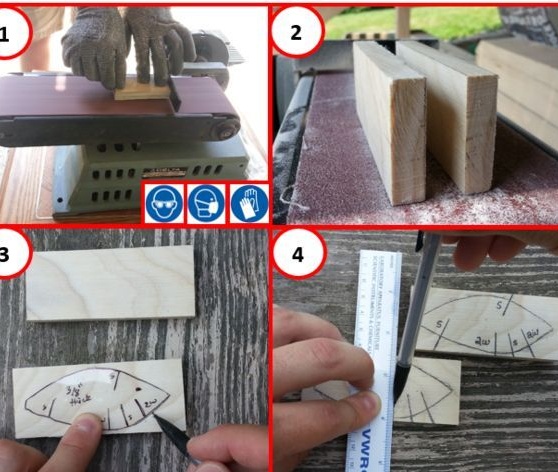
Step one. Lure Pattern
View online file:
The author attached the bait template already ready. You can download it and make exactly the same for it. And you can create your own or change the one that the author did. The author recommends not changing the dimensions of the template, since everything has already been set up for printing on the printer.
There are marks on the template, they indicate where to drill holes for the eyes and the installation of weights. The author recommends creating a template from dense material, and preferably transparent, for ease of manufacture.
Step Two We transfer the template
Now take the finished template and transfer it to the workpiece. Just attach the template and circle with a pencil.
The author’s workpiece turned out to be too thick, so it was decided to cut it lengthwise into two halves. Here you need a band saw or you can use a conventional hacksaw.
Thus, you can make two blanks for bait at once, only cut the blank first along the contour, and then cut lengthwise into two halves.

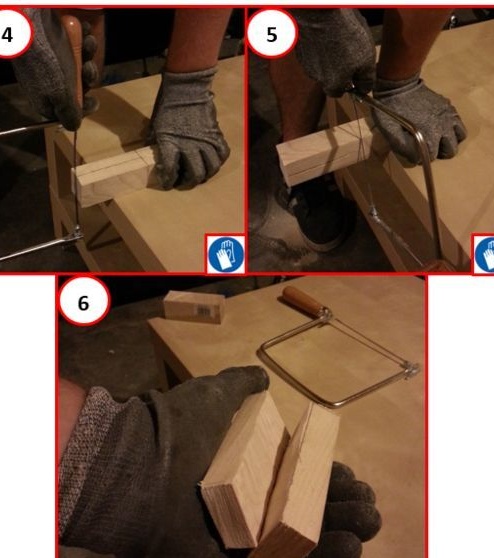
Step Three Cut and grind the profile
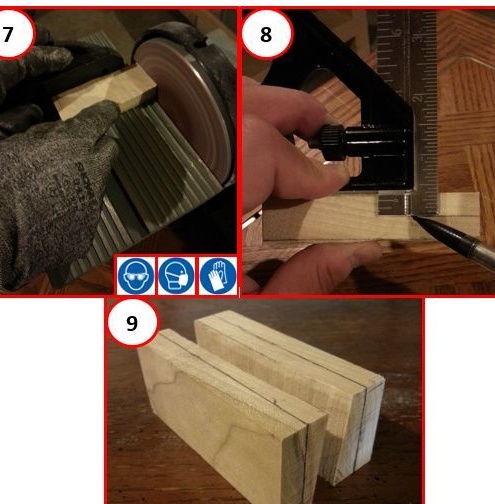
Cut the profile of the jerk with a band saw, a jigsaw, even a manual one, is suitable for these purposes. After this comes the grinding stage. This work is much easier if you have a belt sander, but such a tool is quite expensive, however, there are a lot of inexpensive manual options.
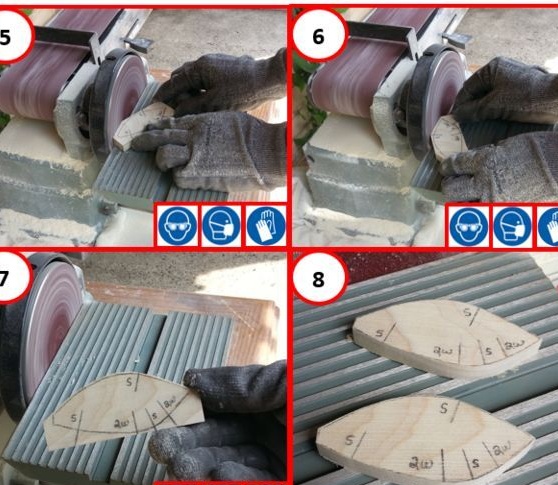
Sand the workpieces well along the sides and along the contour. Make them absolutely smooth. Rough edges can be ground with a rasp. If you work exclusively by hand, we take coarse-grained emery paper and carefully grind the surface. Then slowly we select the graininess less and less, thereby bringing the surface to an ideal.
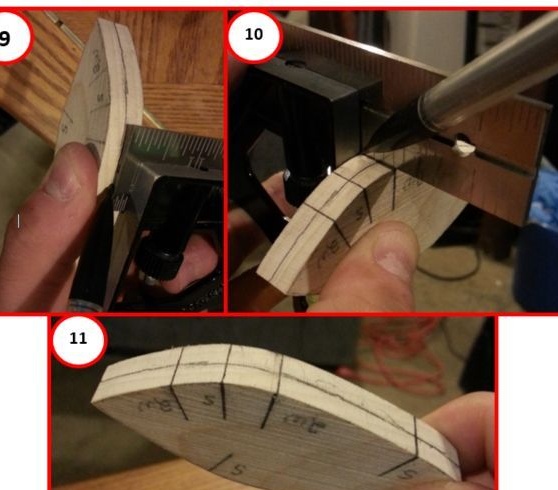
Step Four We install loops and weights
First of all, we take a drill and drill holes in the places designated by the author. First install the loop. This is a very important point, since the loops must be fixed very securely, otherwise the fish may go away with the hook in the mouth. It is best to use hinges with a thread, when you twist them into a tree with epoxy, they will hold very tightly.
The hinges can easily be twisted from the wire yourself using pliers. Apply epoxy glue to the hinges and screw them into place. Allow the glue to dry completely.
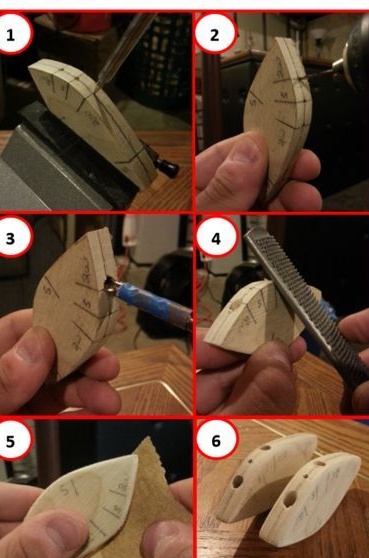
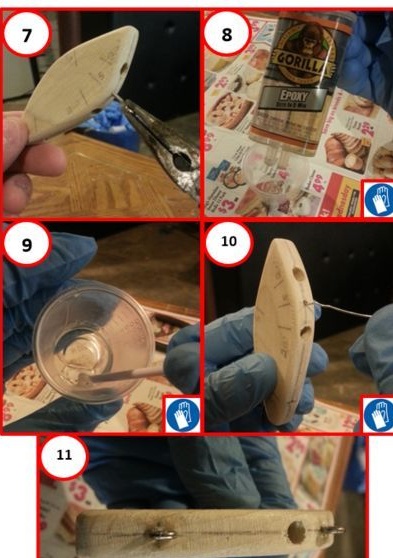
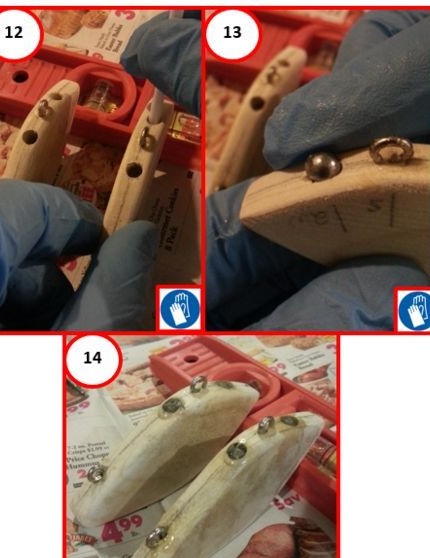
Now we begin to install the weights. Thanks to them, the tackle will sink to the desired depth, then choose the weight of the weights already at your discretion. You will need lead balls or something similar. Drill holes in the designated places so that weights come into them. Pour some epoxy into the holes and drown in the load seats. Wipe out the displaced adhesive immediately. In the end, leave the whole thing to dry, usually the epoxy dries 24 hours.
Step Five Woodworking and painting
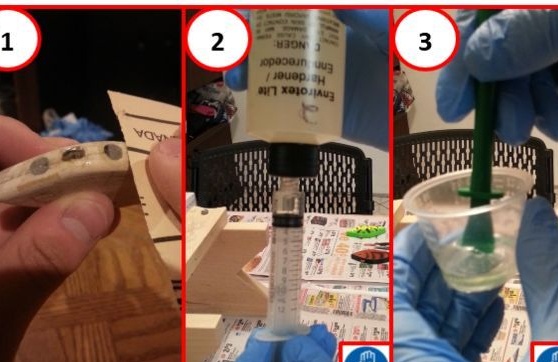
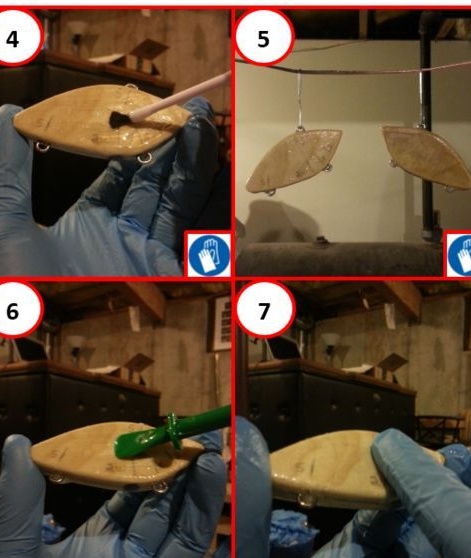
Wood is very afraid of water, it cracks pretty quickly, if you do not make any efforts to protect it. The author decided to make an epoxy protection coating. Mix the resin in the right amount and proceed with processing. First, thoroughly coat the installation sites of the loops and sinkers, since it is through these dreams that water often passes. Then take a brush and thoroughly coat the entire surface of the jerk with resin, do not leave open areas. When the layer dries, you can apply another for reliability.
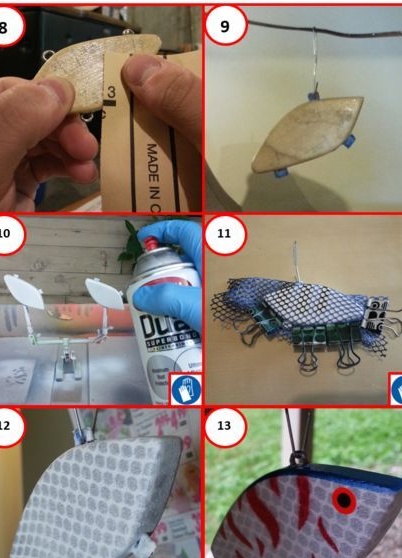
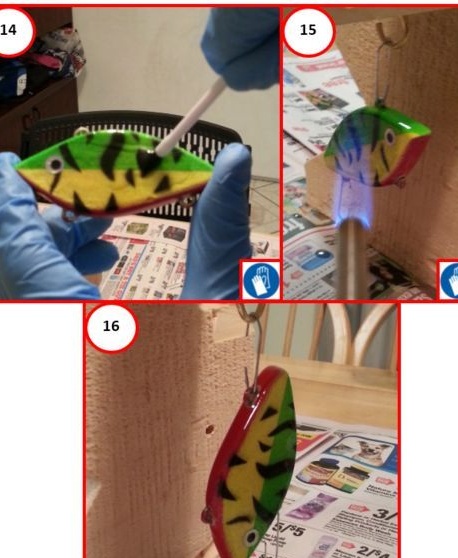
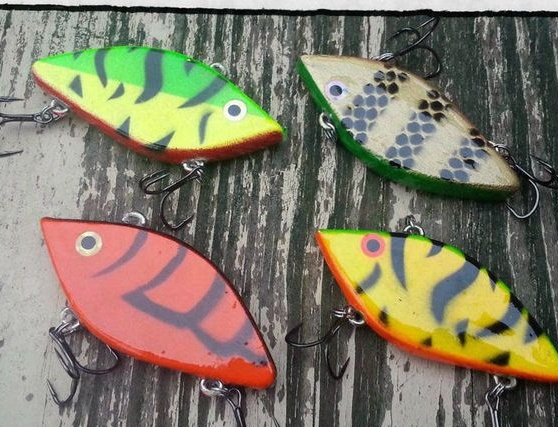
After epoxy treatment, the surface will be uneven, the product must be sanded again. Take 150 grit sandpaper and make the surface even and smooth. That's all, now you can start painting, the paint will perfectly fall on the sanded epoxy coating. First apply the base coat, usually it is imitated under the scales, painting the product in silver. Well, after that, draw stripes and other details that interest you.
A mandatory attribute for tackle is the eyes, many anglers believe that their presence greatly affects the catch. Eyes can be found in old toys and so on. In the worst case, they can be drawn, under a layer of varnish or epoxy, they will look pretty realistic.
After painting, the tackle is necessarily varnished and it is best to apply several layers. Thanks to the varnish, the paint will look better, and it will serve much longer. From time to time, the varnish coating can be updated.
Step Six Final stage
That's all, the jerk is practically assembled, the final touches remain.Fasten the hooks on it, the surest way is tees. With the sizes determined already depending on the size of the gear and the expected production. You can also put doubles, they are no less catchy than tees. In some cases, when the tackle is not attacked by a very large fish, you can put ordinary single large hooks. Their advantage is that it is more difficult to cling to a snag and so on.
Hooks are fastened in the classical way using rings. If desired, you can attach red ropes to the hook to simulate fins.
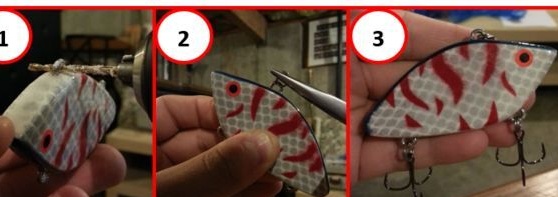
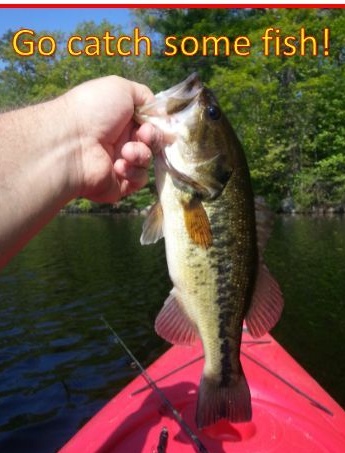
To attach the tackle, be sure to use the swivel, so the fishing line will not twist. When catching a large predator such as pikeperch, pike and the like, use fluorocarbon or metal leashes so that the fish does not bite the line. That's all, good fishing, no tail, no scales!
Make wiring in sharp jerks, withstand a certain pause. During this time, the tackle will move by inertia for a certain time, and then it will gradually sink, it is at the moment of a pause that the predator often attacks the victim.