

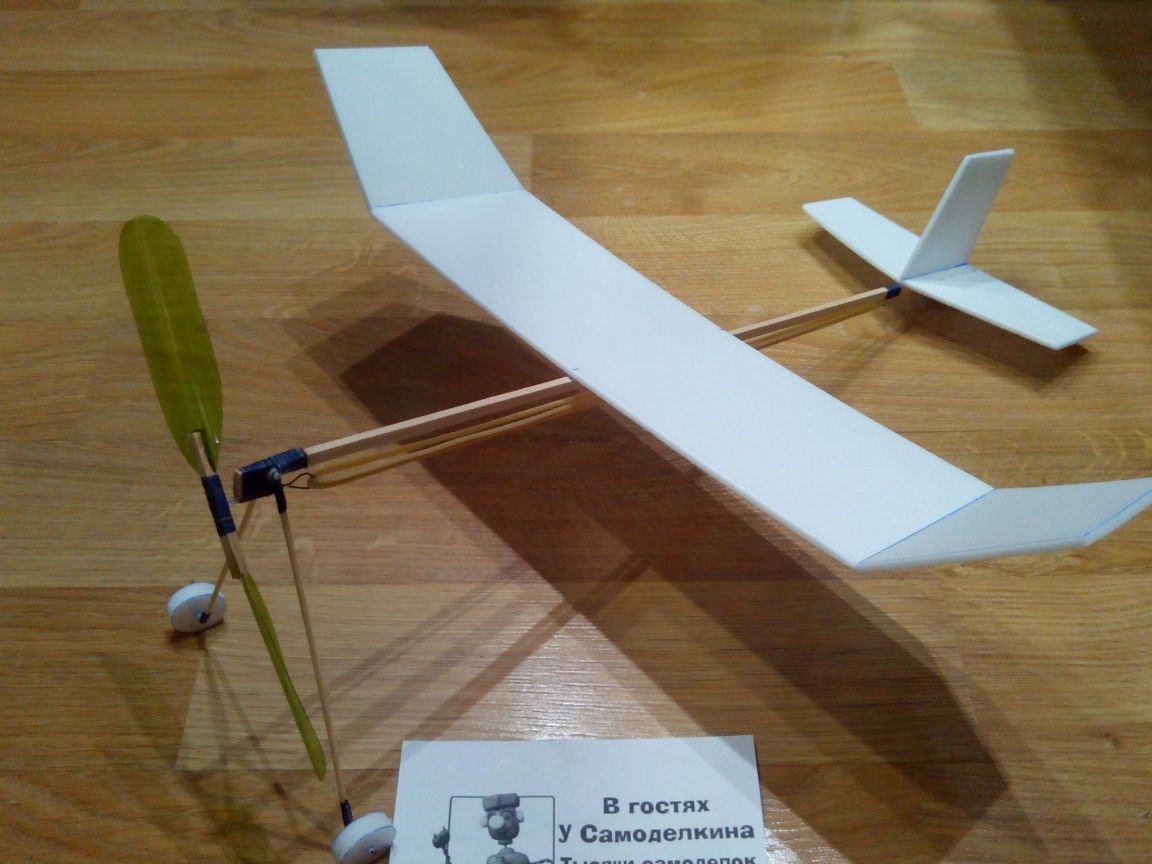
This article describes in detail the manufacture of a rubber-motor aircraft model from ceiling tiles, battens, and other improvised materials. In time, the production will take a couple of free evenings, and any child will enjoy the launches.
Materials:
- ceiling tile
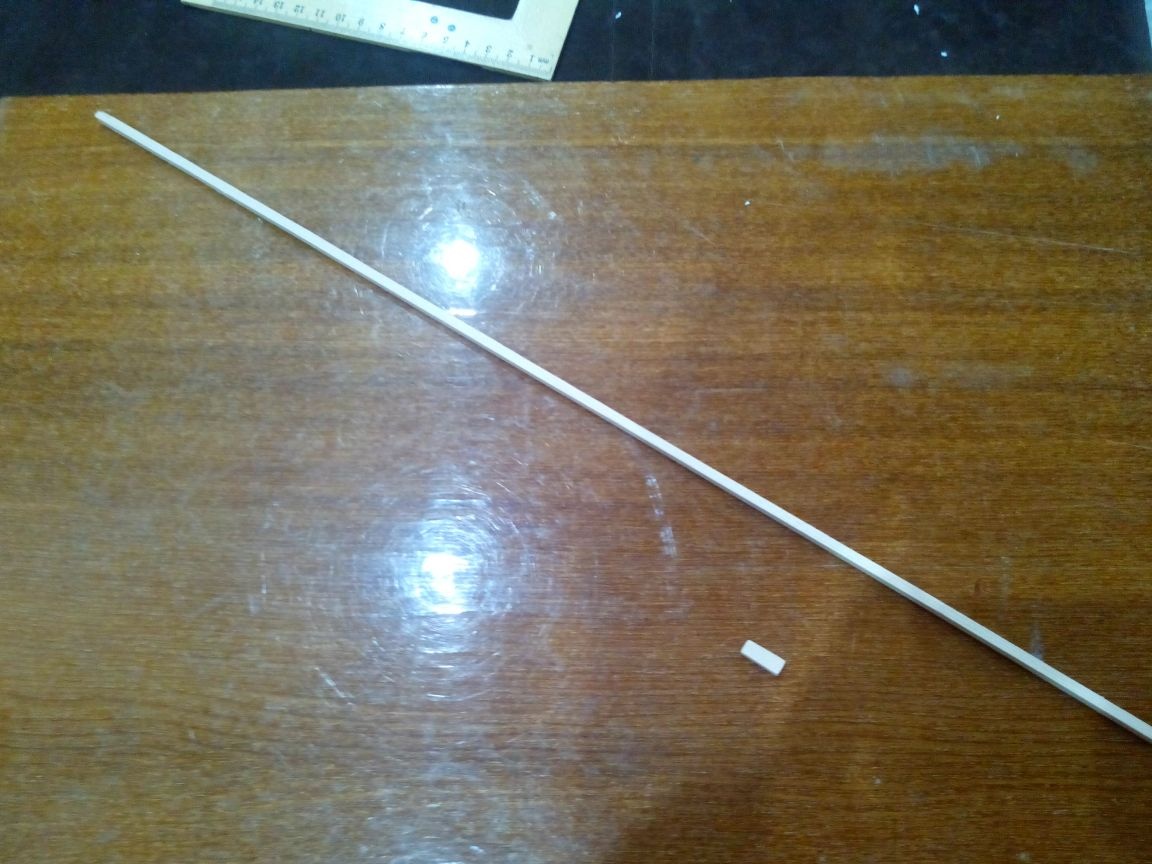
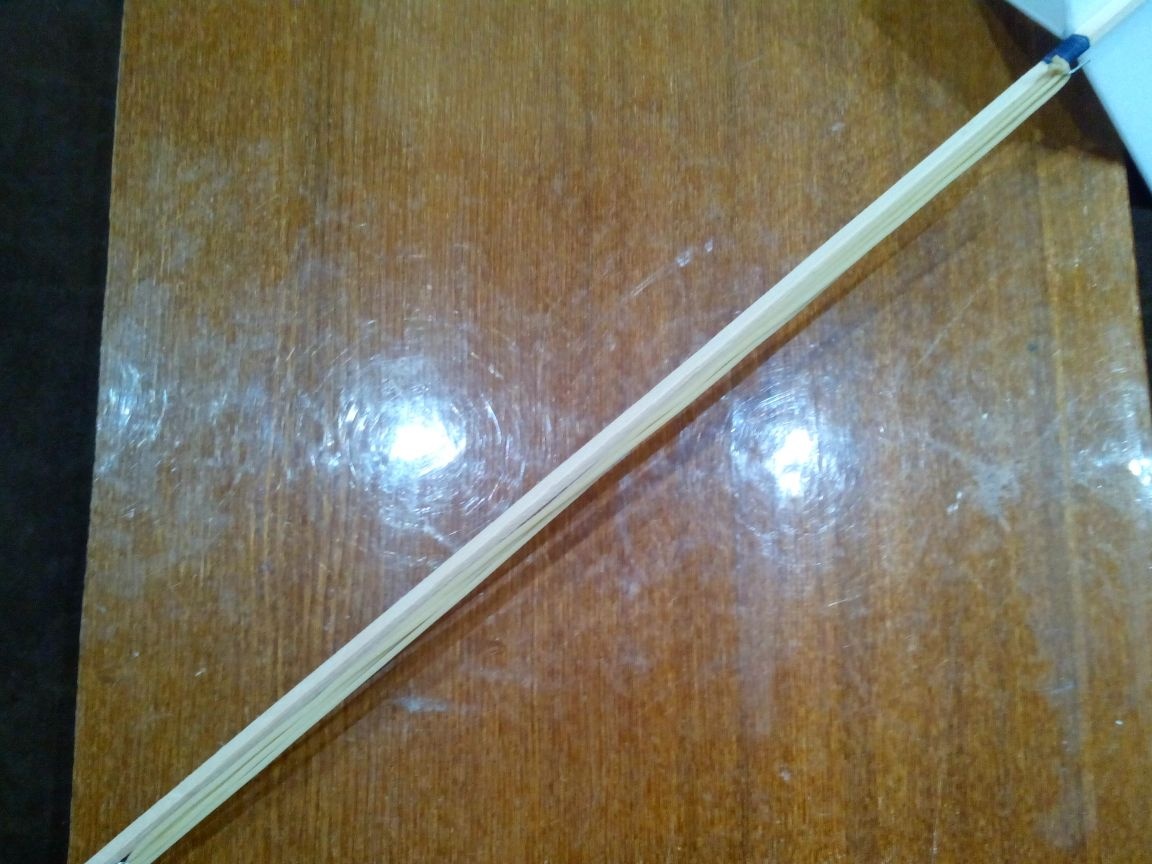
- rail 5 * 3 * 550 mm
- steel wire (or paper clips)
- threads
- fishing tires
- ear sticks (or empty stick pins)
- plastic bottle
- paper
- adhesive tape
- bamboo skewers
Instruments:
- ceiling adhesive, PVA and epoxy (five-minute)
- cutter
- awl
- sandpaper
- screwdriver and thin drills
- pliers
- nippers
- jigsaw
- a pen
- ruler
- square
- scissors
A drawing of the model, or rather a diagram with dimensions - in this PDF file.
View online file:
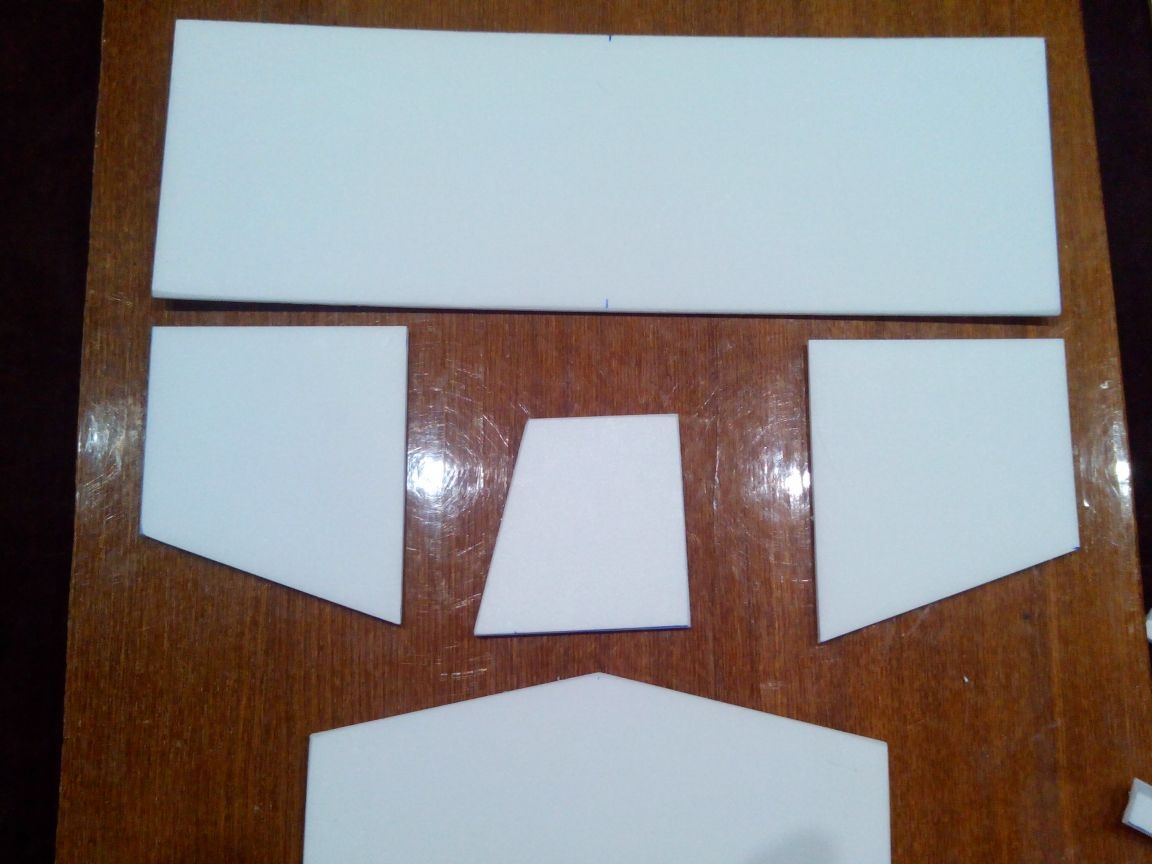
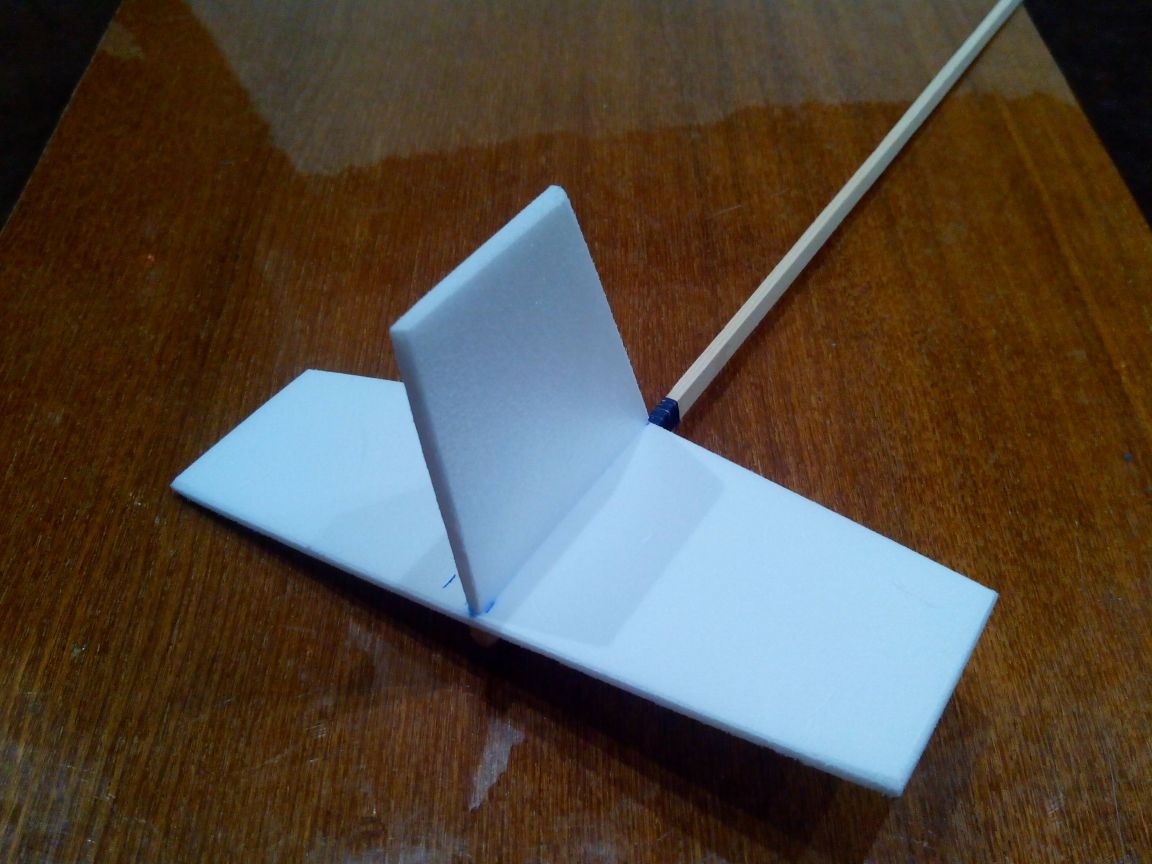
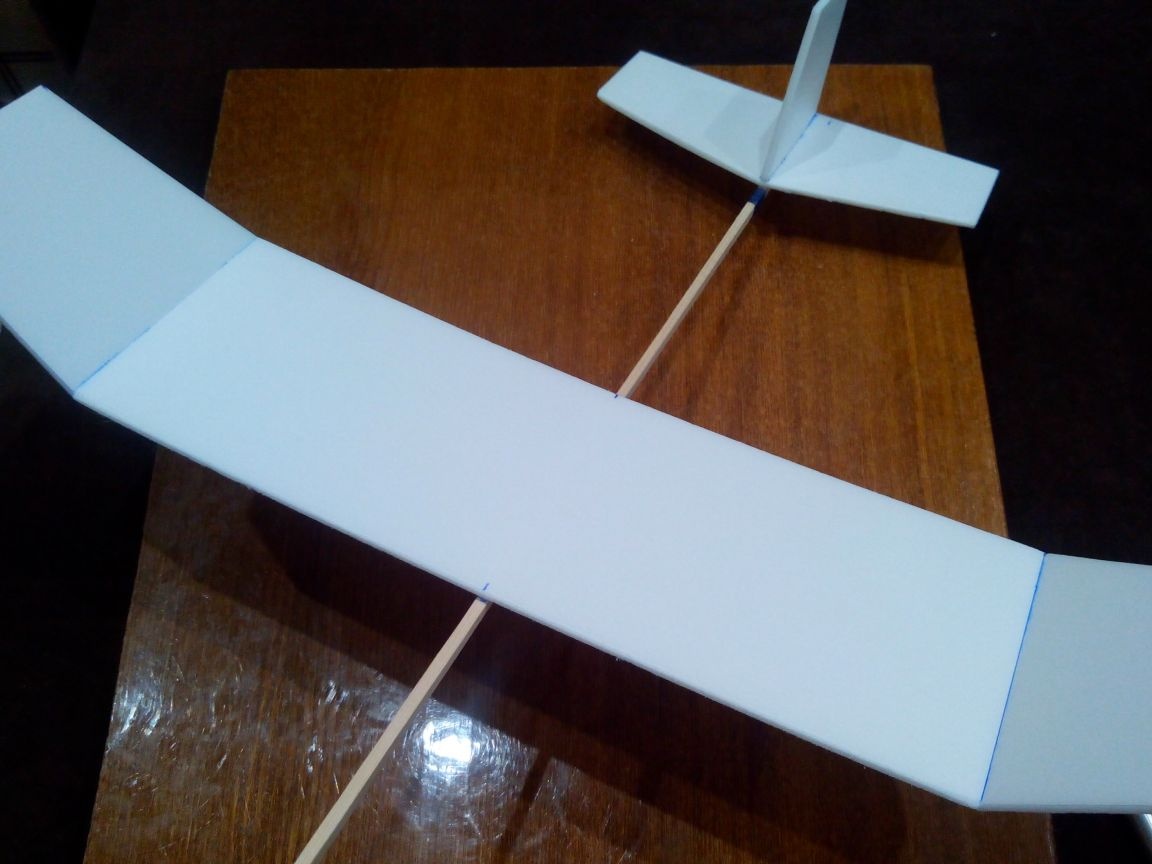
Step 1. Wings and tail.
We draw a wing, wing “ears”, keel, stabilizer directly on a sheet of ceiling tile and cut them out with a cutter in a ruler.
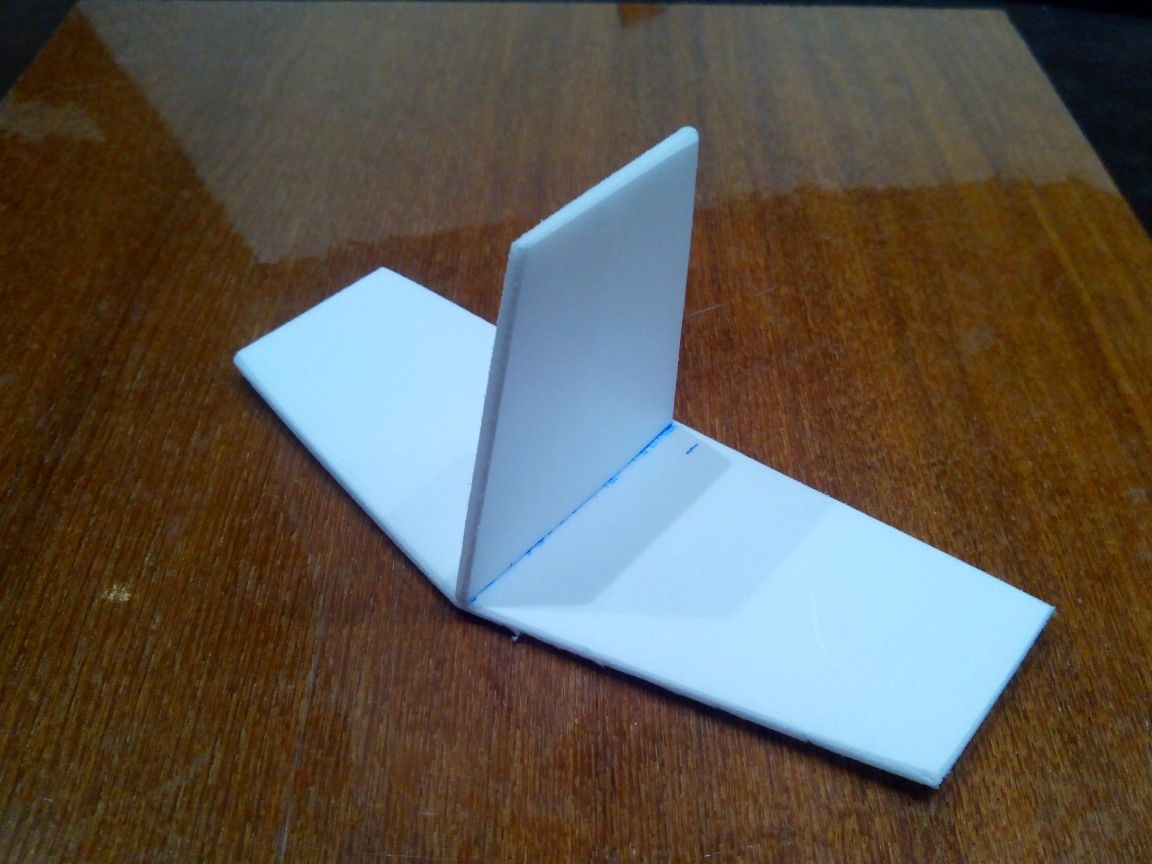
We process the edges of the keel and stabilizer with an emery cloth, rounding them a little, glue the keel to the stabilizer (preferably on a square) and set aside to dry.
The edges of the “ears”, which will be adjacent to the ends of the wing, are ground with sandpaper at an angle.
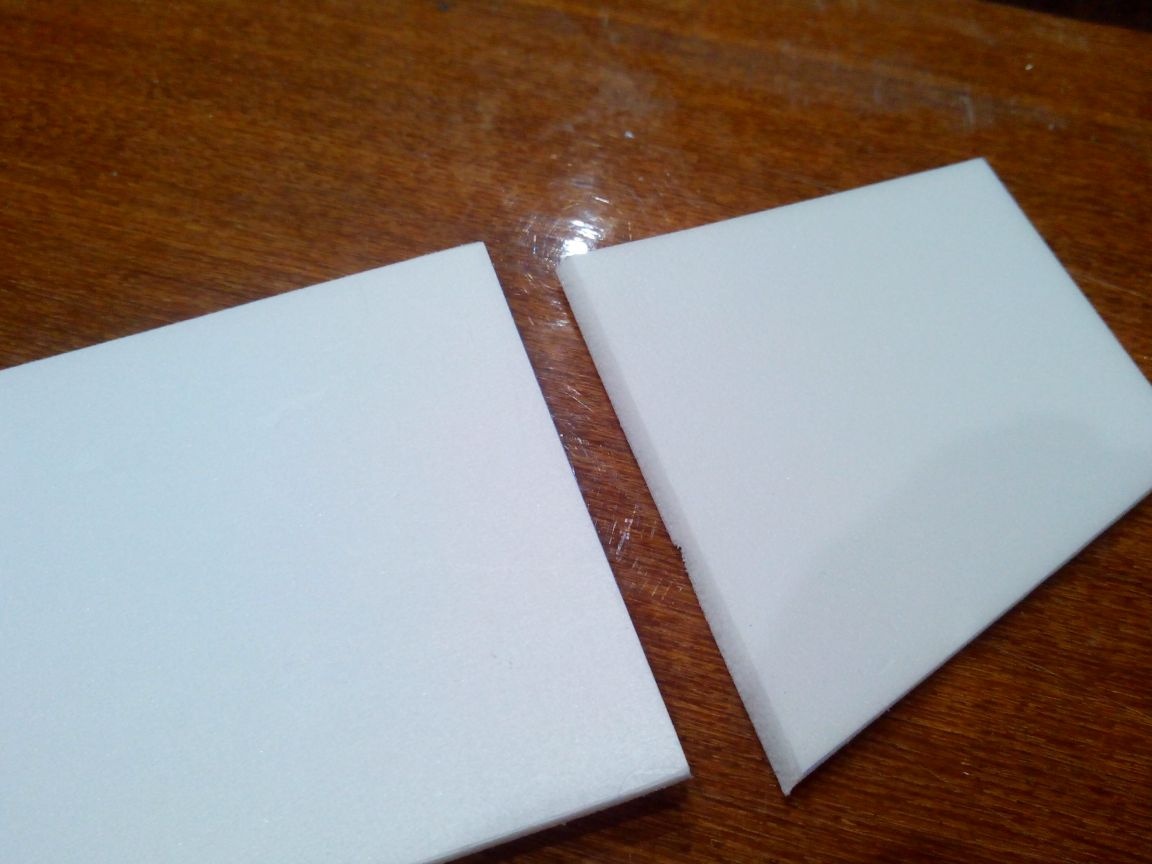
Then we attach the “ears” to the wing, comparing the gluing angle on the ruler, and leave to dry.
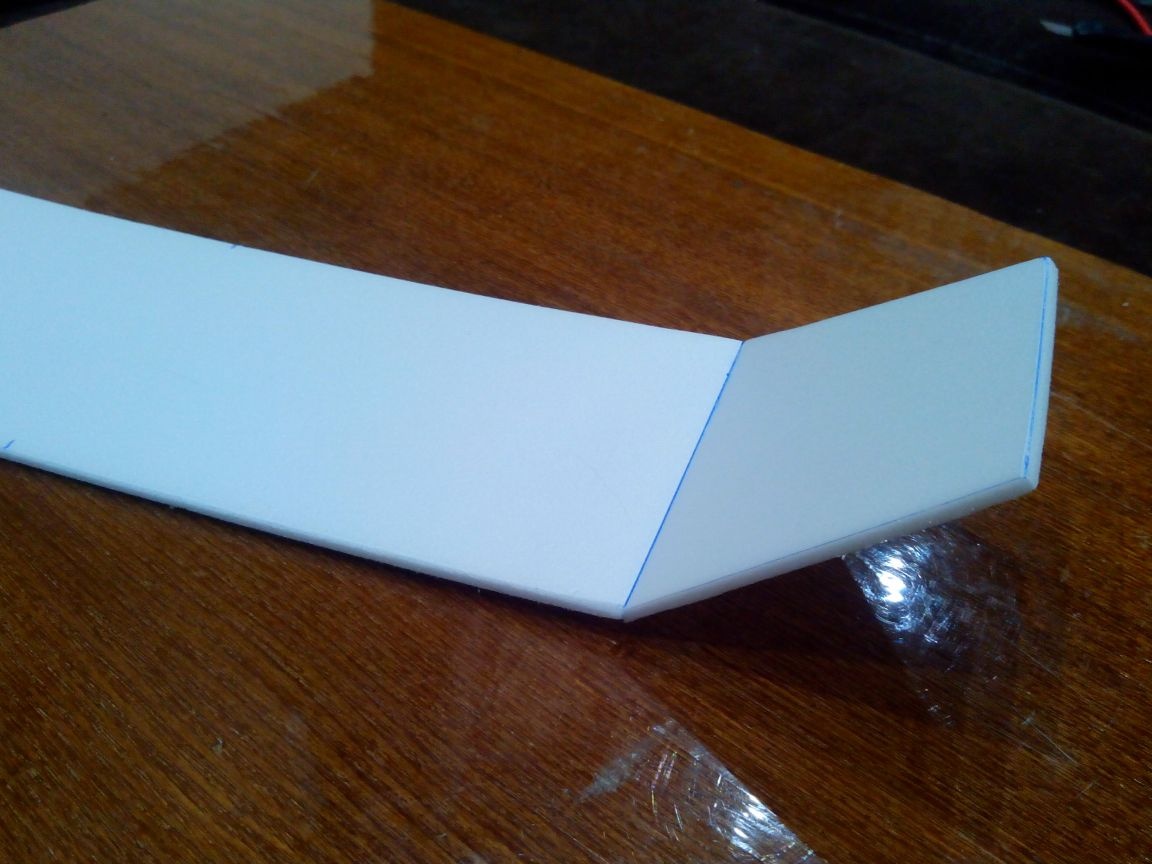
“Ears” on the wing are needed instead of the transverse angle V to provide the model a more even flight.
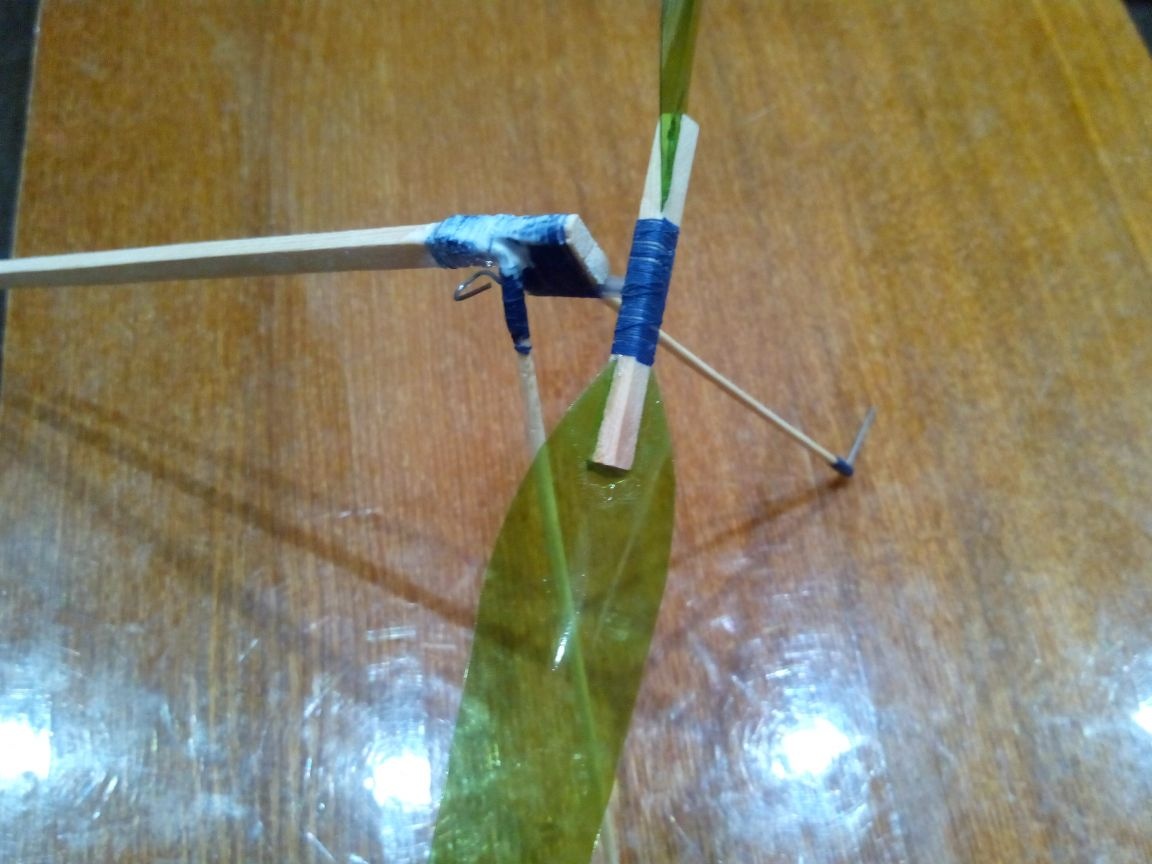
Step 2. The fuselage and the rubber engine.
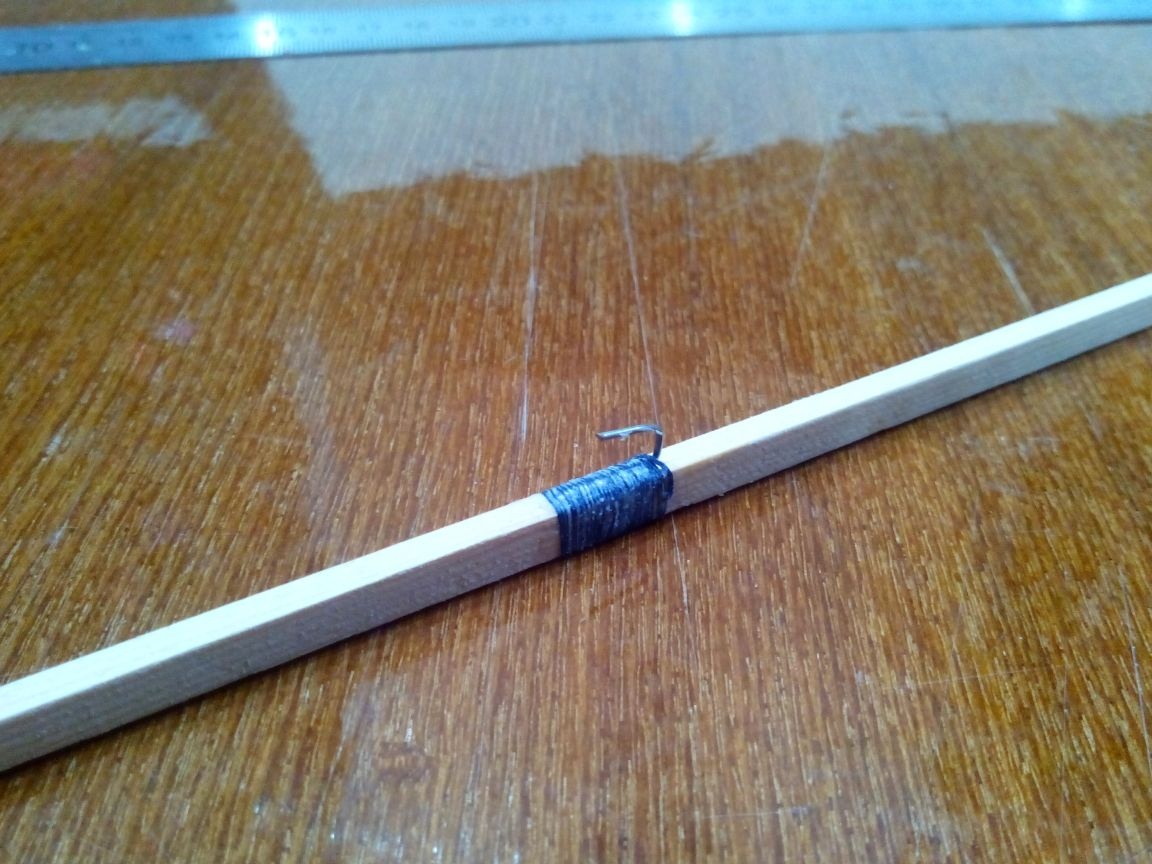
We take a rail with a cross section of 5 * 3 mm and saw off a part of it with a length of 480 mm (the fuselage itself) and 15 mm (engine mount).
From an ear stick or rod from the handle, cut a piece 20 mm long and glue it and the engine mount to the end of the fuselage rail. This tube should protrude a few millimeters forward. And do not forget to make a small mowing, otherwise model will greatly divert to the side.
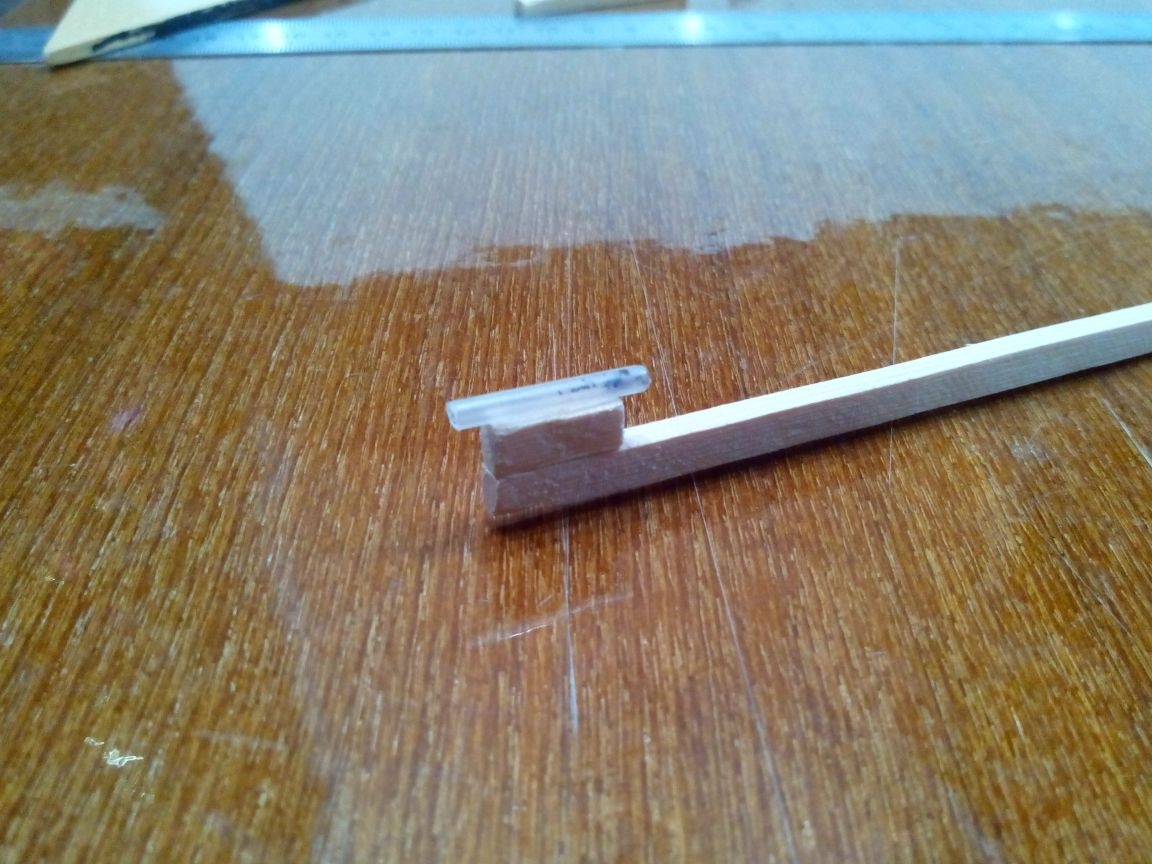
Then we wrap the place of gluing with thread with PVA glue.
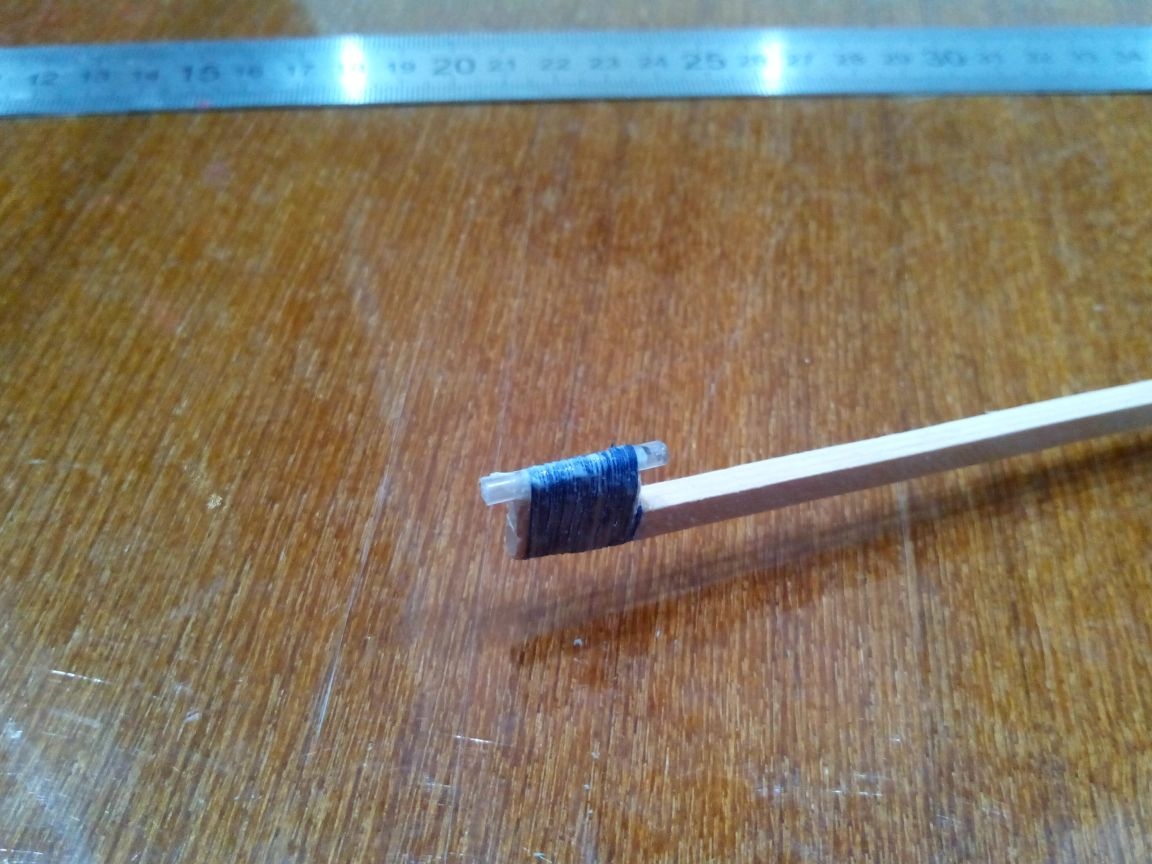
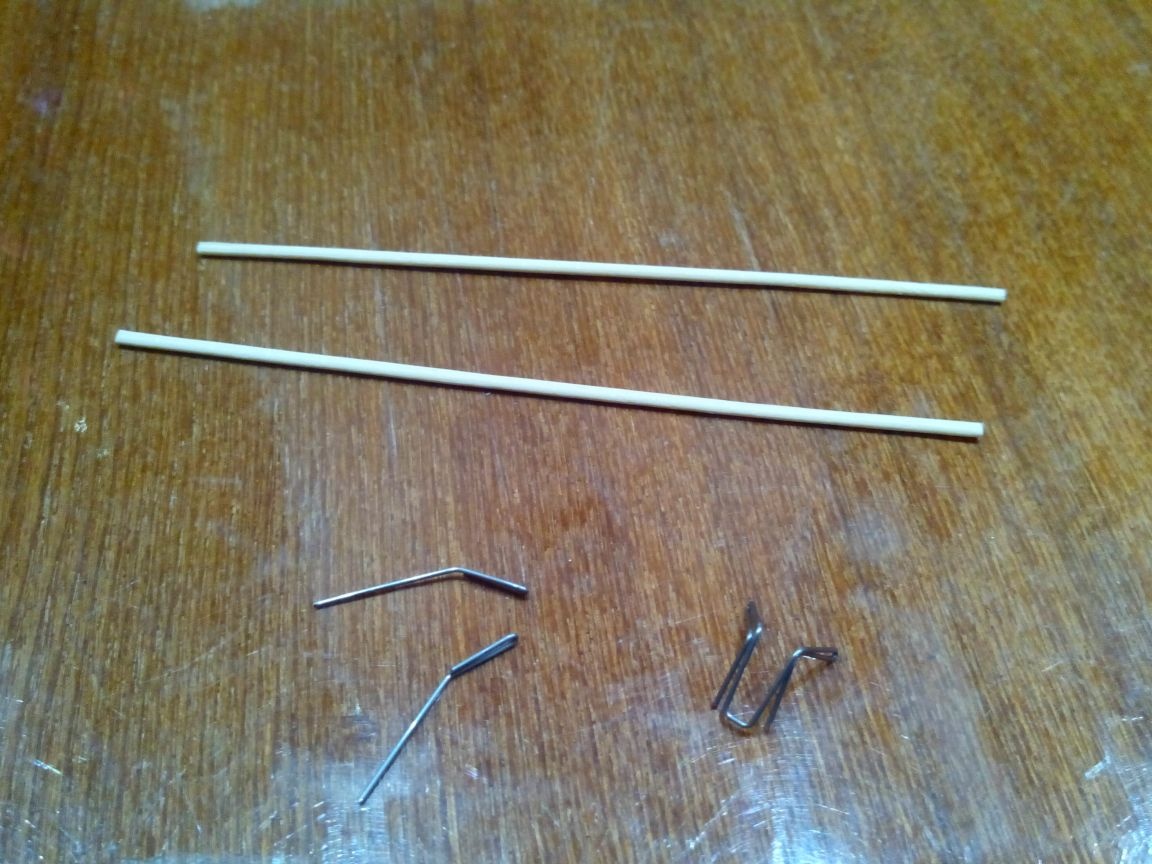
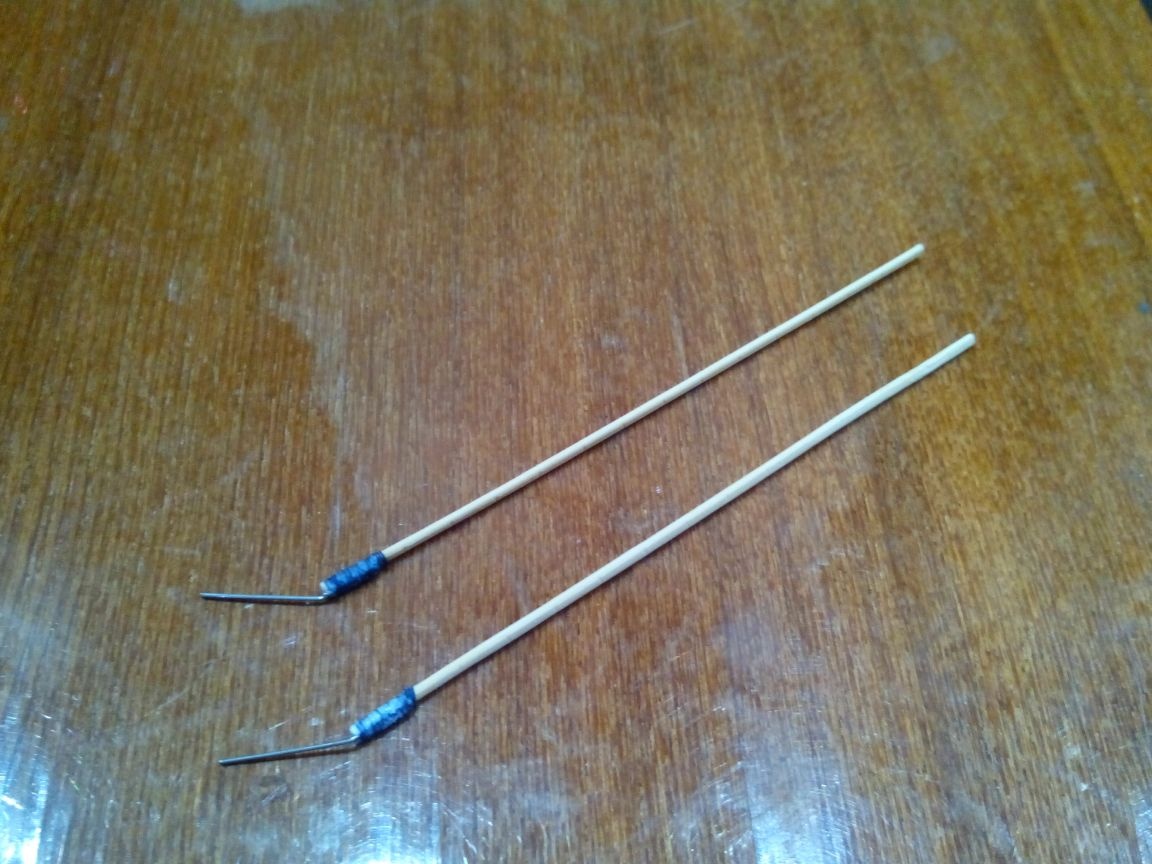
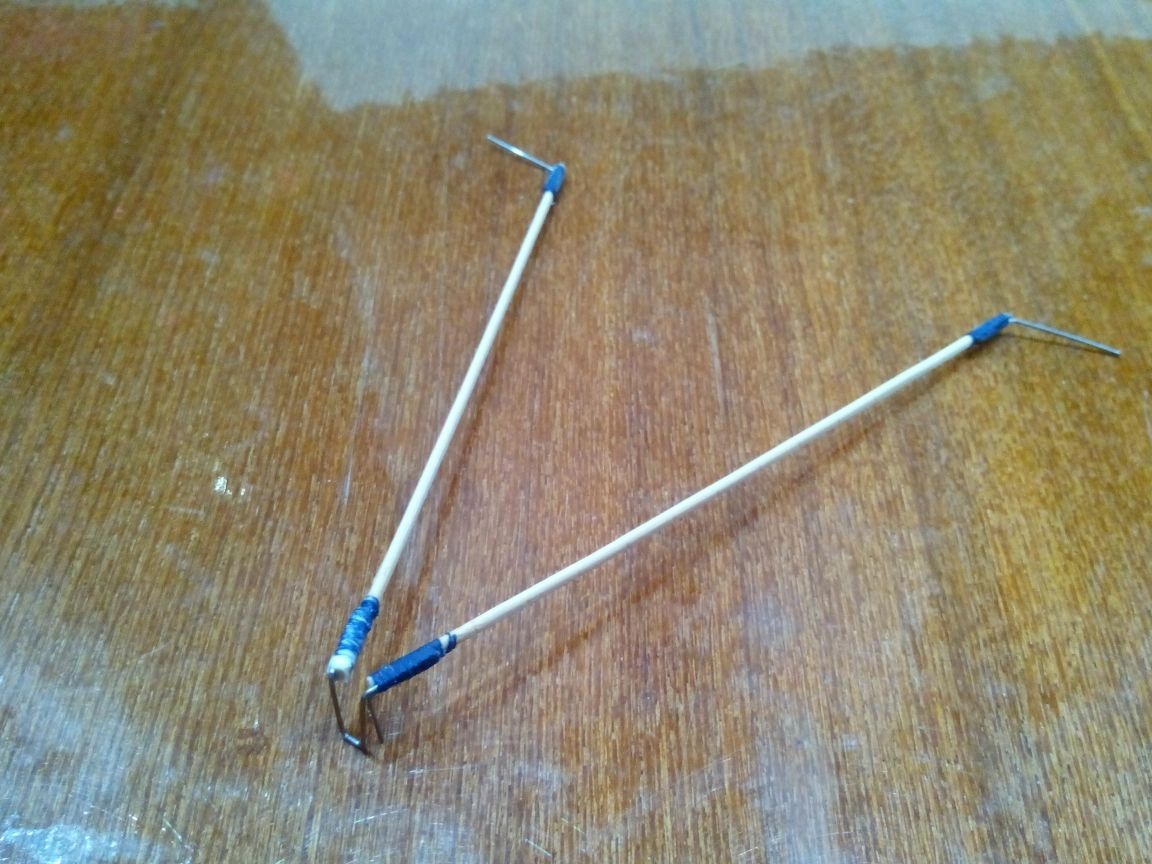
We bend the rear hook for the rubber engine from steel wire, and make a small hole in the tail of the fuselage with an awl.
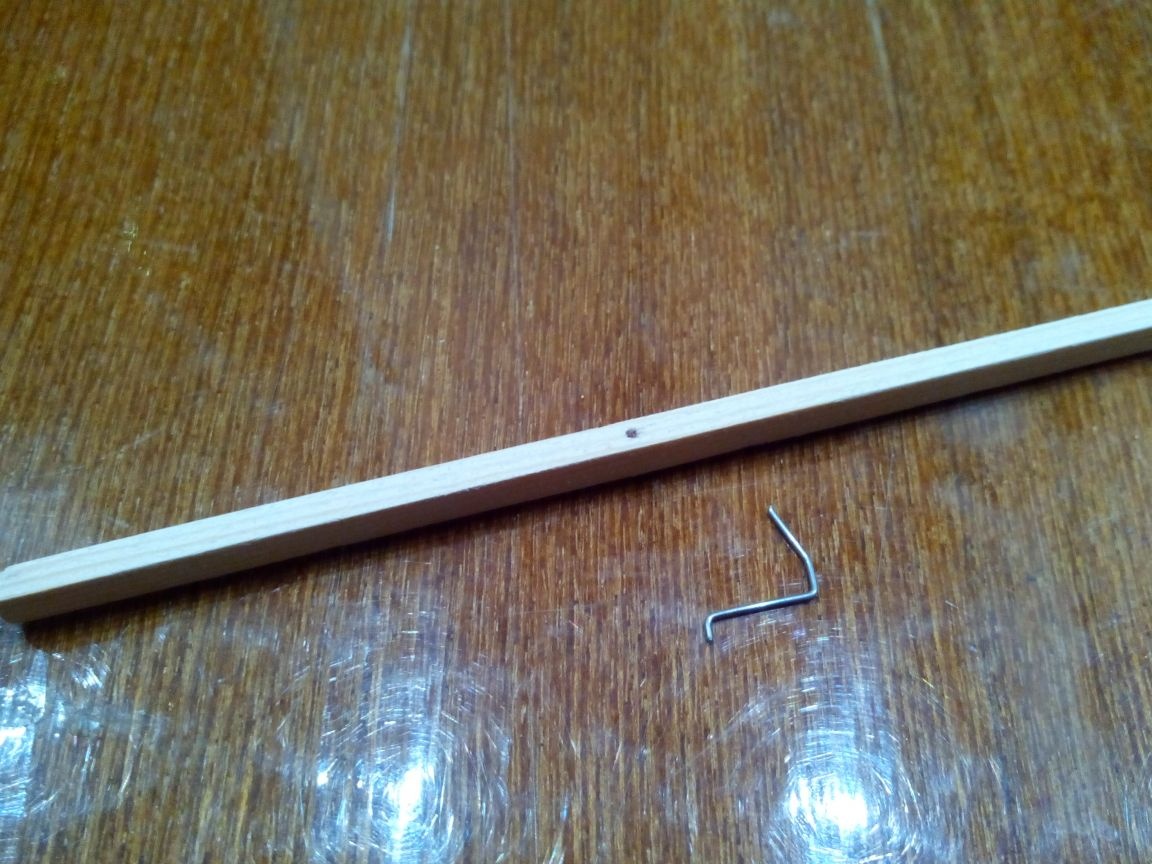
We insert the hook into the hole and wrap the thread with PVA glue.
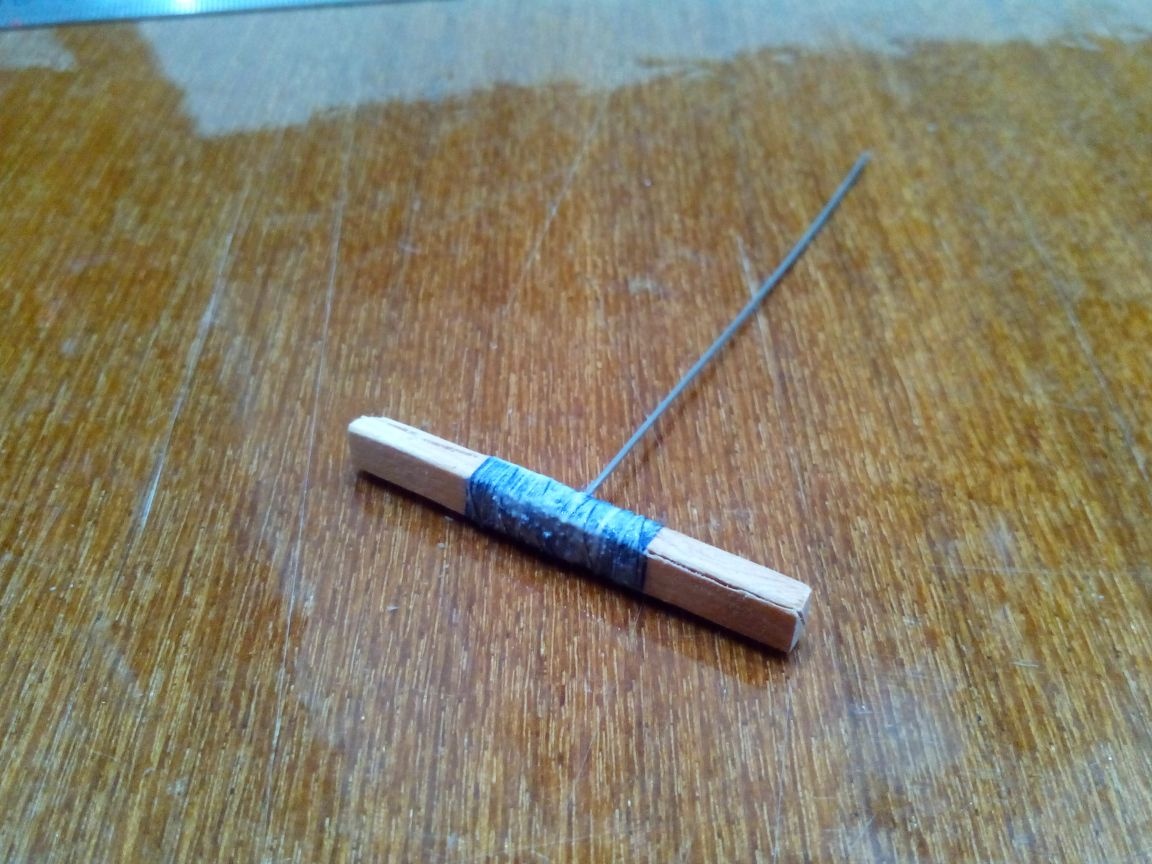
We make the hub of the screw from the same rail - length 50 mm. We make marks of 15 mm from the ends of the hub and make cuts to these marks with a jigsaw, focusing on the ribs, that is, on the diagonal, if you look at the hub from the end. We bend the axis of the screw from the steel wire and insert it into the hole drilled in advance in the center of the hub.
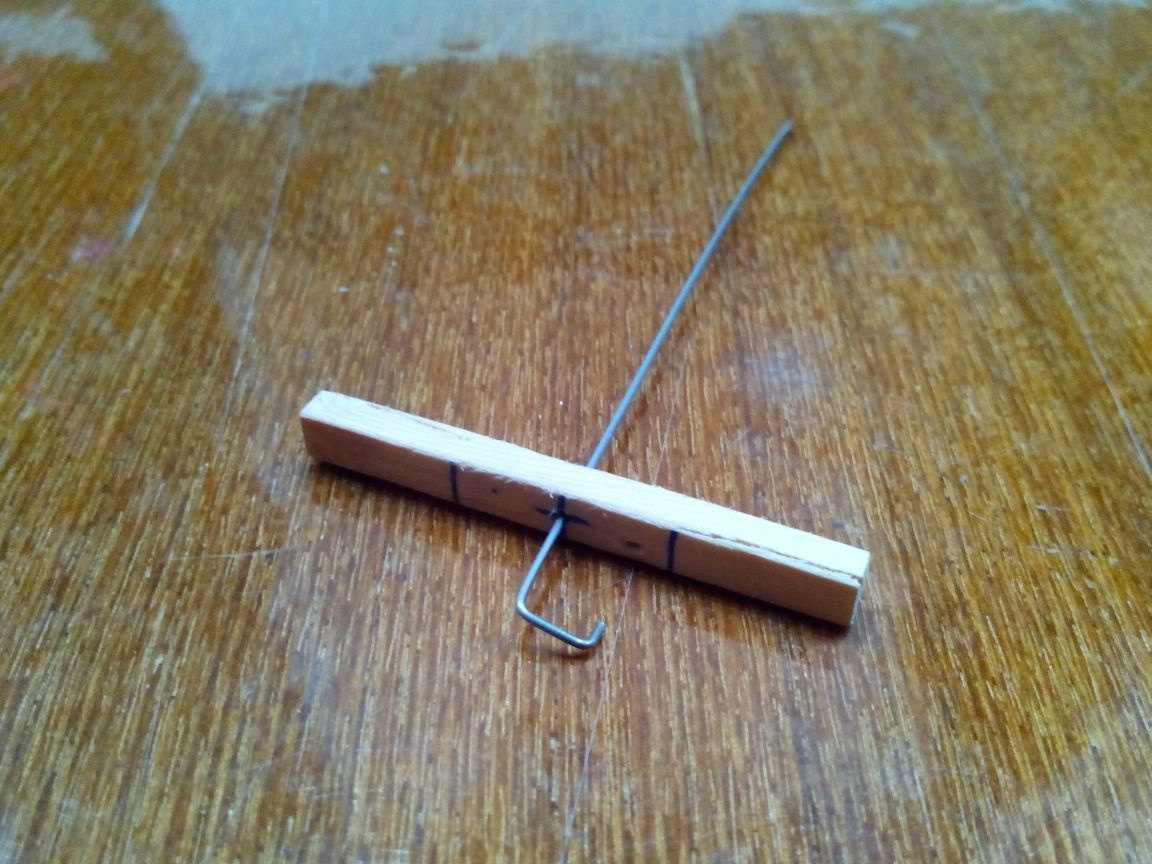
We wind the axis with PVA glue.
On the sheet of paper we draw the templates of the blades (length 90 mm, width 30 mm) and cut out.
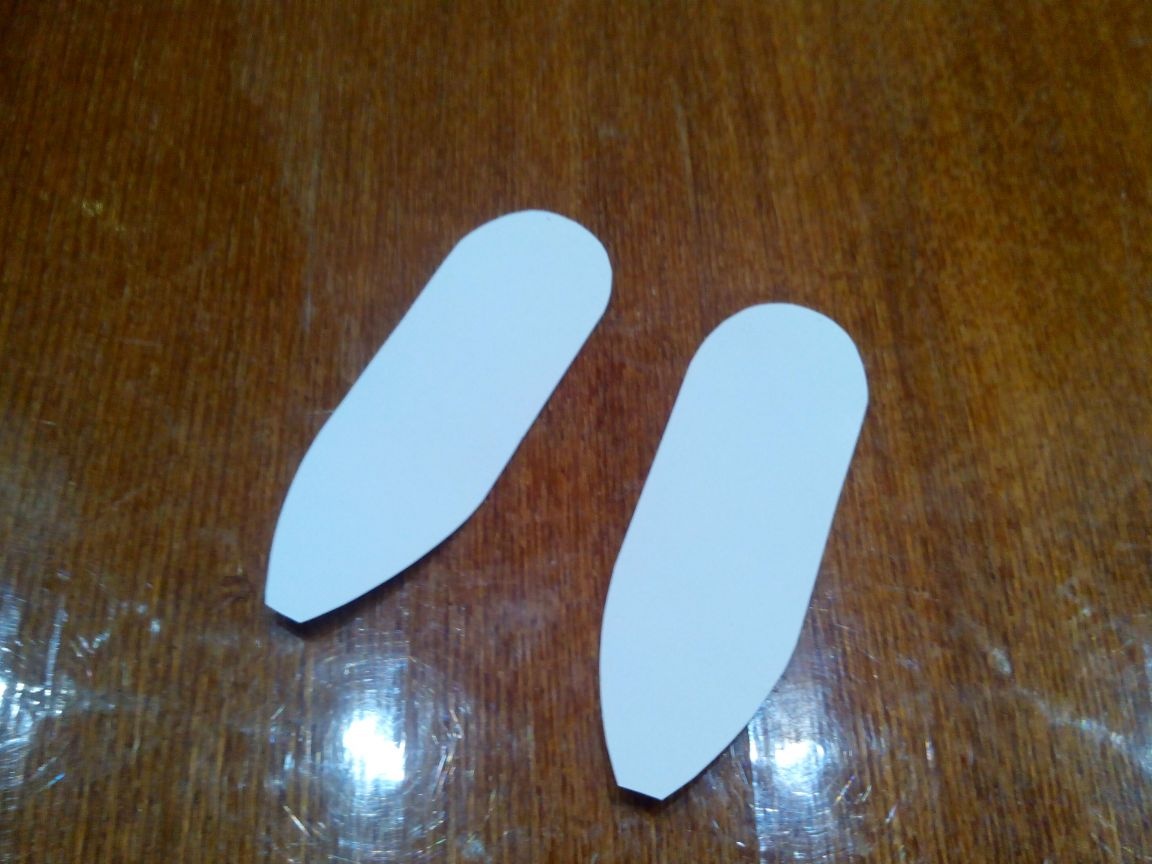
Glue the blade templates to the plastic bottle along, so that the blades have a convex-concave profile.
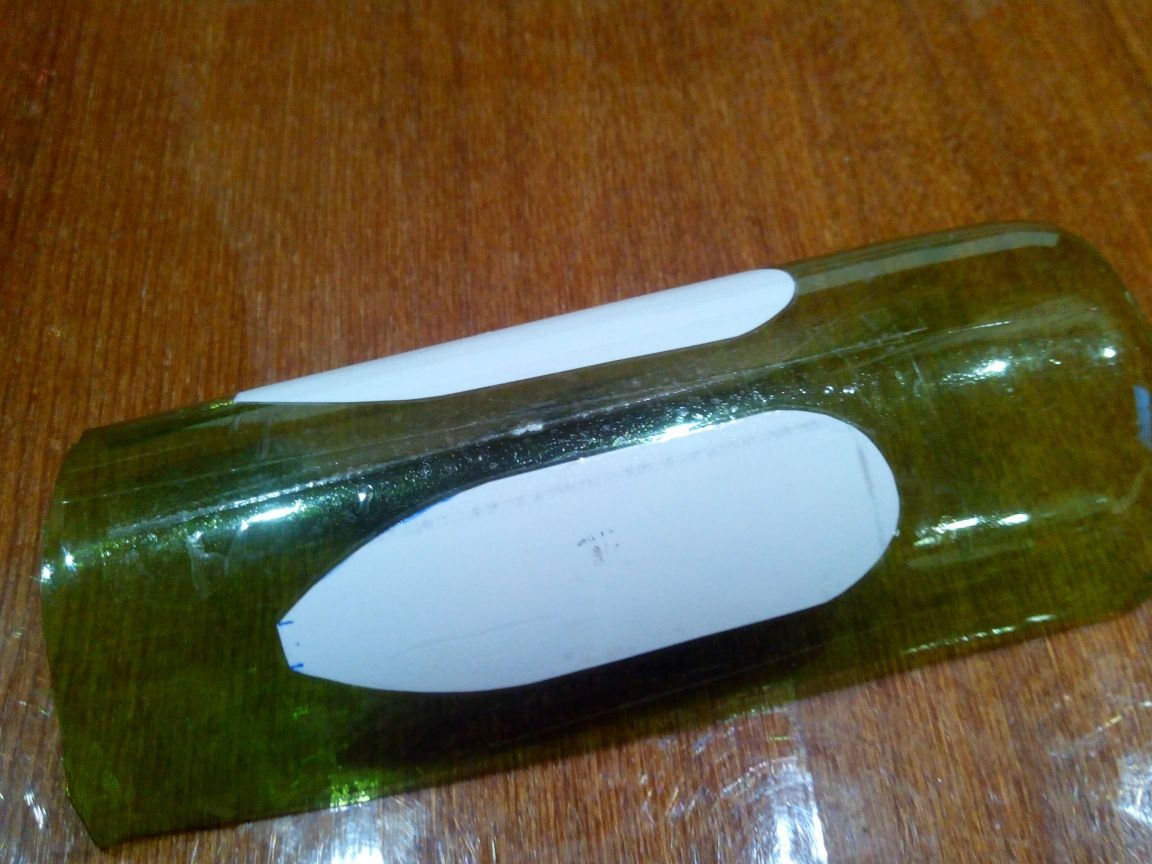
We cut the blades with scissors, and sand the places of gluing them to the hub.
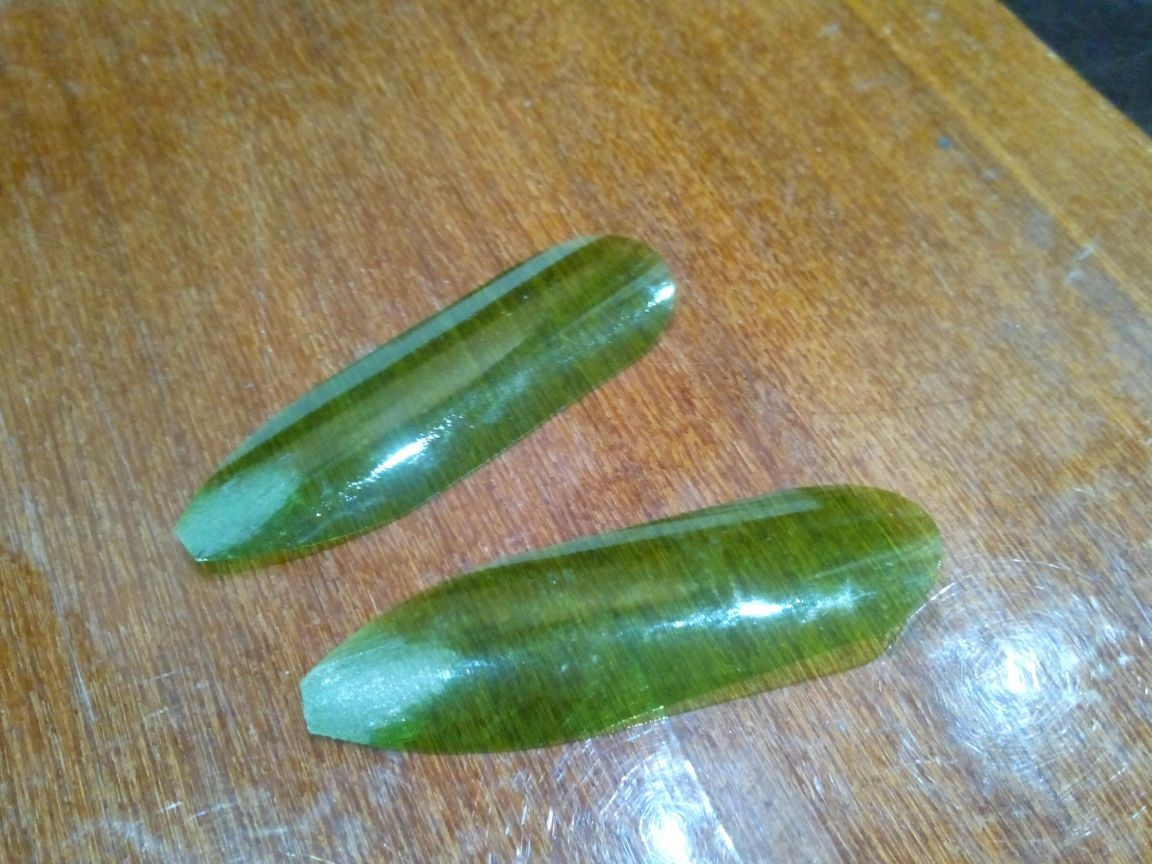
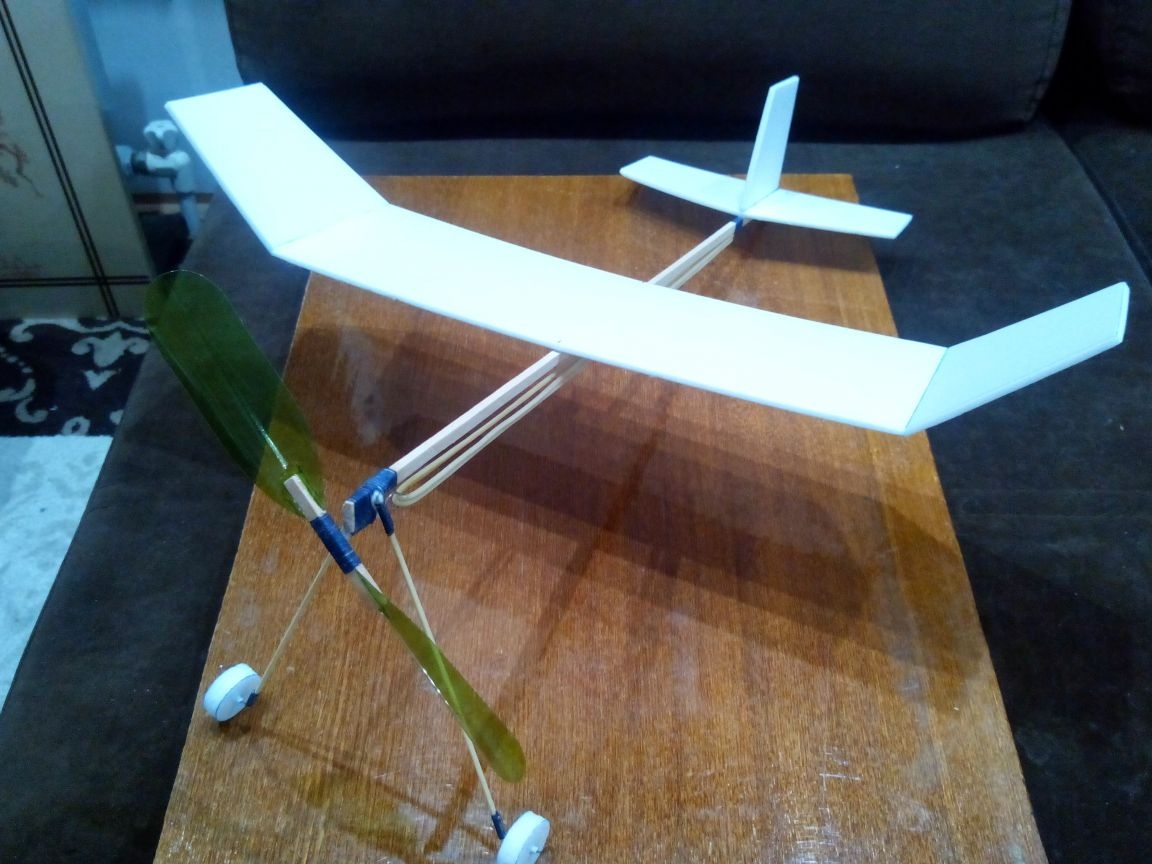
We glue the blades into the hub on a five-minute epoxy (various superglues did not justify themselves in this case - they are too elastic). Then we insert the screw axis into the tube on the engine mount and bend the hook for the rubber motor with pliers.
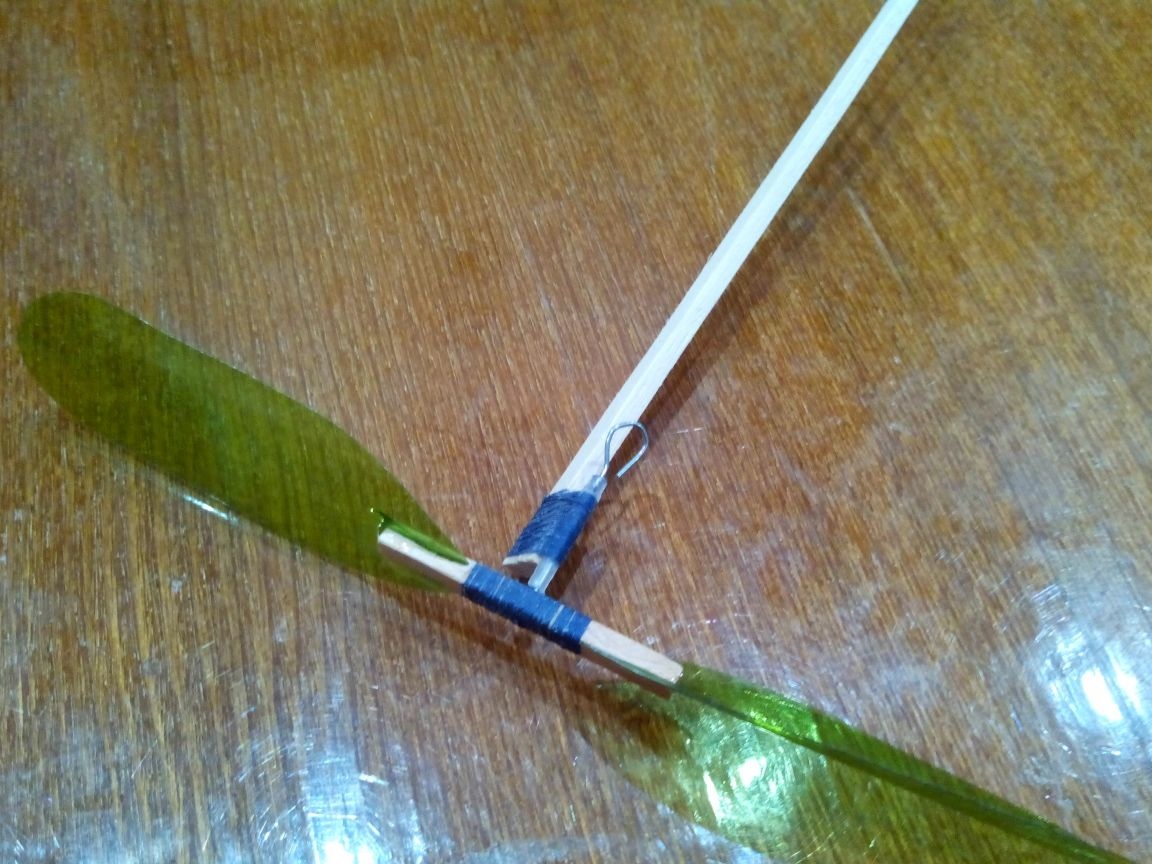
We pull the rubber motor of four threads (although this depends on the diameter of the elastic) between the hooks.
Step 3. The chassis.
Strictly speaking, this model can be made without a chassis at all, but in this case it plays the role of a weighting nose, so that the centering of the model is not too rear. If you want to reduce the manufacturing time of the model, it is enough to stick a weight weighing about 5-6 grams in the bow.
So:
From thin bamboo sticks (for example, from a rug) we make two racks 150 mm long. From the steel wire we bend the connecting part of the struts and the axis of the wheels.
We attach thread with PVA axis glue to the racks.
Also, we connect both racks with glue with threads with glue.
Glue the chassis to the fuselage in the area of the engine mount and wrap with thread with glue.
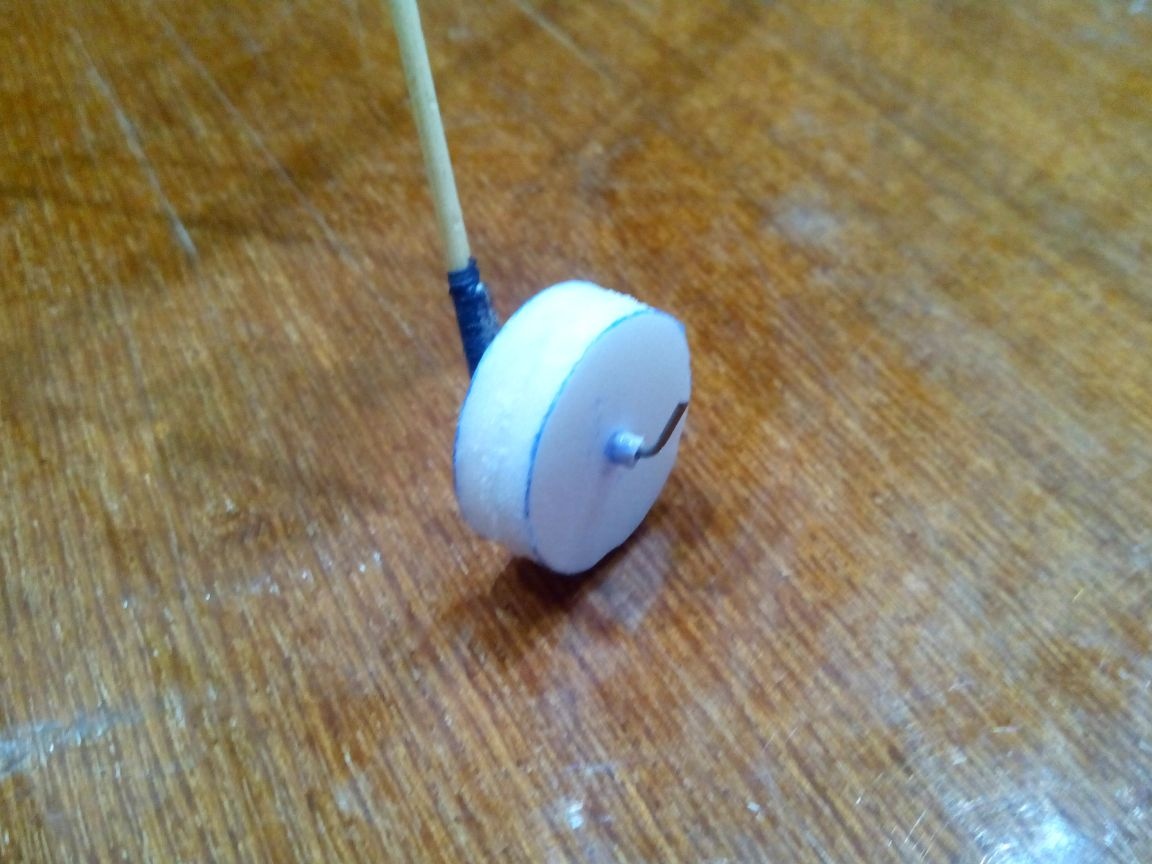
From the ceiling tiles we draw wheel blanks (two pieces each) with a diameter of 25 mm.
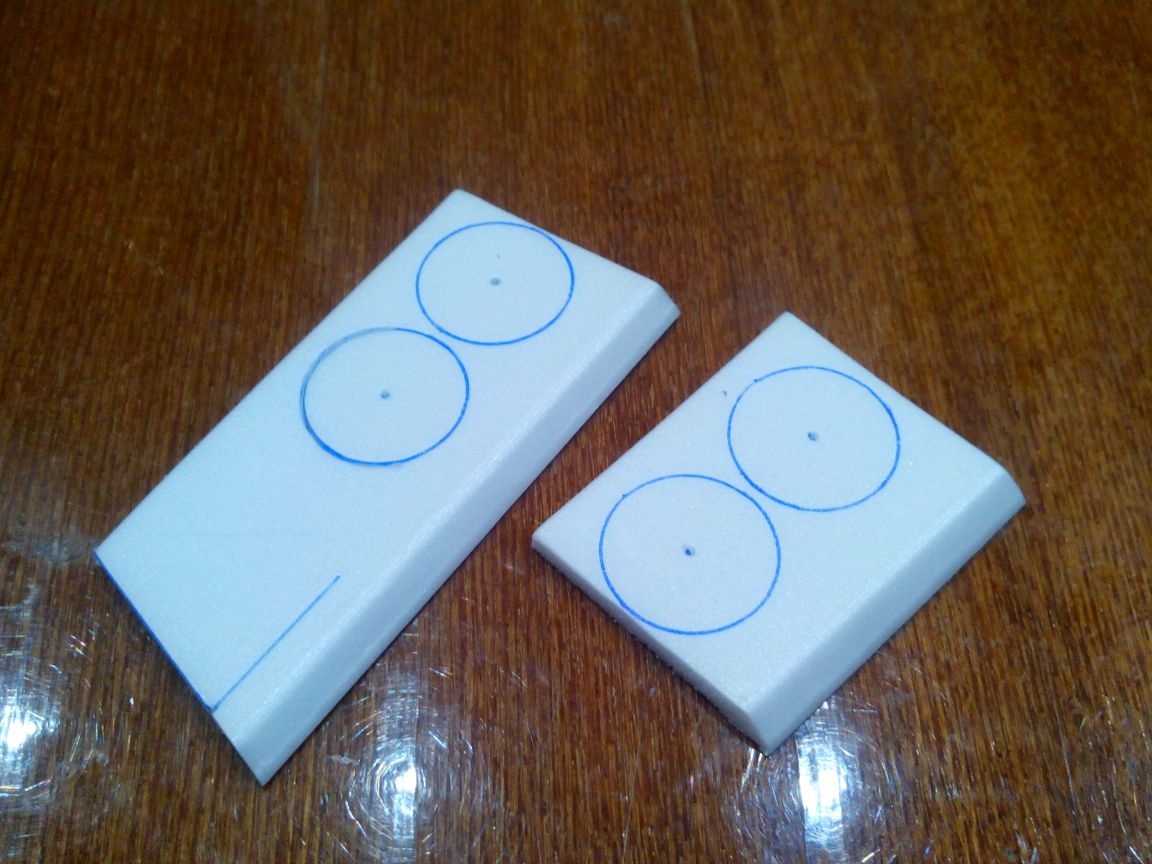
And cut them with a cutter.
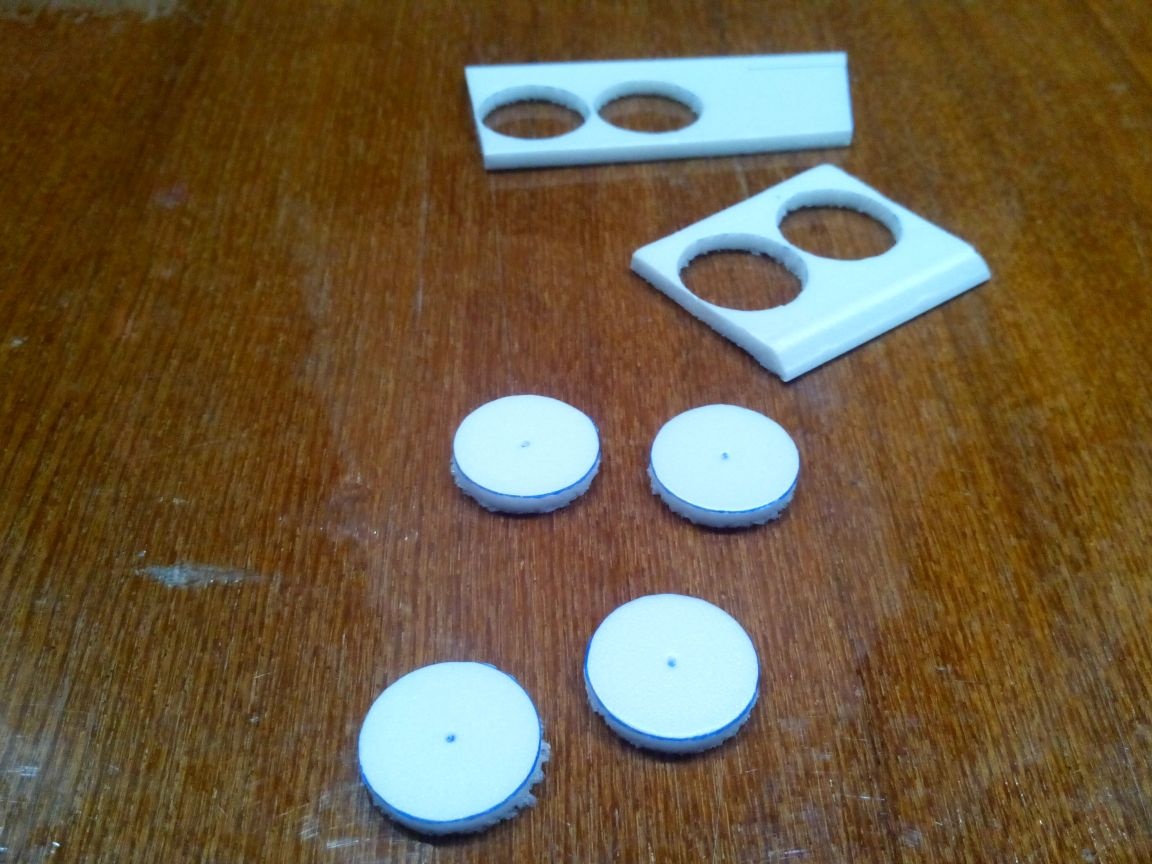
Glue the blanks in pairs. From the ear stick or rod from the handle we make the axles of the wheels (length 12 mm) and glue them into the wheels.
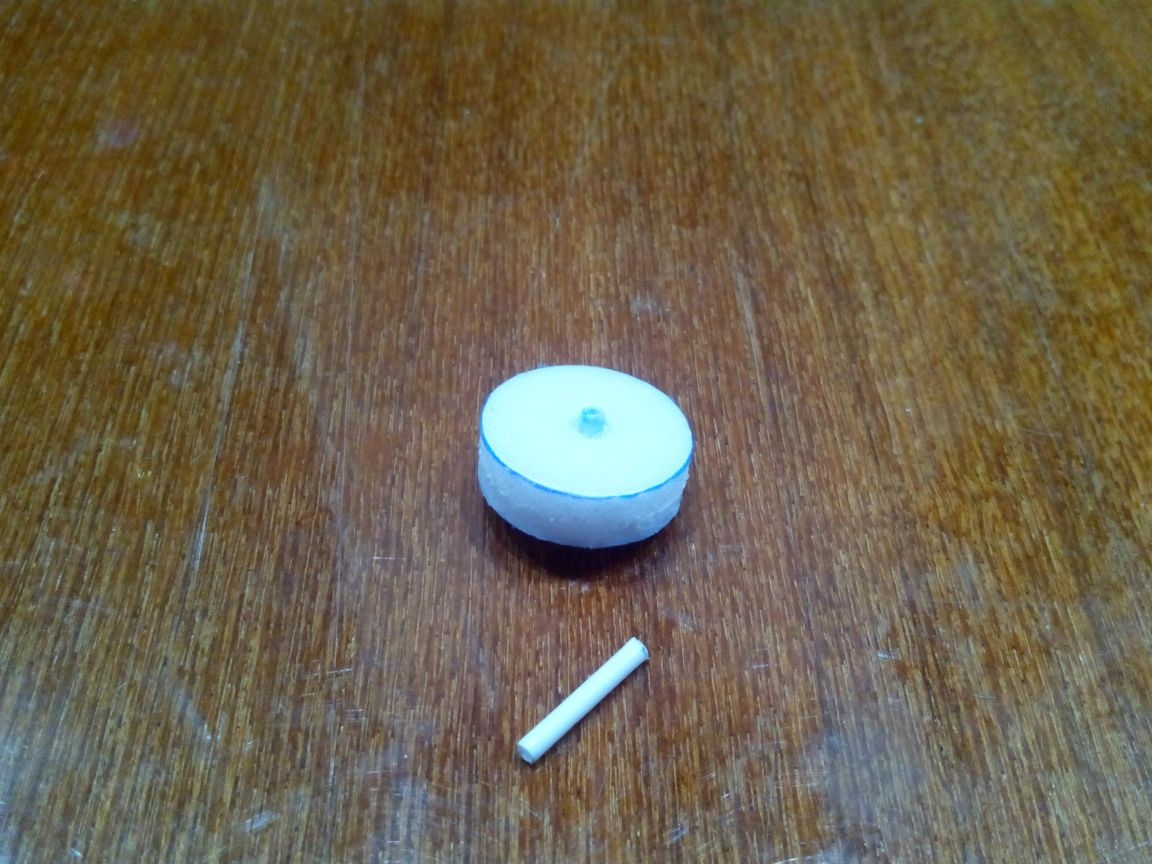
We fix the wheels on the axle in the simplest way - just bend the axle up with pliers.
Step 4. Final assembly of the model.
Glue the tail.
After the glue has dried on the tail, we find the center of gravity of the model (with the chassis glued on, the tail unit and the rubber motor stretched), setting the model horizontally on a stick or even on a finger. Make a mark on the fuselage rail. Then we glue the wing so that the center of gravity of the model is at a distance of 33 mm from the leading edge of the wing (i.e. 1/3 of the width of the wing).
Let the glue dry well. Everything, the model is ready.
A short video of the first flights (filmed at the entrance, because the street is cold and the rubber motor will not last long):
If the model will fly down, you need to glue small strips of adhesive tape in the back of the stabilizer and bend the edges a little up.