Good afternoon, over time I have accumulated a lot of inoperative CD or DVD drives. On the Internet there are many descriptions of the manufacture of various kinds of laser engravers made on the basis of such drives. Today I want to share with you my experience in the manufacture of such an engraver. As a controller - Arduino Uno
To make a laser engraver or CNC (numerical control) of the machine we need:
- DVD-ROM or CD-ROM
- Plywood 10 mm thick (6 mm can also be used)
- Wood screws 2.5 x 25 mm, 2.5 x 10 mm
- Arduino Uno (compatible boards can be used)
- L9110S engine driver 2 pcs.
- Laser 1000mW 405nm Blueviolet
- Analog joystick
- Button
- 5V power supply (I will use an old, but working computer power supply)
- Transistor TIP120 or TIP122
- Resistor 2.2 kOhm, 0.25 W
- connecting wires
- Eletrolobzik
- drill
- Drills for wood 2mm, 3mm, 4mm
- Screw 4 mm x 20 mm
- Nuts and washers 4 mm
- soldering iron
- Solder, rosin
Step 1 Disassemble the drives.
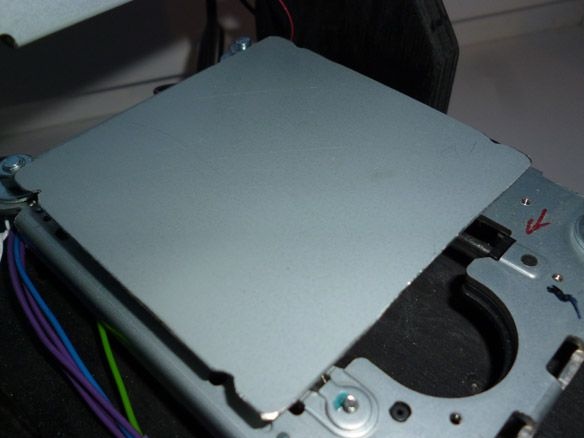
Any CD or DVD drive is suitable for an engraver. It is necessary to disassemble it and remove the internal mechanism, they come in different sizes:
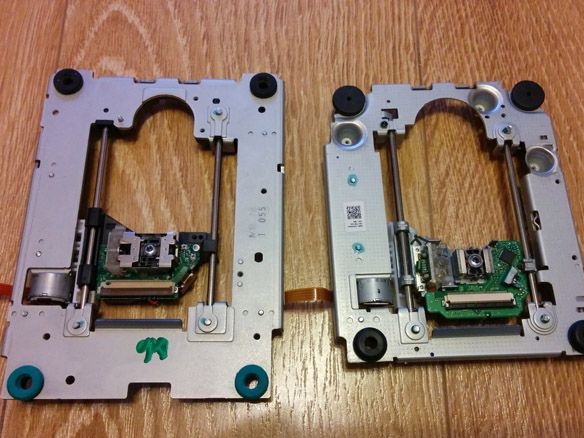
It is necessary to remove all the optics and the board located on the mechanism:
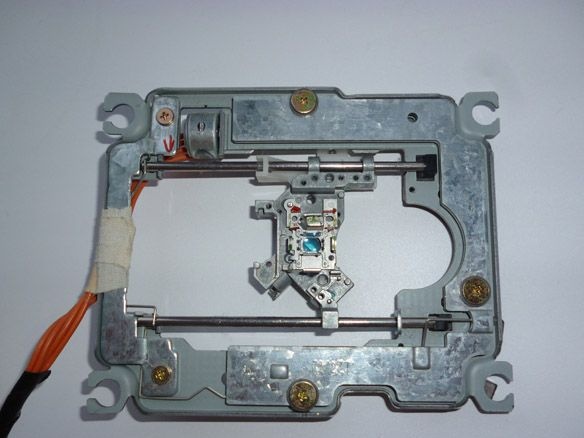
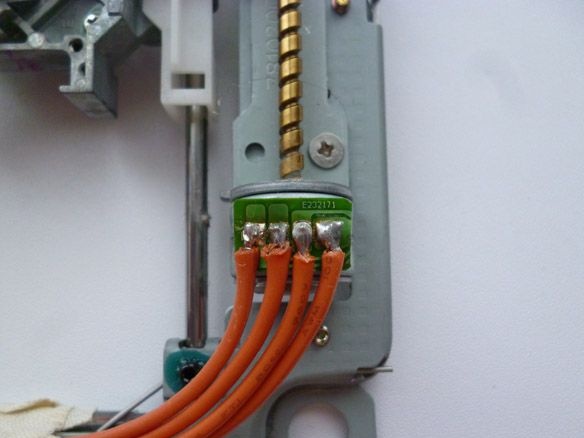
Next, cut off the cable coming from the stepper motor, and solder to the conclusions of the wire:
To one of the mechanisms you need to glue a table. You can make a table from the same plywood by cutting a square with a side of 80 mm. Or cut the same square out of the CD / DVD-ROM case. Then the part you plan to engrave can be pressed with a magnet. After cutting the square, glue it:
To the second mechanism you need to glue the plate to which the laser will subsequently be mounted. There are a lot of manufacturing options and it depends on what you have at hand. I used a plastic model plate. In my opinion, this is the most convenient option. I got the following:

Step 2 Making the case.
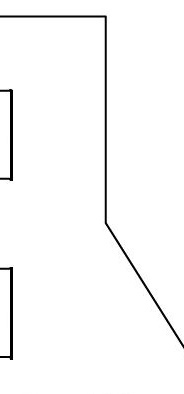
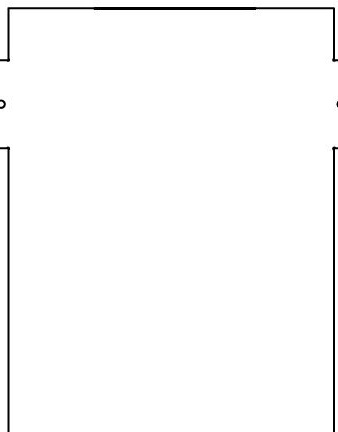
For the manufacture of the body of our engraver, we will use plywood 10 mm thick. If it is not, you can take plywood and a smaller thickness, for example 6 mm, or replace the plywood with plastic. It is necessary to print the following photos and use these templates to cut one lower part, one upper and two side ones. In the places marked with a circle, make holes for screws with a diameter of 3 mm.
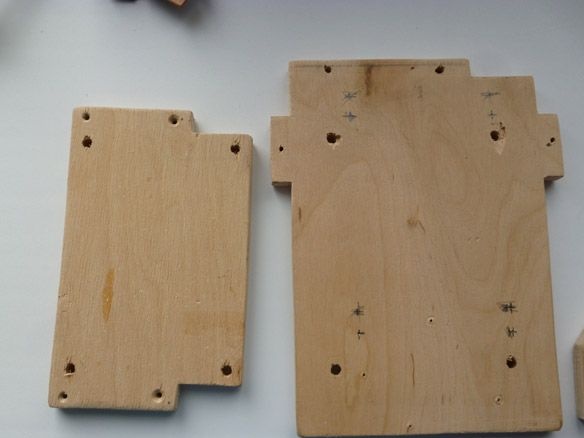
After cutting, you should get the following:
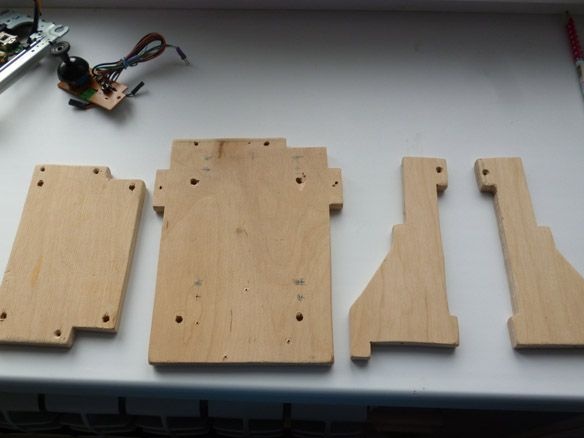
4 mm holes must be made in the upper and lower parts for mounting your drive parts. I can’t immediately mark these holes, so they are different:
When assembling, it is necessary to use self-tapping screws on wood 2.5 x 25 mm.In places where the screws are screwed in, pre-drill holes with a 2 mm drill. Otherwise, plywood may crack. If you plan to assemble the case from plastic, it is necessary to provide for the connection of parts with metal corners and use screws with a diameter of 3 mm. To give an aesthetic appearance to our engraver, it is worth sanding with fine emery all the details, you can paint if you wish. I like black, I painted all the details black with spray paint.
Step 3 Prepare the power supply.
To power the engraver, you need a 5 volt power supply with a current of at least 1.5 amperes. I will use the old power supply from the computer. Cut off all the pads. To start the power supply, it is necessary to close the green (PC_ON) and black (GND) wires. You can put a switch between these wires for convenience, or you can just twist them together and use the power supply switch, if any.
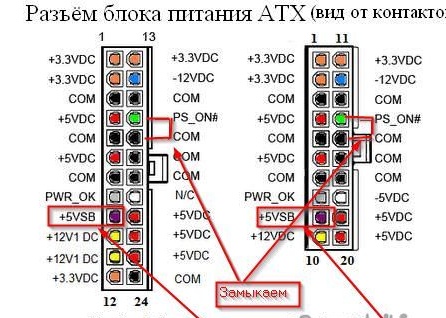
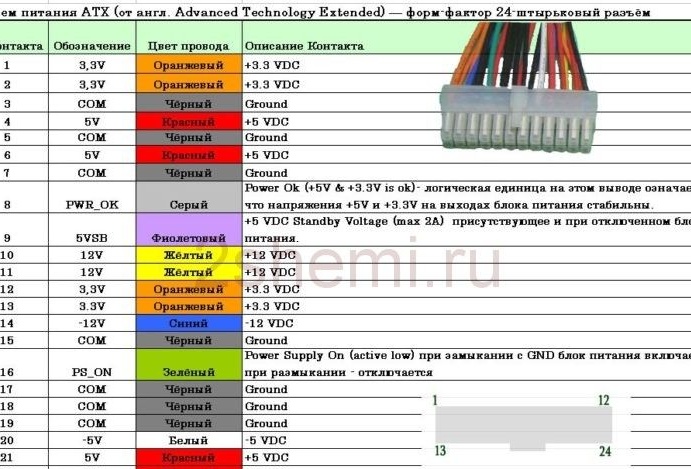
To connect the load output red (+5), yellow (+12) and black (GND) wires. Violet (duty +5) can give a maxim of 2 amperes or less, depending on the power supply. There is voltage on it even with open green and black wires.
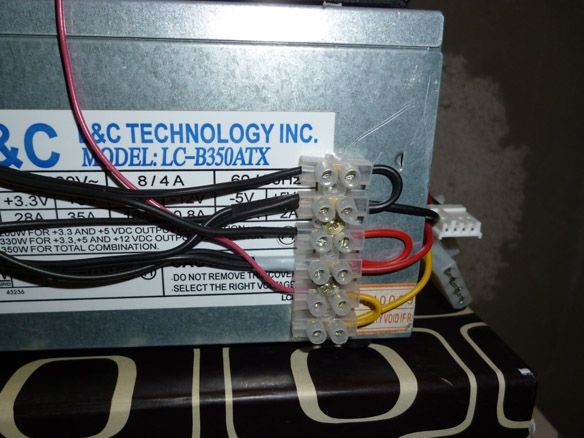
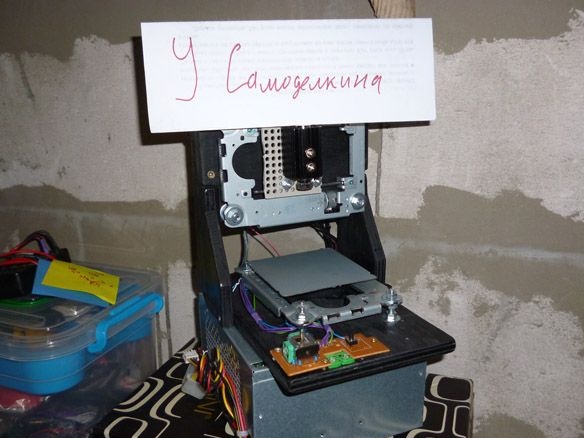
For convenience, we glue the engraver on double-sided tape to the power supply.
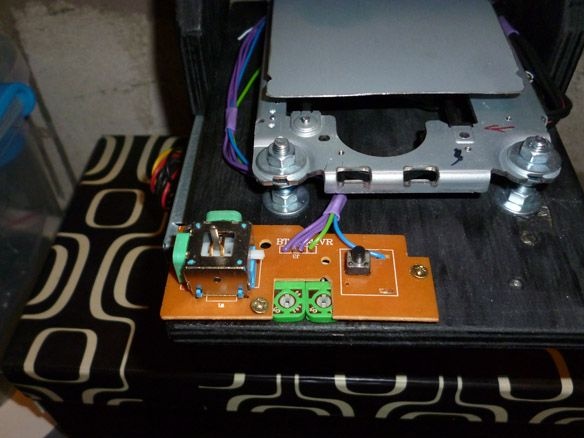
Step 4 Joystick for manual control.
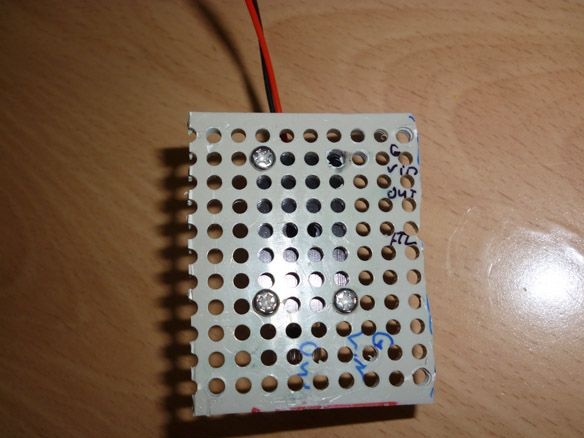
To set the initial position of the engraving, we will use the analog joystick and button. We place everything on the circuit board and wire out to connect to the Arduino. We fasten to the case:
We connect as follows:
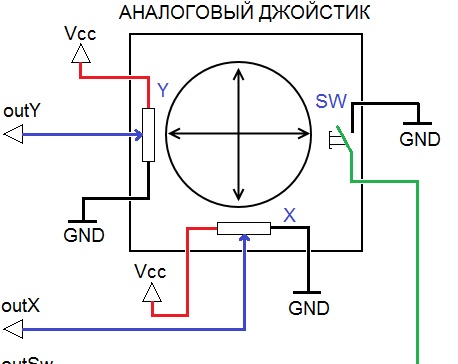
Out X - pin A4 Arduino
Out Y - pin A5 Arduino
Out Sw - pin 3 Arduino
Vcc - +5 Power Supply
Gnd - Gnd Arduino
Step 5 We place the electrician.
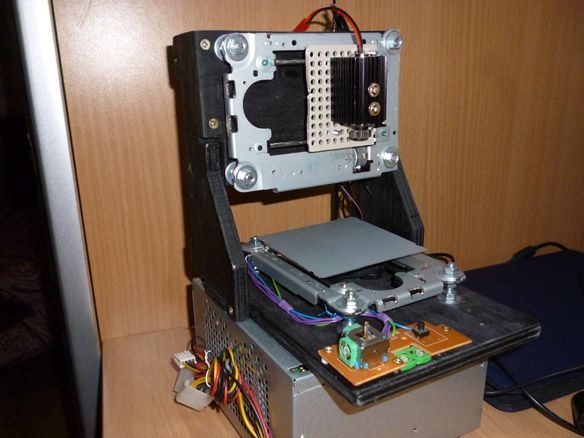
We will place all the electrics behind our engraver. We fasten the Arduino Uno and the engine driver with 2.5 x 10 mm screws. We connect as follows:
The wires from the stepper motor along the X axis (stage) are connected to the outputs of the L9110S motor driver. Further so:
B-IA - pin 7
B-IB - pin 6
A-IA - pin 5
A-IB - pin 4
Vcc - +5 from the power supply
GND - GND
The wires from the stepper motor along the Y axis (laser) are connected to the outputs of the L9110S motor driver. Further so:
B-IA - pin 12
B-IB - pin 11
A-IA - pin 10
A-IB - pin 9
Vcc - +5 from the power supply
GND - GND
If at the first start-up the engines will buzz, but not move, it is worth swapping the screwed wires from the engines.
Do not forget to connect:
+5 from Arduino - +5 power supply
GND Arduino - GND Power Supply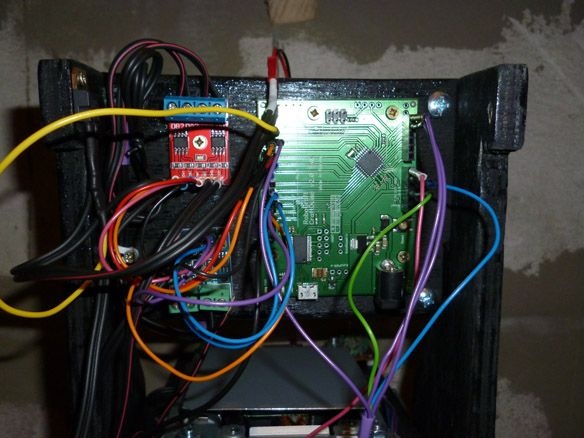
Step 6 Laser Installation.
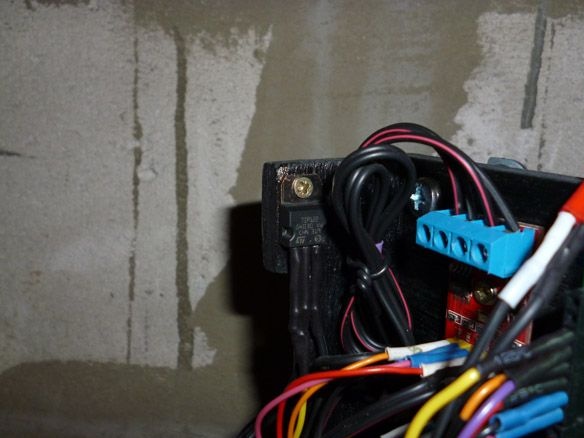
The Internet is full of diagrams and instructions for making a laser from a laser diode from a DVD-Rom writer. This process is long and complicated. Therefore, I bought a ready-made laser with a driver and a cooling radiator. This greatly simplifies the process of manufacturing a laser engraver. The laser consumes up to 500 mA, so it cannot be connected directly to the Arduino. We will connect the laser through a transistor TIP120 or TIP122.
The 2.2 kOm resistor must be included in the gap between the base of the transistor and pin 2 of the Arduino.
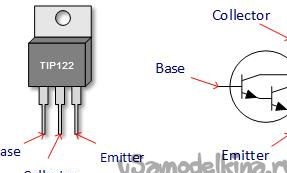
Base - R 2.2 kOm - pin 2 Arduino
Collector - GND Laser (black wire)
Emitter - GND (Common Power Supply)
+5 laser (red wire) - +5 power supply
There are few connections here, so we solder everything on weight, isolate and screw the transistor to the back of the case:
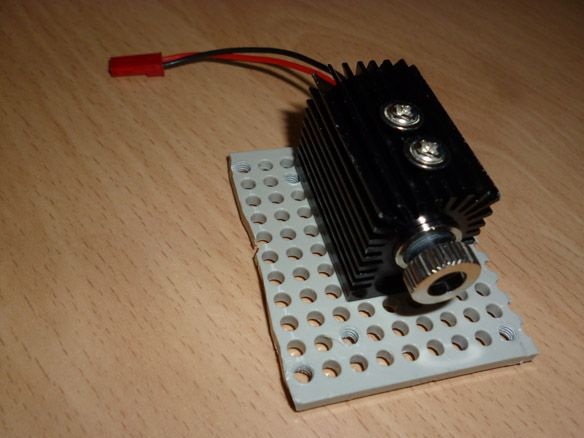
For strong laser fixation, it is necessary to cut another plate from the same plastic as the plate glued to the Y axis. We fasten the laser cooling radiator to it with the screws included with the laser:
We insert the laser inside the radiator and fix it with screws, also included in the kit for the laser:
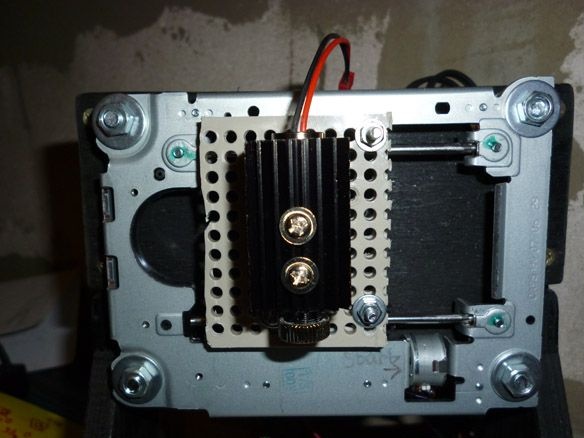
And we fasten all this design to our engraver:
Step 7 Arduino IDE Programming Environment
You should download and install the Arduino IDE. This is best done with an official project.
The latest version at the time of writing is ARDUINO 1.8.5. No additional libraries are required. You should connect the Arduino Uno to the computer and fill in the following sketch:
After filling in the sketch, check that the engraver is working as it should.
Attention! A laser is not a toy! A laser beam, even if it is not focused, even reflected, if it gets into the eyes, damages the retina of the eye. I highly recommend purchasing safety glasses! And he carries out all the verification and adjustment work only with goggles. Also, one should not look without glasses at the laser in the engraving process.
Turn on the power.When changing the position of the joystick, the table should move forward and backward, and the Y axis, that is, the laser, should move left and right. When the button is pressed, the laser should turn on.
Next, you need to adjust the laser focus. Wear safety glasses! We put a small sheet of paper on the table, and presses the button. By changing the position of the lens (we turn the lens), we find the position at which the laser point on the sheet is minimal.
Step 8 Preparation Processing.
To transfer the image to the engraver, we will use the Processing programming environment. It is necessary to download from the official.
Following the installation instructions, put Processing on the computer. We open the project:
The program will send data for engraving a picture with the name "Arduino Logo 300x300.png". To engrave another picture, you should first prepare it. The picture should be PNG extension, 300x300 pixels in size and black and white. The name of the picture must be written in the line:
img = loadImage ("Arduino Logo 300x300.png");The program will send data to the first com-port in turn. You should open the device manager on the computer and see if your Arduino is the first in the list of com-ports. If the first, then you don’t need to change anything, if not, it changes “0” in the line to the com-port number in the list:
String portName = Serial.list () [0];Having prepared everything, we put on goggles, presses the start button in the processing window and enjoy the engraving process.