
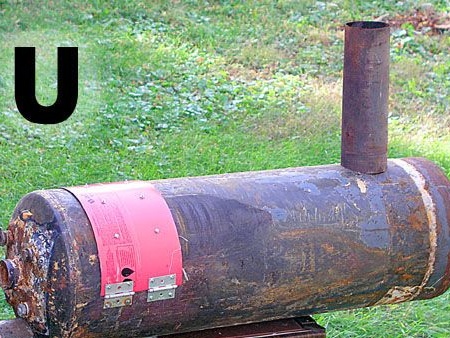
if you have garage, a workshop or other similar premises, it just can not do without such a thing as a stove. Typically, these stoves are made of metal, they do not accumulate heat, but instantly give it up as fuel is burned and allow you to quickly heat the room. Such furnaces are made of various materials, it can be thick pipes, barrels, gas cylinders and so on.
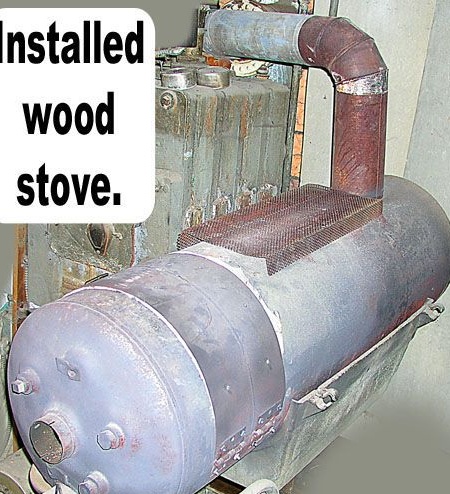
In this manual, we will look at how do it yourself You can make a stove from an old water boiler. Such containers usually have a sufficiently thick metal so that a furnace can be built from it and it would not burn out. Materials will be needed here a little, you will need a chimney and some scrap metal to create legs and other details.
Materials and tools that the author used to make the furnace:
Material List:
- An old water boiler (probably gas);
- a piece of pipe for the chimney;
- a steel plate for the manufacture of valves;
- an old gas cylinder (or a piece of sheet steel for making a door);
- door hinges;
- small bolts with nuts and washers for the door;
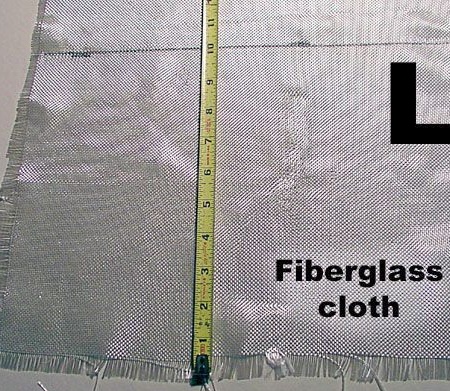
- fiberglass or similar fabric for the manufacture of gaskets;
- tin can.
Tool List:
- grinder;
- (preferably);
- ;
- welding;
- spanners;
- hammer;
- scissors;
- stapler;
-marker;
- ;
- roulette.
Furnace manufacturing process:
Step one. Prepare the boiler
First of all, you need to prepare an old boiler. Any old boiler will do, and it’s not scary if it already has holes in it. The main thing is that the metal is more or less thick and does not burn out at high temperature. As for the sizes, then already choose at your discretion, the author recommends the use of containers with a volume of 150-200 liters.
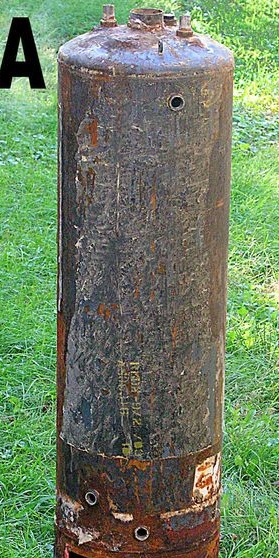
Typically, water heaters are insulated for good heat retention. Of course, this insulation must be completely removed. We use a knife, a grinder and other available tools. The metal part will probably be painted and may be in glue, we need to clean the whole thing from the metal. We take a grinder with grinding discs and clean the boiler to a shine. If the paint does not clean well, it can be pre-burned in a fire or with a blowtorch.
At the same stage, you need to unscrew from the boiler everything that can be unscrewed.These are various fittings, taps, tubes and so on. What can not be unscrewed, you can simply cut it off with a grinder.
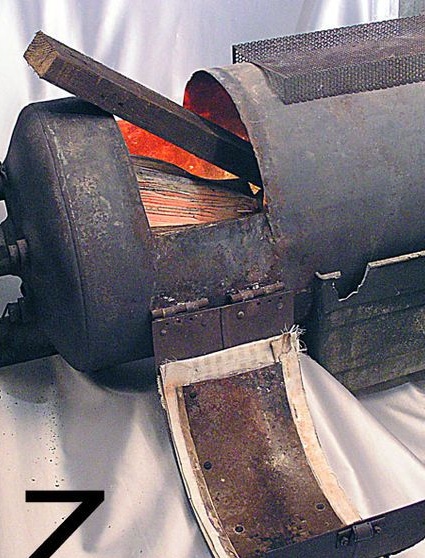
Step Two Cut out the door
Choose a suitable place on the tank under the door through which firewood will be loaded. Decide on its size, and then draw on the boiler using a marker. Now the door can be cut out, for this purpose the author uses a grinder.
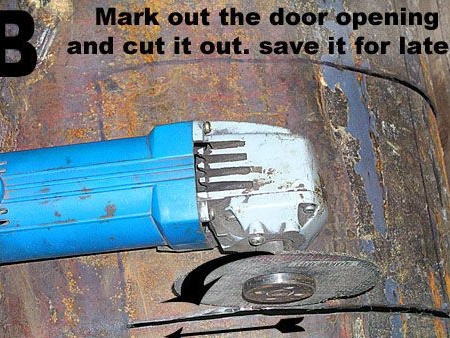
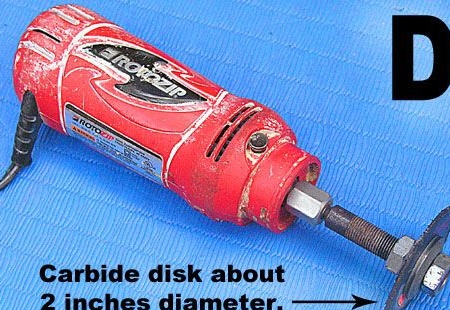
When cutting with a grinder, there is one nuance, you need to cut so that the circle rotates in the opposite direction from the one in which direction you are cutting. In more detail, the author indicated this moment in the photo. In his opinion, with this approach, the cutting wheels of the grinder last longer.
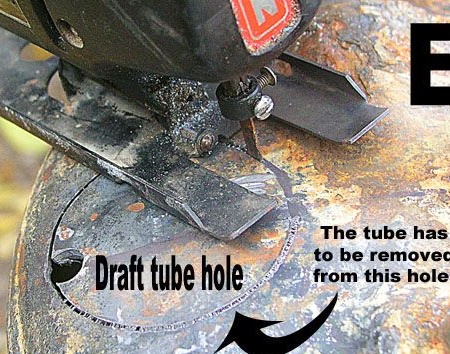
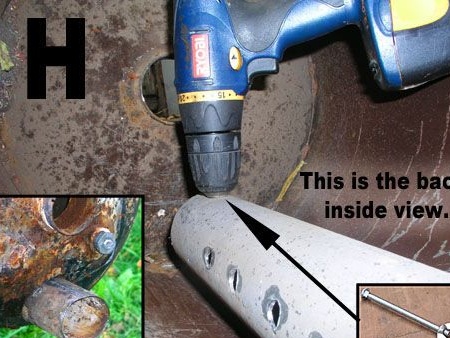
Step Three Cut a hole under the chimney
In the container, you need to cut a hole according to the diameter of the chimney that you have. How to weld a pipe is up to you. The most important thing is that the connection is tight and smoke does not come into the room. You can make a hole slightly larger than the diameter of the pipe, and then insert the pipe into it. But you can do the opposite, smaller, and weld the pipe butt. In principle, a better seam should be obtained if the pipe is inserted into the hole.
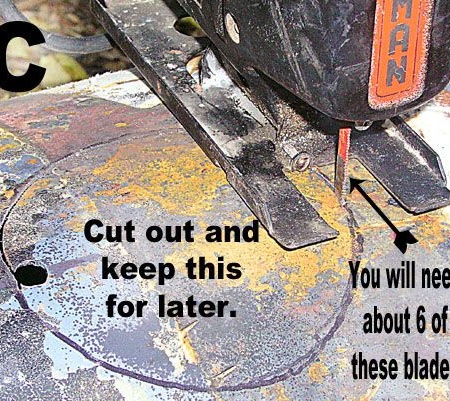
To cut a hole in a suitable shape. The author uses a reciprocating saw for this. First, we drill a small hole for the saw blade, and then cut out the main hole.
Step Four Cut a hole under the blower
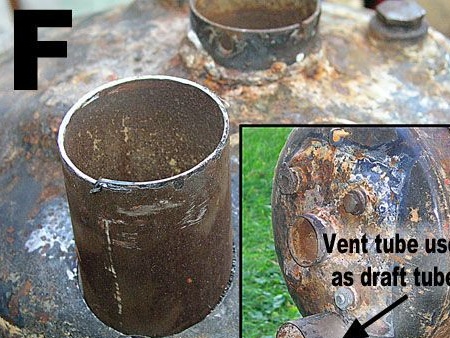
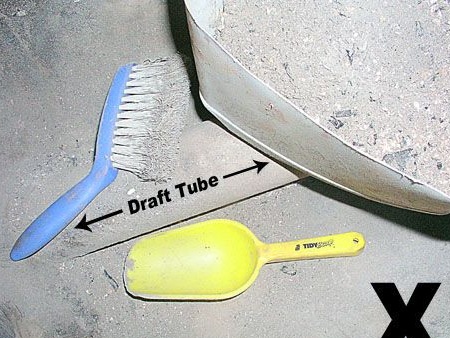
Any furnace must have a blow, thanks to this, air is supplied, which supports the combustion of fuel. The blower is located at the bottom of the furnace, it is a long pipe with holes that runs along the entire length of the furnace. The diameter of the pipe used by the author is 3 inches.
We cut the hole exactly as we cut it under the chimney. We drill a small hole, and then we cut out the main one with a saber saw.
Step Five Blower pipe
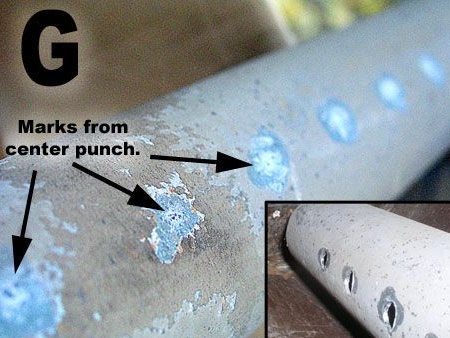
Make a pipe for the blower, it will allow you to burn wood efficiently with maximum heat. Take the pipe along the entire length of the furnace, or less, as desired, and then drill holes in them. According to the author, their order is of no particular importance. But it is better to arrange them at the same distance from each other for uniform air supply.
At the very beginning of the pipe, drill a hole for the bolt and nut. A damper will be installed here, with which you can control the air supply and, as a result, control the combustion rate.
Step Six We prepare the material for the door
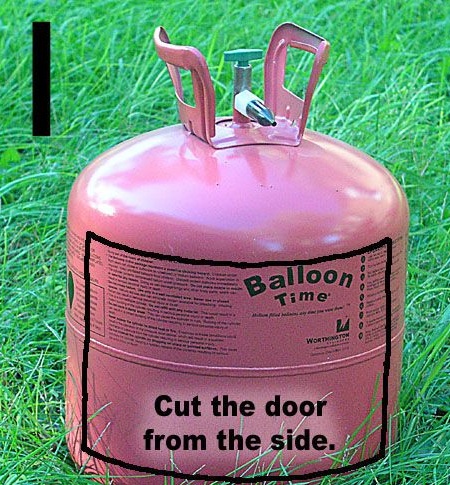
To make the door, you will need the part that we cut earlier, but it will be small, so if you put it just like that, the smoke from the furnace will leak out into the cracks. To make the door wider, the author donated a gas cylinder from under helium. Cut a square out of it a little larger than the size of the door. Be sure to peel off all the paint from the cut out part, as it will start to smoke and stink when heated.
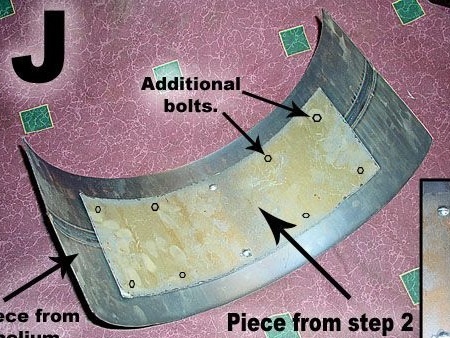
Seventh step. Connect the two parts
Now you need a drill and 10 bolts with nuts. Drill 5 holes on each side of the inside and tighten the bolts with nuts. But it is not necessary to tighten much, so there will still be a gasket.
Step Eight. Gasket
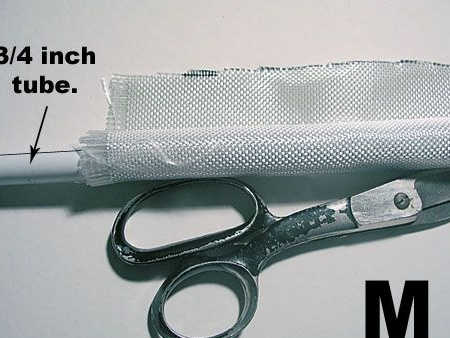
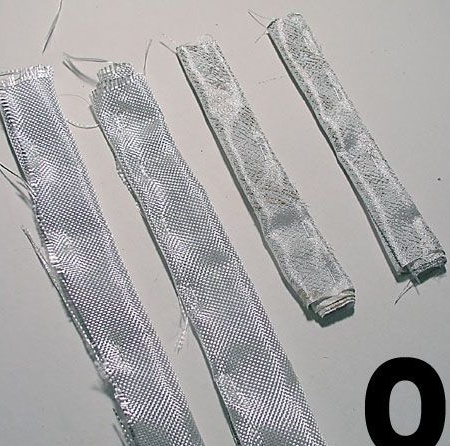
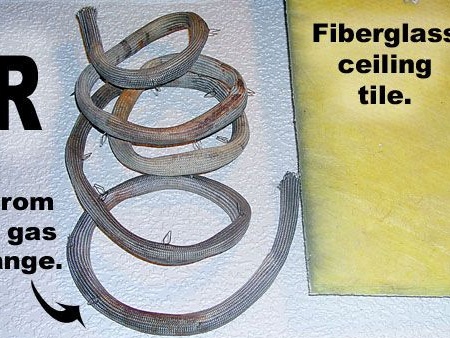
So that smoke does not pass between two sheets of metal, the author decided to install a gasket. Of course, only heat-resistant substances will go here. You can use fiberglass, asbestos and so on. The author ruffled to use fiberglass, cut off the desired piece, and then twist it into a “cord”, fixing it with a stapler.
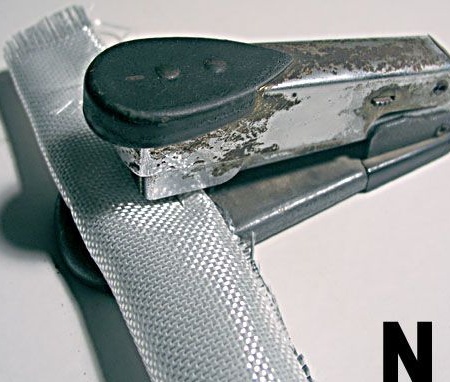
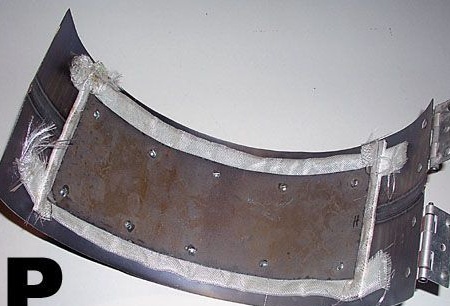
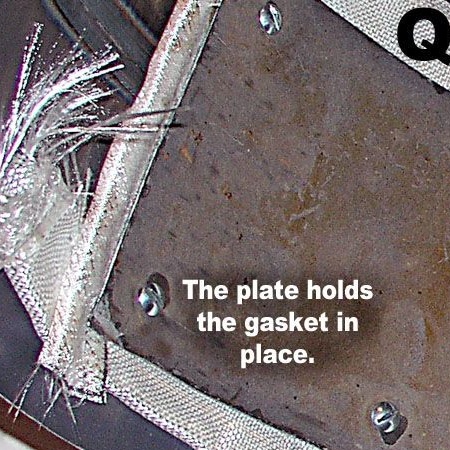
That's all, a fiberglass cord can be installed. Lay it in a circle around the two halves of the door, and then tighten the structure with bolts and nuts. That's all, the door is ready. Its design is quite complex, but the door will not heat up much and will not burn out.

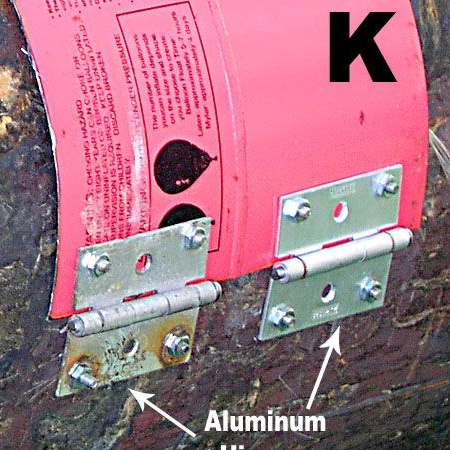
The door can be installed. We take a drill, drill holes and fasten using door hinges. Do not forget to make a latch for the door so that it does not open spontaneously during a flash of fire. You will also need to come up with a door handle that will not get very hot. The author decided to use a glass pen.
Step Nine. The final stage of assembly
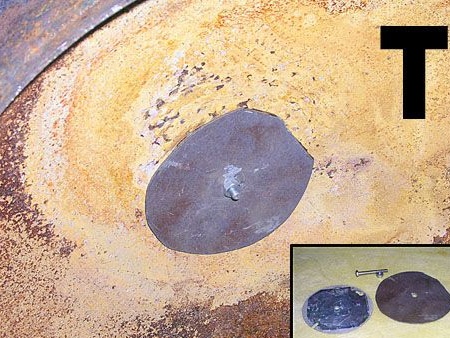
There are likely to be many extra holes on the tank that need to be plugged. They can either be brewed, or made as the author. We take metal plates, the parts cut out earlier are also suitable, we drill holes in them, and then we fasten them with bolts and nuts.
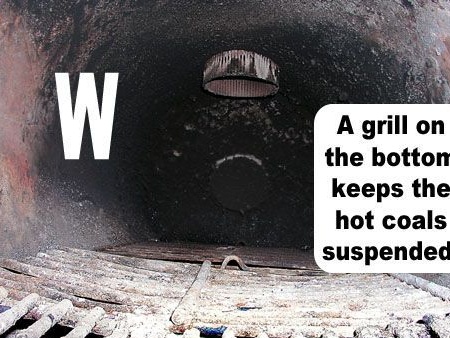
Make simple grates for your stove by welding them from fixtures.
Weld the chimney as well as the blower pipe into place. That's all, now the stove can be tested. You need to install it on a refractory support or weld the legs, as the metal is very hot.
Step Ten How to use?
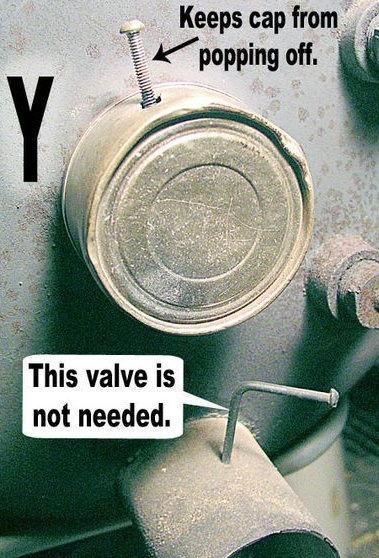
Open the door and load the wood into the stove, then close it. We take a lighter or matches and set firewood through the hole that was used in the boiler instead of the hood. Then, when the firewood flames up, this hole must be closed, for this purpose we use a tin can and a bolt or nail. If you wish, you can equip the door here.
Do not forget to open the blower shutter after this.

The first time to melt a furnace is best in the open air if there is a suspicion that the paint is poorly cleaned from the surface. If the oven is working, congratulations! As an aesthetic, you can paint it with heat-resistant paint. In addition to the esthetics, the paint will protect the metal from rust.