

Having constructed wood lathe, had some fun with simple turning in the centers. After a while, it became necessary to process more diverse workpieces. I had to move my brains, as if from improvised means, without access to a third-party lathe (for metal), make the appropriate equipment. One of the designs turned out to be very inexpensive, convenient and in demand.
The snap-in fixture was often made up of two parts - a universal small metal faceplate and a specialized wooden part. A metal faceplate can also be used, as usual, by fixing screws to the workpiece.
What was used.
Instruments.
The wood lathe itself, cutters for it, a set of bench tools. You can not do without a cutting machine (grinder), it is better to use a small one - it is more convenient and safer. Headphones for both shooting and goggles or visor. Also, do not get out without welding, respectively - a small inverter and accessories. Electrodes 2.5mm. Often used hot melt. It is necessary that neither be drilling, more convenient and more accurate, it is clear, the machine.
Materials
Actually, only the right number of nuts and washers. It’s better to paint the finished piece of metal, then plus paintwork. A little tree for "narrow specialization", I often use dry birch wood with even layers.
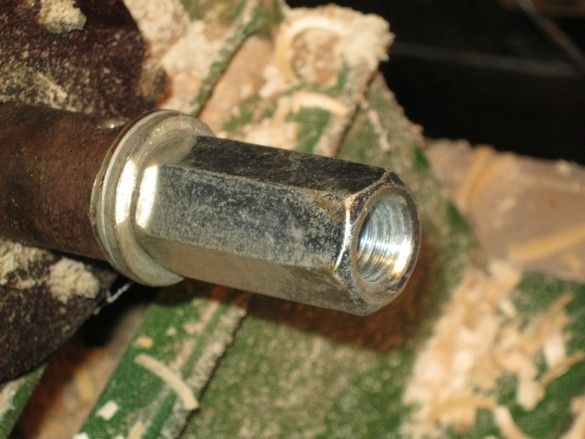
So. The spindle of my lathe ends with an M16 thread, which allows the use of standard hardware. In this case, this is an “extension nut." It is cut in half directly on the machine, turned on, rotating. Angle grinder. It should be cut carefully. At first, on a switched off machine and with an idle grinder in his hands, carefully try on, so that it is convenient, elbows wherever standing and so as not to fit into anything rotating.
The machine turns on and after adopting a pre-tested pose, turned on by a grinder, we strike a mark on the marker in the middle of the rotating nut. Especially carefully at first, until the edges are sawn, then it will begin to cut more evenly and the pressure can be slightly increased.
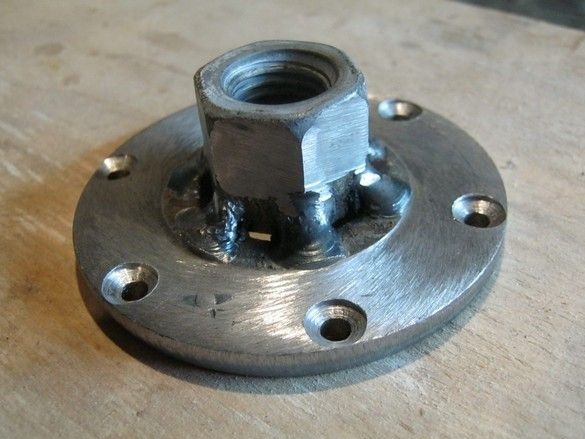
After some time of our efforts, the wall of the nut is cut through and the half falls away.The height of each half, taking into account the width of the cut, turns out to be slightly larger than its standard non-“extension” sister. The length of the thread on the spindle of my machine does not allow the use of a regular nut - it sticks out from under the finished faceplate and causes a lot of inconvenience later, when working.
The next step will be welding. From the standard range of hardware, I take a “reinforced washer,” in some stores it is called a “body washer,” of a suitable diameter. Usually, this is almost the largest of the available assortment. You need to check if the nut falls into it. The nut should stand in the center of the hole in the washer. A cut nut will stand better - there will be no chamfer on one side of it, this should be taken into account when trying on a new one in the store.
The cut off half is welded to the washer. Neatly. It’s very good to first tighten them with a clamp, but usually it turns out pretty well. The ribs are welded in the following order - any, then the opposite. The workpiece rotates 90 degrees, again any of the two, then the opposite. So there is less chance that the nut will slide off the washer. Actually, in the first copies, I tried to organize a “groove” with the same grinder on the rotating half of the nut, for a sure fit in the hole, but the angle grinder is not the tool that can do this job well - often, because of the not very even edge of the “groove” , the nut was not very aligned with the washer.
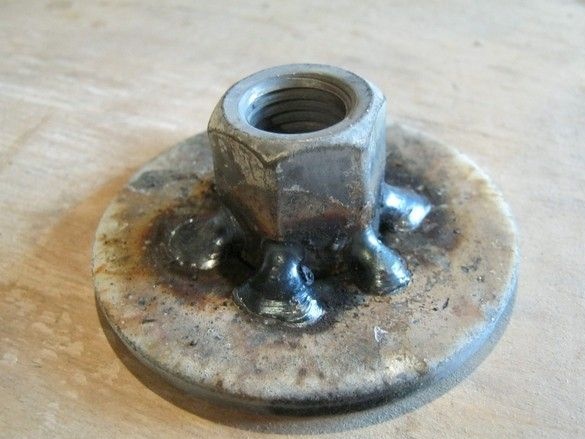
After cooling the workpiece, as usual, we encase the glass crust of slag and put the workpiece on the machine spindle, during rotation we evaluate the runout, if they are within reasonable limits, we correct the included angle grinder.
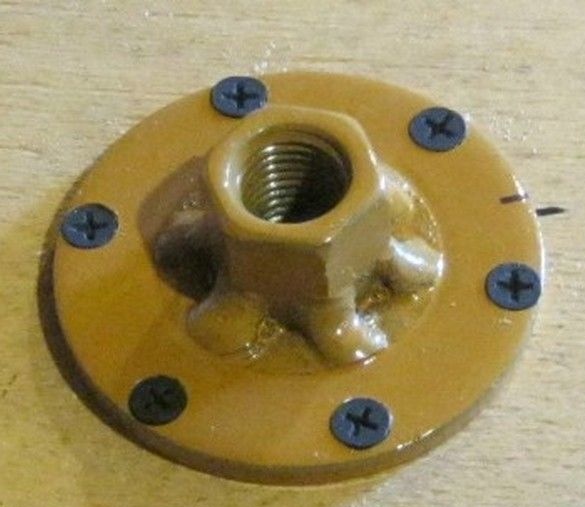
It is possible for aesthetics and on the reverse side. Here, sharpening with a pencil in the right place of the rotating workpiece, we note the diameter along which the holes will be drilled. To use the future faceplate with relatively large objects, they can be drilled more, up to six, if for trifles - three, four.
After, it would be nice to paint until there is rust - the zinc layer is partially burnt, partially drained. Below, popped "ocher" from a spray can, in two layers, although I am usually lazy.
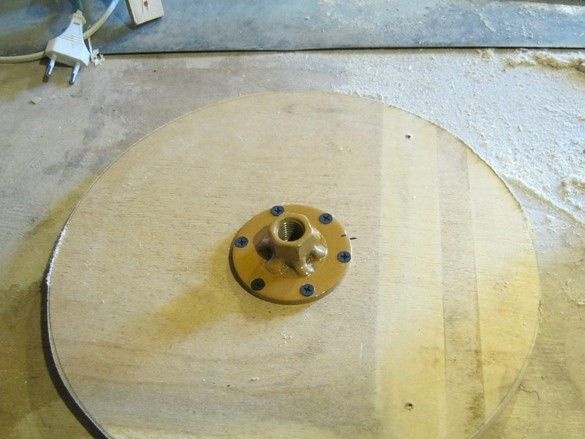
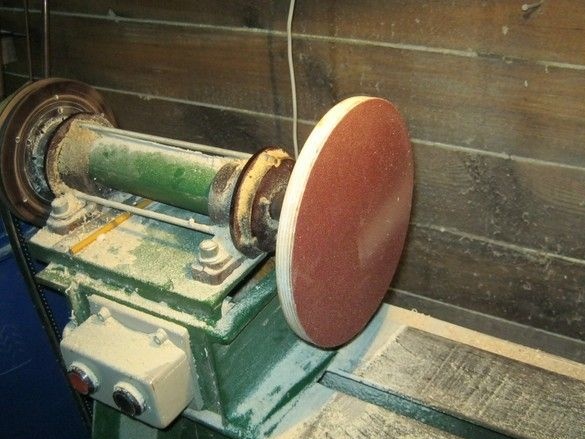
In the photo, the finished faceplate on the grinding disc is made of thick plywood. On a disk under oppression, PVA glue is glued, medium-sized, a sandpaper on a rag basis. Through a layer of newspaper so that you can tear off the licked sweat.
For sharpening the tool, fitting small pieces of wood before gluing.
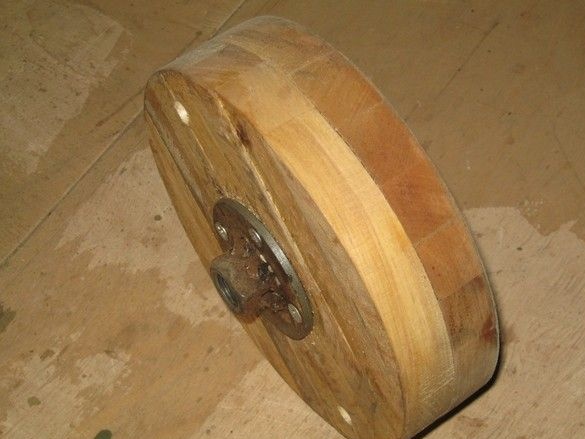
A similar contraption, but smaller in diameter and glued from birch blocks in two layers with overlap. For sharpening turning tools. At the end there is the same sandpaper, a leather belt will be glued along the circumference for fine-tuning with GOI paste.
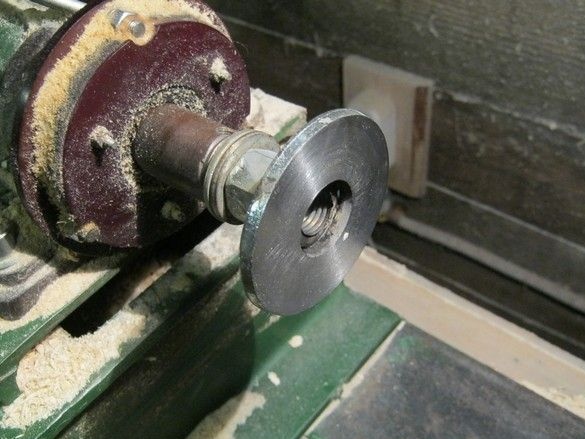
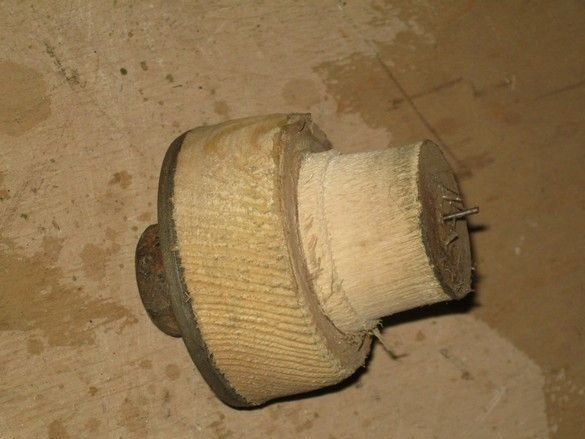
And finally, the use of our faceplate for current work. Like the usual one, our small one is convenient to use where you need to mount the workpiece at one edge, without a rear center. At the same time, it is very convenient to glue the workpiece to the intermediate block. A piece of the board is not attached with long screws and is turned to a convenient diameter, the workpiece is already glued to it. Hot melt adhesive.
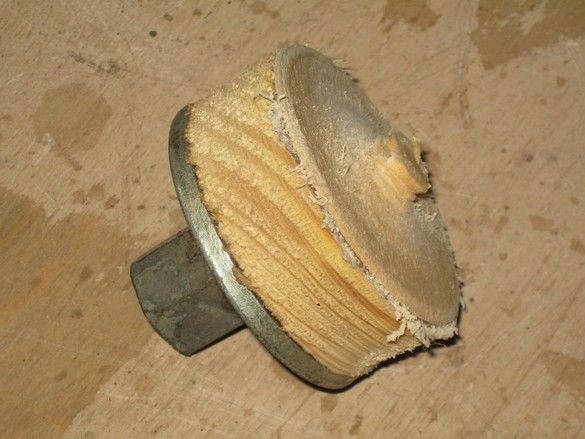
In the photo there is such a "cartridge", with a crop left over from the workpiece. Before gluing the next one, the faceplate is put into the machine, and “cut off” with a cutting tool, cutting off the remains of the glued one. At the same time, it is necessary to capture a part of the old adhesive layer so that it (glue) does not accumulate too much.
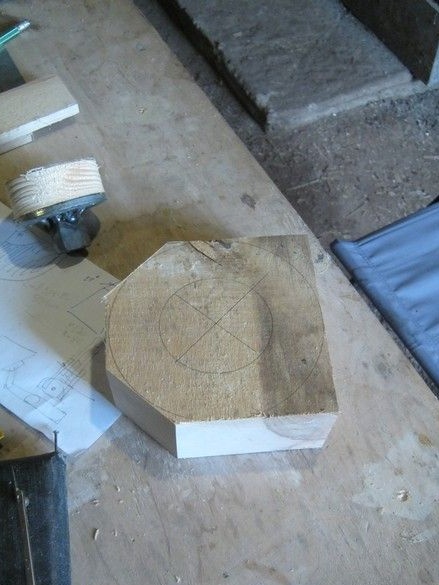
The workpiece is marked, while, among other things, a compass, a circle of diameter is drawn slightly larger than the "block" on the faceplate. This allows you to accurately orientate it when glued.
I lubricate both surfaces to be glued with hot glue, not necessarily completely, the circumference around the perimeter is enough, the centimeters backing away from the edge.
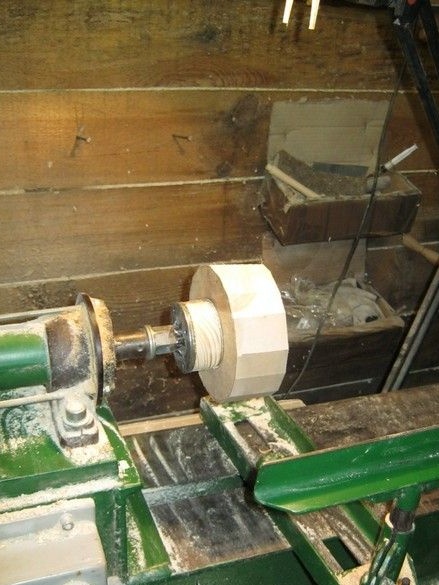
Initially, before the complete "fooling", it is better to press the workpiece back center, then, when there is no shock loads, it is removed.
The beauty of such an installation is through the block, in the significantly more economical expenditure of the workpiece material, moreover, when turning, you do not need to constantly remember how long the screws are so as not to climb the cutter to their depth.
Well, for dessert - there are several options for a more specialized tooling based on the manufactured faceplate.
For example, this one, it was required that something turned very precisely around the existing center - as simple as that.

Or, for example - a part of a candlestick made of 6mm plywood or a thin birch plate. For its clamping and processing, such a snap was made.
Sharp cloves prevent the workpiece from turning. Assembled, tightened by the rear center.
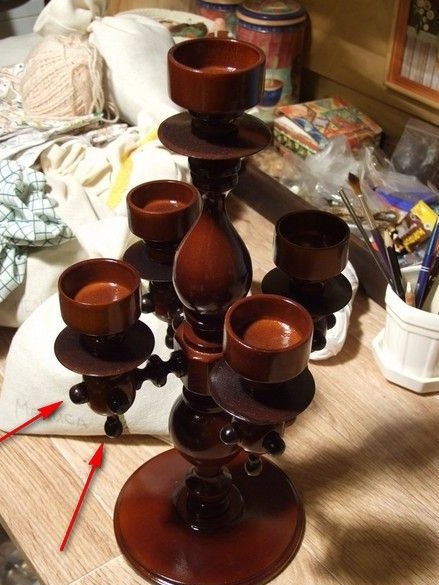
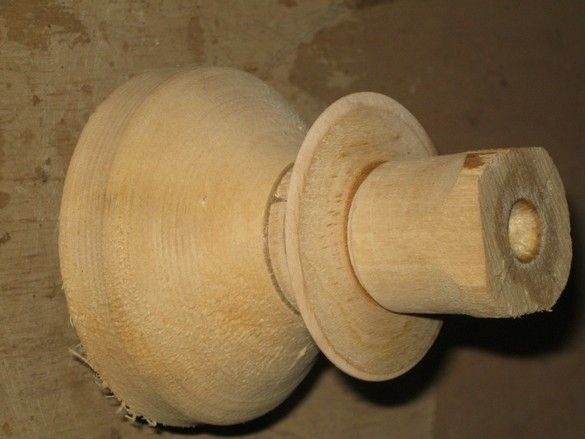
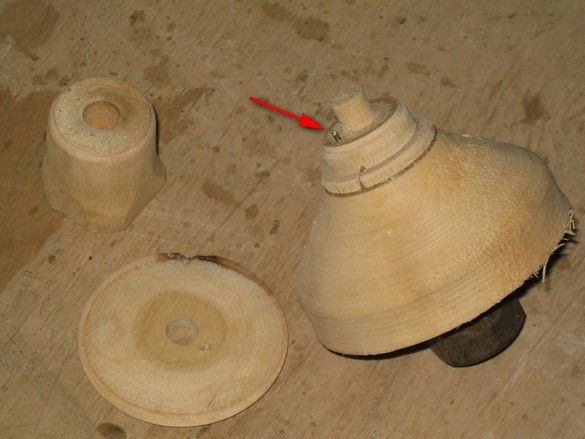
In the manufacture of the candelabra, a number of small parts were required, such as navels, I had to make a simple wooden chuck collet.
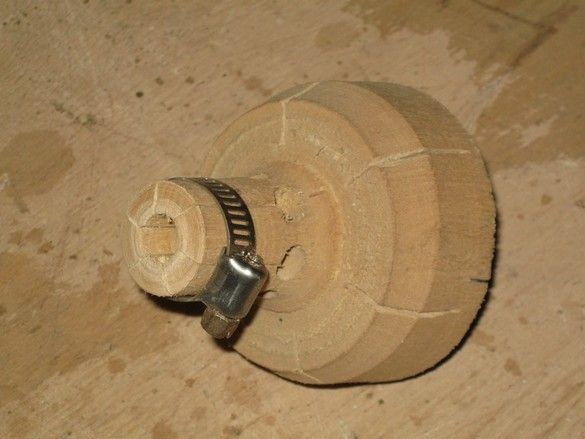
Despite the somewhat limited capabilities, it also has a number of advantages, namely, ease of manufacture, low cost. When processing miniature parts, near the most “jaws”, one should not be too afraid to hook the “cartridge” with a tool, which in case of using a metal factory analogue, sometimes has fatal consequences. Yes, safety is again a minimum of protruding parts, they can be reduced even more if you replace a metal worm clamp with annealed steel or copper wire or even make a little taper on the outside of the jaws and fill the ring for clamping. Metal or wood.
In the manufacture of a collet chuck, the cylinder is first turned, a central hole (a drilling machine) is drilled, holes are marked and drilled on the side. Then, in the lathe, the future clamp is machined - non-thick jaws are formed. Last of all he made cuts of the collet petals.