If you constantly make something, then surely you have an acute need for a mitral saw. This is an excellent cutting tool that allows you to quickly, efficiently and safely cut materials.
The mitral saw differs from circular, in that its cutting disc is movable, it goes down to the workpiece. This is very convenient, you can position the material at the desired angle, and then with a slight movement of the hand cut it at a clearly defined angle.
One went further and decided to upgrade such a saw. He decided to make it more retractable. Now the knife moves not only in the vertical direction, but also in the horizontal. This will allow you to make quite long longitudinal cuts and perform other useful work. For the manufacture of his mini-machine, the author decided to use the usual one. Consider how he did it.
Materials and tools that the author used for homemade:
Material List:
- plywood, galvanized sheet steel;
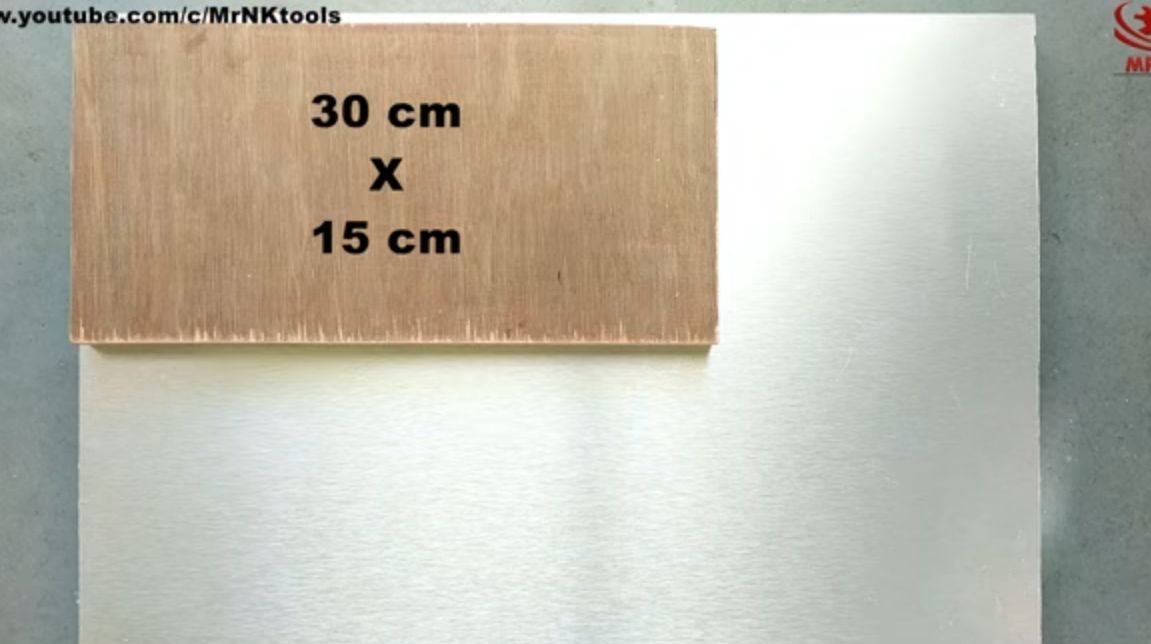
- a piece of plywood measuring 30X15 cm;
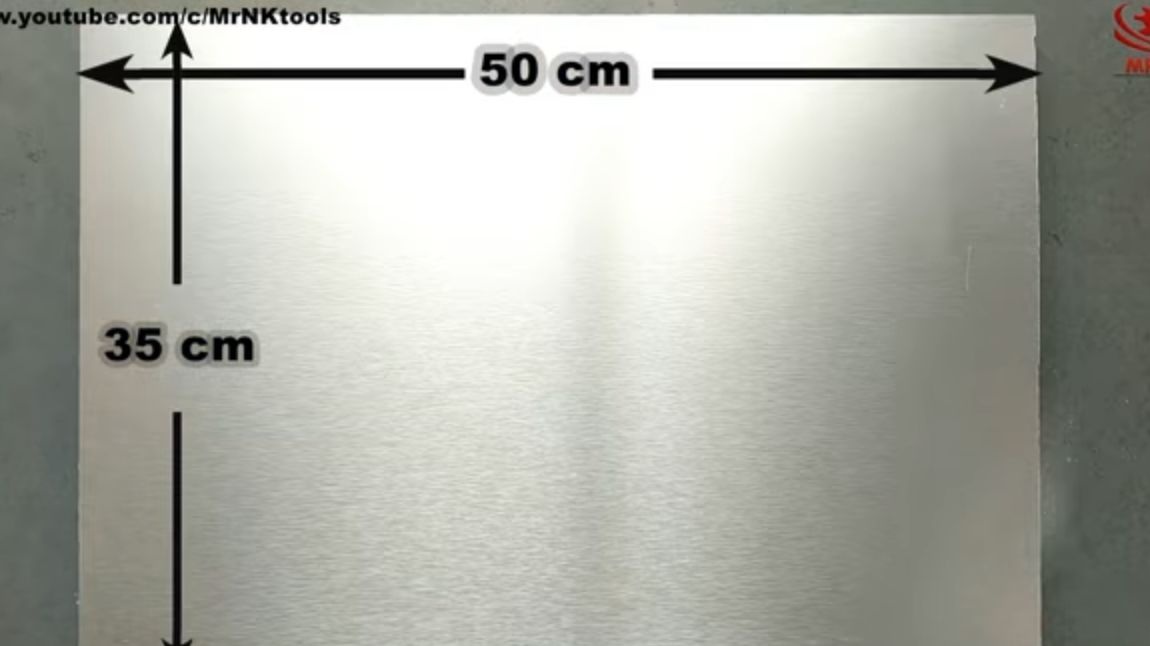
- a sheet of galvanized steel measuring 50X30 cm;
- 5-inch saw blade;
- bolt, nuts, washers (for fastening the cutting disc;
- door hinge;
- two sliders;
- drill;
- wood screws;
- paper, scissors, pen (for making a template);
- a piece of thin sheet steel (suitable for canned food);
- oil or wood paint.
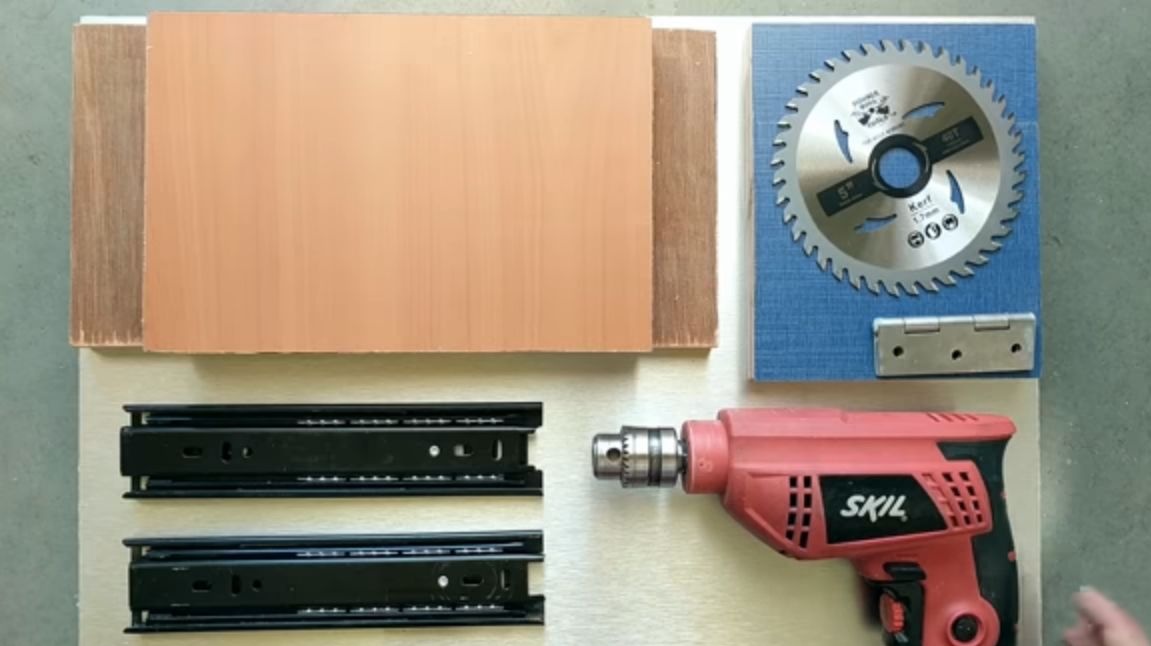
Tool List:
- ;
- marker;
- jigsaw;
- rasp;
- glue for wood;
- wrenches or pliers;
- (for drilling).
Saw manufacturing process:
Step one. We assemble the base and the vertical support
As a basis, you will need plywood or a wide, flat board. From above, the author attaches galvanized sheet steel to it. Thanks to this coating, a convenient desktop is obtained, but it is not necessary to use metal at all.
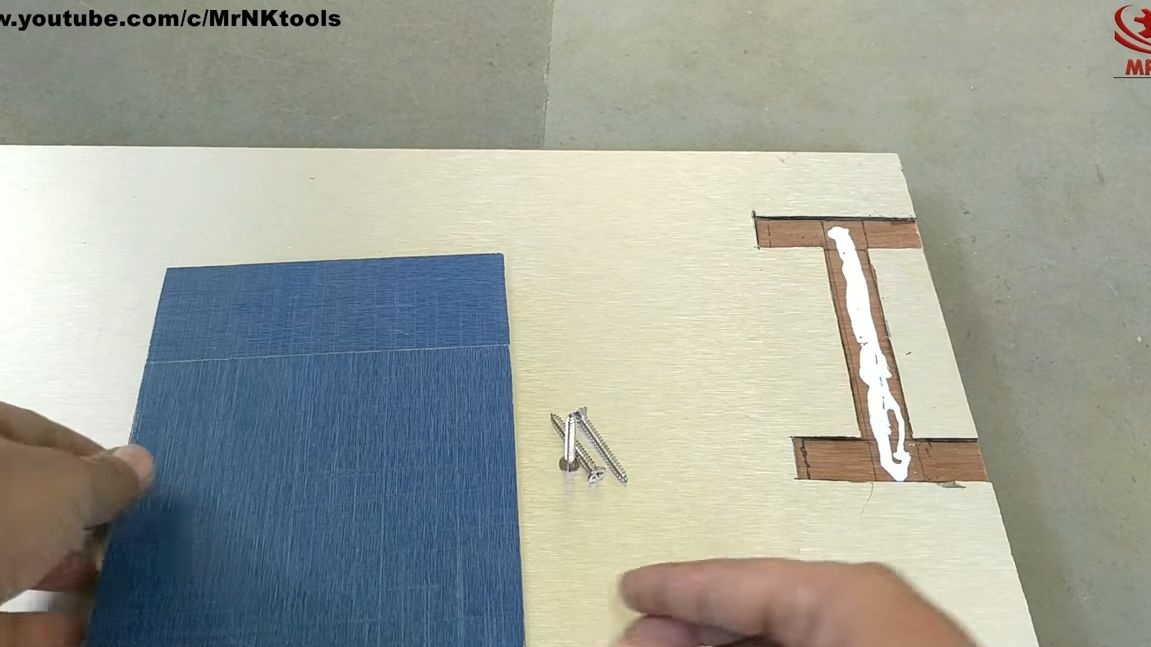
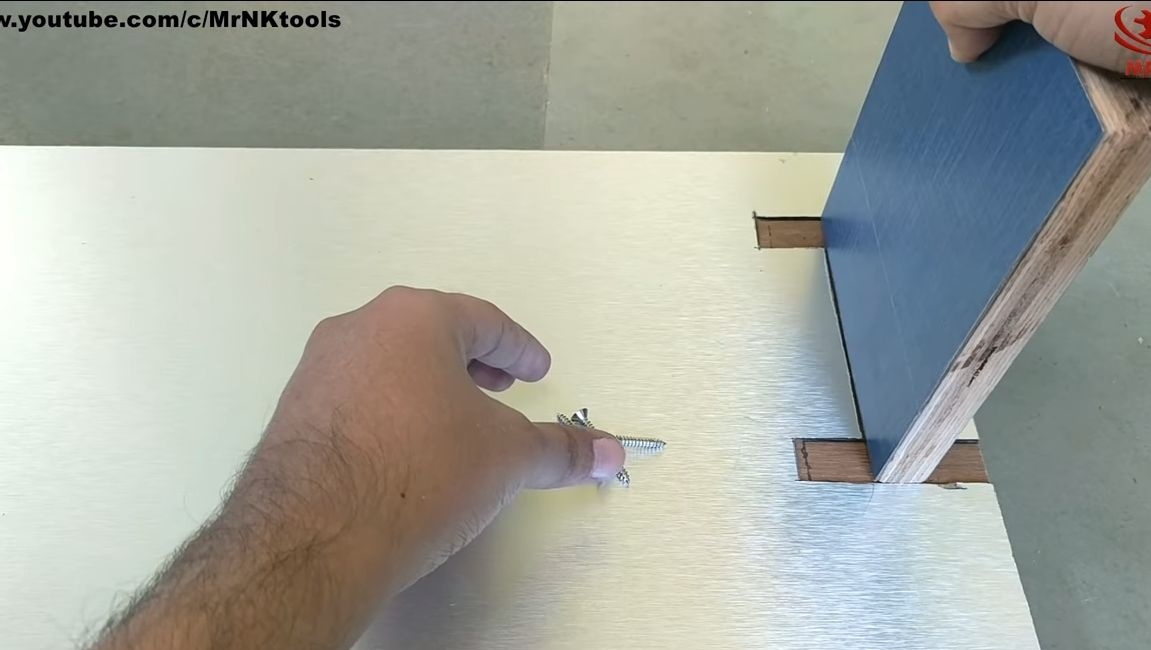
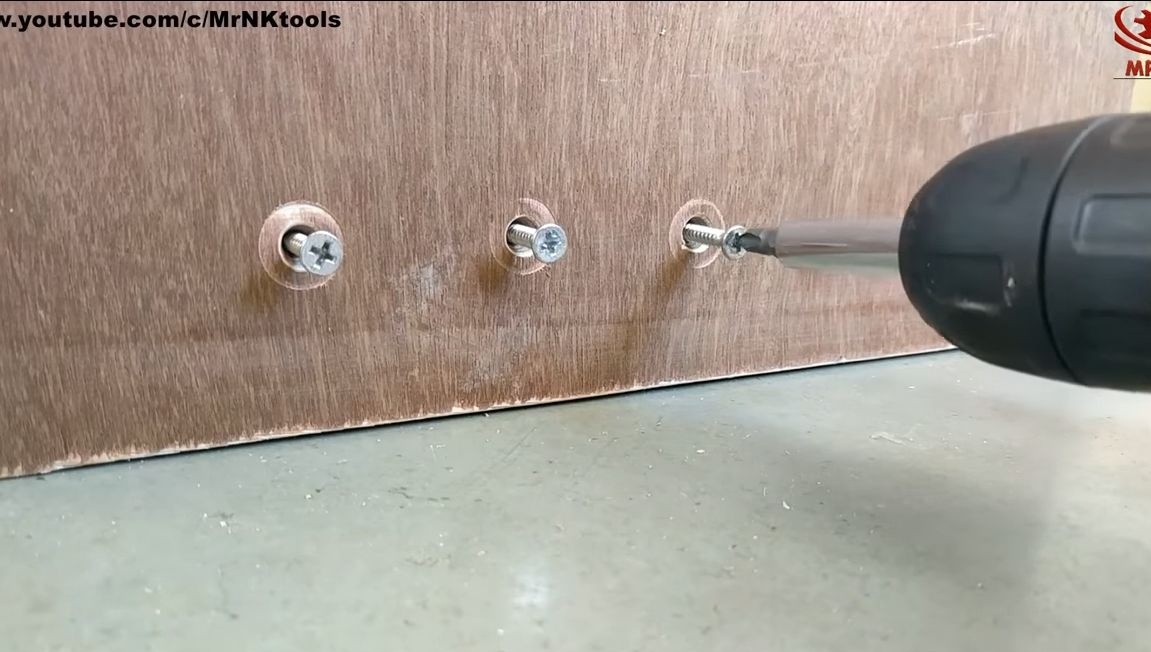
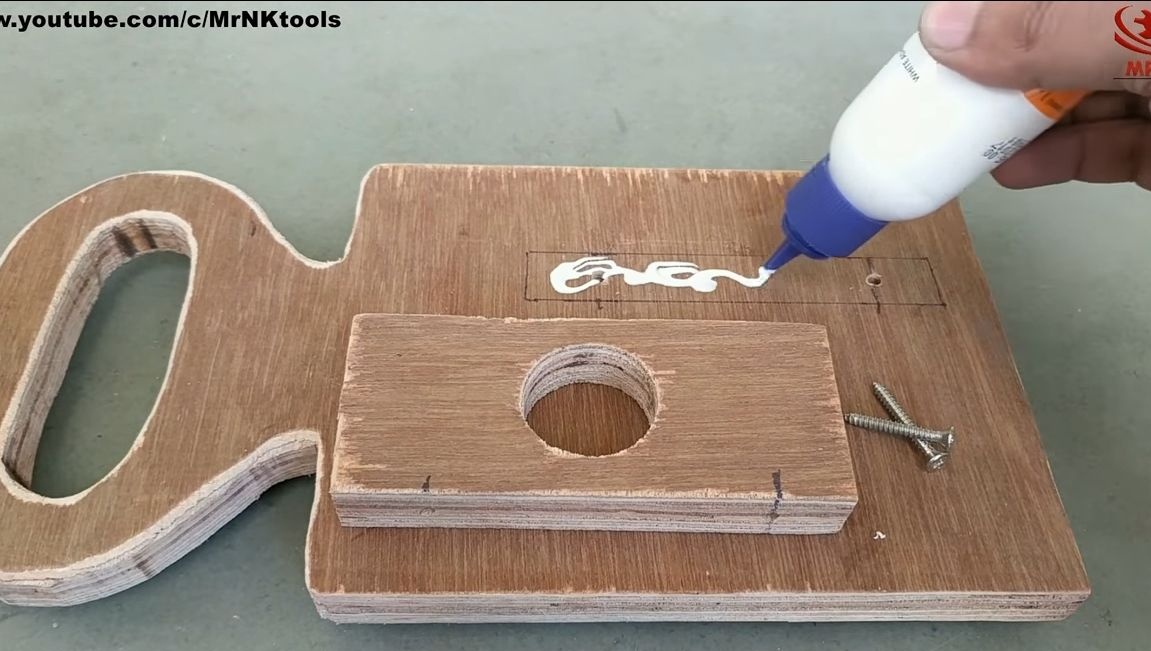
As a vertical support that holds the drill and the entire structure, we take a piece of plywood measuring 30X15 cm. Cut a groove in the base metal under it, as the author did. Drill 2-3 screw holes in the base to tighten the part well. Apply glue to the base and install a vertical stand. On the other hand we screw in the screws.
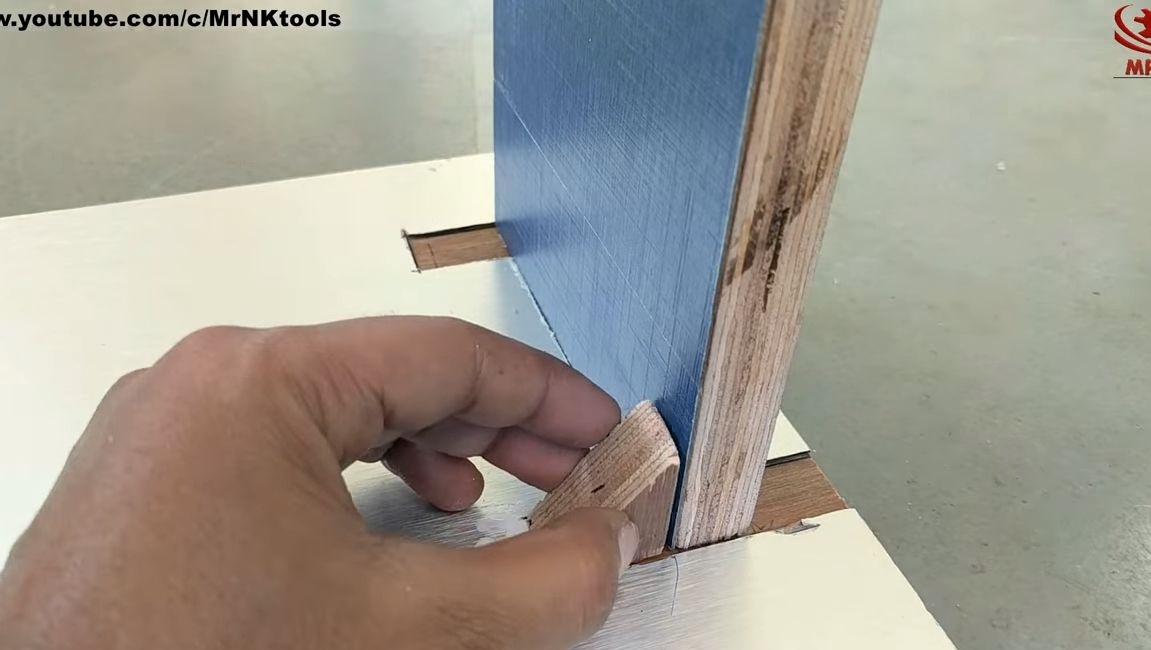
Our support should be as strong as possible, since the consequences in the event of a breakdown can be fatal. To strengthen, cut 4 triangles of plywood. Glue them on both sides of the rack and let the glue dry.
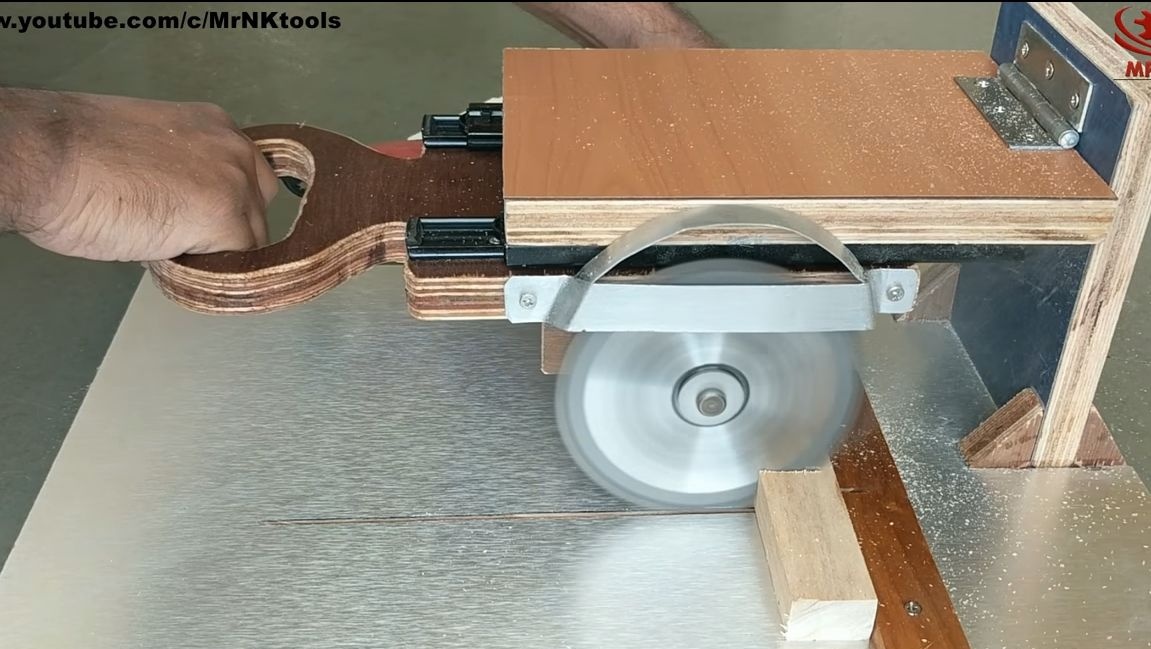
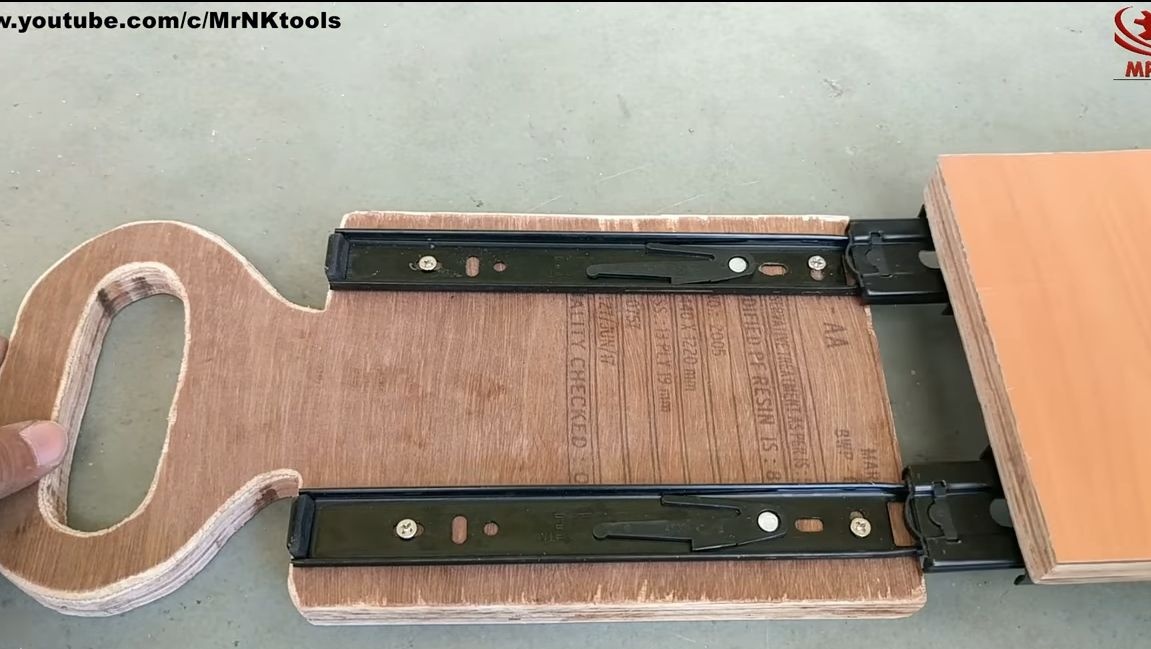
Step TwoWe make an exit platform
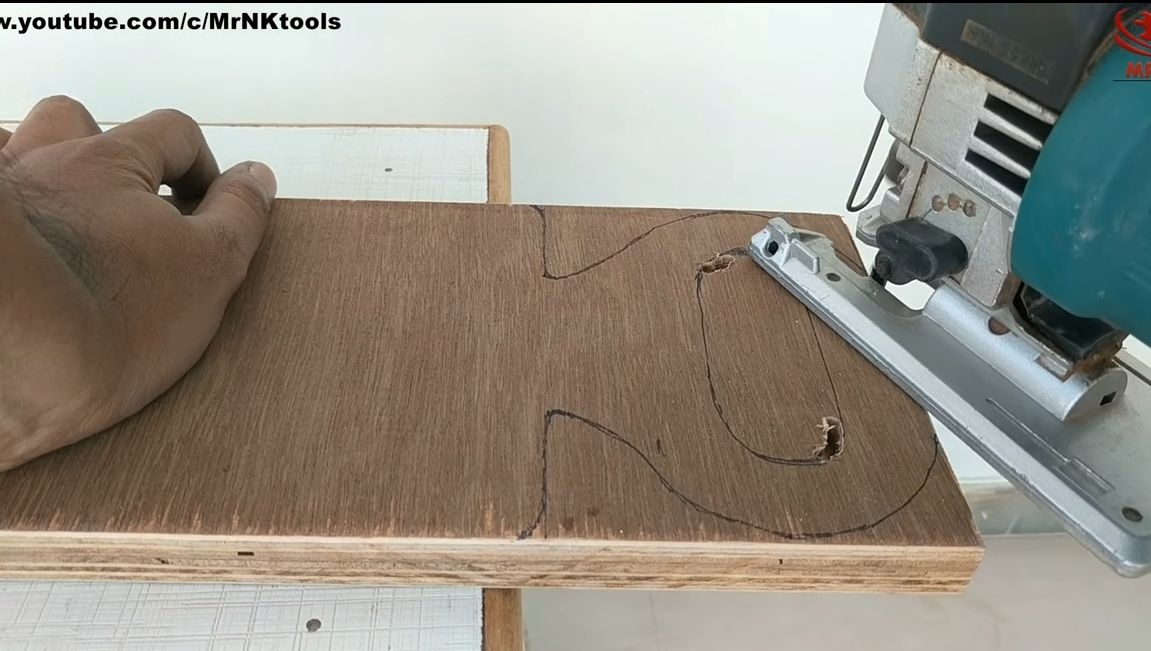
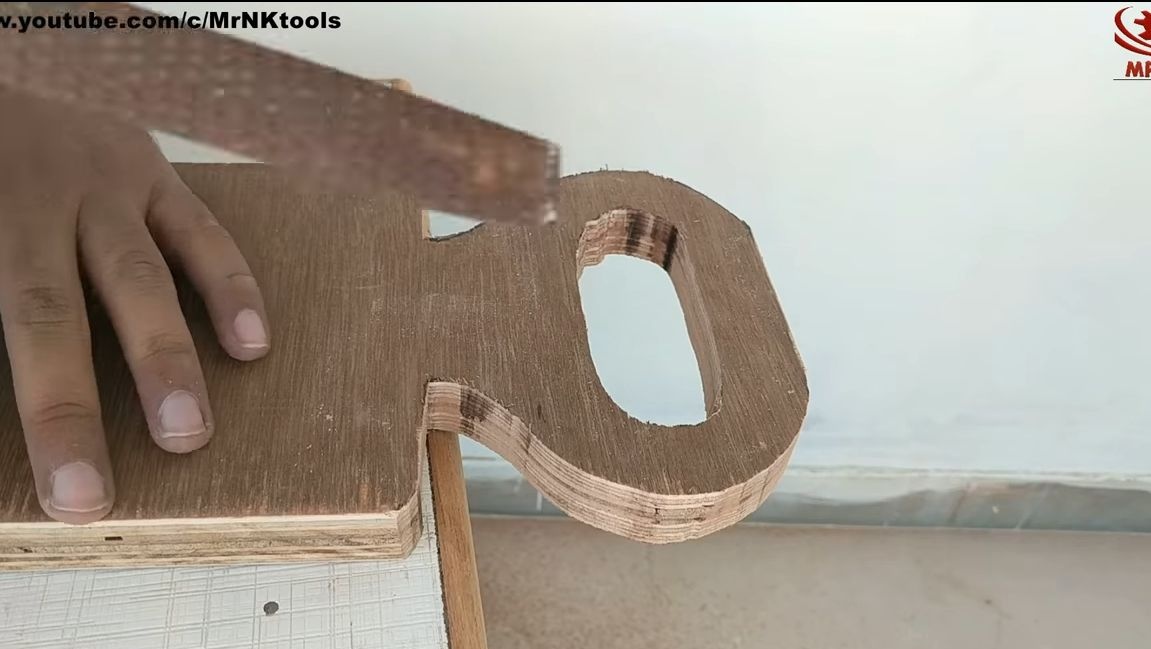
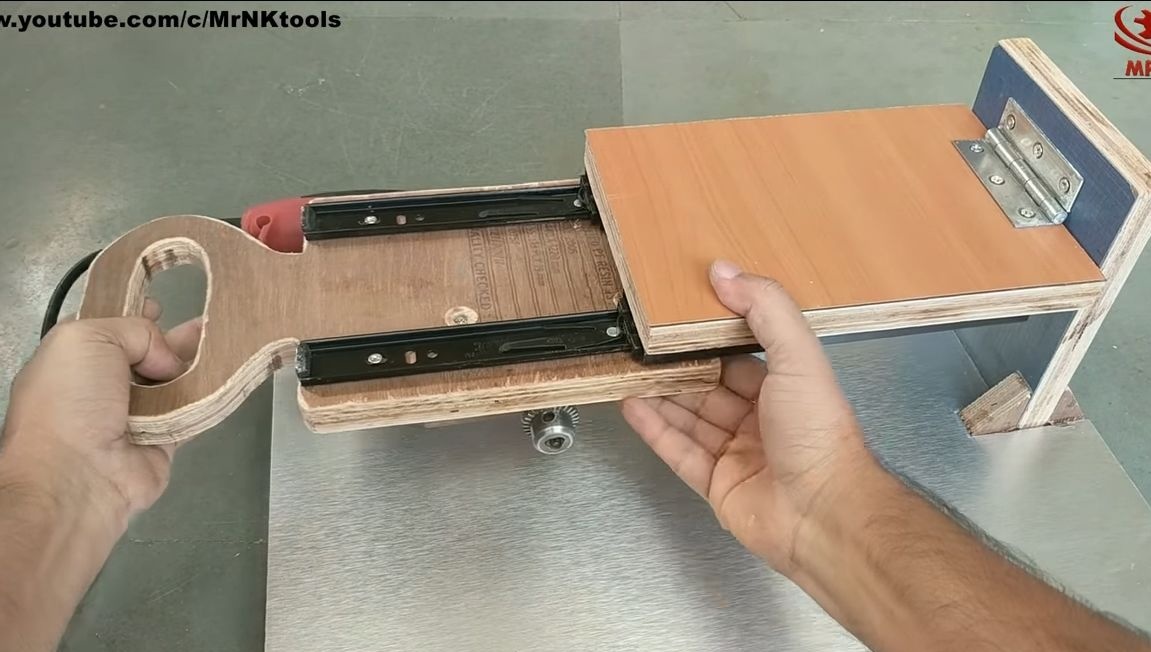
We turn to the manufacture of a moving platform. It is mounted on sliders and moves in a horizontal direction. A drill with a cutting wheel is installed on this platform. The platform is made of plywood. There is nothing complicated in its manufacture, you just need to cut a handle that is convenient in shape and smooth the edges of the material. The author first made a pen profile template from paper, and then attached it to plywood, circled it with a marker and cut it out.
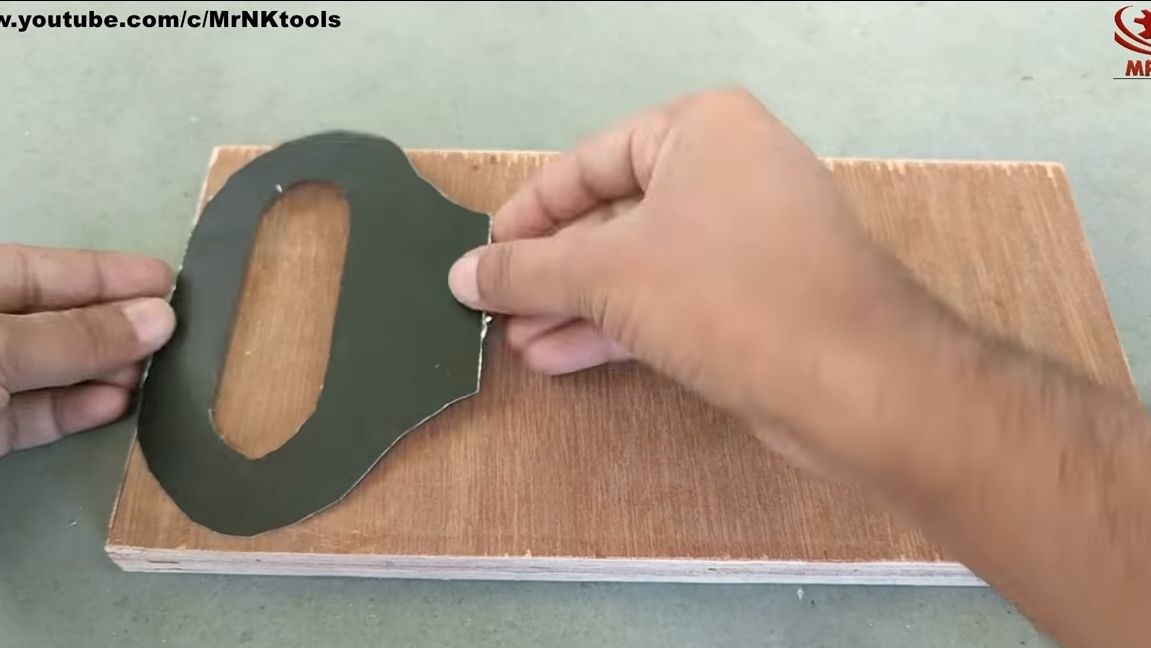
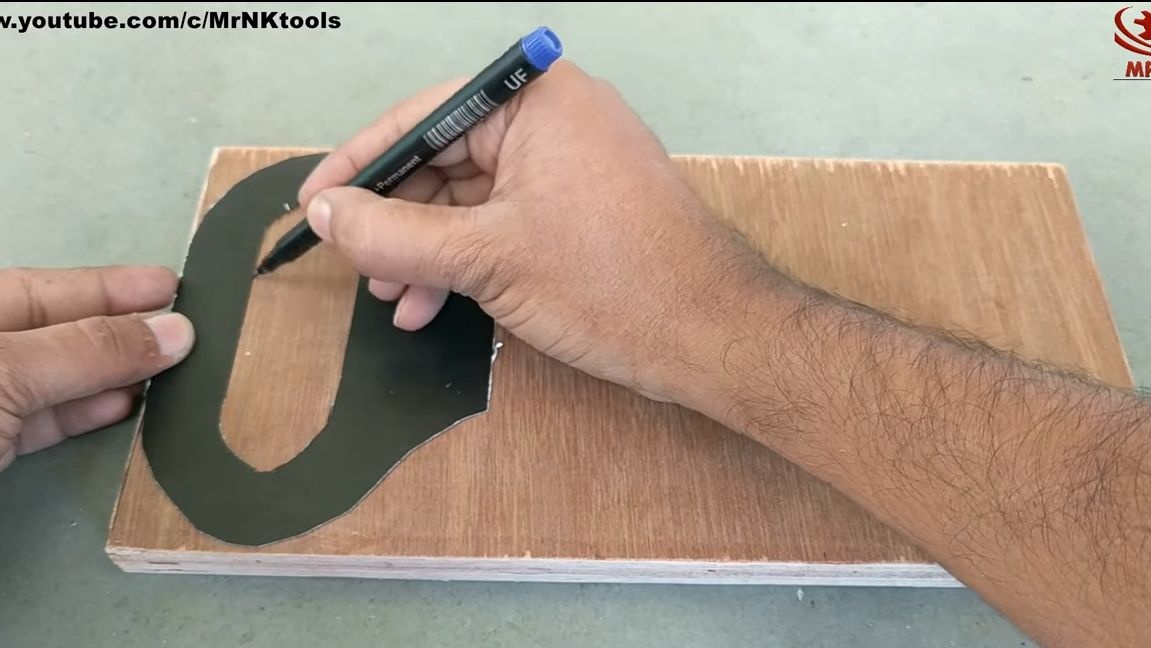
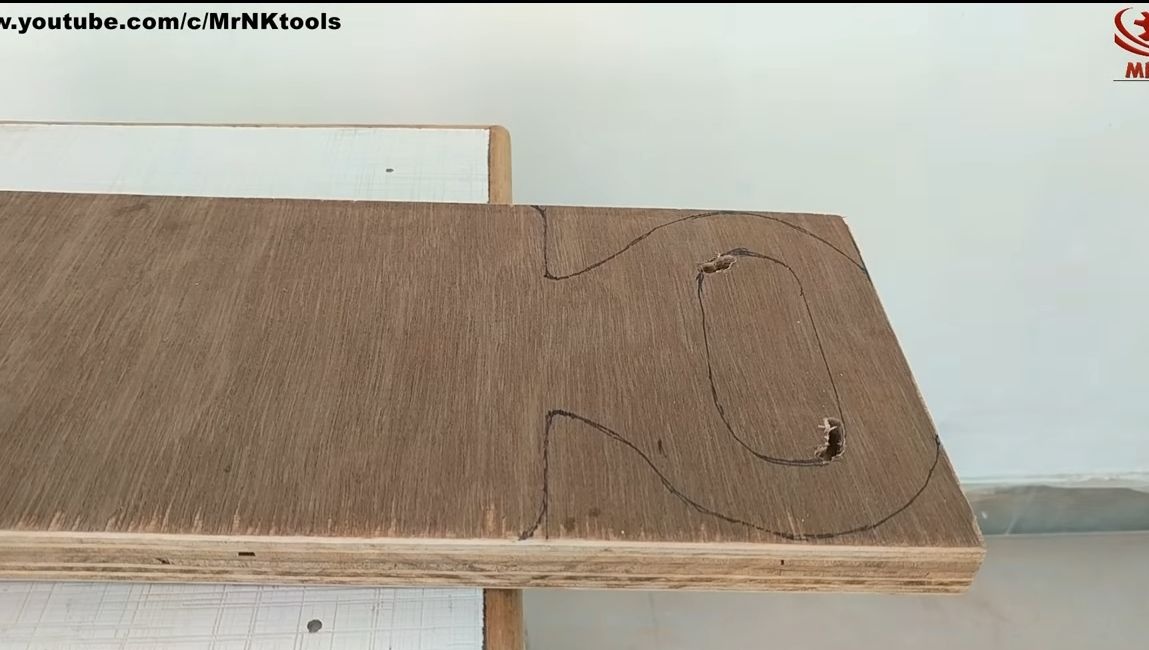
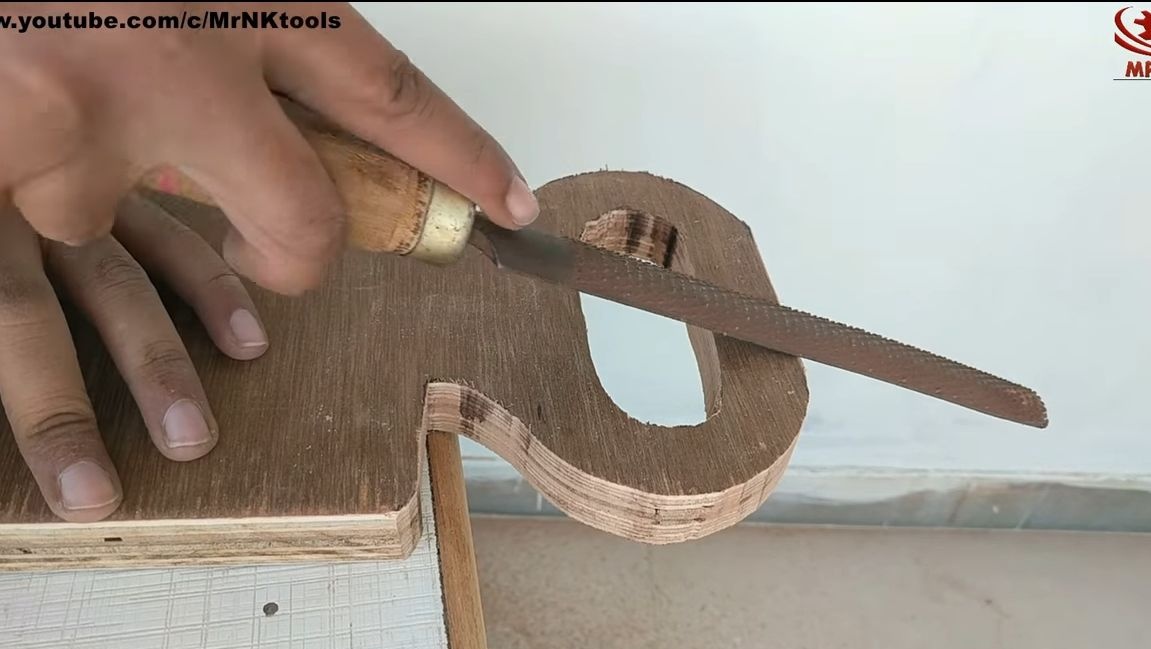
Cutting such a shape is most convenient with a jigsaw, but you can handle it manually. Drill holes to cut out the inside. In the end, you will need a rasp, grind with it burrs around the entire perimeter of the platform. If you wish, you can also go with sandpaper.

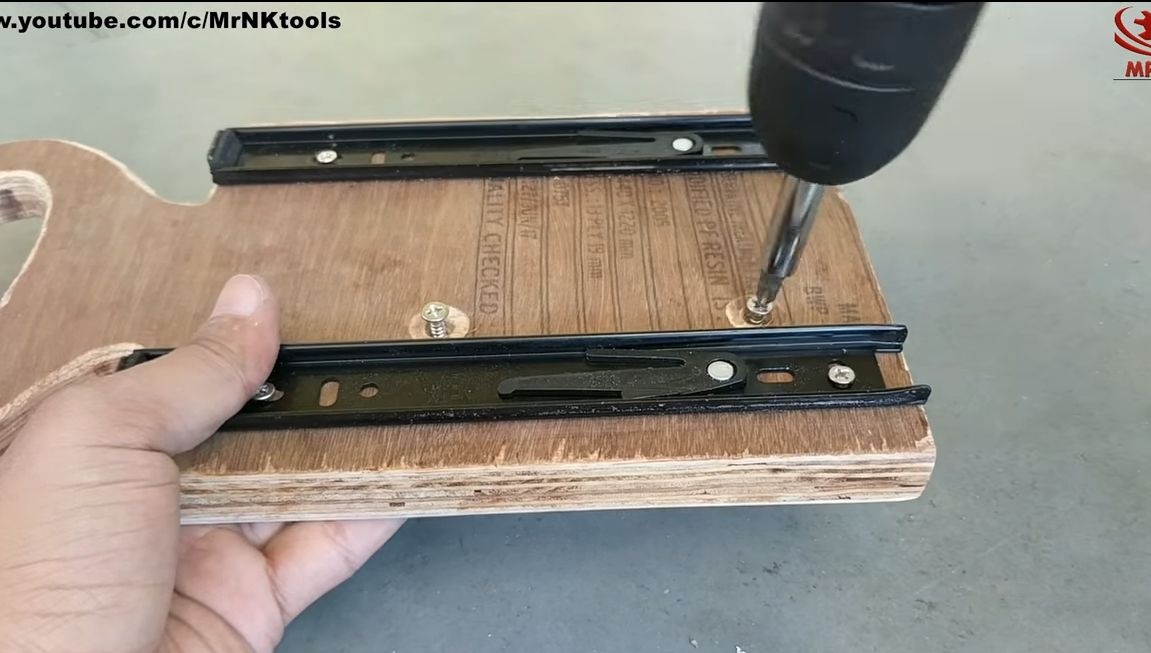
Step Three Install the sliders
For the design you will need to buy two good slider. They should not have large backlash, since razka will not be of high quality. You can buy them in construction or furniture stores.
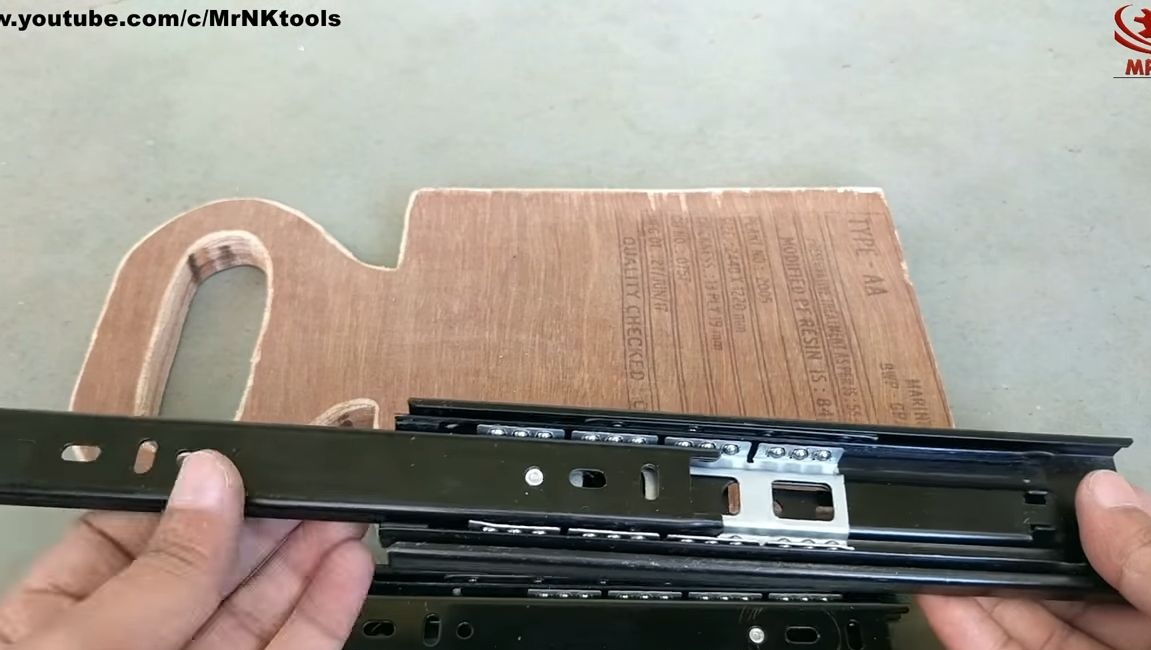
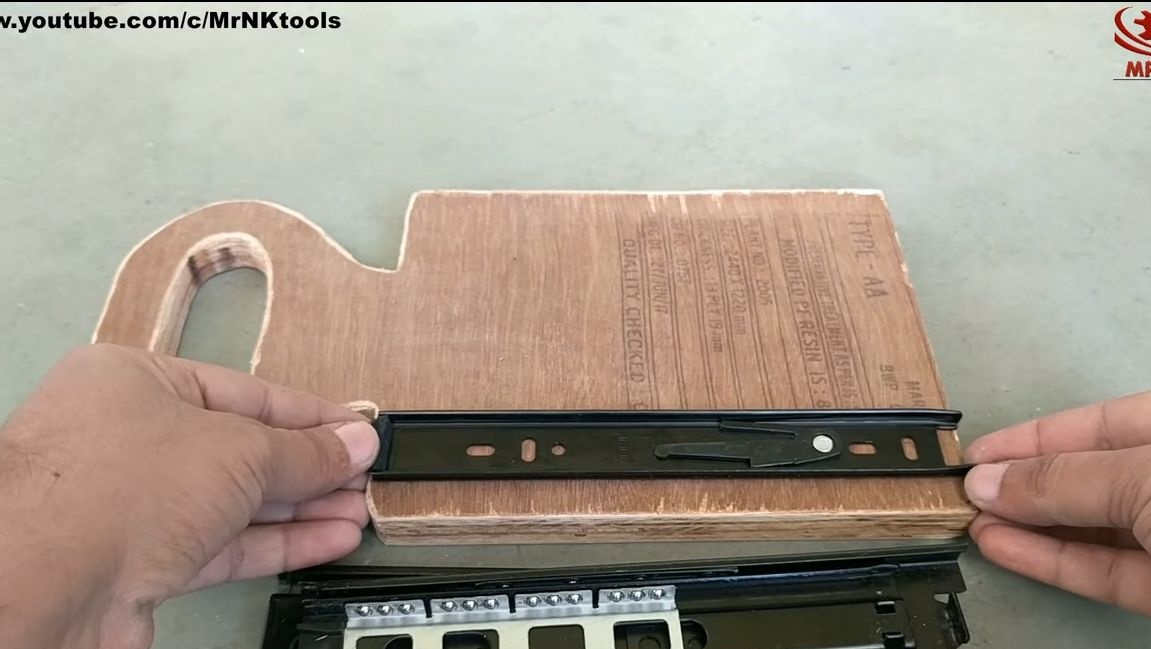
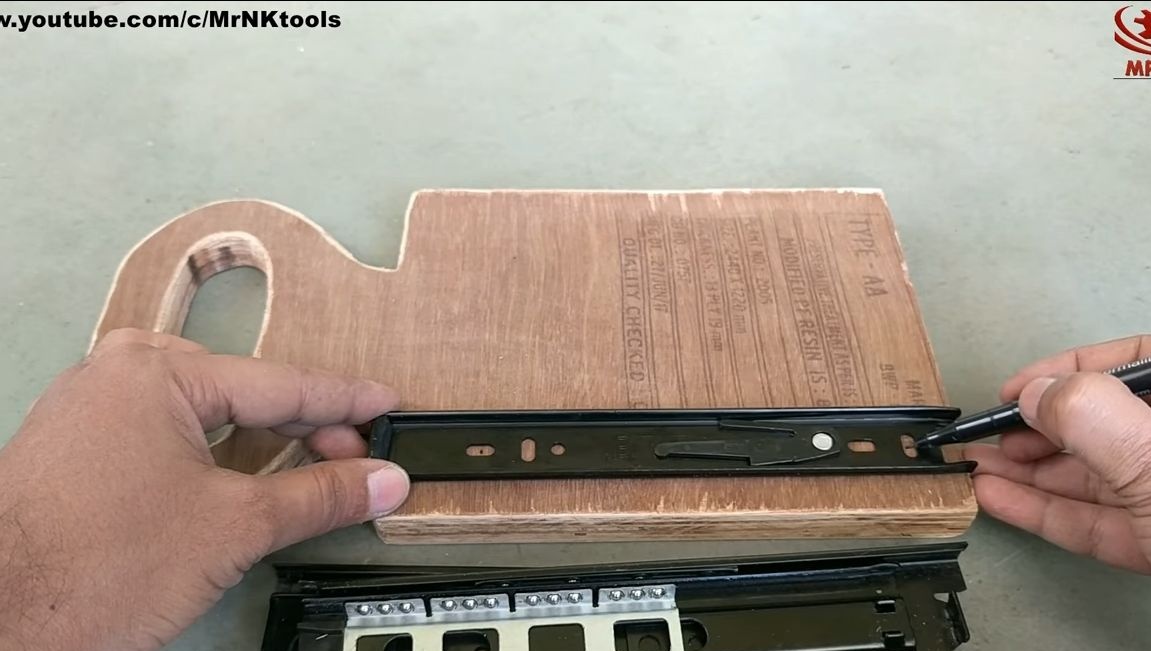
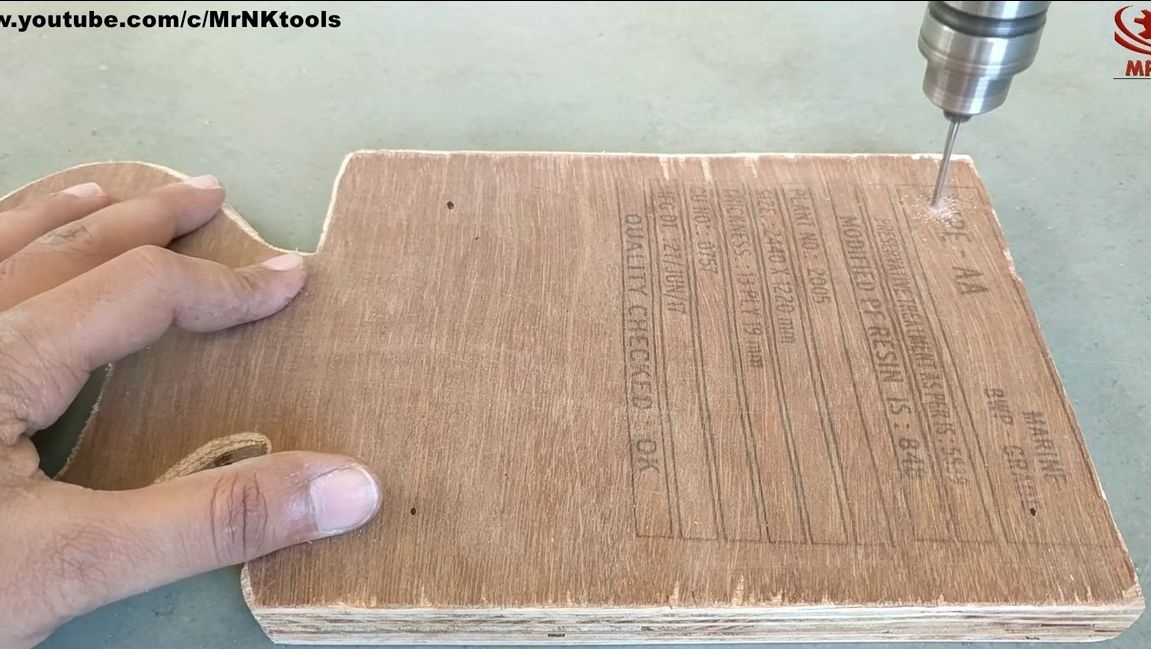
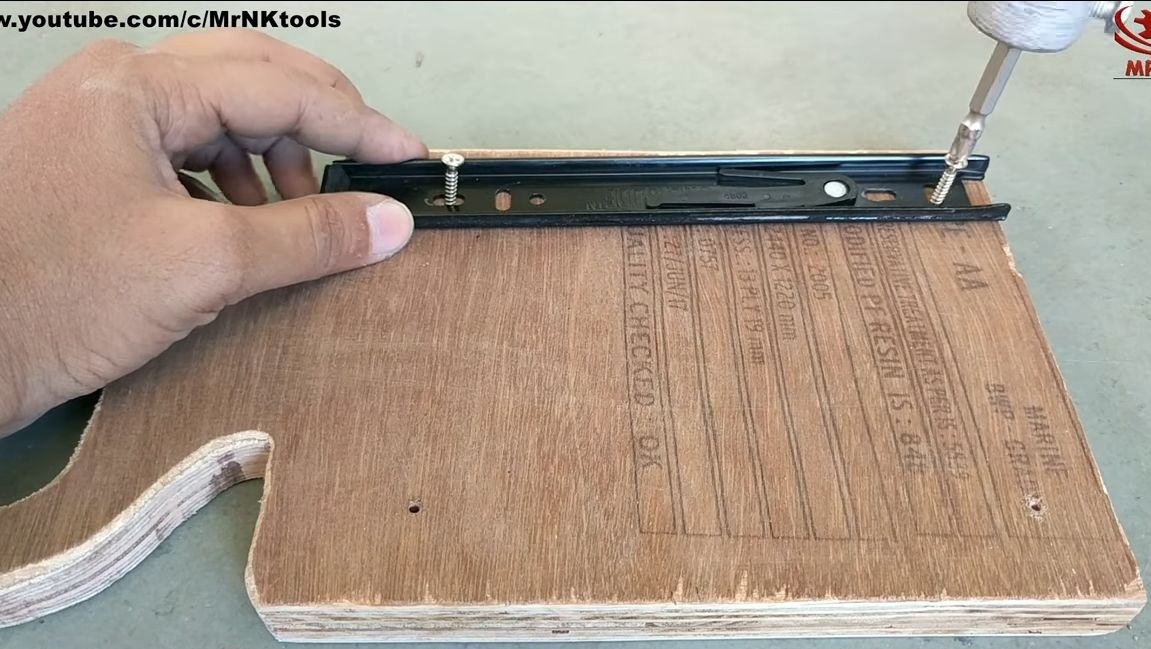
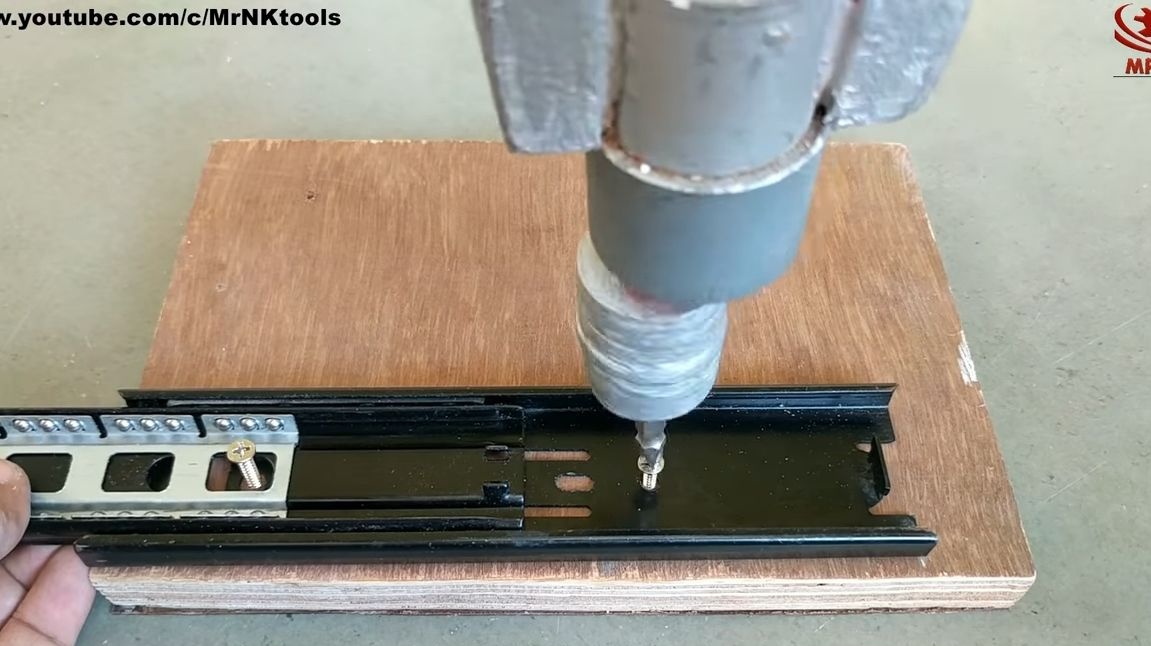
To fix the sliders, we disassemble them, you should get two halves. One part is attached to the platform, and the other to the base. Take another piece of plywood the same size as your platform and lay one on top of the other to accurately drill holes. The second piece of plywood will act as the base (horizontal mount).
Sliders must be placed strictly parallel, as otherwise the design will wedge. When drilling holes, screw the sliders with the screws on the tree.
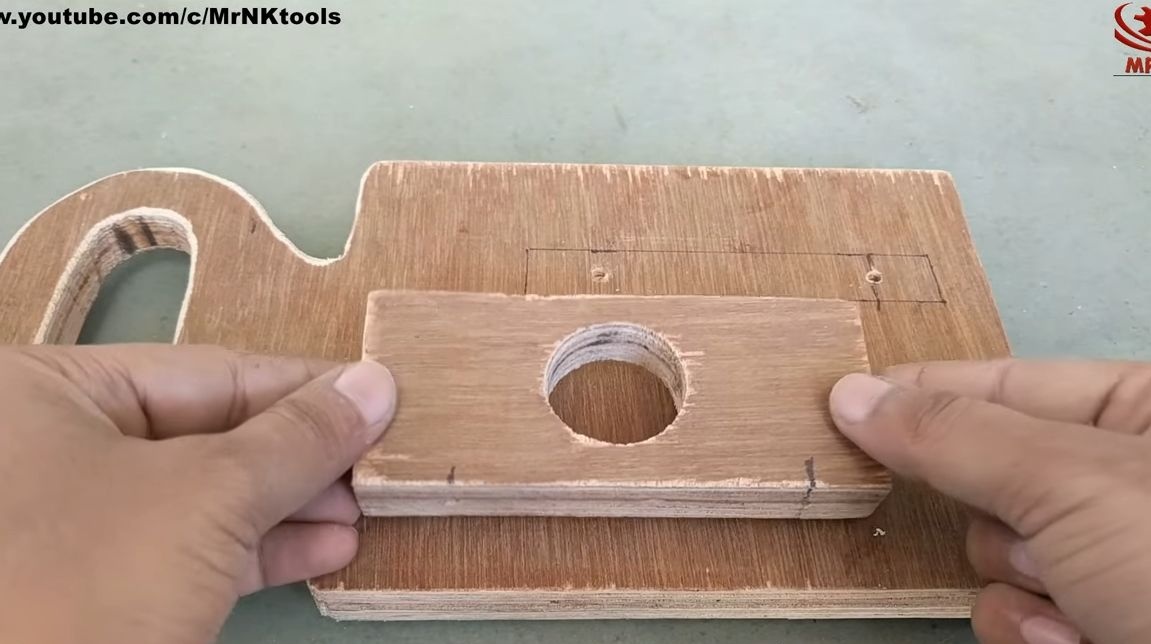
Step Four Install a drill
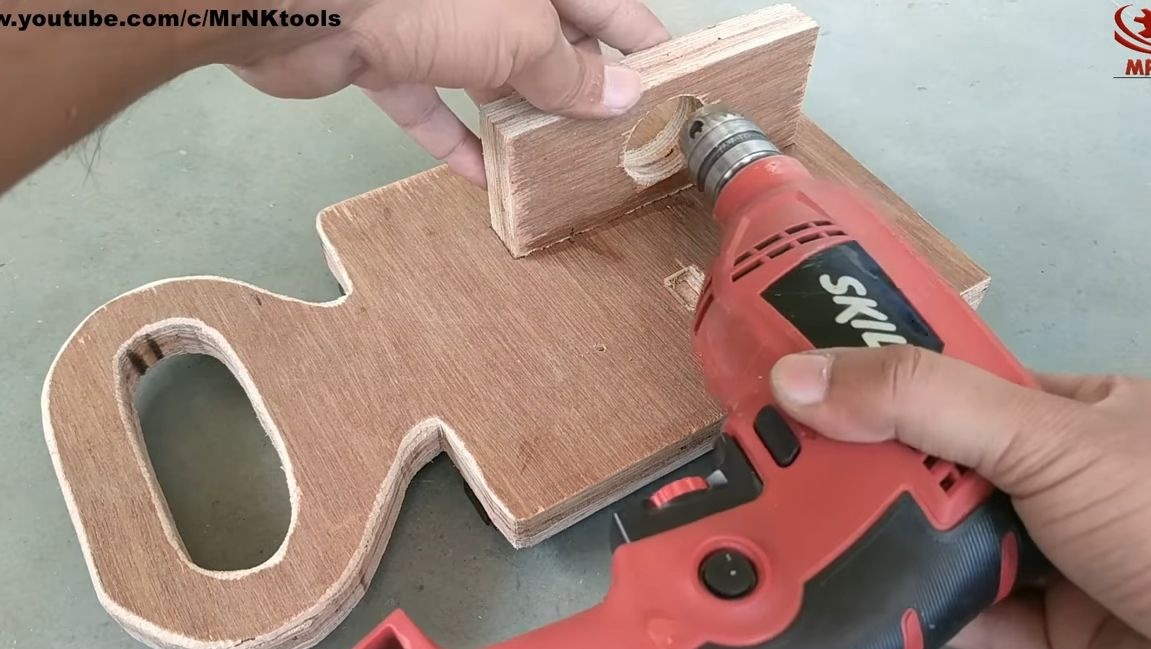
The drill is attached at two points. For fastening you will need to make a part from plywood, which is visible in the photo. This is a rectangle with a large hole inside, the nose of the drill (the one where the front handle is located) is inserted into this hole. We put glue on the plywood and install the part. On the other hand, be sure to tighten 2-3 screws on the wood so that everything is held securely.

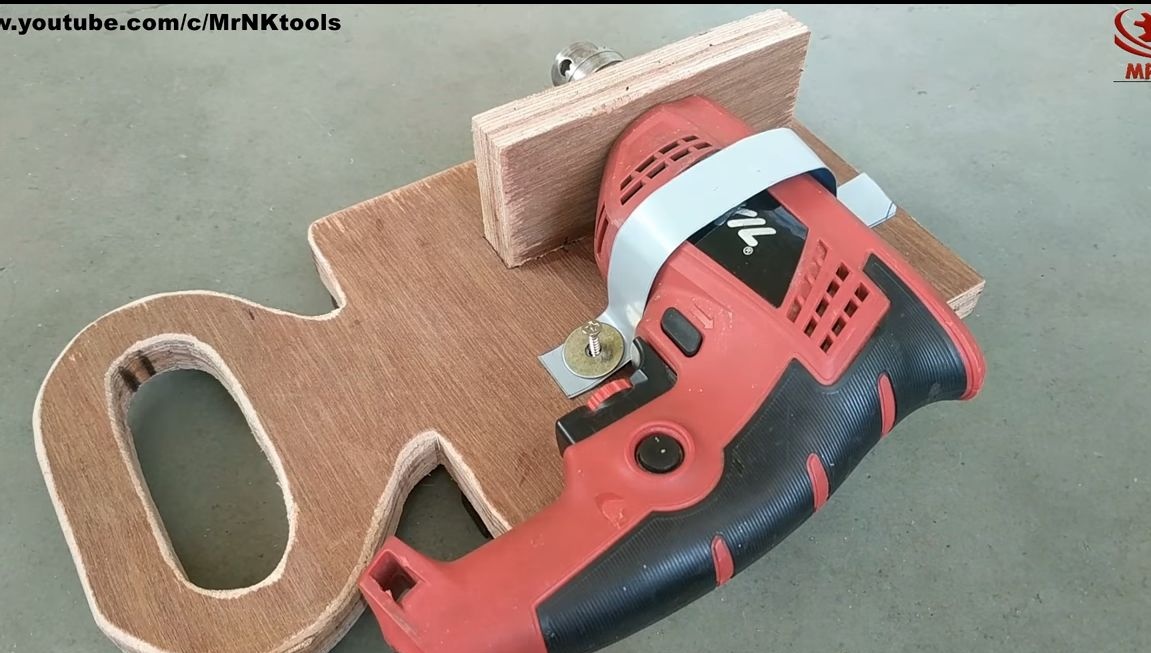
The second attachment point is a clamp, the author made it himself. You will need thin sheet steel, you can completely use metal from used cans. Cut the strip of the desired length and drill holes. We carefully hold the drill with a clamp using screws on wood. Do not forget to place large washers under the screw caps so that the metal does not tear.
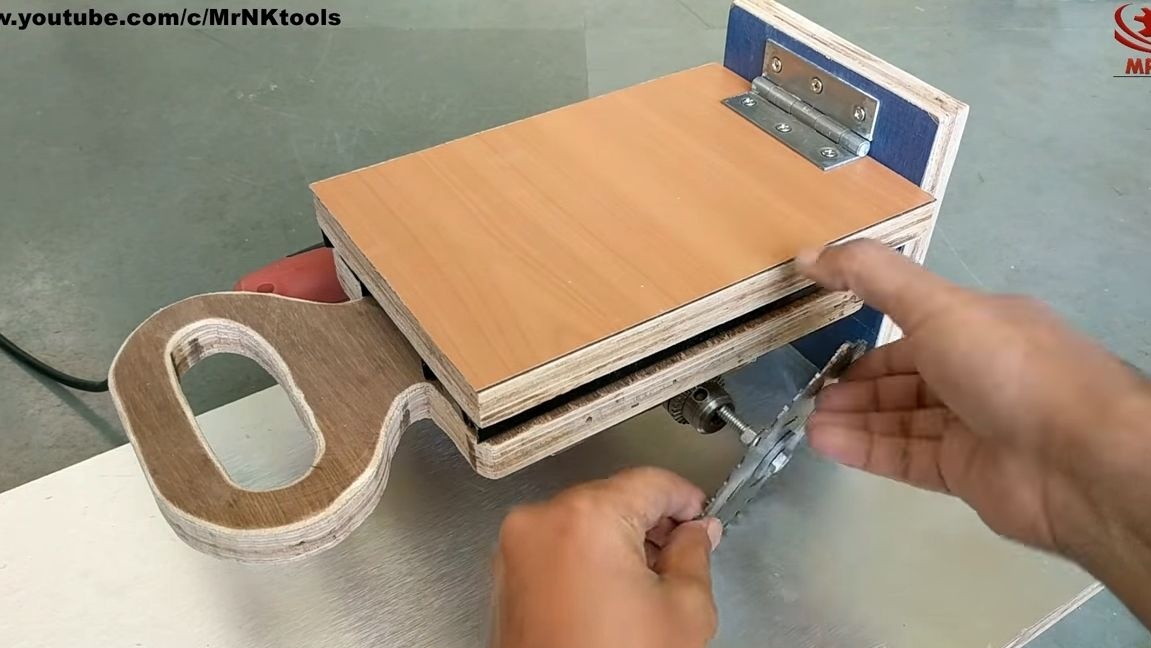
Step Five We fix the horizontal support
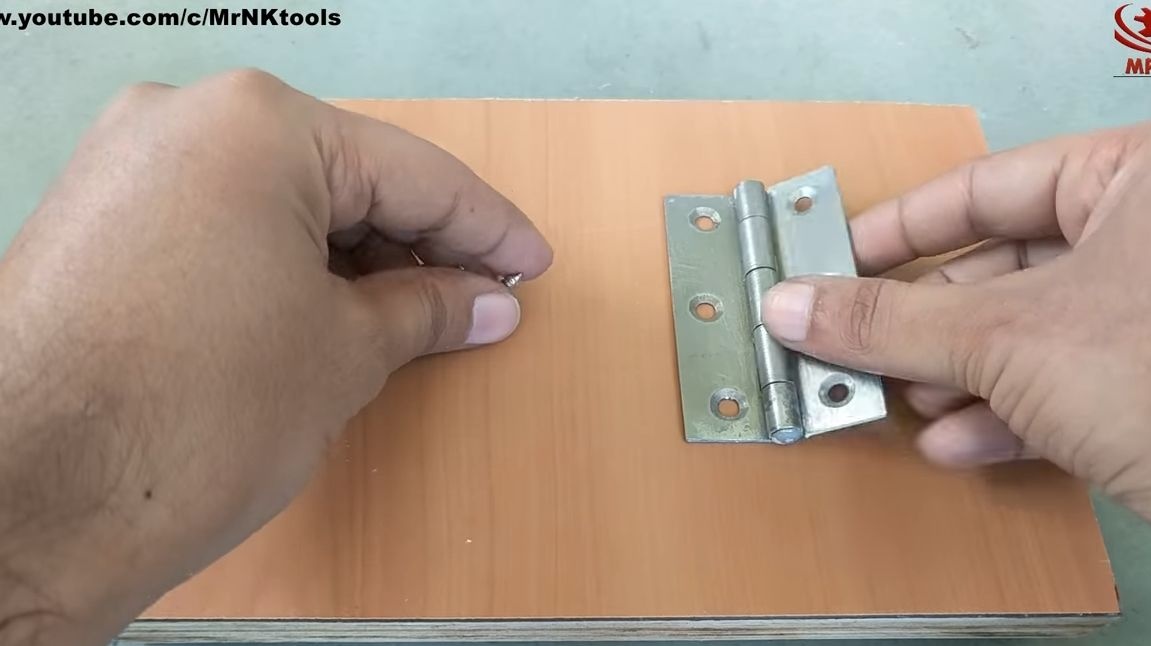
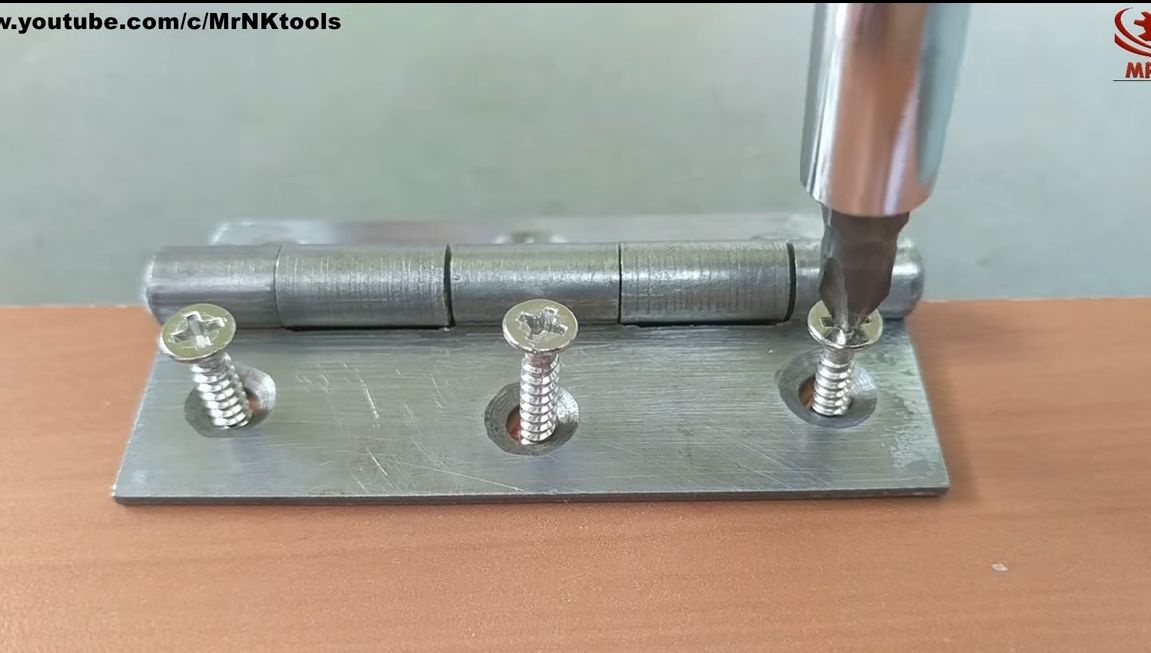
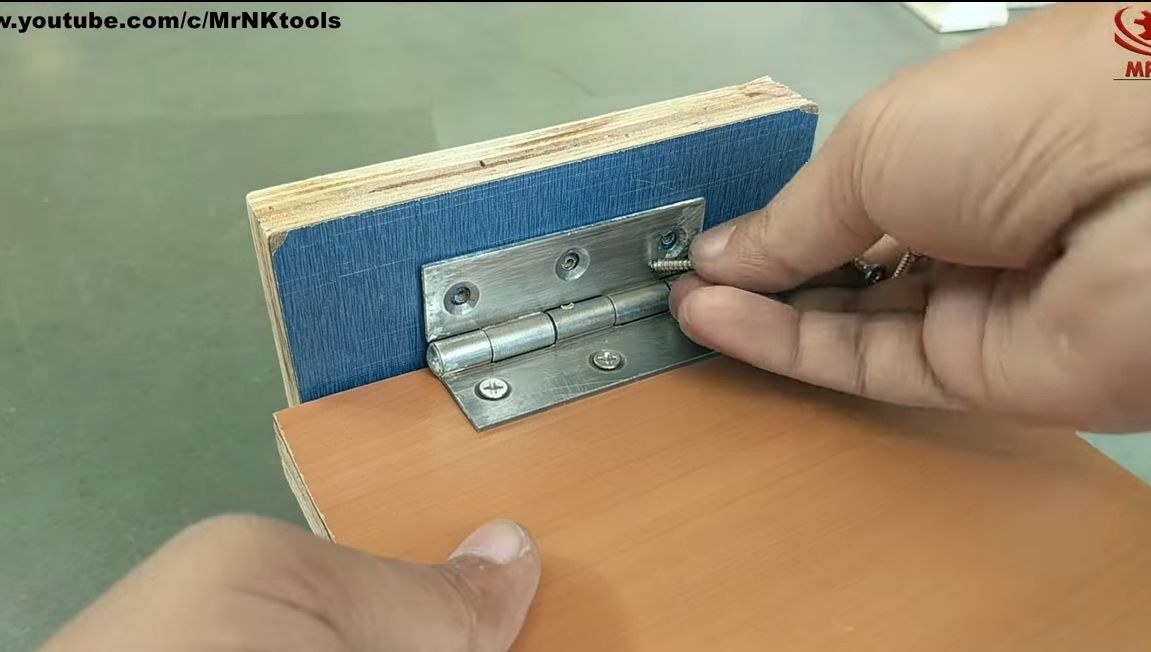
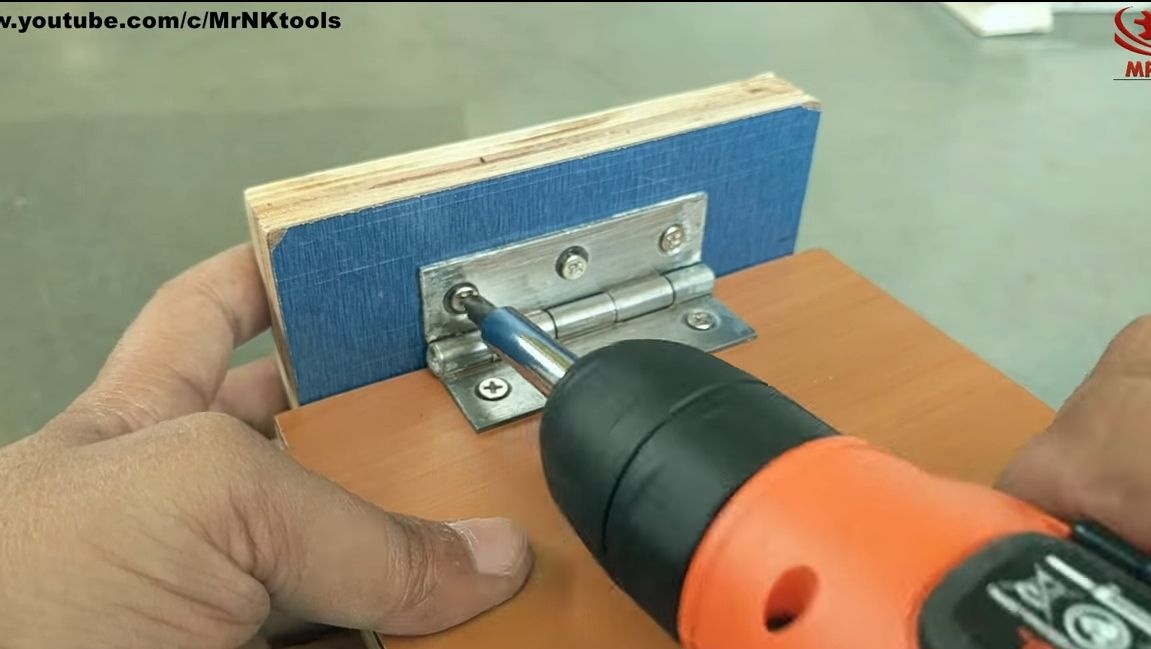
A horizontal support holds the platform with a drill. But it cannot be fixed rigidly, it must move up / down. For these purposes you will need a door hinge. We drill holes under it and screw in the screws. Noose. Take it stronger, since the lever is quite large and the load is considerable.
That's all, now install on the sliders a retractable platform with a drill. Congratulations, half the battle is done! We drink beer, relax ...
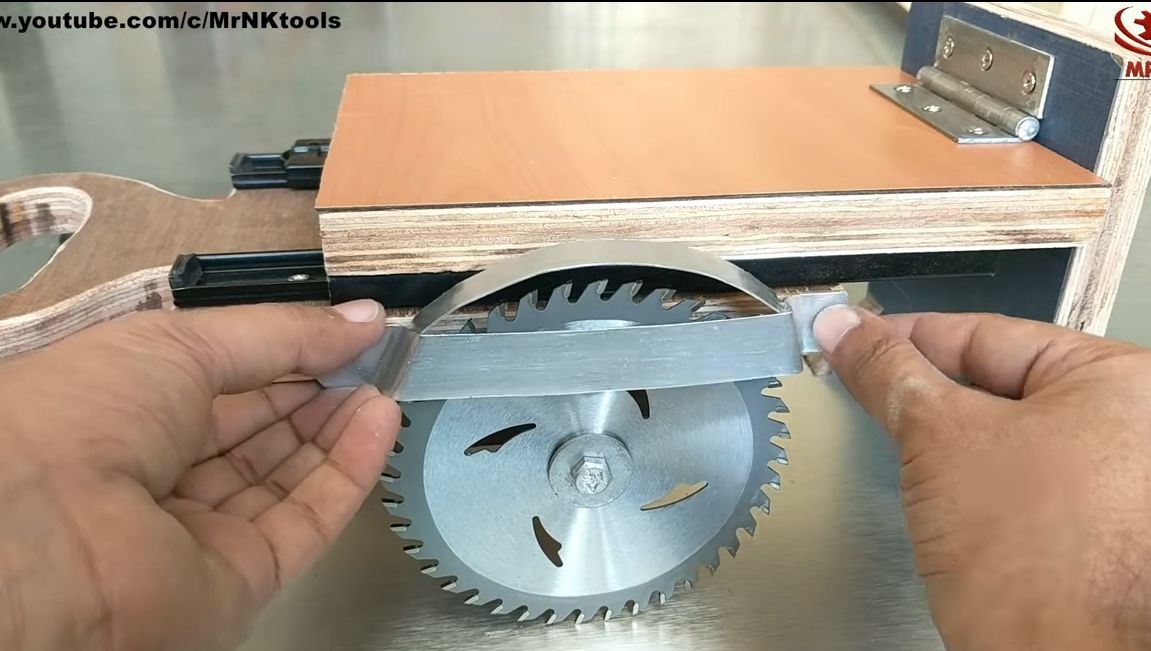
Step Six How to fix the cutting disc?
To fix the cutting disc, you will need a bolt, two large washers and two nuts. The diameter of the bolt must be such that it enters the hole in the disc with a minimum clearance. If there is a big play, you will need to make a sleeve from the tube.

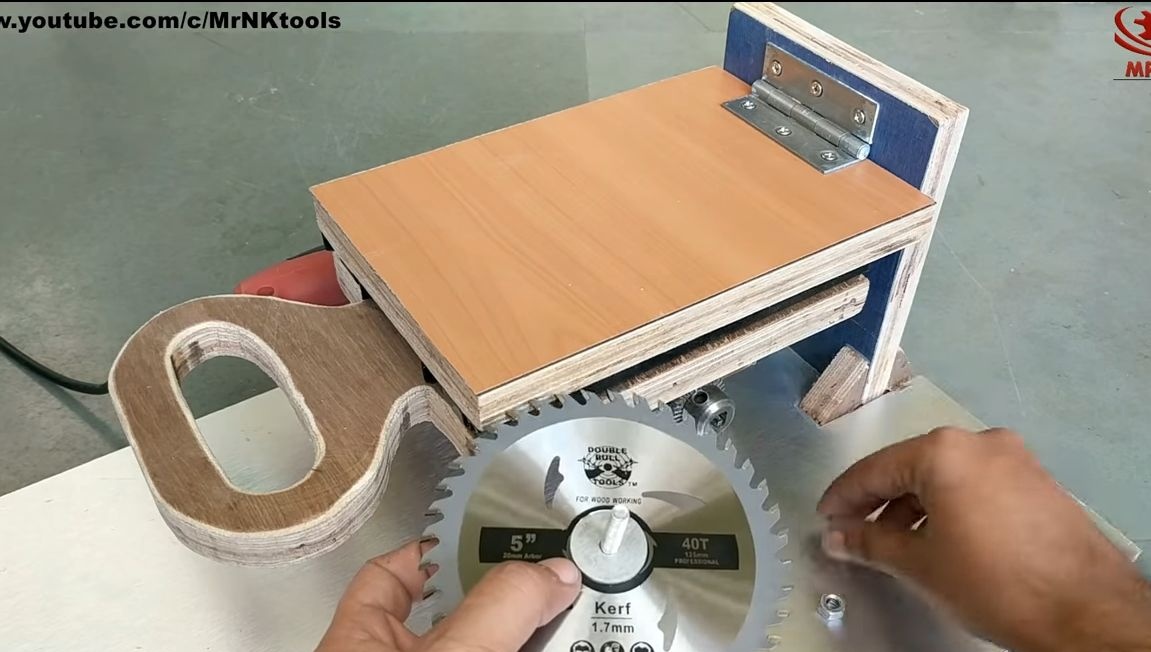
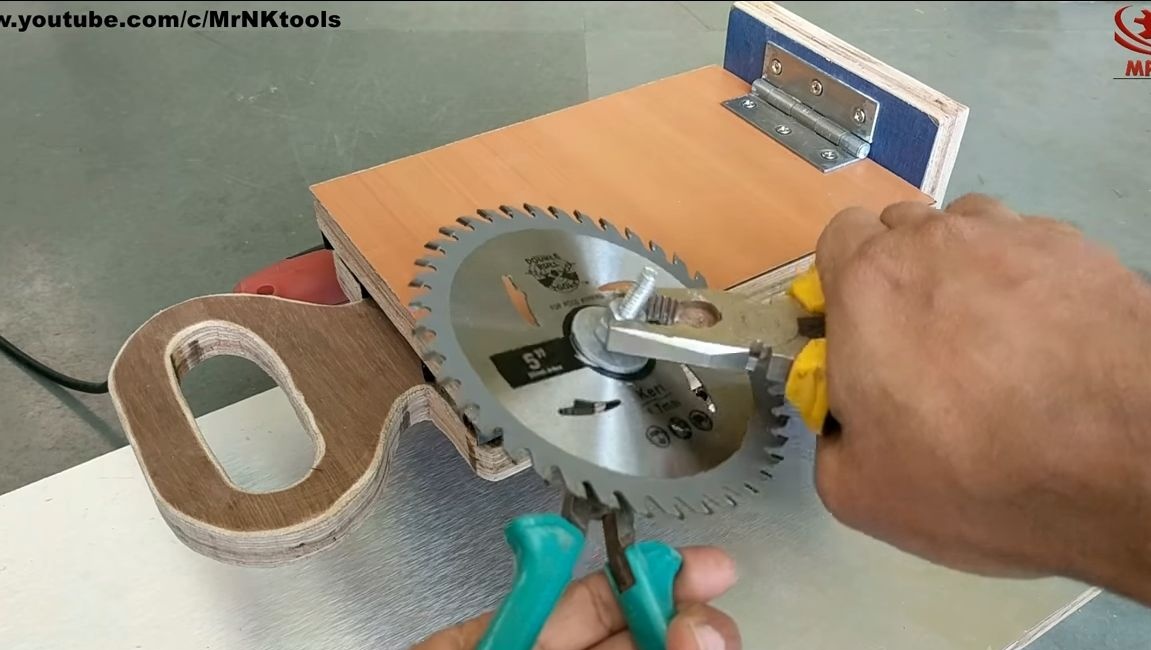
We put large washers on both sides and then tighten the whole thing with a nut. We use wrenches or, in extreme cases, a pair of pliers. To prevent the nut from loosening, it must be locked. To do this, tighten one more nut over the existing one. You can also use nuts with a plastic insert, they are great for such purposes.
Seventh step. Fasten the cutting disc in the drill chuck
All you have to do is fix the manufactured nozzle in the drill chuck. We insert the rod into the chuck and tightly hold it with a key for a drill.

Step Eight. Protective shield
Take care of the safety of the device.Although the drill does not develop high revolutions in comparison, a loose screw can do a lot of trouble. Make a shield for it that will hold the disk if it loosens. Also, the flap will catch a flying piece of material or a tooth detached from the disk.
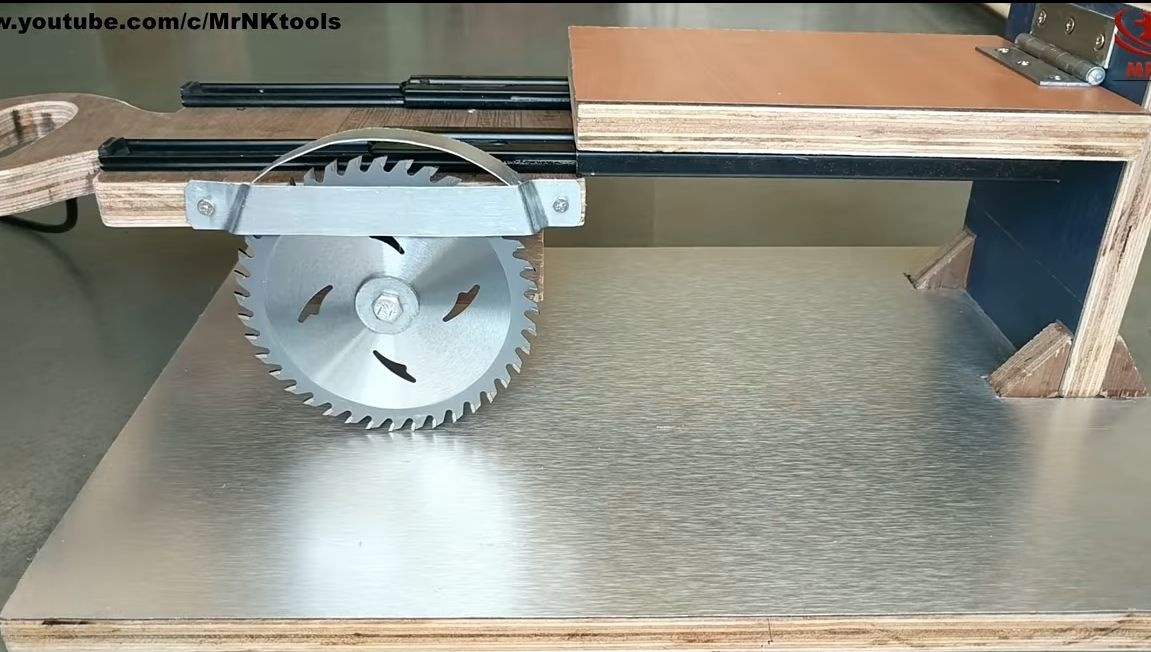
The shield is made very simply. You will need sheet steel, take thicker. The shield is made of two parts. First we cut and bend the side part, and then the one that is located on top. It can be soldered, and it is better to fasten it with small bolts with nuts. Fasten the protective shield with screws, fasten securely!
Step nine Emphasis for the machine
For convenient and safe cutting on the table should be an emphasis in which you will rest the material. You will also need to make a cut in the desktop so that the knife can cut through the material through. We make this slot with the help of the mitral saw already made by us.
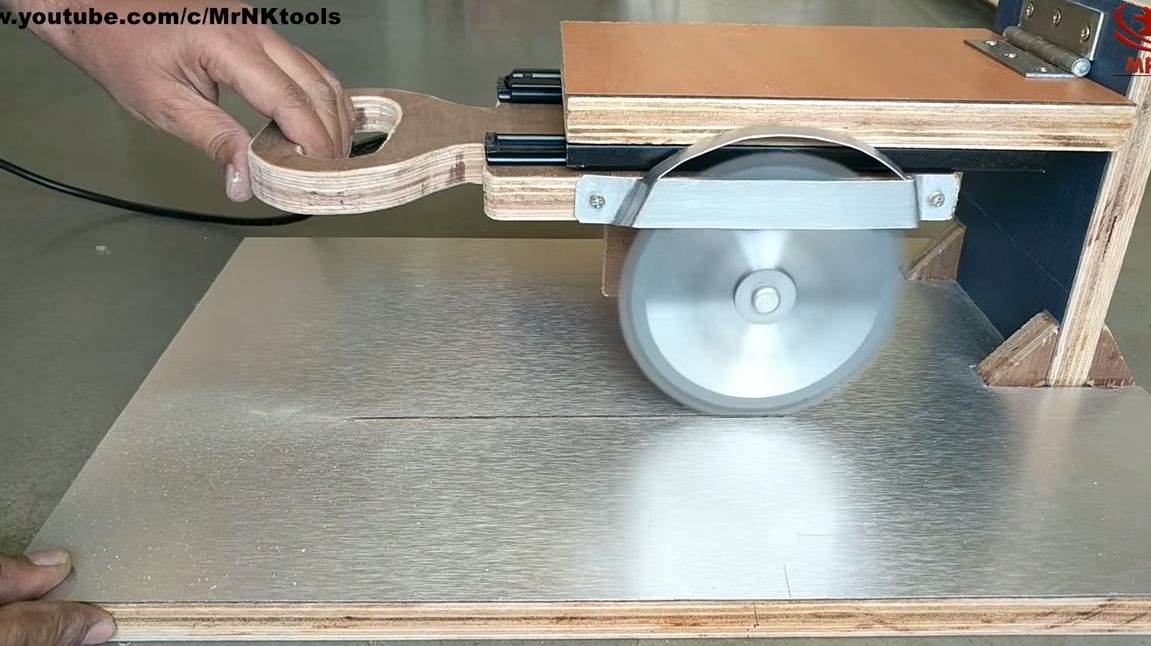
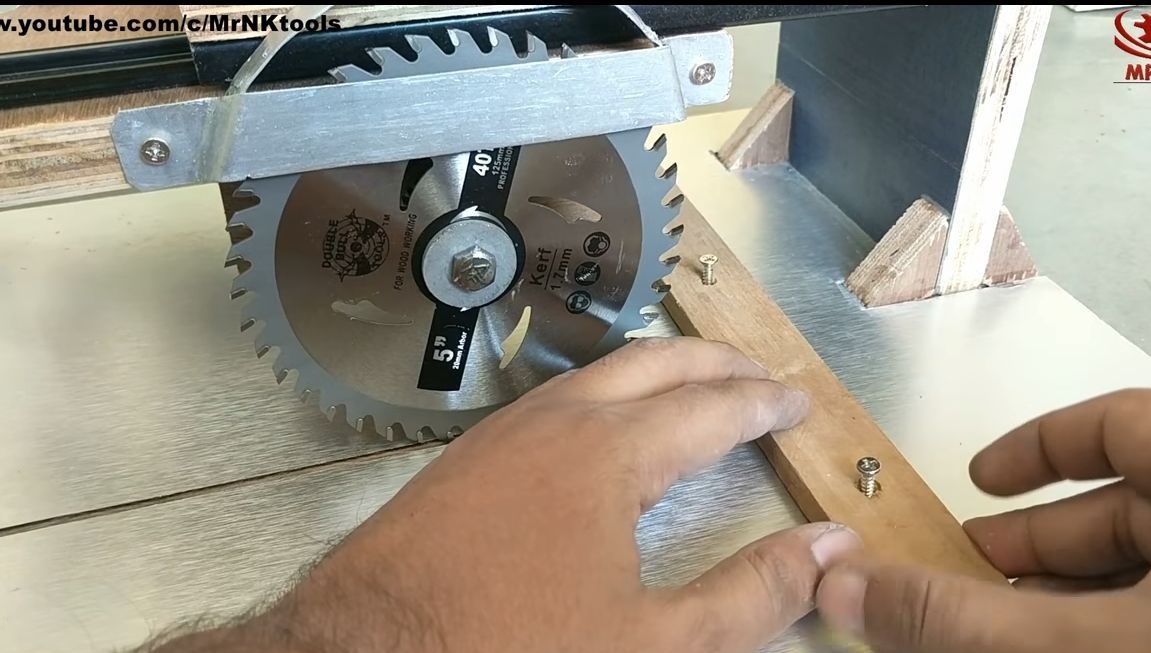
That's all, now tighten the stop. It is a bar or strip. We fasten it with screws.
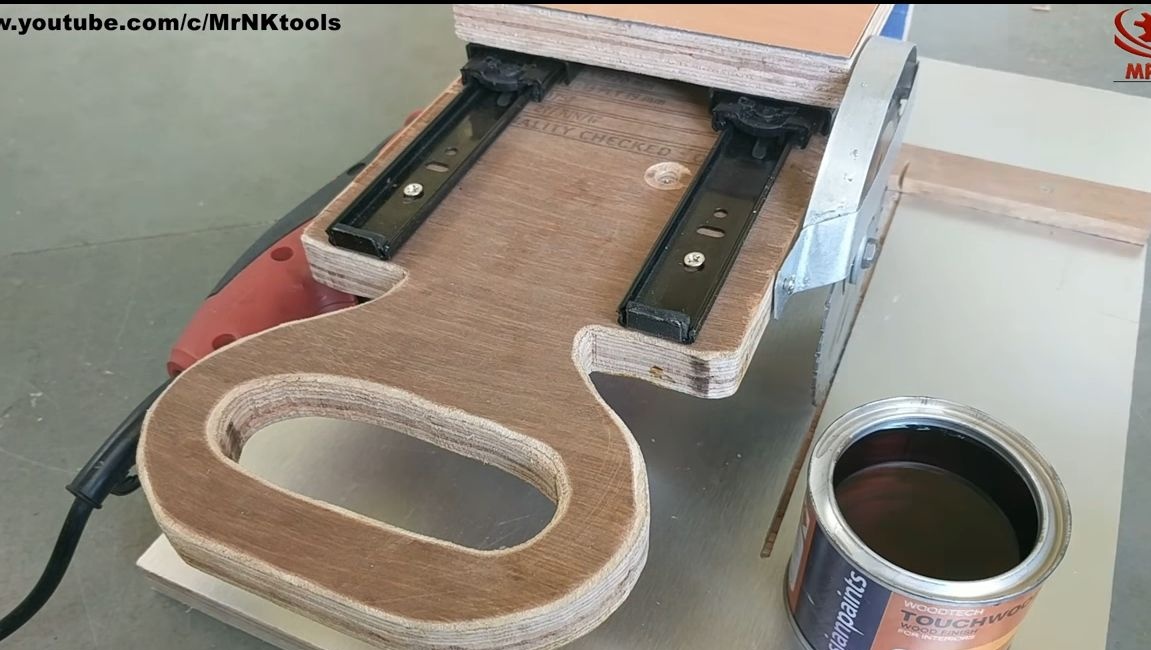
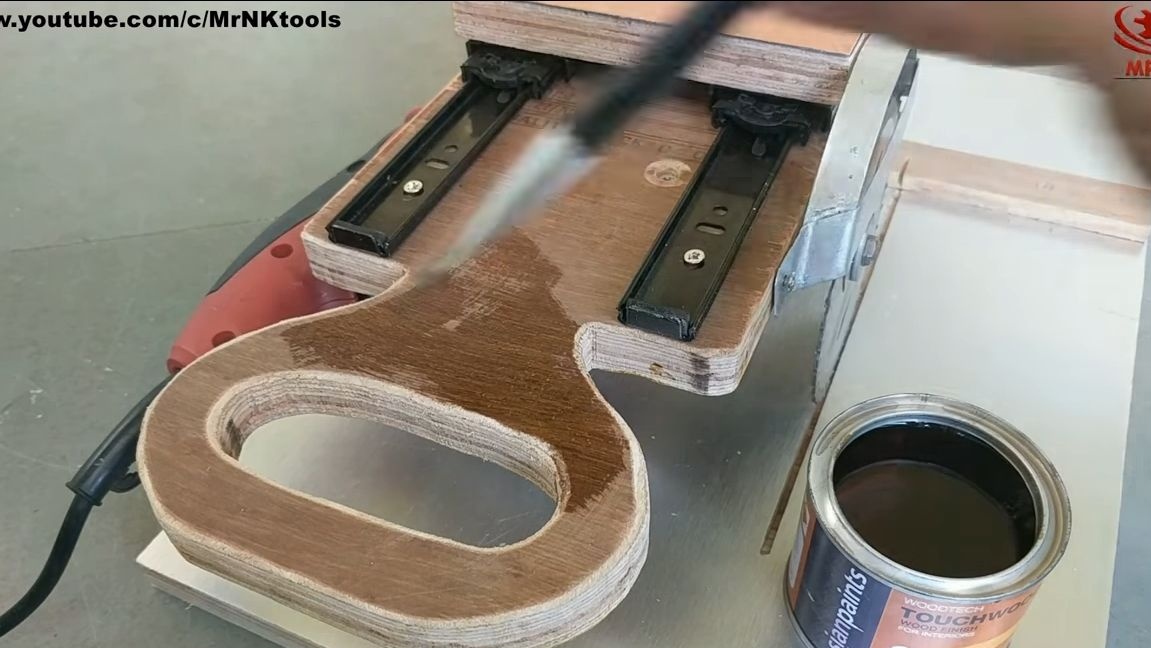
Step Ten Finishing touches
The machine is ready! If you wish, you can cover the plywood with oil or paint, so your device will last longer and will look better. Good luck