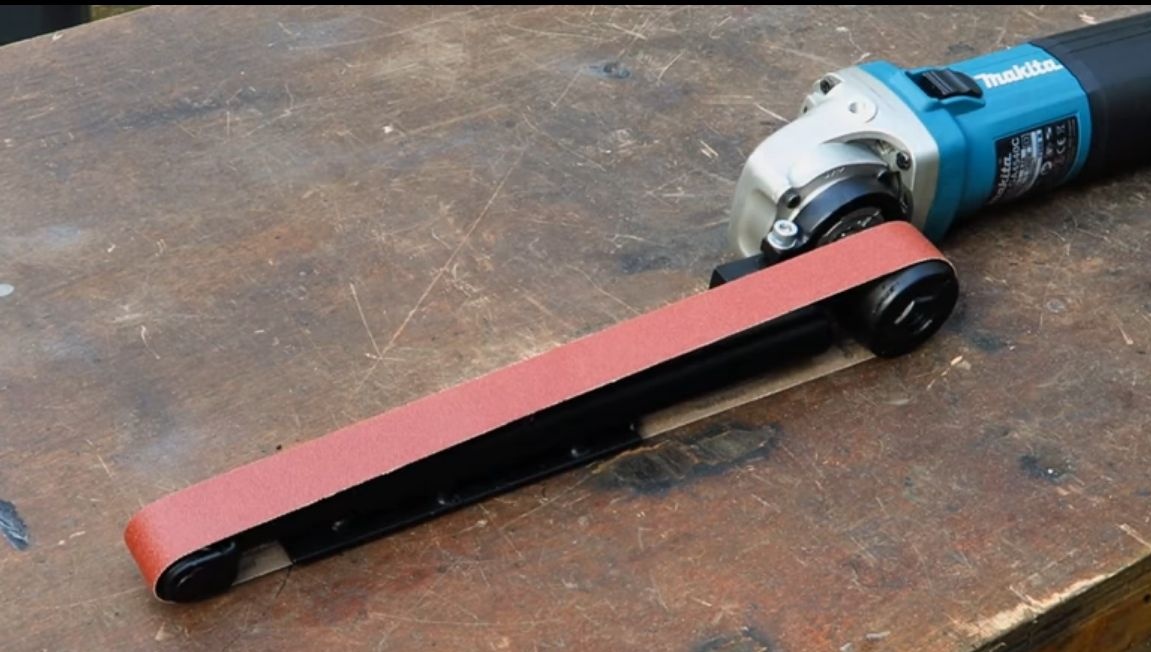
An electric file, also known as a belt sander, is a very convenient thing when sharpening, grinding and other types of processing. Especially popular are belt grinders used by craftsmen who make knives. With it, it is very convenient and quick to grind the blade, and to bring out straight bevels and sharpen the knife to the state of the blade is not a problem at all.
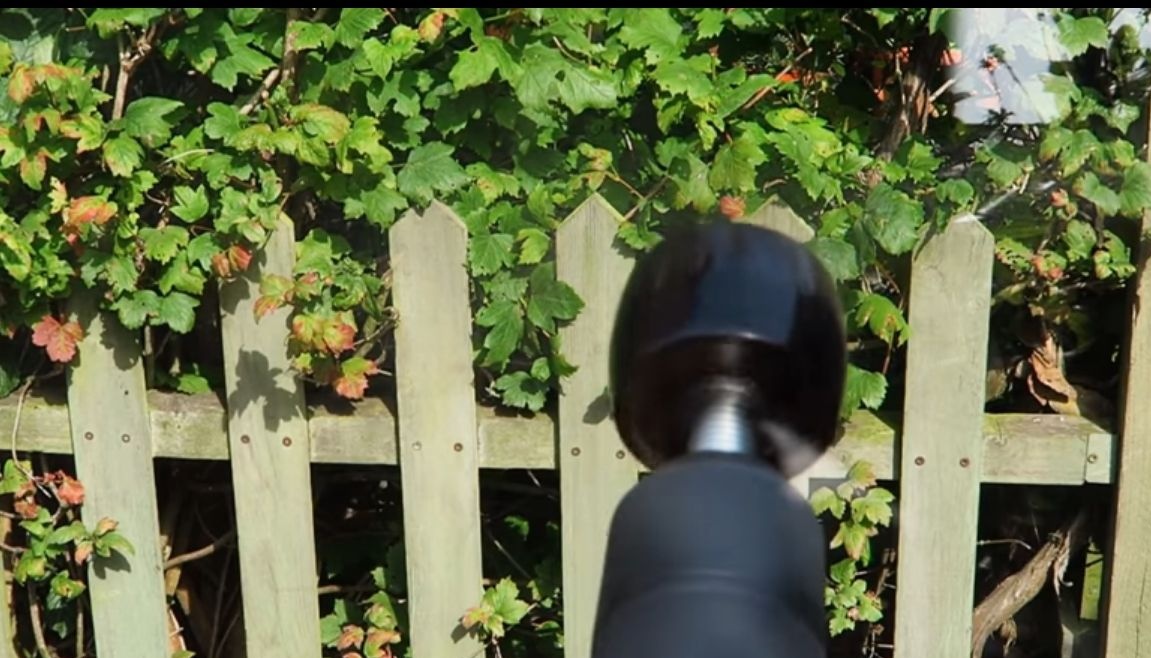
Today we will look at how to make a simple belt grinder from a grinder. This machine does not have a very wide sanding belt, but is intended mainly for manual work. However, no one forbids you to fix it and use it as a stationary one.
Tools for the manufacture of such nozzles can be used different. The author used a fairly professional set of tools - this is a lathe plus a drilling machine. However, you can do without them, if you are smart.
A lathe will be needed in the manufacture of the leading "pulley", which transmits the movement to the sanding belt. It is made of wood. You can simply clamp the workpiece into the drill chuck or fix it on the shaft of the grinder.
As for the drilling machine, it’s more difficult here, the author uses it to make a mounting bracket, and also cuts the drive wheel out of wood.
Materials and tools that the author used for homemade:
Material List:
- thick steel plate;
- three bearings;
- steel axis;
- steel plate;
- steel tubes (one must go into the other);
- spring (for belt tension);
- plywood;
- screws;
- long nut (with thread as on the shaft of the grinder);
- paint;
- epoxy adhesive.
Tool List:
- grinder;
- mitral saw;
- pliers;
- ;
- ;
- tap;
- ;
- rasp;
- sandpaper;
- lathe;
- a vise.
Manufacturing process fixtures:
Step one. Making a mounting bracket
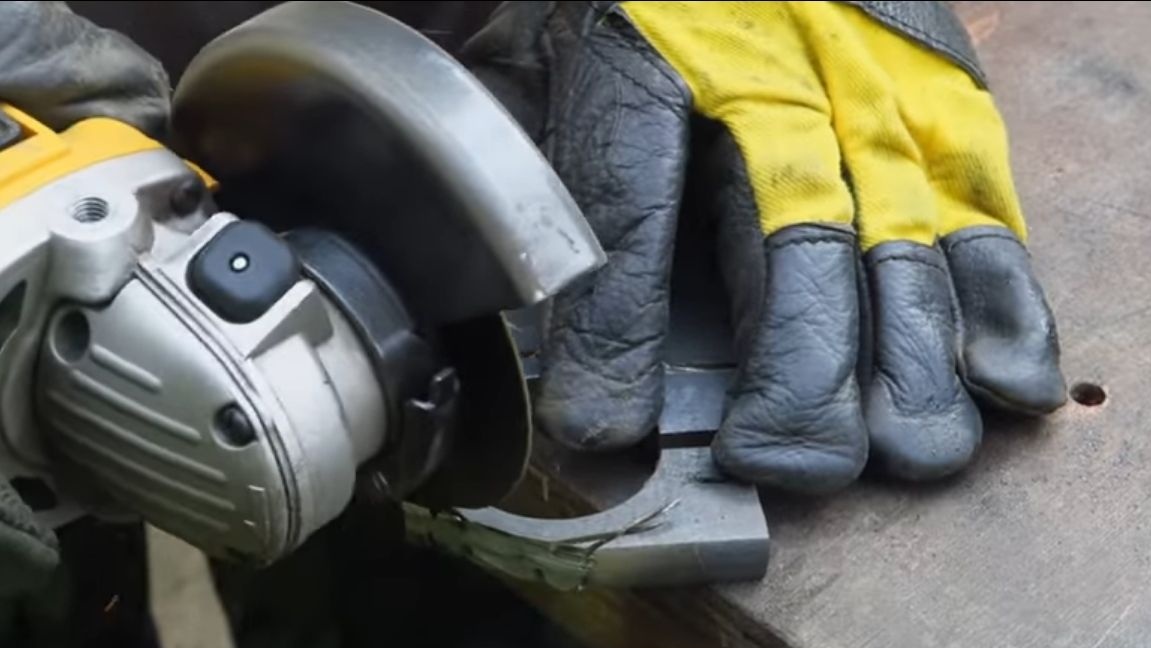
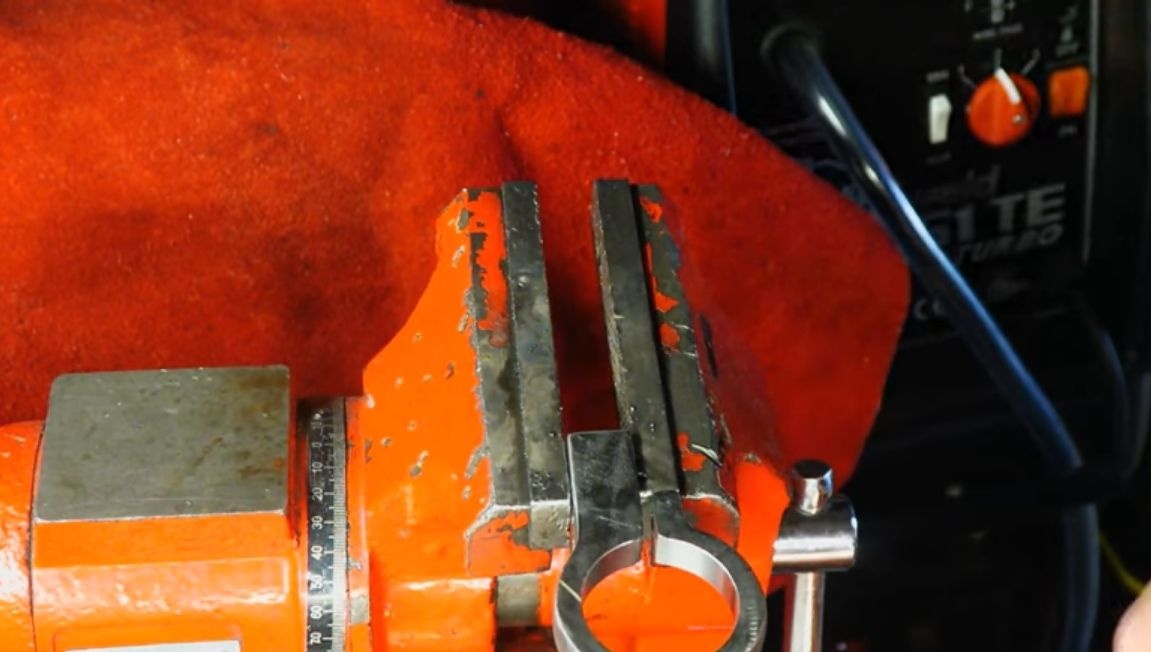
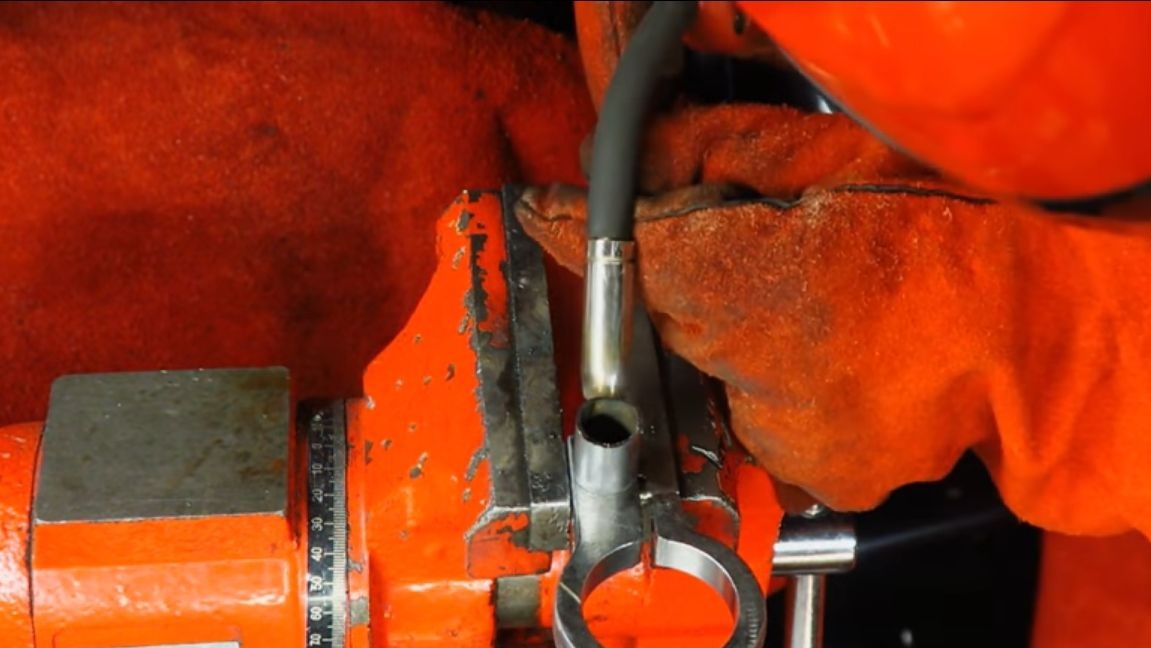
One of the most difficult tasks in this matter is the mounting bracket, which holds the entire structure on the grinder. It is installed instead of the front handle of the grinder. However, if you have all the necessary tools, then there is nothing complicated about this. You can go the simpler way in the manufacture of this bracket. For example, it can be made from an ordinary steel plate by bending it to fit the size, and then another plate can be welded to it to attach all the structures.In general, there are a lot of solutions; let us consider how the author did it.
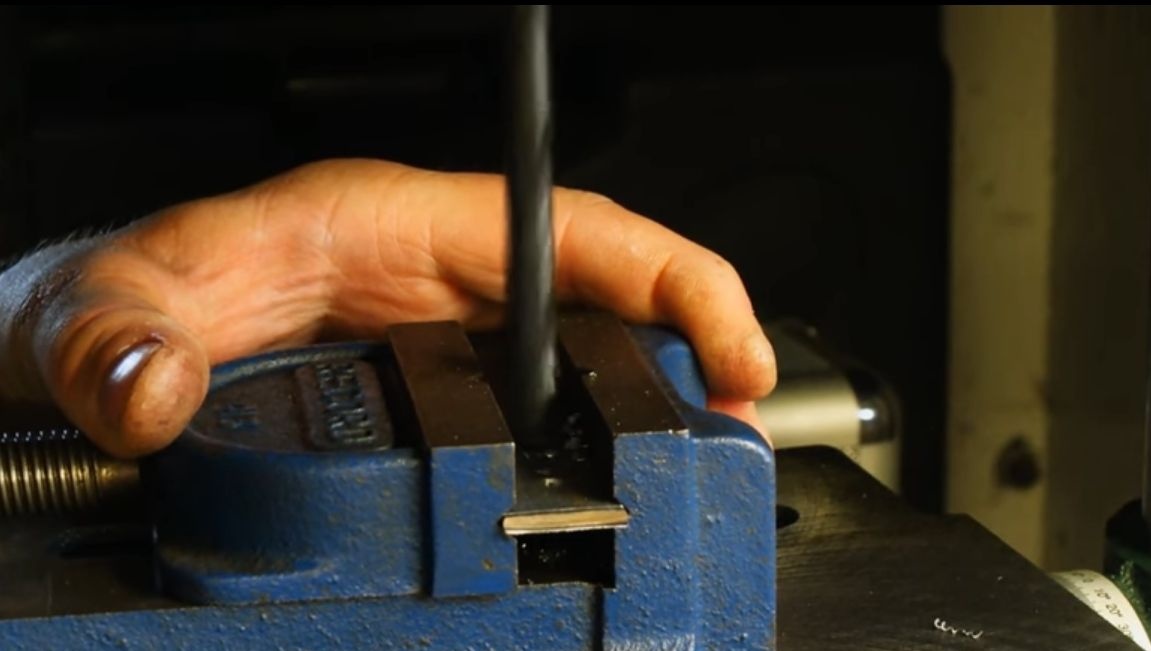
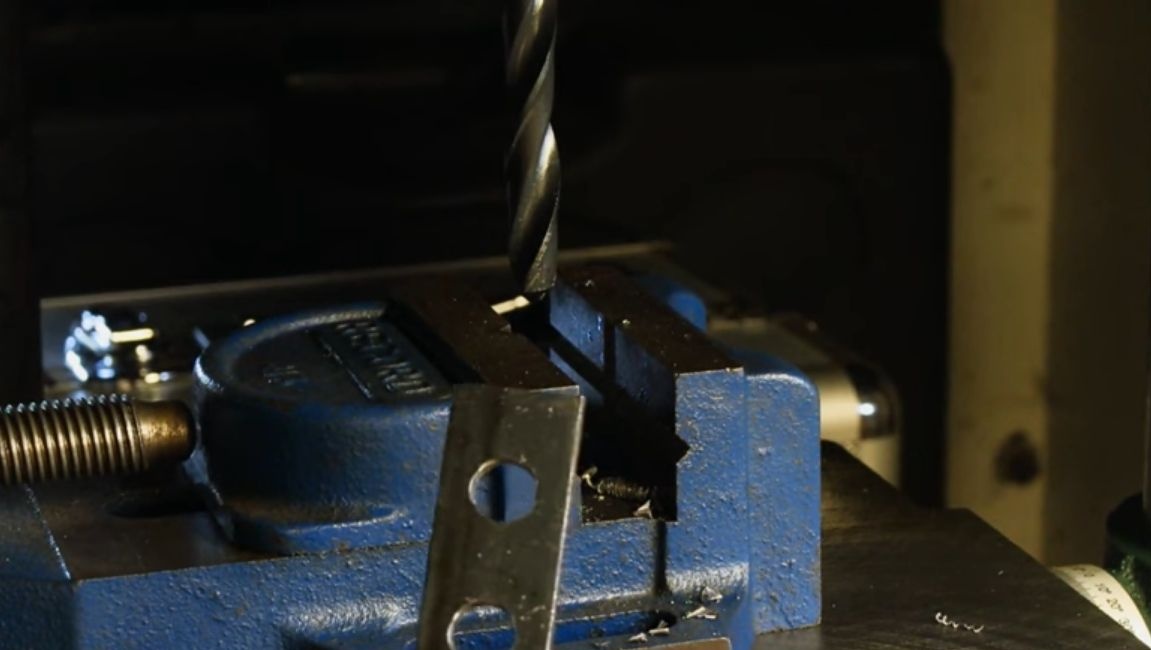
The author took a thick steel plate and drilled a hole in diameter on a drilling machine, such as the front of the grinder, to which the handle is attached.
Then, with the help of a mitral saw, he made a cut to this circle, so that later the part could be pulled on the grinder with a screw.
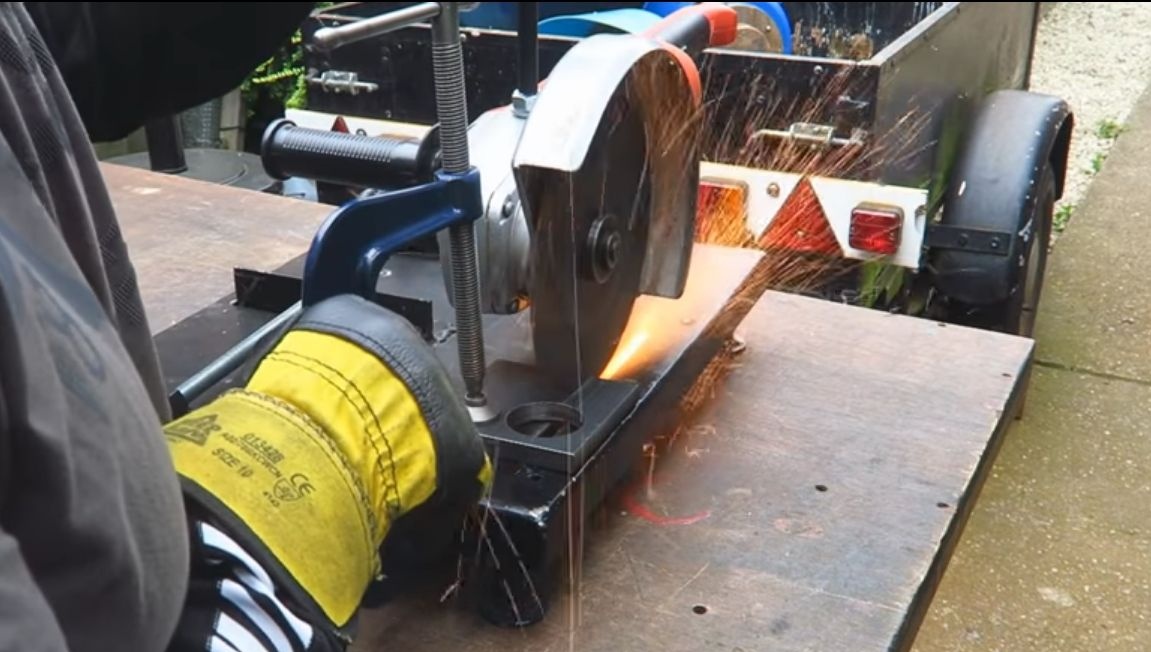
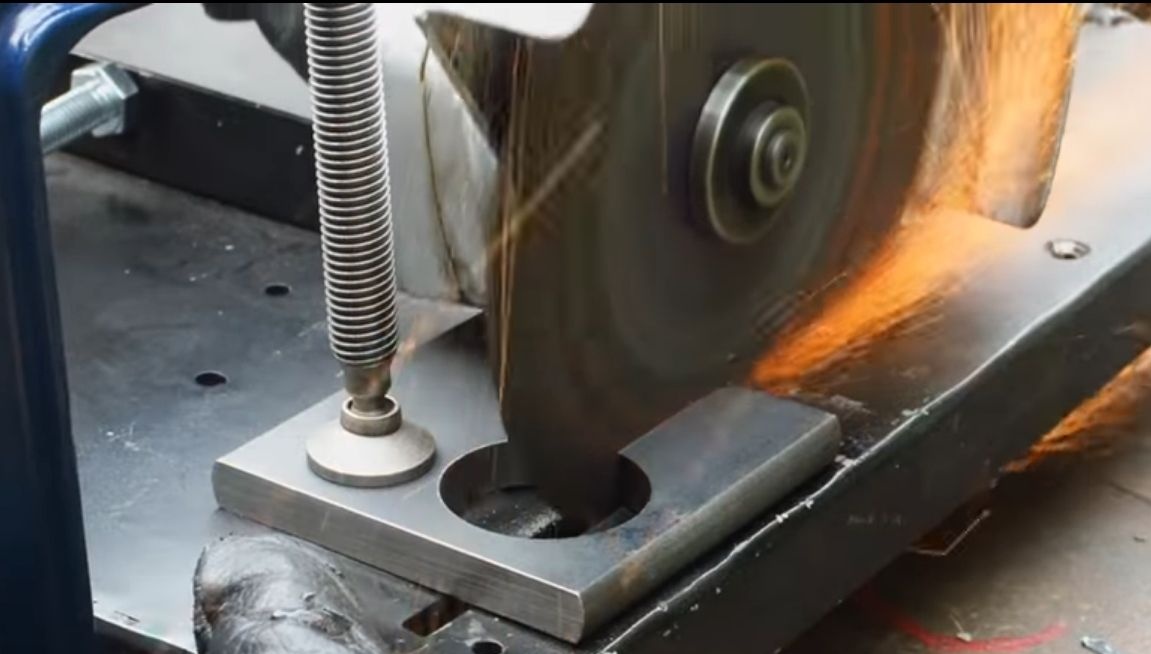
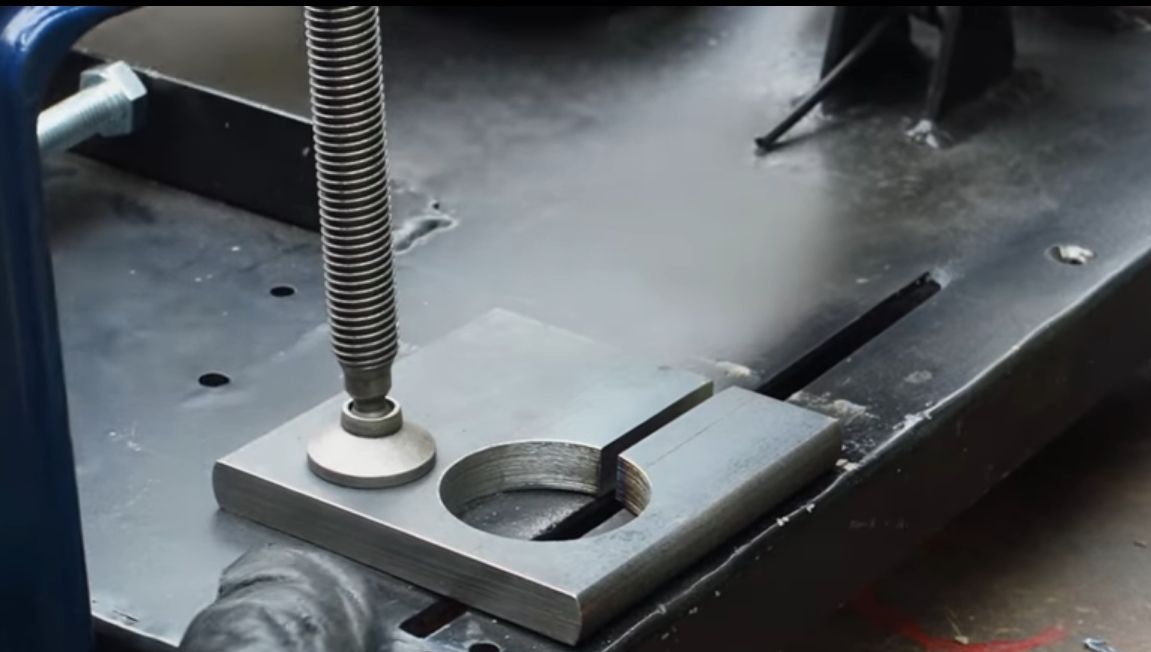
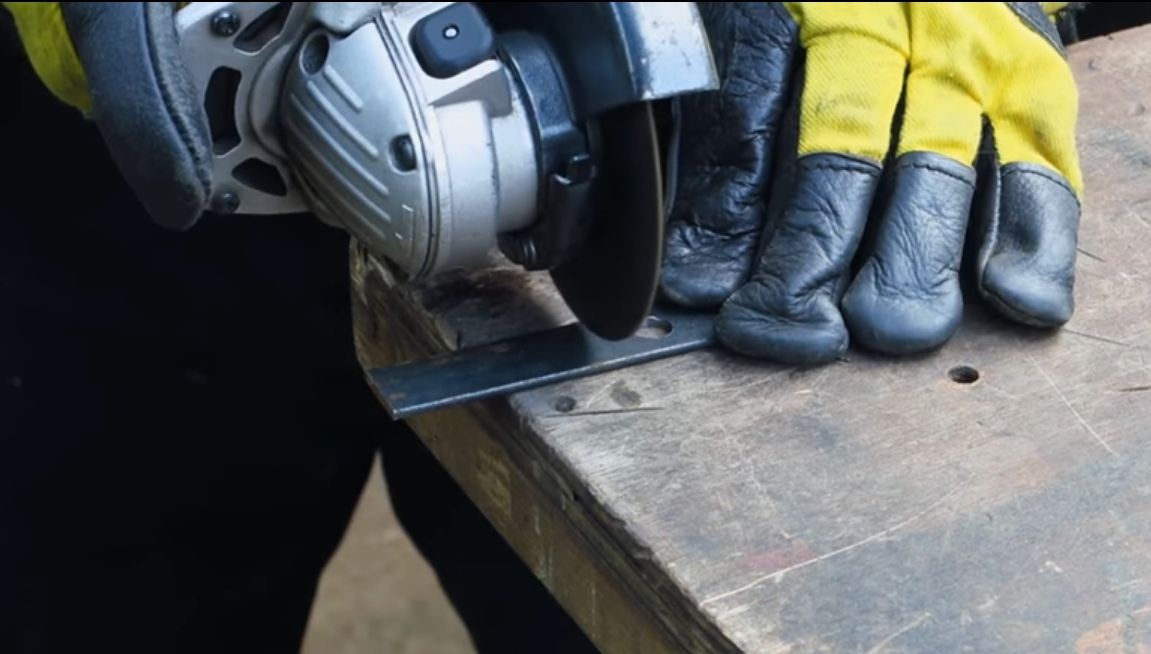
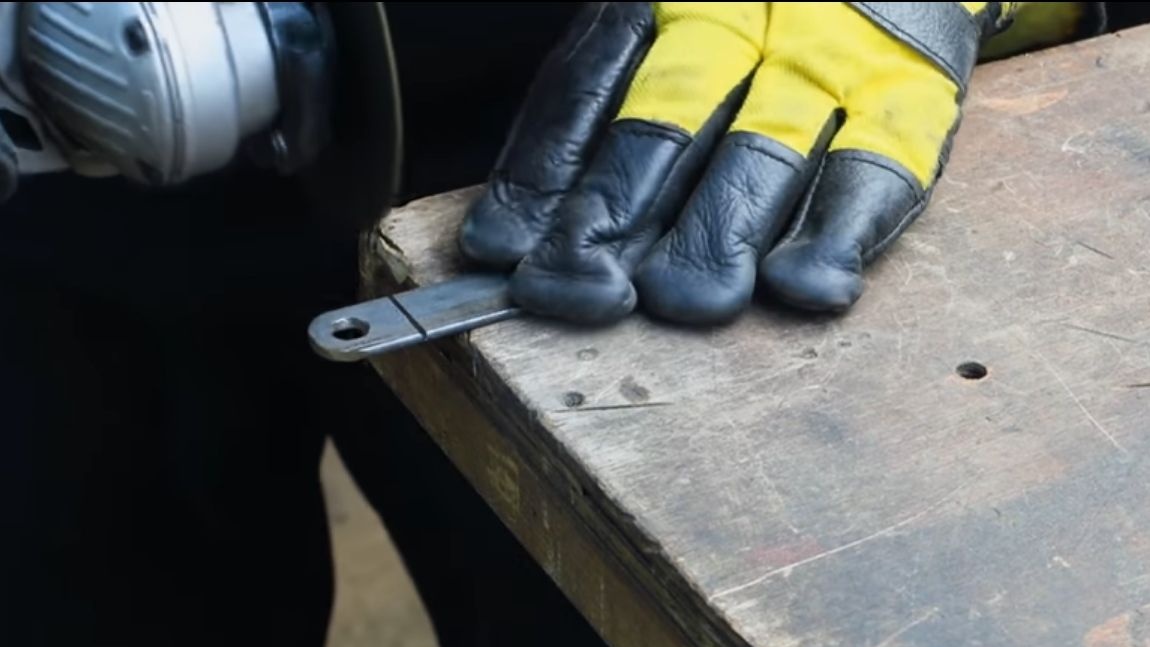
We take the grinder and grind all the excess from the bracket. We cut off rough edges, then we simply grind it. There is nothing complicated about it, but you need to spend time.
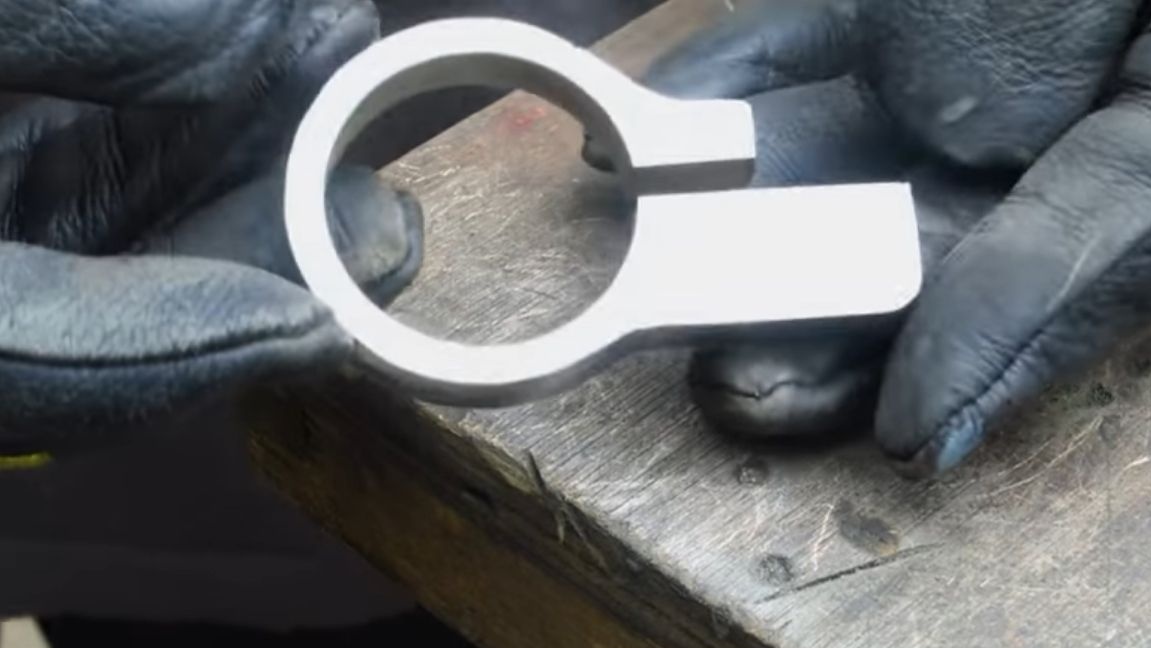
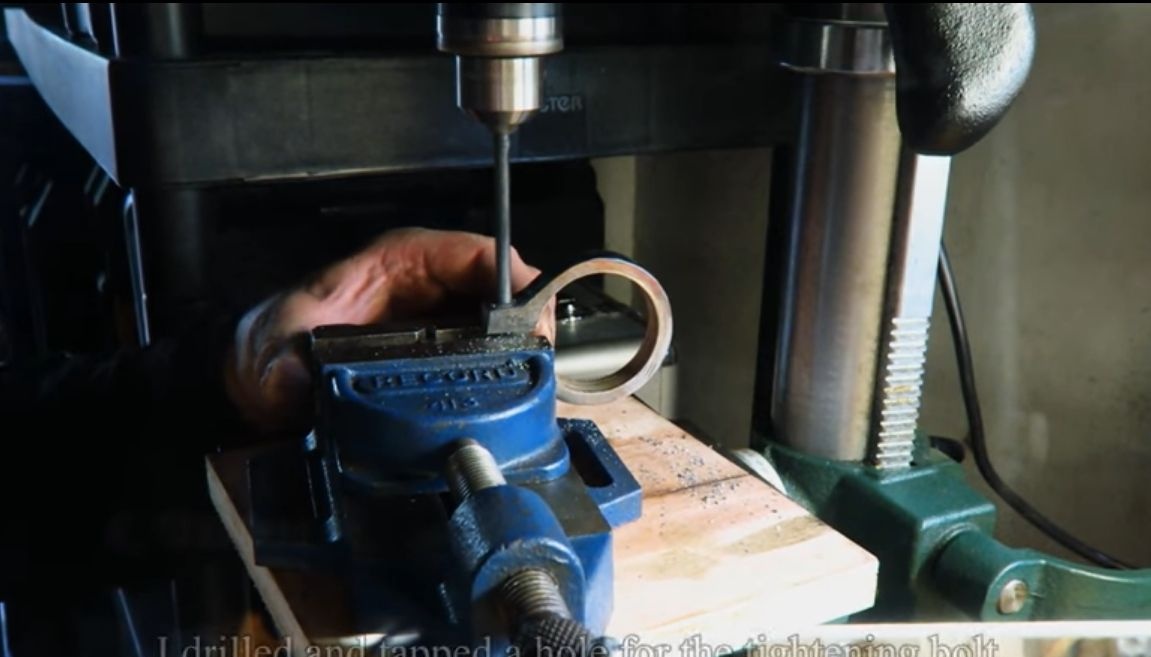
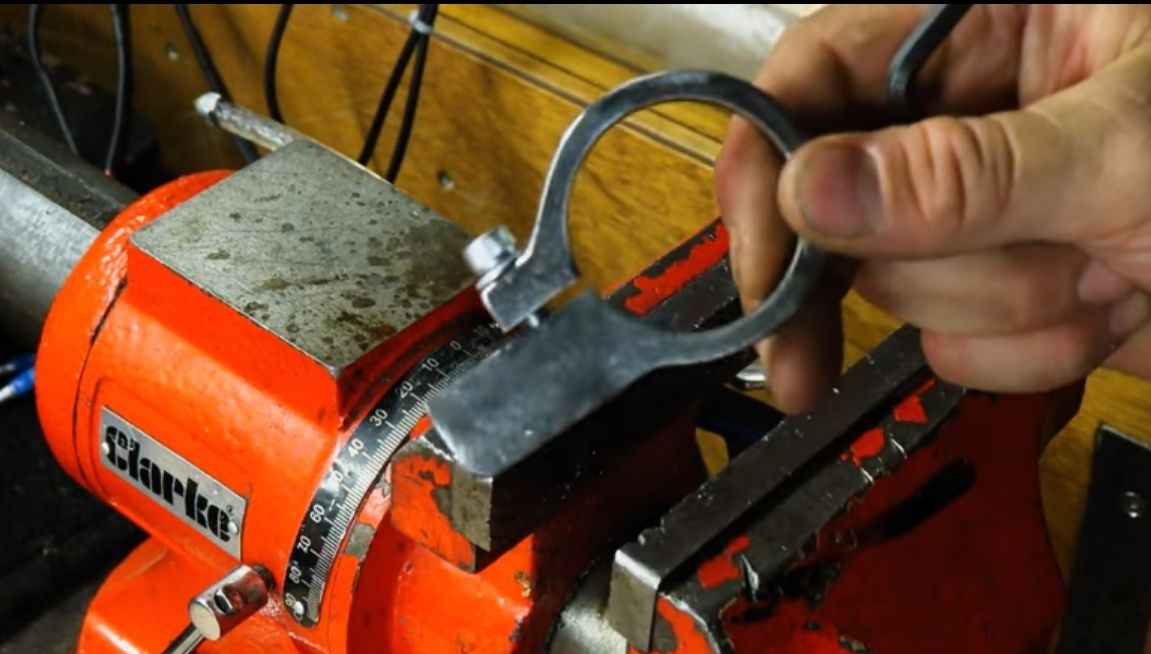
Again we turn to the help of the drilling machine and drill a hole for the tightening bolt. After that, we clamp the workpiece into a vice and cut the thread under the bolt with a tap. In principle, you can simply drill a through hole, and then pull it off with a bolt and nut.
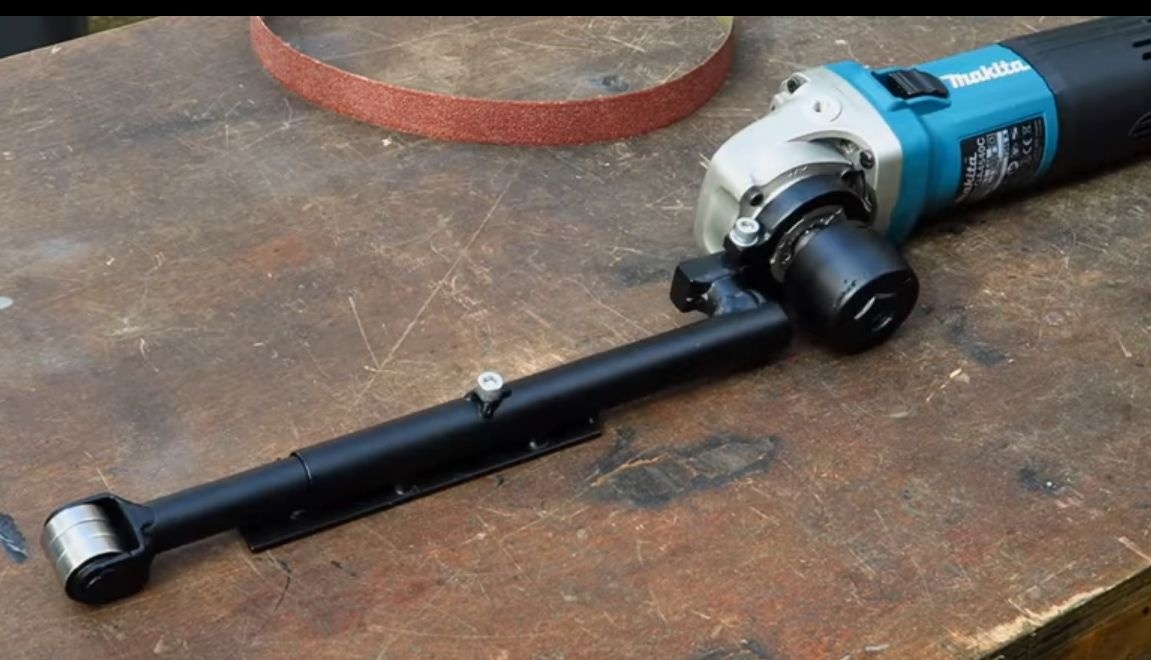
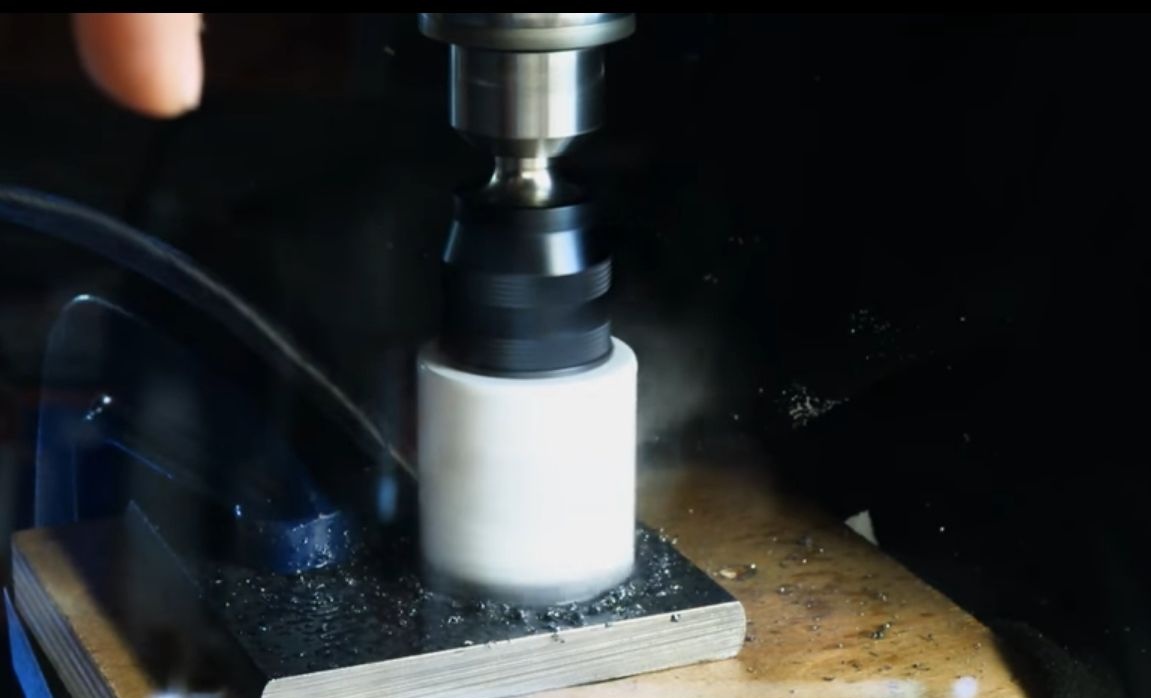
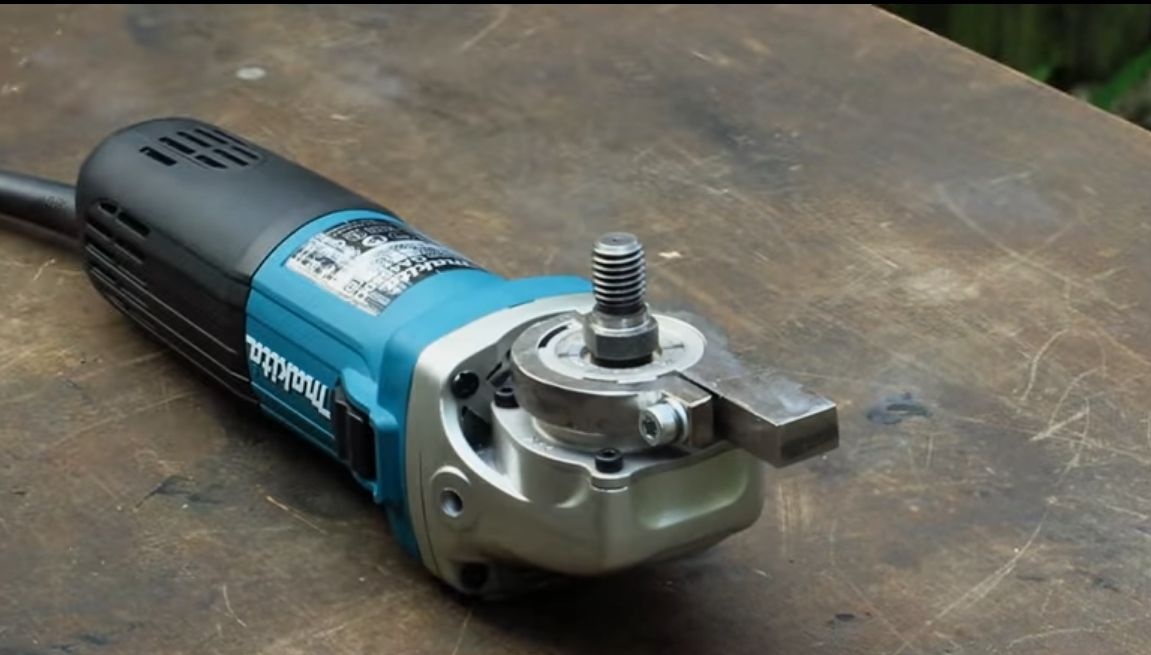
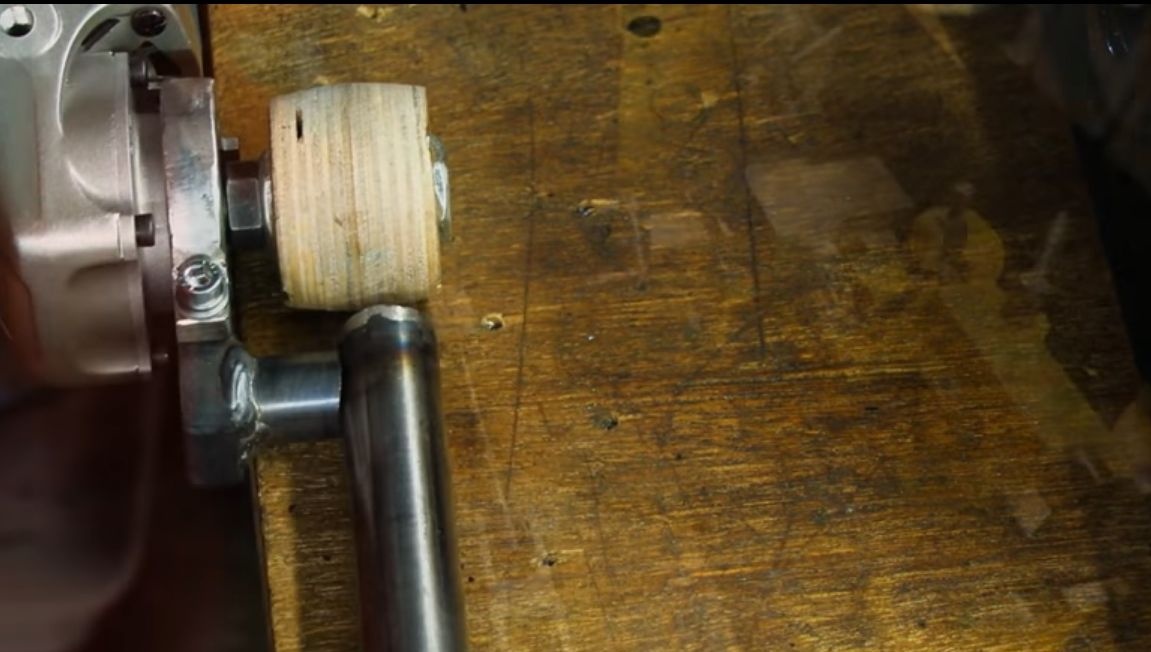
Step Two Making the drive wheel
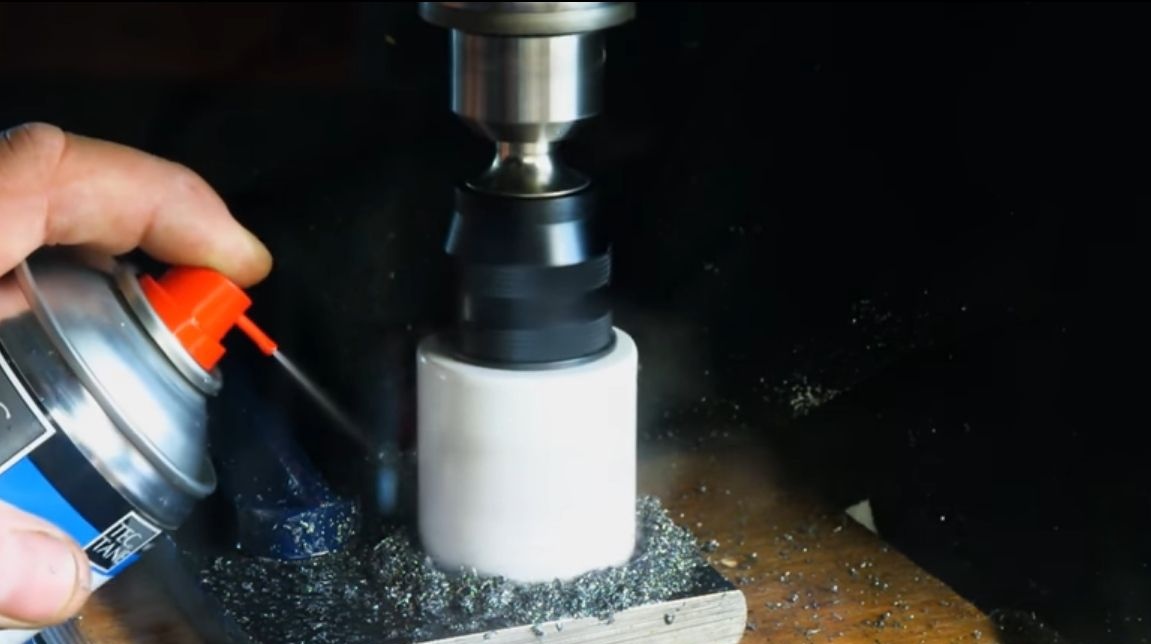
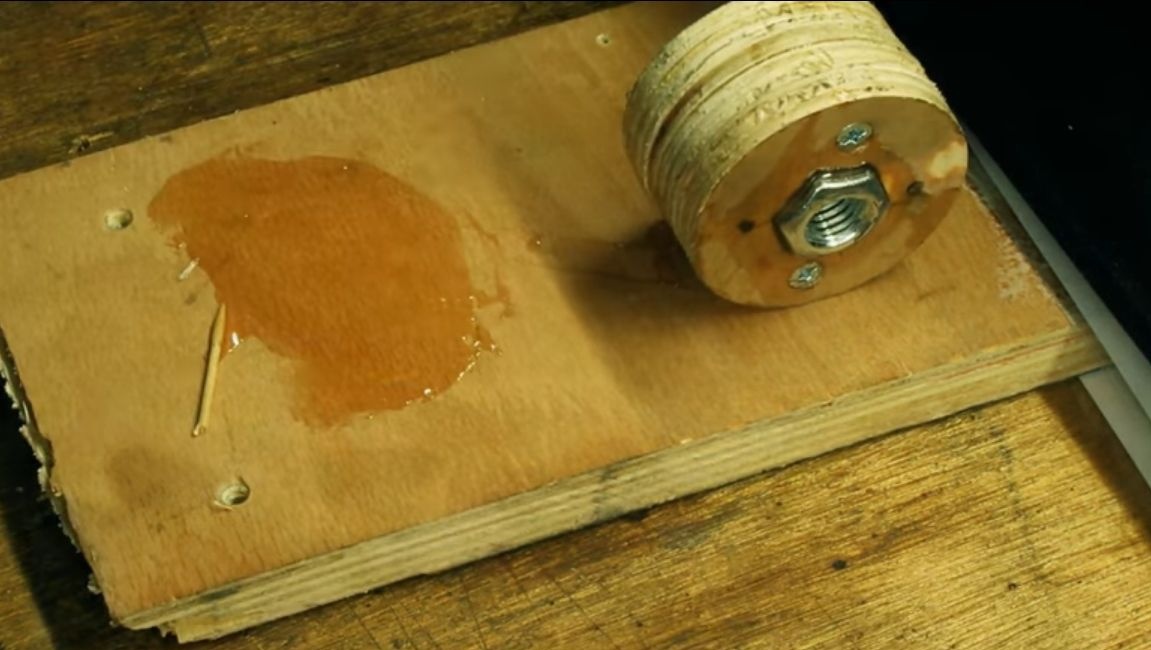
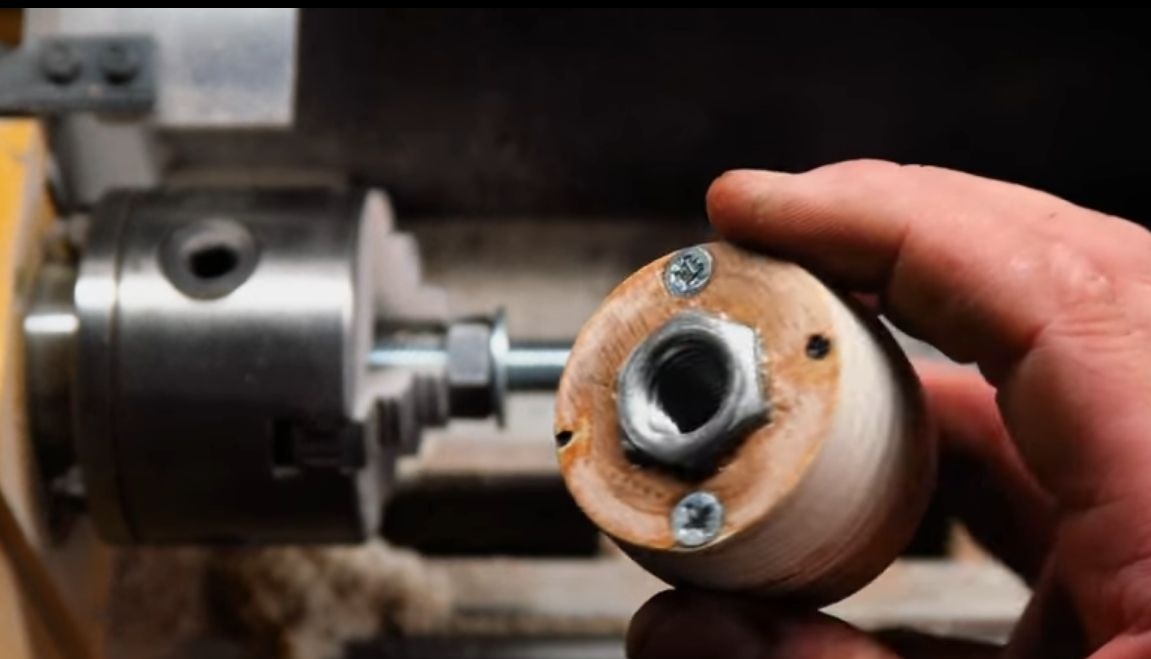
The drive wheel is made of plywood, if it is not thick enough, you can use pieces. You need to cut the number of rounds on the drilling machine, and then glue and tighten the screws on both sides for accuracy.
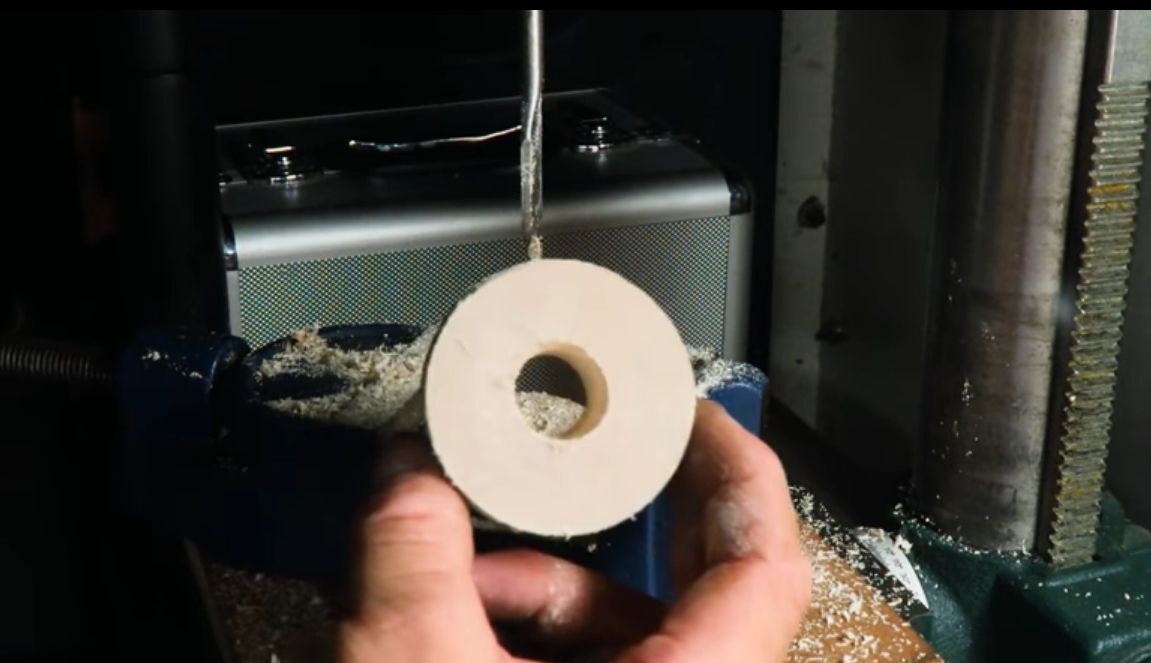
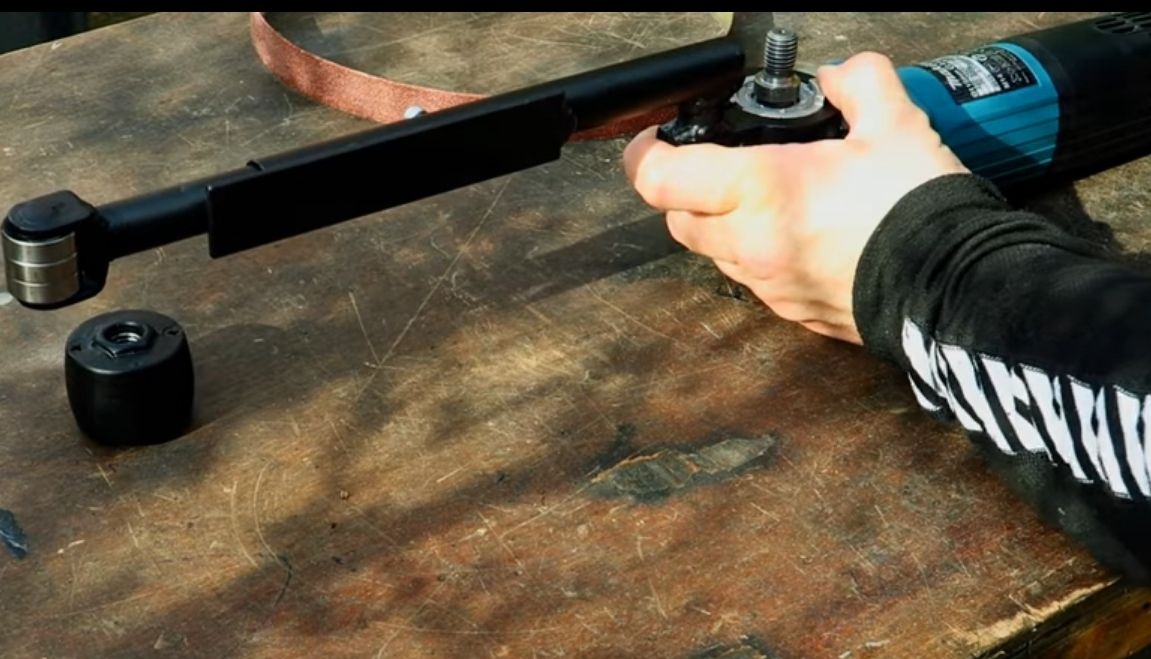
We clamp the wheel in a vice and, using a rasp of suitable thickness, grind the pentagon. This is done so that the nut can go inside, the thread on the nut must be such that it can be screwed to the shaft of the grinder.
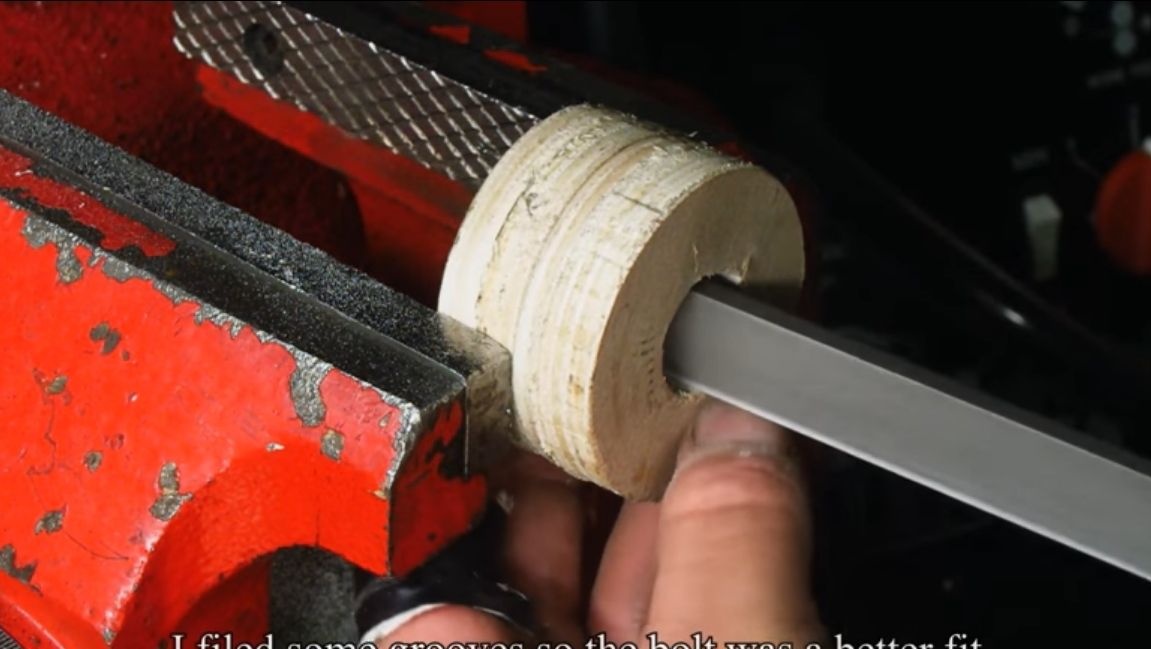
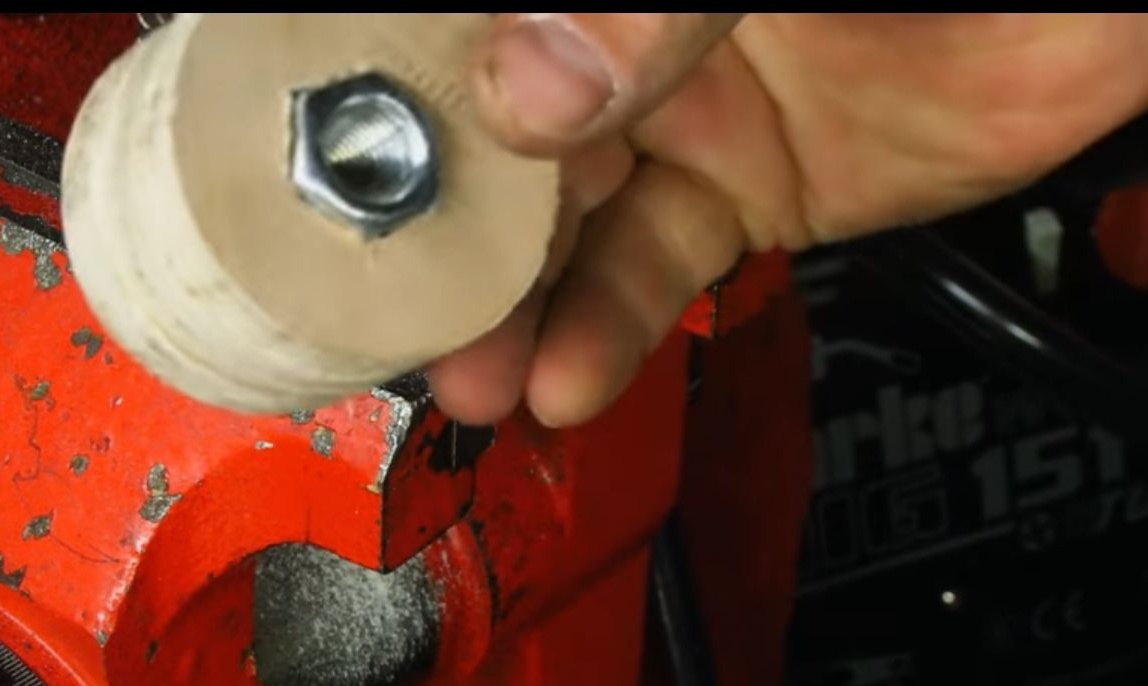
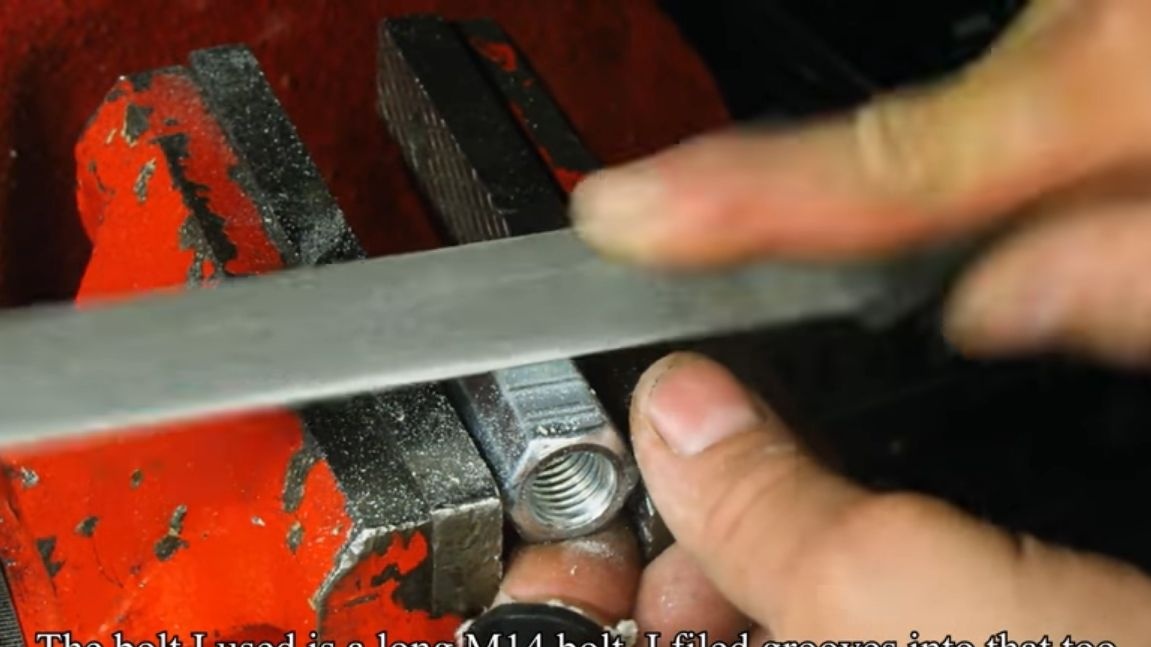
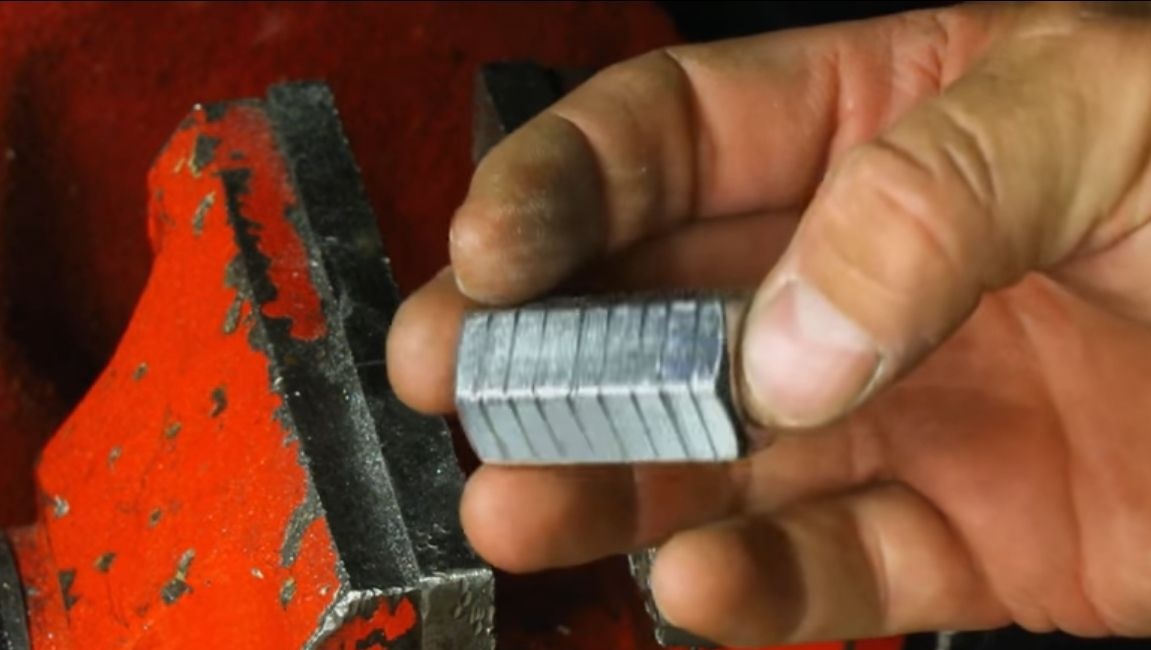
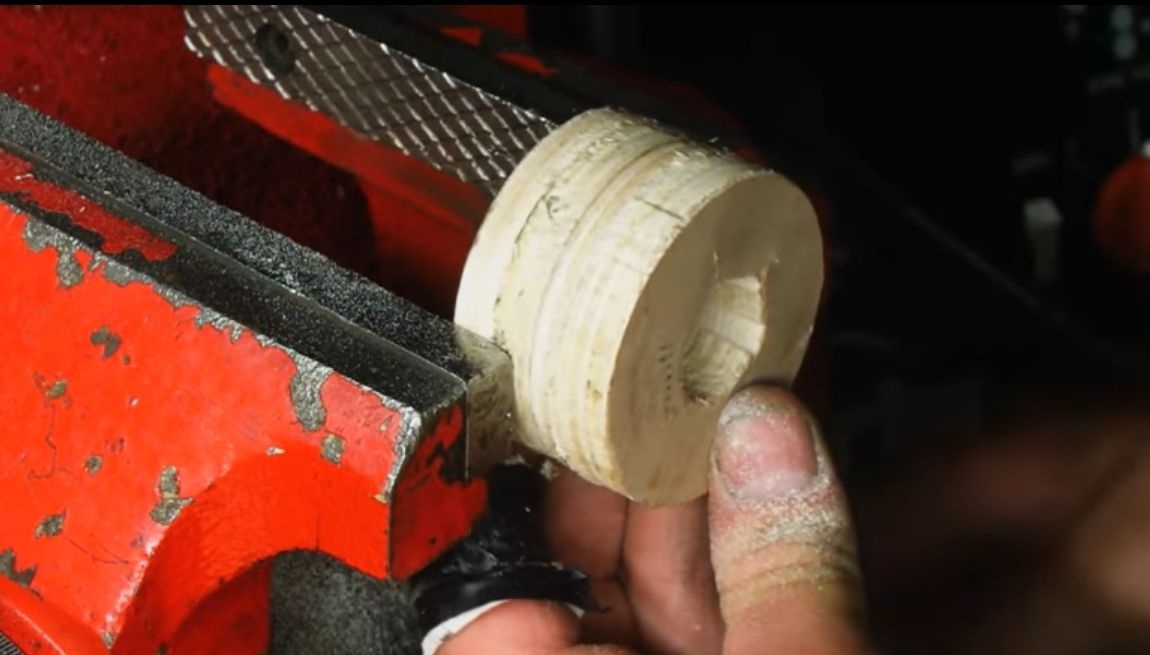
Prepare the nut. Make grooves on it over the entire area, you can use a grinder for this, but the author uses a file. It is also advisable to treat the surface with large sandpaper. This is all for good bonding.
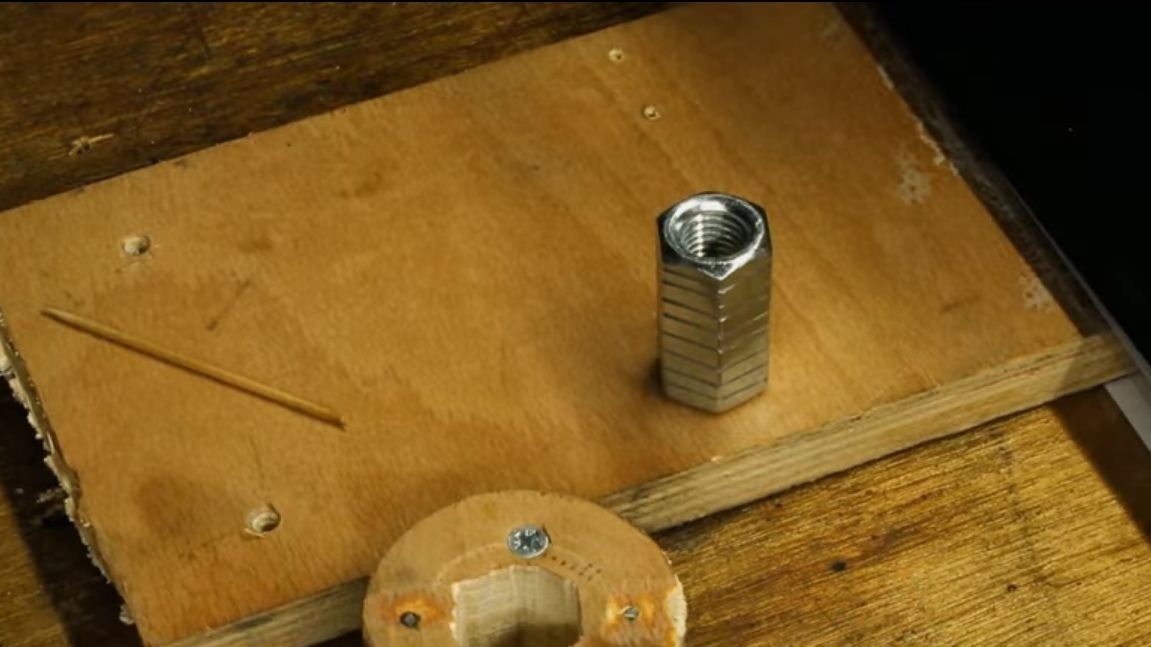
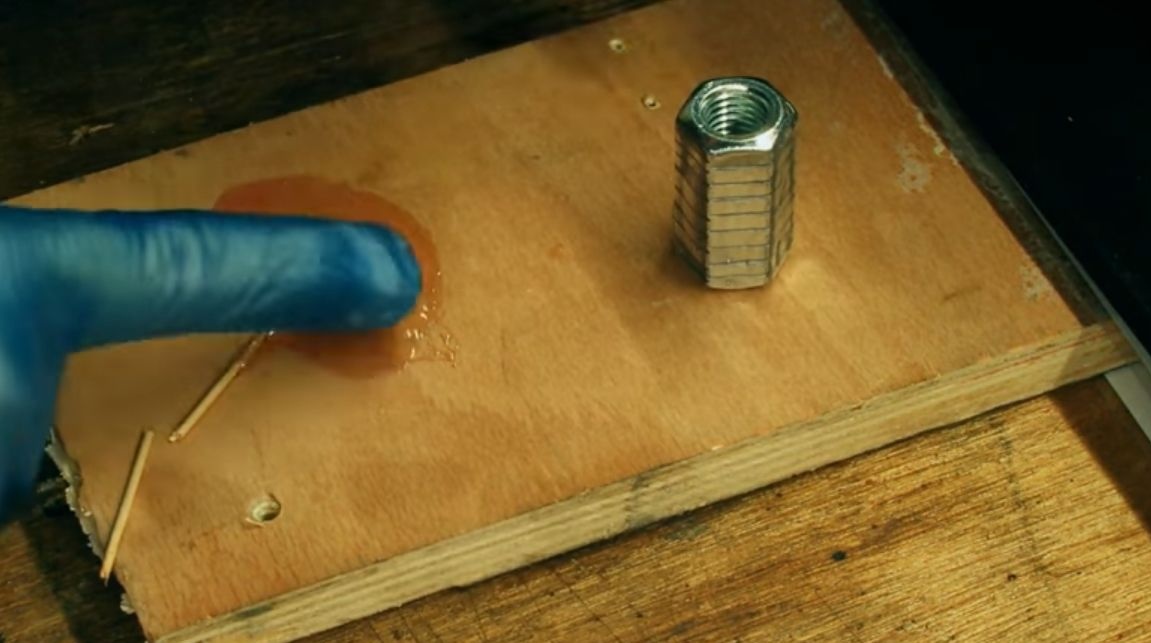
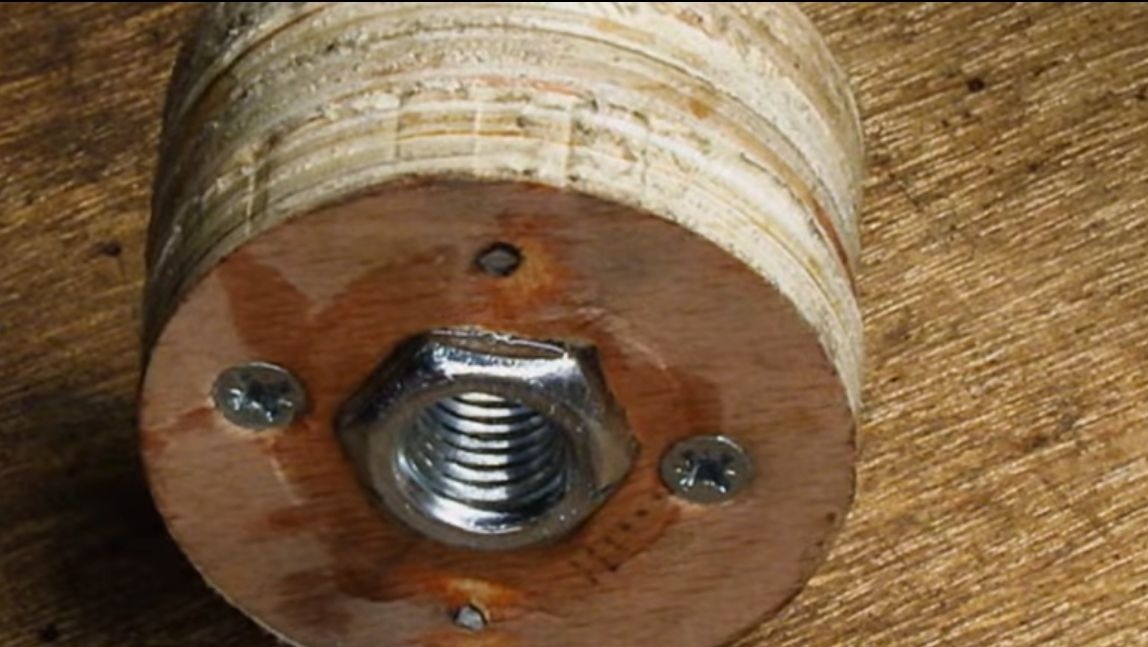
Dilute the epoxy with hardener, grease the nut and gently press it into the wheel. Wait for the glue to dry.
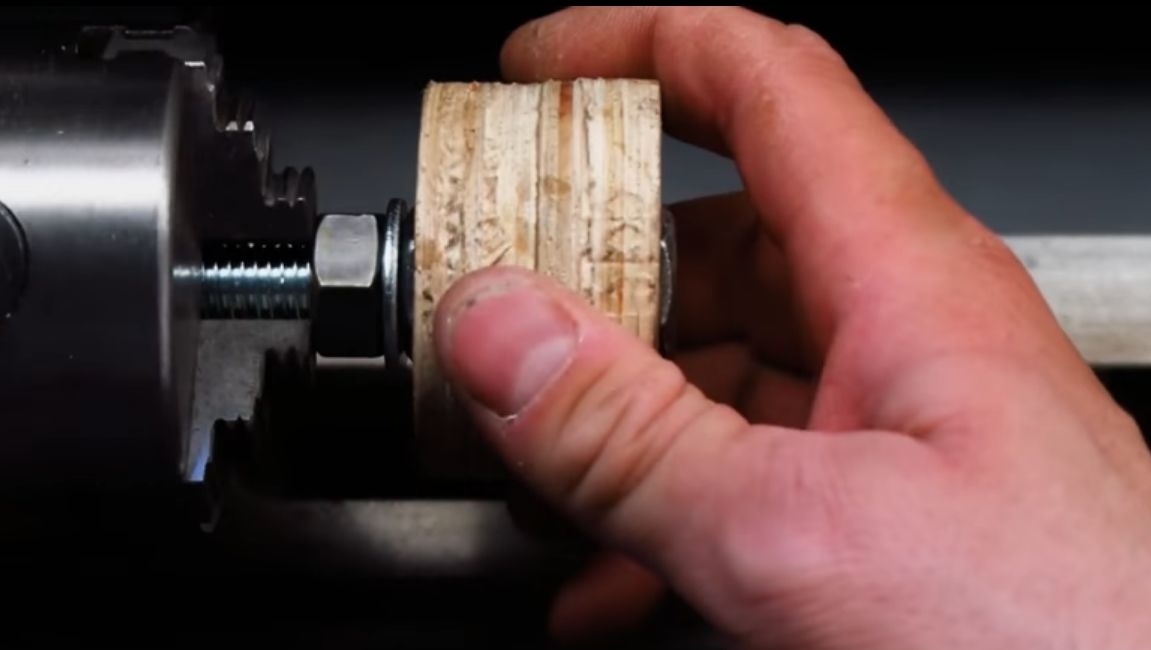
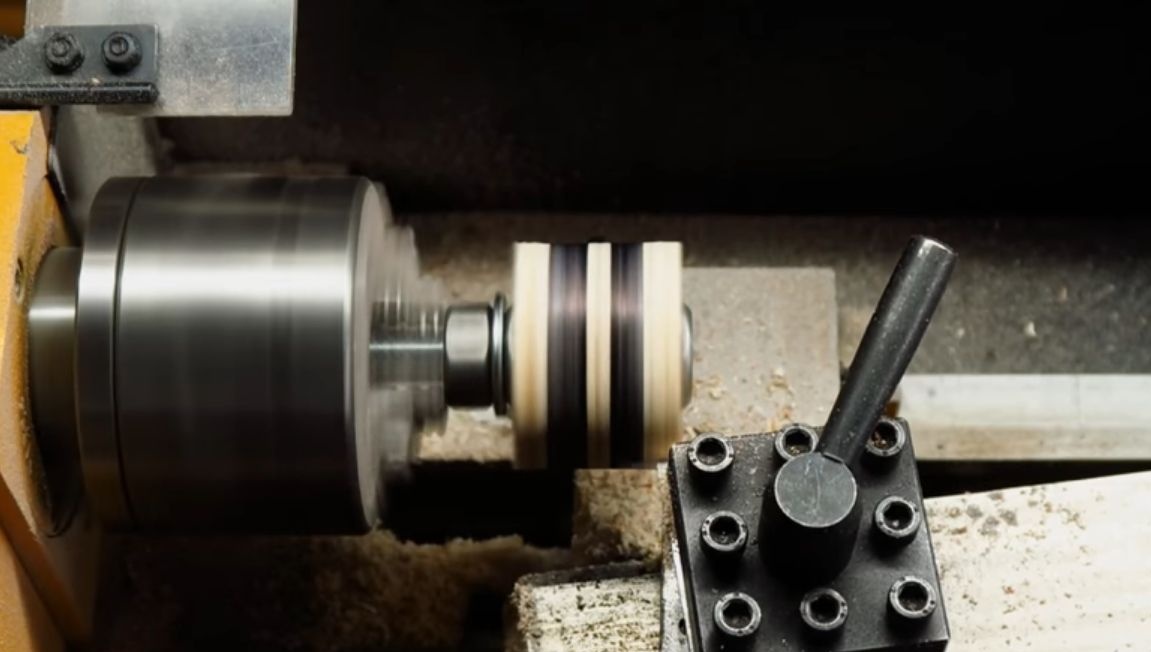
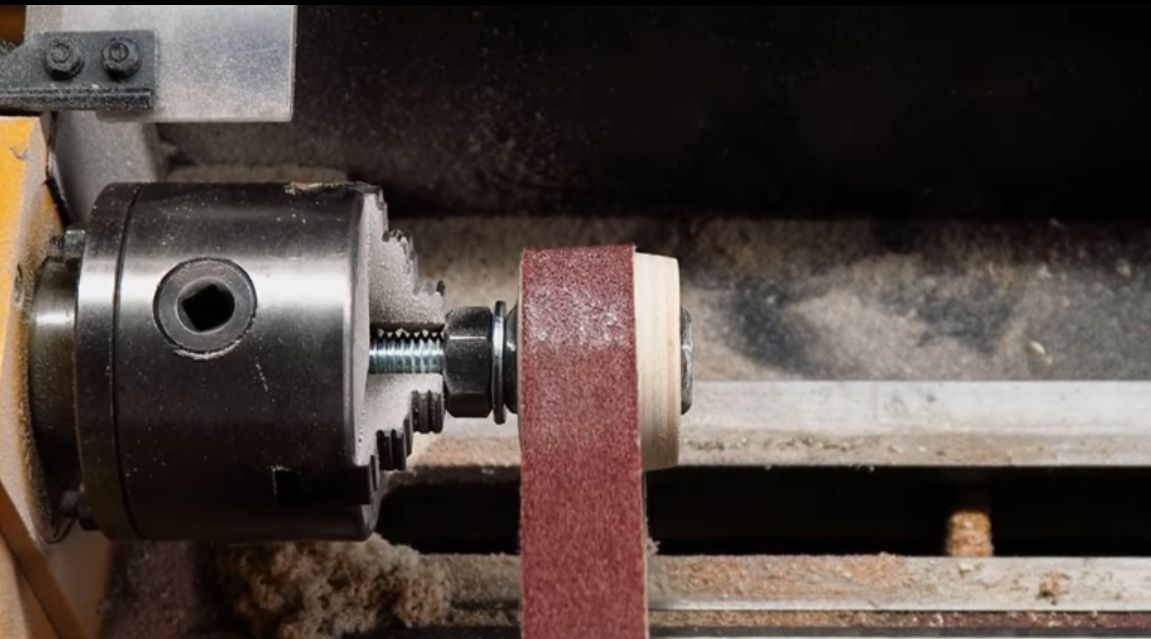
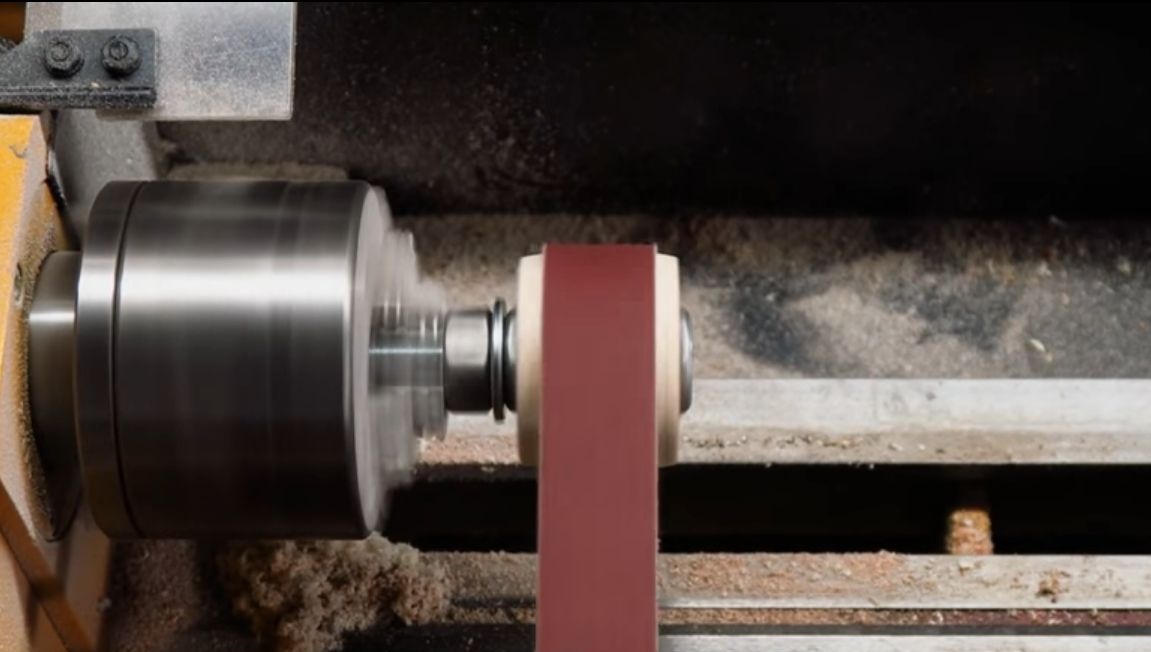
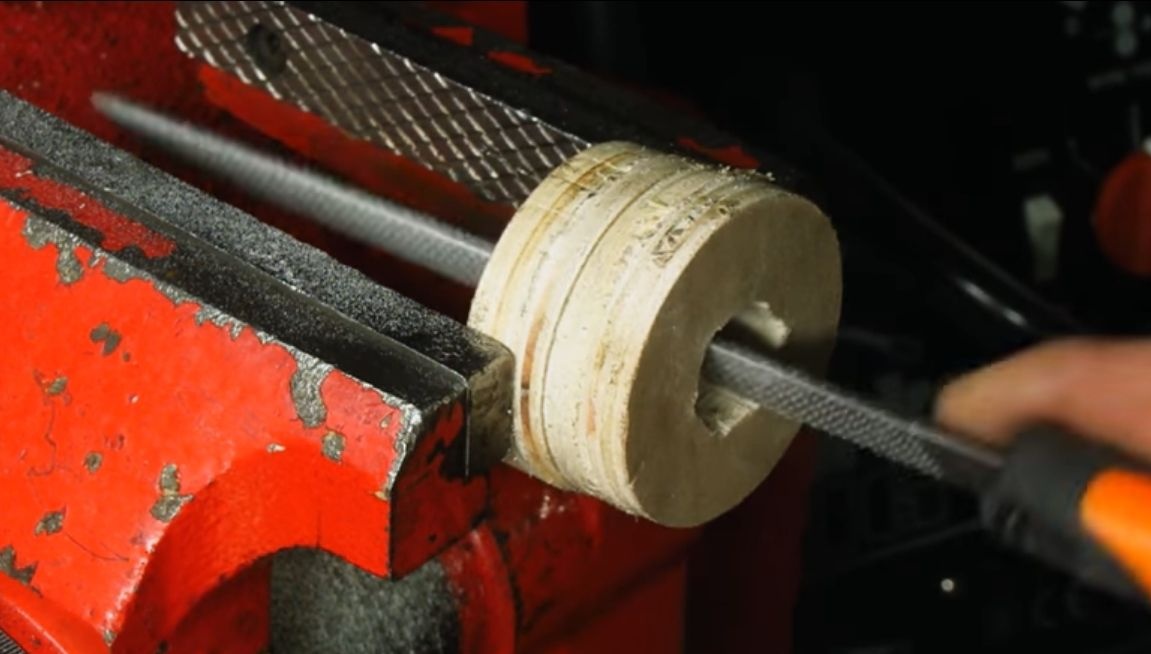
Now you can proceed to grinding the wheel. Clamp the bolt in the lathe, and wind the wheel on it. We turn on the machine and form the wheel profile. In the center, it should be of a larger diameter than at the edges. Due to this, the grinding belt does not fly off the tool during operation. Finish off with sandpaper.
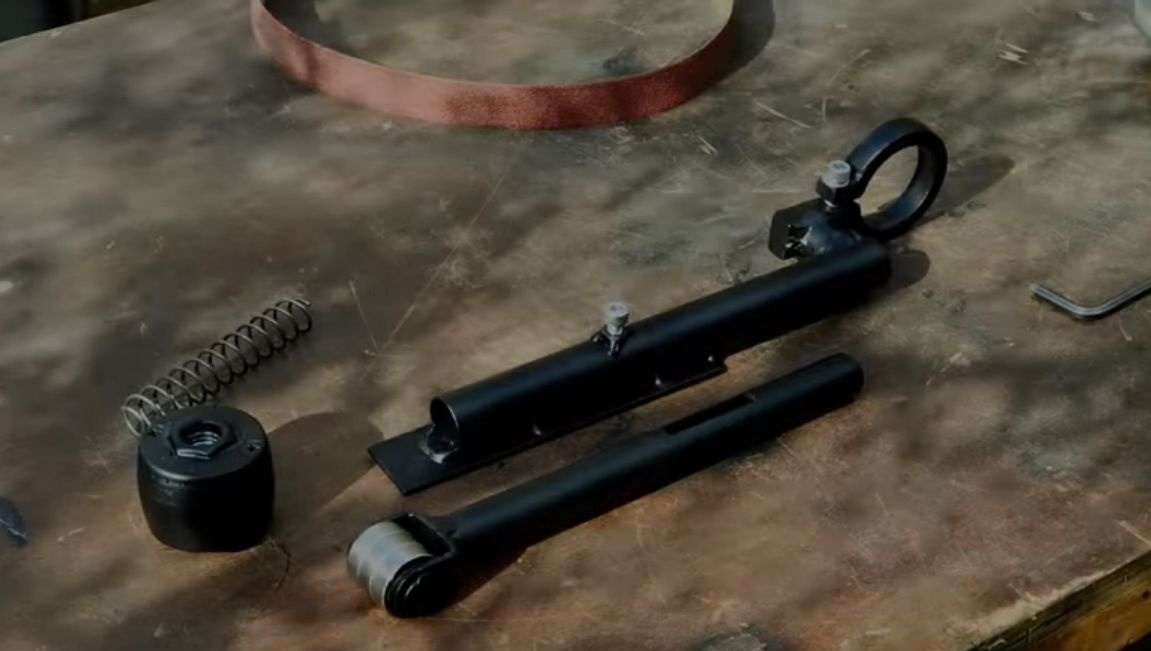
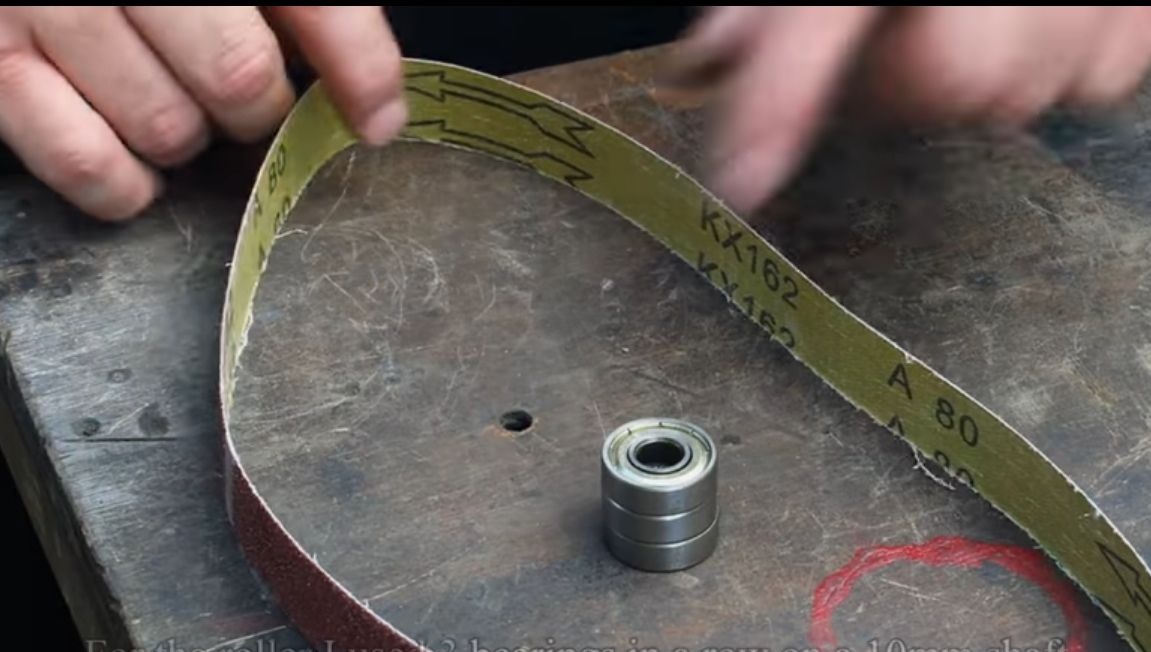
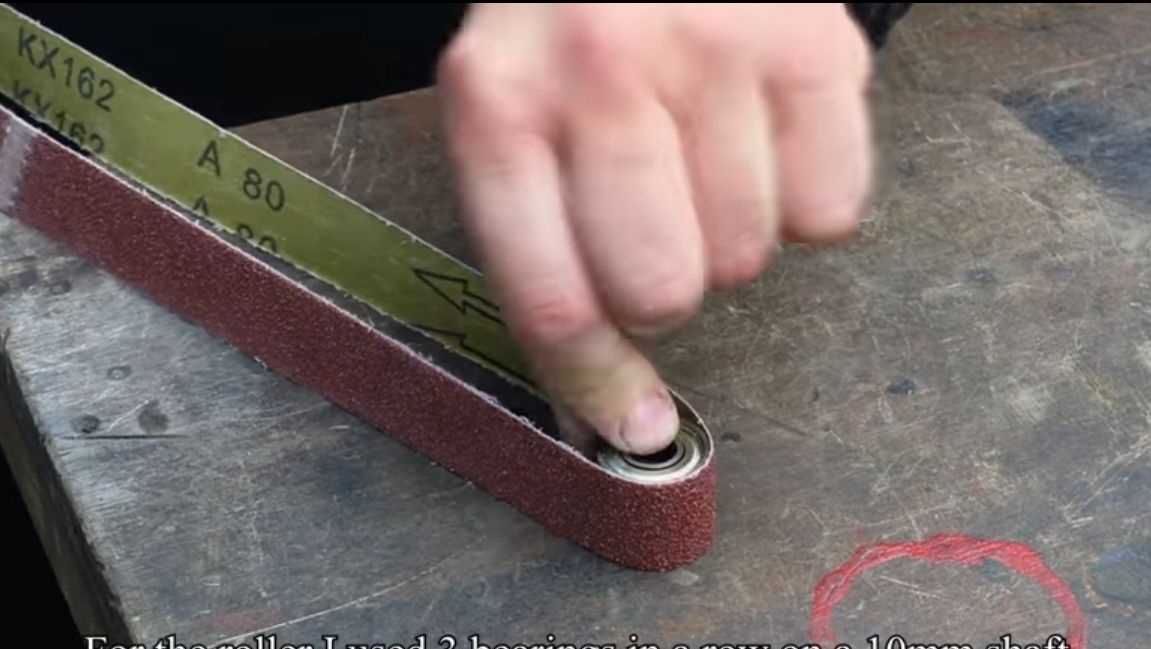
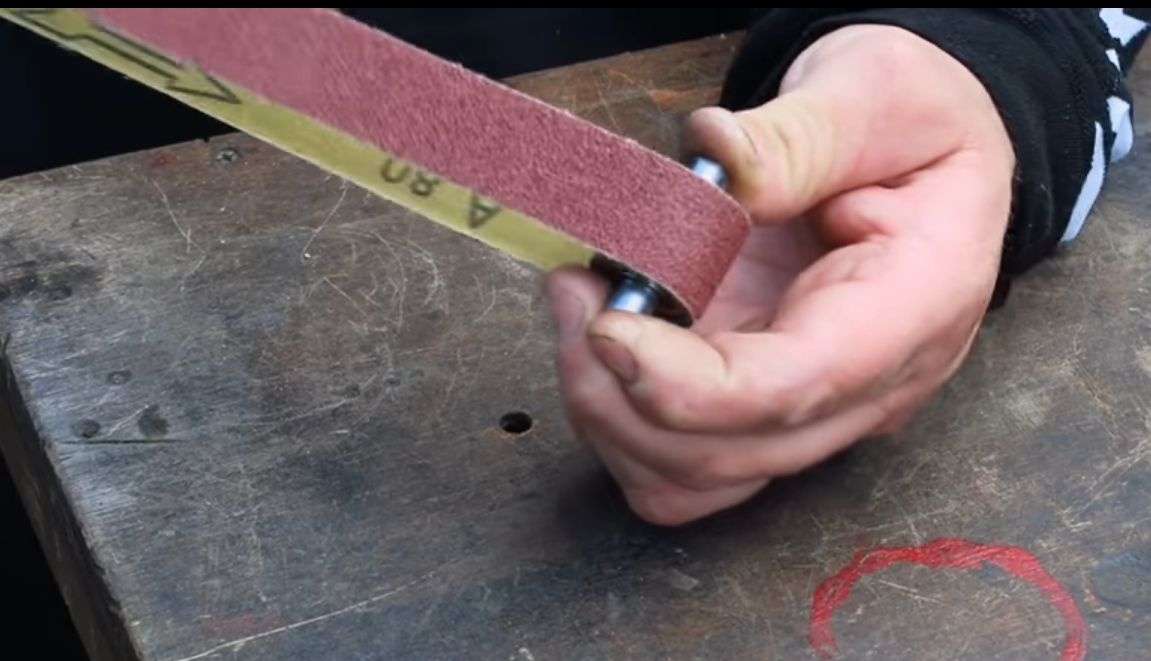
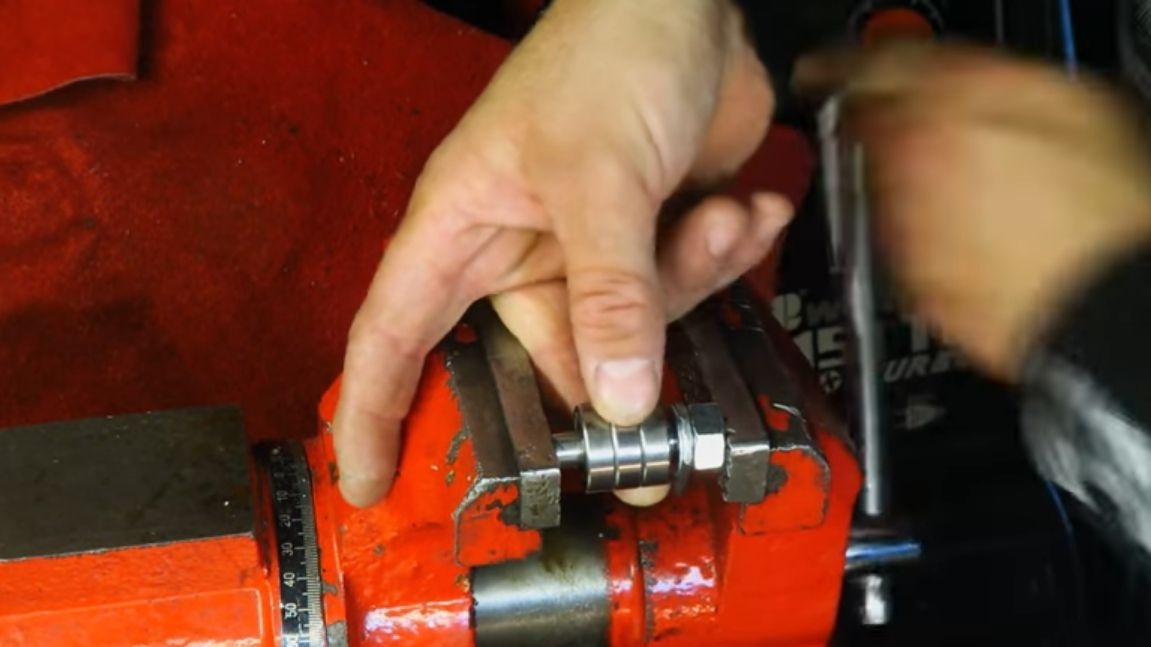
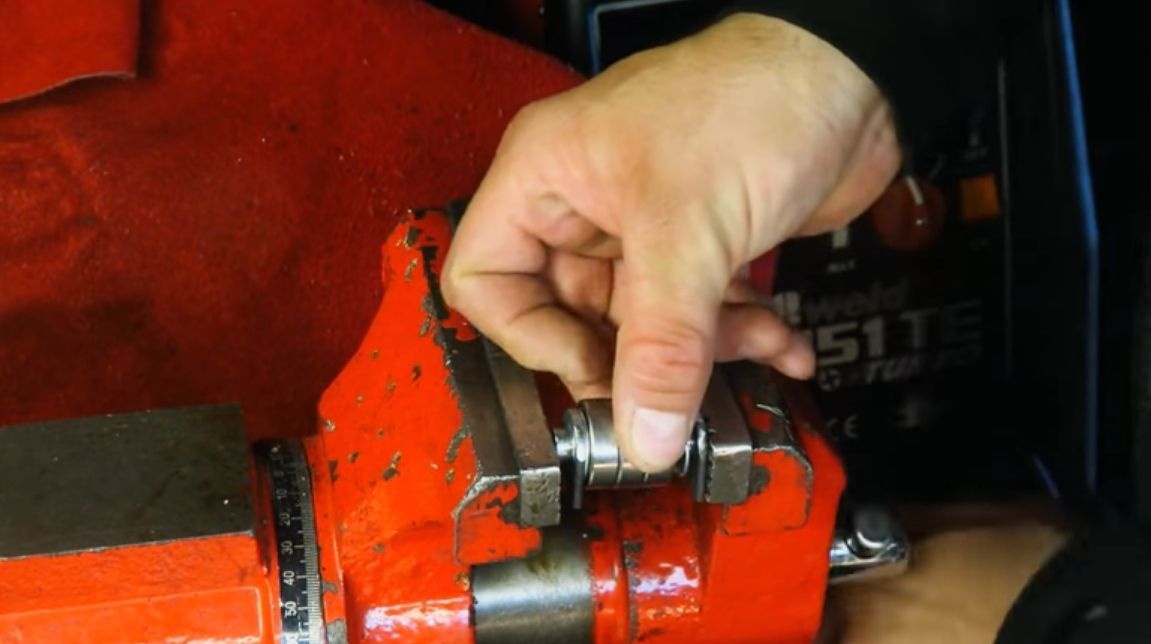
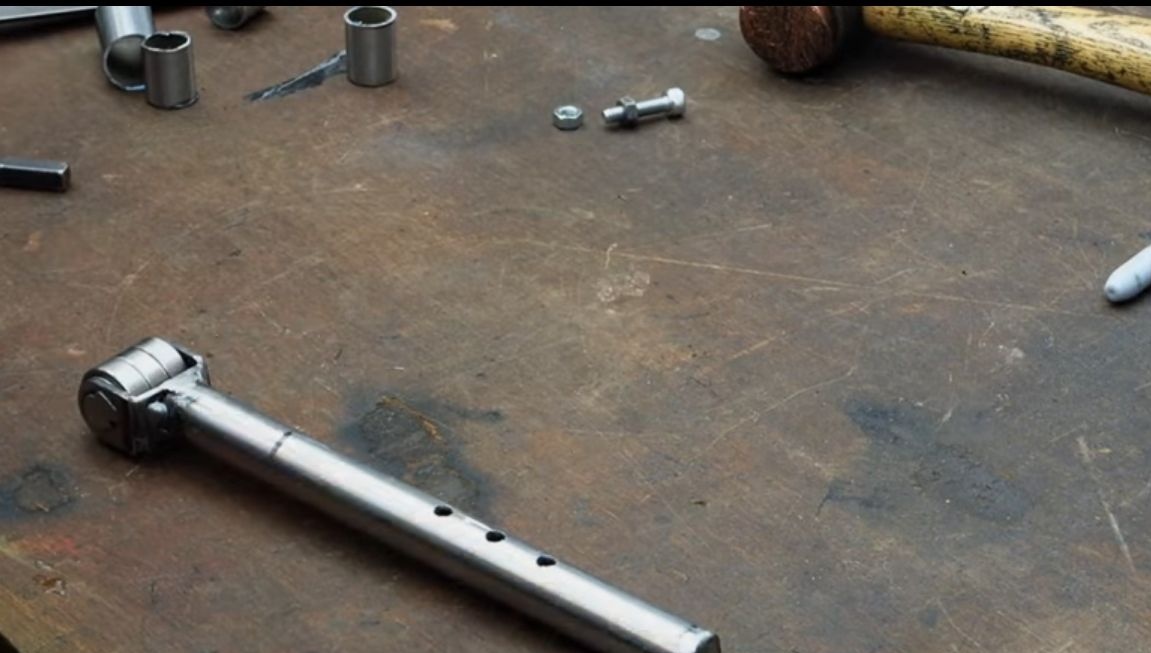
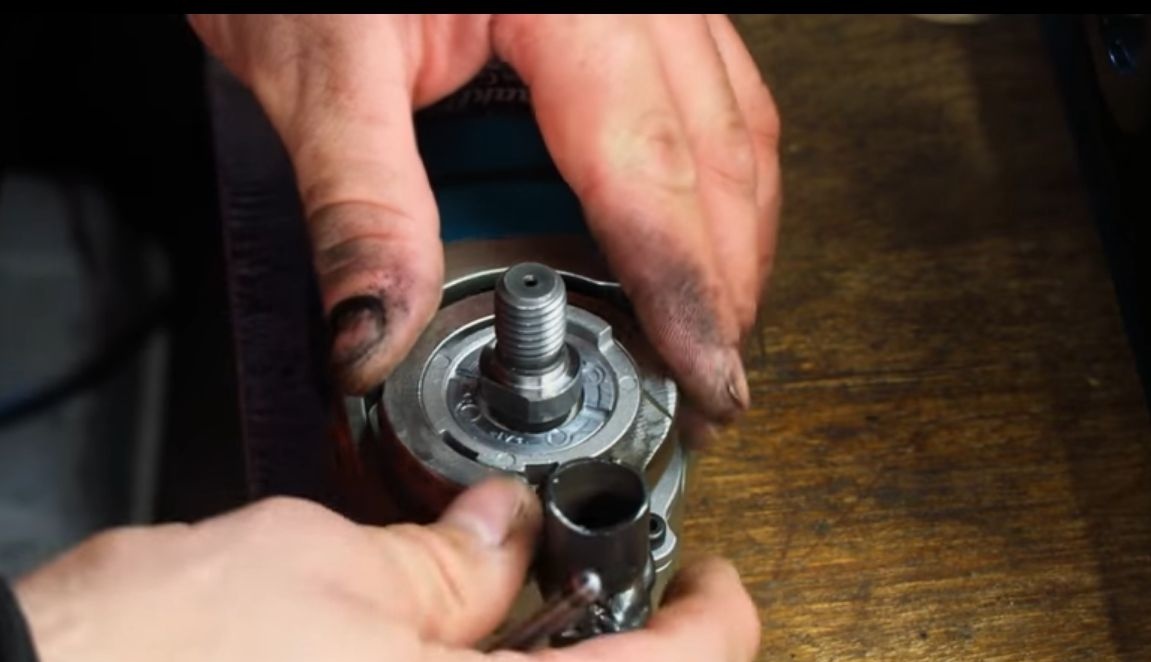
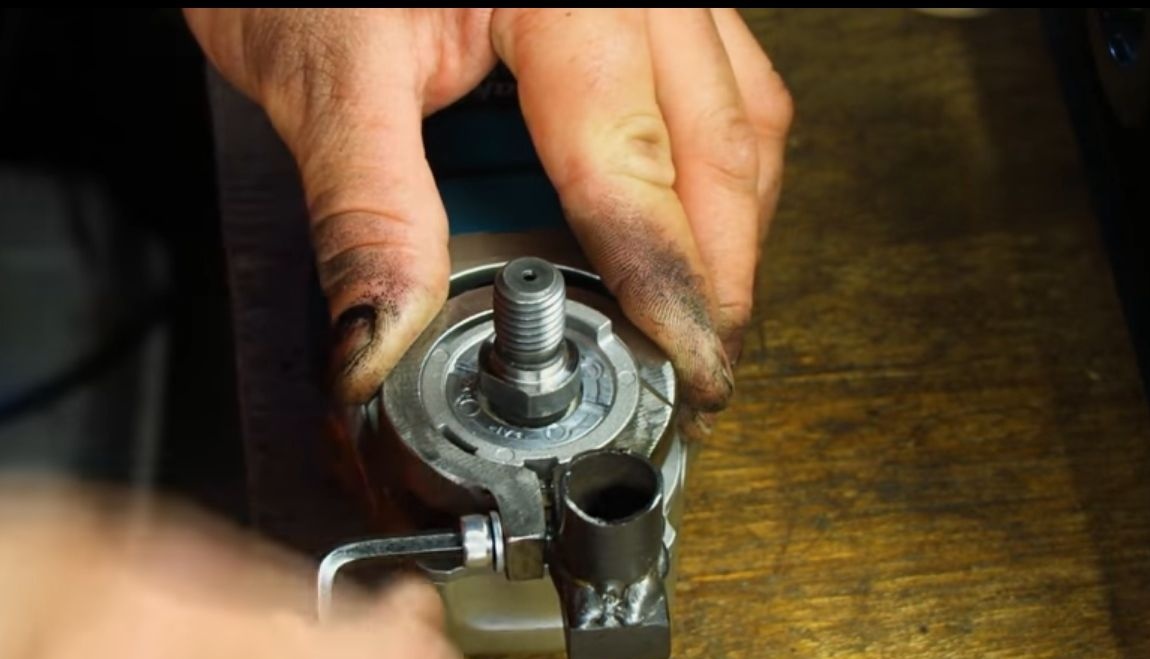
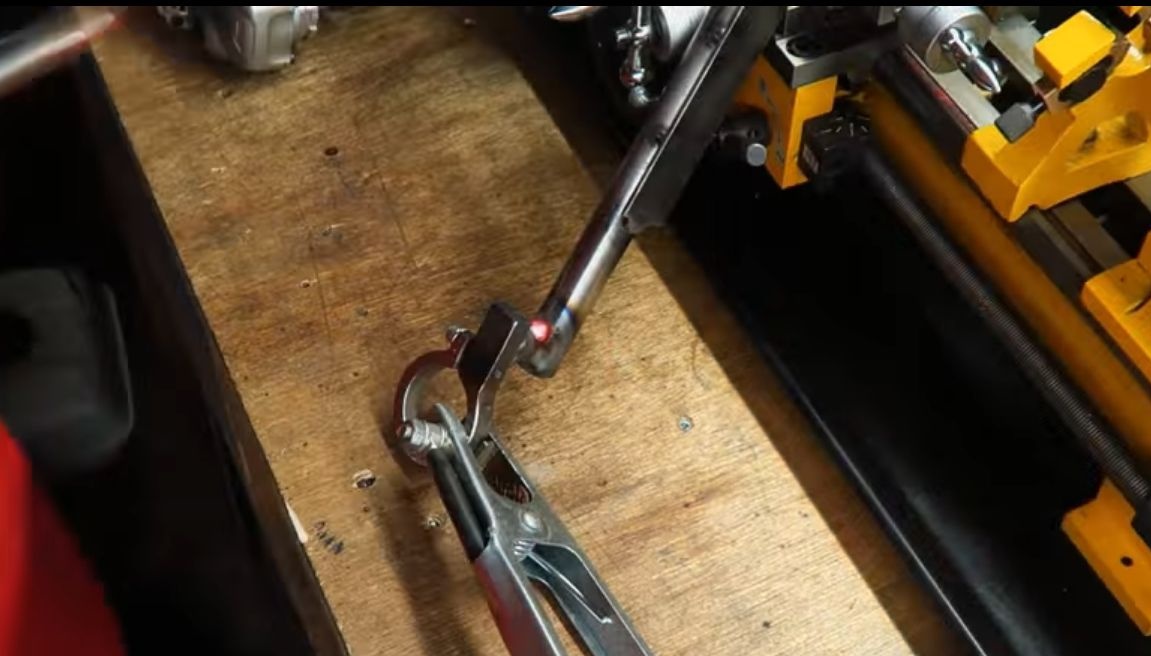
Step Three Nasal axis
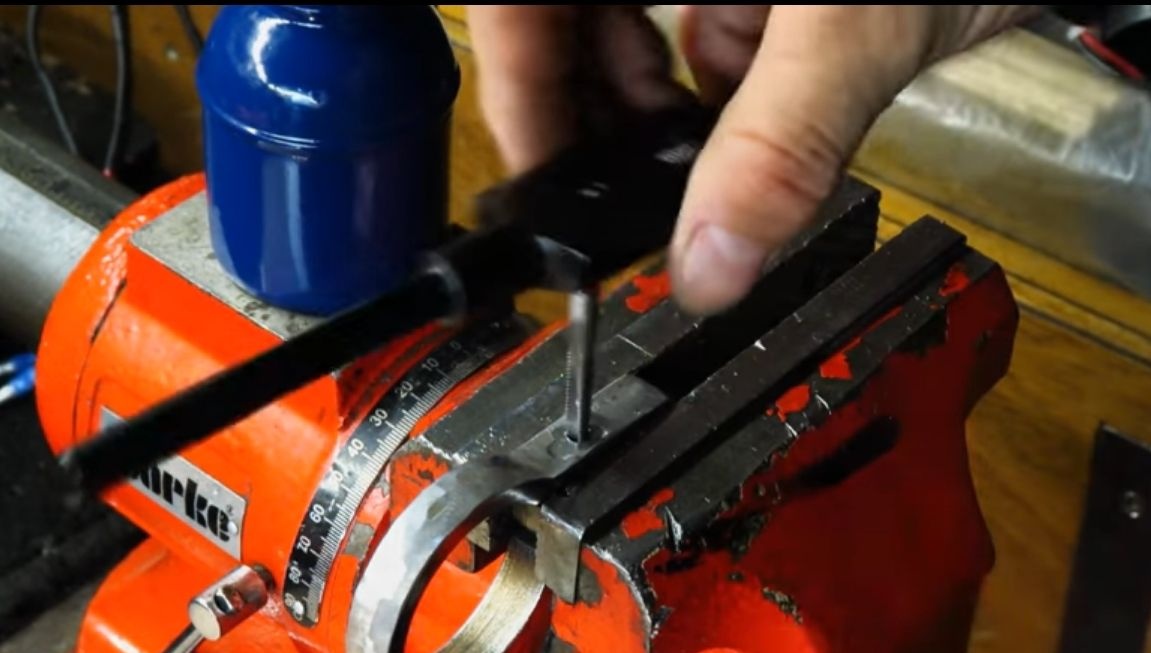
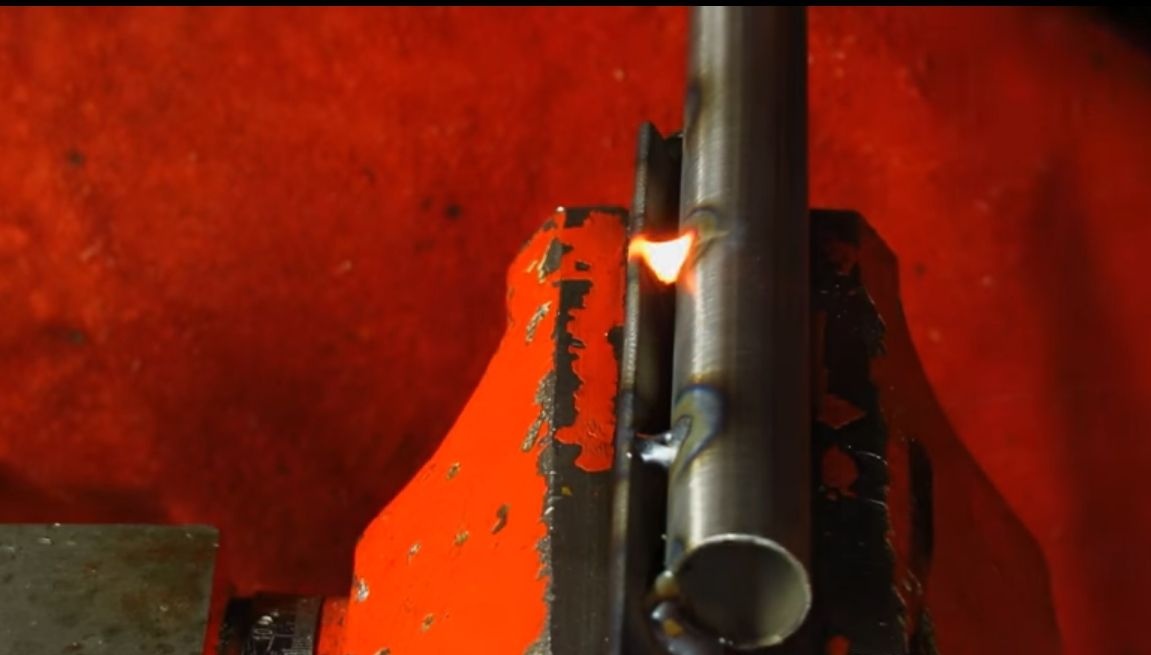
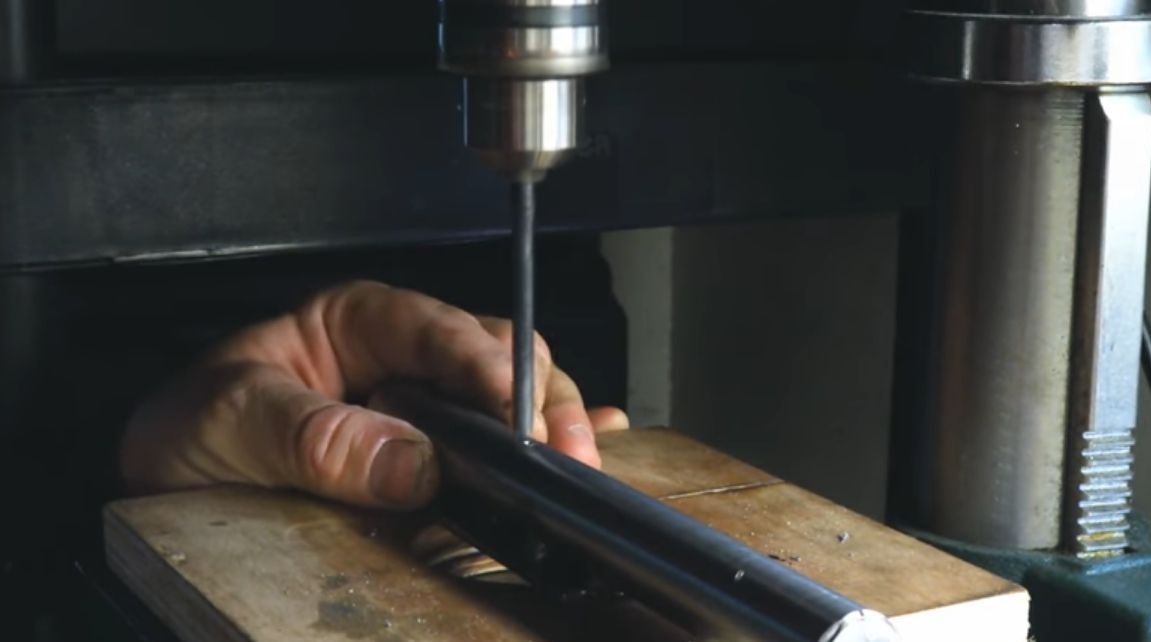
In the bow of the device is also a wheel, that is, a driven wheel. It is made of three bearings. Under them you need to find the axis. To fix this whole thing, we take a plate and drill two holes of a slightly smaller diameter in it than the selected axis. The point is then to press these plates onto the axis. Cut two parts from the plate and grind them, as the author did.
Press the plates onto the axle using a vise. Now you just have to weld another plate on top of them. The plates are also welded to the axis on both sides for reliability.
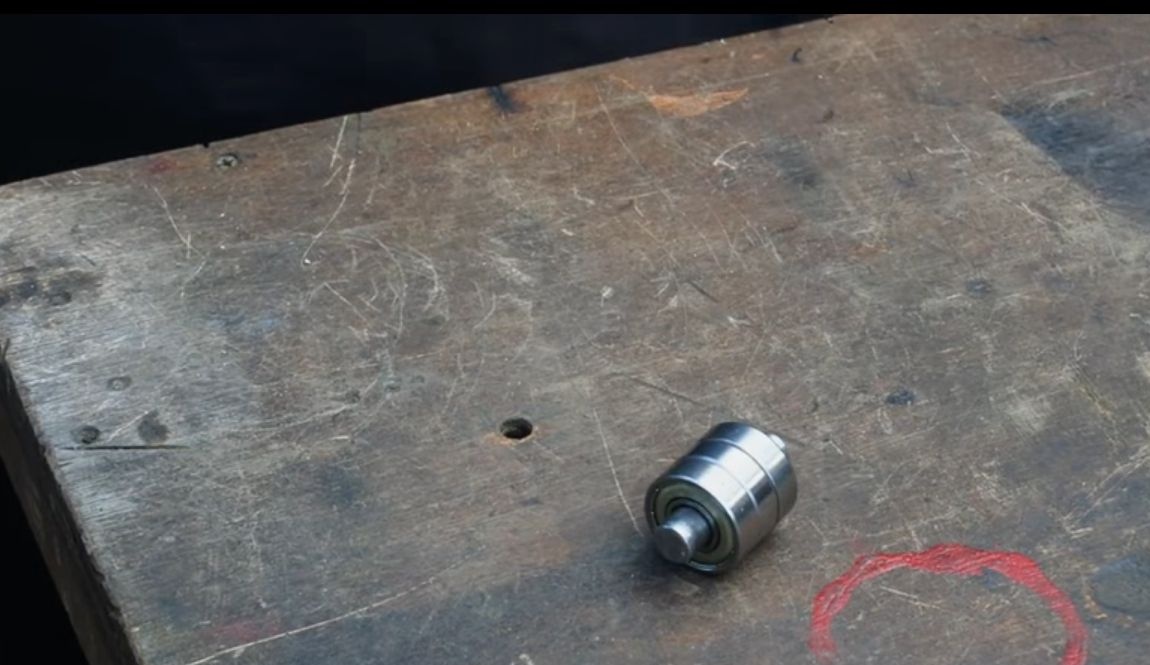

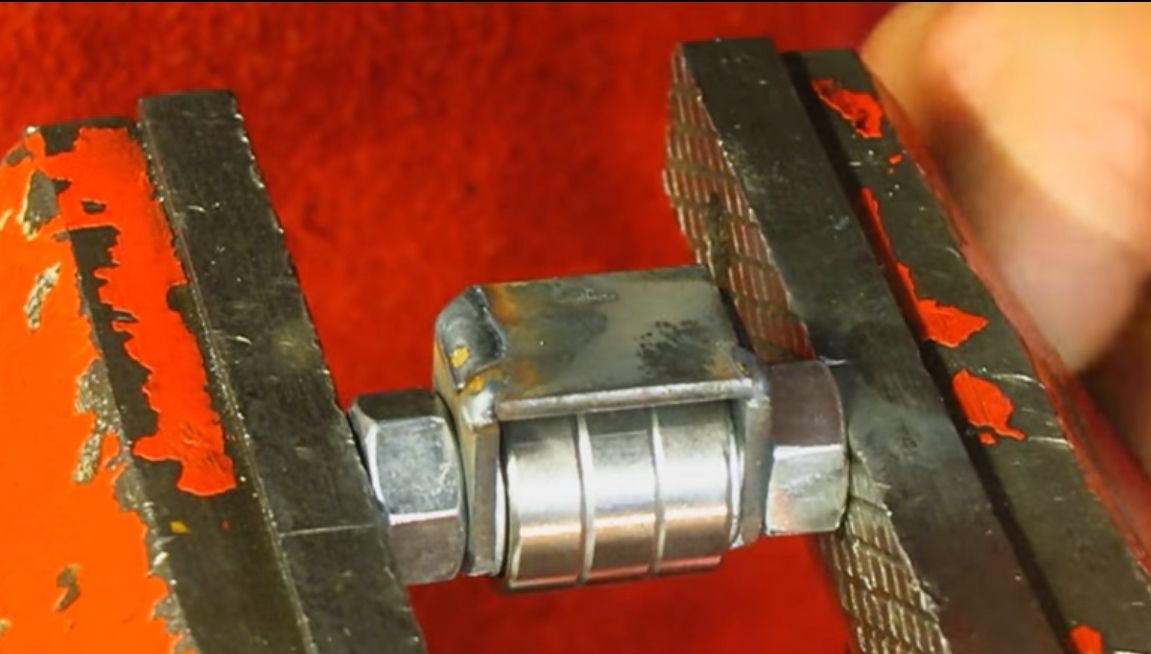
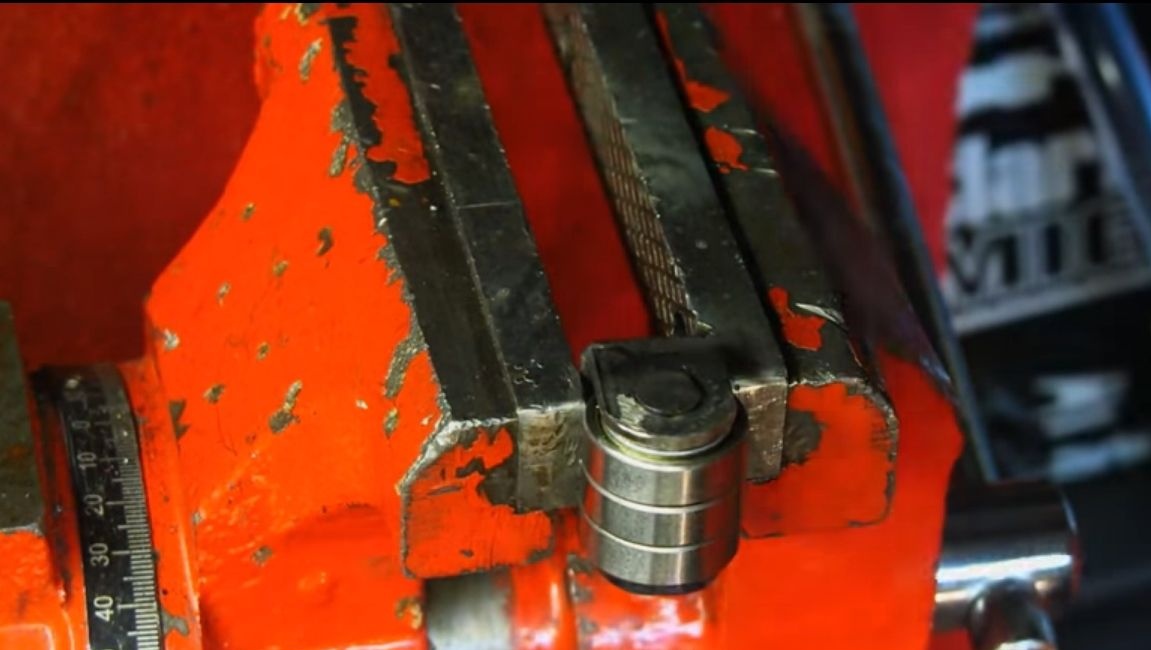
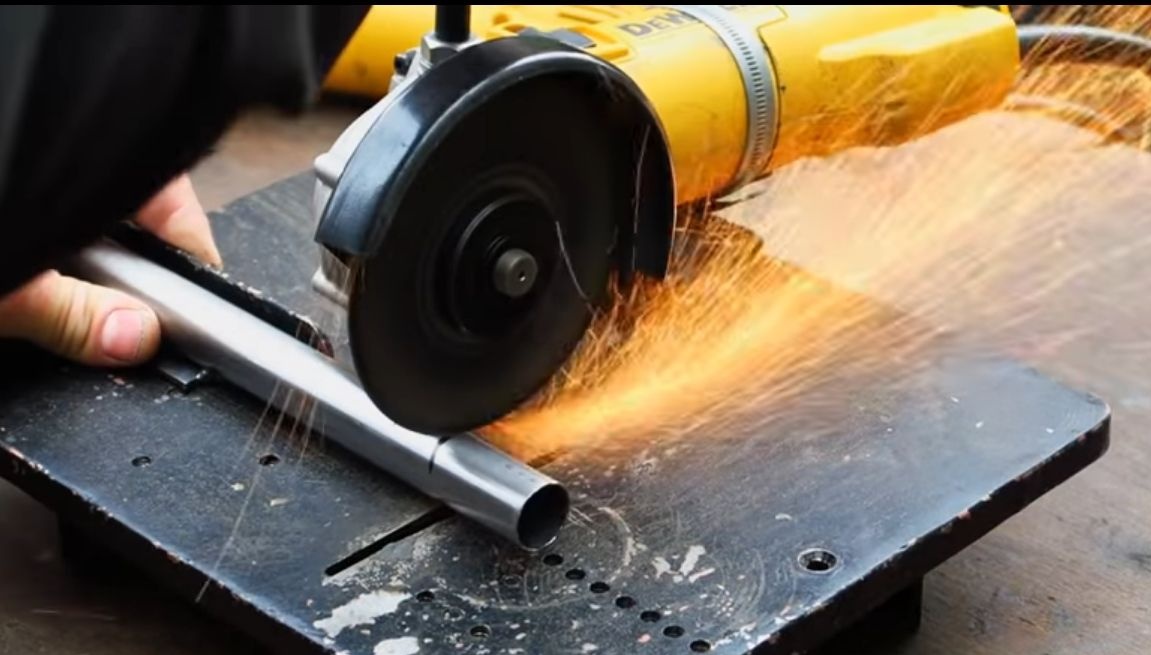
Next, weld a piece of pipe to this part, it should be slightly smaller in diameter than the main pipe of the frame. That is, one pipe should go into another.
Step Four Work plane
As a "frame" a piece of pipe is used. Weld a metal plate to it. You will rely on it when working with a tool.
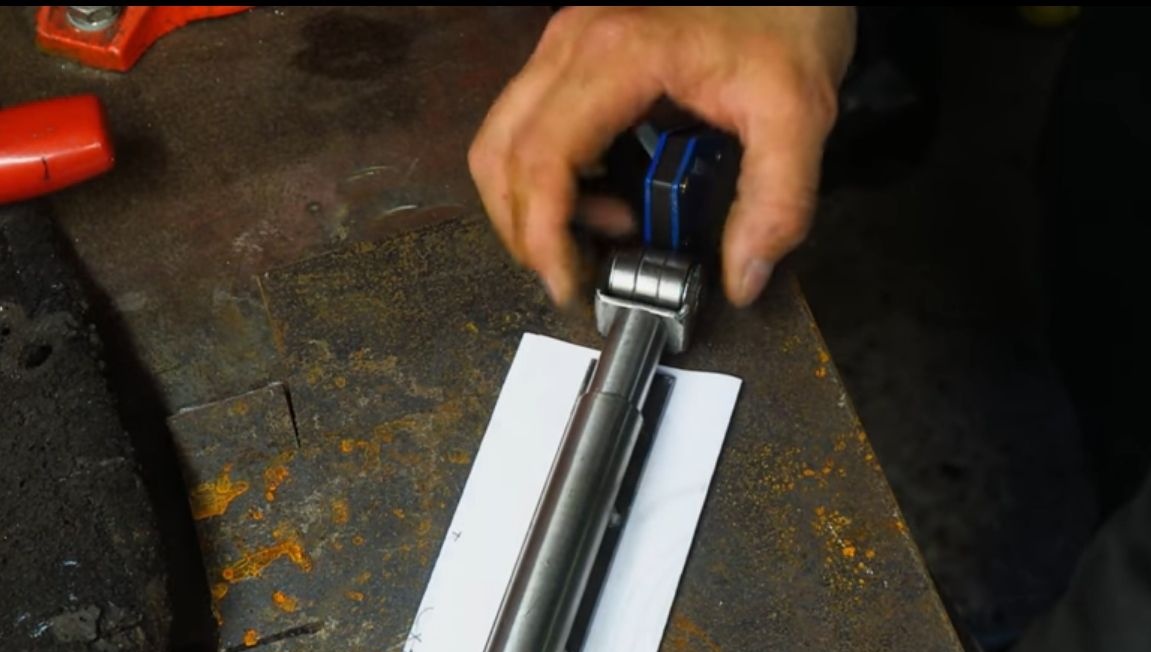

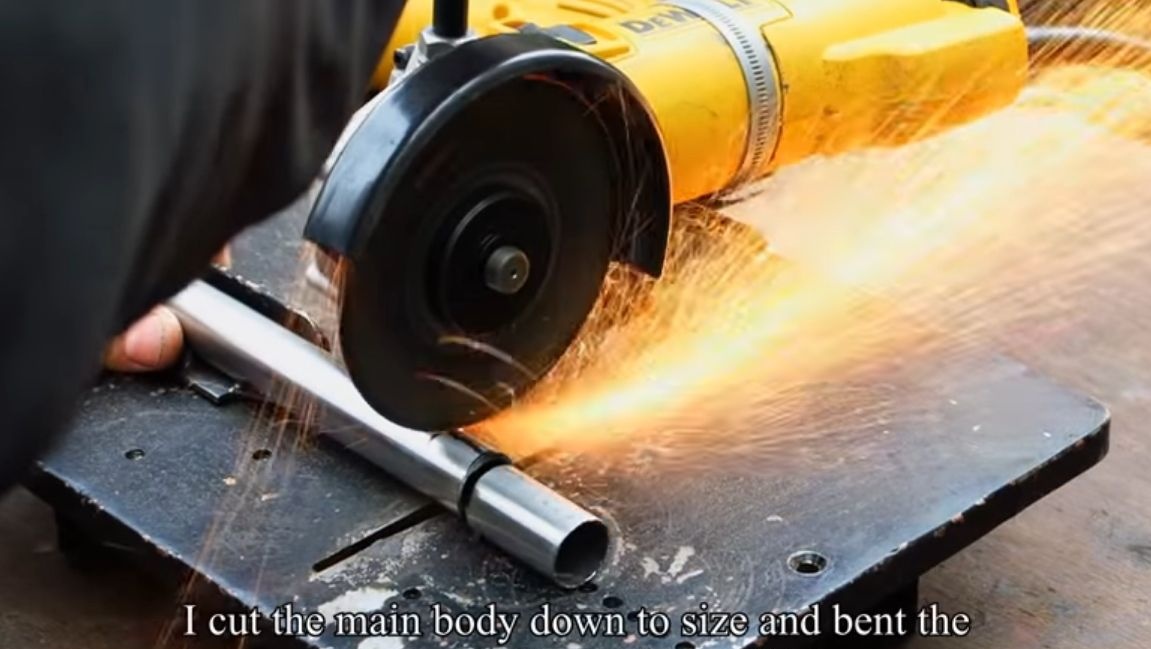
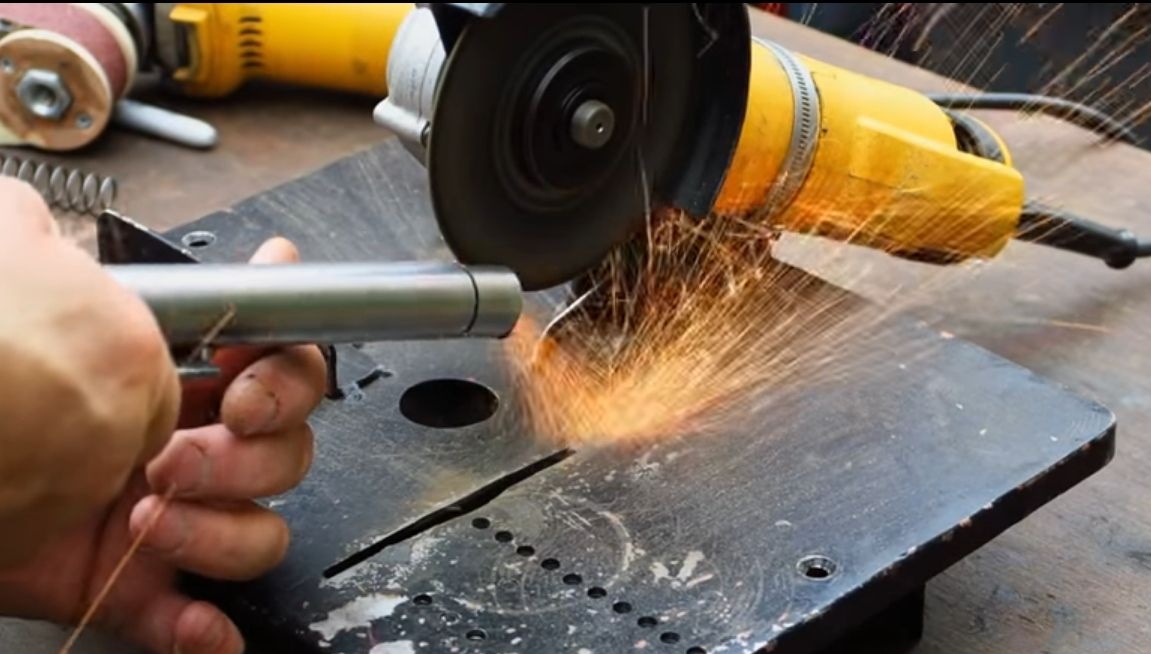
Step Five Retractable pipe modification
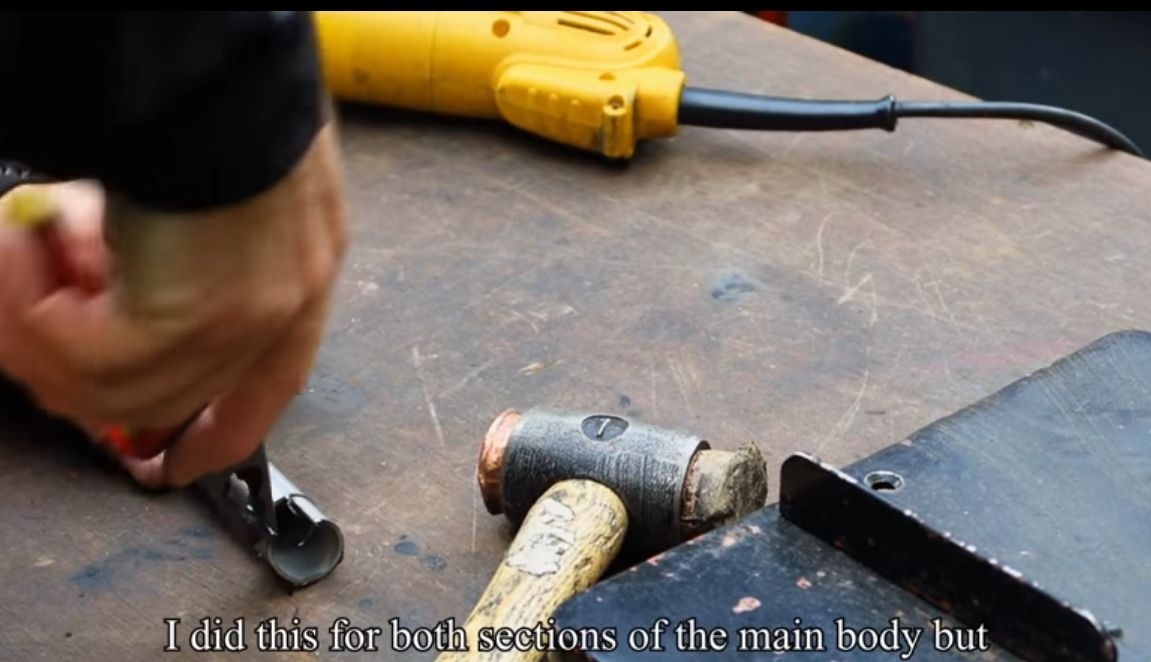
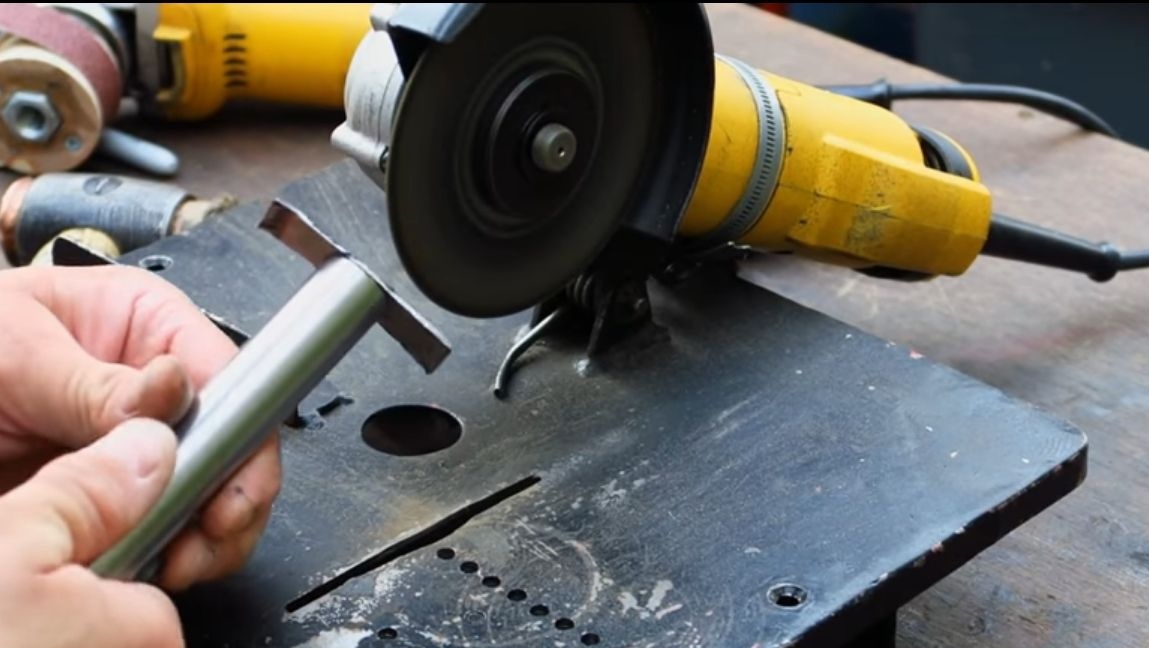
Cut two pieces from the extension pipe. Flex one piece and plug the pipe with it. This support will be needed for the spring. We will need the second piece during the final assembly of the structure.
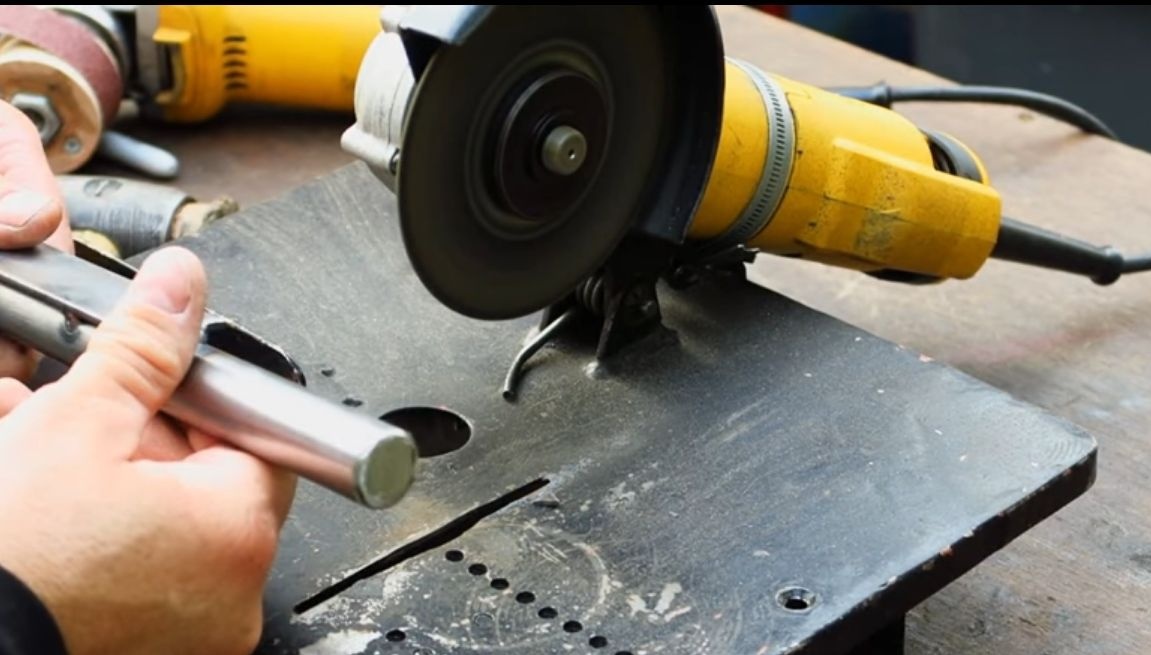
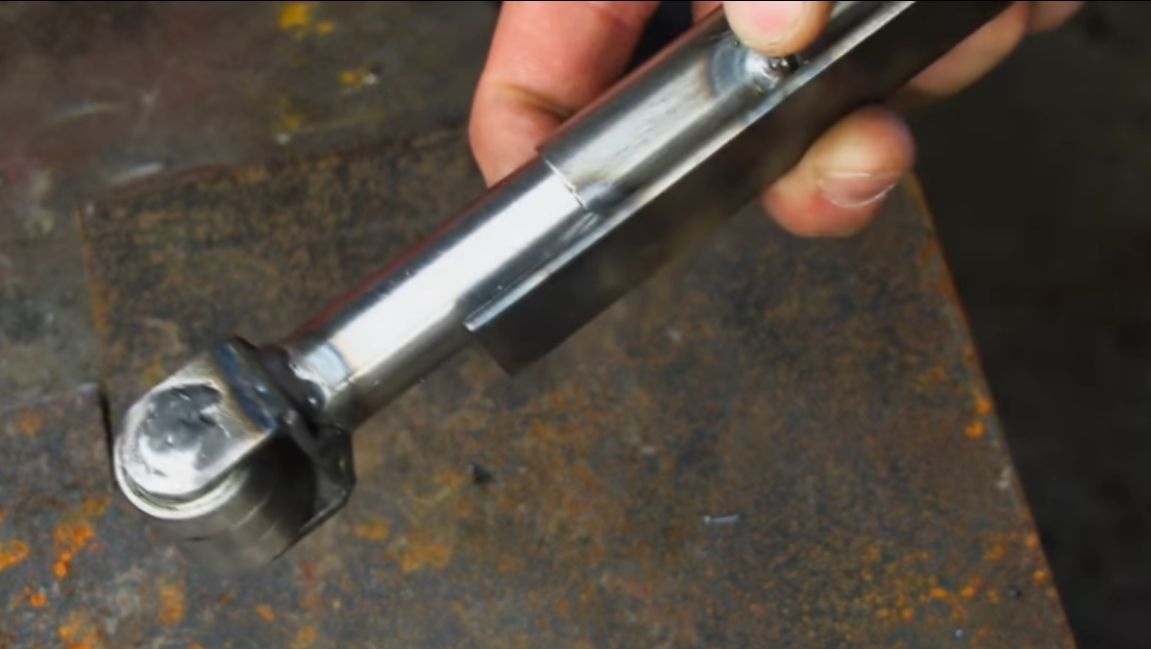
Step Six Arrangement of the tension system
One pipe enters another, and between them is a spring, which pulls the grinding belt. So, so that the retractable pipe does not twist, you need to cut a rectangular hole in it. First, drill a series of holes with a drill, and then cut the rectangle with a dremel or grinder.
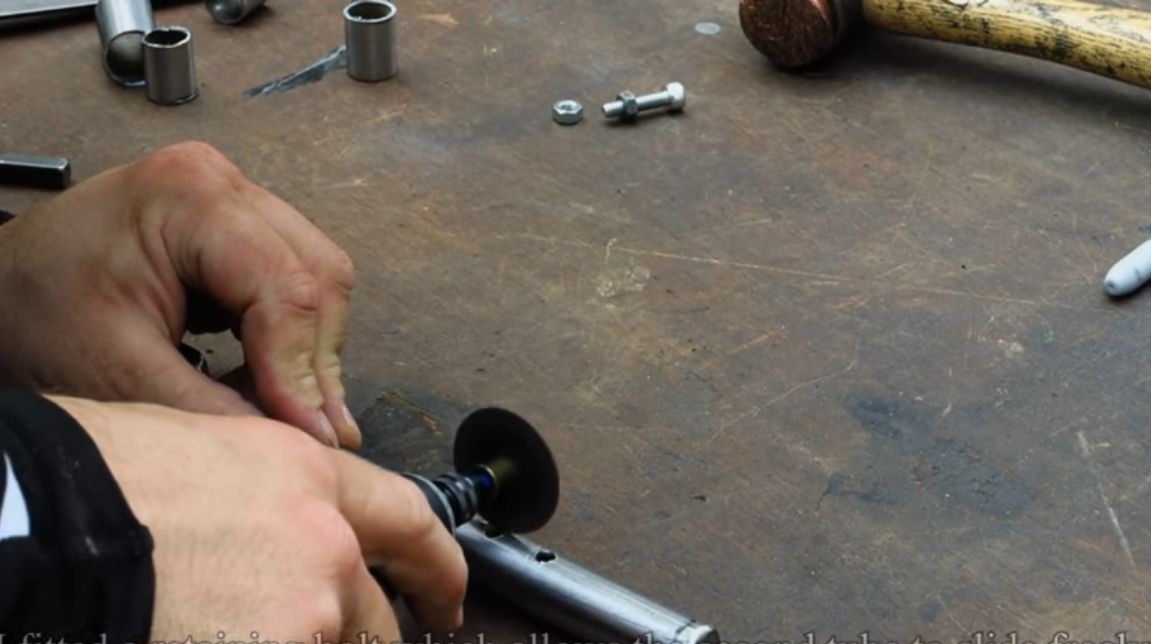
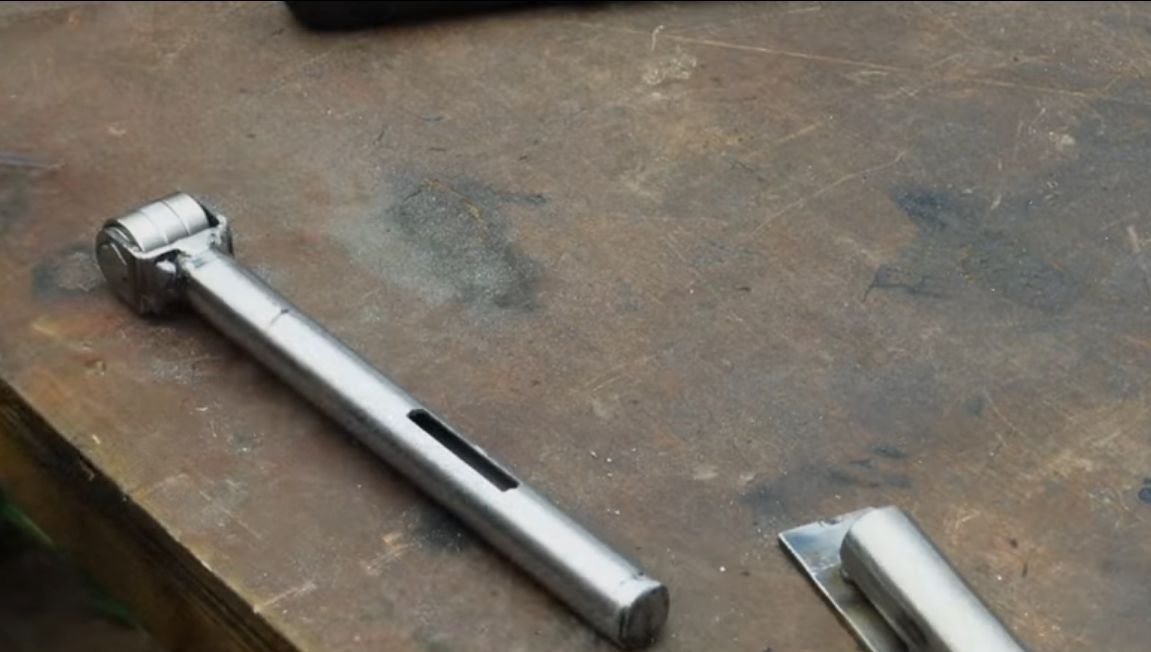
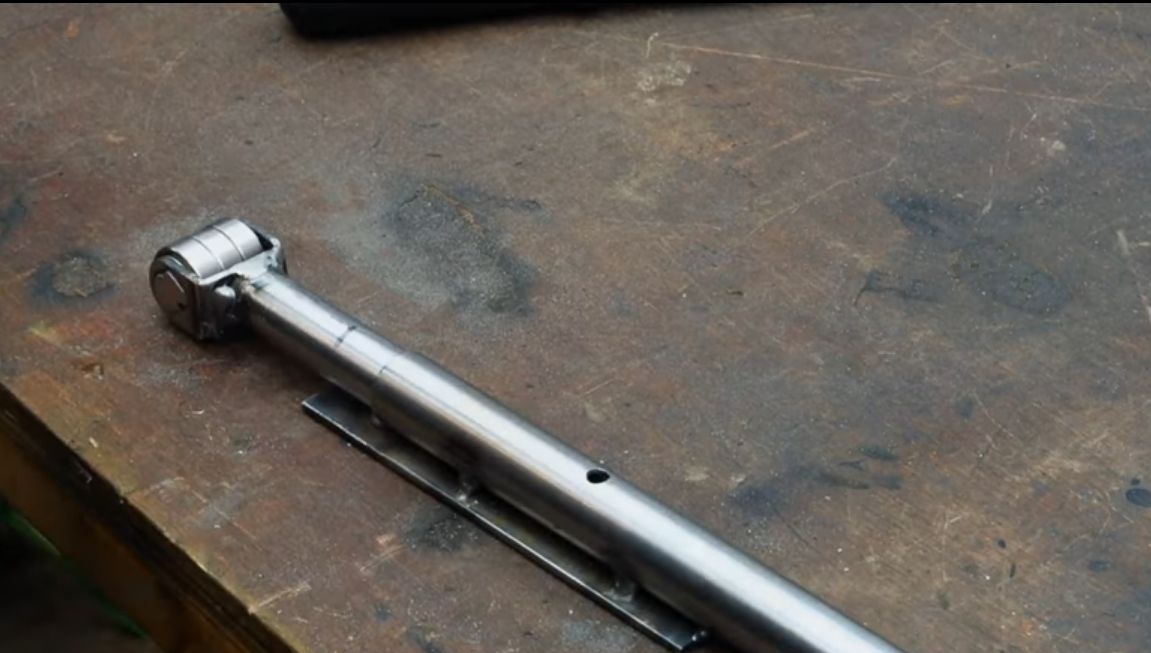
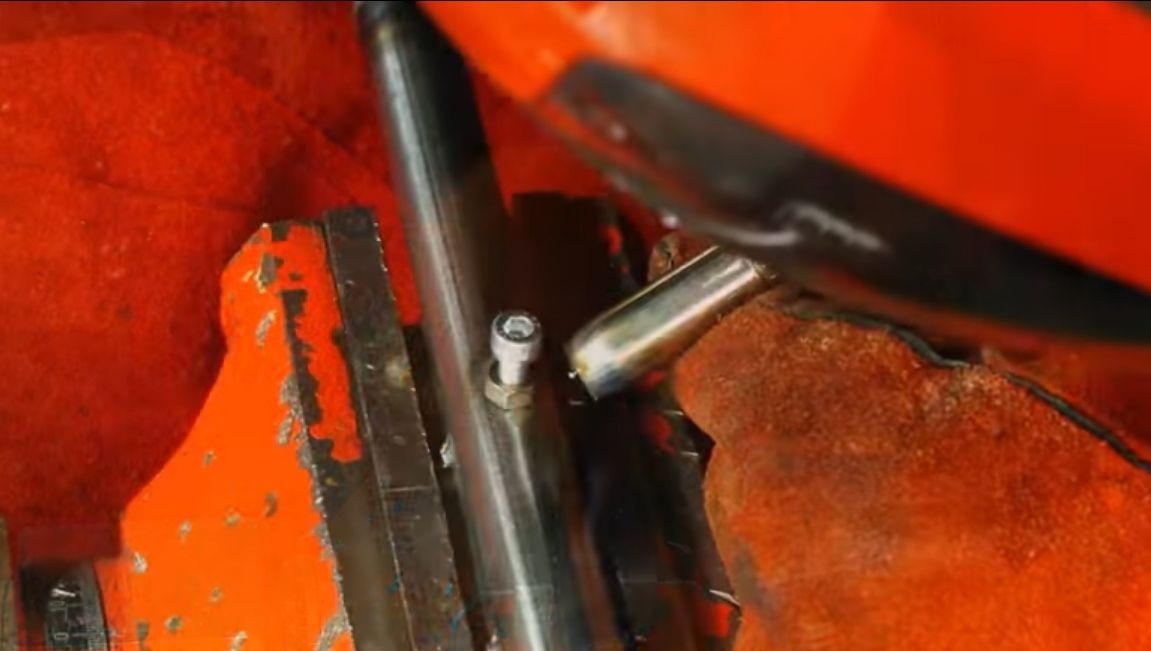
In the main pipe, drill a hole for the bolt. We take a bolt with a nut and then carefully weld the nut opposite the hole. Now, when you wrap the bolt, it will hold the inner pipe.
Seventh step. Final assembly
Now everything can be put together. Take a previously cut piece of pipe and use it to connect the bracket to the main structure.Weld well, everything should be reliable.
Step Eight. Painting and assembly
Paint all the details so that they do not rust and look beautiful. The author also paints the drive wheel, holding it in the drill chuck.
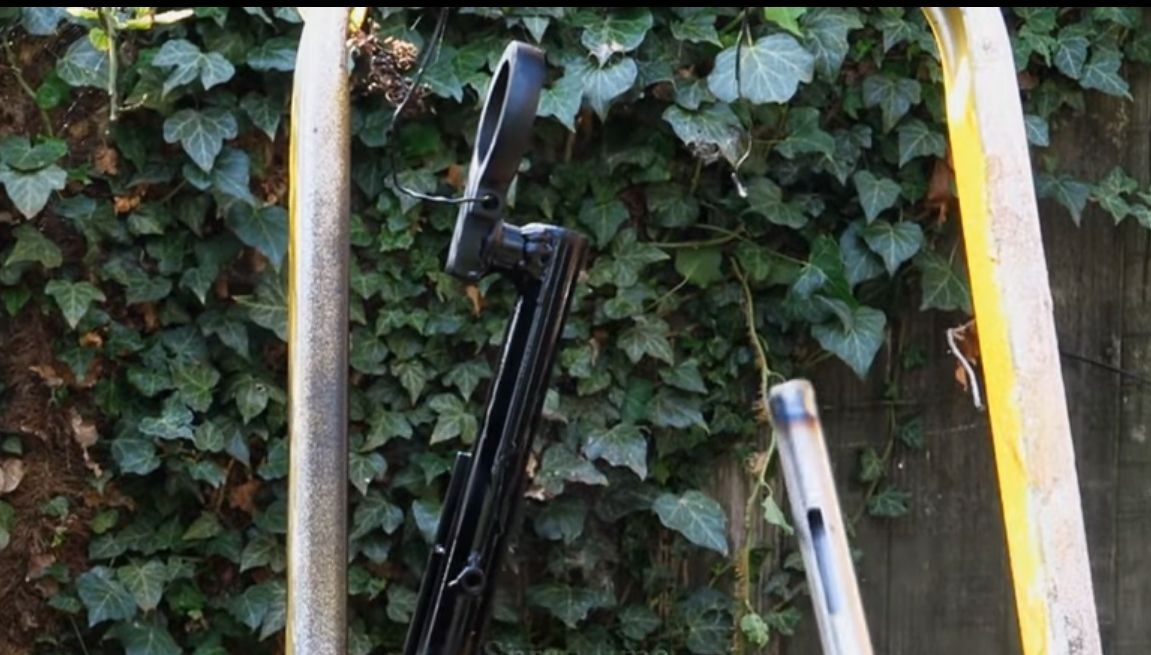
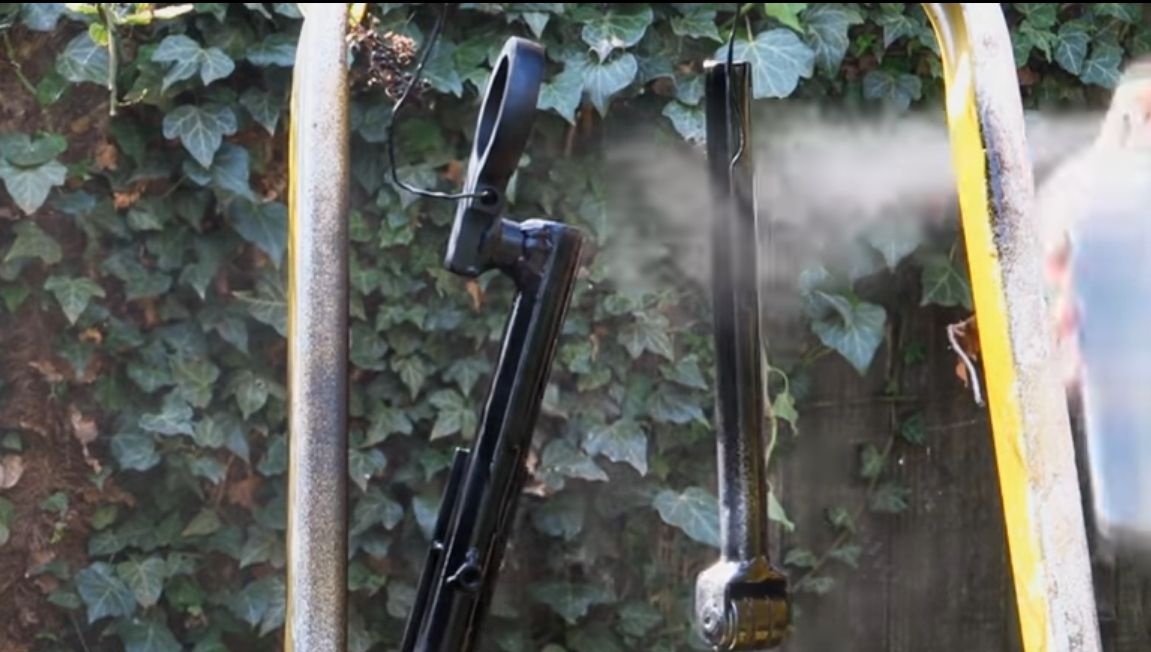
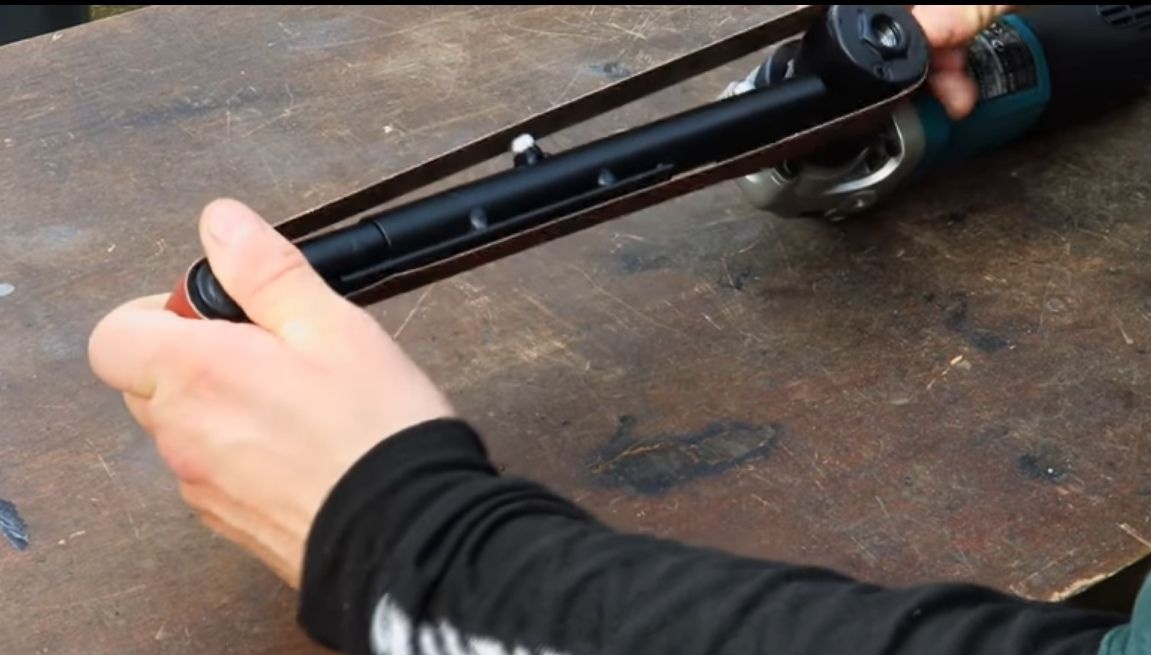
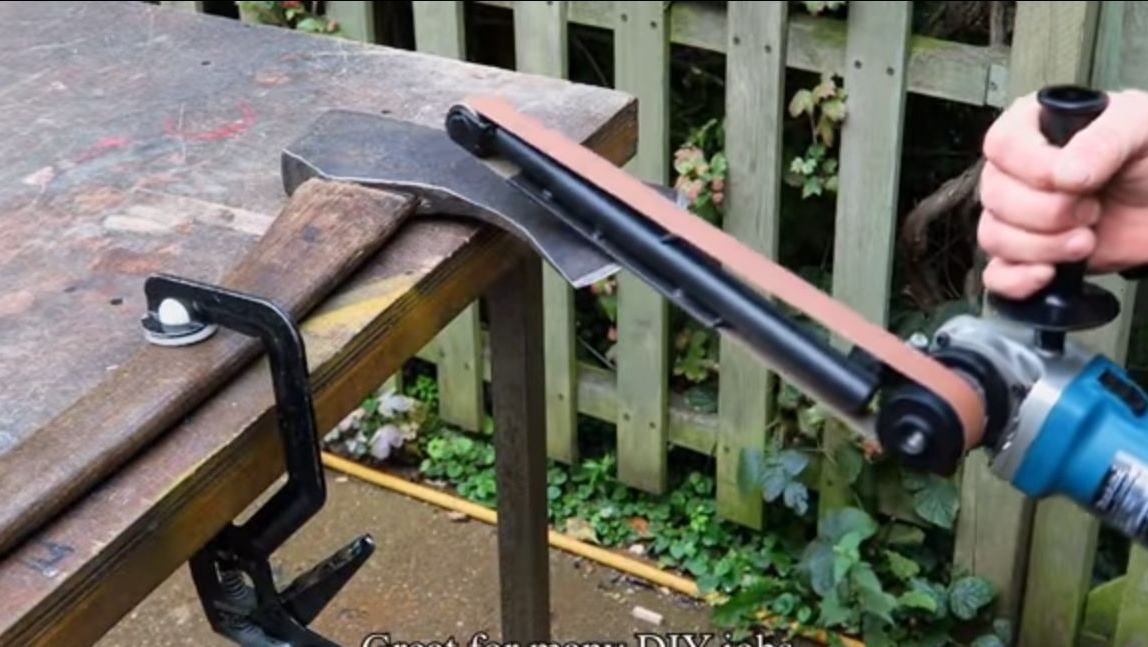
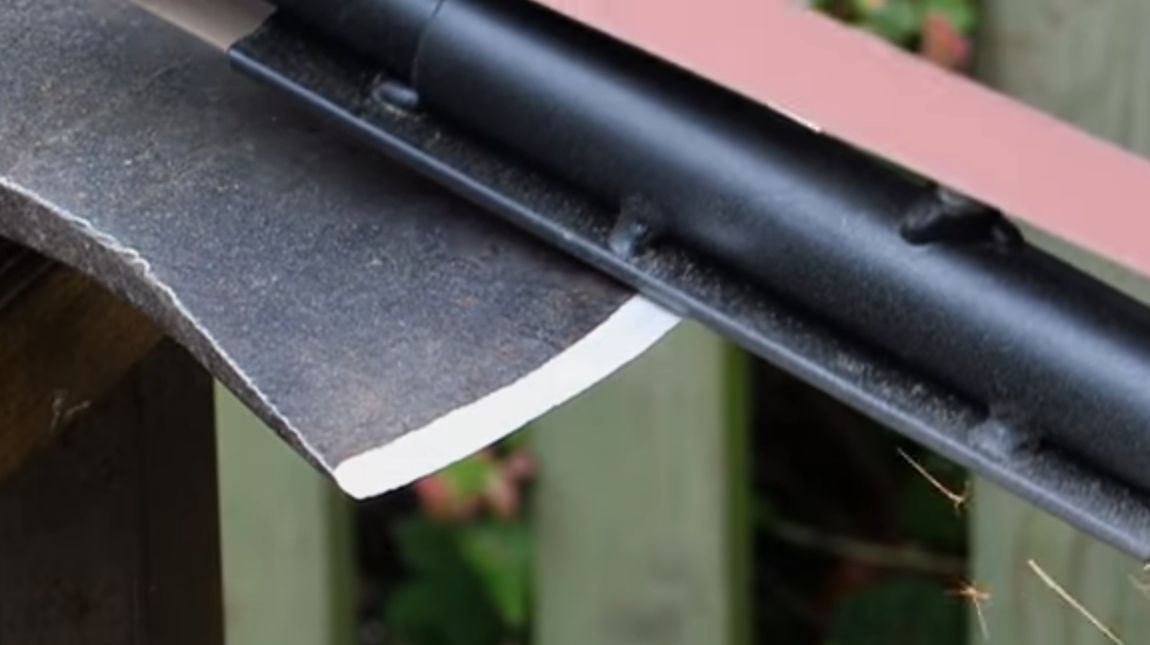
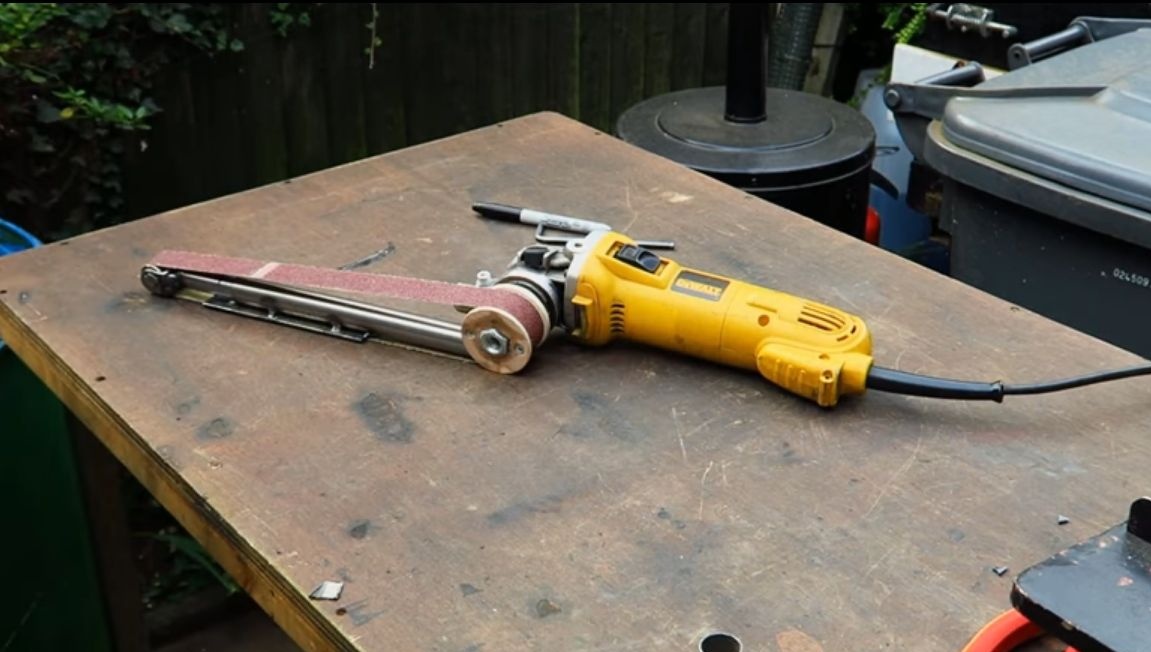
Assemble the machine, insert the extension pipe into the main one and tighten the bolt, remembering to install the spring. Put on the sanding belt. That's all, you can turn it on! It is highly desirable that the grinder had the ability to adjust the speed. Start at low revs to make sure everything is working well.