
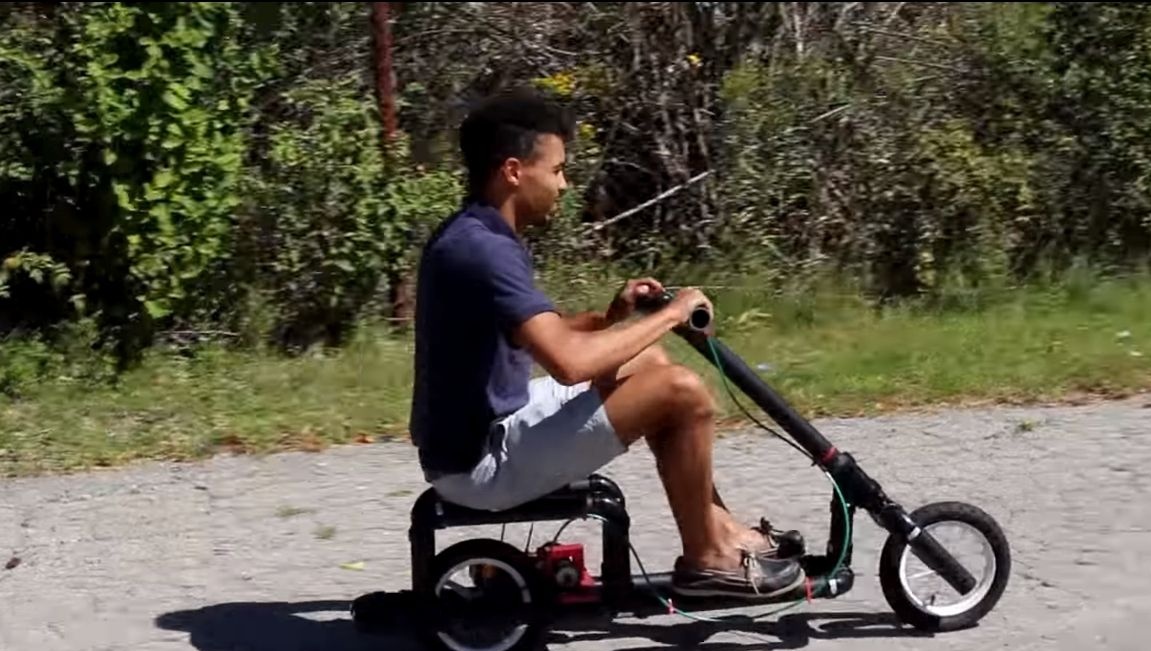
Surely, this article title has already broken your brain.
 But this is not a joke, from plastic pipes and you can really make a scooter, and quite reliable. Given that it’s grown men ride on it, for a child such homemade will be just right. Of course, you will not go too far to the battery, but nothing prevents you from installing several lithium cells inside the frame and driving kilometers on this technique.
Even if the batteries run out, the scooter can still be used. On it it will be possible to move down the mountain, and if you turn off the screwdriver, you can use it in the classic version. By the way, if you ride down a hill on such a scooter with the battery turned on but discharged, it can theoretically be recharged.
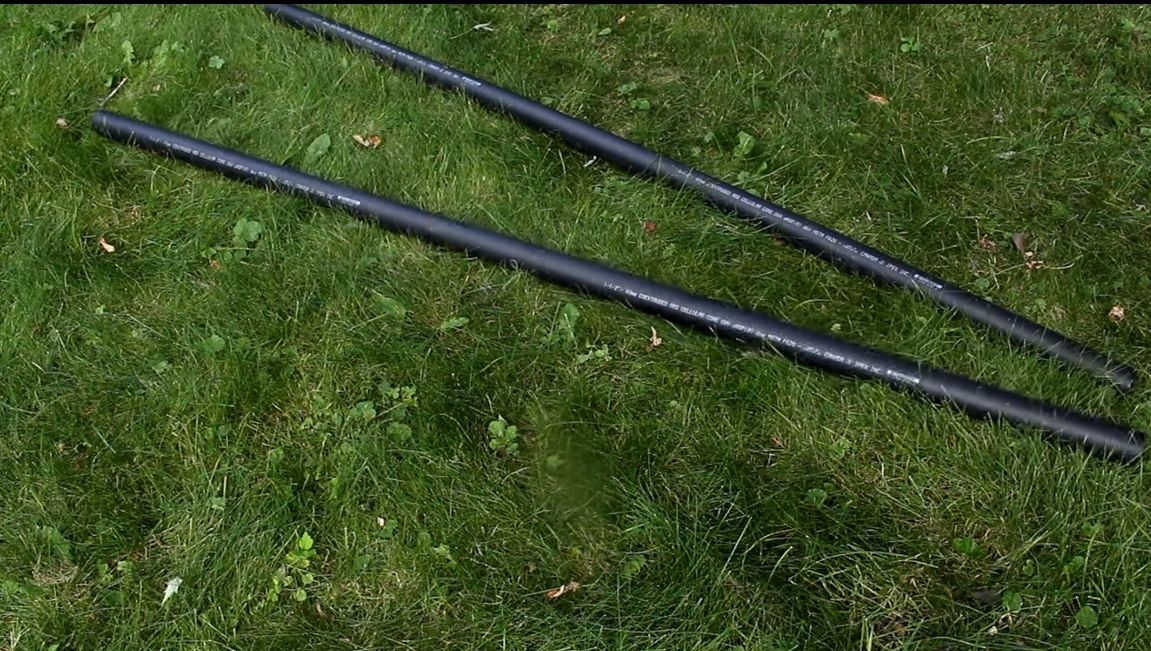
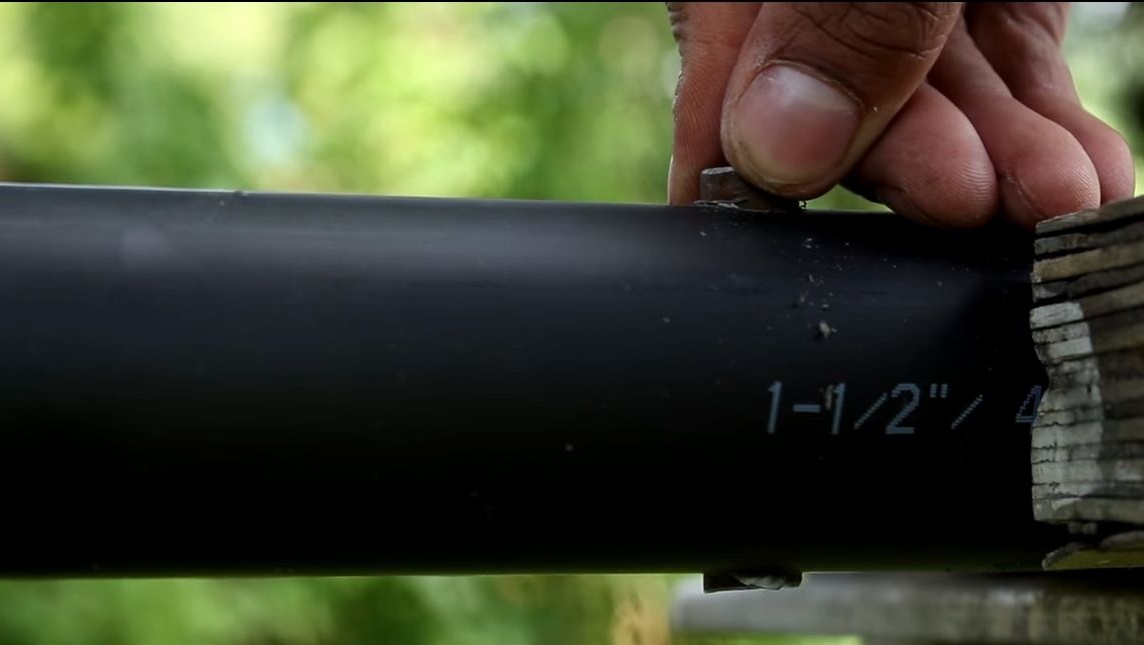
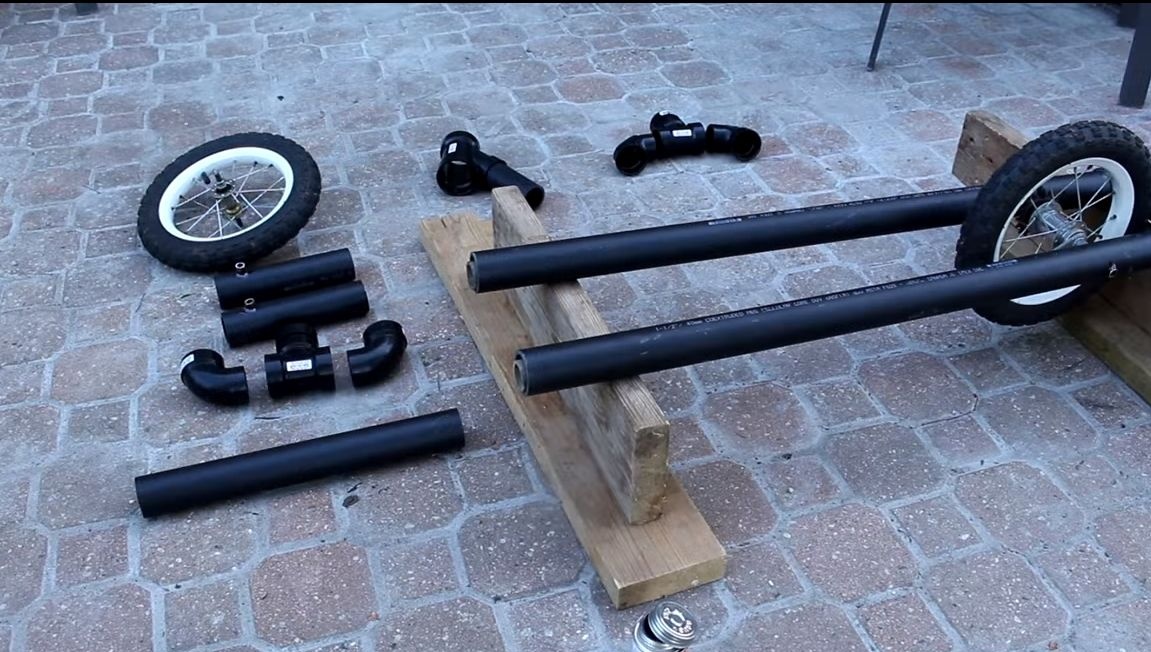
Homemade assembly is very easy, you are required to clearly follow the instructions and find all the necessary components for the pipes, these are tees, corners and so on. The author used pipes made of ABS plastic as a material, but it seems to me that PVC pipes are quite suitable. Choose material stronger.
List of materials and tools that the author used:
Materials:
- pipes made of ABS, as well as tees, corners, crosses and other elements;
- glue for gluing pipes;
- two bicycle wheels from a children's bicycle (rear and front);
- a piece of plywood;
-
- a small leading asterisk;
- steel tubes for the manufacture of bushings;
- self-tapping screws;
- a bicycle chain and a lock to it;
- two syringes and a hose;
- plastic clamps.
Instruments:
- a hacksaw for metal;
- screwdriver;
- vise;
- marker;
- drill with drills;
- pliers.
Scooter manufacturing process:
Step one. Cutting workpieces
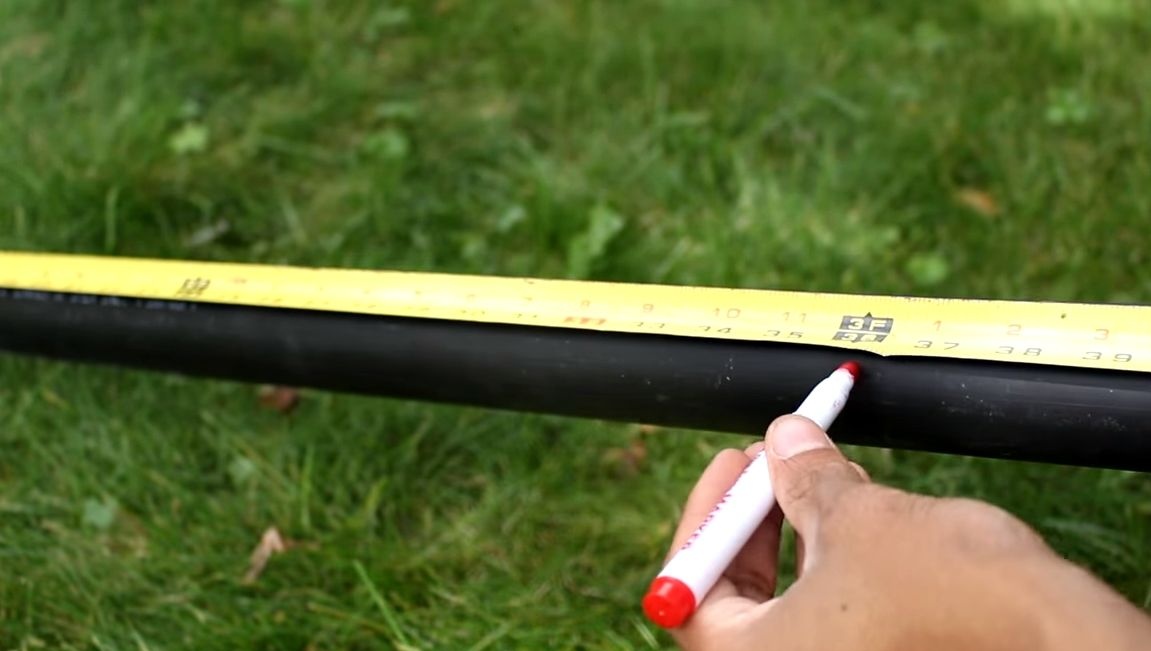
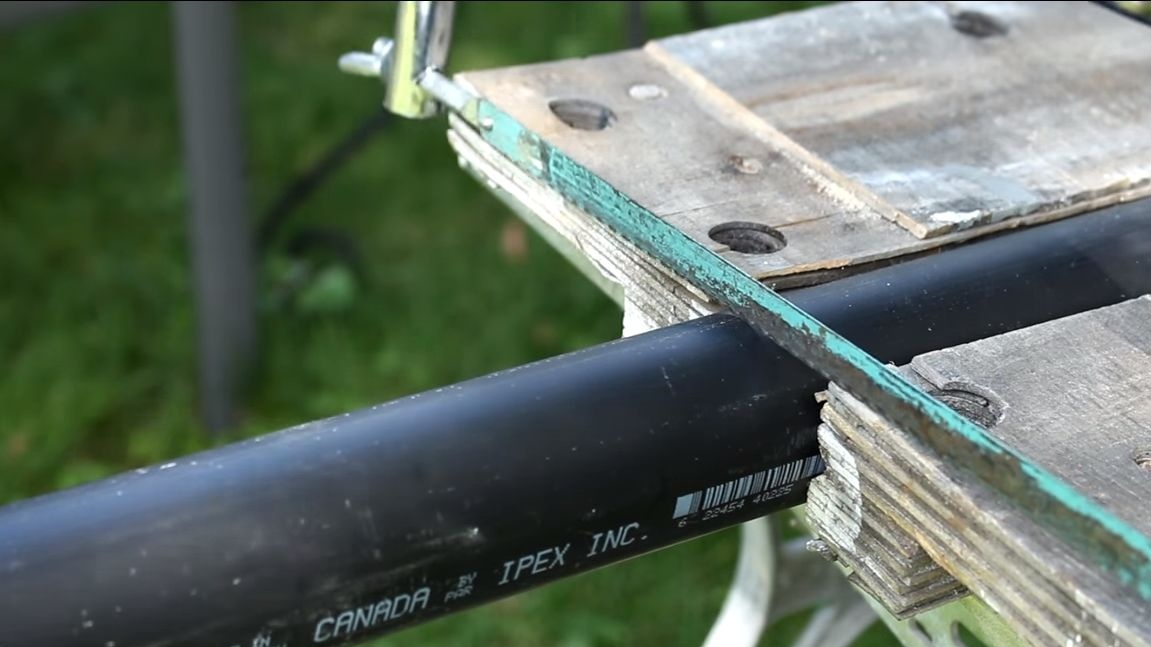
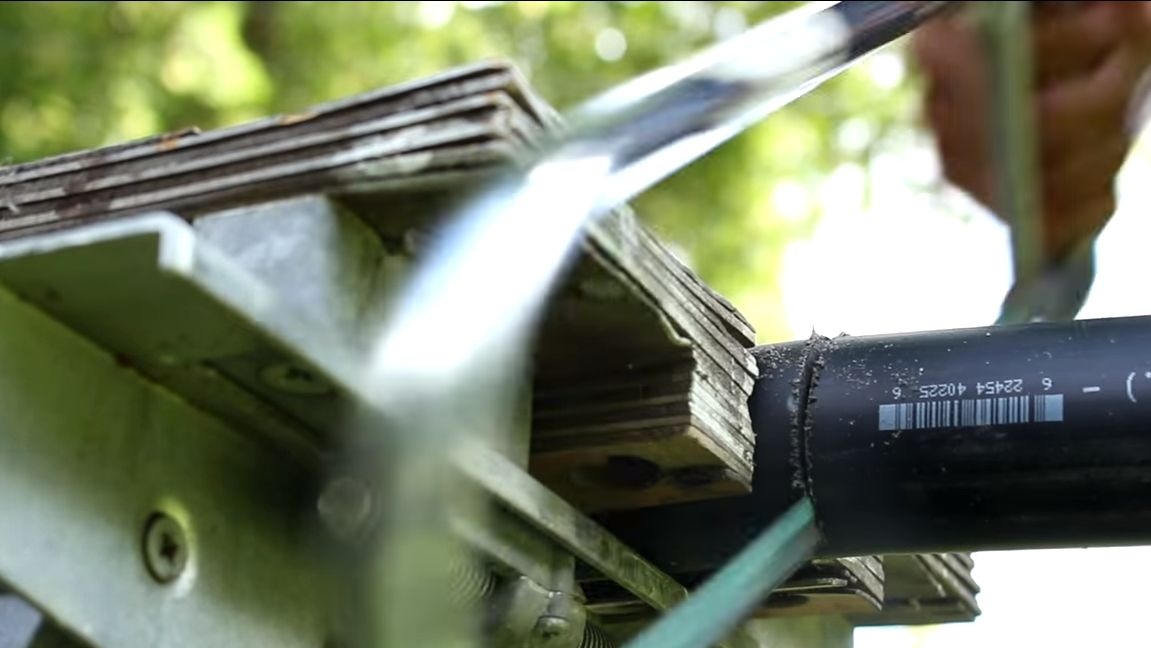
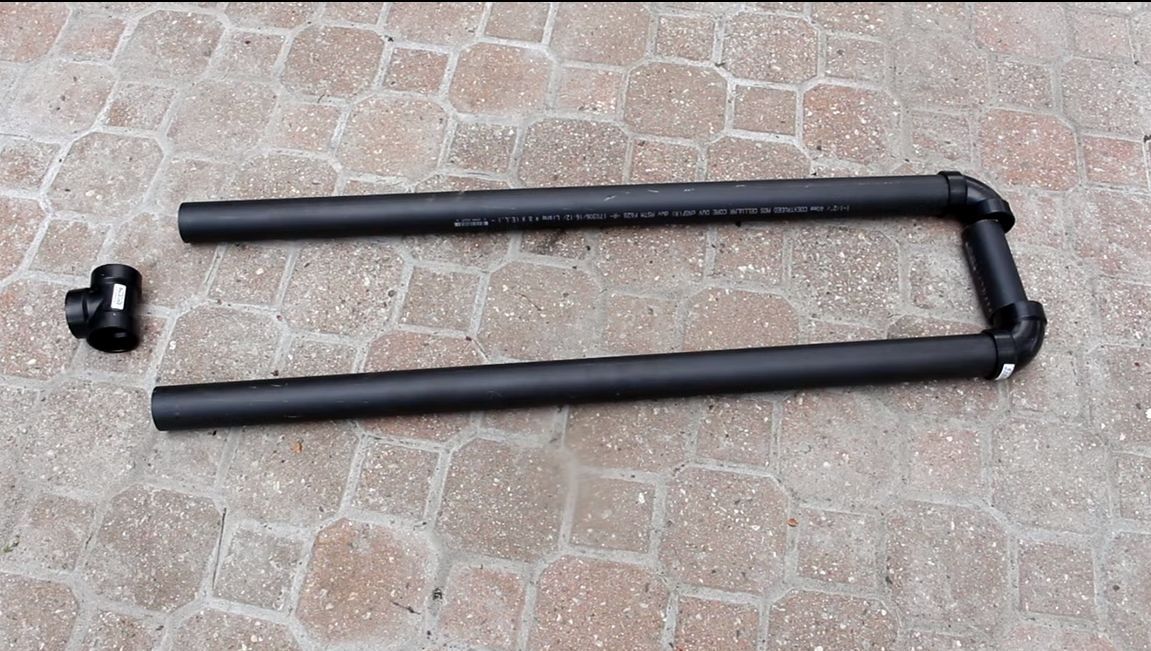
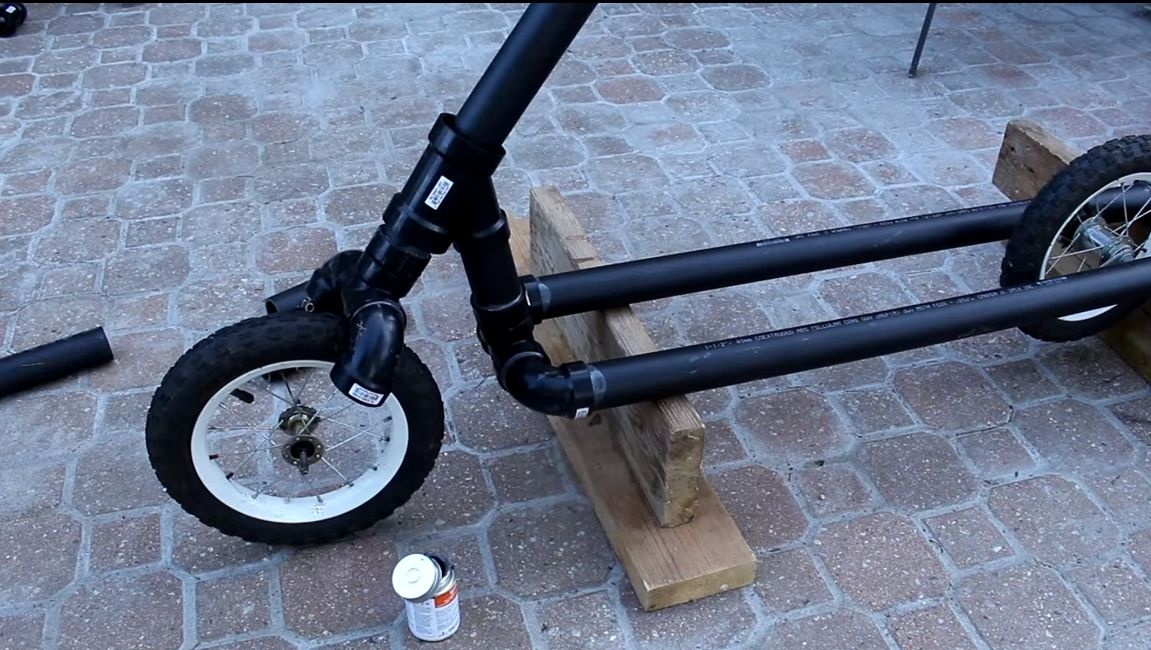
The frame is made of ABS pipes, all you need is three pieces. Two long pipes and one short piece. We measure the desired length, clamp the pipe in a vise and cut it using an ordinary hand hacksaw for metal.
Pipes are connected using various parts for pipe mounting (tee, elbows, etc.).
Step Two Rear wheel mounting
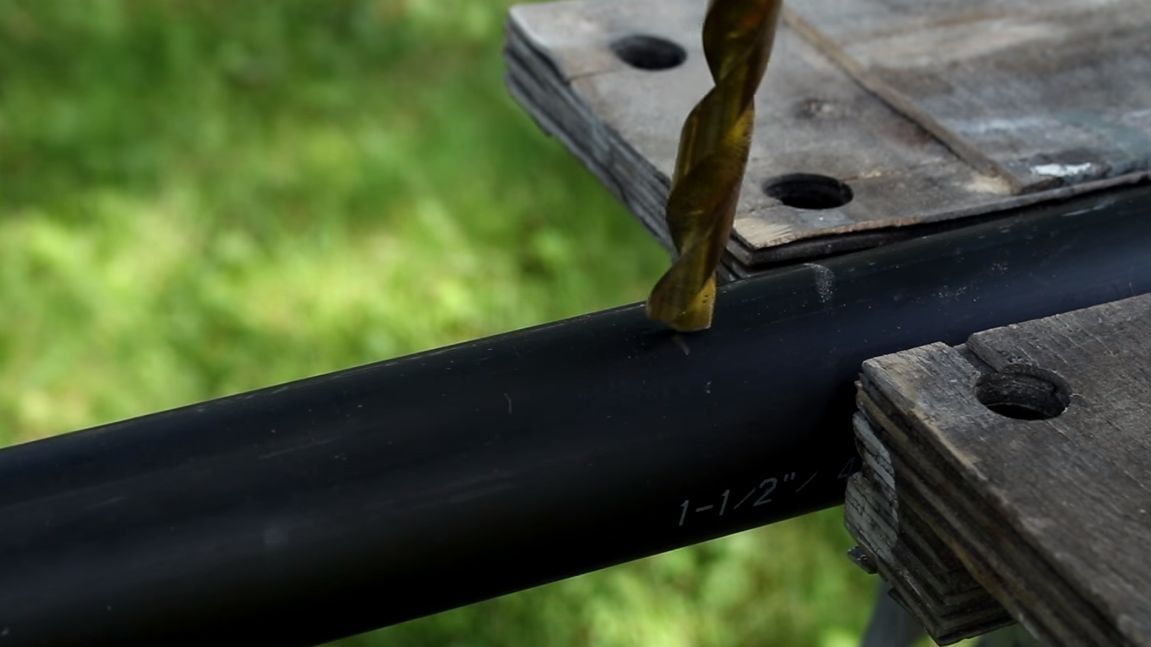
Proceed to install the rear wheel. We take the wheel and mark with a marker the places where we will drill holes. The wheel must be fixed strictly parallel to the frame. Next, we drill pipes in the right places, using a drill of a slightly larger diameter than the axis of the wheel.
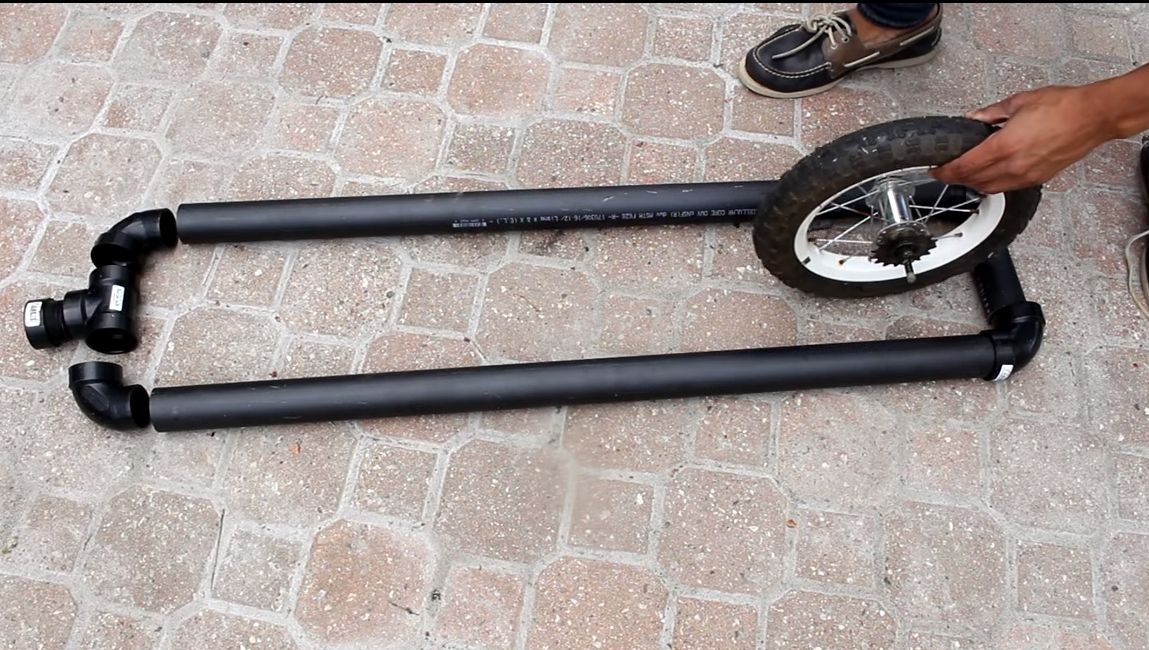

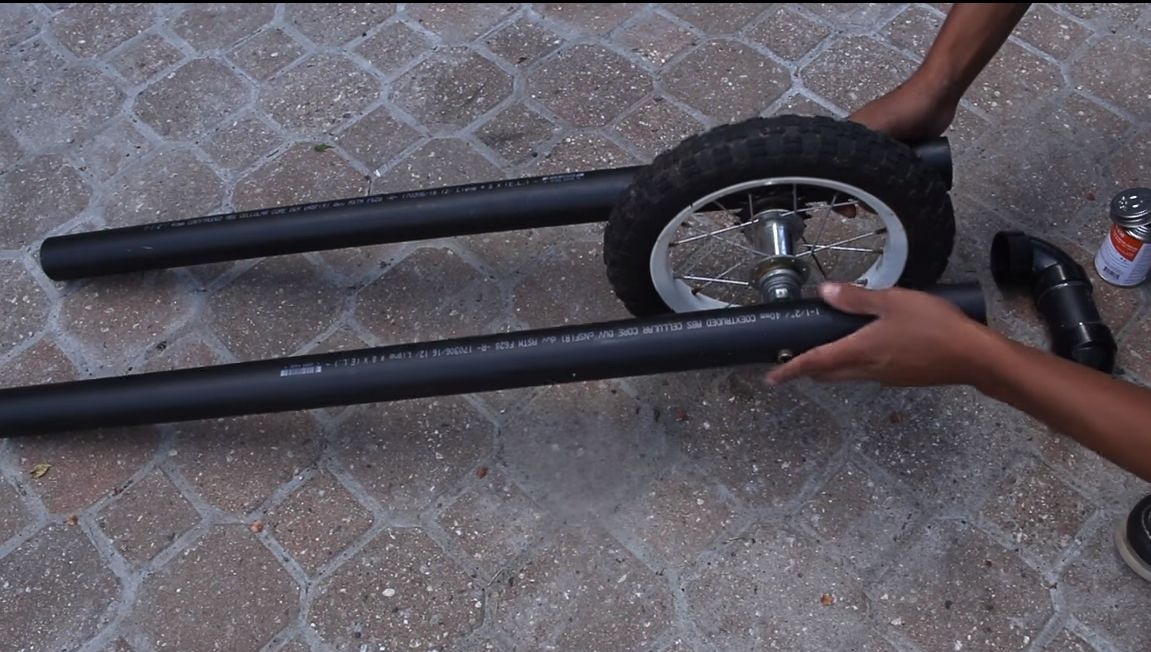
It’s not worth it to just screw the wheel to the pipes, this is not a reliable method. Install first into the sleeve pipes. The author makes them from steel pipes of suitable diameter. In principle, if the wheel enters between the pipes with a minimum clearance, it is not necessary to screw it with nuts.
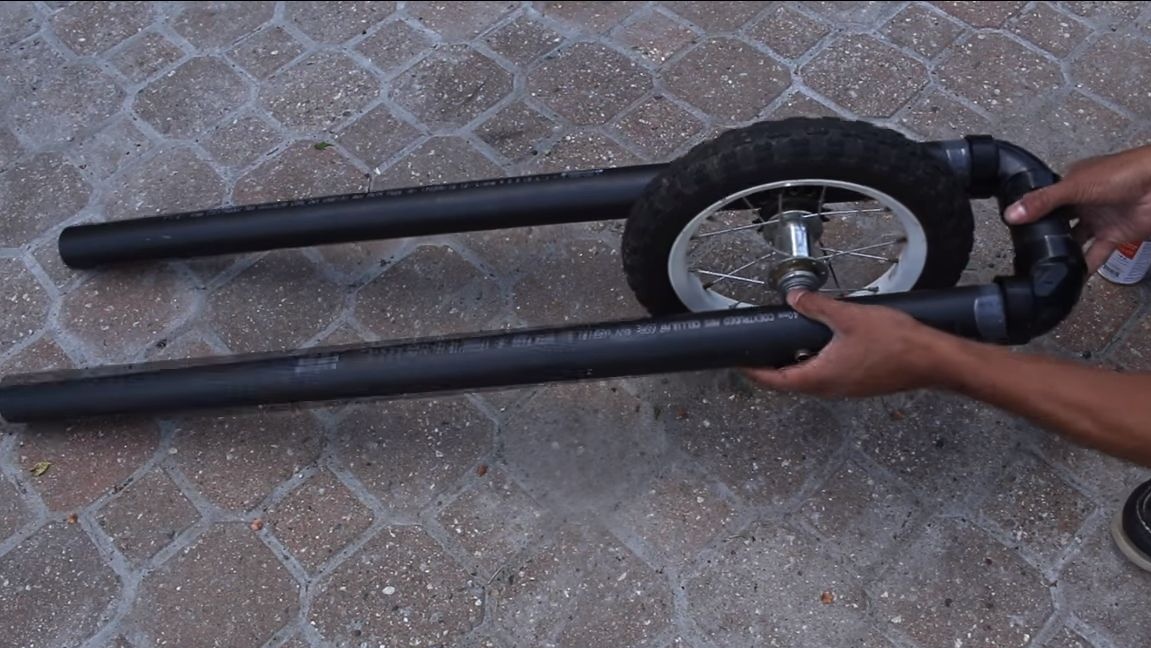
Step Three Front fork and front wheel
Using pipe accessories, assemble the front of the frame. Do not forget that the front fork must be rotated to control the bike. We coat all joints well with glue for pipes, you can also use epoxy glue.
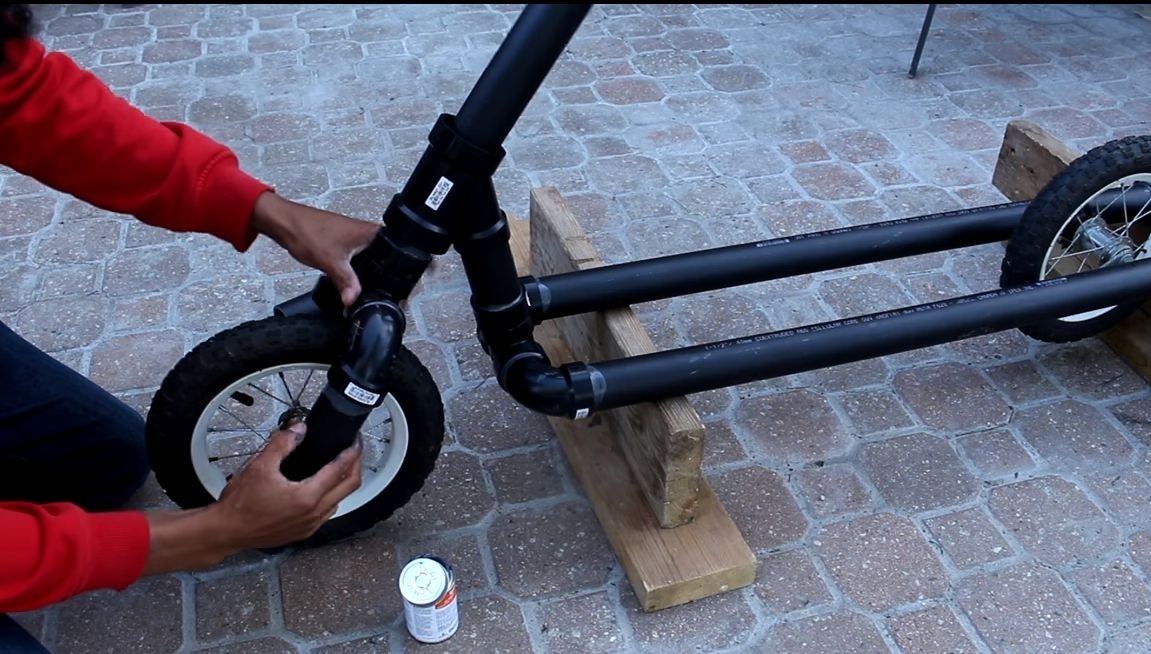
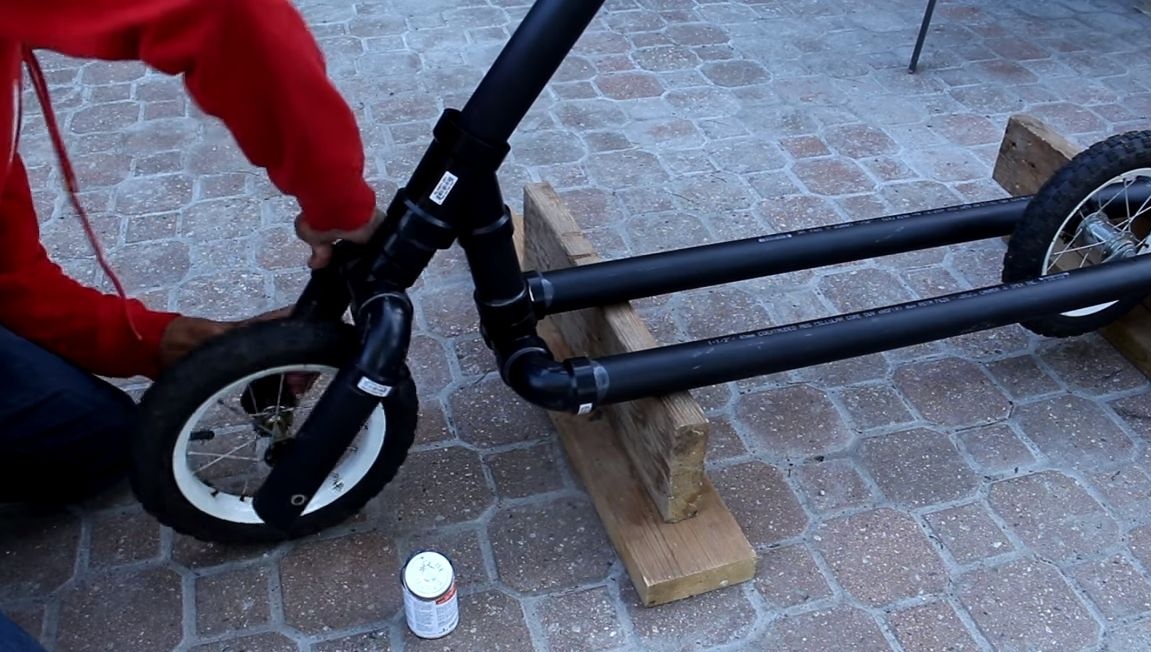
The front fork is made of two pieces of pipe, we drill holes in them under the axis of the bicycle and install bushings. Now put the tubes on the axle and set the wheel in its place. The bushings also need to be glued to the pipes. If desired, to make the structure more reliable, pipes of smaller diameter can be laid inside the frame.
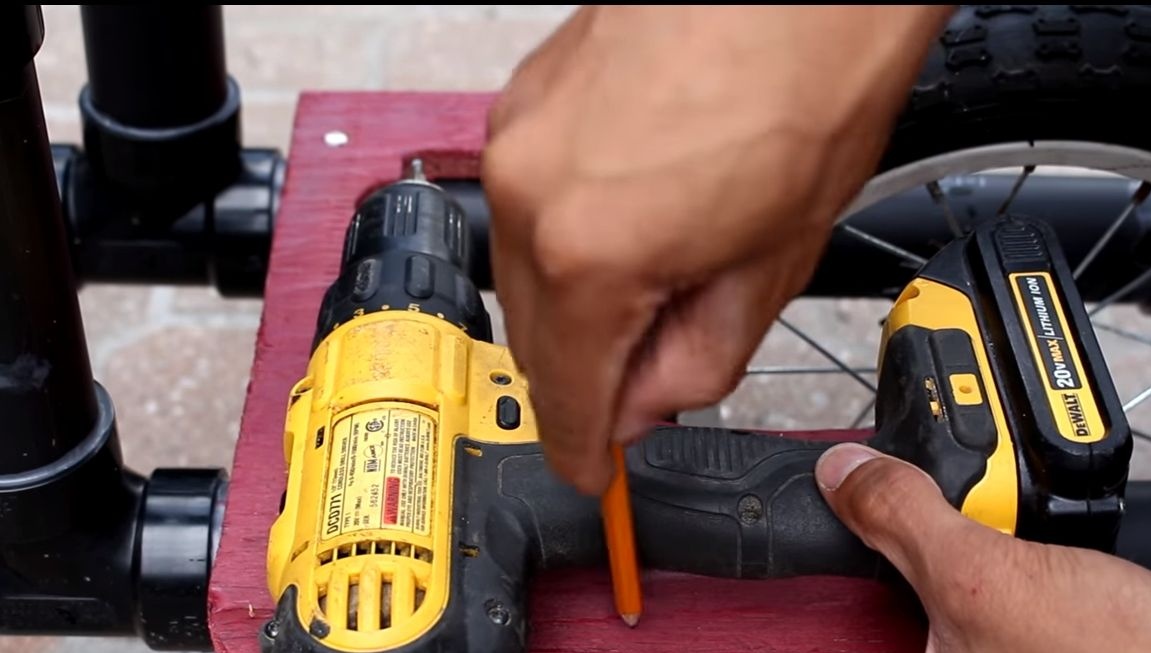
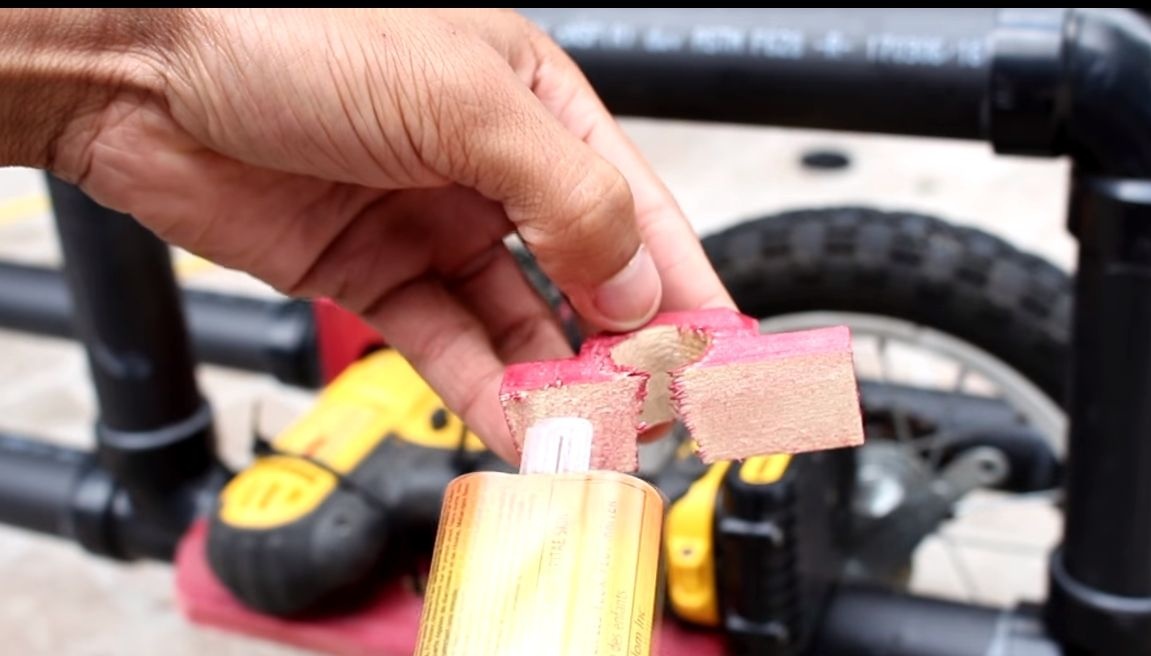
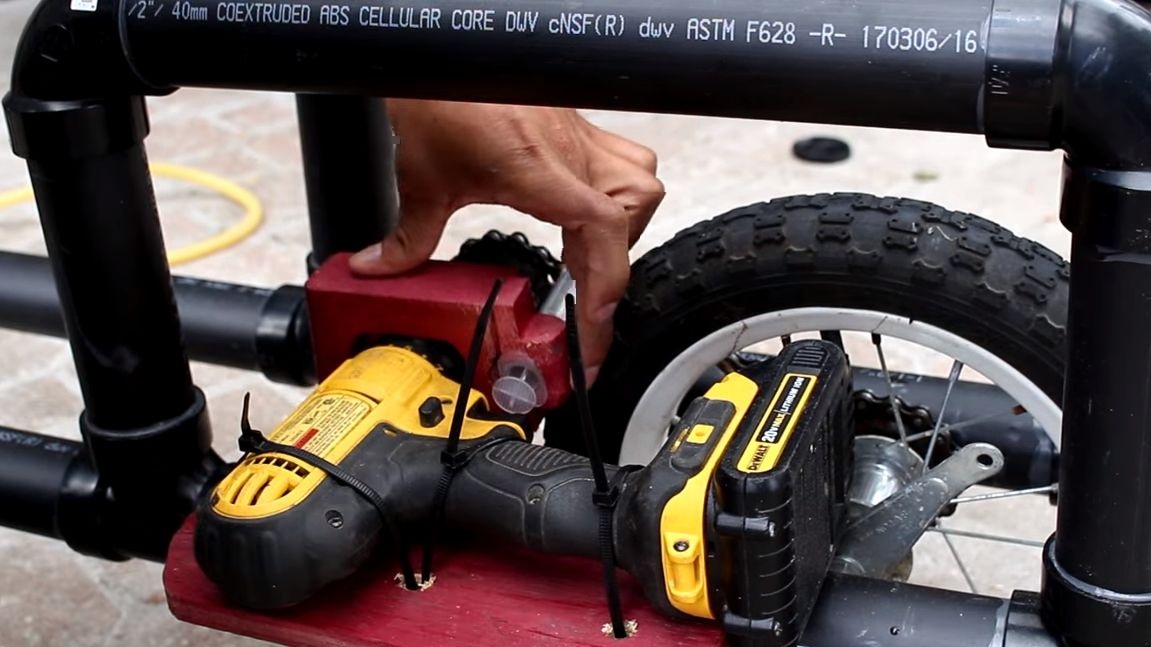
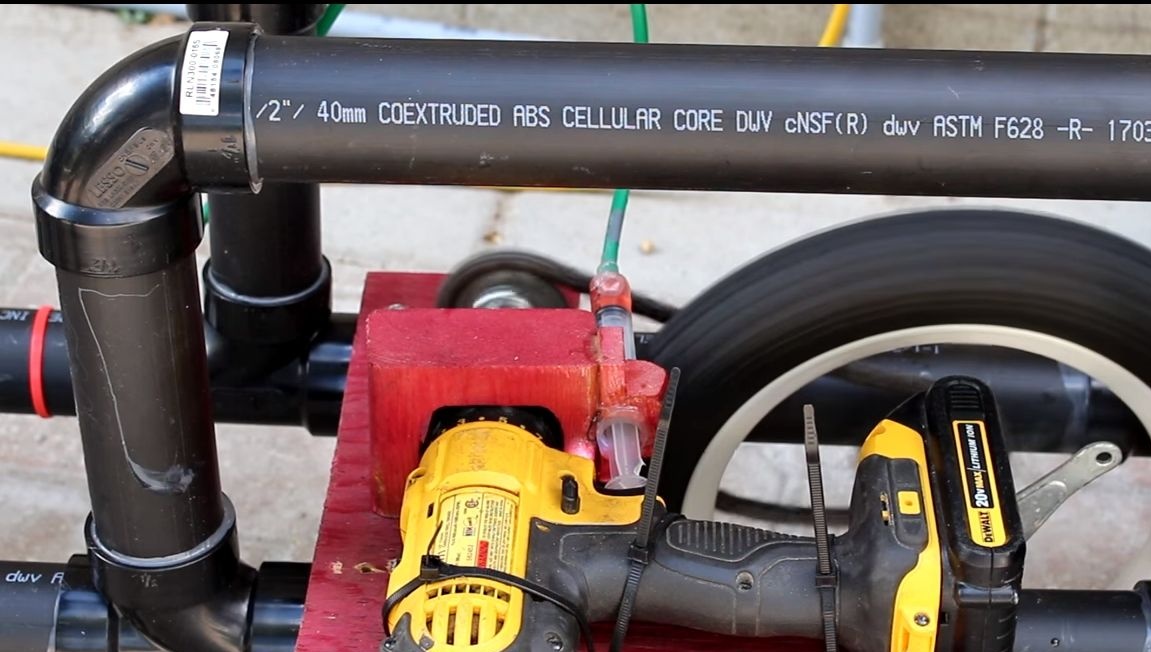
Step Four Fasten the screwdriver
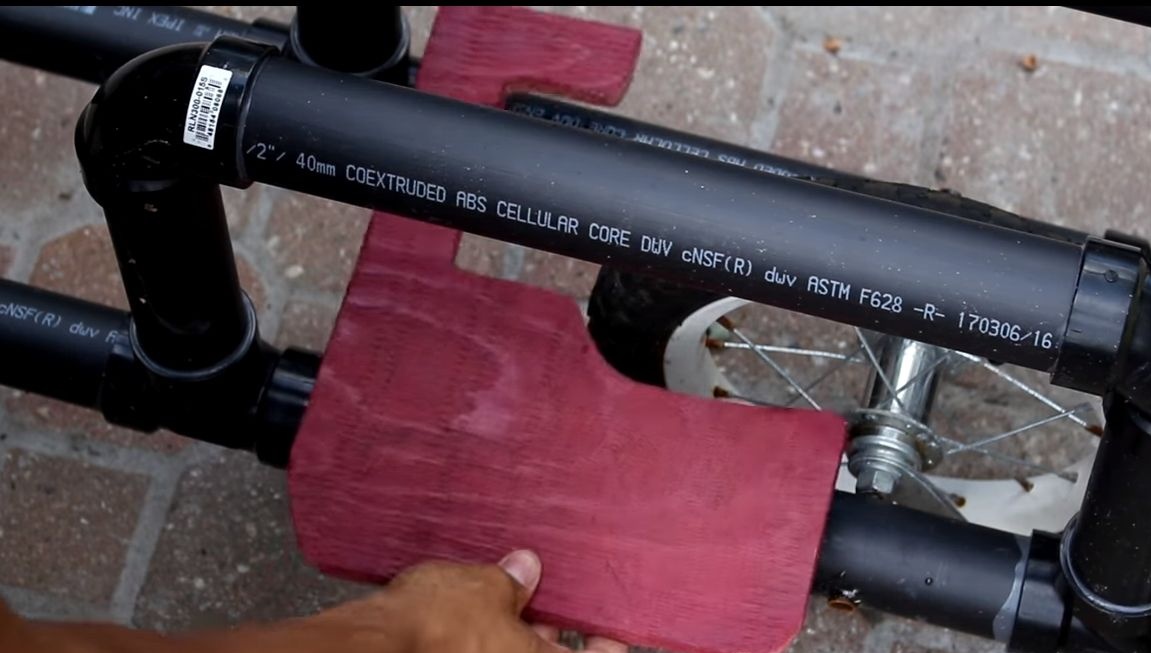
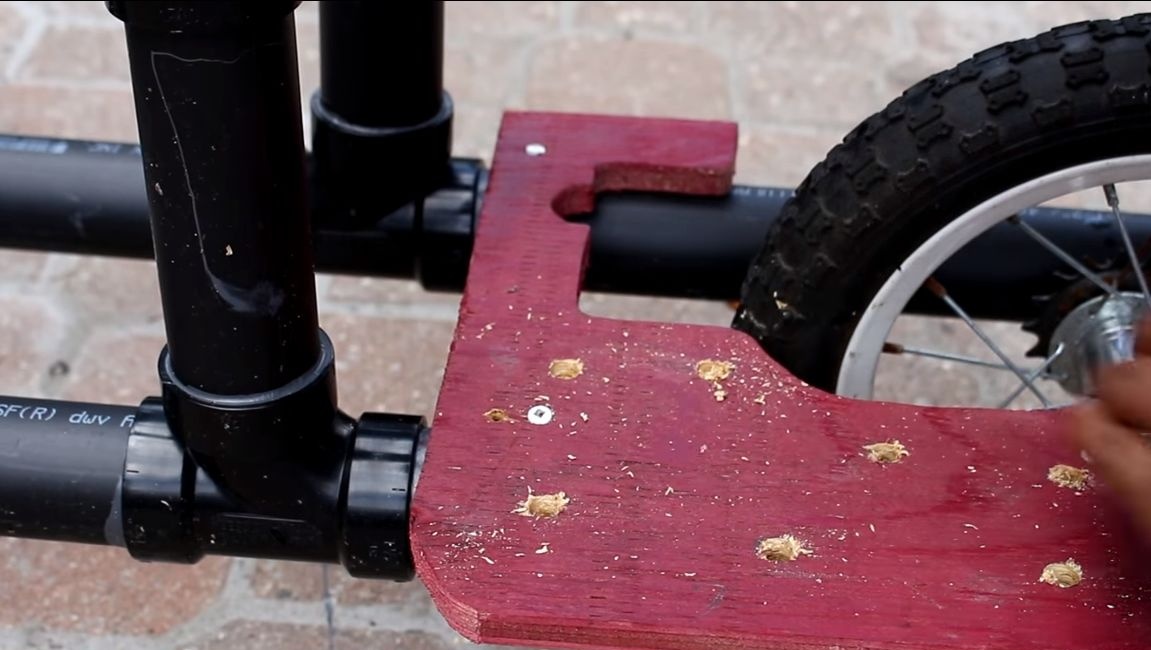
To fix a screwdriver, you will need to make a special platform. The author cuts it out of plywood, exactly how he did it, remains behind the scenes. You can cut the desired profile using a hand jigsaw, but it is better to use an electric one. Process the plywood and paint, or better, apply several layers of varnish at the end. So the product will not only be beautiful, but also the wood will be protected from moisture.
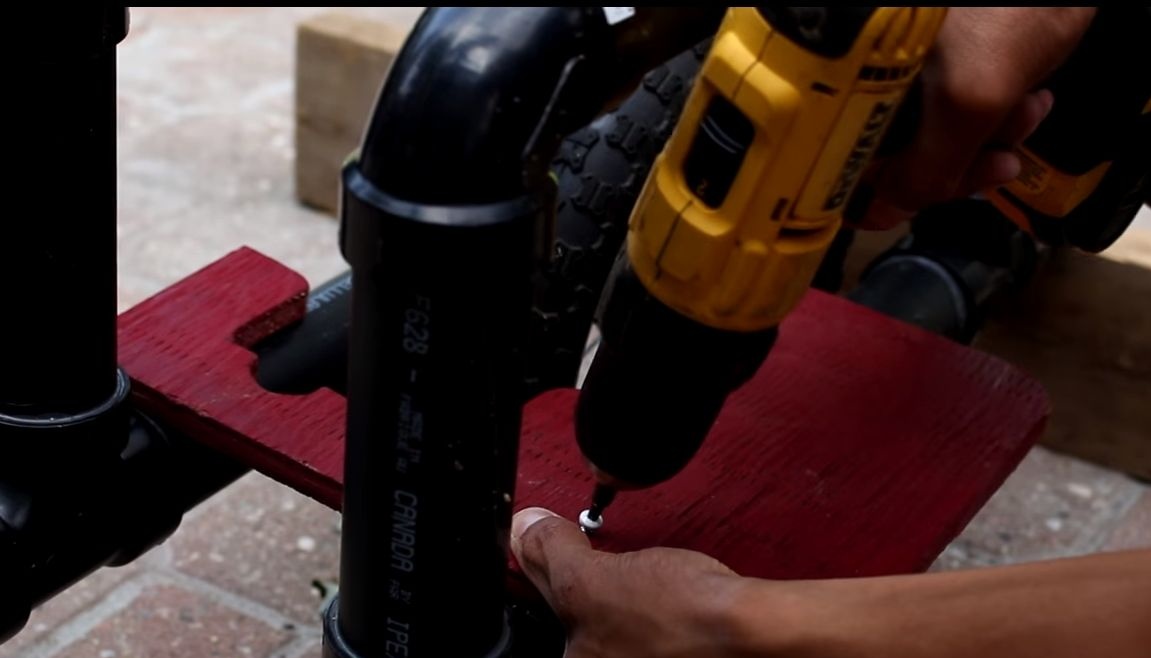
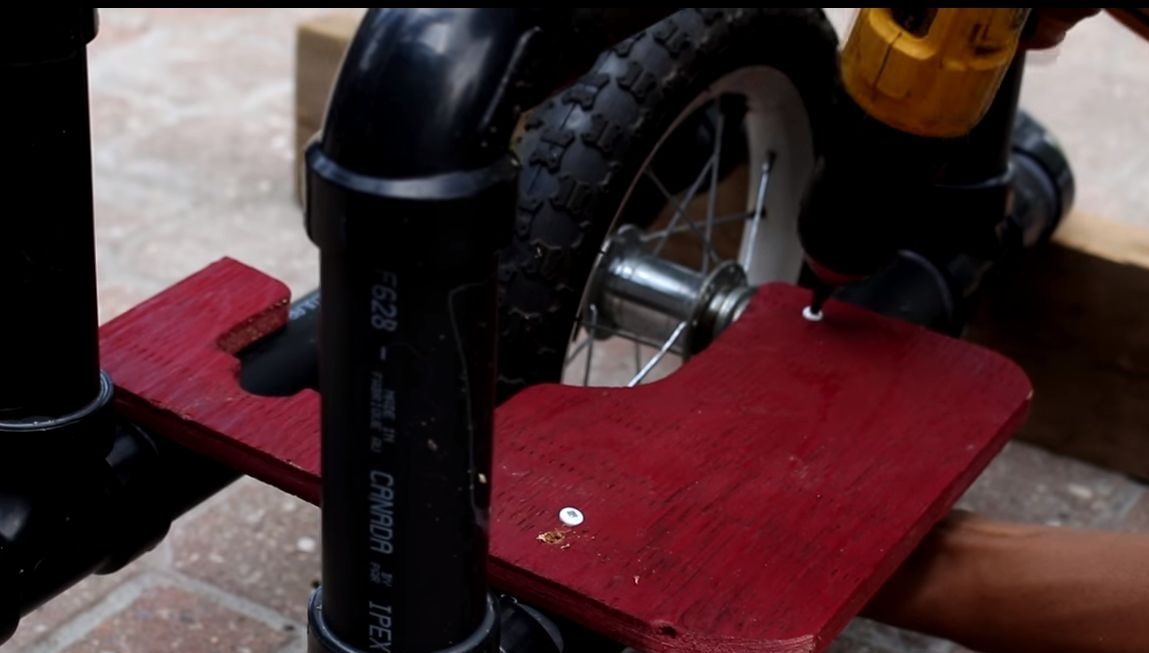
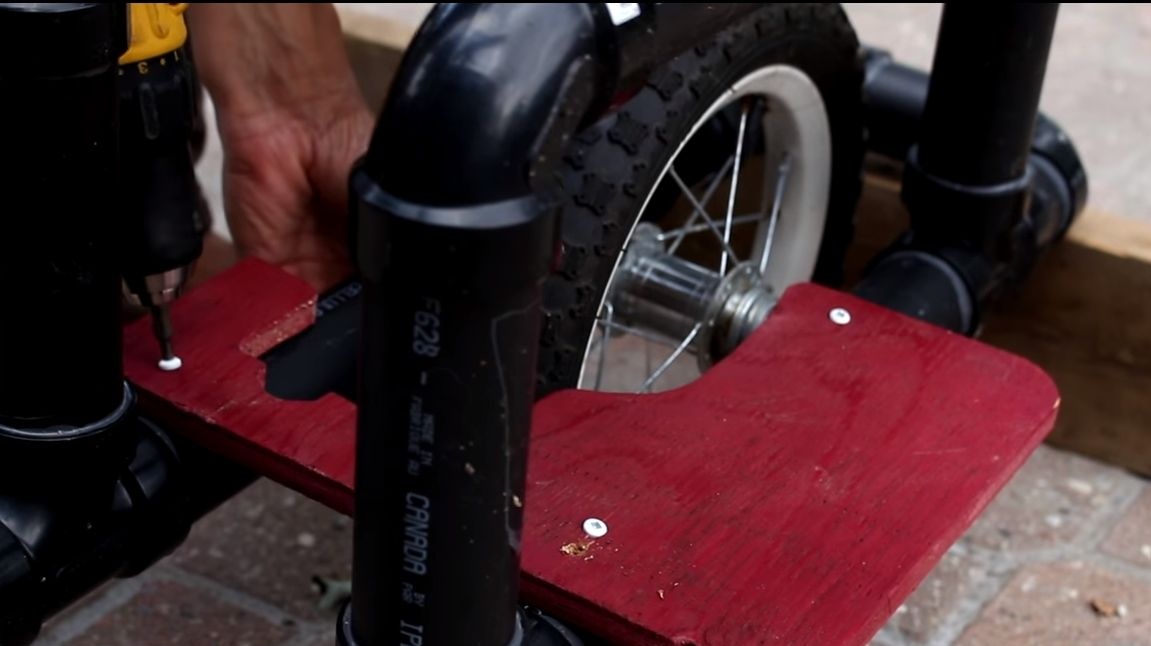
It's time to fix the screwdriver. By structure, they are different, the way you fasten them depends on this. Position the screwdriver so that the end of the chuck is approximately flush with the rear sprocket. Note also that there will be an asterisk on the cartridge, so the screwdriver will need to be shifted a little later.
The author fastens the tool with the help of ordinary cheap and common plastic ties. The more they will be, the more securely the tool will be fixed.
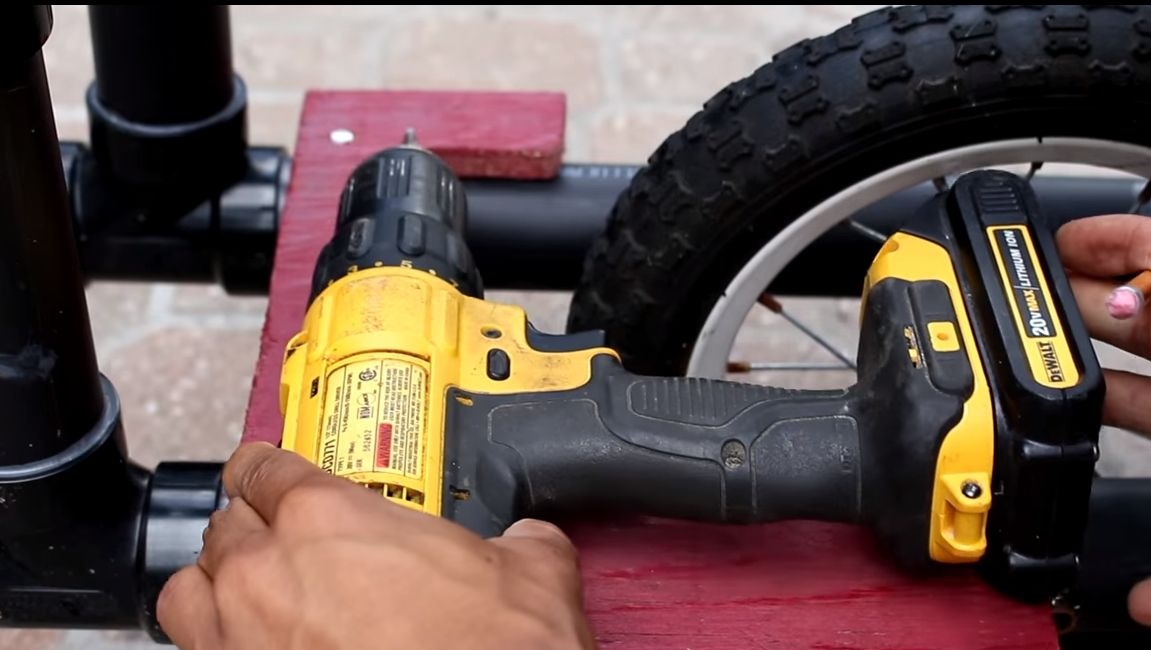
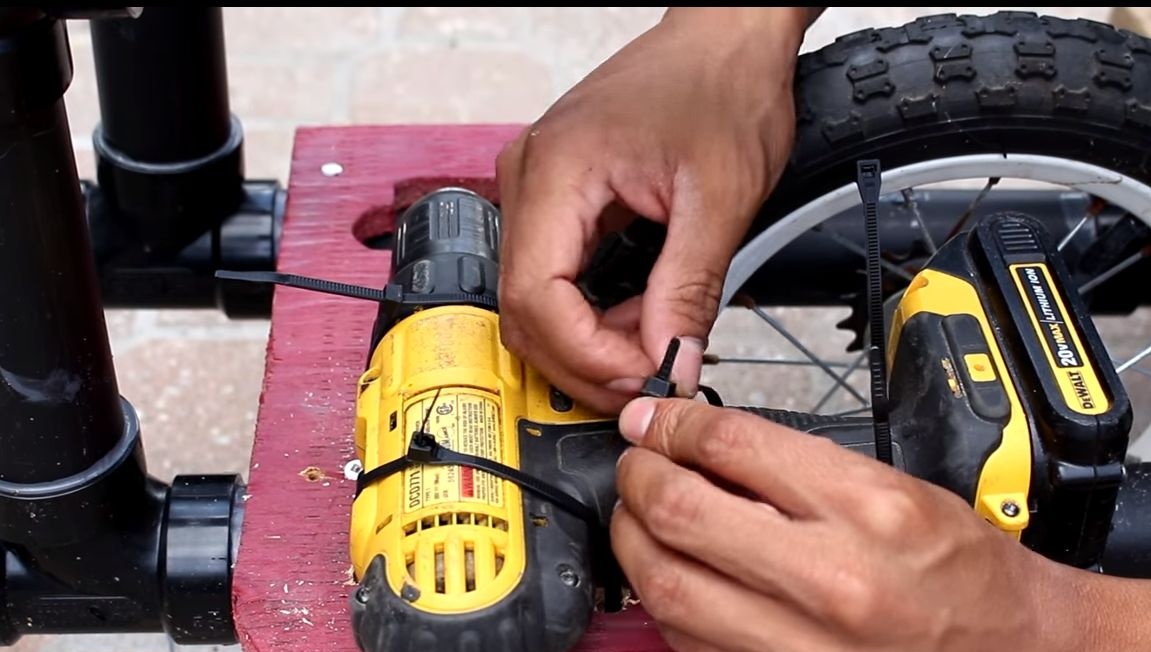
We drill holes around the handle and body and tighten the device. Just do not fix the battery, as we will have to remove it for charging. Consider the fact that the screwdriver should not "walk" under load, otherwise the chain will fall.
To eliminate just such moments, you will need to cut out fasteners from plywood or boards that will hold the nose of the screwdriver. Secure it with self-tapping screws.
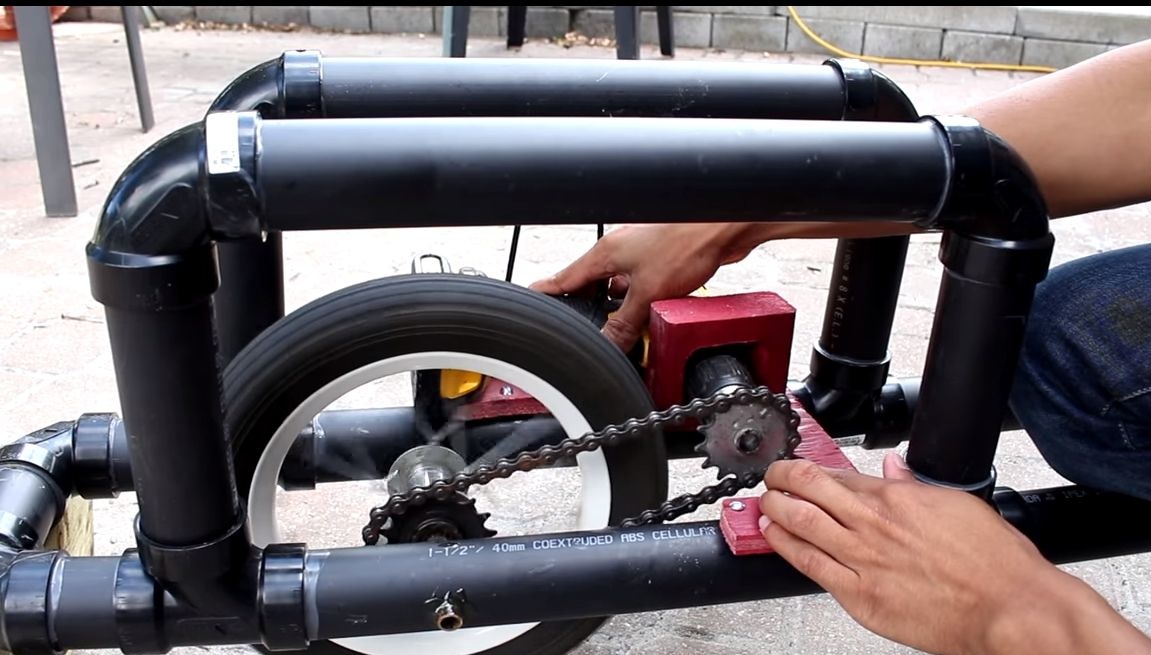
Step Five Set the drive sprocket
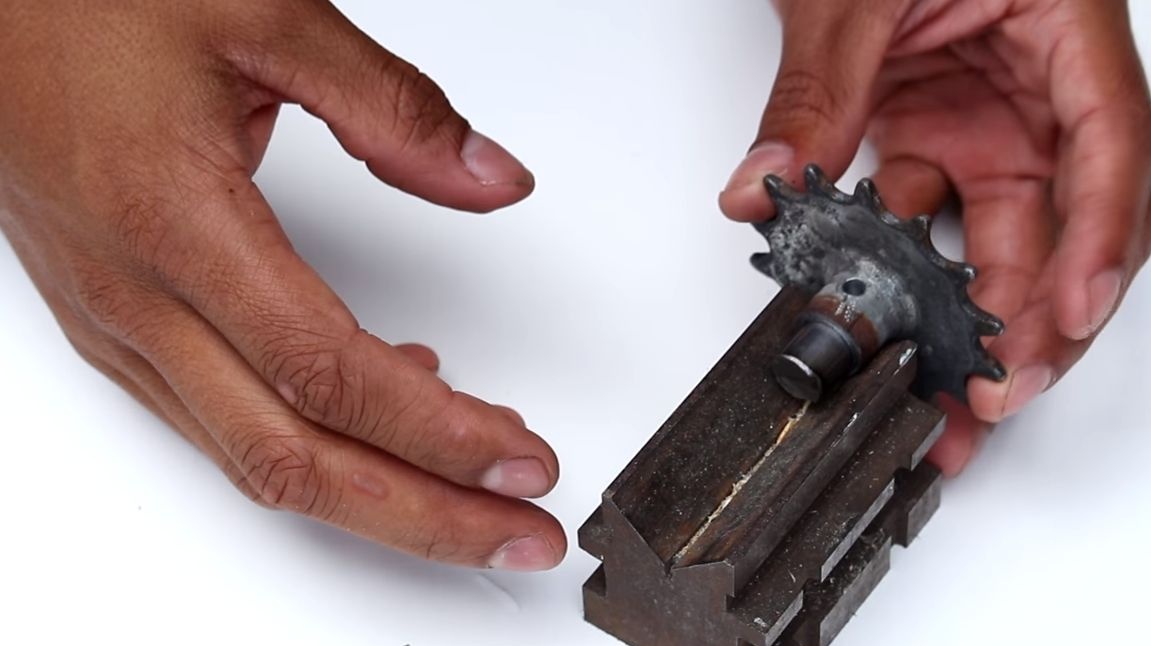
You will need a small drive sprocket, the smaller it will be, the higher the torque will be. An asterisk can be found in old motor vehicles. The author installs a small rod inside his sprocket, which is then clamped with a screw.

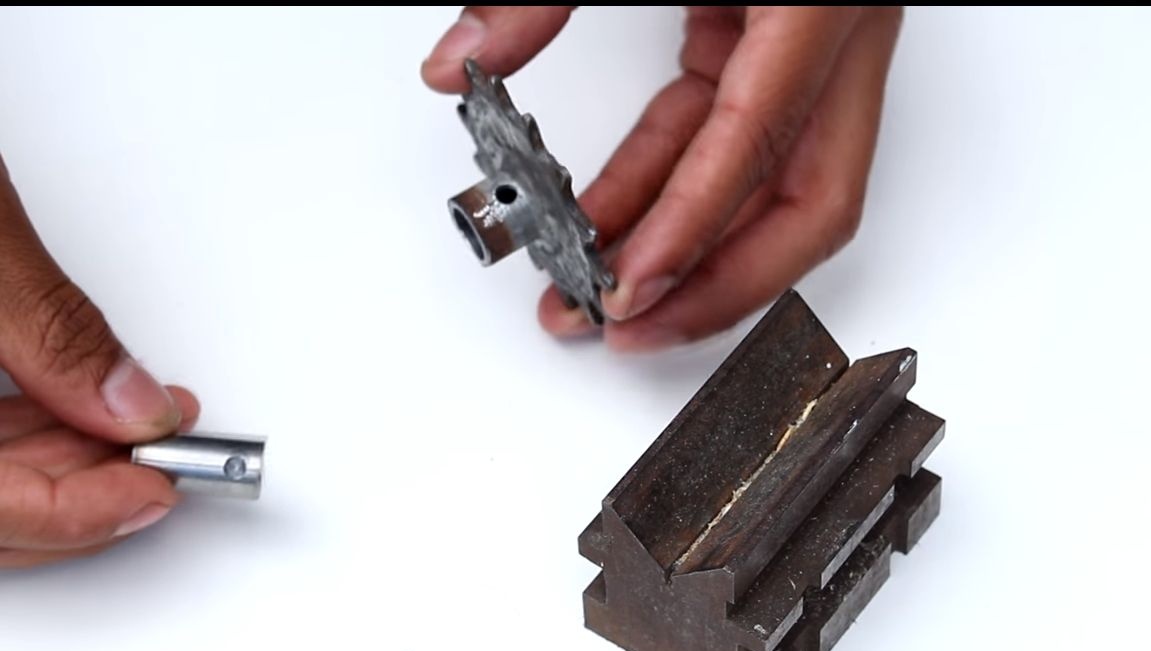
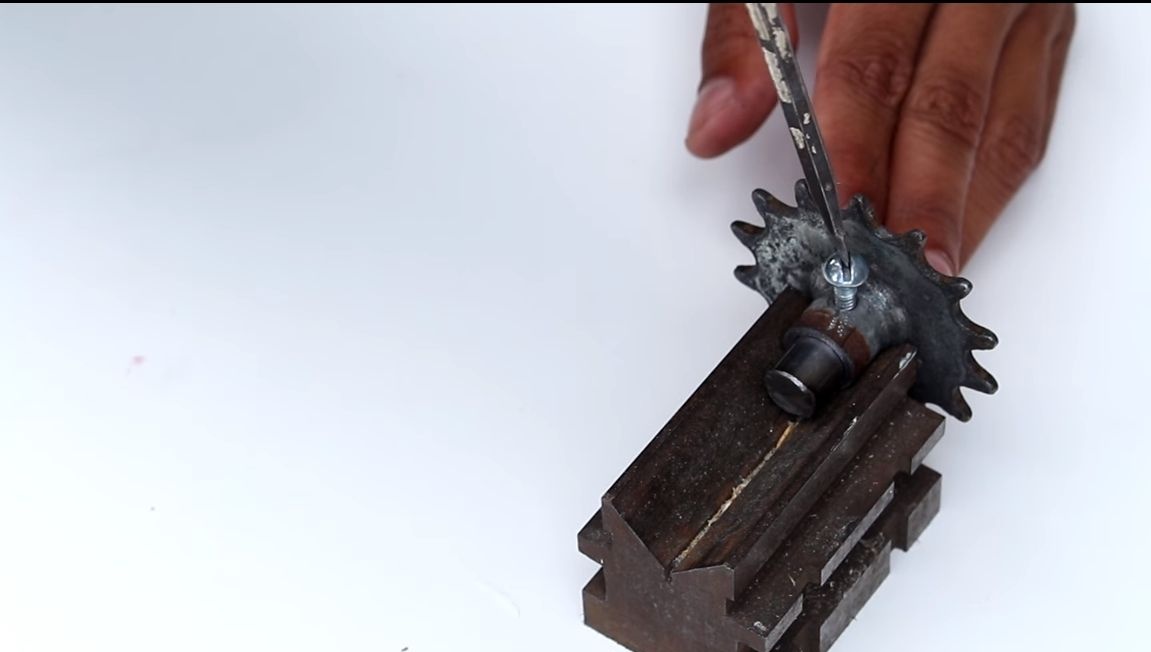
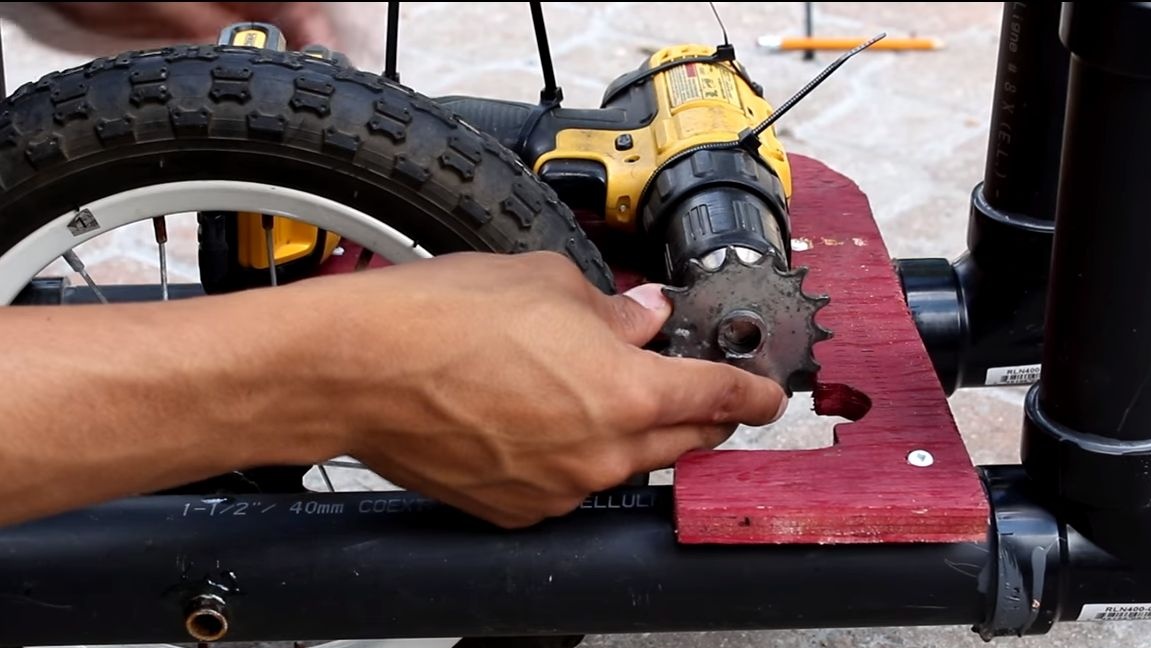
That's all, now it's easy and simple to install an asterisk in the screwdriver's chuck. It is placed, like all nozzles. It should be noted that the bearings of the screwdriver must be in good condition, otherwise, if the shaft “walks”, the chain will fly off. The author of the video shows that the alignment is a little broken, but the chain does not fly off at the same time.
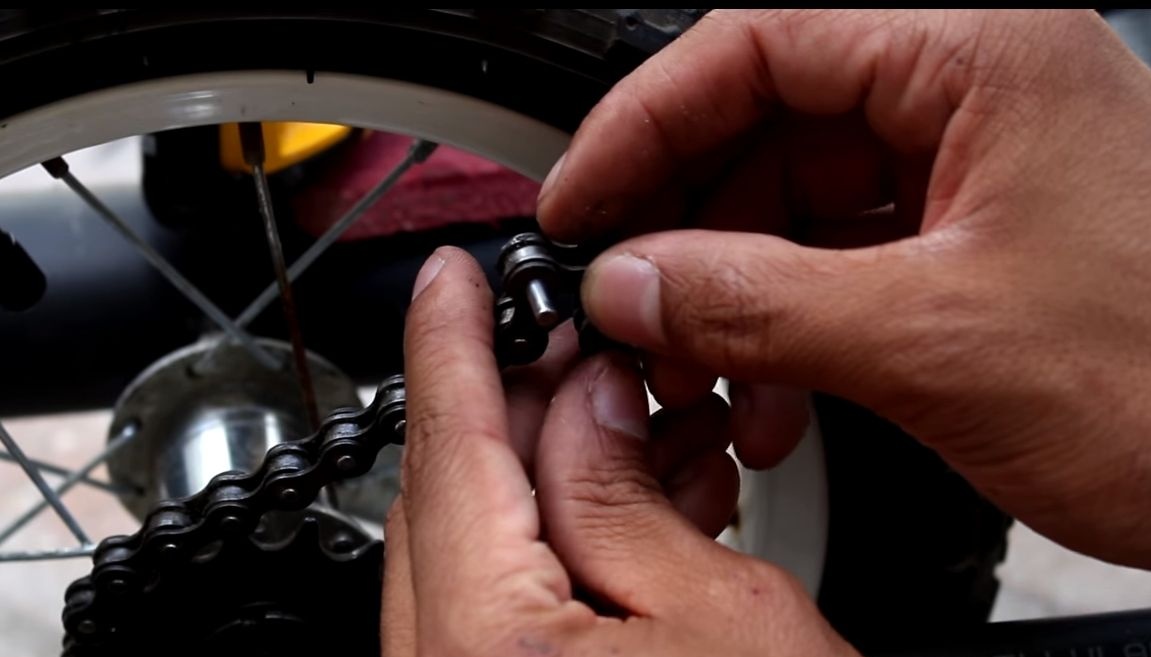
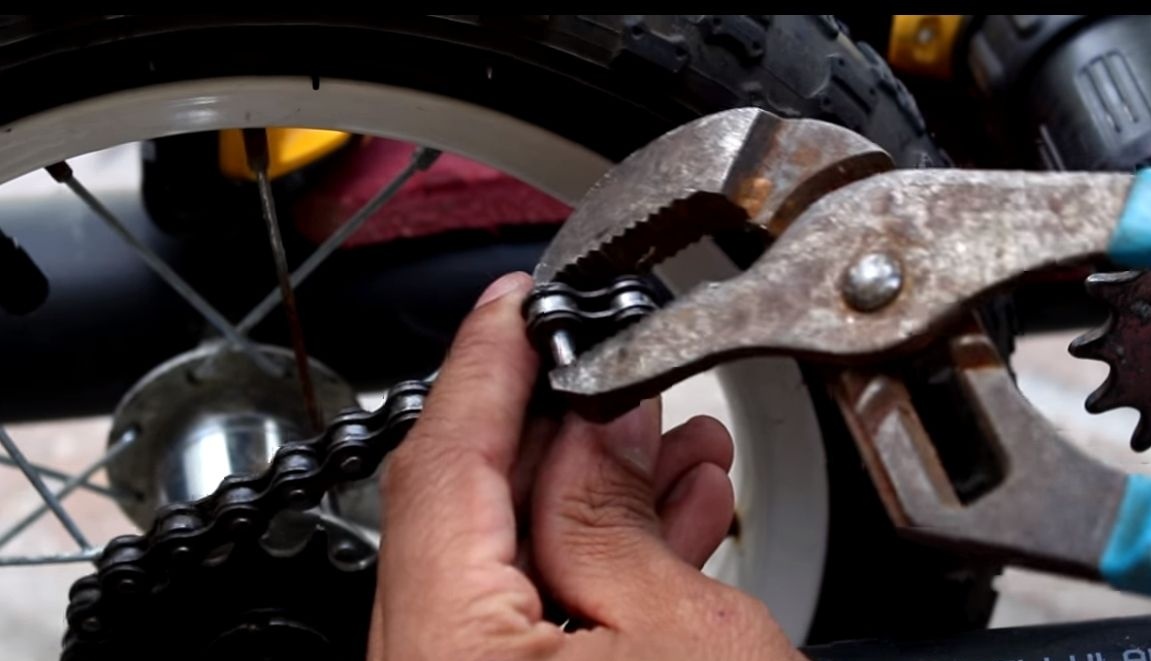
Step Six We establish a chain
We take a bicycle chain and cut to the desired length. You need to precisely adjust the chain to the length, since there is no way to tension the chain in the structure. We pull the chain through the sprockets and connect it with the lock.
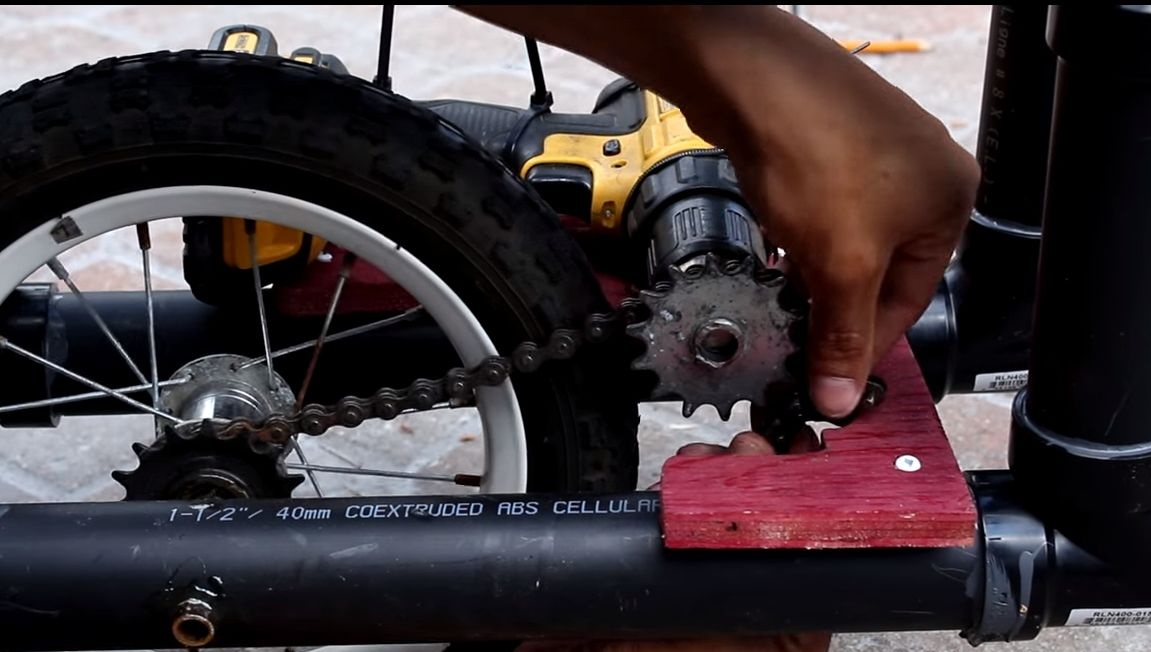
That's all, now turn on the drill and make sure that the chain does not fly off. If everything works, go to the finishing touches - the control system.
Seventh step. Gas button
To bring the vehicle into action, you will need to pull the trigger of the screwdriver. How to do this? Very simple, use hydraulics! The author made a hydraulic control system from two syringes and a piece of hose.
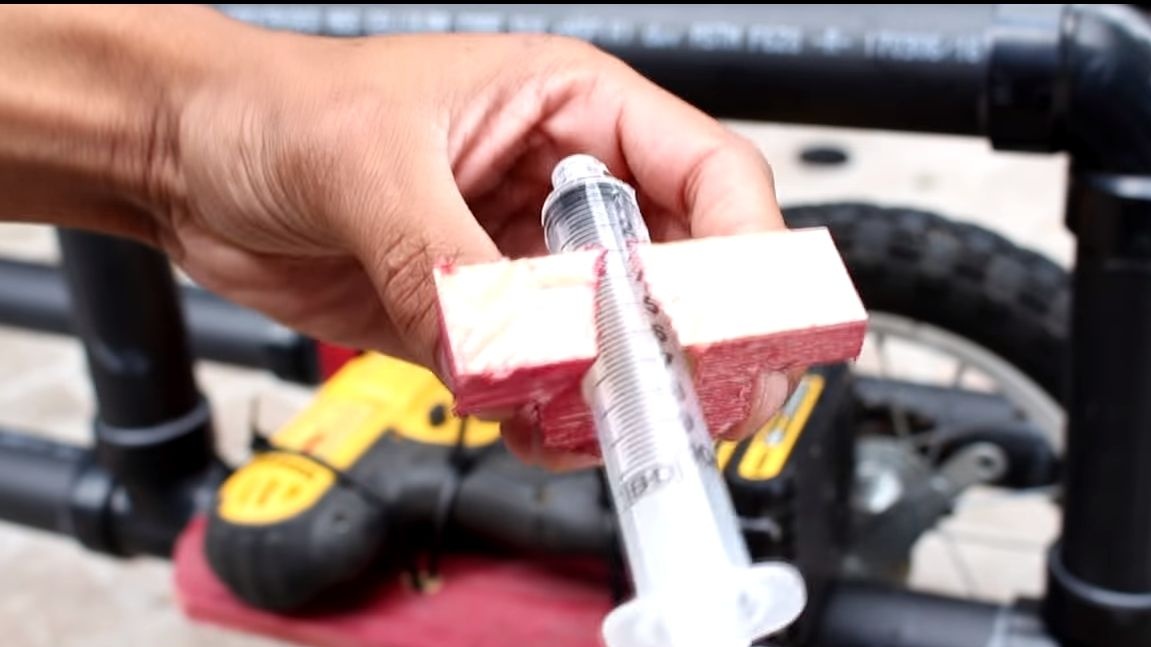
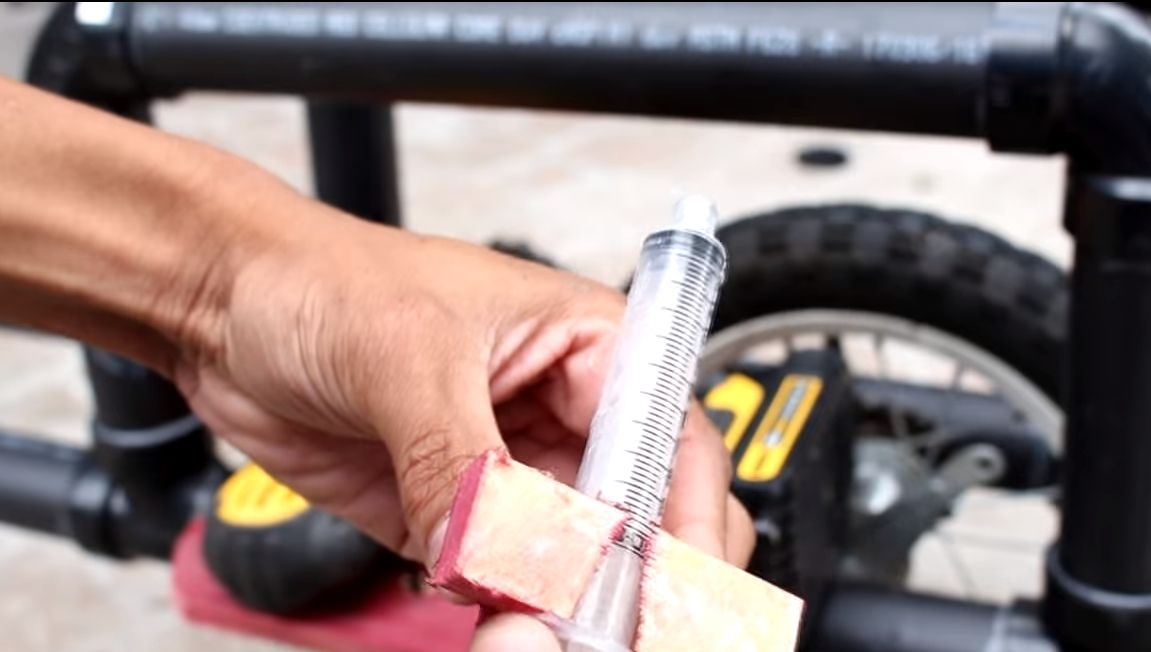
We take a piece of plywood and cut out a bracket of such a shape that it can hold the syringe. As a “driven” syringe, we choose a syringe of a larger volume than the “lead” one, which is located on the steering wheel.As a result, due to hydraulics, it will be easier for you to press a button to turn off the screwdriver.
We apply epoxy glue to the bracket, install a syringe, and then fasten this entire structure opposite the trigger of a screwdriver. The syringe plunger must be deployed so that when pulling it pulls the trigger.
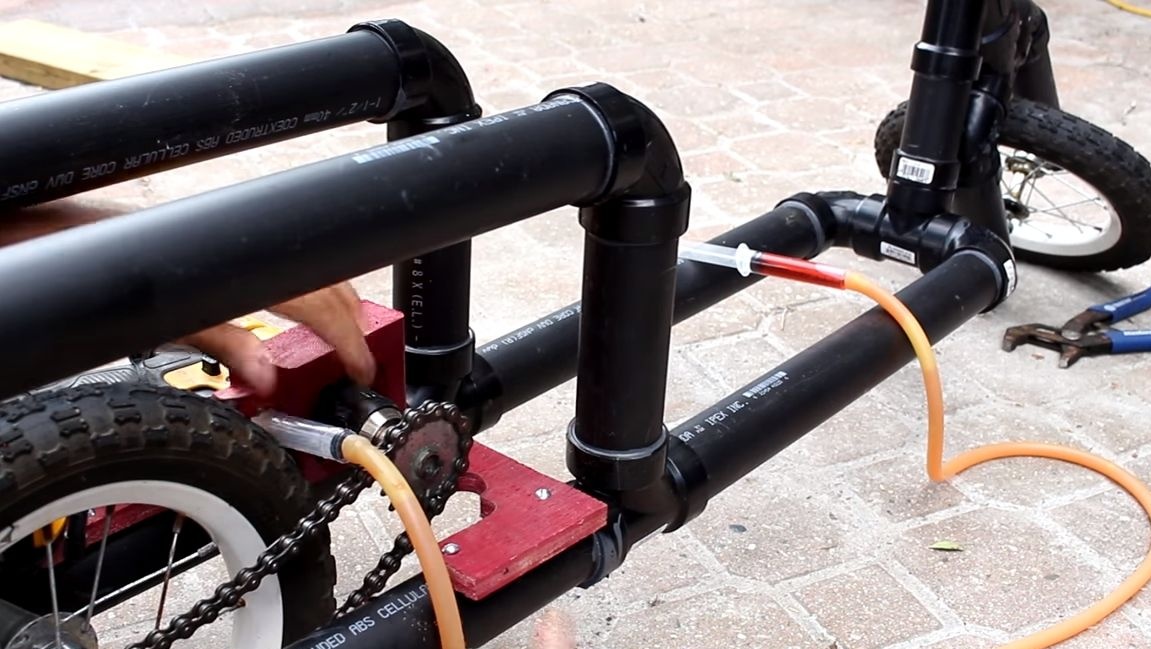
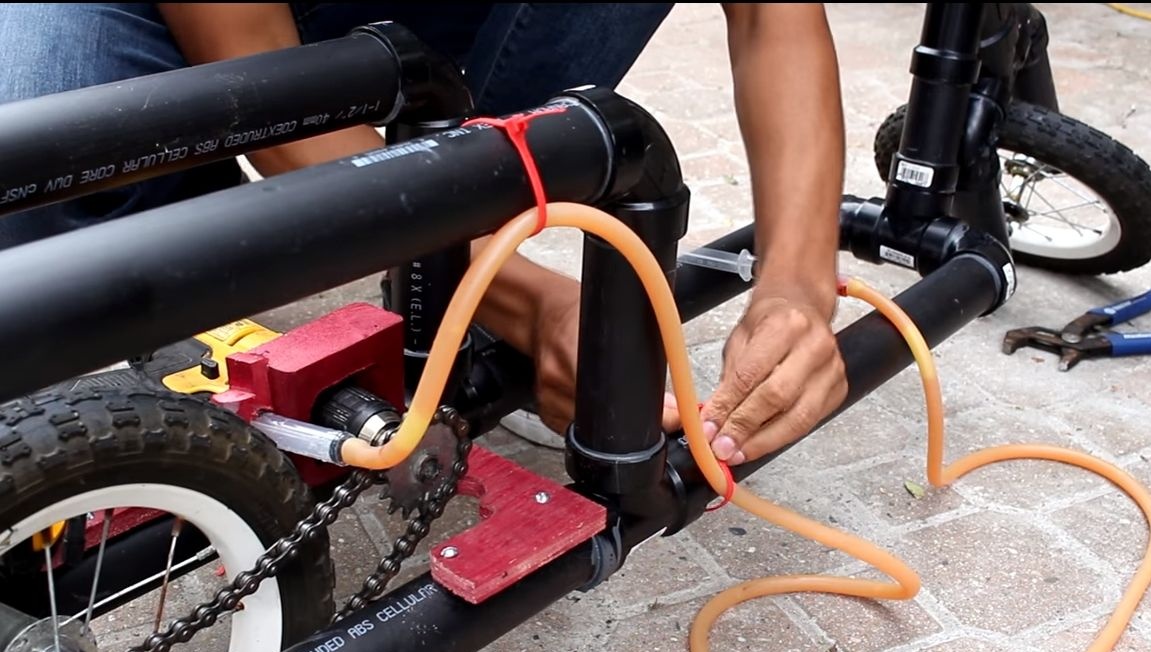
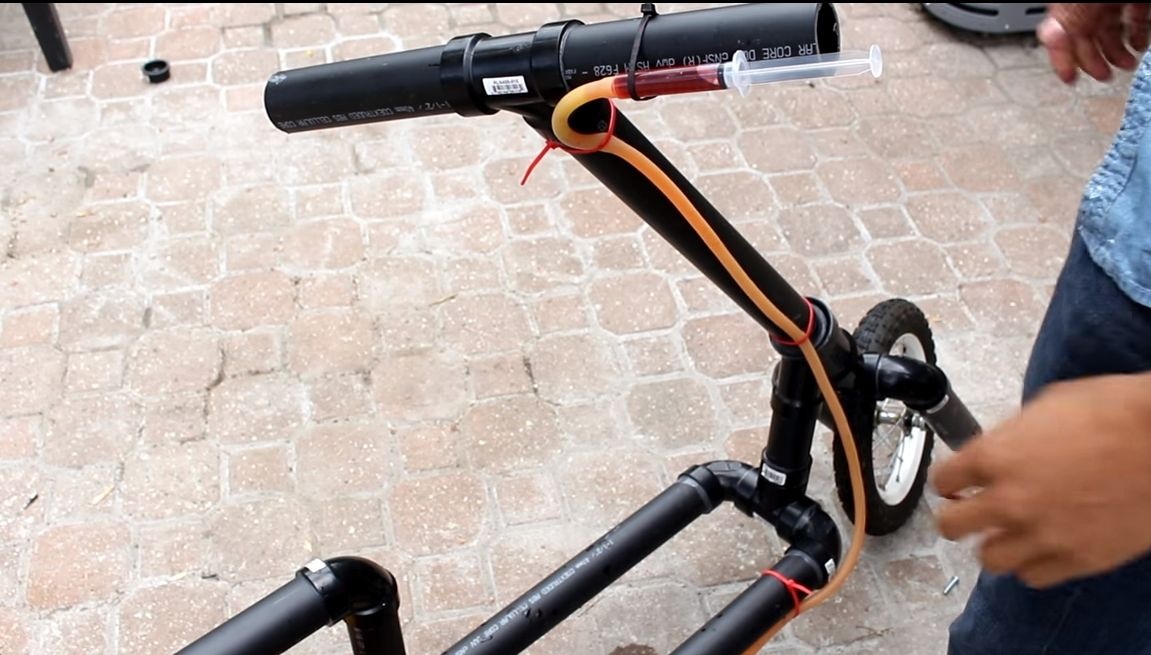
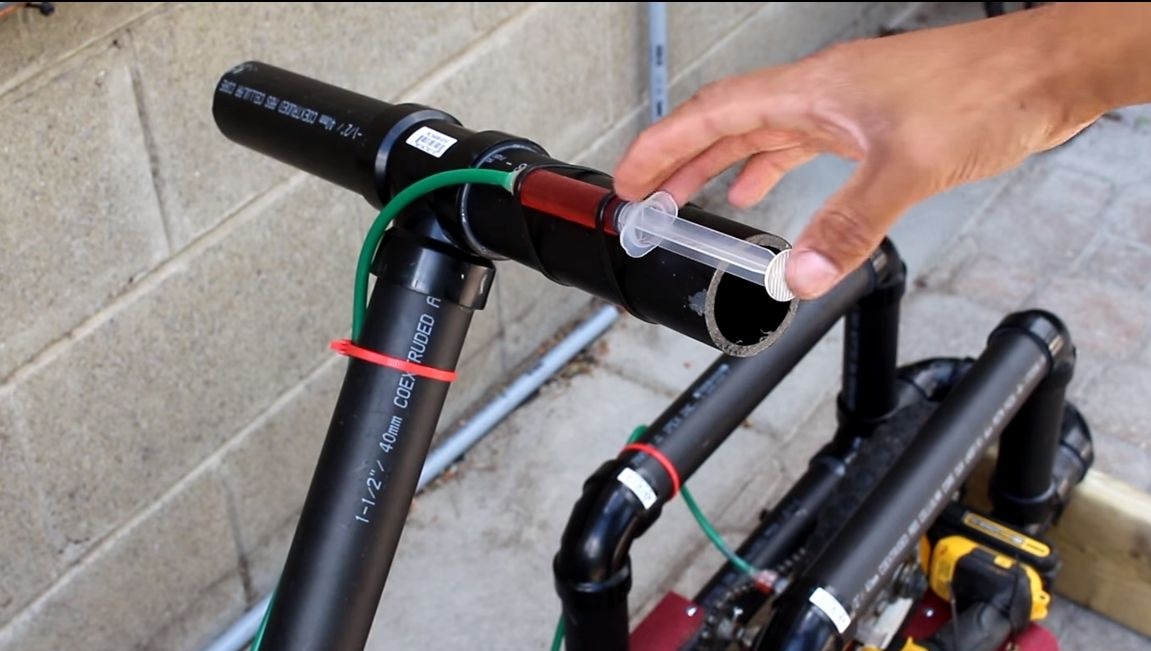
Connect the hose to the installed syringe, it must be firmly fixed on the syringes so that it does not fly off under the pressure of the liquid. Route the hose on the scooter frame to the handlebar using plastic clamps to secure it. At the end, install another syringe on the steering wheel using clamps. The hydraulic system can be filled with ordinary water, unless, of course, you plan to ride in cold weather. The author decided to tint the water red for beauty.
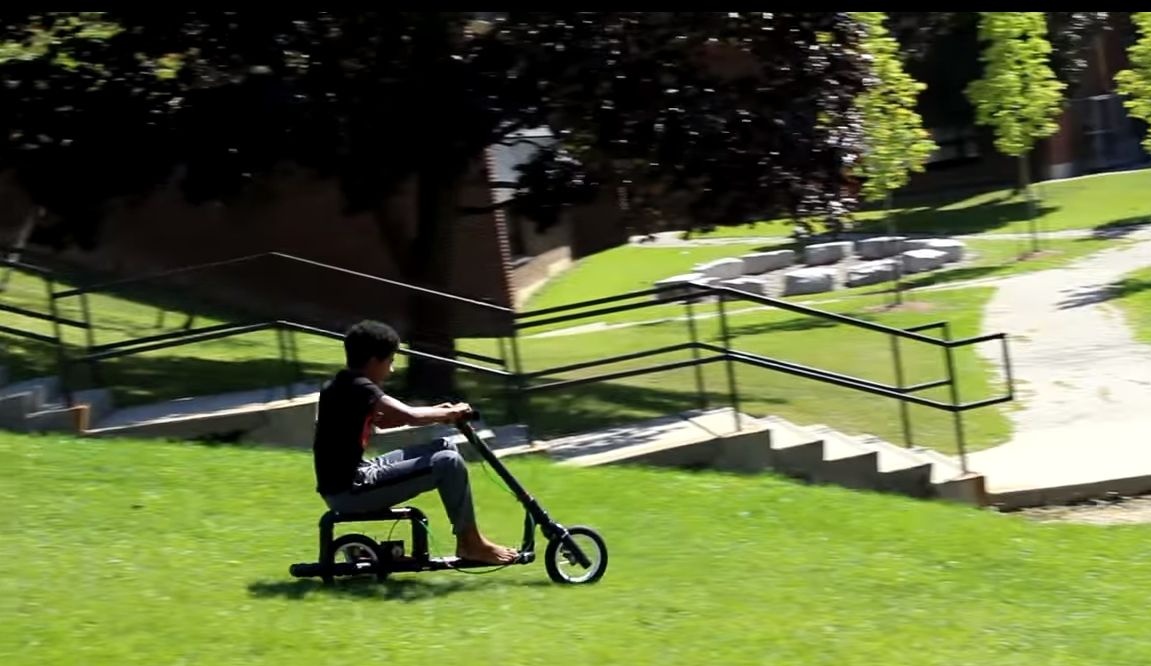
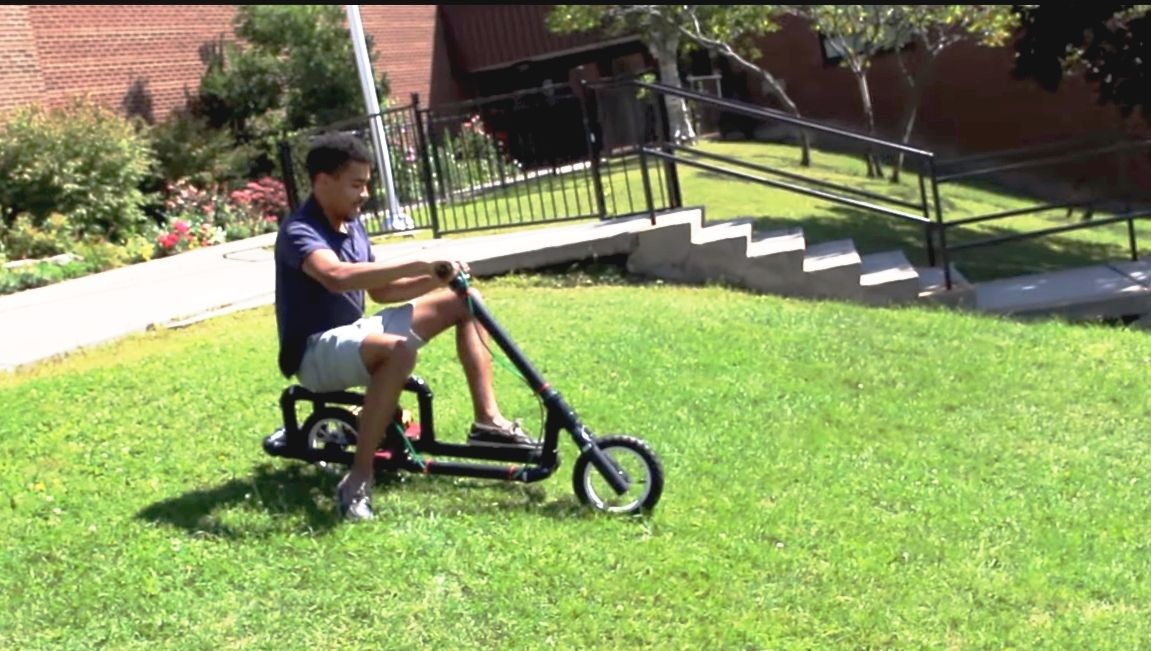
That's it, the scooter is ready! We press on the piston of the syringe, and the scooter begins to go. The more you press the button, the higher the speed of the screwdriver will be, and the faster the scooter will go. Surely, the battery charge is not enough for a long time, but for a child this moment will be unforgettable.
As for the brakes, they are not provided for in this design. Appliance brakes, apparently, all the same screwdriver. But no one bothers you to put a hand brake on the front wheel.