In carpentry, in arts and crafts, periodically there is a need for round sticks. These may be elements. craftswood structures, of furniturepins, dowels, arrows for the bow finally.
Since the stick is the body of rotation, the first thought in the sense of manufacturing will be to grind it on a lathe, however, it is rather difficult to sharpen long and thin parts, additional support points for a rotating workpiece (for example, a rest) are required. Well, in general, the manufacture of an unfortunate, well, for example, arrow, is thus extremely laborious and unjustified. Indeed, it seems, a certain process, in two movements. Simple and economical. Not requiring close attention to him, such a mechanistic one.
The proposed equipment for the milling machine, suggests just such. The equipment is simple, it does not require high precision in manufacturing. Made of wood, as hard as possible - birch is good. The manufacturing process itself is divided into two stages - the production of square billets of the desired length and processing them on a milling cutter with special equipment. It will take a simple setup of the equipment once and the sticks can be made in-line. Cons of the method - you will need a manual milling cutter (most conveniently) and a circular saw. However, in our time, an electric tool, sometimes quite bizarre, has ceased to be anything surprising in any home workshop.
Actually, the process itself looks something like this.
A square billet rotates with a screwdriver and is pulled over the mill. The cutter cuts off all the excess, it turns out the body of revolution - a cylinder. The task of our equipment is to position the tool and the workpiece in space in the right position.
From the very beginning about sticks. So.
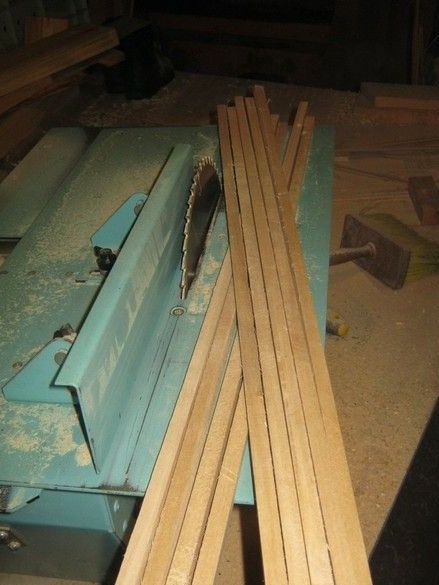
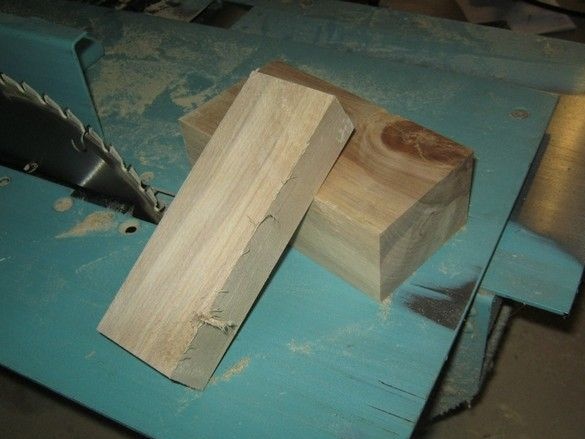
A suitable straight-layer piece of wood is selected - the sticks are usually quite thin and slanting layers make the finished stick highly susceptible to curvature due to changes in humidity, or generally very weak to bend. It is long with a certain margin - a hundred millimeters, it turns out to be not beautiful, it is a technological tail. Wood, based on further use - for example dowels, is best made from wood of the same breed as the product.For decorative crafts, it is better to tighten the wood, they will allow you to get a cleaner surface.
Sawing into workpieces. Normal work on a circular saw. After several trial cuts and fine-tuning the stop, we cut the desired number of blanks. It is worth striving for continuous work - for the manufacture of one stick, too much time is spent on tool deployment, tuning, and so on. It is better to make some stock of blanks and spend them as needed. When working on a circular saw, we will certainly use safety glasses or a transparent shield - if you dust your eyes, you may find yourself in a very unpleasant position when both hands are busy, your eyes can’t see, and it’s difficult to call for help due to howling a saw. Take care of yourself.
Sanding small burrs on the edges of the workpieces is not worth it - individual grains from the surface of the grinding skins remain in the pores of the wood and greatly reduce the resource of the cutting tool used to process them further. In our case, milling cutters.
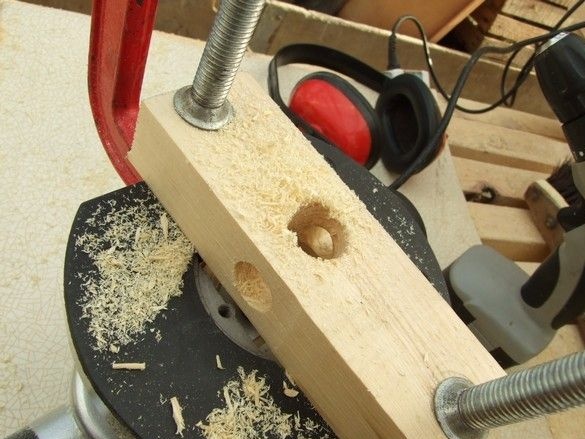
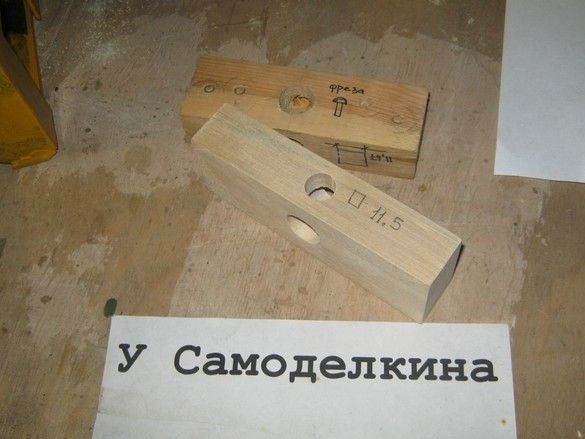
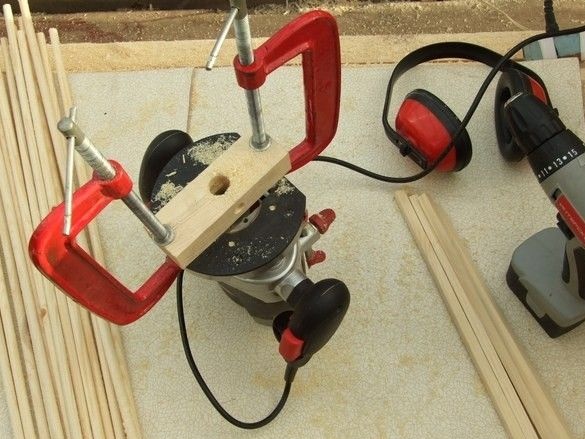
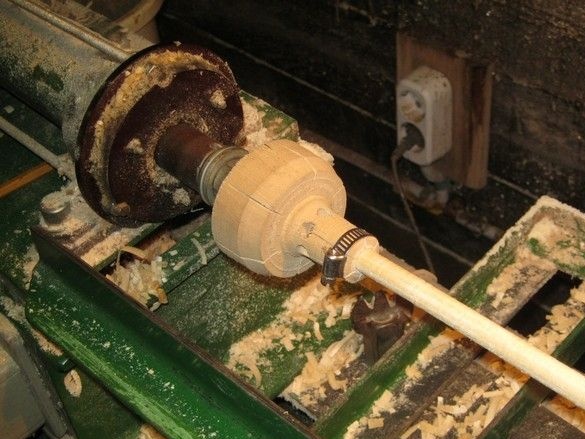
A straight grooving cutter of small diameter is fixed in the spindle collet of the manual milling cutter. Semicircular works well. On the platform of the milling machine, our equipment is fixed with clamps. If possible, a large hole coaxially with the cutter.
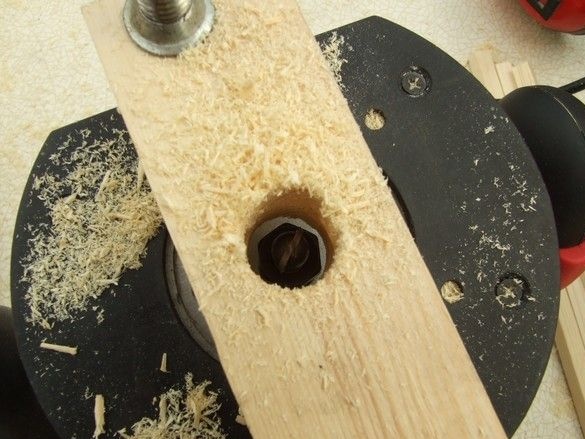
The sole of the milling cutter with the fixed snap-in is recessed and fixed in the position when the milling cutter is flush with the bottom edge of the exit hole for the finished stick.
We organize enough space around us, fix the milling cutter or call an assistant if the workpieces are longer than the reach of our hands, in this case, you should also take care of fixing the start key on the milling machine, for example, with an electric nylon screed.
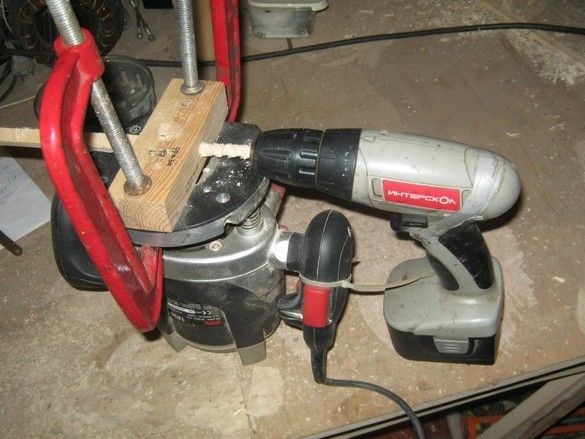
We turn on the milling cutter and insert the workpiece into the hole for the square billet, turn it by hand. The bitten tail is sent to the hole for the finished stick. We serve the workpiece with rotation "by hand" until its end becomes possible to clamp in the chuck of a screwdriver. For my router, this happens when the end of the workpiece extends beyond the sole. This is approximately 100mm.
We turn on the screwdriver at maximum speed, turn on the router and the working screwdriver pulling the workpiece "on itself". Until the full exit. Order.
If we have sticks for technological needs, then we leave it, if smooth ones are required, we will have to sand it. I, as the owner of a wood lathe, were lucky in that sense. I'll use it. To clamp our stick, I use a homemade wooden collet chuck mounted on mini faceplate. At the back I squeeze the stick with a fixed conical center, without strong pressure. Often, a long stick has to be supported in the middle, already smooth with just a hand or a piece of felt.
Two to three numbers of the skin from large to small, each number when changing the direction of rotation of the spindle. That is, we skim a bit, turn off the machine, switch the direction of rotation to the opposite, skim the same number, and so on.
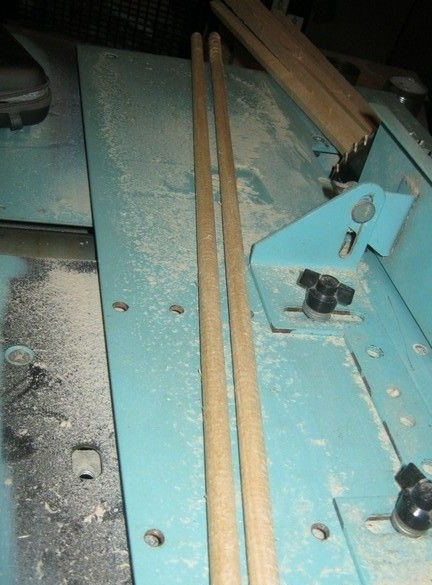
Everything, the wand is ready, take out, cut to the desired size, apply.
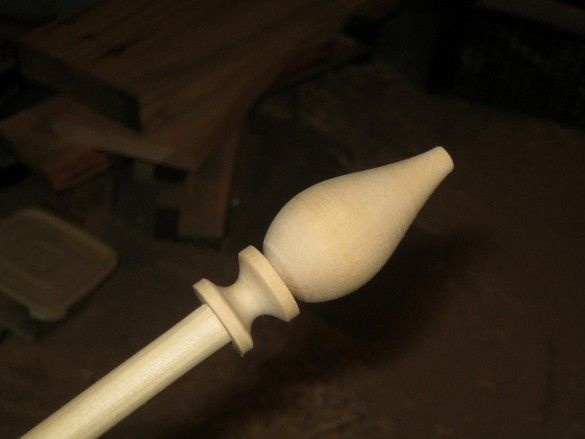
Well, for example, a suspension for a picture of wool - two "tops" are mounted and glued to the ends of the made sticks.
What is required for the manufacture of equipment.
Instruments.
Joiner's, marking tool. Pen drills on wood. Faster and more precisely, tooling can be made using machine tools, for example, a circular, pendulum saw and a drilling machine, they can be done with minimal effort, however, there is almost no limit to human capabilities - all this can be done with a hand tool, but you need more skill . When using an electric tool, goggles or a shield, headphones, and possibly a respirator are also required.
Materials
Hard wood block, medium sandpaper.
First of all, we determine the size of the equipment, it follows from the dimensions of the milling machine, its sole. Trying on, you should try to minimize the “flyout" of the cutter whenever possible, this will reduce vibration during operation, the tool will work longer, the surface of the stick will be cleaner.
It should strive for the "rectangularity" of the workpiece. If you use a hand tool, it is better to do further marking a little differently. The ribs of the workpiece can be slightly skinned - it will be more convenient to mark it.
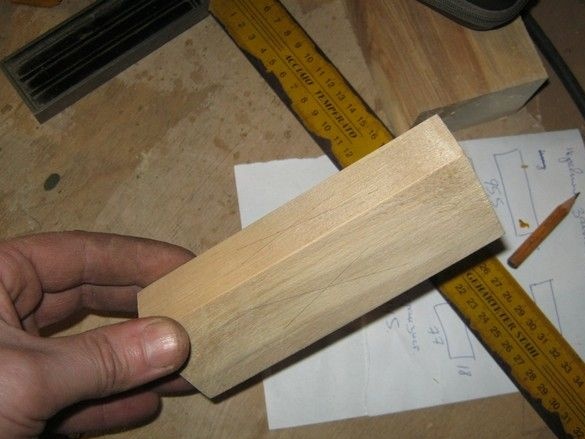
Mark the middle of each face.
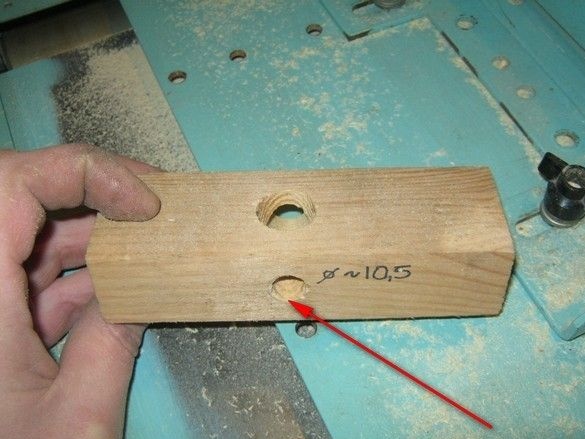
Yes. It is necessary to determine the diameter of the future stick - I recommend stopping at 10mm. The size is very convenient for the workshop - great for dowels in the manufacture of furniture, frames, just sticks are good for decorative elements of crafts, not too thin and behave very decently in the sense of distortion from a change in humidity. Finally, the common good twist drills on wood have a maximum diameter of exactly 10mm, which is convenient.
Further hole sizes are designed specifically for this diameter of the finished stick. 10mm
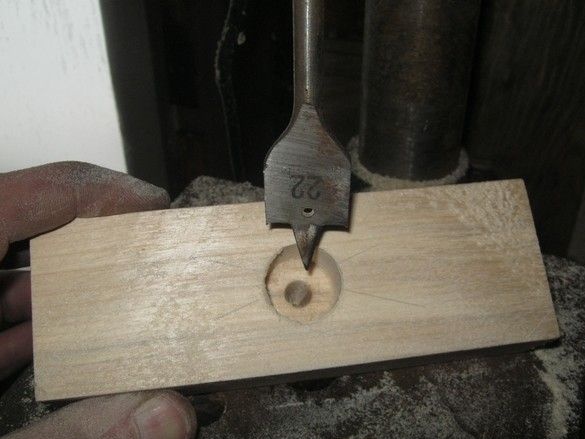
We drill at maximum speeds - the hole is cleaner. So that the outlet does not have an ugly ragged edge, we drill only to half the depth.
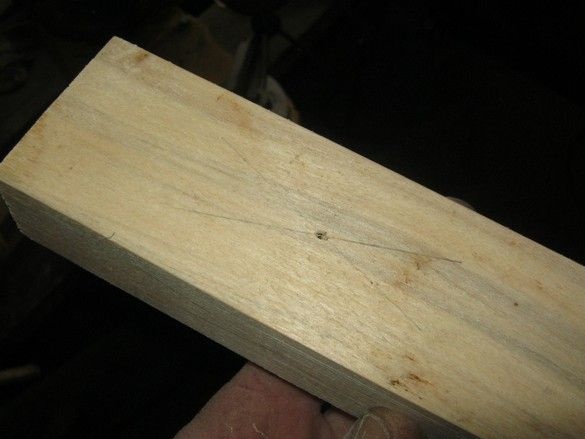
The guide pin of the pen drill comes out on the other hand long before the drill passes completely, to this small hole, turning the workpiece over, we orient ourselves as to the center of drilling.
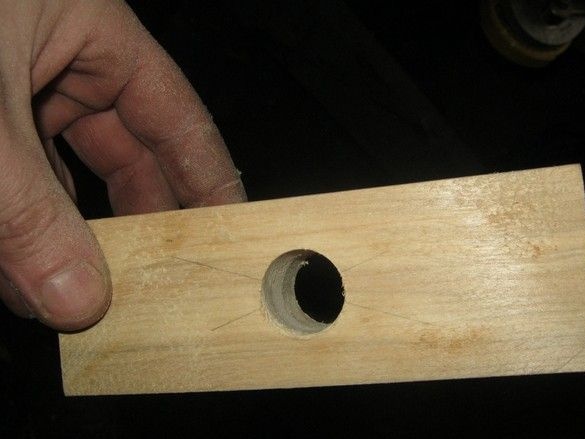
Now, holes with a diameter of 16 mm and 10 mm opposite are drilled on narrow faces. Regarding the large hole for the cutter, they can be slightly offset, this is not significant, but relative to each other, there must be pine, otherwise the stick can jam.
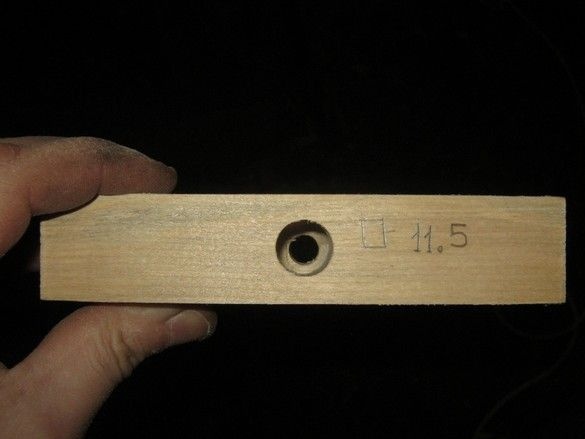
Possible burrs on the edges of the holes are lightly sanded. The hole for the workpiece, it is better to sign, so that later it is painful not to remember the size.