
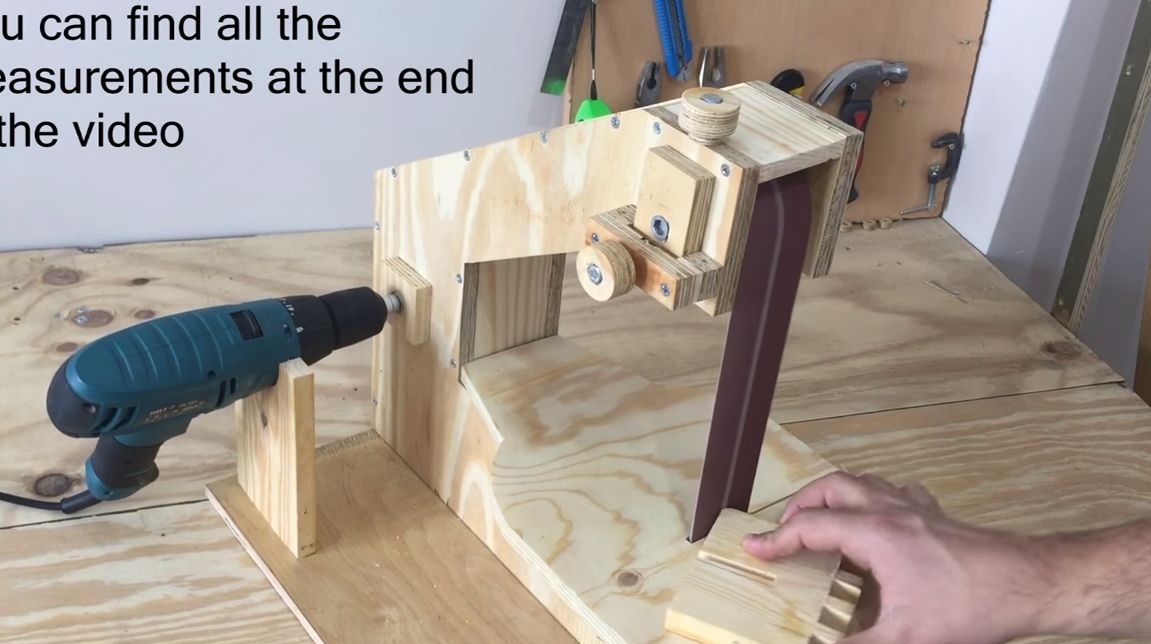
A belt sander is a very convenient tool on the farm. They can quickly grind various materials, whether it is wood, plastic or even metal. In fact, this device is the same file, it is only driven by electricity. We have so far these machines are not very common, so they cost a lot of money. But that doesn’t scare us, right? Let's try to make such a machine from improvised materials!
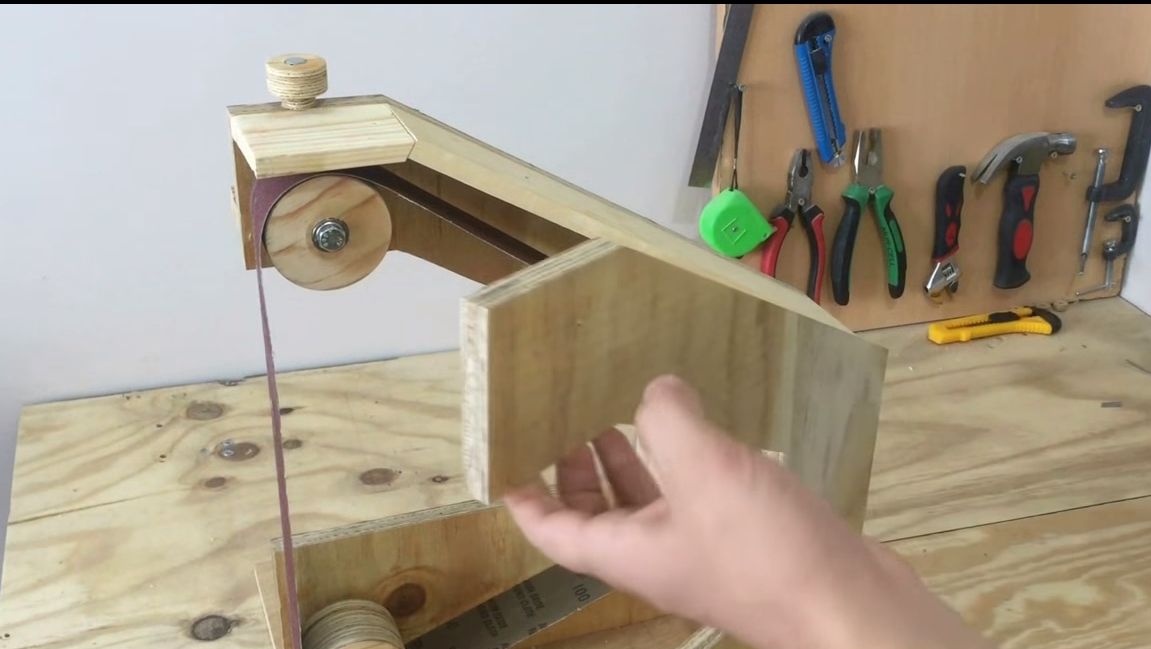
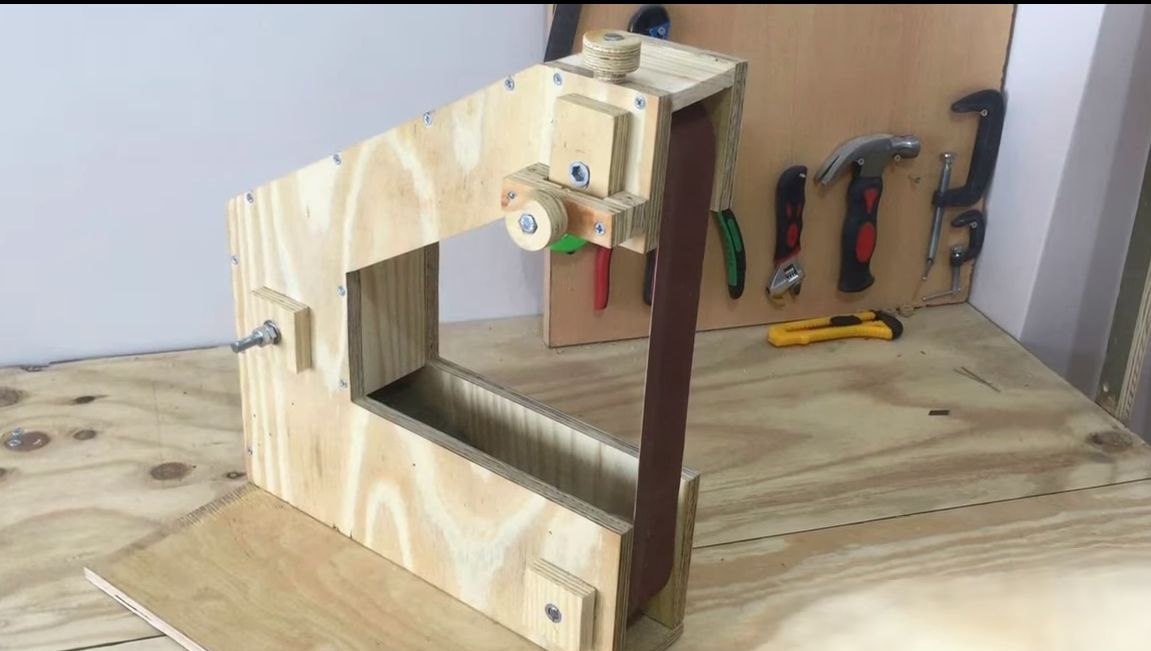
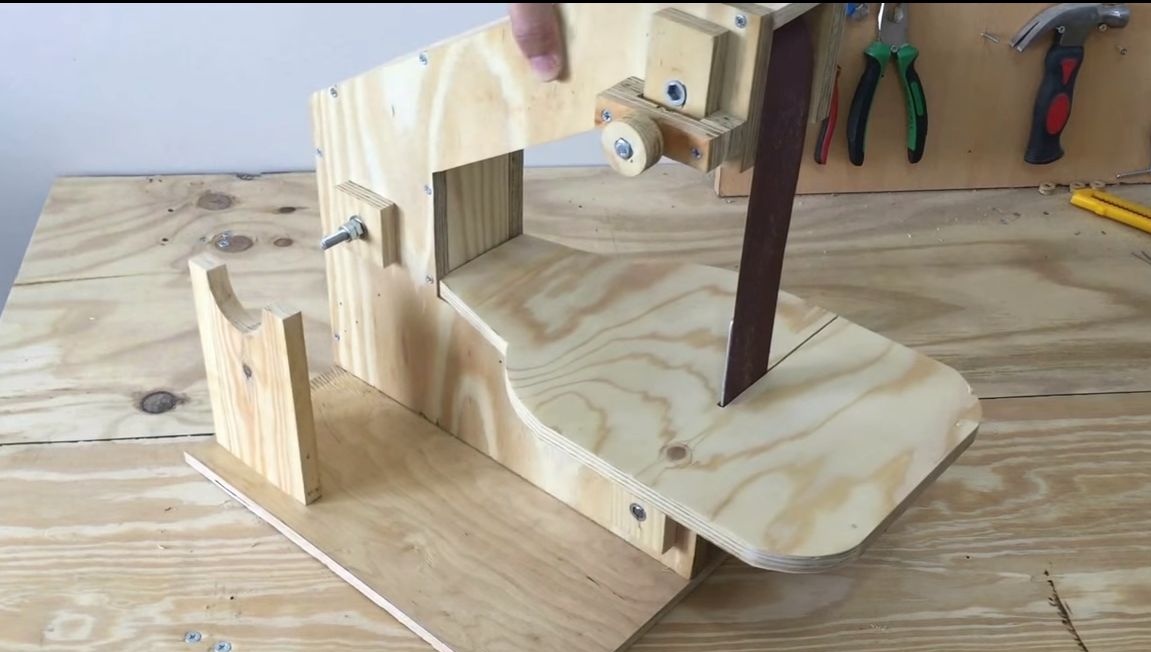
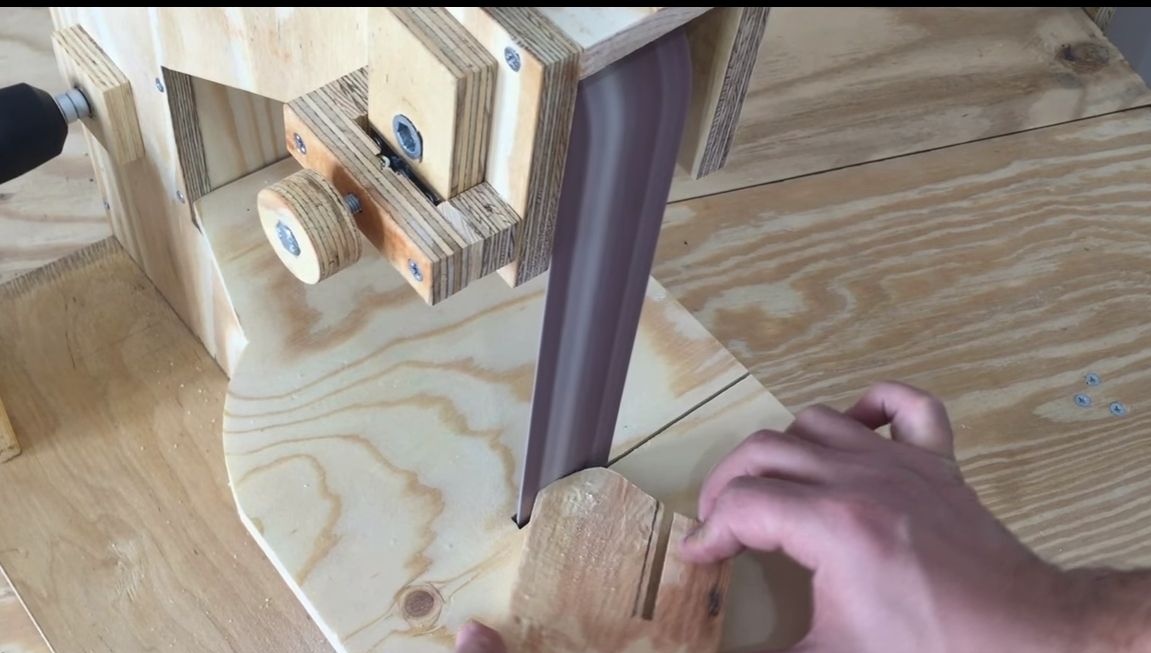
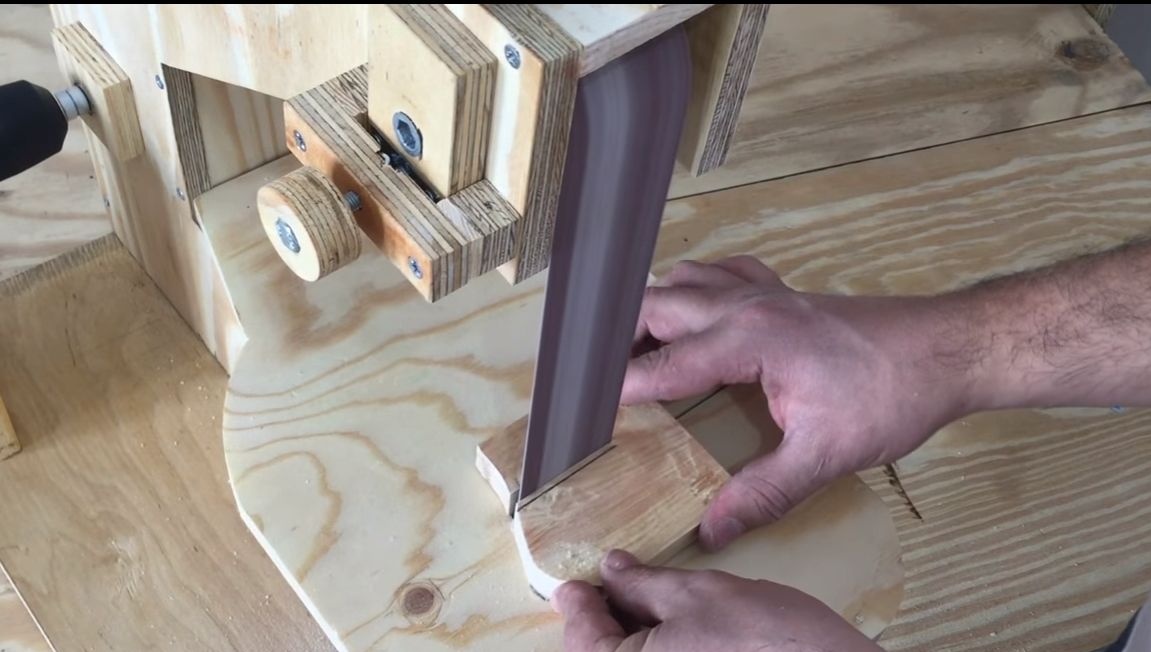
A feature of this machine is that the belt "hangs in the air", this makes it possible to polish the grooves and other hard to reach places.
Plywood is used as the main material for the entire structure. Frame, drive wheels, tensioner, everything is made of it. You will also need bearings, bolts, nuts and other little things. The installation is driven by a screwdriver, and the network screwdriver is the best suited for these purposes, it is more powerful, and the battery is not here. Let's consider in more detail how to make this a miracle of technology.
Materials and tools used by the author:
Material List:
- network screwdriver;
- grinding belt;
- bearings, bolts, nuts, washers and more;
- plywood;
- steel plate (acts as a stop);
- self-tapping screws;
- glue for wood.

Tool List:
- a drilling machine with bits for drilling holes of large diameter;
-
-
-
- hammer;
- stationery knife;
- spanners;
- ruler;
- clamps.
The grinding machine manufacturing process:
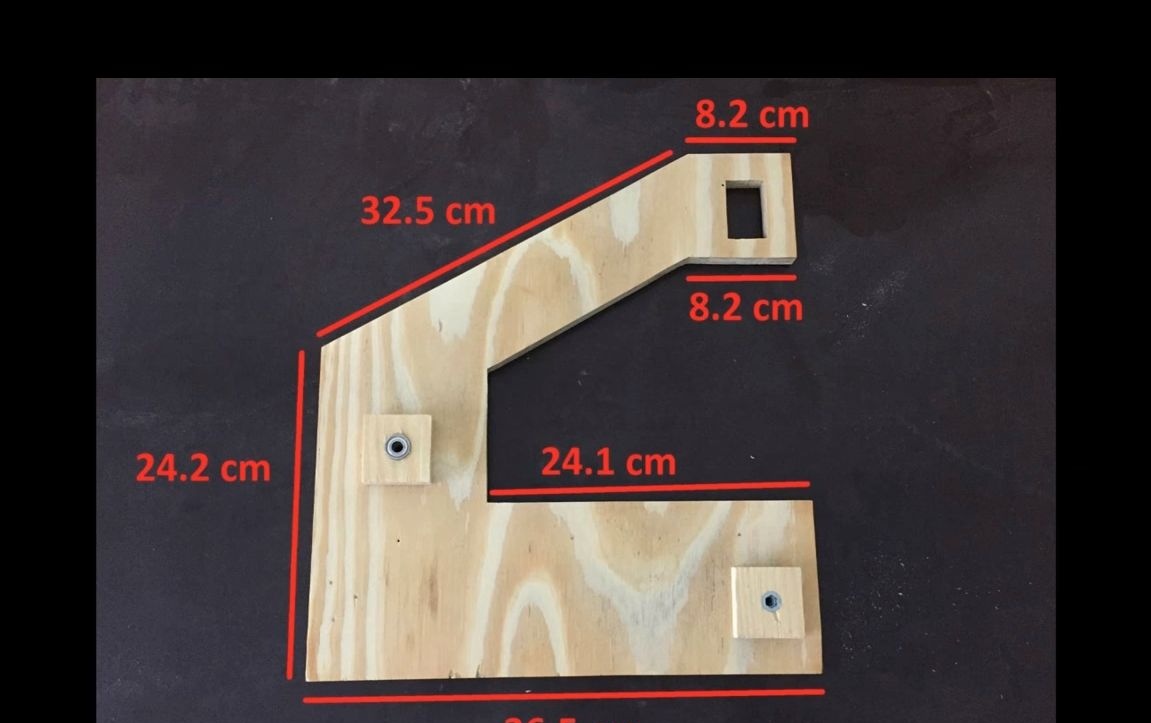
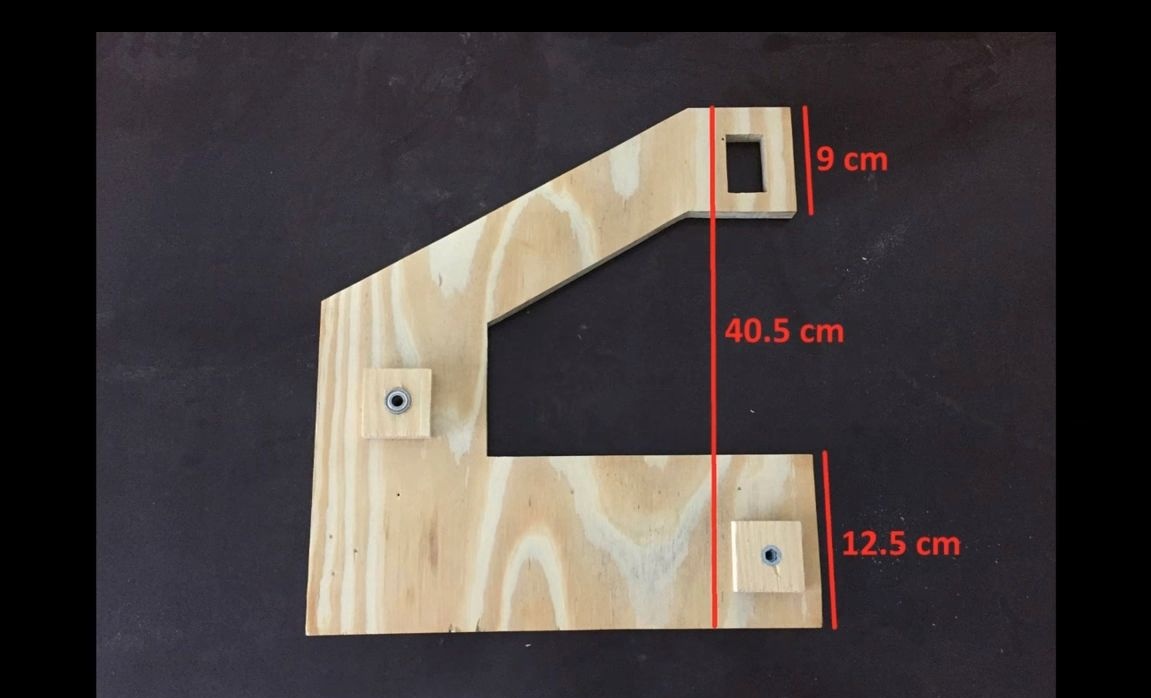
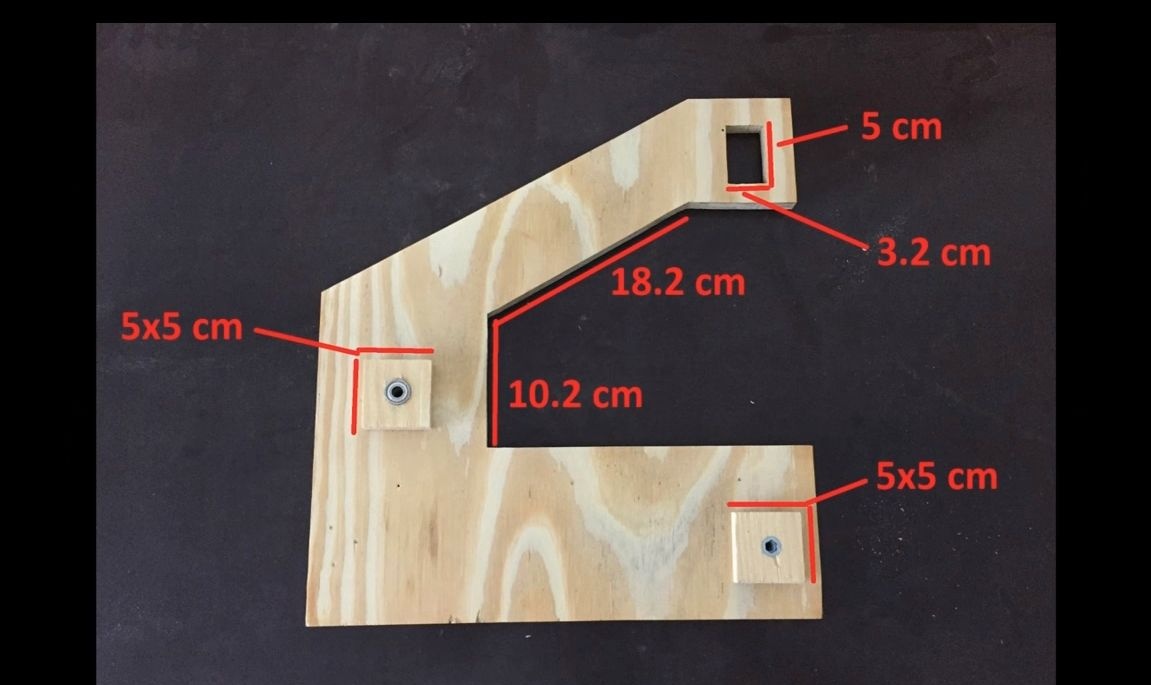
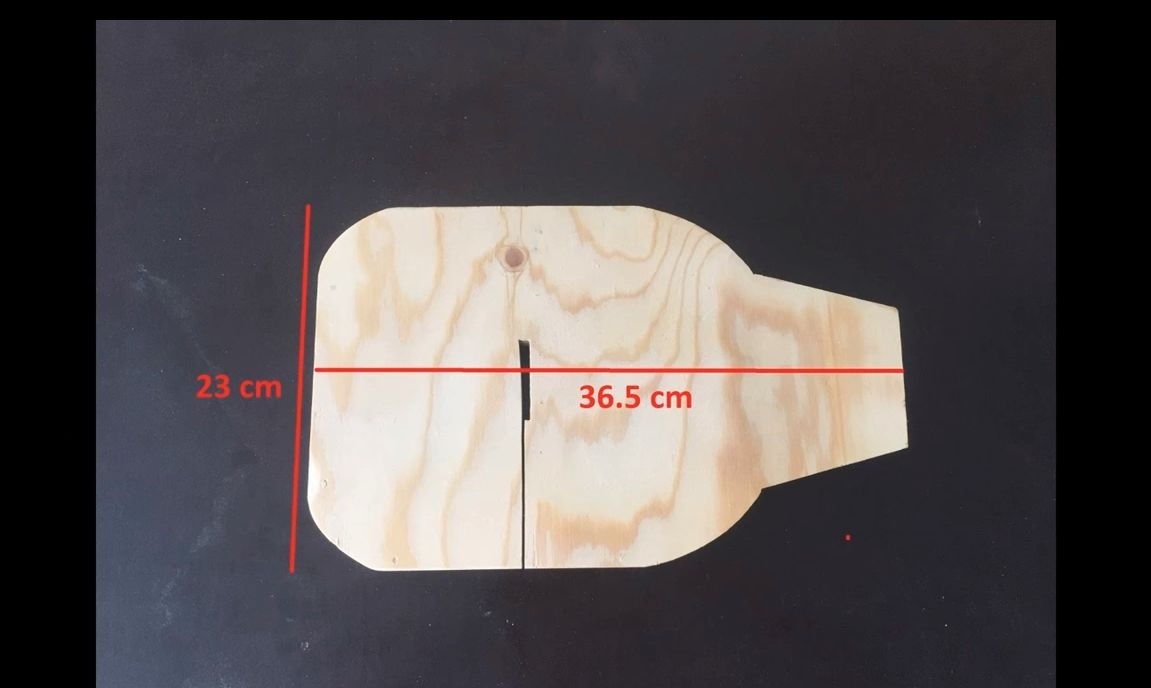
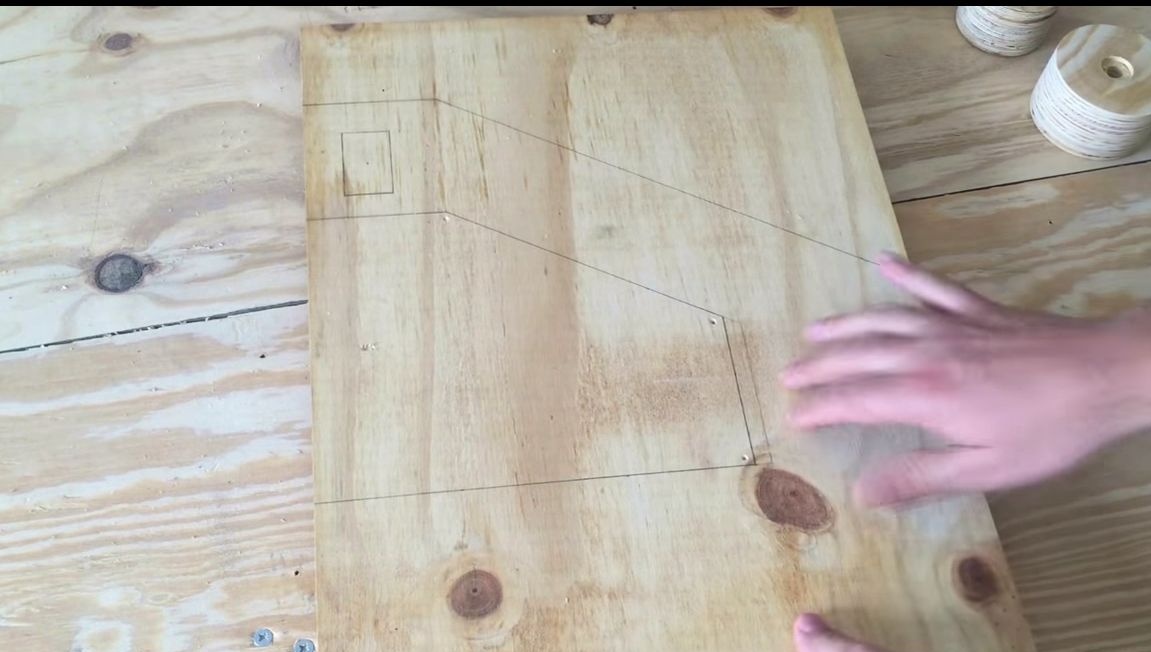
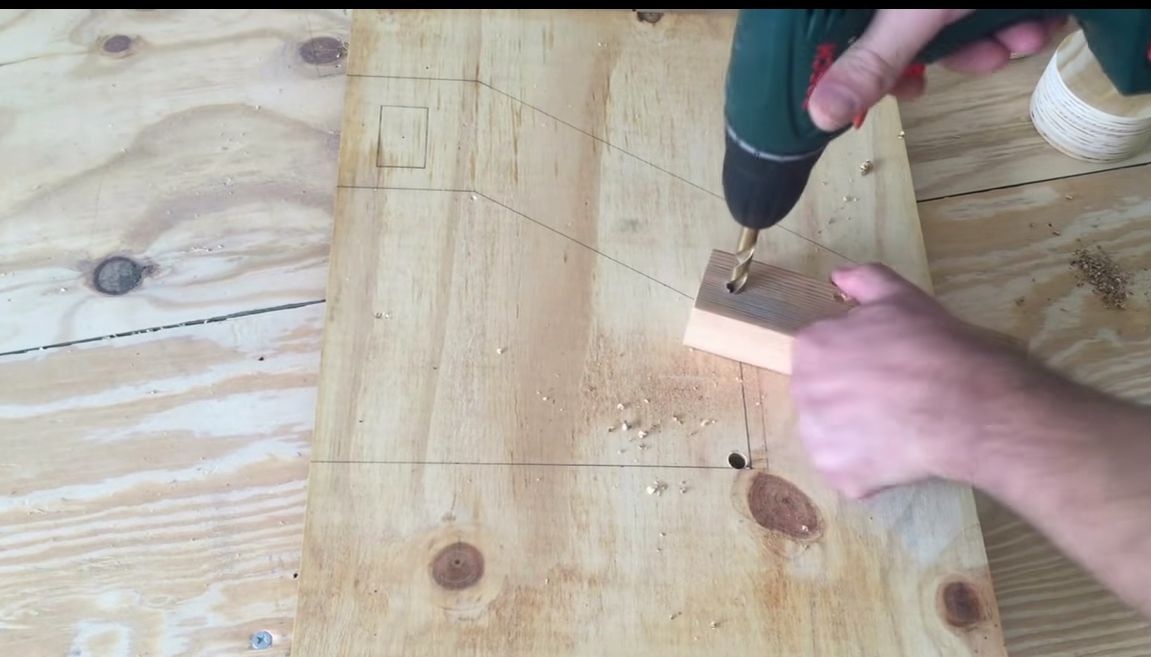
Step one. We make a frame
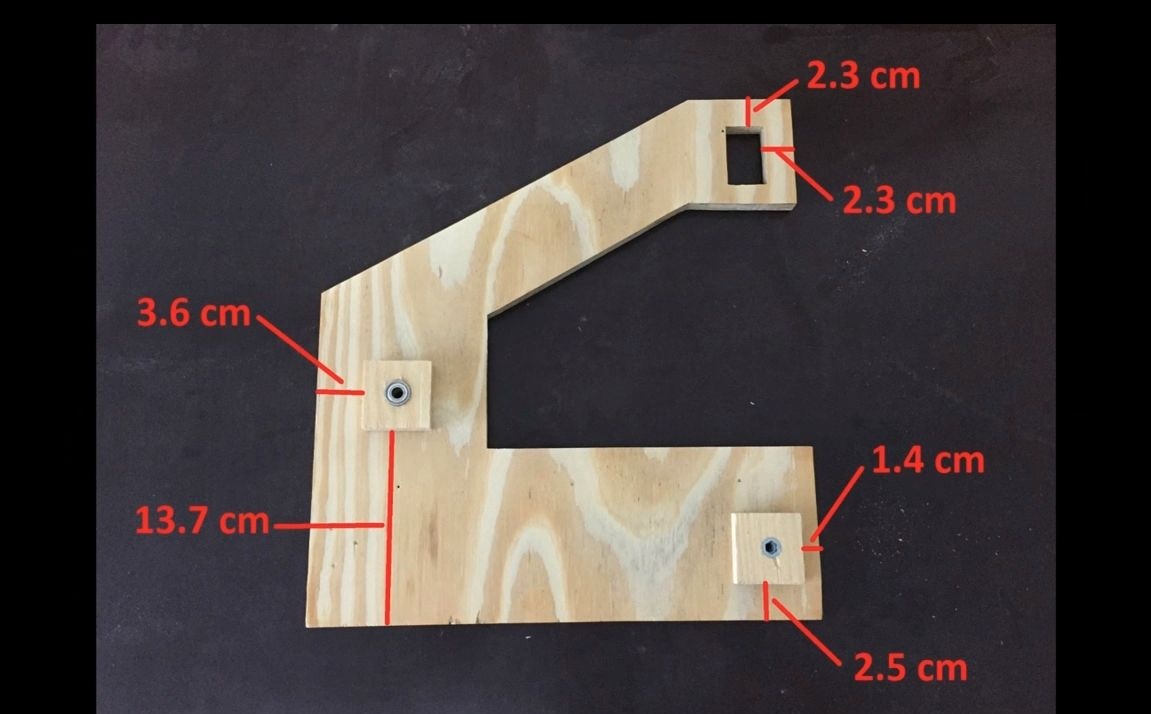
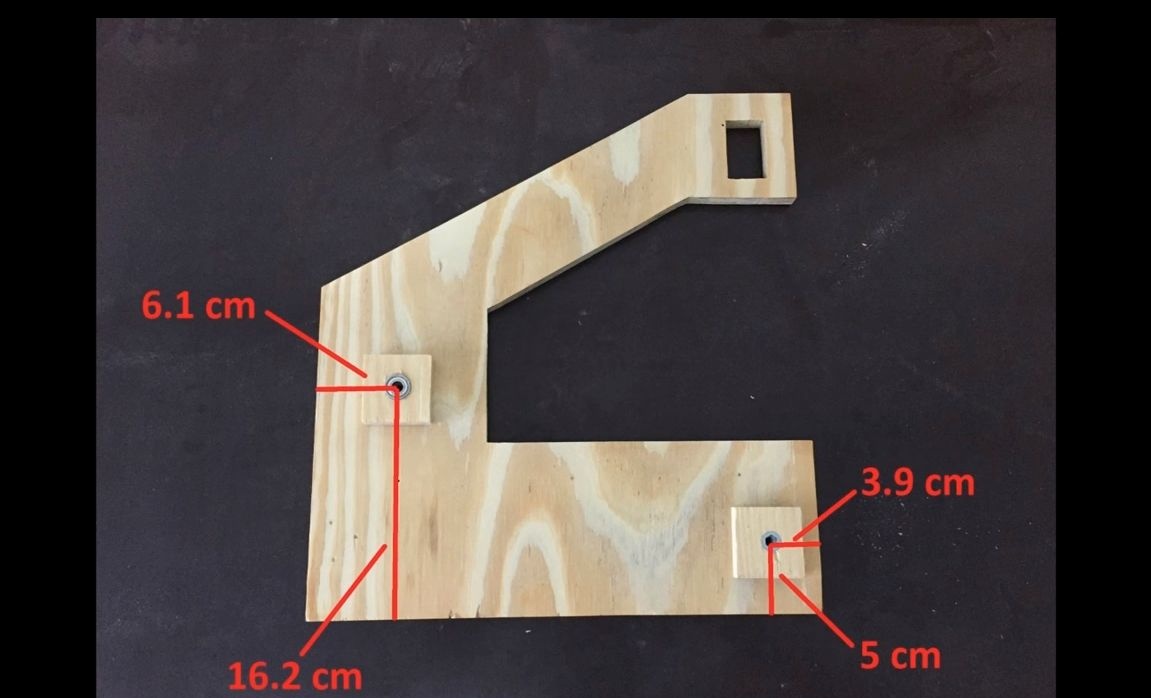
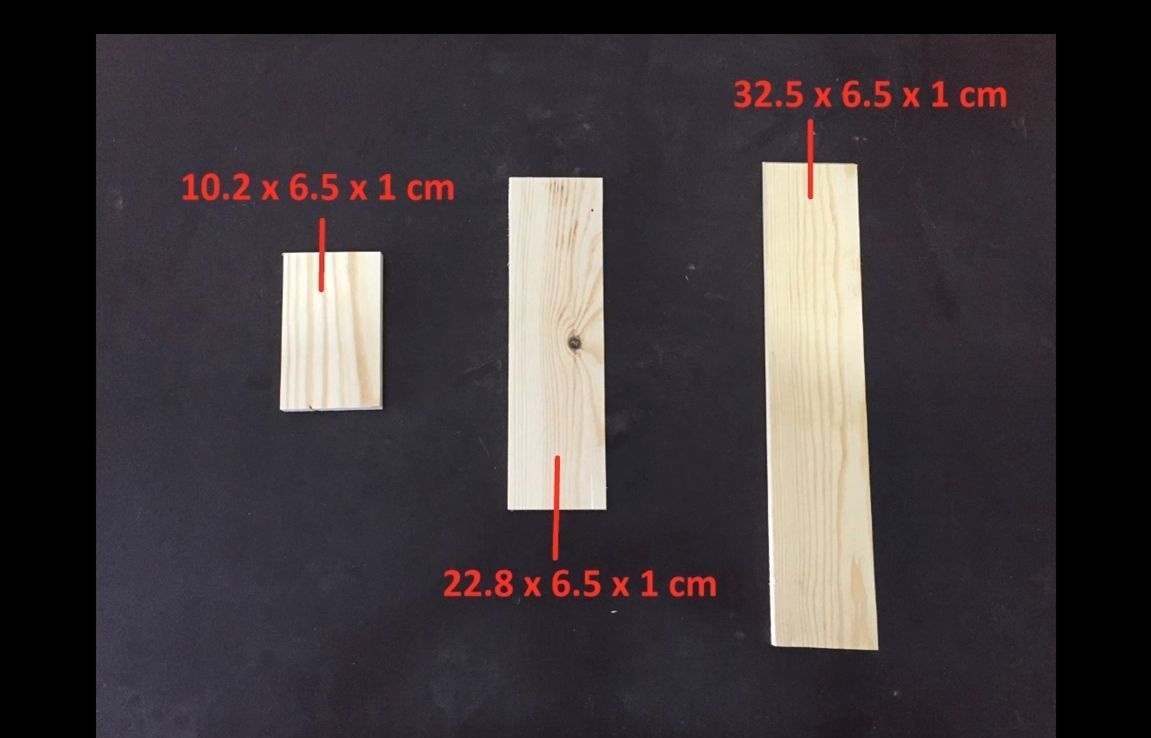
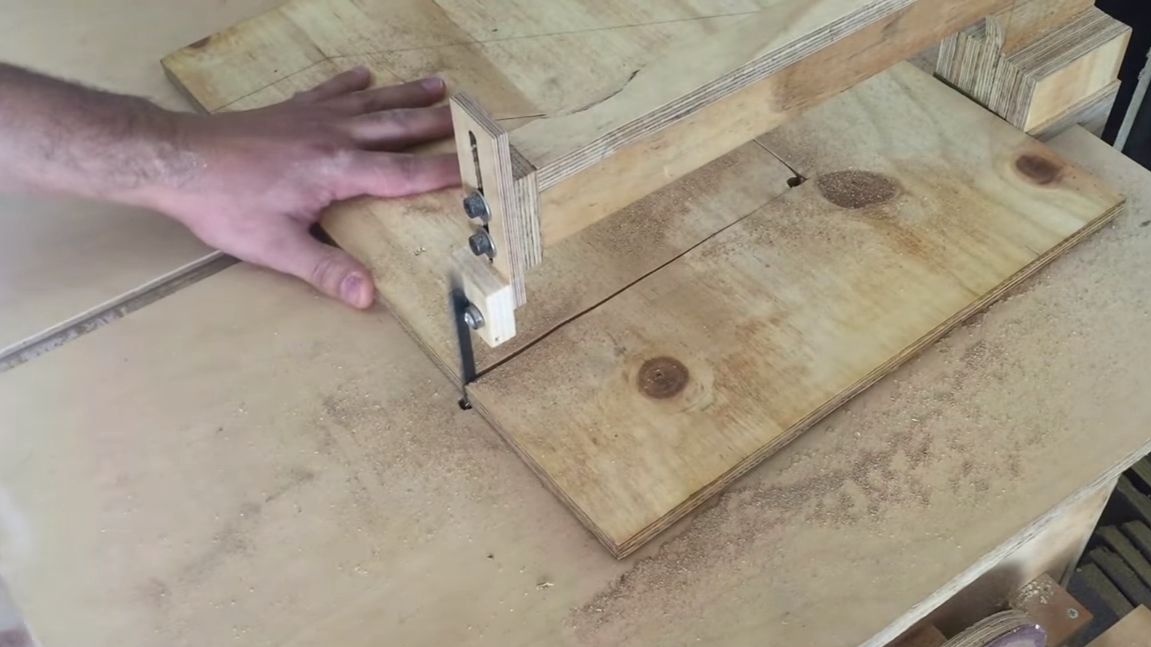
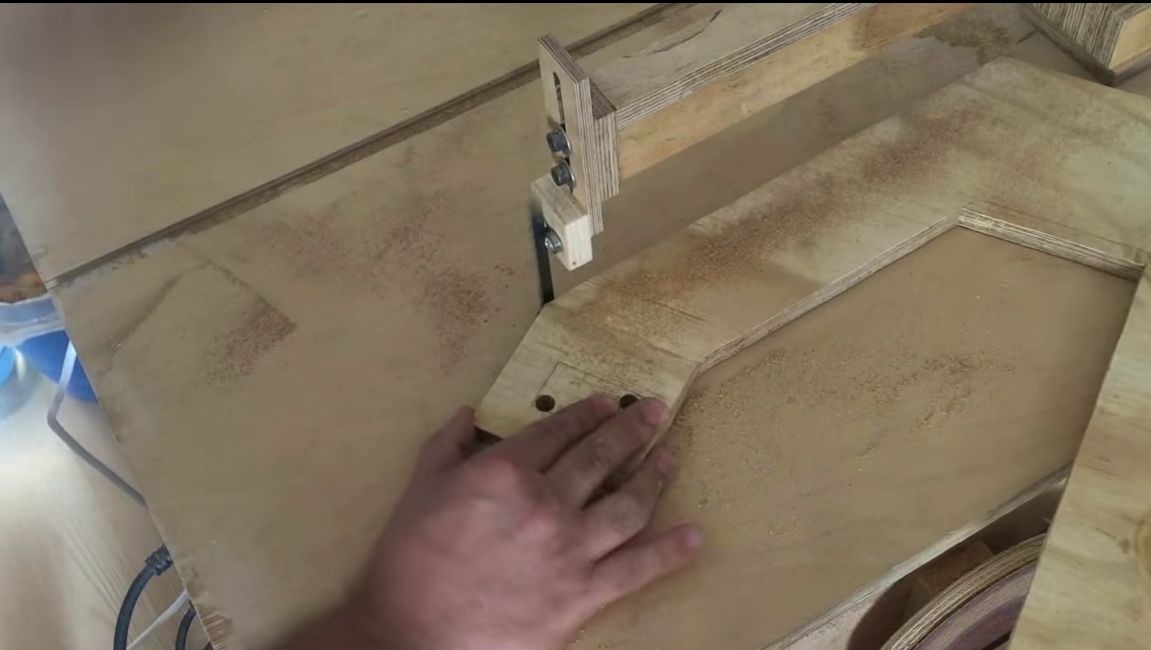
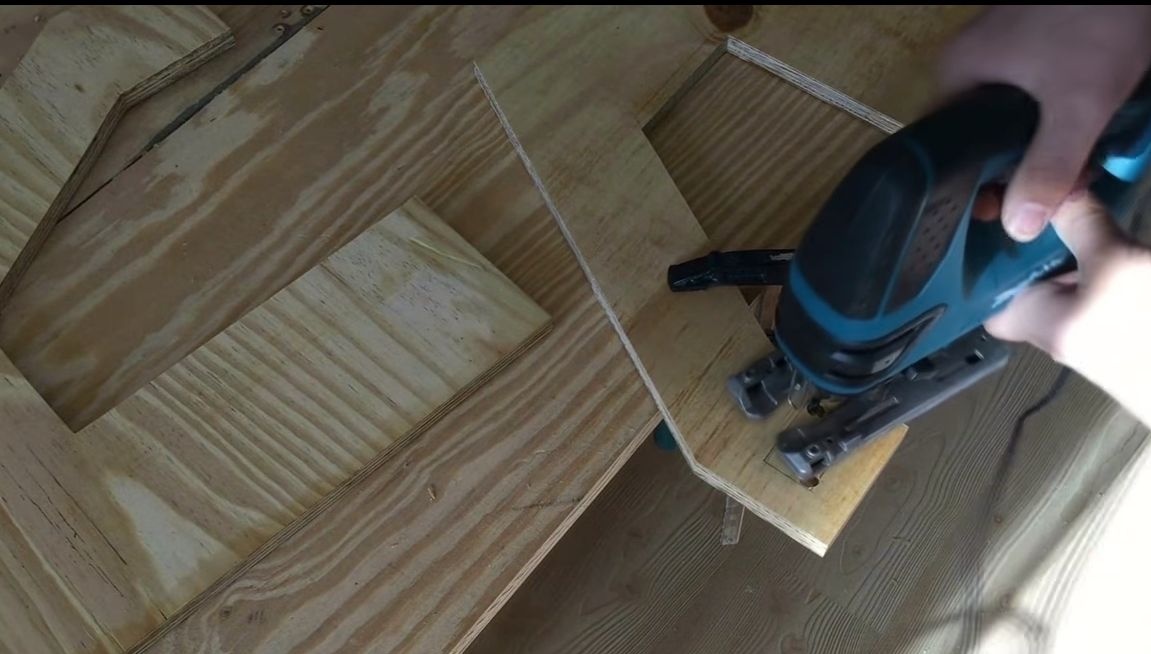
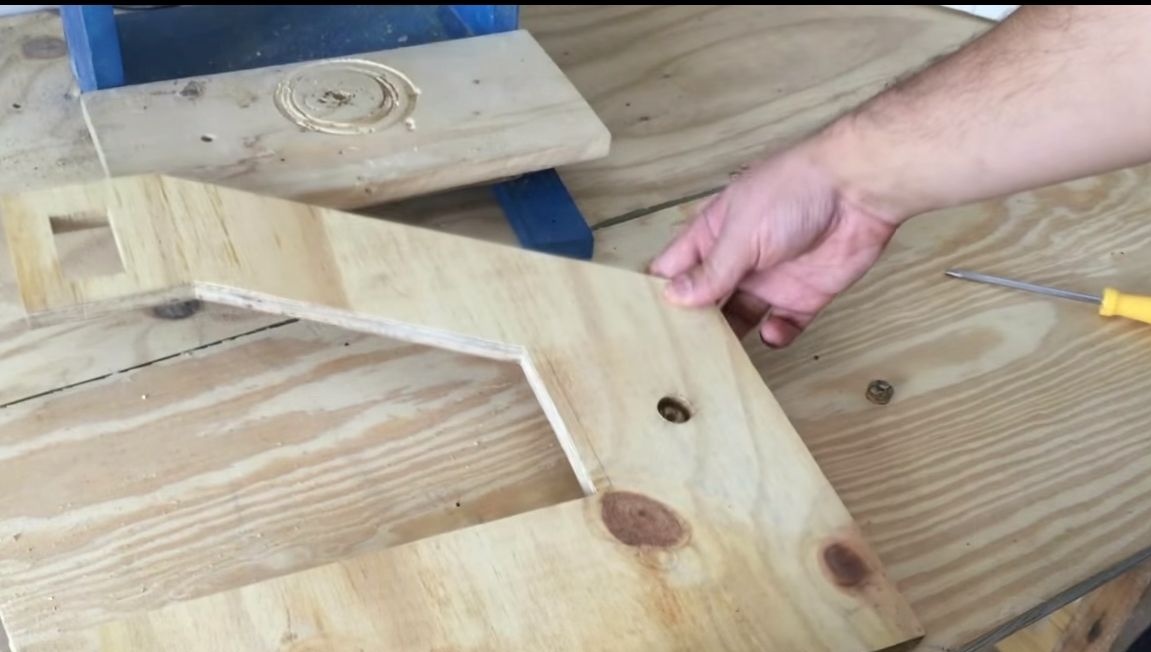
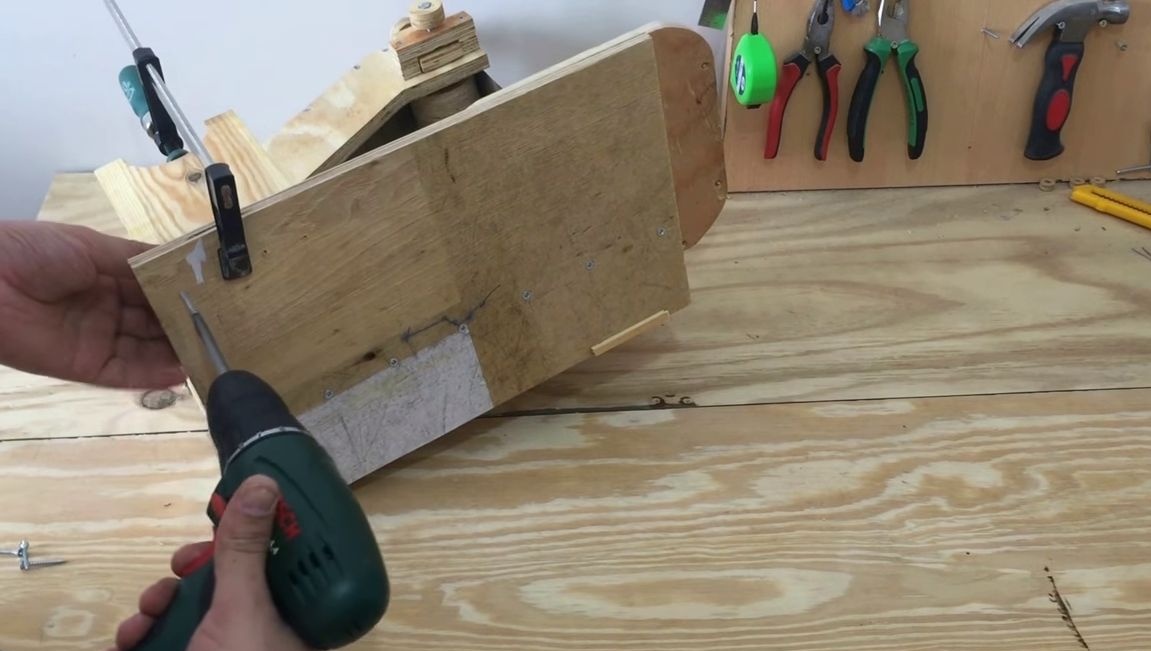
For the frame you need a sheet of plywood, the dimensions of all products were presented above not a photo. We mark the design, drill holes and cut out using a jigsaw.
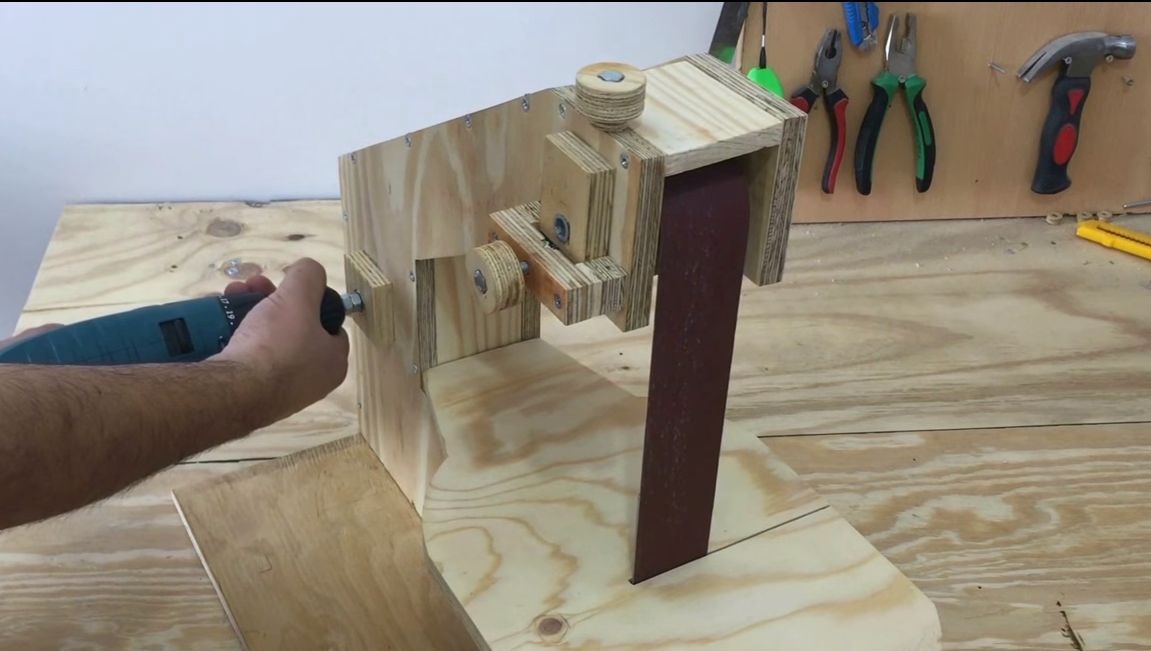
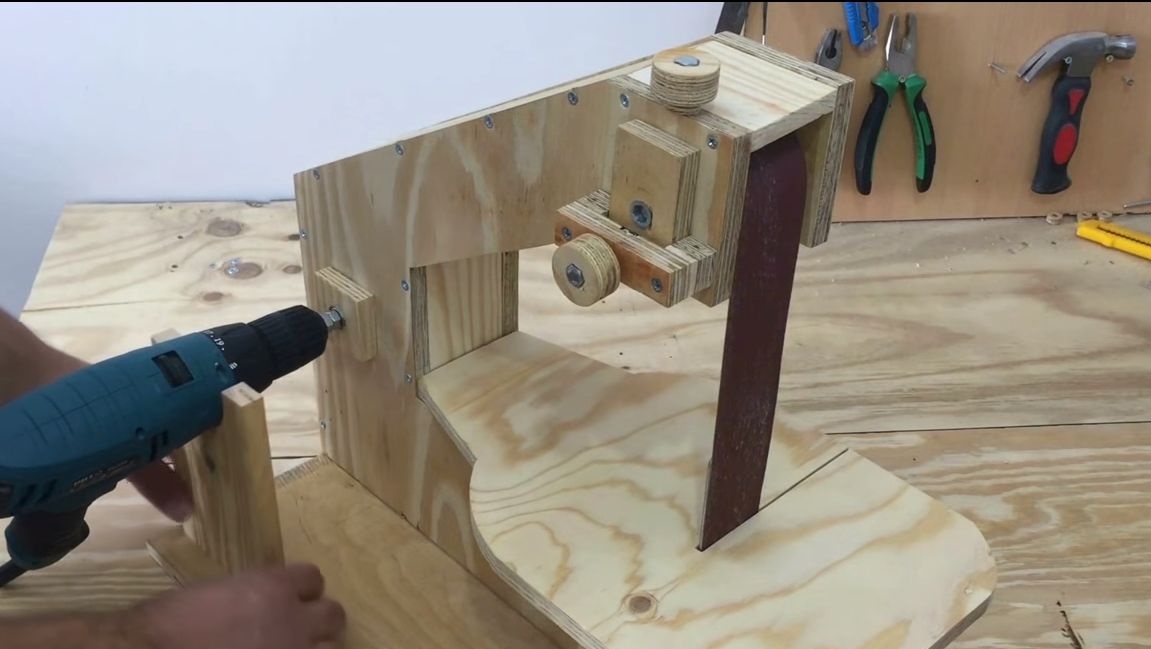
Step Two Wheel axles
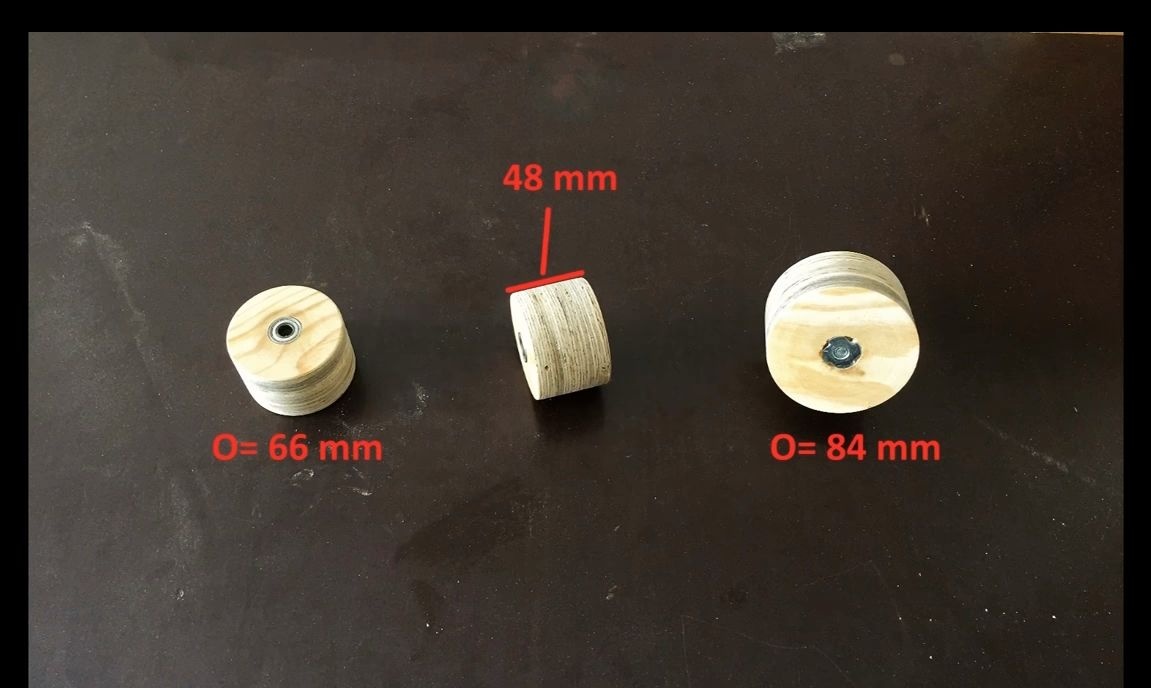
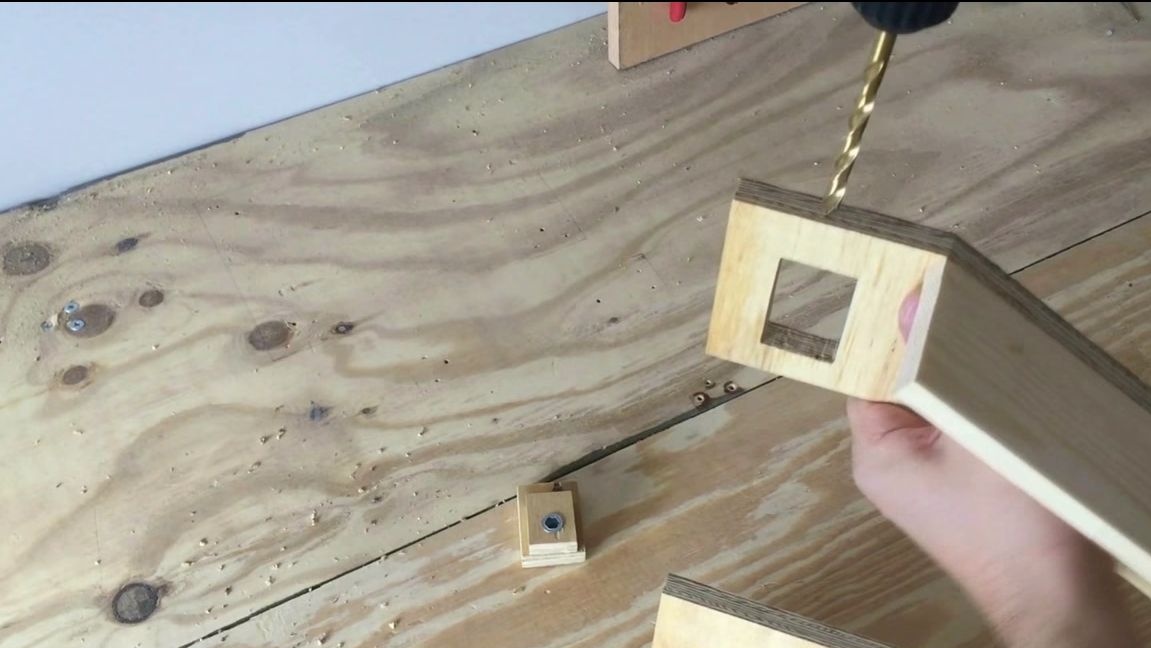
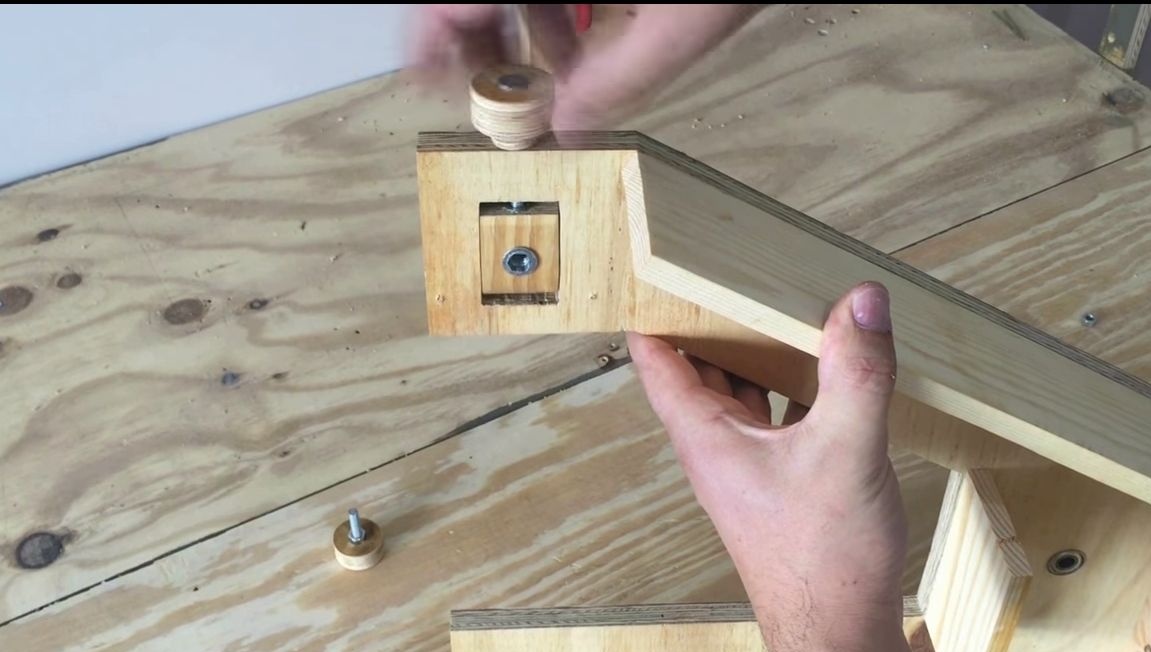
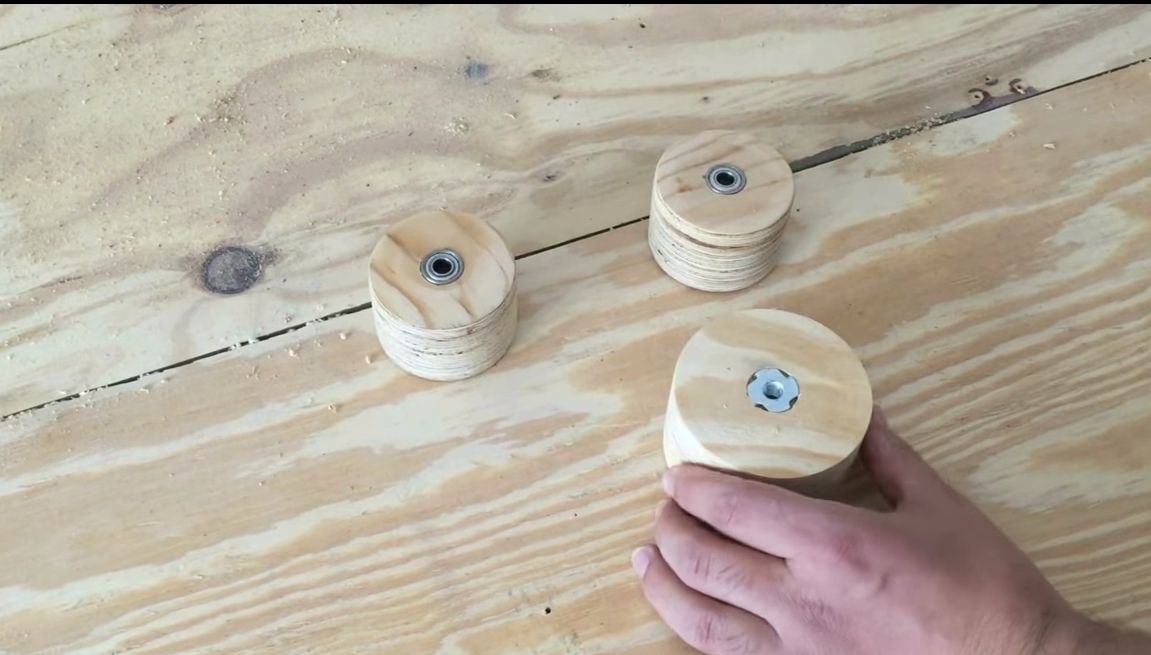
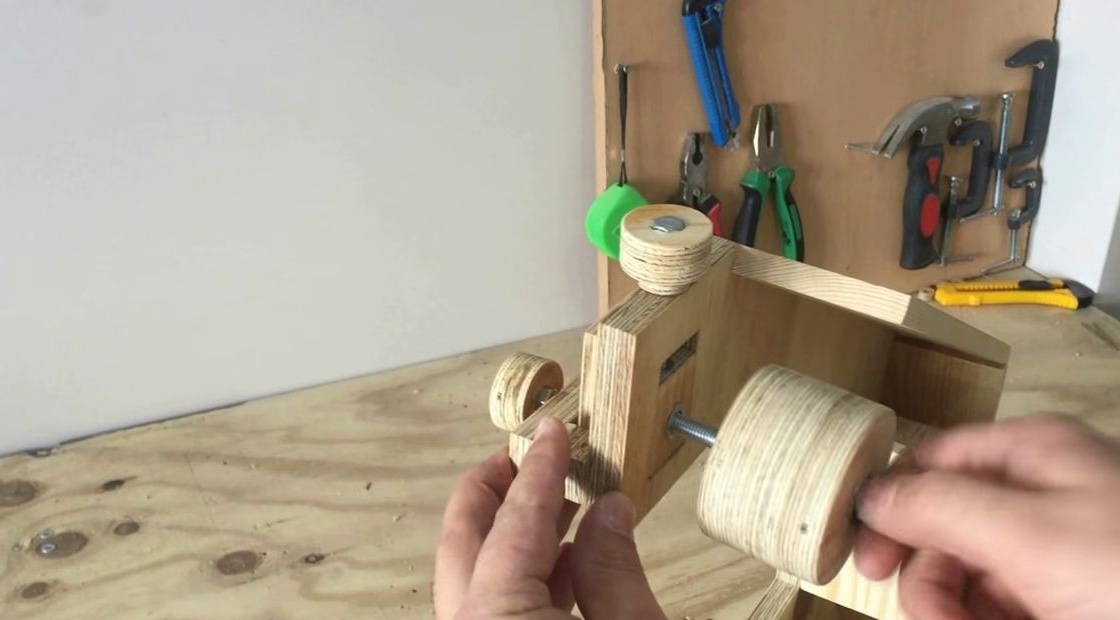
The design of the machine provides for the installation of 3 wheels, two of them driven and one drive, it is made of a larger diameter. The axis of the drive wheel is rigidly screwed to the wheel, and it rotates on bearings that are installed in the frame.
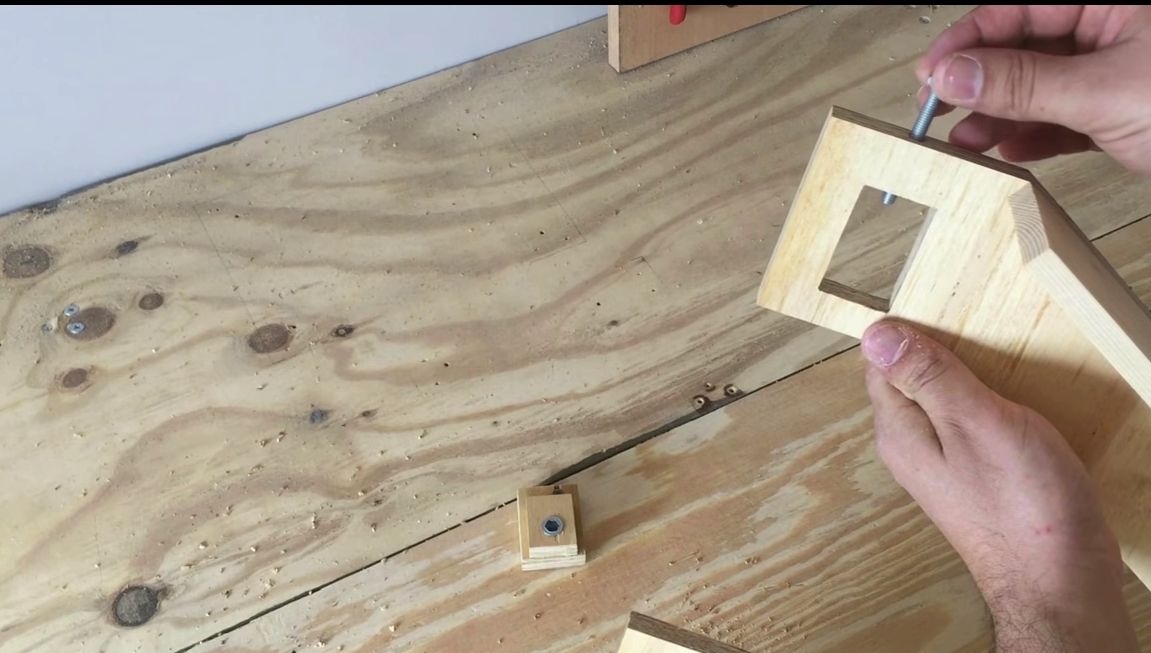
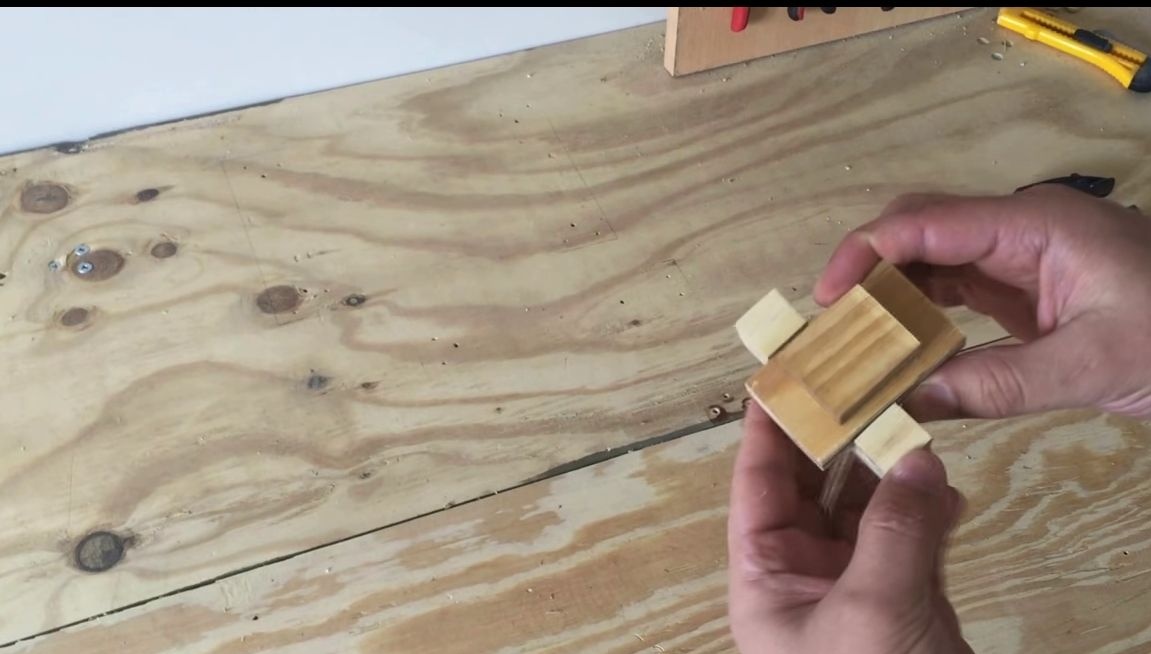
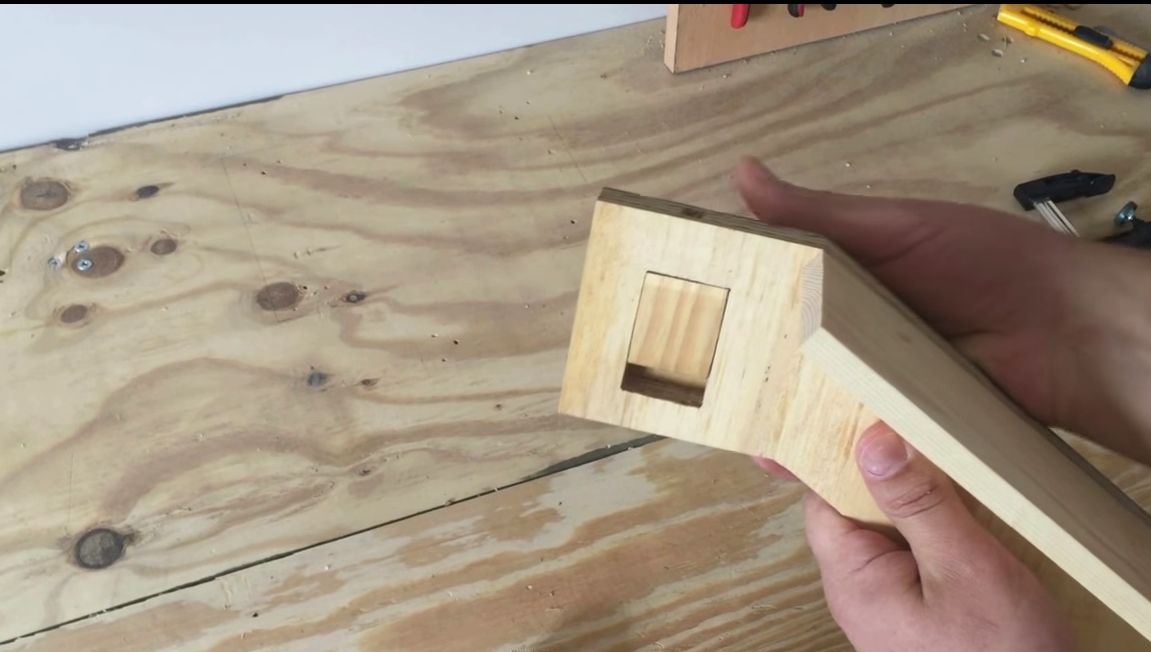
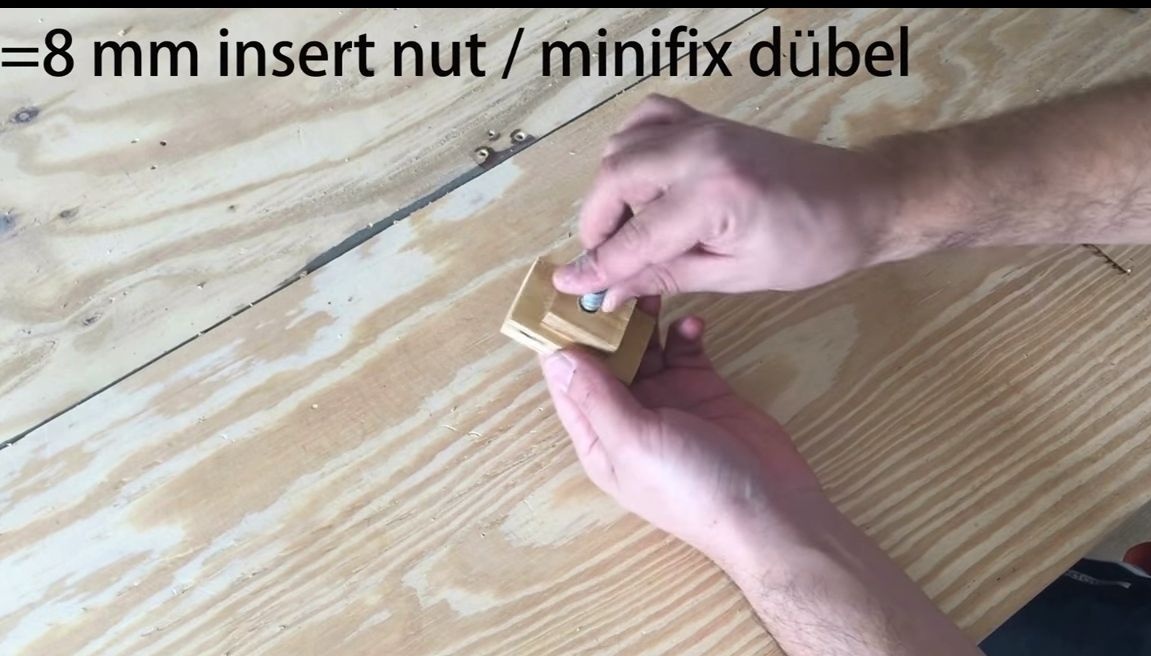
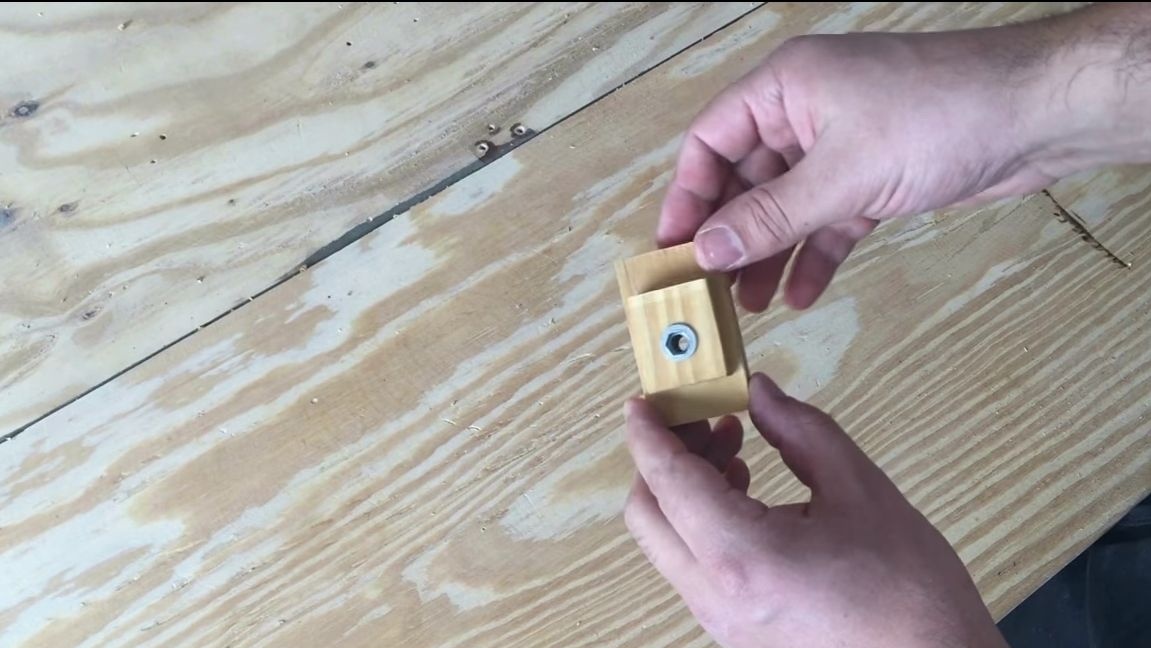
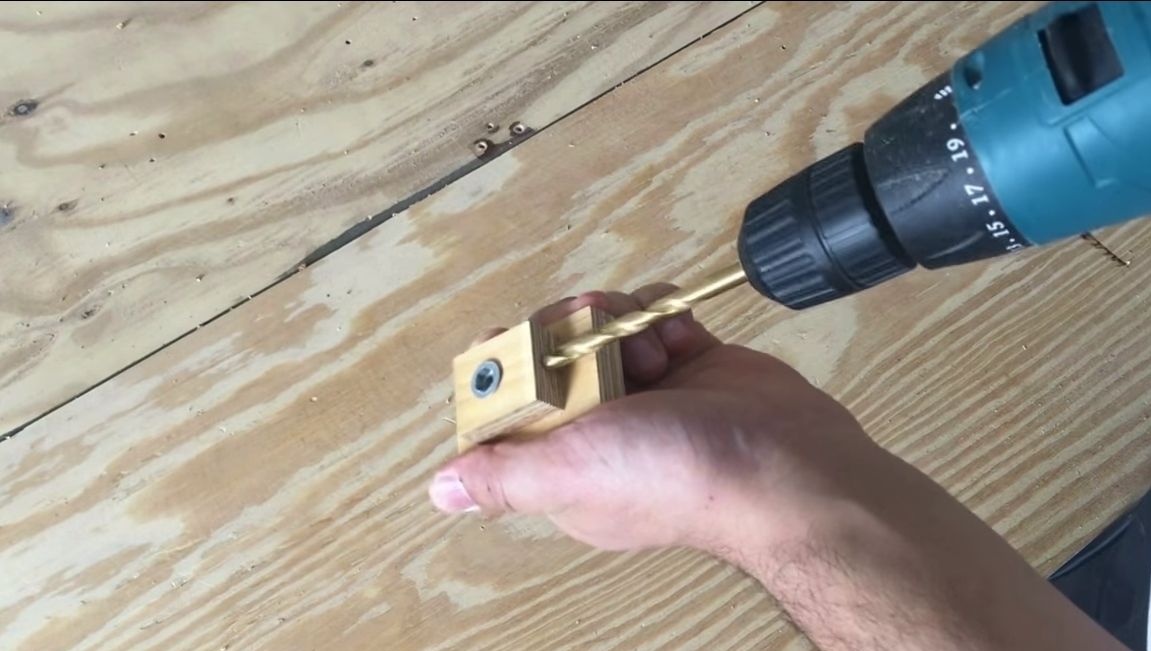
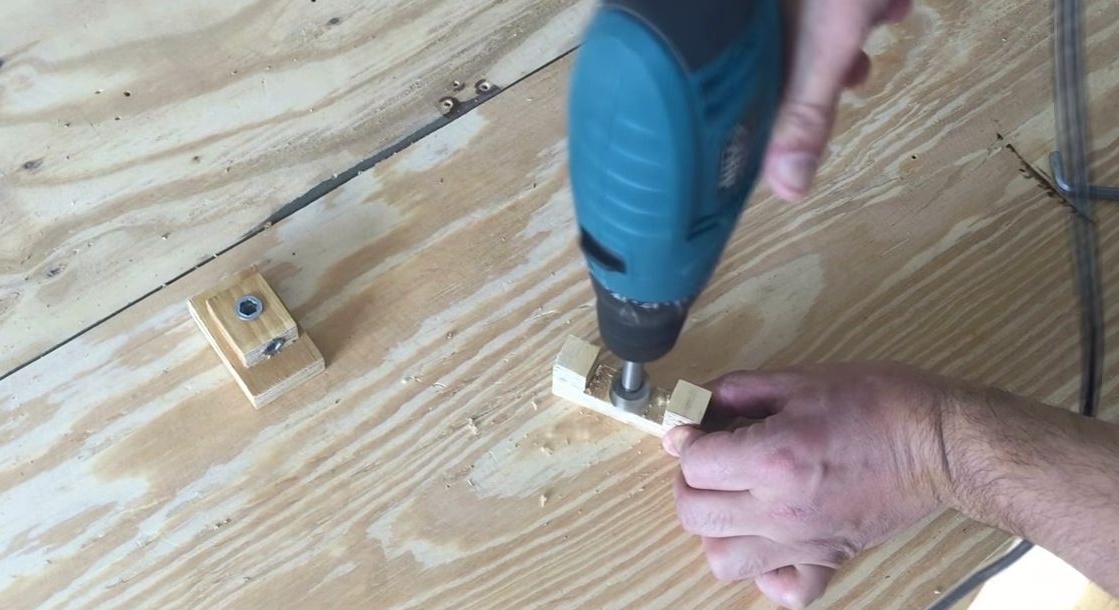
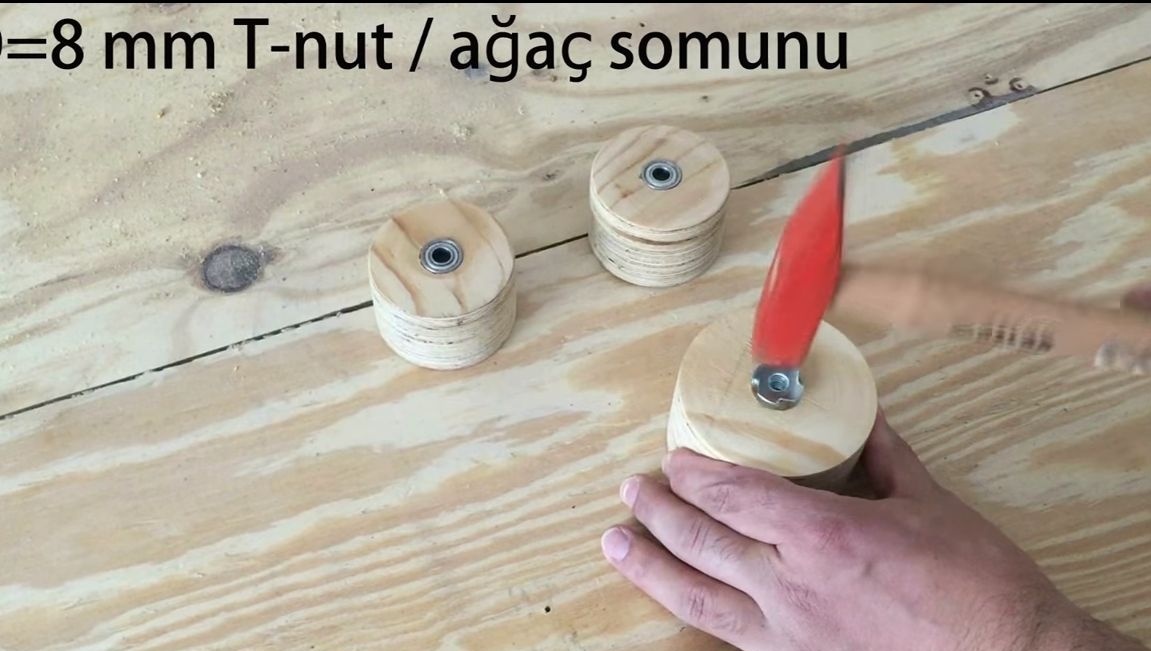
As for the driven wheels, the bearings are installed inside the wheels themselves, and the wheels are fastened with bolts and nuts. Nuts are installed in the ramp for the bolts, into which they are wrapped.
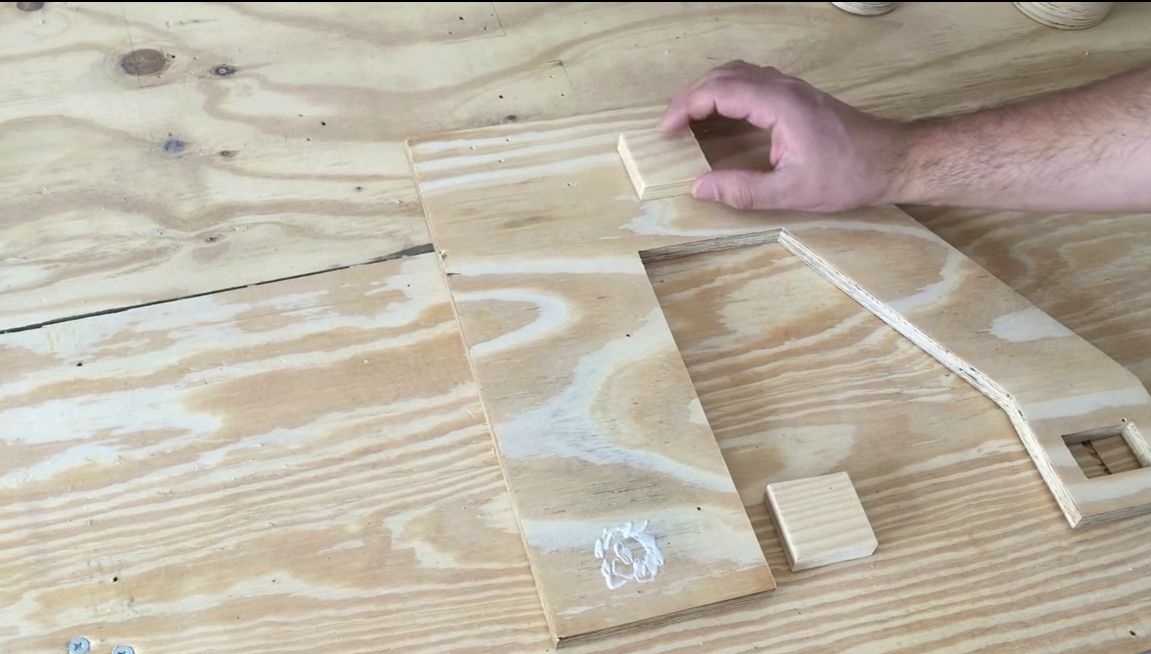
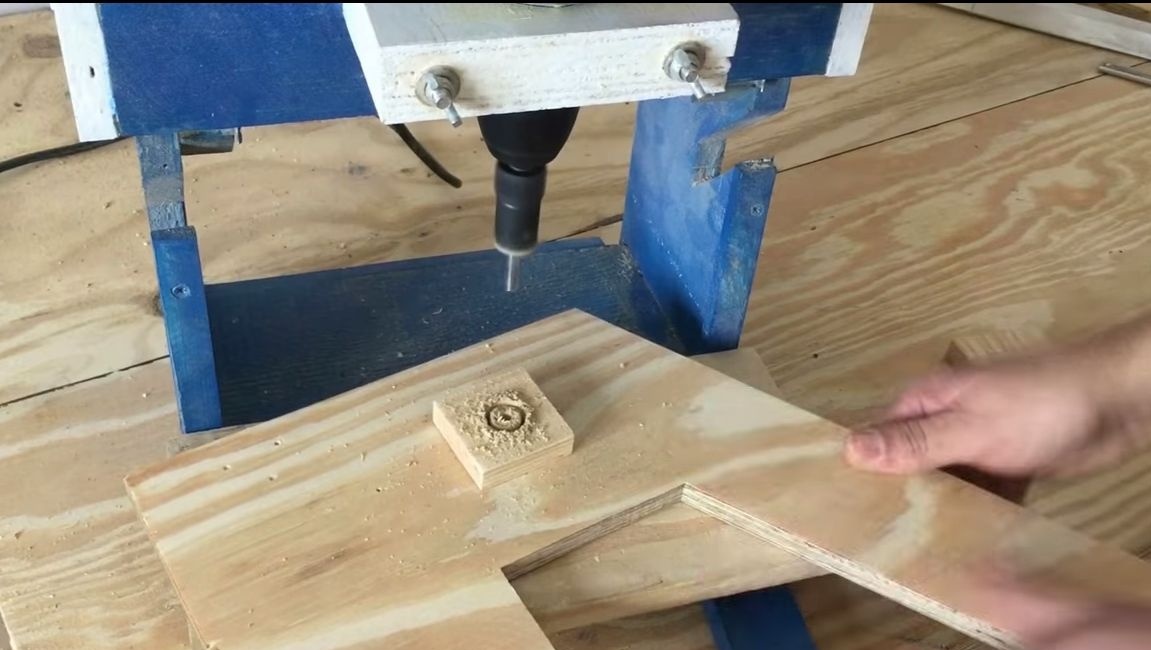
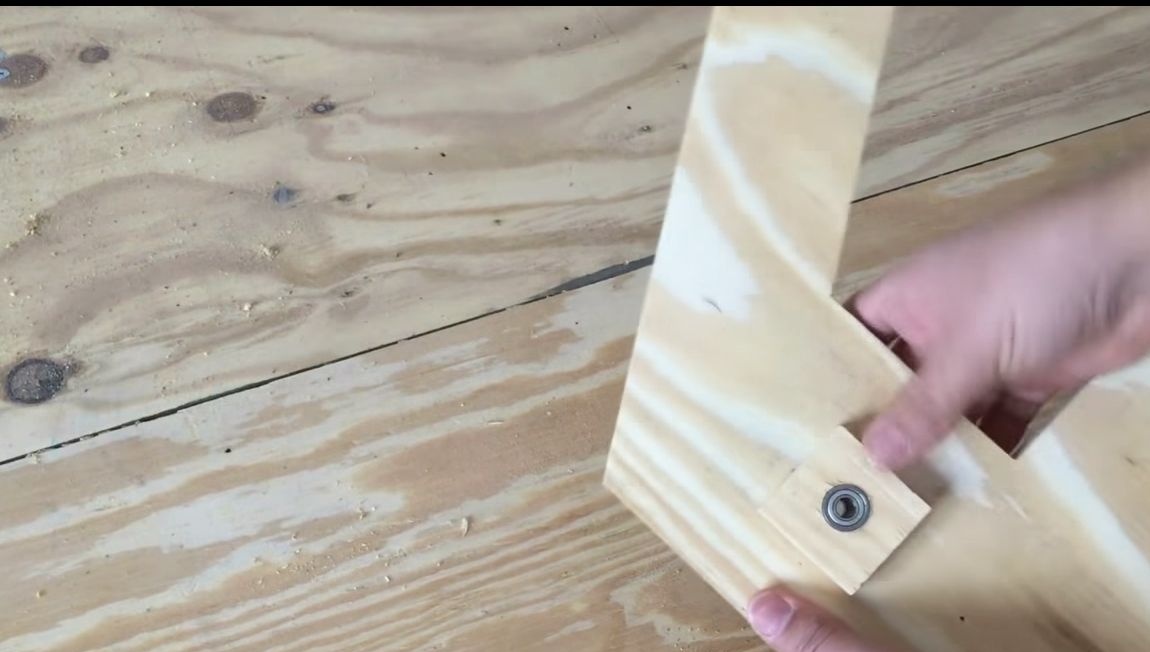
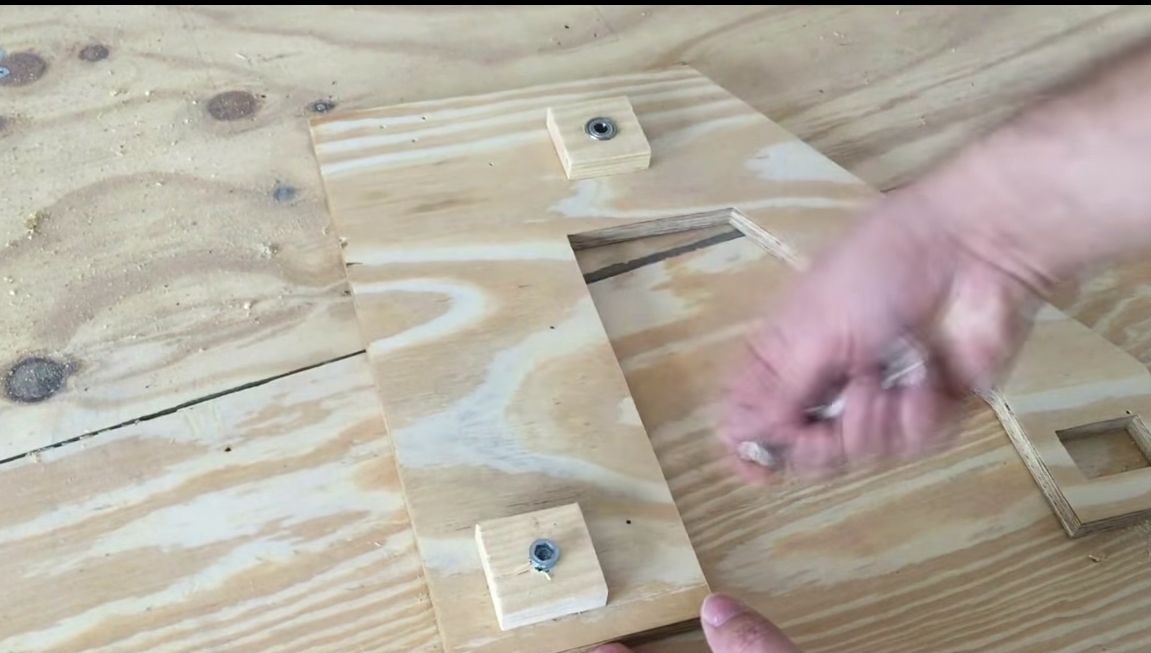
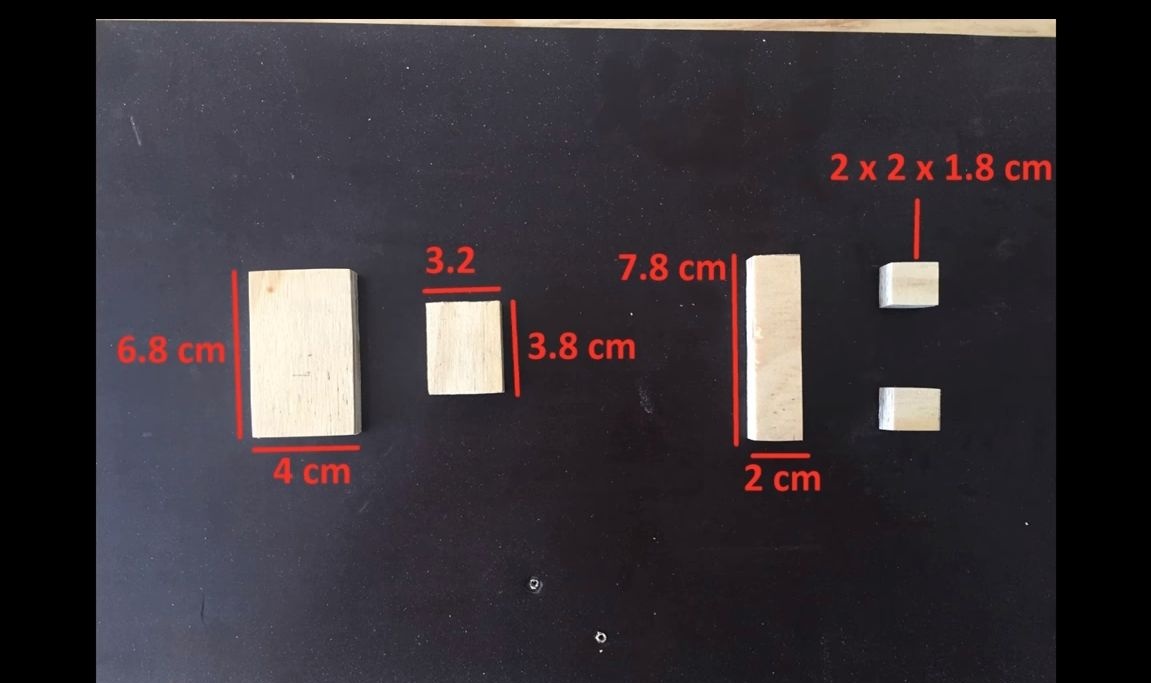
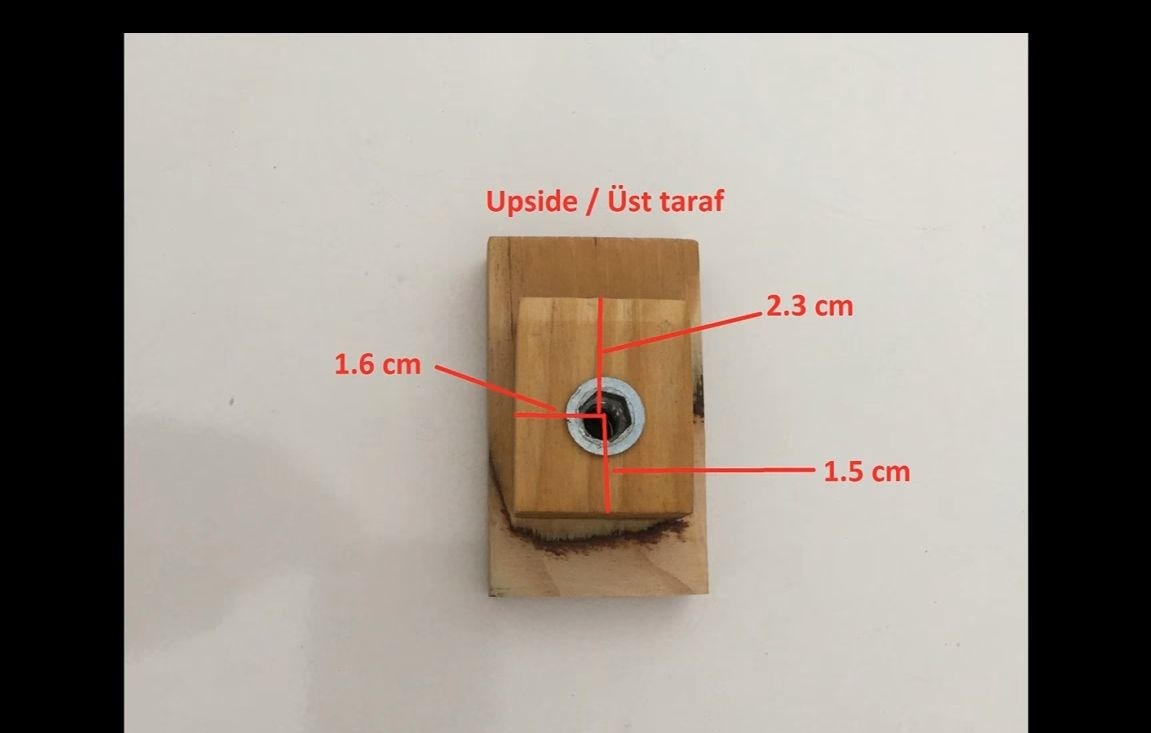
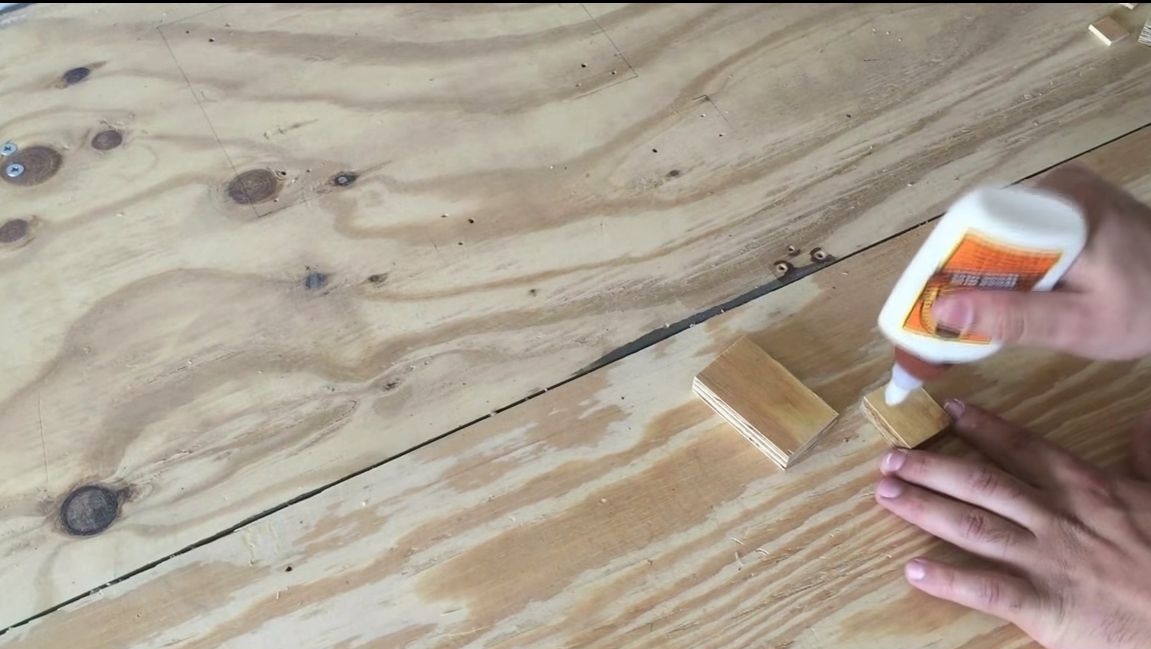
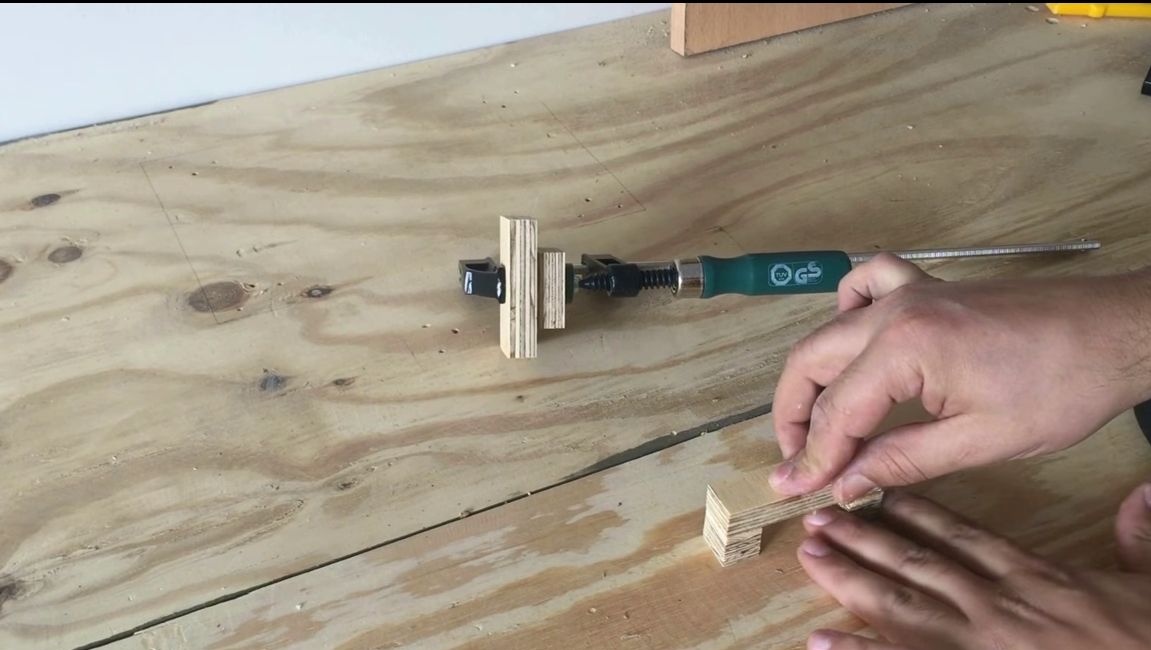
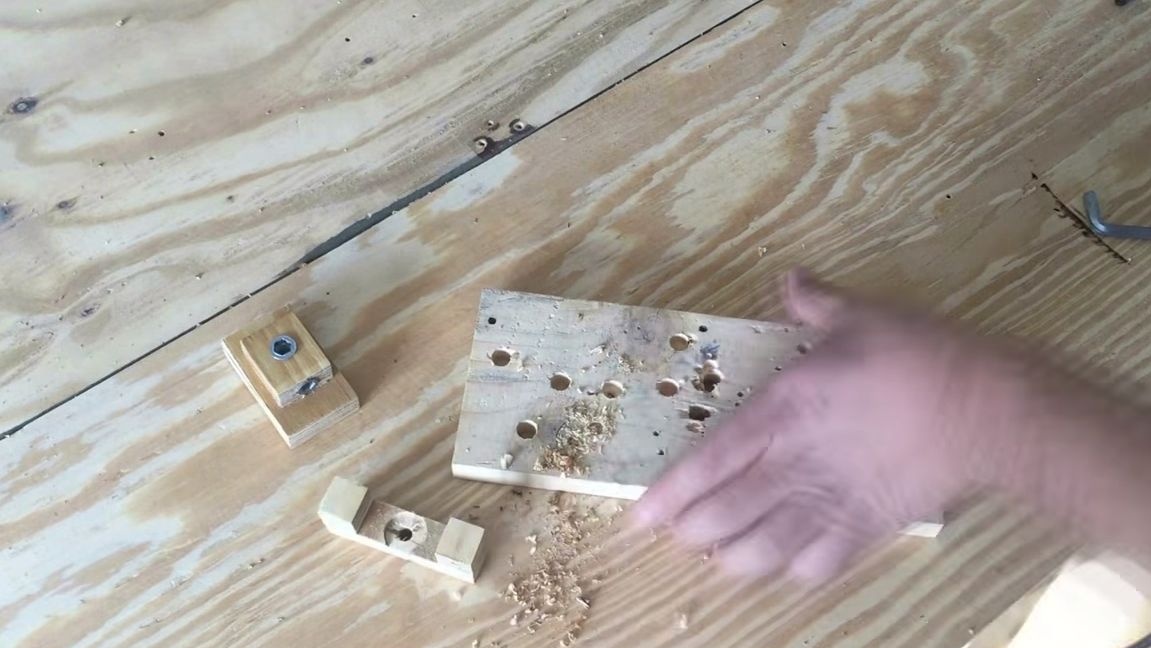
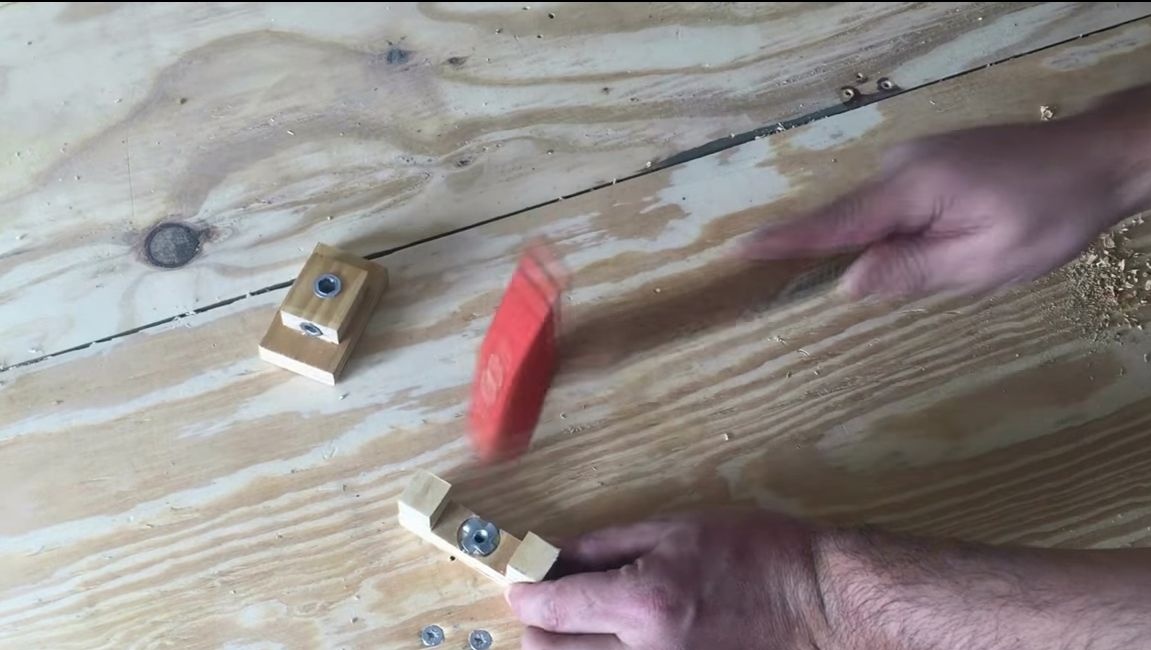
Fasteners for mounting bearings and nuts are made from pieces of plywood. For one driven and driving wheels, cut two squares out of plywood, drill holes and then drive nuts into the manufactured seats, preferably glued to epoxy.In the other square, install bearings for the drive axle.
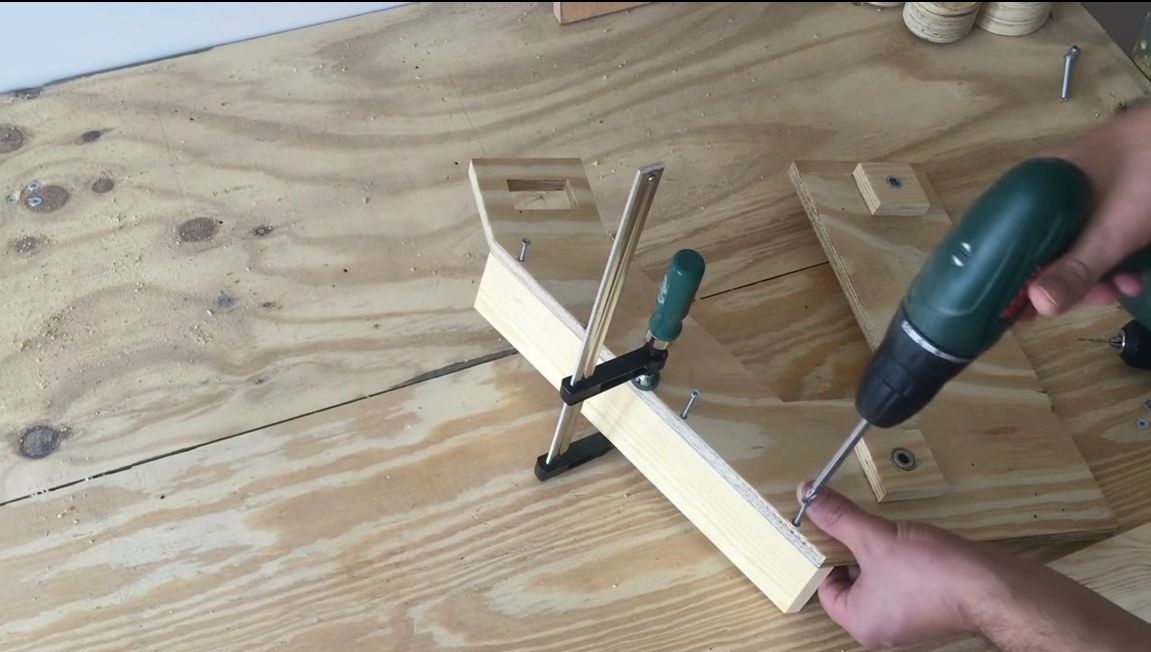
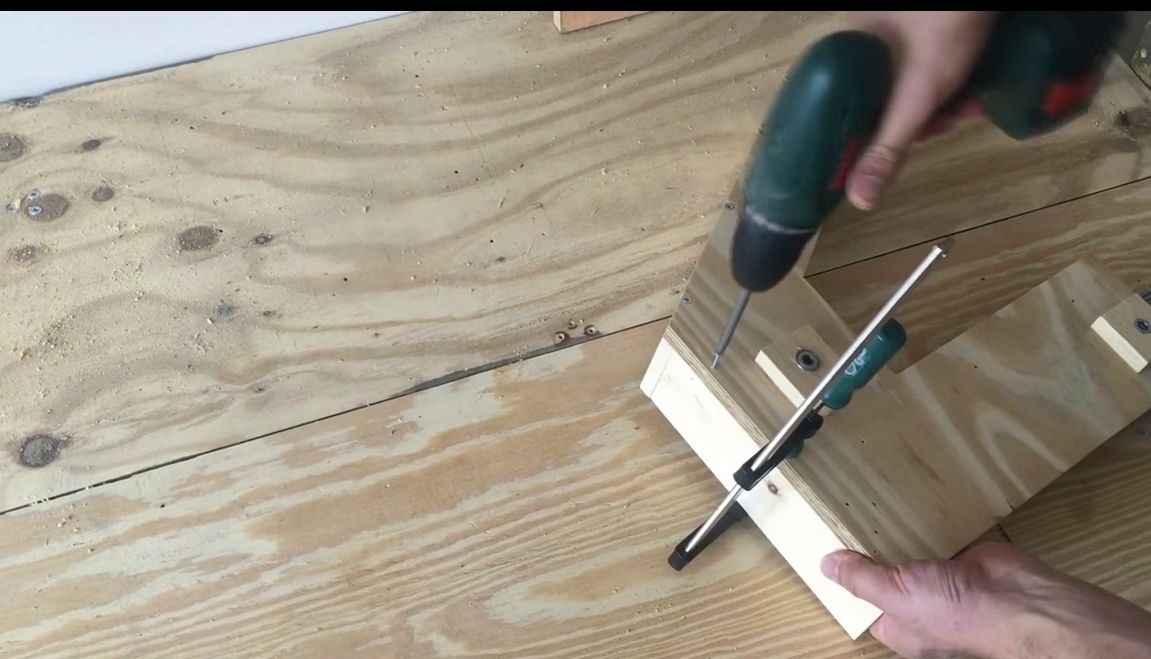
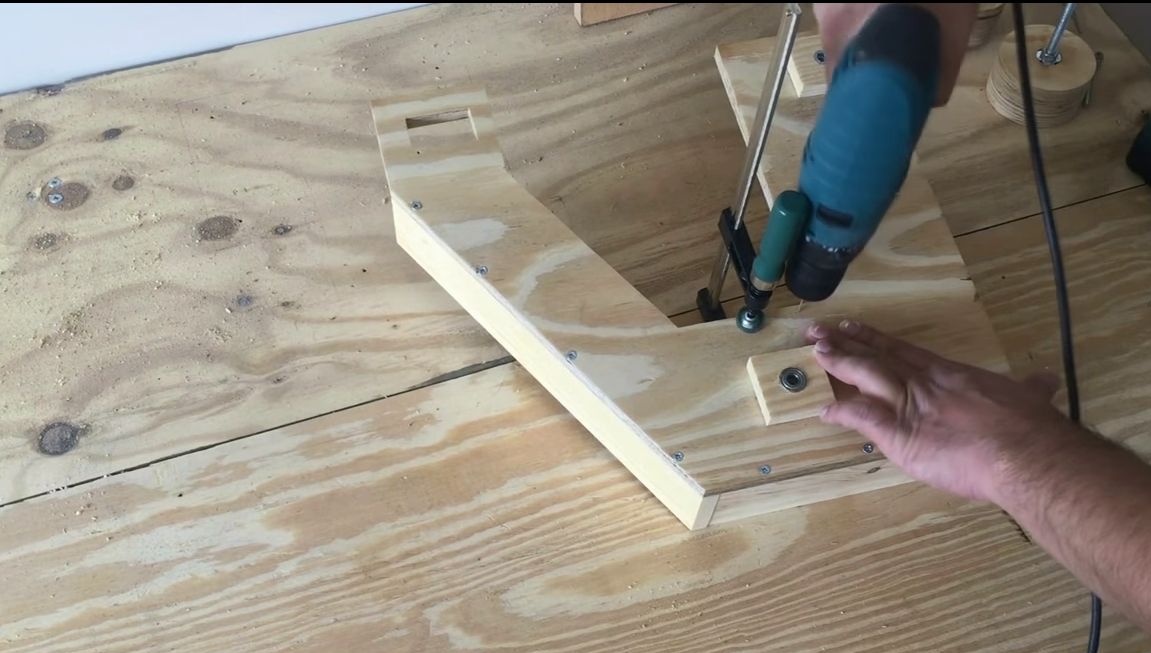
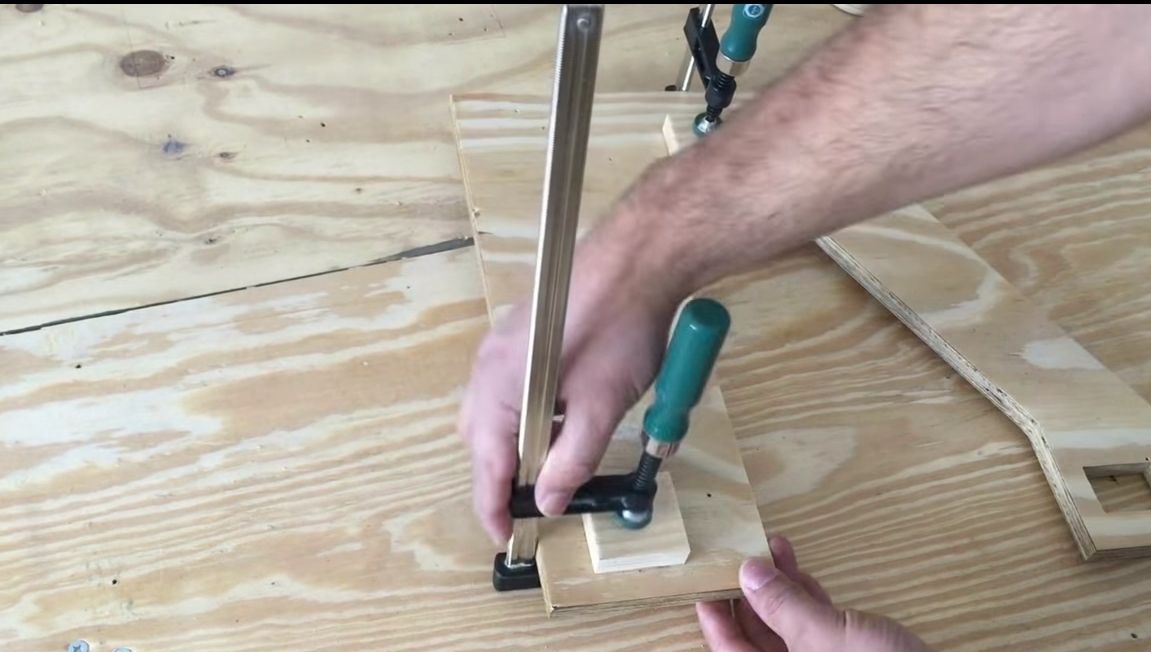
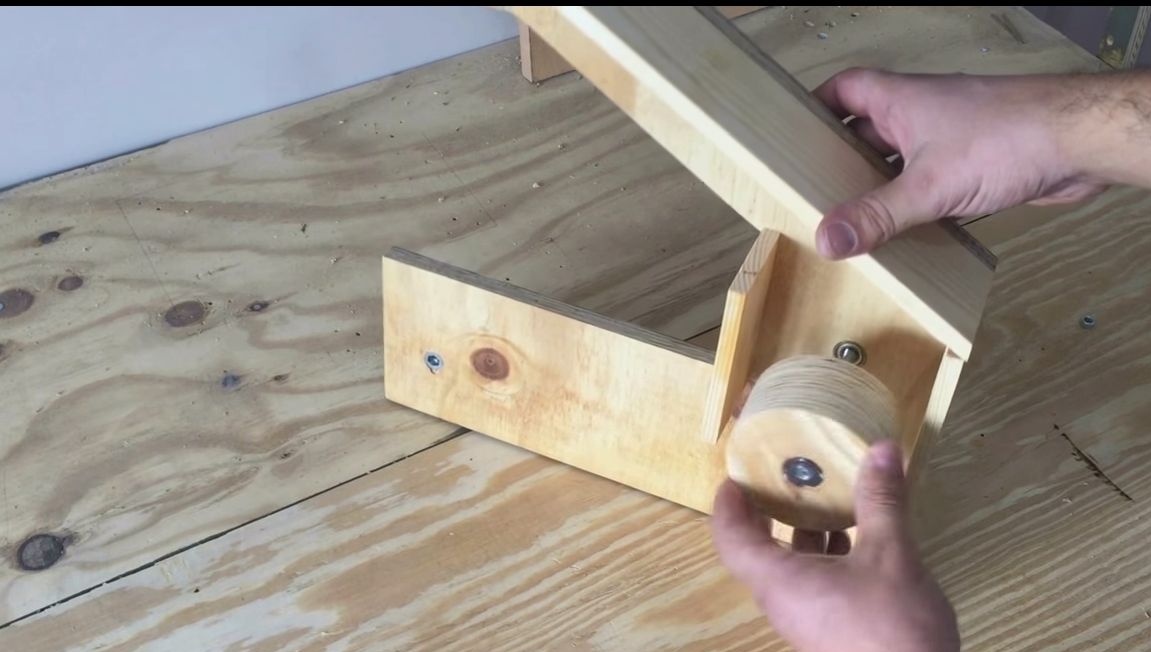
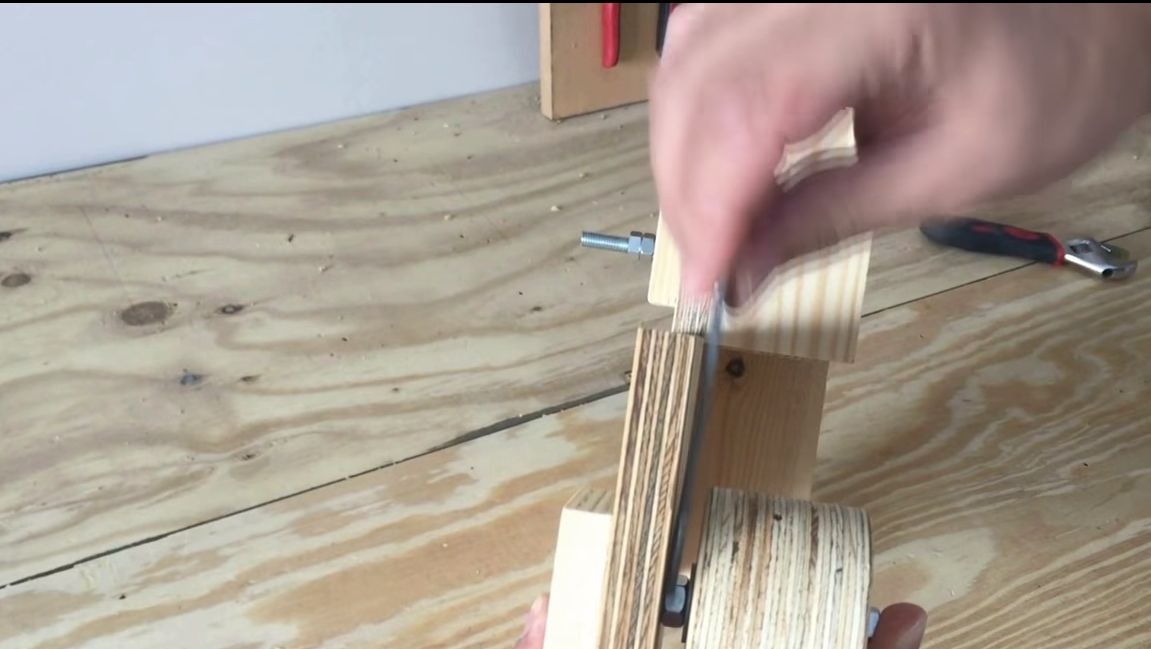
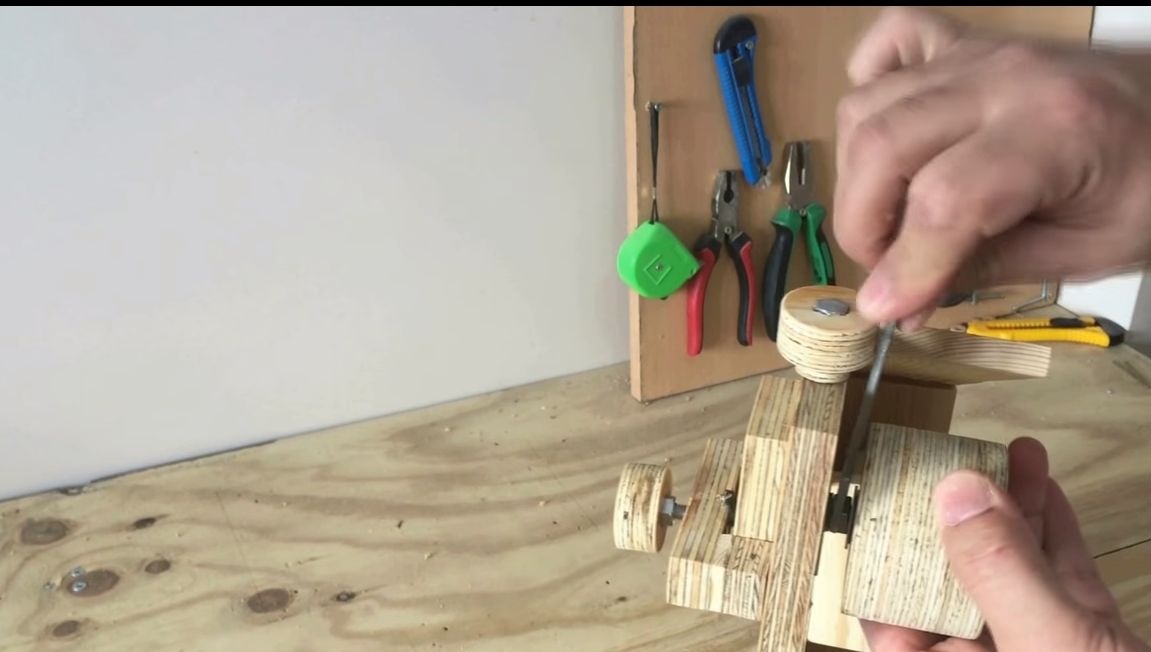
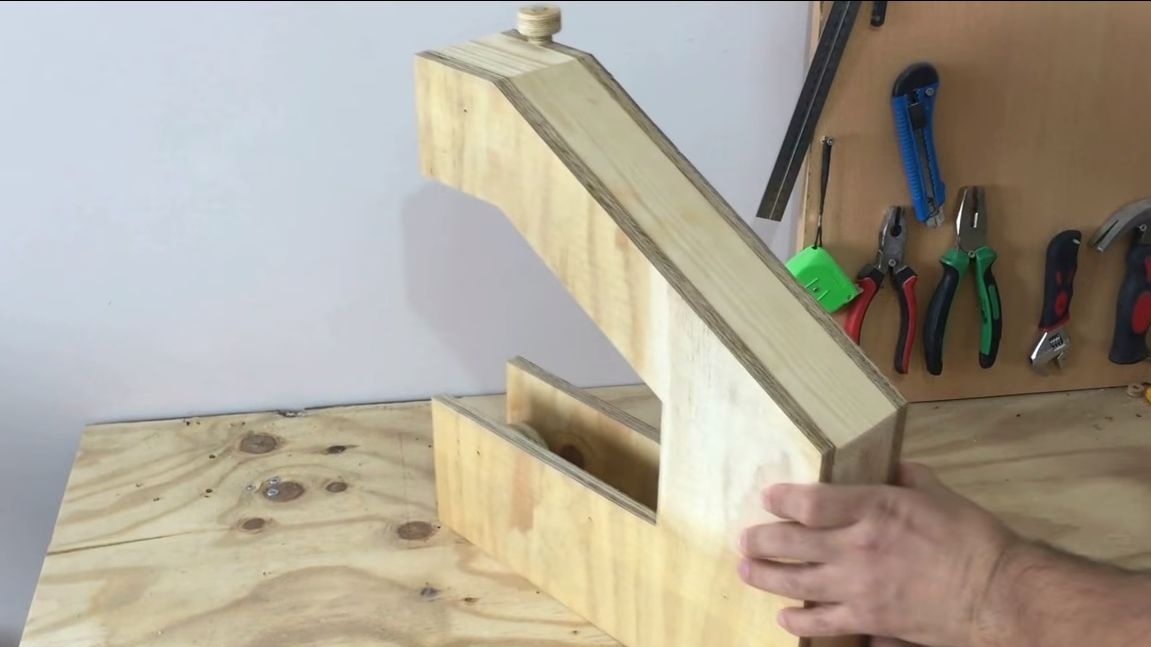
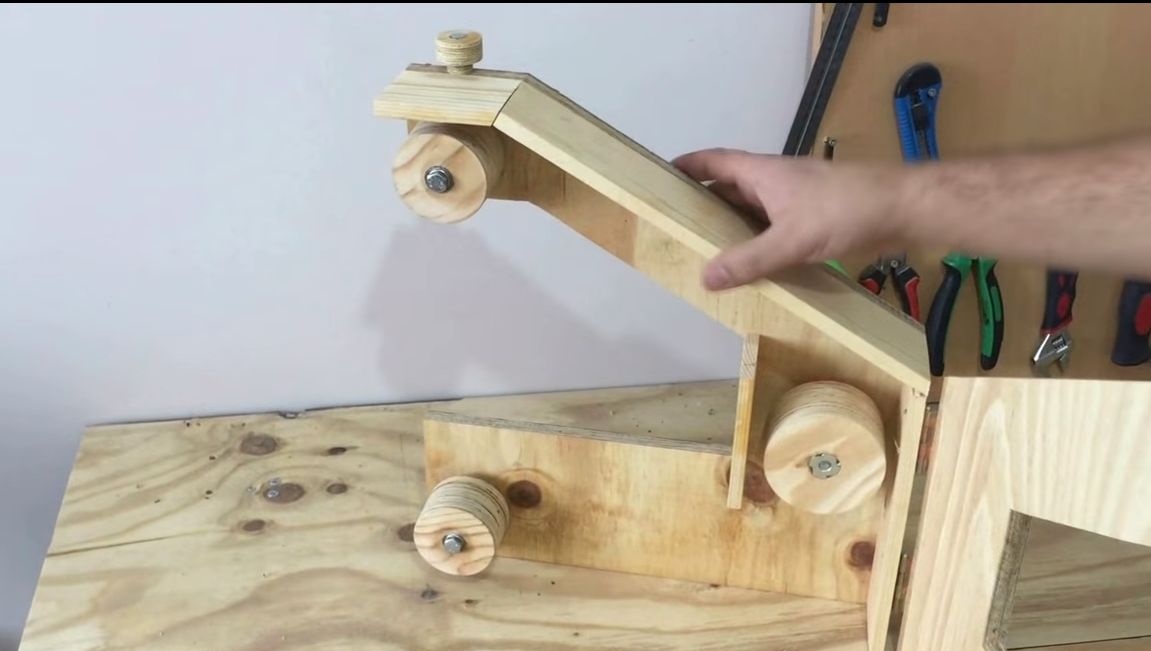
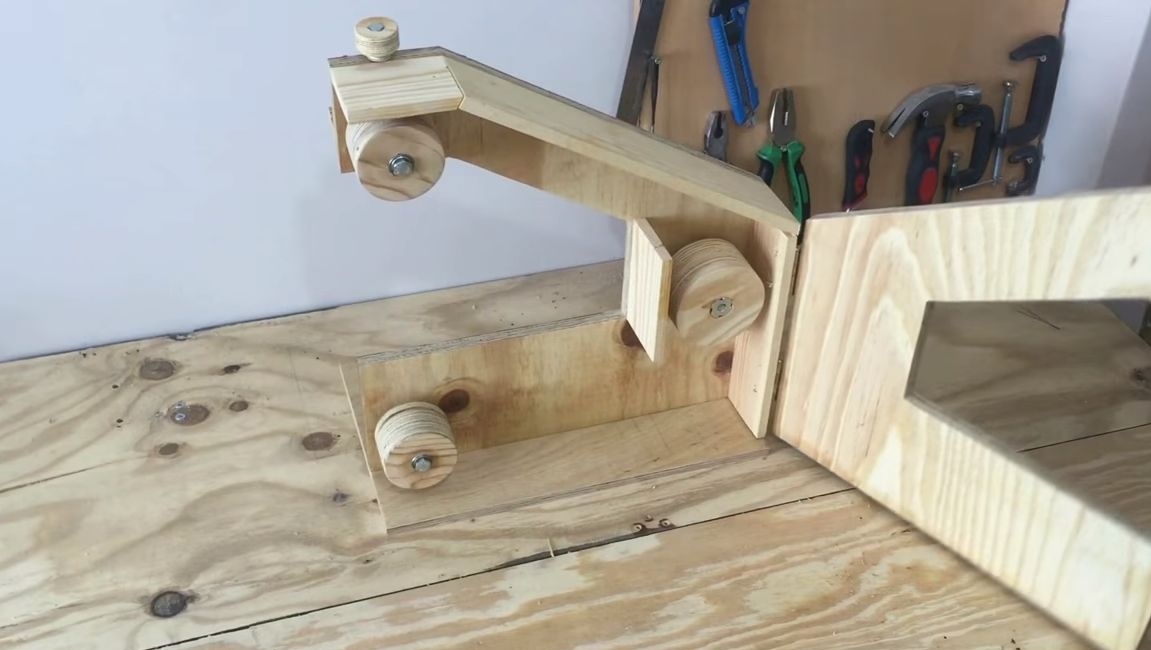
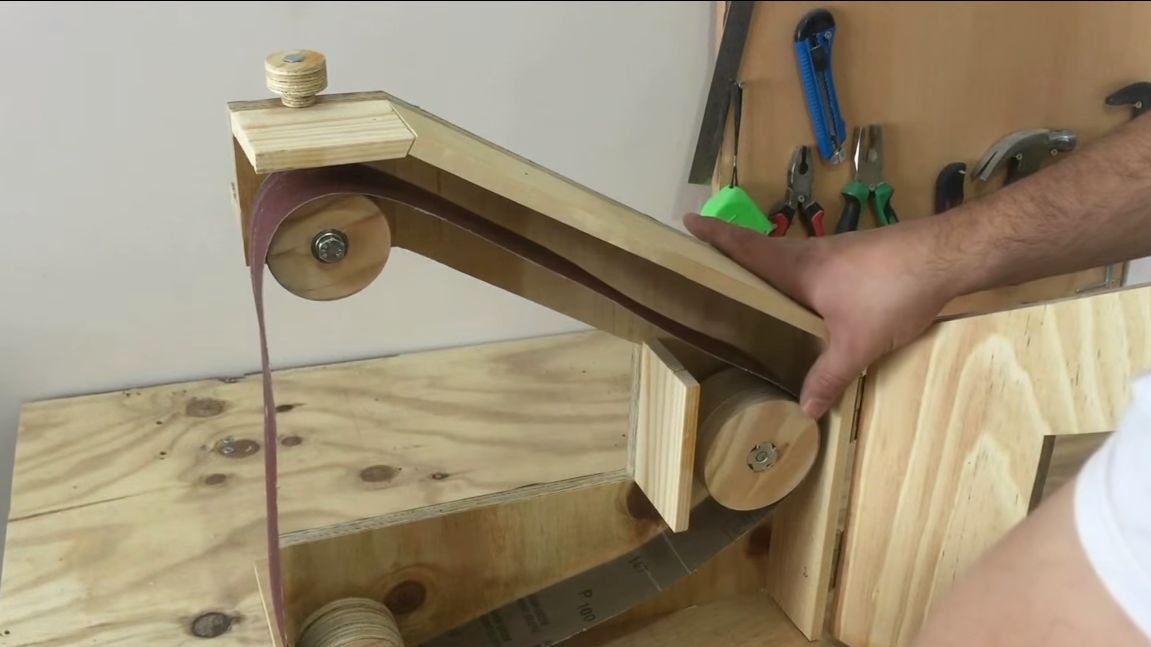
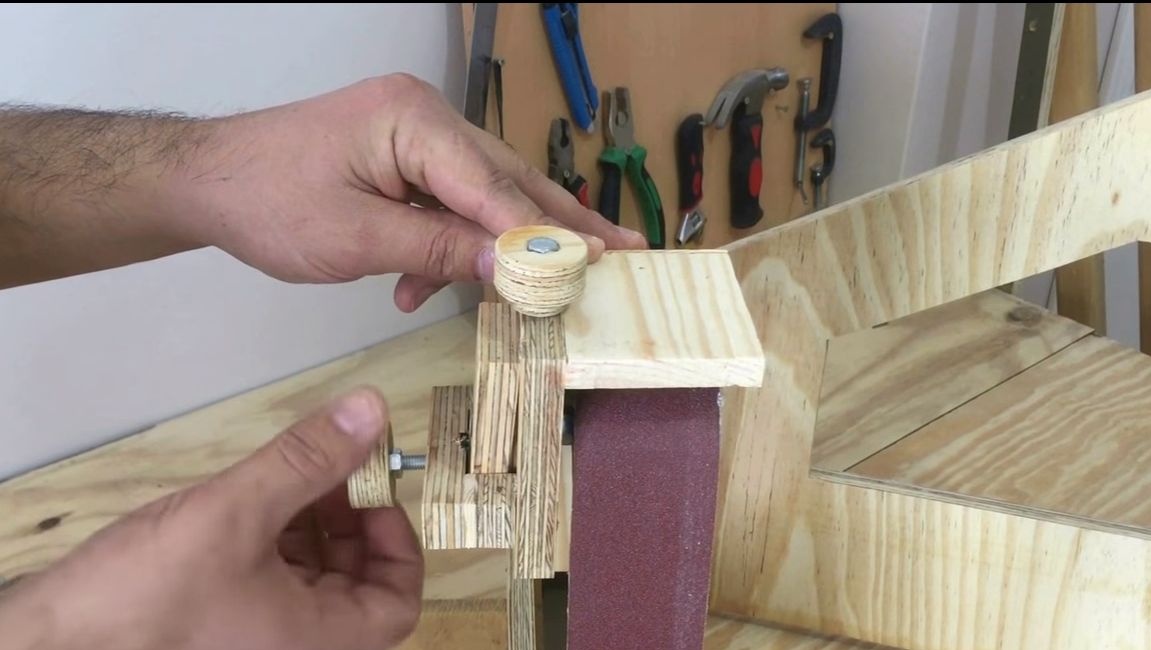
Step Three Stretching device
Another driven wheel is attached to the tensioner; cut out the corresponding groove for it in the frame. The tensioner has two adjustment knobs, one handle pulls the grinding belt, and the other allows you to adjust the machine so that the belt moves in the center of the wheels.

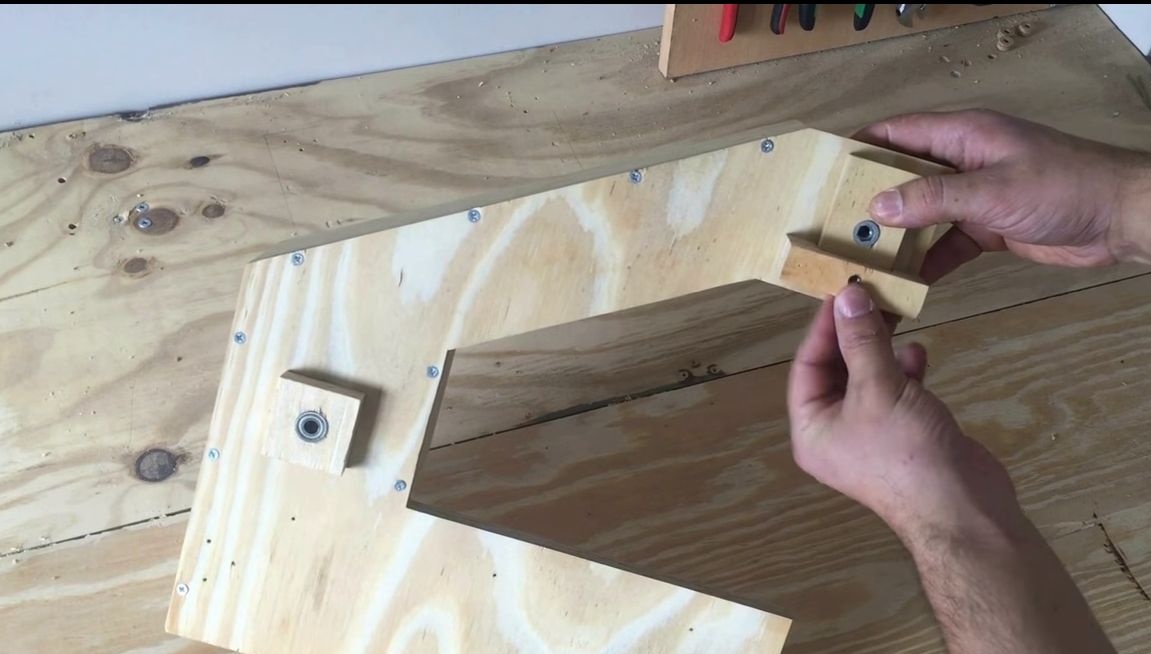
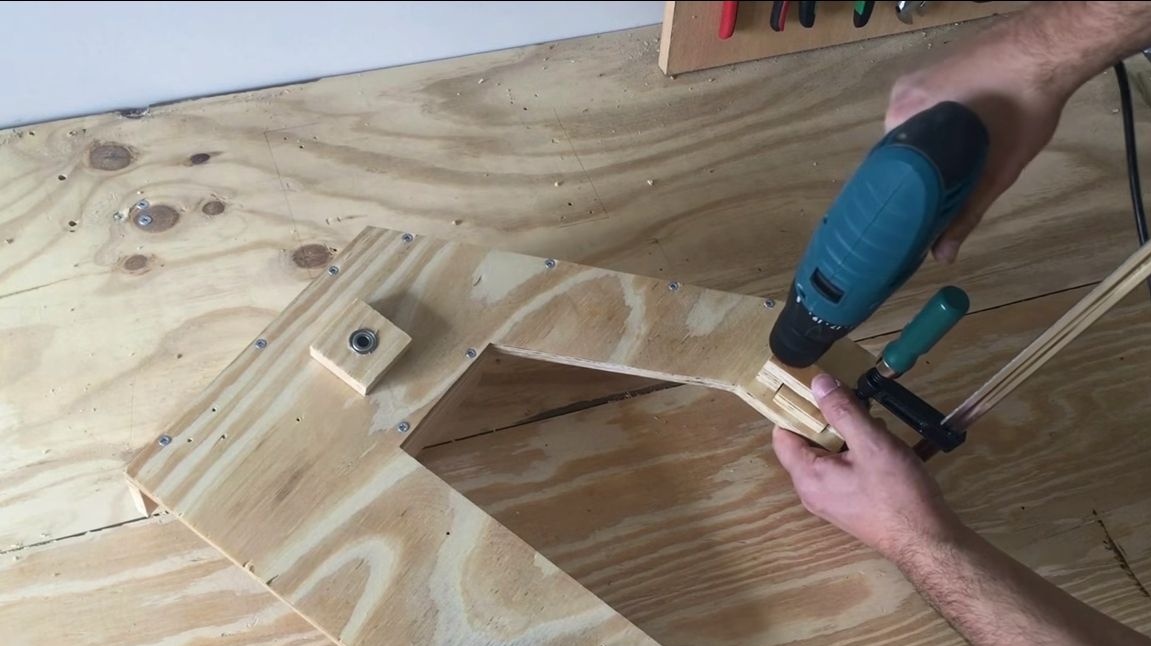
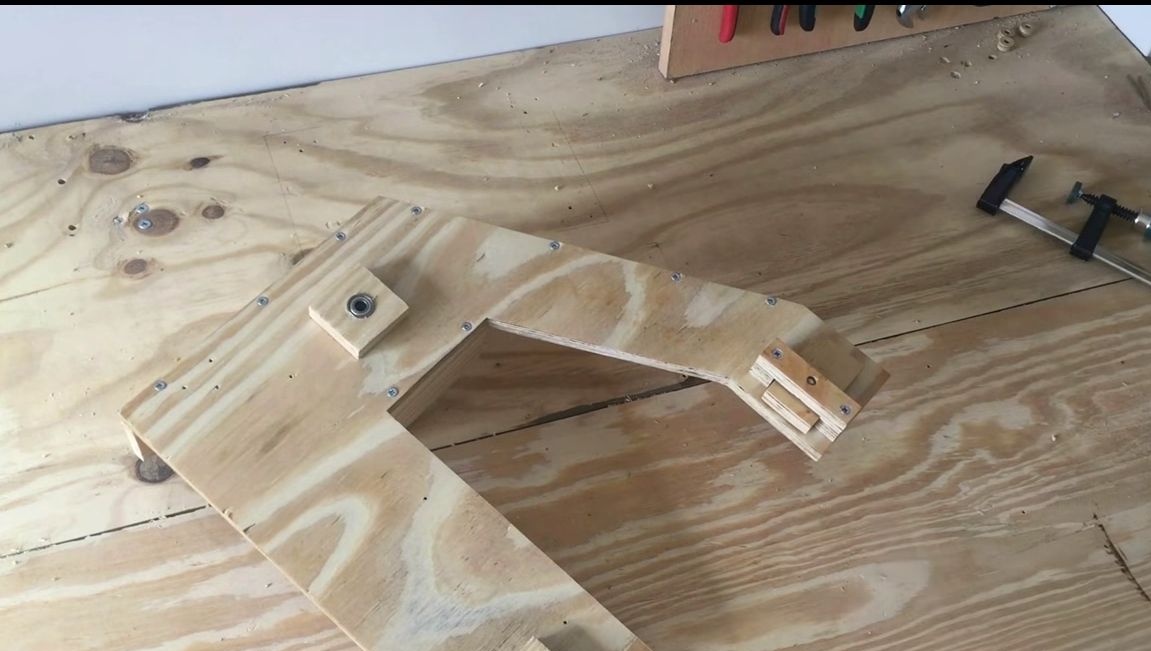
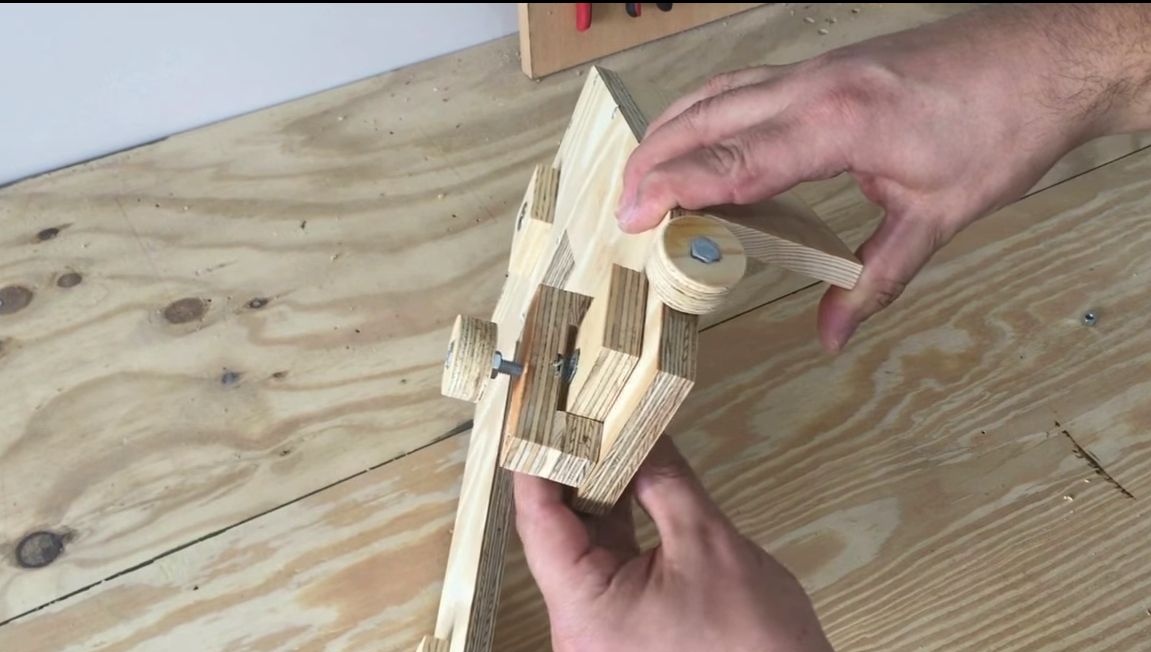
How is the tensioner done, look in more detail at the photo. Cut the necessary parts from plywood and install the nuts in them. The adjusting knob is a bolt, at the end of which a wheel cut out of plywood is fixed.
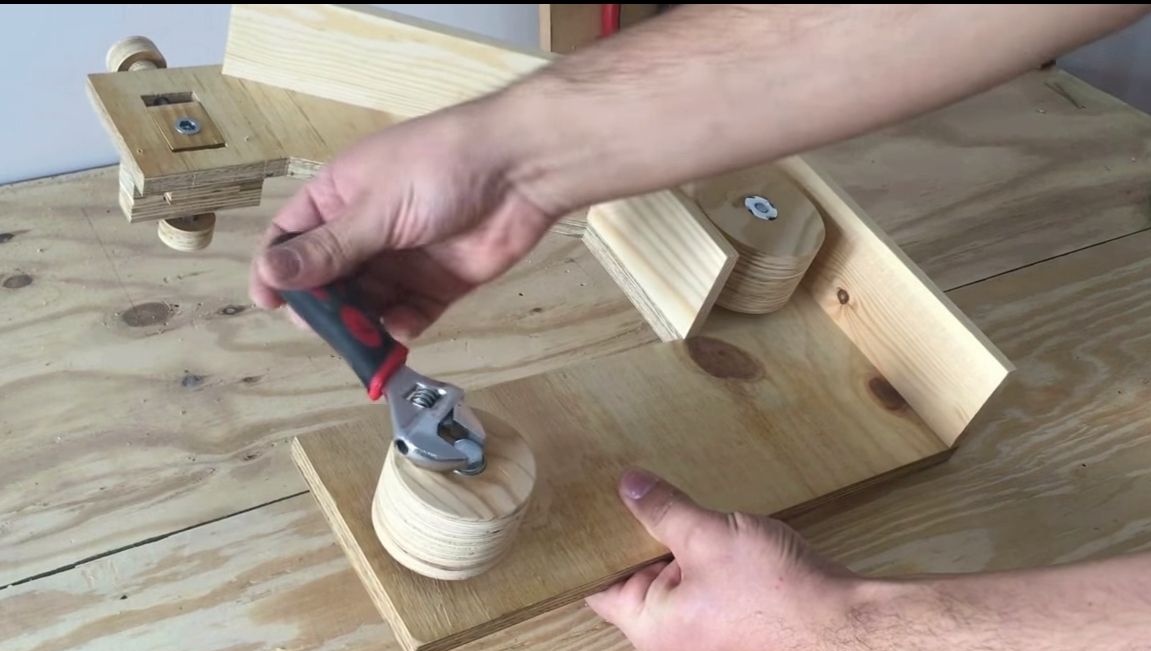
Step Four We make wheels

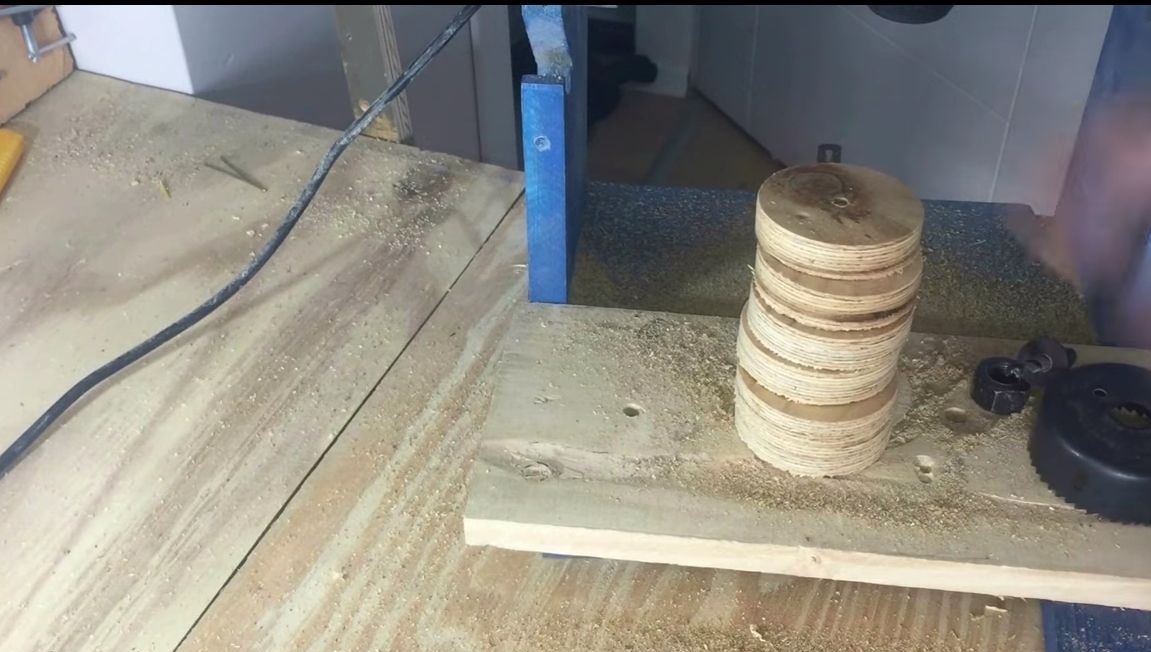
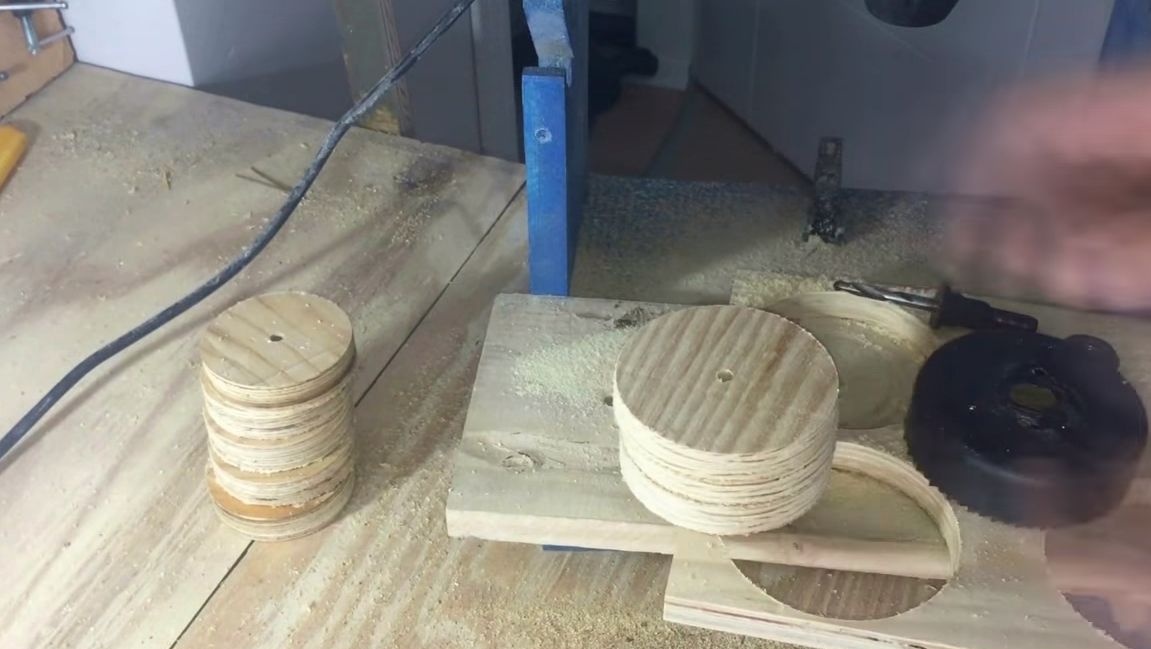
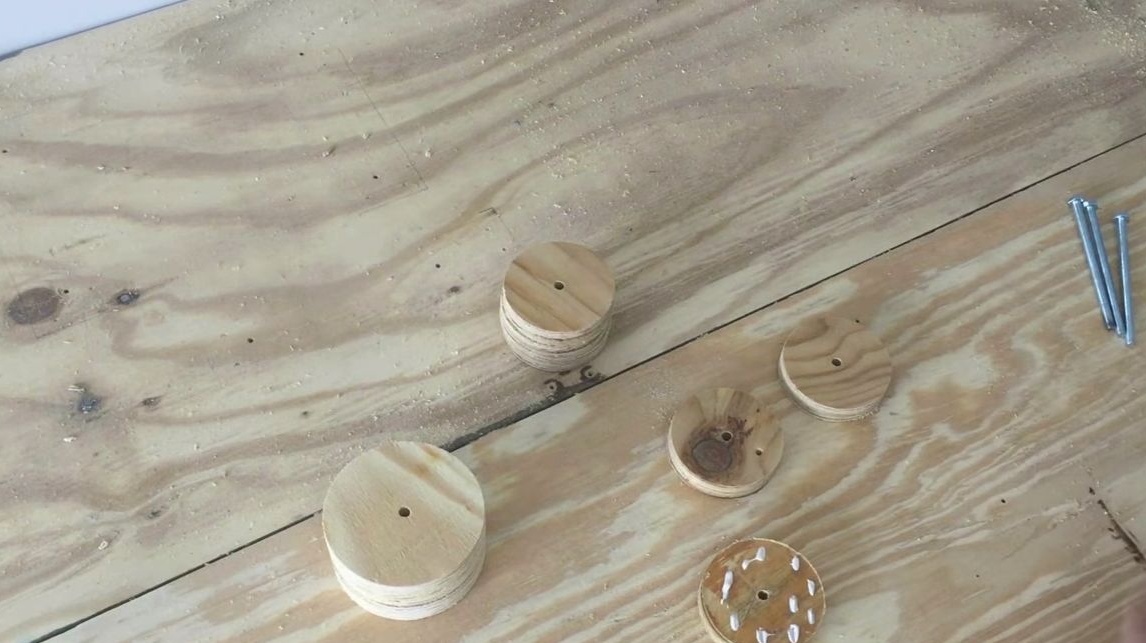
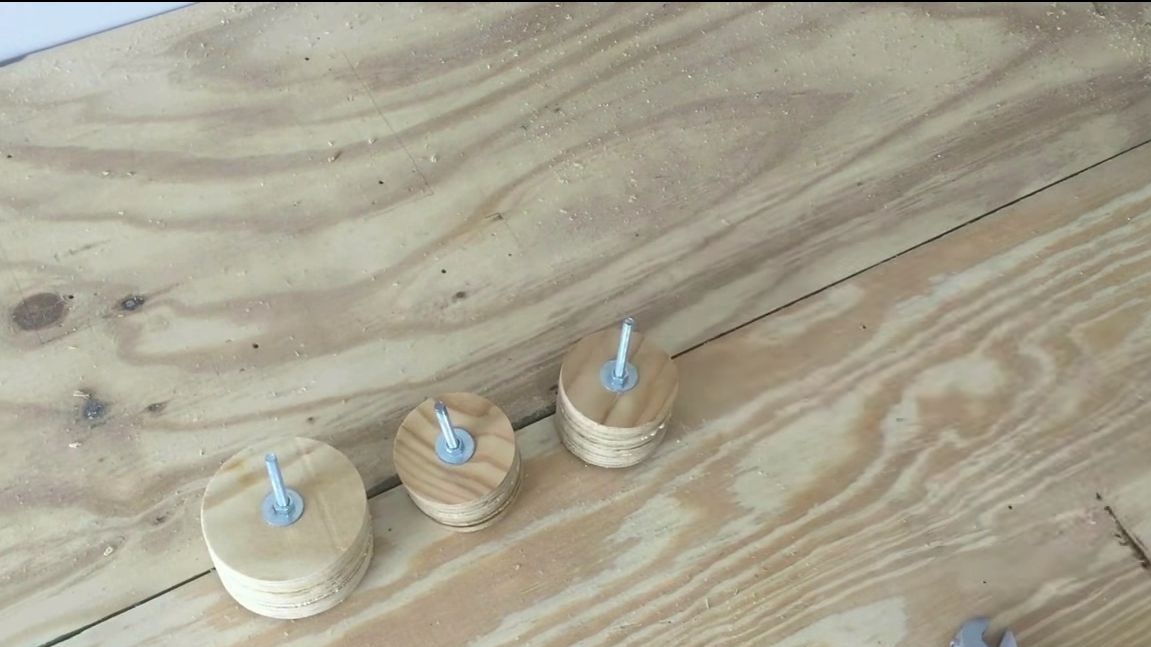
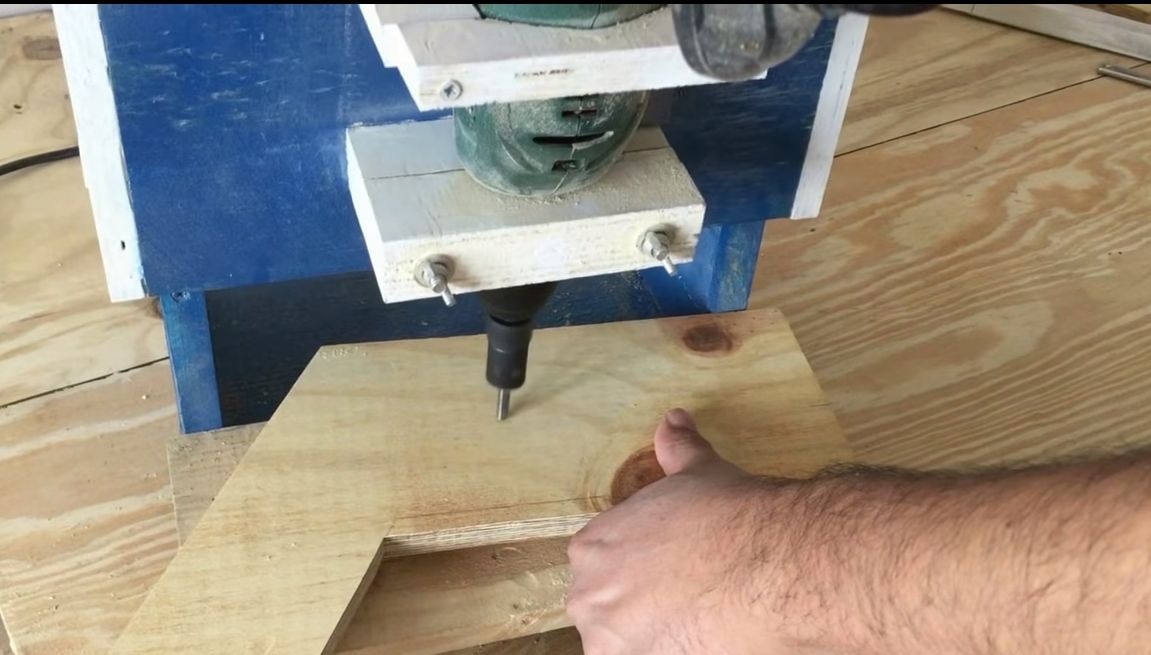
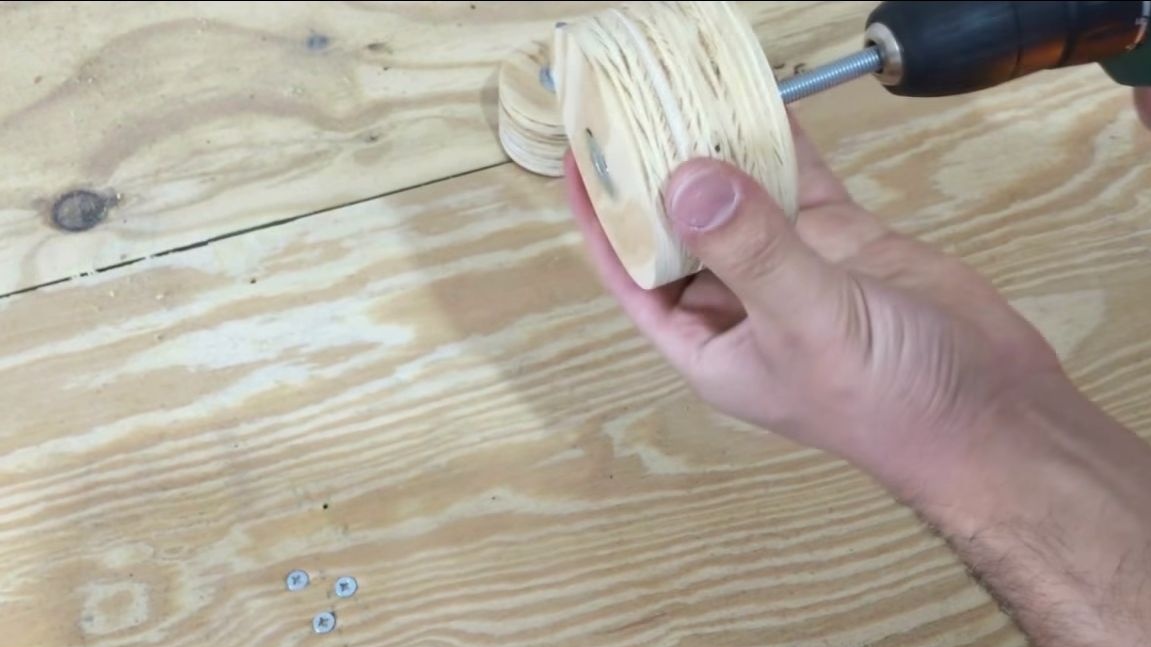
Let's start with the driven wheels, they are smaller in diameter than the drive wheel and there should be two of them. Each wheel is made of three layers of plywood. Cut 6 rounds with a bat and a drilling machine. Apply glue to the parts and glue the wheels, tighten them with a bolt and nut for a while until the glue dries.
The drive wheel is made in a similar way.
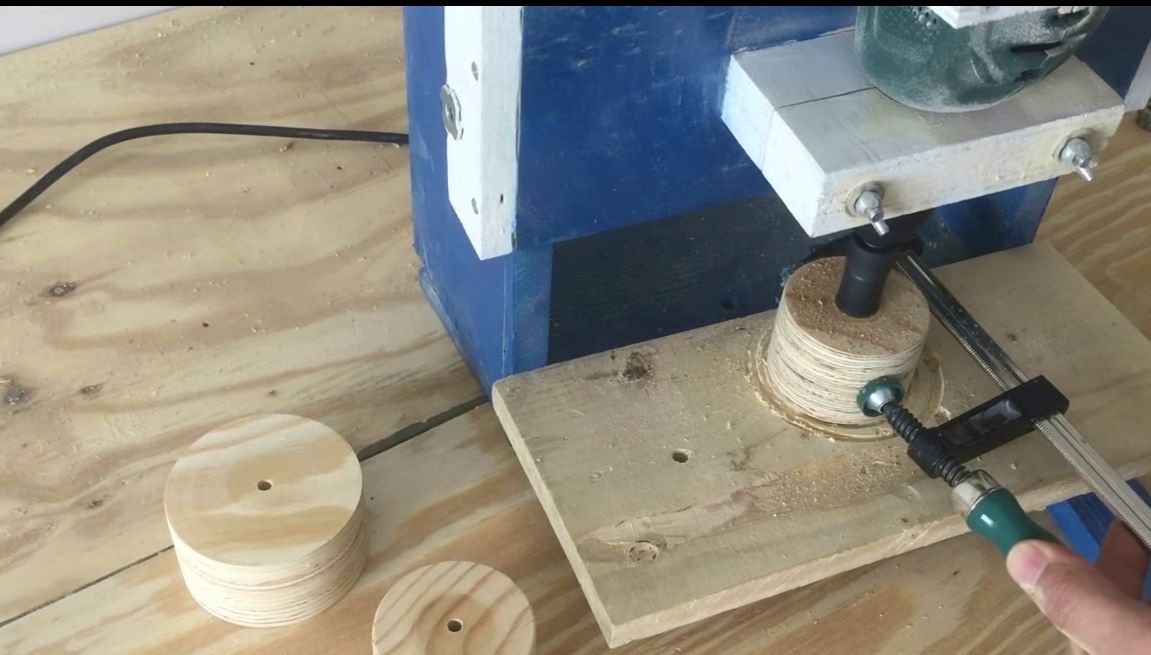
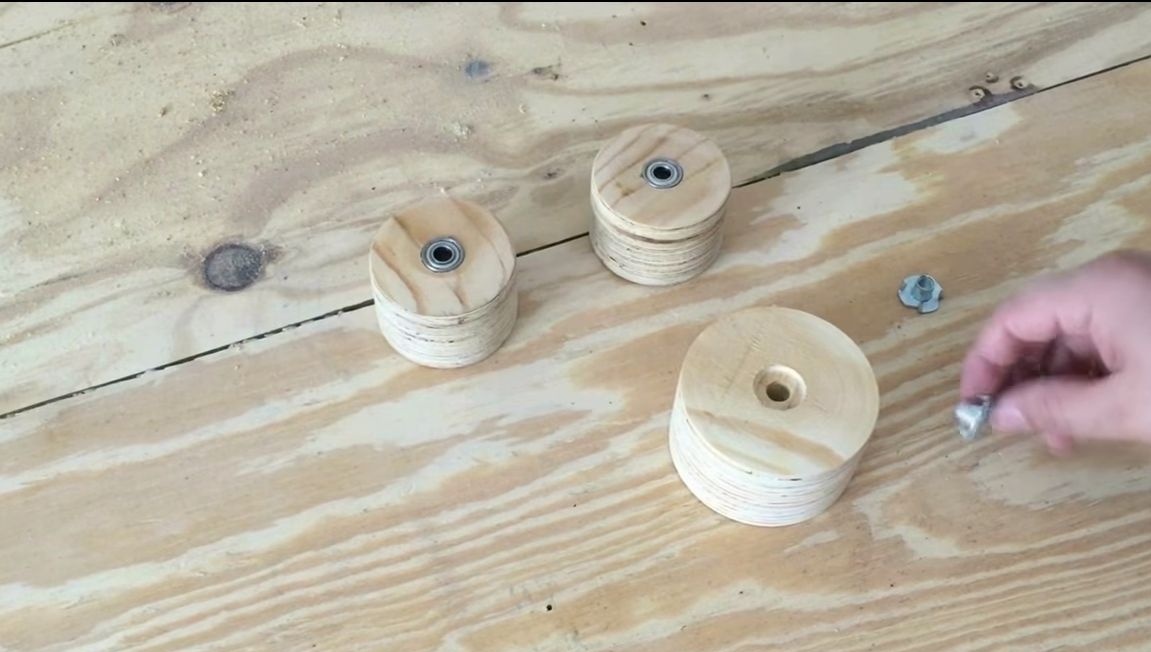
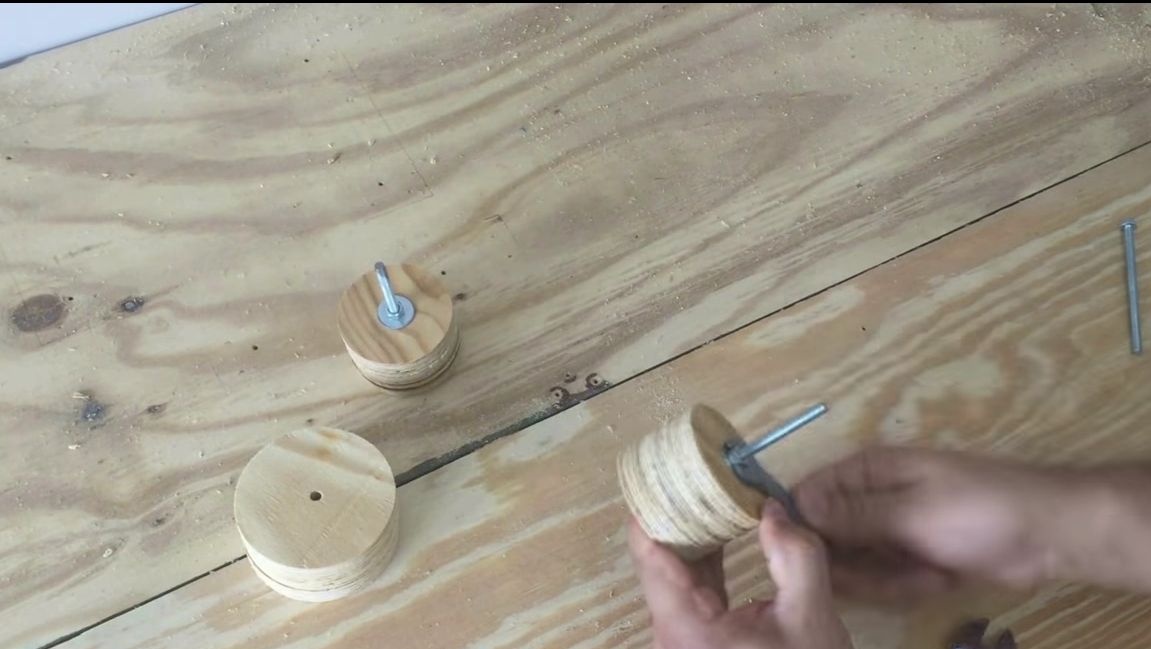
Set the "filling" of the wheels. We install bearings in two small wheels on both sides, that is, all you need is 4 of them. Drill seats under them and carefully press in. Bolts act as an axis of the wheels, we select the washers necessary in size, put on both sides and tighten the nuts a little. Wheels must rotate freely on axles!
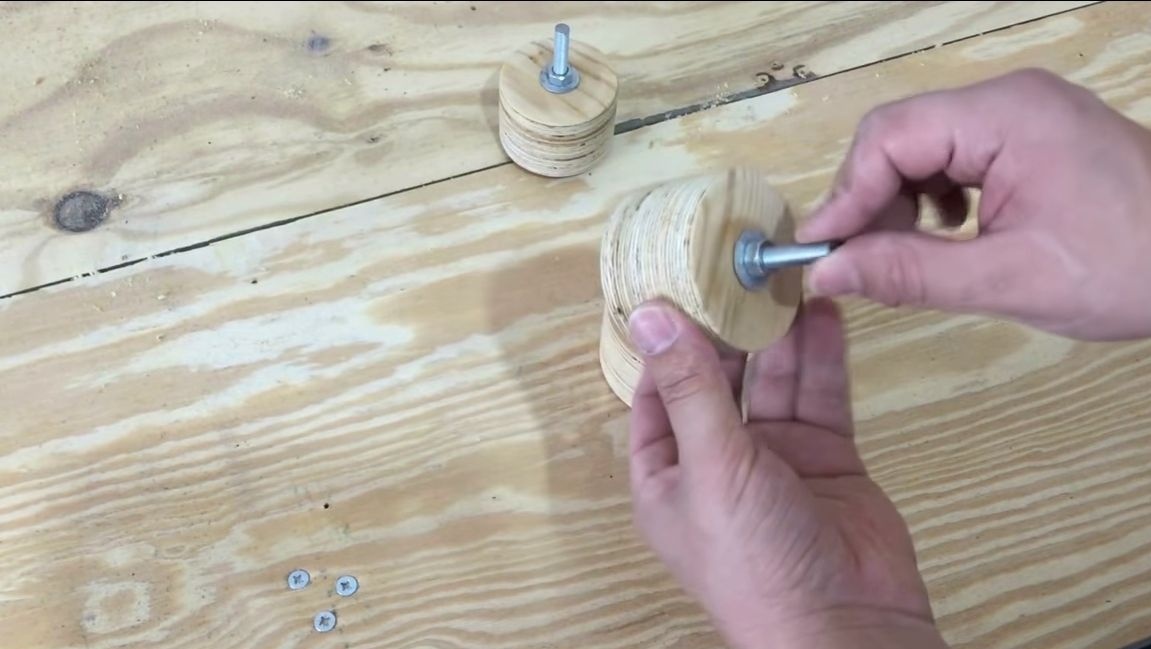
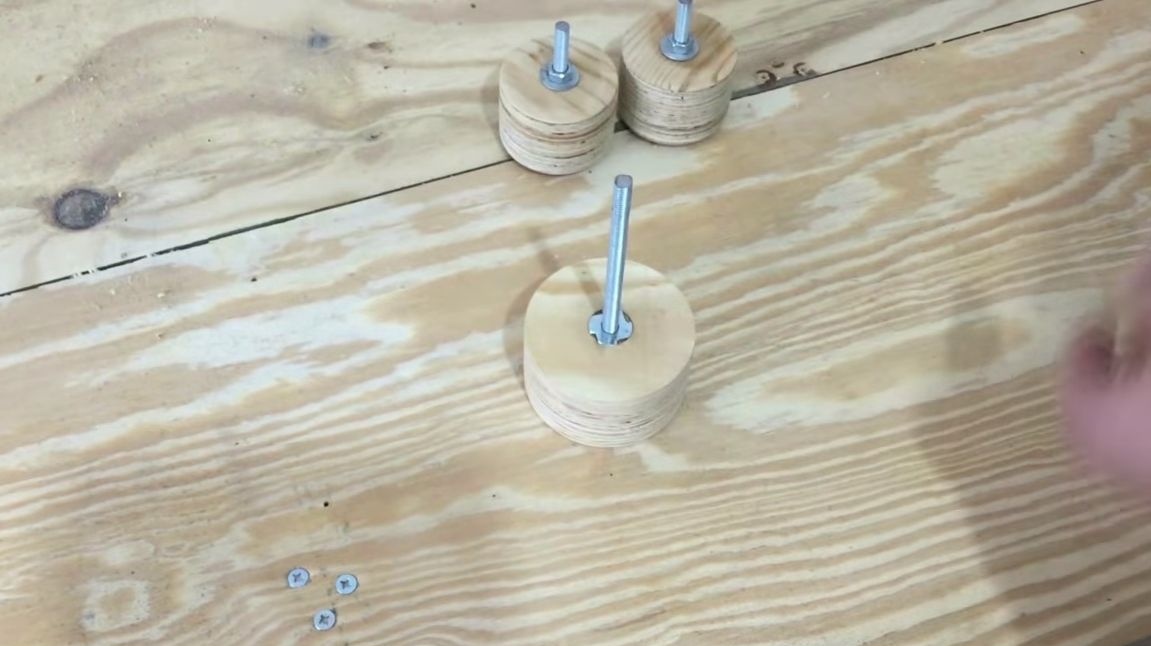

As for the drive wheel, the principle is similar, but nuts are used instead of bearings. We twist the threaded rod as an axis and fix the thread so that it does not untwist using a nut.
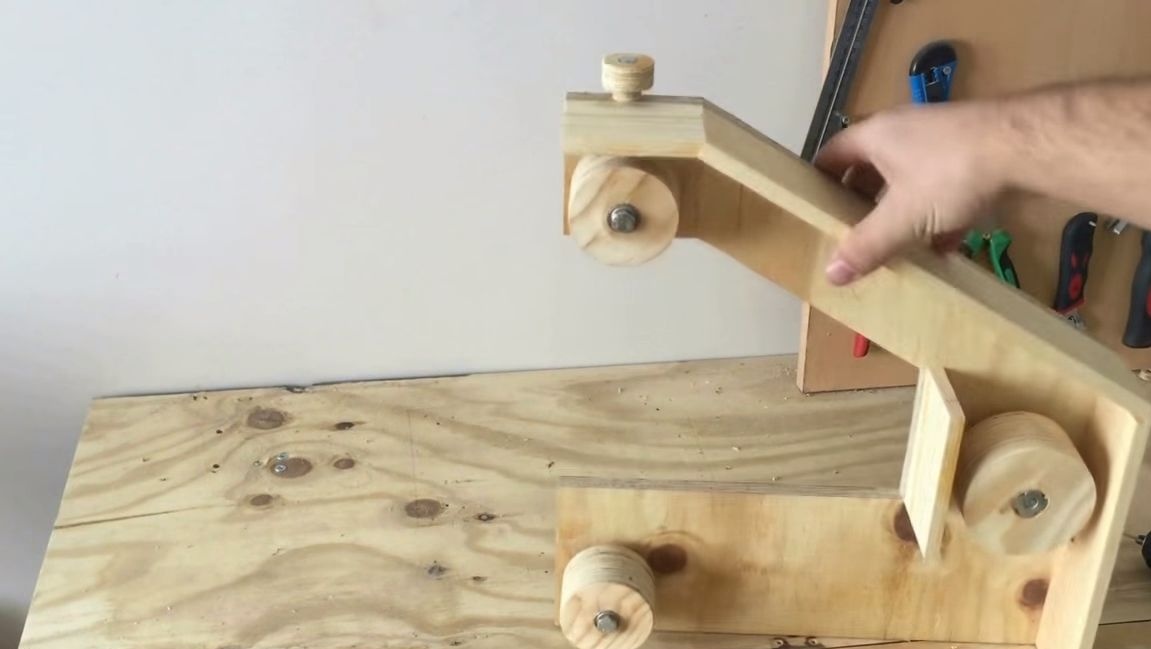
Step Five Set the wheels in place
Let's start with the drive shaft, install it in the place where the bearings are installed in the frame. On the other hand, we twist two nuts so that they do not untwist when the machine is working. Using the nuts, adjust the axis so that the play is minimal, but the wheel should rotate and the bearing should not be overtightened.
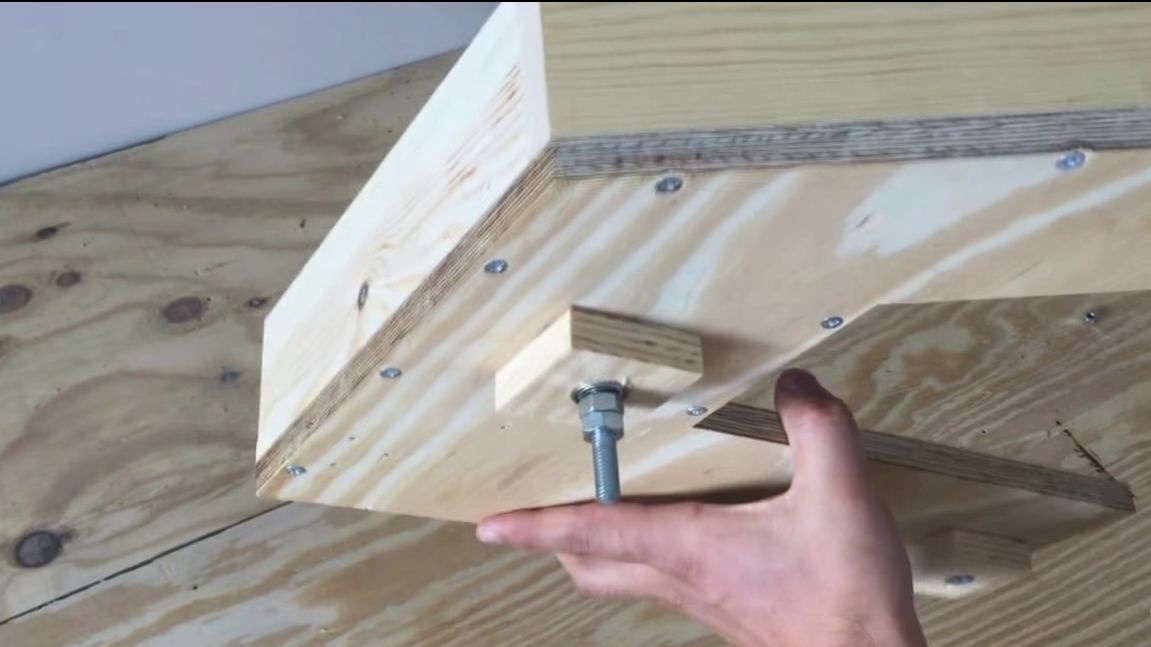

Getting to the driven wheels. Install the lower wheel. Screw the wheel axle into the nut installed in the frame. There will be a nut between the wheel and the frame, fix and adjust the wheel with it.
We pass to the upper wheel, it is fastened similarly to the lower one, only to the tensioner.
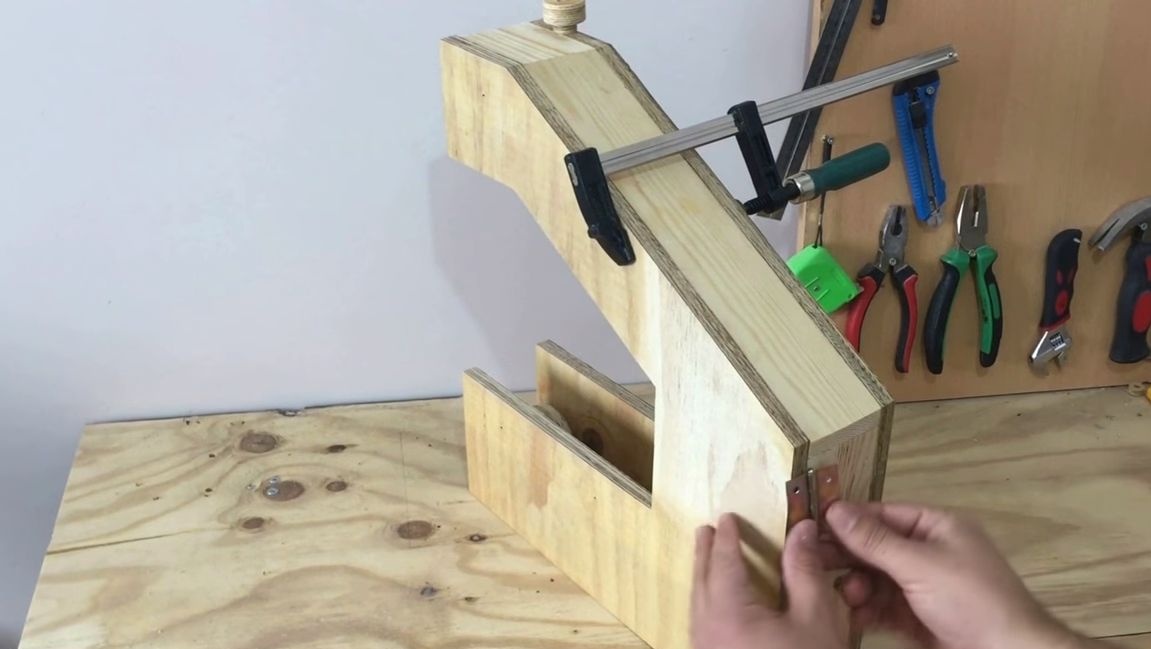
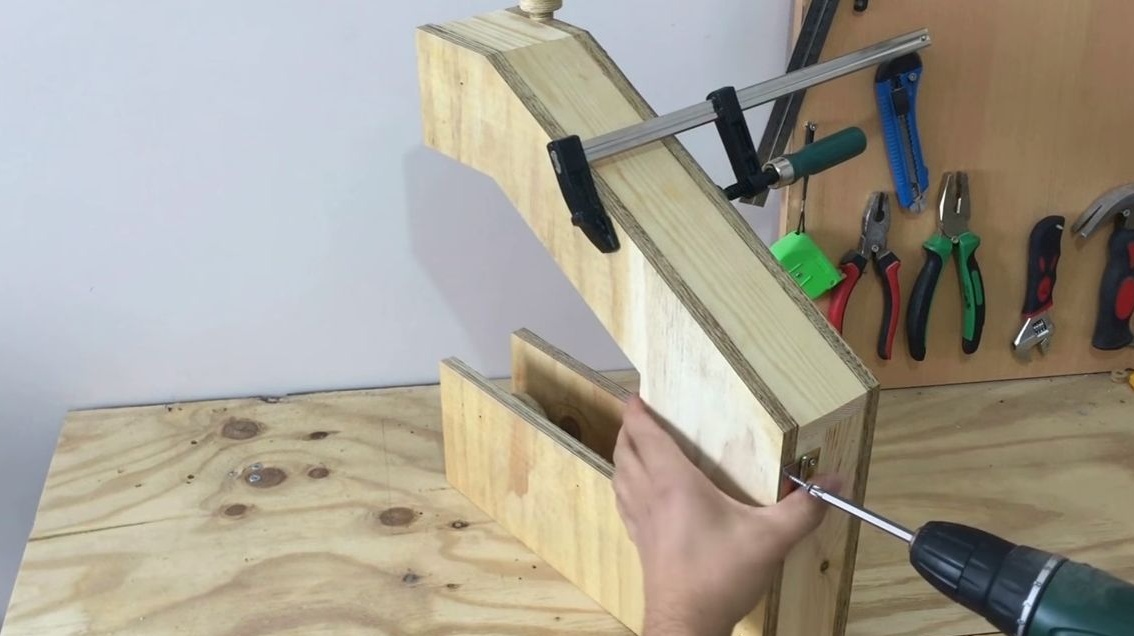
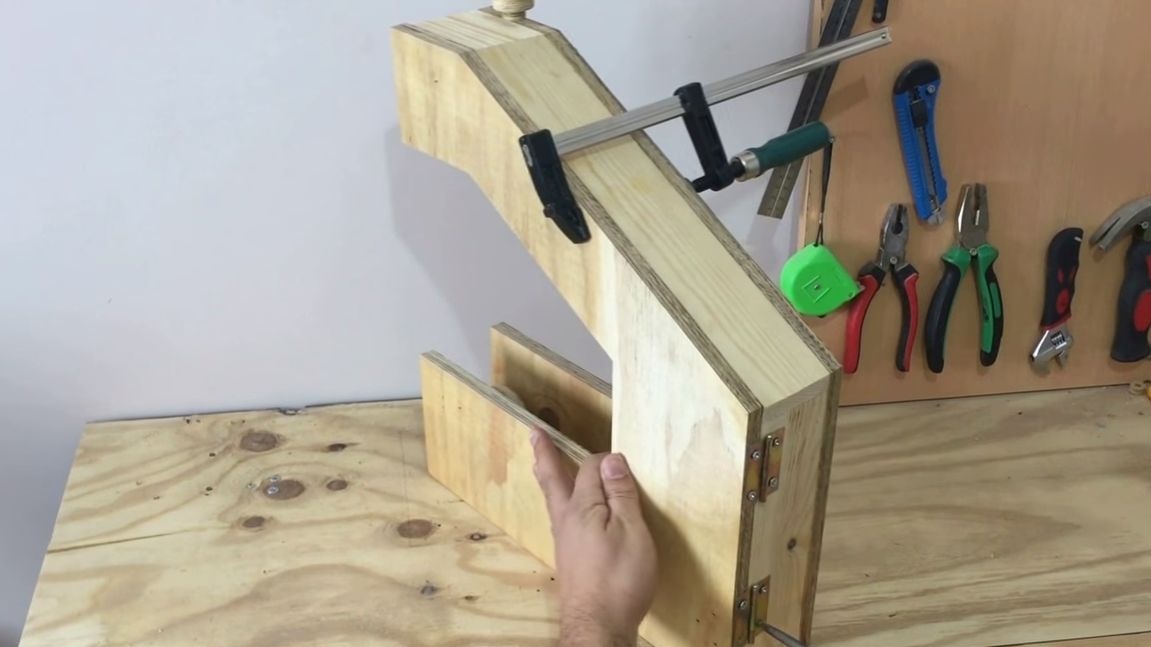
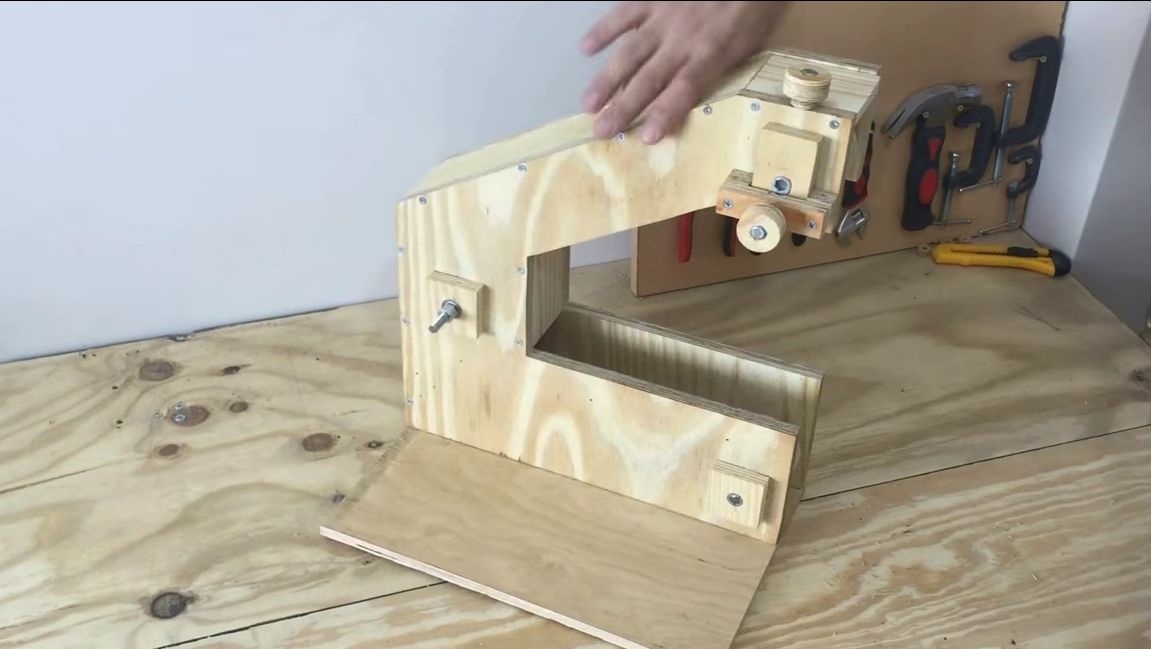
Step Six Put the side cover
Of course, the machine should be closed during operation, but we should be able to install a grinding belt. You had to cut the side cover earlier, we fasten it with the help of door hinges. For the door, it is also advisable to come up with a valve so that it does not open spontaneously.
Seventh step. The basis for the machine
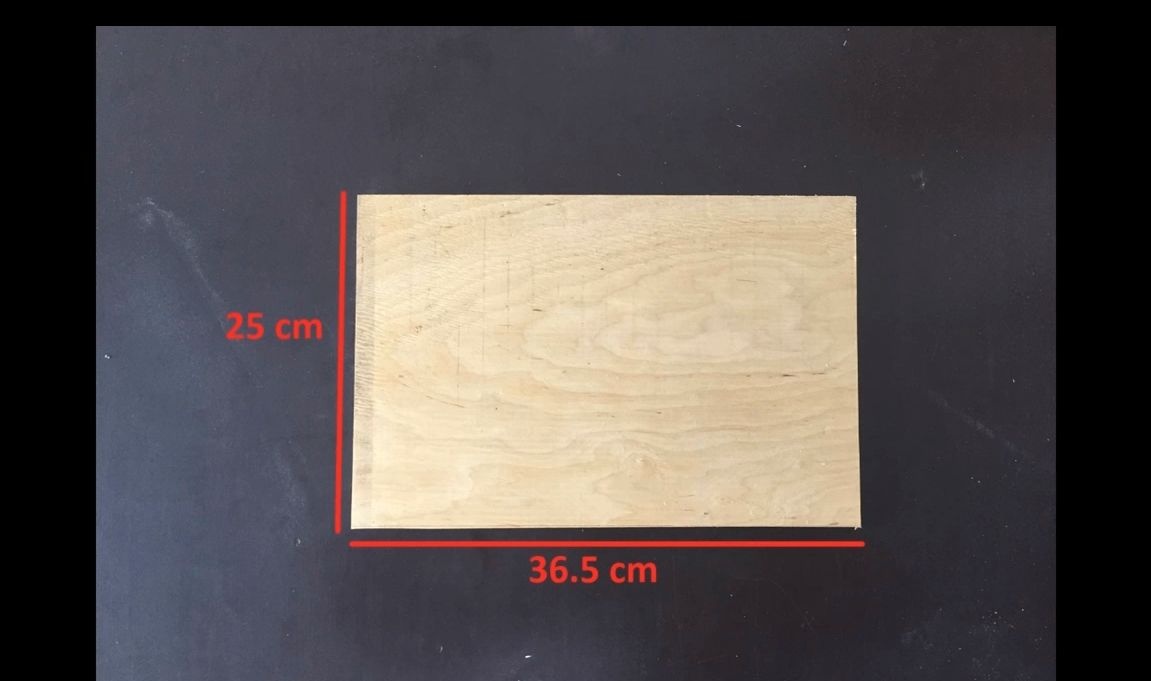
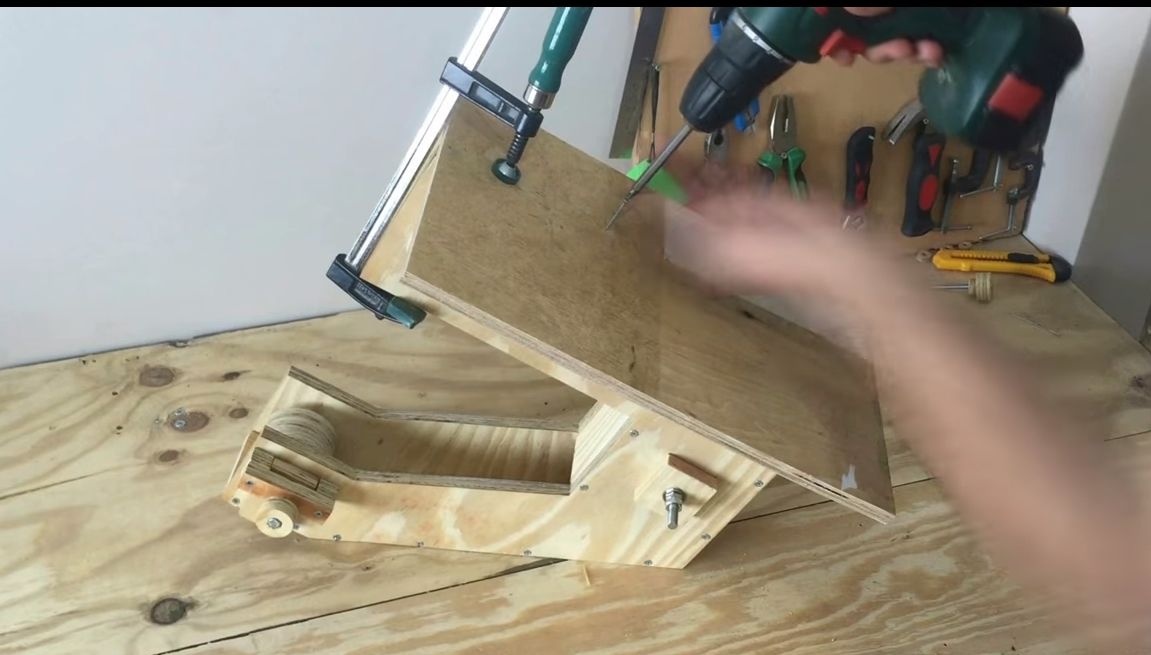
Screw the base to the machine, for this you need a sheet of plywood.
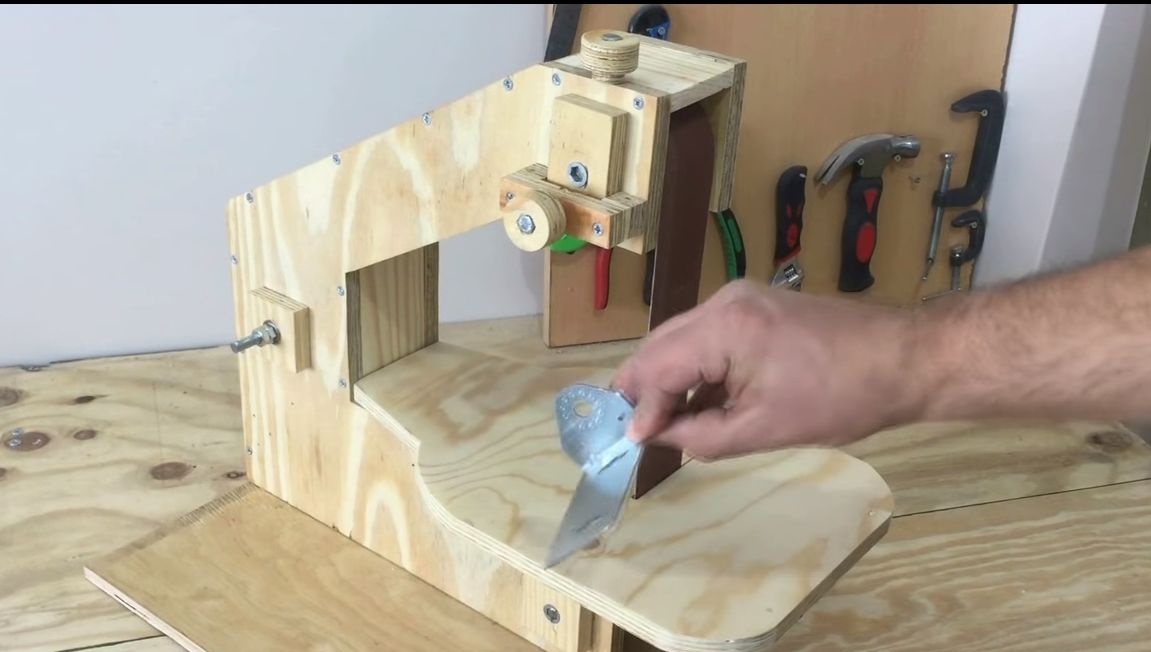
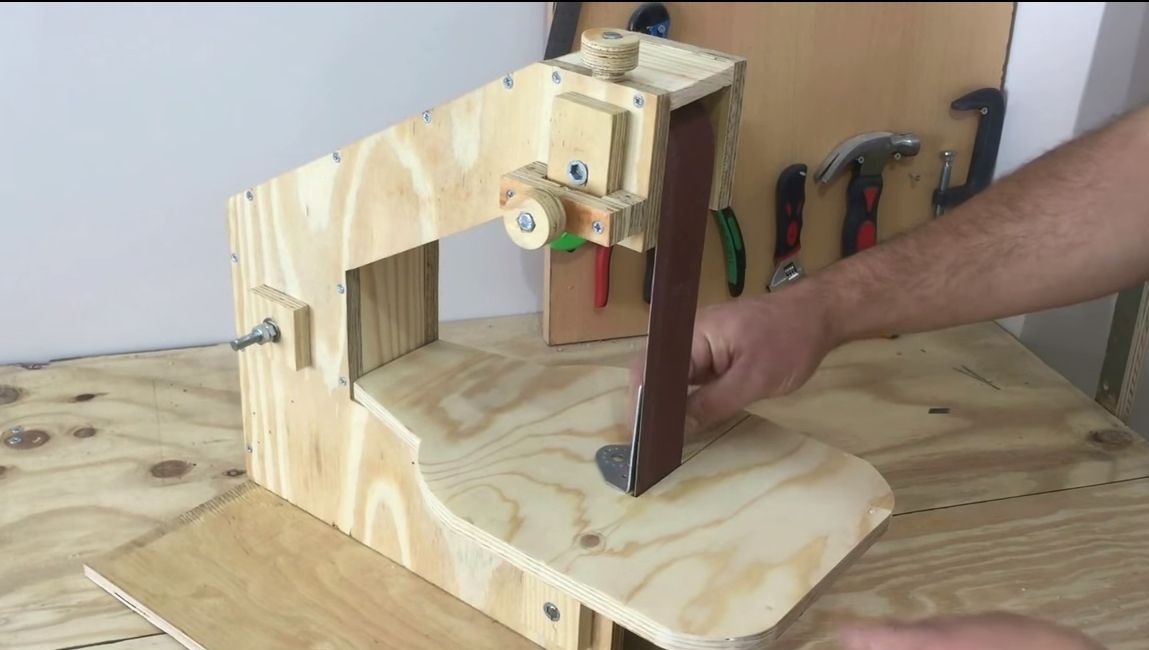
Step Eight. We prepare and install the grinding belt
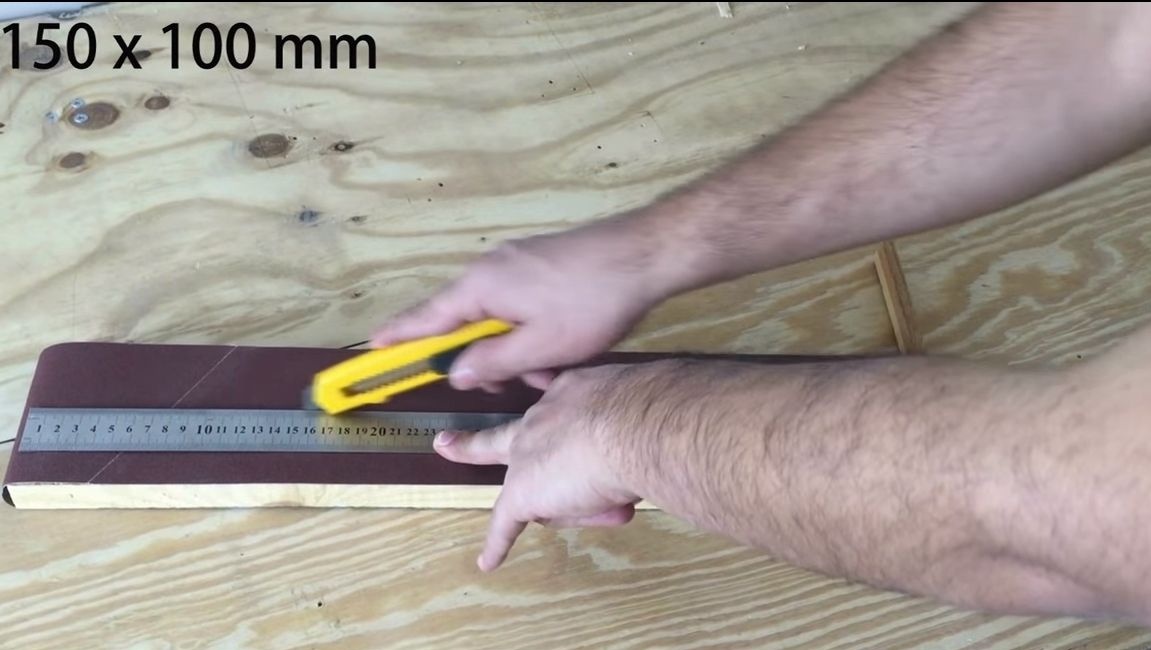
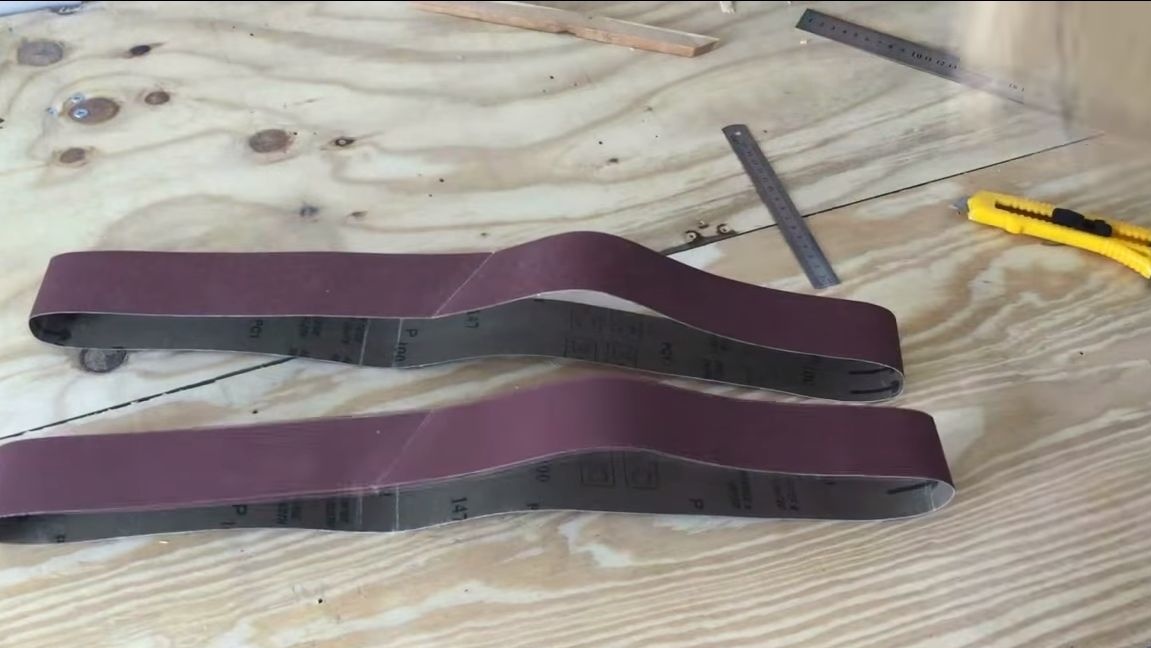
The purchased sanding belt will be wide to install in the machine. But the author made the machine so that the belt could be cut into two parts and as a result get two pieces. We cut it with a ruler into two halves, using a clerical knife or something similar.
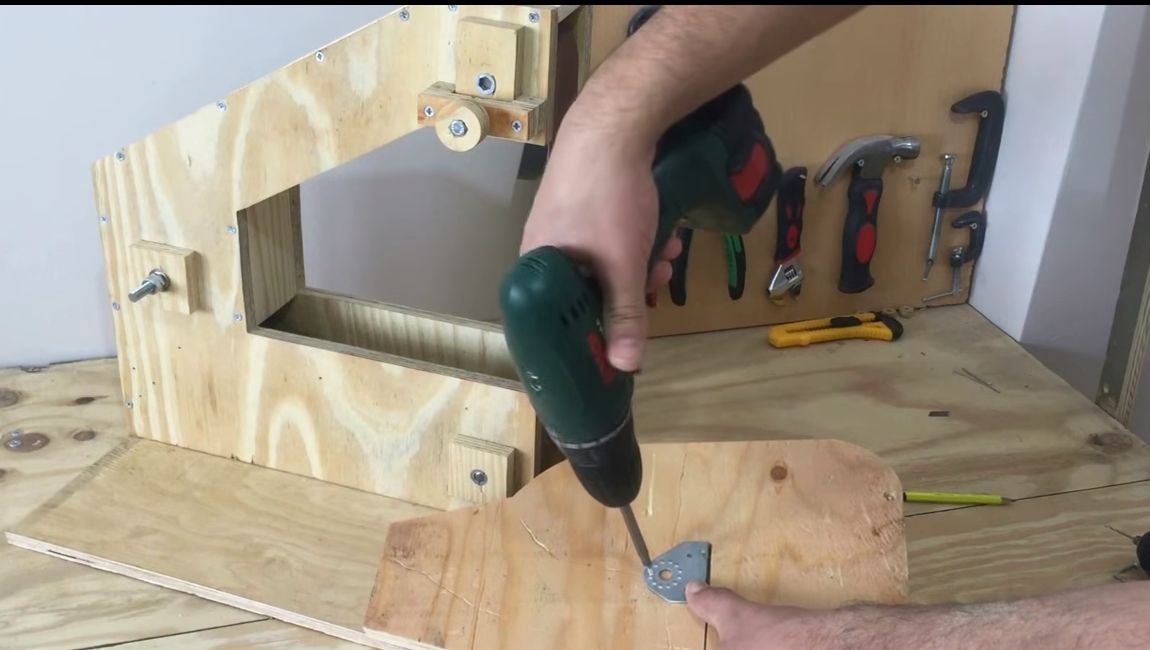
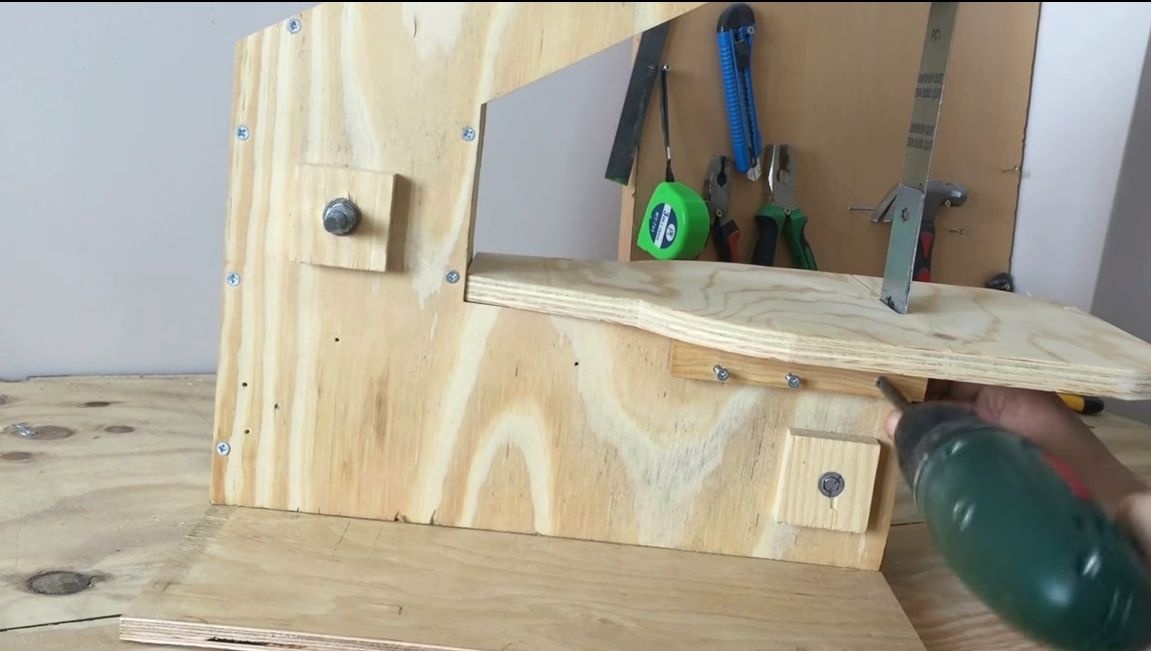
Step nine Desktop
The desktop is also cut out of plywood. It is attached to the machine with screws. In addition to this, there is a metal plate on the desktop, it works as a stop for the belt during operation. We fix it to the countertop with screws.

Step Ten Connect the shurik!
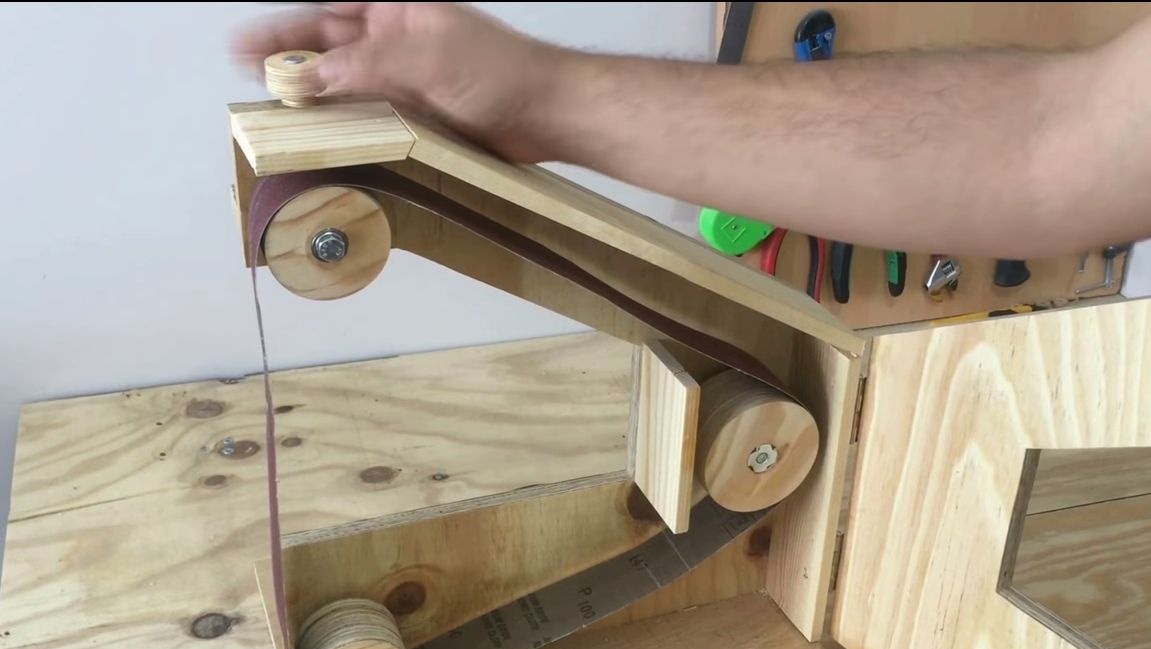
The machine is ready, it remains to connect a screwdriver and configure the device! First turn on low revs and adjust the belt. The upper wheel adjusts the tension, and the side wheel can center the belt on the wheels. The belt should go clearly in the center of the wheels and not rub against the body.
Finally, make a simple bracket for the screwdriver that will support it. We cut it out of plywood and fasten it with screws. The machine is ready, enjoy your use!