

Perhaps the most useful use of electricity for humans is artificial lighting. When it becomes dark for half a year, almost immediately after dinner, it is difficult to imagine life without electric light.
As a person whose peak activity is in the afternoon, I live almost the entire winter under artificial lighting.
Electric lighting in general and lamps in particular are of great importance in shaping the appearance, style, home, its comfort. Frankly, I never liked the "general" lighting - this nightmarish standard chandelier in any home. There is in this lighting, something from the operating room. Clear business - economically and without hassle, to illuminate the room in the evening. But comfort, not even a mosquito sneeze. Another thing is "local" lighting - a lot of small bulbs in different places. But, here, you’ll have to make it through - very thoughtfully arrange the lamps, and to each wiring, sockets. But, the right word, it's worth it.
Having moved with the whole family to the built house in the village, for the first time, they were content with a simplified interior, let's say, Spartan, perfecting it in the course of the play. Lighting was a match - clothespin-clothespins from Ikea, wire cobwebs on the ceiling, pinned with a construction stapler. One winter, they decided that, as the Bird-Govorun said, “There is no more strength to rustle!”
We started designing - it turned out that in a room of about 45 m2, we need more than 10 small lamps. Hanging from the ceiling. Having familiarized themselves with the assortment offered by the industry, they became discouraged - lamps, not only do not for the most part stand up to criticism, they are also worth it. Yes, and fixtures were required, hmm ... authentic - to match the style of "house of an intelligent woman Yaga."
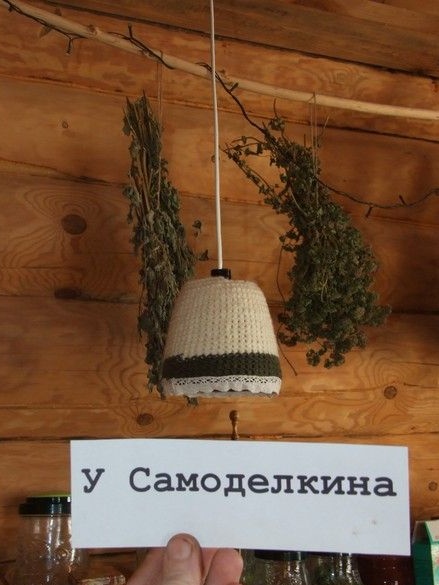
Once, in a big city, we solved a similar problem by the forces of the same Ikea. They sell unpretentious lampshades-accessories for table lamps. We remade them mounts for "hanging" and it turned out pretty elegantly and not at all expensive.
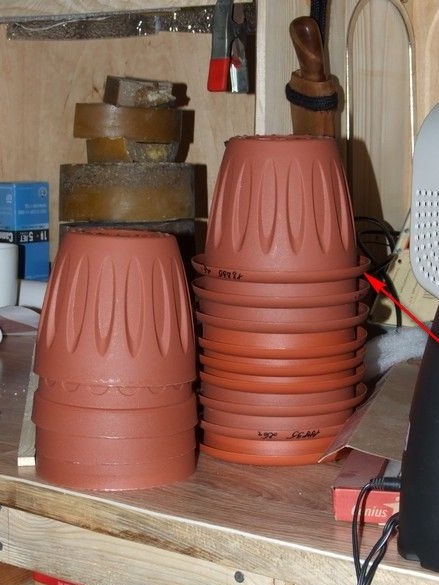
Remembering the previous experience, they looked around - what would it be to apply for an impromptu lampshade, preferably for nothing. Ikea, unfortunately or fortunately, is now far away. The gaze fell on the simple plastic flower pots.
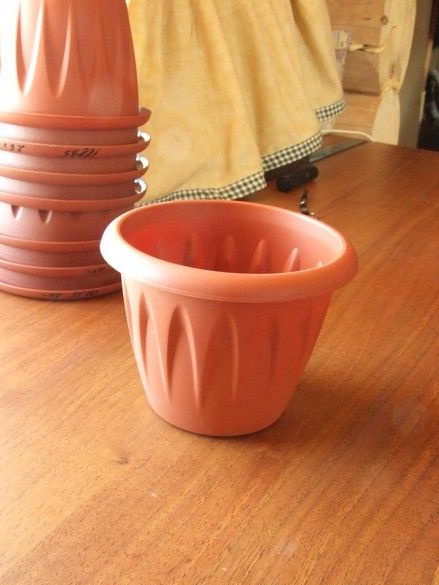
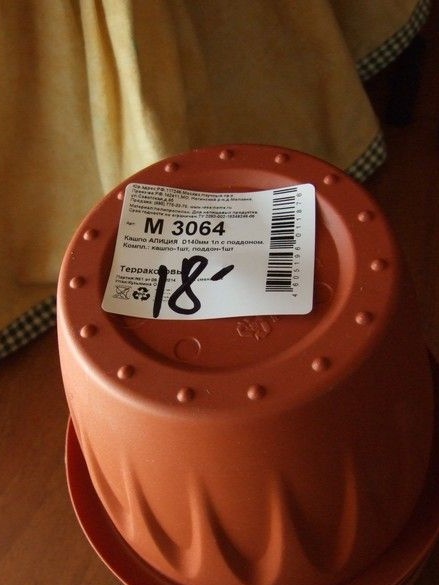
They cost a penny, there are several different sizes, those that are smaller are suitable for small bulbs with an E14 base. There are large, in those, it is quite possible to put, quite powerful lamps with a base E27.
The plastic of the pots is thin, cut well with a sharp knife, powerful scissors, and can be drilled perfectly. The only negative is plastic, which is still not quite “electric” and is unlikely to withstand significant heating, however, modern lamps (energy-saving, LED) do not emit so much heat. Unless, of course, do not go too far with power. Well, as for emergencies - the more reasons to do the wiring and the electrical part of the lamp carefully.
It is decided that they will be lampshades. Decide on the design of the lamp.
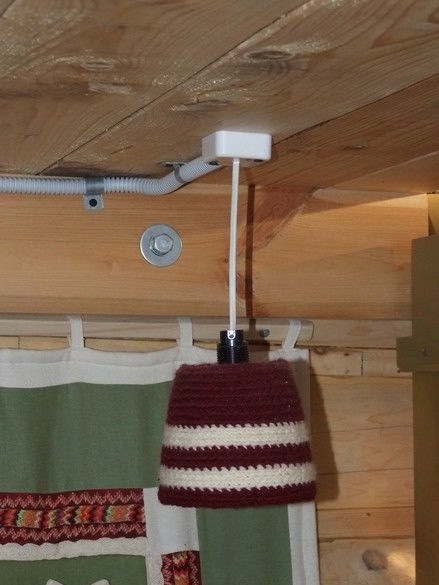
The decorated ceiling pot is held on a wide threaded washer from the cartridge kit. The cartridge itself hangs on a thick multicore "network" wire. The weight of the lamp with a cartridge is small, the lampshade is negligible. The end of the wire is fixed in a small plastic box. The boxes were purchased at an electrical engineering store and are designed to hide the telephone wire connection. Its cost is also low. The wire passed into the central hole is tied in a knot, after the knot, the ends of the wire are cut and connected by soldering. The soldering point is isolated by two layers of thermotube. Self-tapping screws at the corners of the box, inside also insulated with a layer of thermotube.
What was used in the manufacture.
Instruments.
Powerful scissors, a sharp knife, something for drilling with a set of the necessary drills. It is convenient to use a screwdriver, it can also be used as a drill. A set of tools for wiring, of course - a soldering iron with accessories. Construction or special hair dryer for working with heat pipes.
Materials
The pots themselves are blanks for shades, a wire "network". Thermotubes. Lamp holders, you should look for with an external thread and a wide nut, this is important - the lamp hangs on the nut. Finally, the lamps themselves, energy-saving or LED, with power - without fanaticism. Boxes to hide the connection on the ceiling.
First of all, I drilled holes for lamp holders. Feather drill. Its diameter is quite large and even small revolutions of the screwdriver, allow you to get a neat edge without burrs. To center the feather drill, first in the center of the bottom of the pot, a small hole is drilled with an ordinary spiral. With a diameter of 3 ... 4mm.

You can try on a cartridge with a bulb, evaluate.
Then he cut the cantica near the pots.
It is possible with a sharp knife, but not clerical or the like - they have a fragile blade, but here, you may need to make some effort and the blade may burst at the most inopportune moment. But it’s better to do this work with powerful scissors. Safer and tidier.

Thinking, he still drilled special holes for the release of warm air. He drilled with a drill on wood - he was afraid of the one with a spike in the middle, spiral for metal - on thin fragile material, destruction at the moment of the drill exit is possible. In fact, the plafond is ready - it can be used in its pure form, for example, in utility rooms, a workshop, at home, it will look nicer with any decoration.
The installation procedure for the lamp is as follows - a piece of the lighting cord of the desired length is cut off, with some margin. Its end is being cut off. If the terminals are in the cartridge, just with washers on the screws, form a loop on the drill of a suitable diameter, solder it. Thoroughly clean the rosin, and better, and rinse with alcohol. We align the tubercle from the nodule with pliers. If the terminals look like a tray for reliable clamping of an even wire, the loop can be omitted. We connect the wire to the cartridge, on the free end we put on a ceiling box with drilled holes.We tie a knot on the wire, cut off the excess, leaving a small tip. We cut it, solder it with prepared wiring leads, isolate it with a heat pipe, just in case in a couple of layers. We insert self-tapping screws into the holes in the corners, from the inside of the box we sit on each piece of a thermotube of a box that is long in height. So, for reliability. We put a screwdriver closer to us, put everything unnecessary in a box and put it on the ceiling. We look around from all sides - whether everything is hidden, in the right place, and fasten. All. We unscrew the nut on the cartridge, put on a shade, put the nut in place. Screw in the lamp, turn it on. We move away, we squint with pleasure.
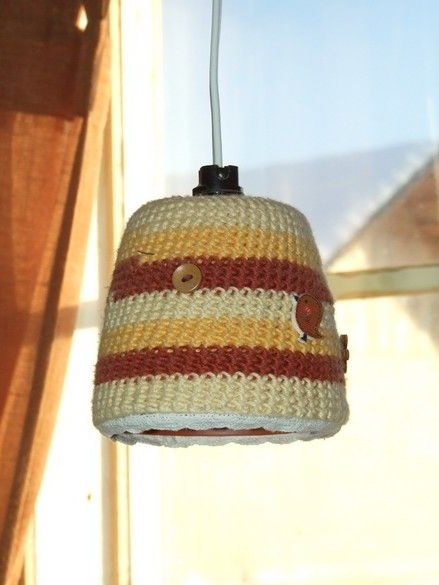
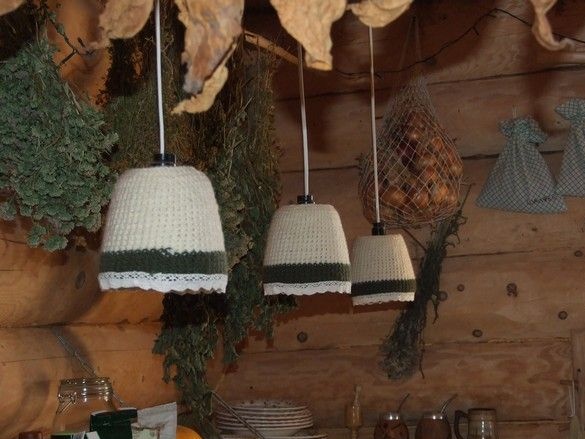
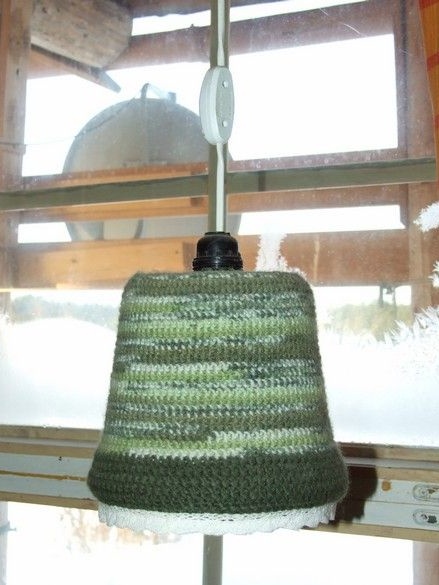
You can decorate the ceiling in many ways, who for what is much more, for ours, the wife crocheted such socks with ruffles. Each group of lamps has its own outfit, like a kilt from a Scot, above, one of two, in a children's corner.
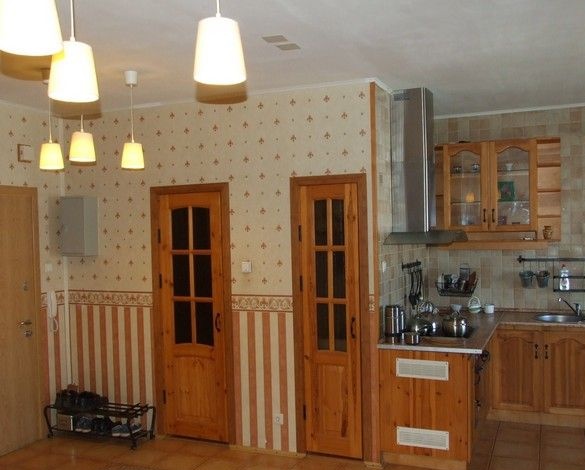
Two lamps were also made for large lamps with an E27 lampholder; it was convenient to place the switch on the wall, it was necessary to improvise. Placement of the switch, admittedly, is not the most convenient - after turning on, the lamp sways for a while, but there was no way out, and we do not use these often. Everyone else has the usual switches on the wall.
There are three such things in the kitchen, most of all decorative ones - we use long lamps hidden under a shelf for work, however, we also turn them on often.
Well, the last option - above the berth, there are as many as three of them, quite low overhead - it’s convenient to read.