

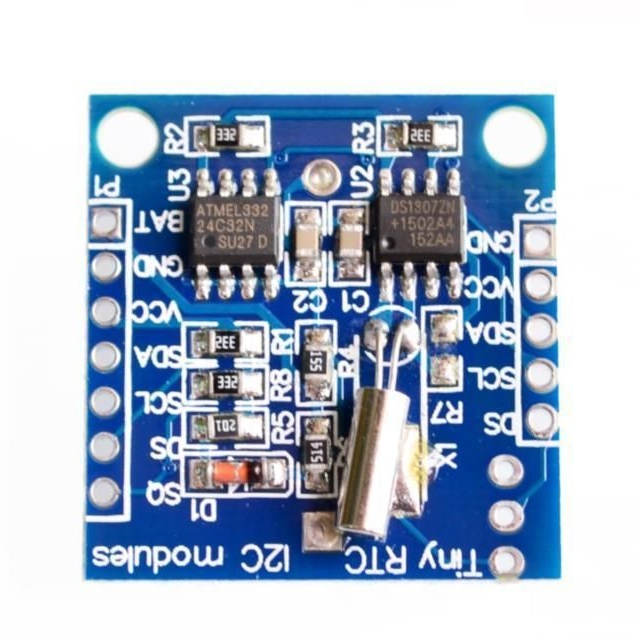
The Tiny RTC I2C Modules board turned out to be a very useful device. As soon as I present a picture with the connection of two microchips with a strapping on the breadboard, it becomes a little uneasy from the number of unreliable connections. The Tiny RTC I2C Modules board is very convenient to use for working with the ds1307Z real-time clock chip with a serial I2C interface, a 24C32 memory chip with a serial I2C interface, the ability to install a ds18b20 temperature sensor. You can also get accurate rectangular pulses from the 7th output of the ds1307Z chip, on the connector it is marked with the letters SQ. On the circuit board of the Tiny RTC I2C Modules, it is difficult to see that the seventh pin of the ds1307Z chip is connected to the seventh pin of the P1 connector.
Tiny RTC I2C Modules Board Schematic:
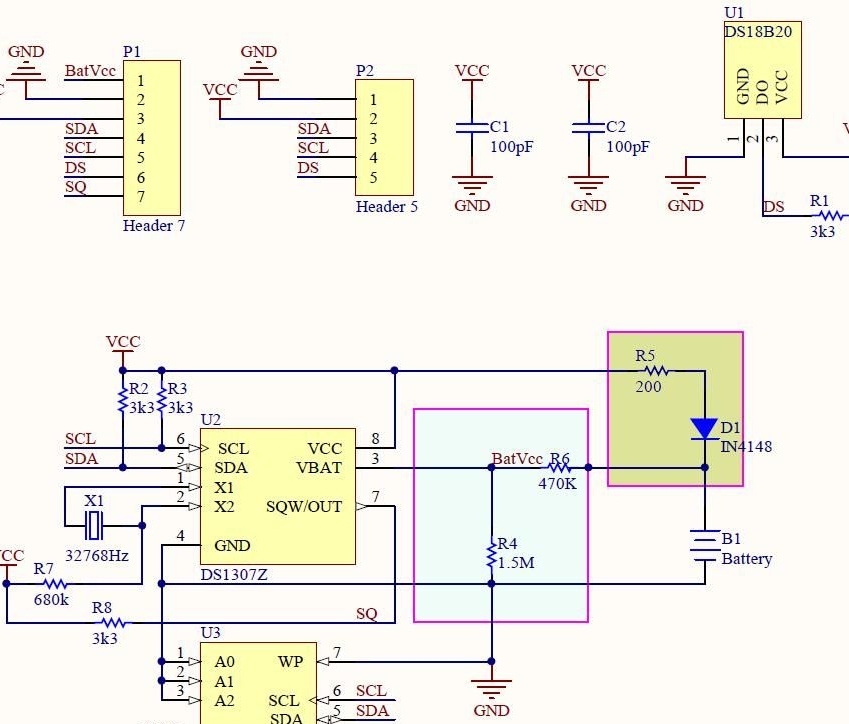
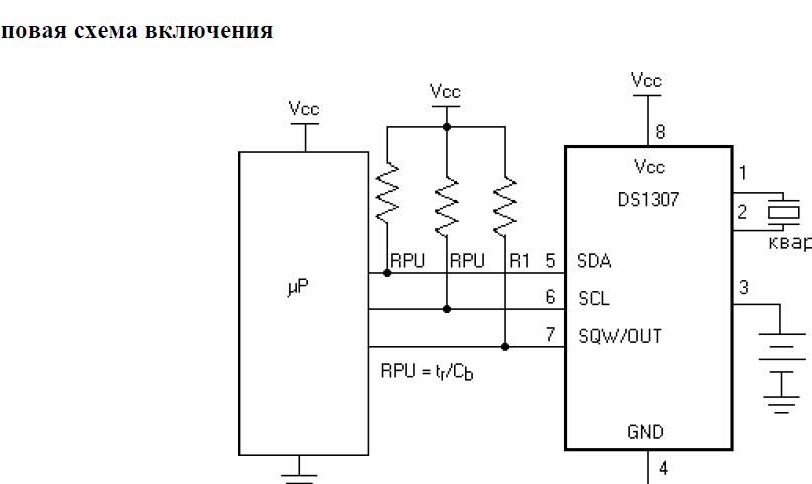
Before buying, I looked for information on the Internet. I learned that the board was made to work with a lithium battery, which is difficult to buy. Buyers of the Tiny RTC I2C Modules board installed a lithium battery instead of the battery, and the board did not work correctly. The microcircuit consumes very little power, so the board can be used with a lithium battery. To do this, remove the following radio components from the Tiny RTC I2C Modules board: diode D1, resistor R4, and solder the jumper in place of R6. I also removed the resistor R7, having familiarized myself with the typical circuit for switching on the ds1307 chip.
Typical ds1307 circuitry:
You can learn more about finalizing the Tiny RTC I2C Modules board from a video recorded and published on the network by comrade Alexei Bukreev.
Datasheet on the ds1307 chip:
View online file:
View online file:
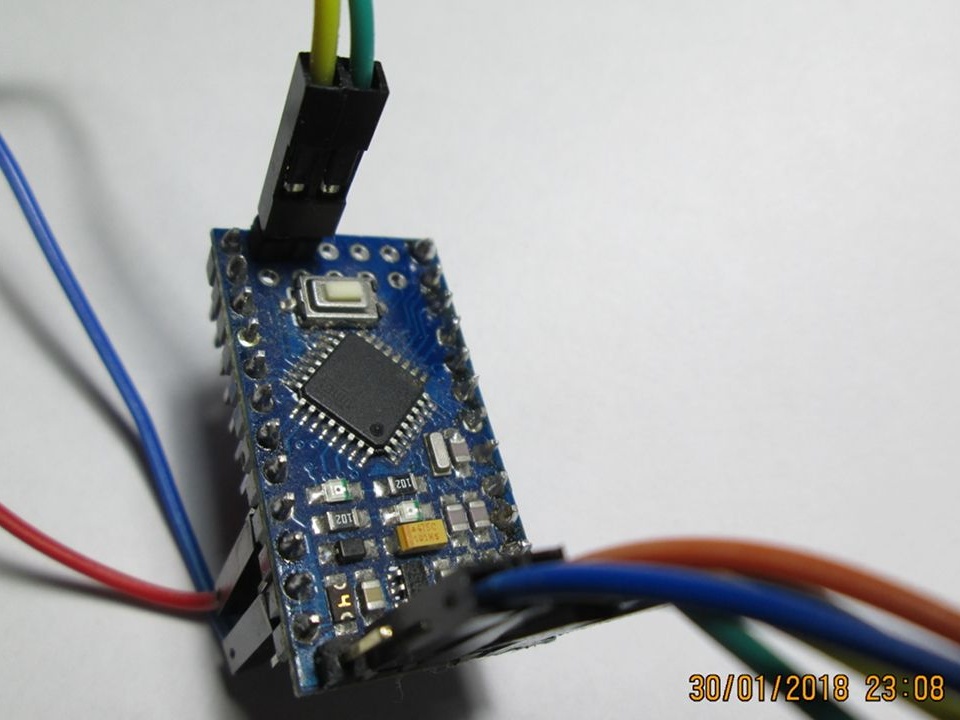
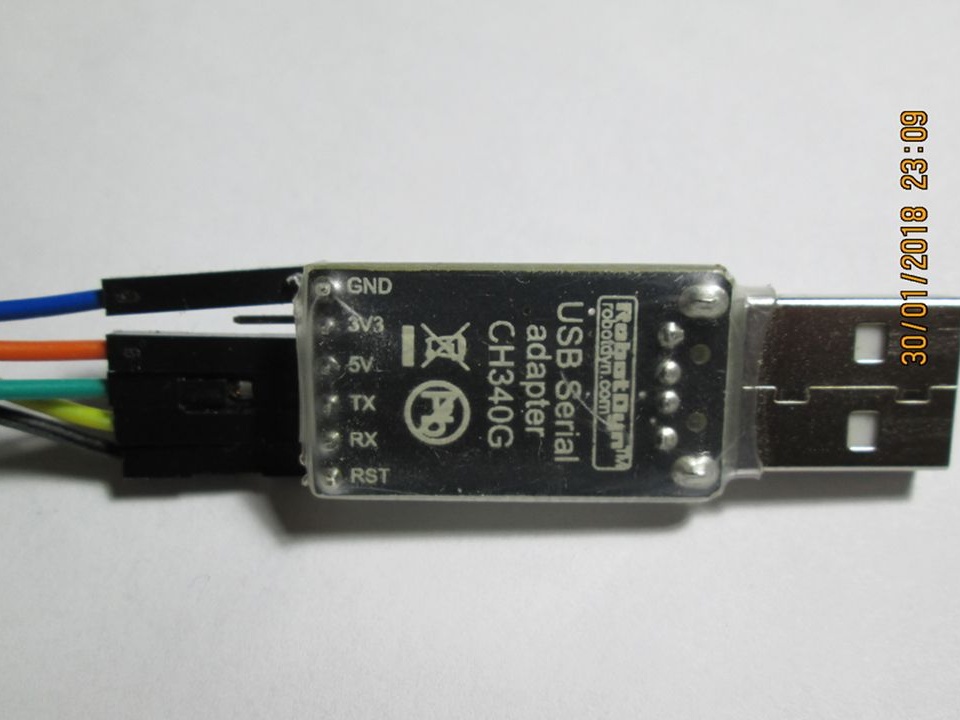
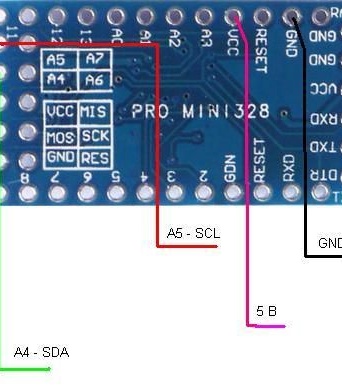
I connected the board Arduino Pro Mini with Tiny RTC I2C Modules and Arduino Pro Mini with USB serial adapter CH340G.

Run the code to determine the addresses of the ds1307 and 24C32 microcircuits.
Code itself:
 #include
String stringOne;
void setup ()
{
  Wire.begin ();
  Serial.begin (9600);
  while (! Serial);
}

void loop ()
{
  byte error, address;
  int nDevices;
  Serial.println ("Scanning ...");
  nDevices = 0;
  for (address = 1; address & lt; 127; address ++)
  {
    Wire.beginTransmission (address);
    error = Wire.endTransmission ();

if (error == 0)
  {
  String stringOne = String (address, HEX);
  Serial.print ("0x"); Serial.print (stringOne); Serial.print ("-");
    if (stringOne == "0A") Serial.println ("'Motor Driver'");
    if (stringOne == "0F") Serial.println ("'Motor Driver'");
    if (stringOne == "1D") Serial.println ("'ADXL345 Input 3-Axis Digital Accelerometer'");
    if (stringOne == "1E") Serial.println ("'HMC5883 3-Axis Digital Compass'");
    if (stringOne == "5A") Serial.println ("'Touch Sensor'");
    if (stringOne == "5B") Serial.println ("'Touch Sensor'");
    if (stringOne == "5C") Serial.println ("'BH1750FVI digital Light Sensor' OR 'Touch Sensor");
    if (stringOne == "5D") Serial.println ("'Touch Sensor'");
    if (stringOne == "20") Serial.println ("'PCF8574 8-Bit I / O Expander' OR 'LCM1602 LCD Adapter'");
    if (stringOne == "21") Serial.println ("'PCF8574 8-Bit I / O Expander'");
    if (stringOne == "22") Serial.println ("'PCF8574 8-Bit I / O Expander'");
    if (stringOne == "23") Serial.println ("'PCF8574 8-Bit I / O Expander' OR 'BH1750FVI digital Light Sensor'");
    if (stringOne == "24") Serial.println ("'PCF8574 8-Bit I / O Expander'");
    if (stringOne == "25") Serial.println ("'PCF8574 8-Bit I / O Expander'");
    if (stringOne == "26") Serial.println ("'PCF8574 8-Bit I / O Expander'");
    if (stringOne == "27") Serial.println ("'PCF8574 8-Bit I / O Expander' OR 'LCM1602 LCD Adapter'");
    if (stringOne == "39") Serial.println ("'TSL2561 Ambient Light Sensor'");
    if (stringOne == "40") Serial.println ("'BMP180 barometric pressure sensor'");
    if (stringOne == "48") Serial.println ("'ADS1115 Module 16-Bit'");
    if (stringOne == "49") Serial.println ("'ADS1115 Module 16-Bit' OR 'SPI-to-UART'");
    if (stringOne == "4A") Serial.println ("'ADS1115 Module 16-Bit'");
    if (stringOne == "4B") Serial.println ("'ADS1115 Module 16-Bit'");
    if (stringOne == "50") Serial.println ("'AT24C32 EEPROM'");
    if (stringOne == "53") Serial.println ("'ADXL345 Input 3-Axis Digital Accelerometer'");
    if (stringOne == "68") Serial.println ("'DS3231 real-time clock'");
    if (stringOne == "7A") Serial.println ("'LCD OLED 128x64'");
    if (stringOne == "76") Serial.println ("'BMP280 barometric pressure sensor'");
    if (stringOne == "77") Serial.println ("'BMP180 barometric pressure sensor' OR 'BMP280 barometric pressure sensor'");
    if (stringOne == "78") Serial.println ("'LCD OLED 128x64'");
   nDevices ++;
  }
    else if (error == 4)
    {
      Serial.print ("Unknow error at address 0x");
      if (address & lt; 16)
        Serial.print ("0");
      Serial.println (address, HEX);
    }
  }
  if (nDevices == 0)
    Serial.println ("No I2C devices found \ n");
  else
    Serial.println ("done \ n");

  delay (5000);
}
After starting the Arduino IDE, choosing the model of the arduino board, installing the serial port (I have com31), and copied the above - located code into a window with text replacement. I started the compilation, while the Arduino IDE asks to save the sketch folder. Click save and the Arduino IDE will compile. We write the program to the arduino board and in the serial port monitor we see the following:
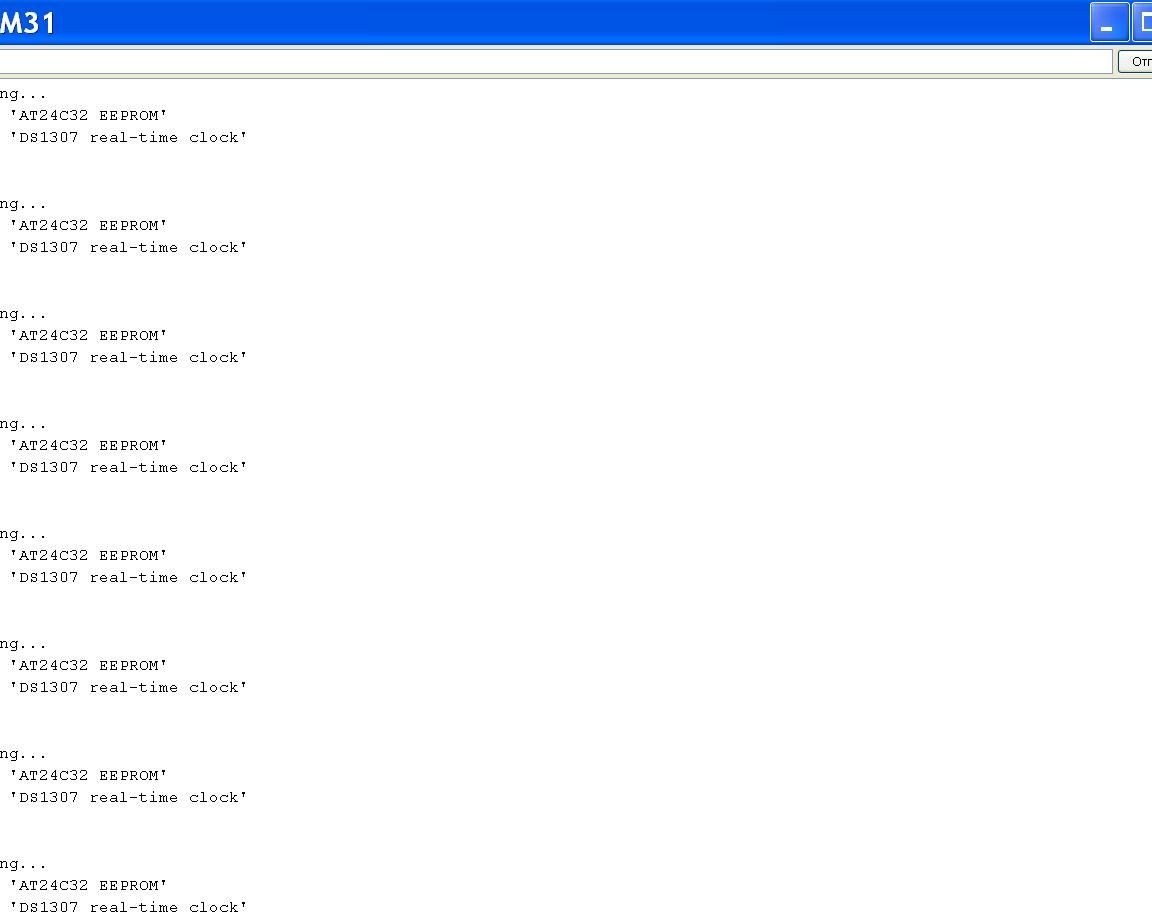
So, we made sure that the boards are connected correctly.
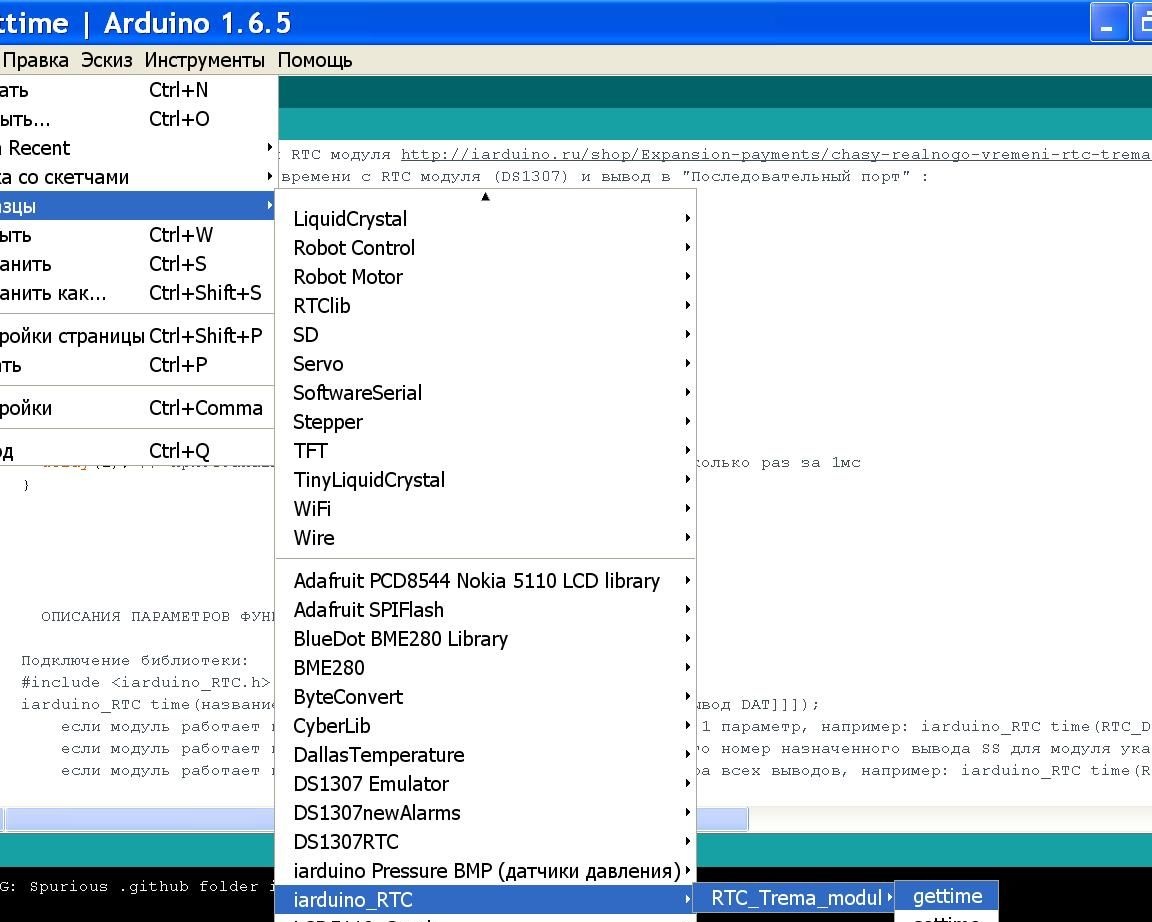
Now, to work with the real-time microcircuit (ds1307), you need to install the library “Universal library iarduino_RTC.zip”
File: iarduino_RTC.zip universal library:
After installing the library and rebooting the Arduino IDE, run the gettime example:
After completing the compilation, writing the program to the arduino board, in the serial port monitor we will see the result of the real-time chip.
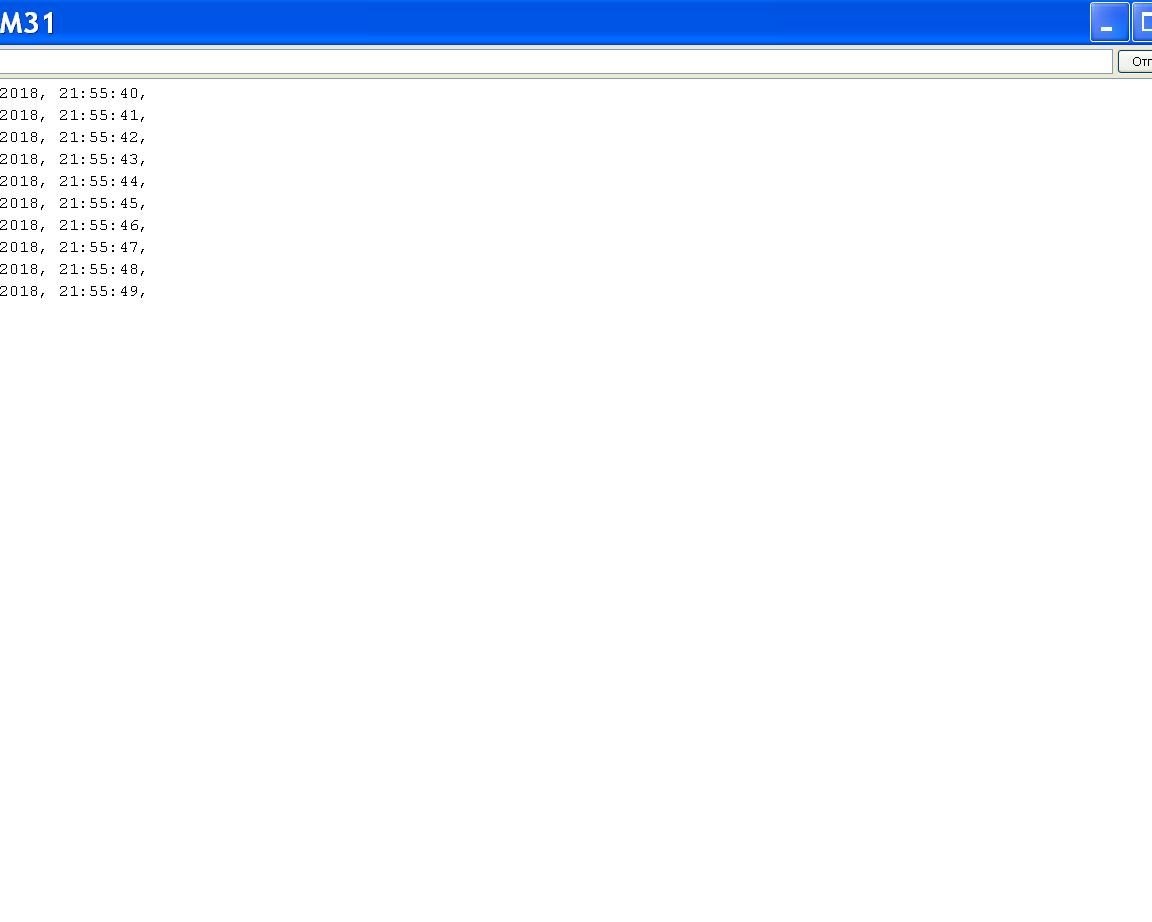
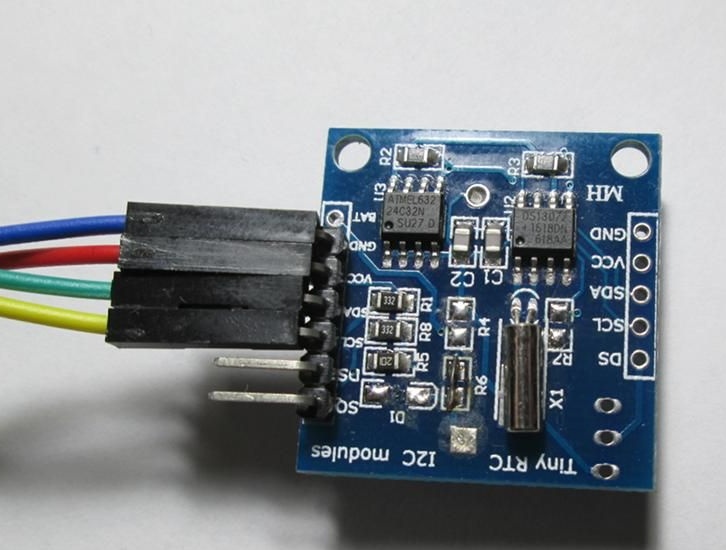
In the photo below, my Arduino Pro Mini:
Enjoy the shopping!
Cost: ~ 29