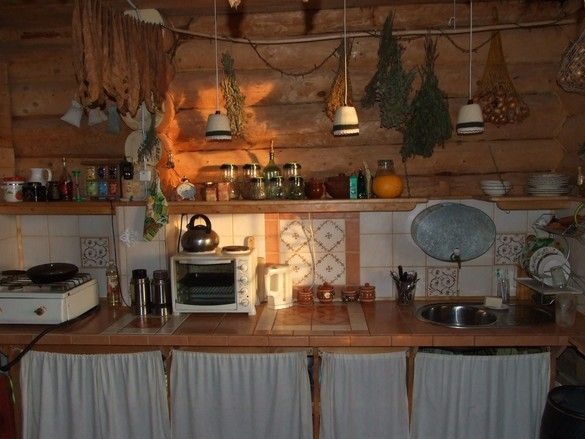
The kitchen in the house is a sacred place. Apparently it happened like that - “mansions are not spacious”, from the “living room” basically only the name, about the “dining room”, I will not say anything at all. Where are family councils, night gatherings and the reception of the closest guests? Well, that’s the same. Clearly, a purely utilitarian value is also pretty. In a word, the room, the device of which deserves the closest attention.
For the arrangement, the kitchen is one of the most difficult rooms, judge for yourself - powerful electrical appliances, everywhere they can splash with water, water supply plus sewage, correctly place, rather big refrigerator, stove and oven, gas pipeline or separate powerful wiring, exhaust hood, lighting - ooo ! Yes, the working surface - so as not to cut, not to melt, not to be scratched.
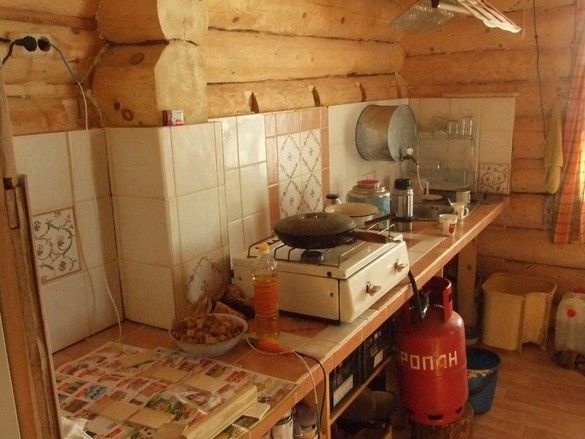
Having got to the "cultivation" of what replaced the kitchen and having worn out brains, it was decided to tile the work table and the "apron". By this time, the log house itself has already “sat down” enough, in order to fix individual elements directly to the logs, this will somewhat simplify the design, reduce the “dead” space and allow it to look more elegant. But have to tinker more.
Speaking about the device, design, style, finally, it is worth mentioning that at one time, they came across a little and participated in the frenzy that is usually called “European-quality repair”. Usually aspirated. Here in the village, they decided to do so that, if possible, nothing resembled such a decoration. It turned out very easily - on the one hand, the absence of any substantial funds for the finished furniture and decoration materials from the store, on the other - the presence near the forest where you can find all sorts of Christmas trees, sticks. Note - completely free. And the cost of furniture, which is sometimes comparable to the cost of a log house, like, hmm ... mobilizes. In addition, not hidden logs inside the house, combined with all these sticks, driftwood, bunches of grass and the like, it's just a miracle how good. As a matter of course, a style took shape, a sort of "house of an intelligent woman Yaga." People from the city, usually enthusiastic. We like it too.
What was used.
Instruments.
The usual set of carpentry and carpentry tools, a screwdriver was very useful. Gun for polyurethane foam, squeezer for tubes with sealant.Used electric jigsaw, electric chain saw. For wiring, appropriate tools were used, a soldering iron with accessories is understandable, however, if you reduce the reliability requirements, you can do with the terminals. Construction dryer for working with heat pipes. For the manufacture of a wooden shelf I used a circular saw, a milling machine fixed in a makeshift table, the shield “rallied” from separate rails using special home-made clamps - “wime”. He also used an electric surface grinder. It’s clear - brushes, containers for varnish. Yes, for cutting ceramic tiles, an improvised detachable "machine" from angle grinder was used. Rubber spatula.
Materials
A bit of lumber - board, timber. Sliver sheets with glue - OSB? Ceramic tile glued to acrylic sealant. "Grout" the desired color. In some places, silicone sealant glued “plinths” onto it. LMB. PVA glue, carpentry. For priming wood before gluing tiles, you can use a regular, "building" or ready-made primer. Mineral wool to fill the “deaf” cavities. Fasteners - self-tapping screws, nails.
The base table was already made a long time ago, and it was used, covered with an oilcloth. In the photo you can understand the design - five O-shaped racks of boards screwed to the floor. The corners are connected "to the floor of the tree." The countertop is also made of planks. Pre-built shelves are arranged, braces are made. The table is completely not connected to the logs of the walls, but it is very rigid - braces and numerous connections help.
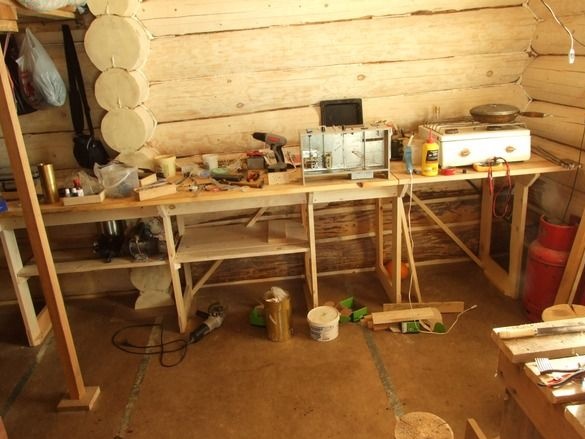
This is in a few years. The table top is reinforced with two layers of slab, with intermediate gluing. I did not regret the screws either.
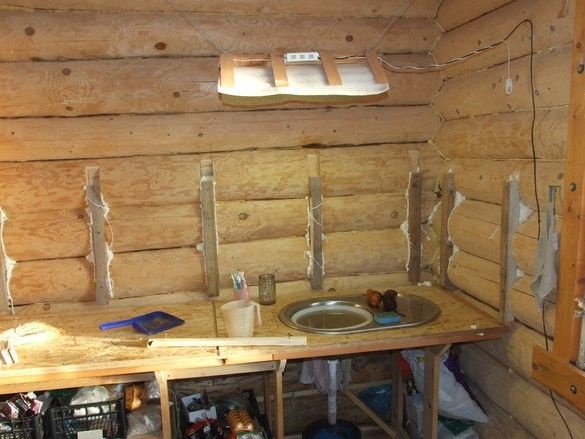
To reduce the "dead" space behind the vertical wall, we "cut" it into logs - after marking with a plumb line and tape measure, sawed the edges of the grooves with a chainsaw. Electric, you can and benzo, but then - the windows are wide open. After, the middle chose a chisel with a rubber mallet. The bar aligned vertically with the bottom of the groove. Similarly, I installed the latter. After the installation of the first and last, the intermediate ones were aligned on them, so that they were “on target”. He filled all the cracks with mounting foam - there are fewer drafts, and most importantly, insects creep into all the cracks in the autumn - to winter. In winter, a little stronger stove and flood, climb, sleepy but happy - spring has come.
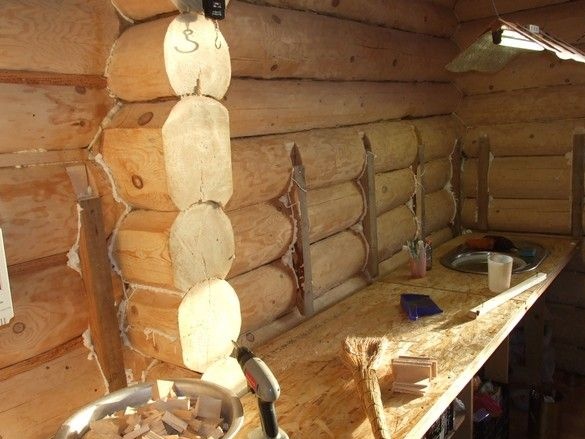
The short logs of the slash interfered fairly, but there was nothing to be done, only slightly cut off their round sides, to make it more convenient.
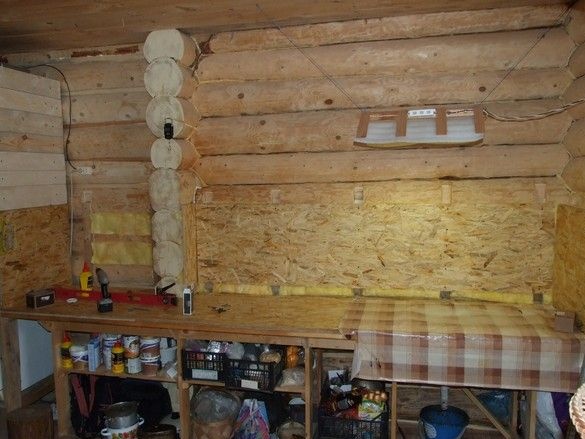
After that, the vertical part was also leveled with two layers of the slab, with gluing and careful filling of the “deaf” voids with mineral wool so that no one climbed there. The vertical wall with the table is still not connected in any way.
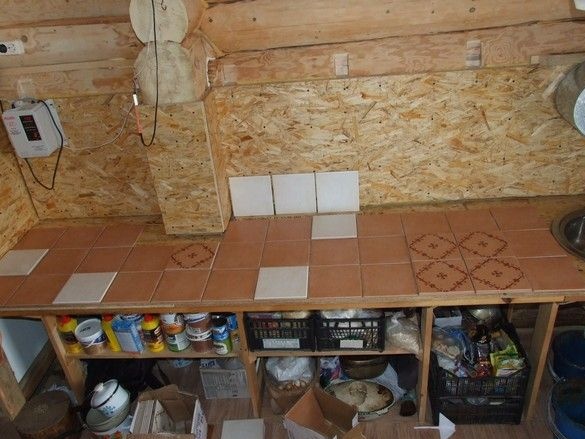
After complete sheathing, the tiles were laid out - there are two types and decors. Decided what where.
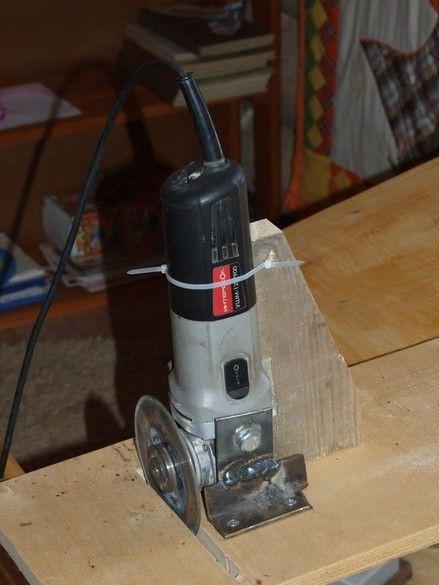
Such a “tile cutter” was made - two brackets made of scraps of a corner were welded, two short bolts were selected, the thread luckily coincided. In the photo, he is upside down.
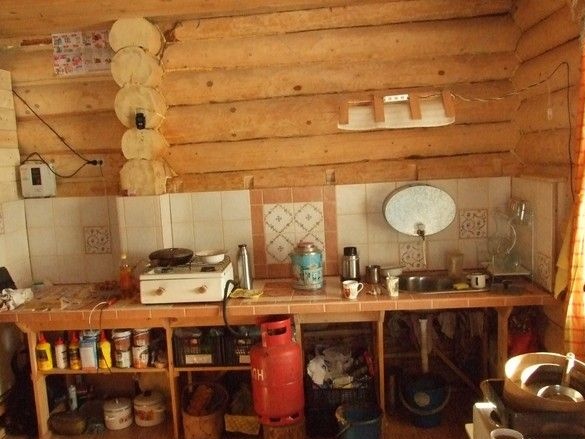
After preliminary priming and drying, the tile is glued. Glued on acrylic sealant - somewhat wasteful, but quite durable, and most importantly, work can be done in the room where people live - not dirt and dust. In addition, the seam comes out somewhat elastic, which, given the wooden base, can be important.
Plastic “crosses” are picked out from the seams, and they are filled with “grout” of the selected color. Rubber spatula, and so on, according to the instructions.
Finishing the vertical wall, it was decided to finish the shelf. For beauty and for running trifles, until we get the hang of making lockers.
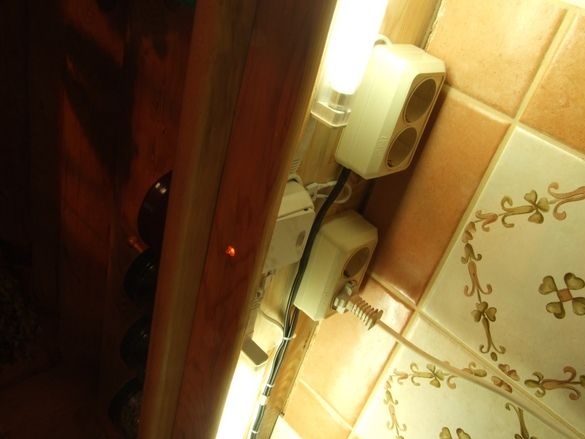
All electrics, it was decided to mount on the underside of this shelf, including the outlet. Together with lamps for illumination of the working surface. It turned out very convenient and compact.In addition, sockets located on the inside of the shelf do not callous eyes, the chance of getting water into them is minimal. Practice has shown that it’s quite convenient to use them - there aren’t many devices that need to be plugged in each time, for example, with us, this is probably just a coffee grinder. The rest are included more or less constantly.
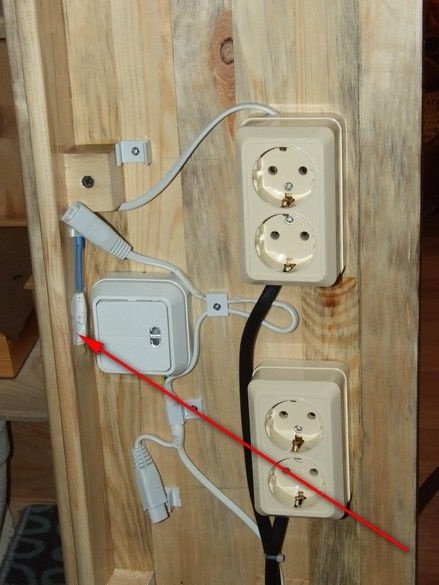
Electrical installation from the inside out, wiring made with a copper wire, all connections are made by soldering - the load in the kitchen is usually powerful, to avoid. An arrow marks an interesting moment - a neon bulb with several hundred kilo-ohm resistor, constantly on, located opposite the switch to see where to poke. Further on the photo will be visible.
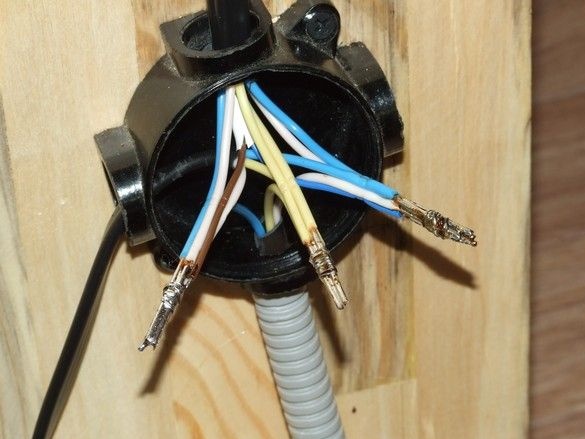
A junction box, at the other end of the shelf. Phase, zero, earth, everything is like in humans. The bundle of wires is soldered into one, previously fastened with a thick tinned wire. The ends, of course, are also pre-tinned. On top of the rations of the heat pipe, the tip in the hot state is pinched with tweezers or pliers.
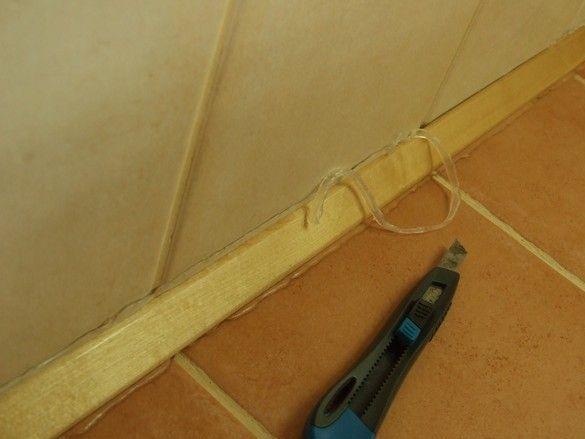
Plinths are cut from birch rails. After coating with yacht varnish in several layers, glued to silicone sealant, hiding the cracks.
Below, the operation of the neon indicator lamp “on the object” is shown. Practice has shown - to make it was an excellent idea, it is really very convenient. The switch itself is not visible, the shelf is located approximately at chest level, the light bulb also shows, including twilight, and in the dark, where to look for it.
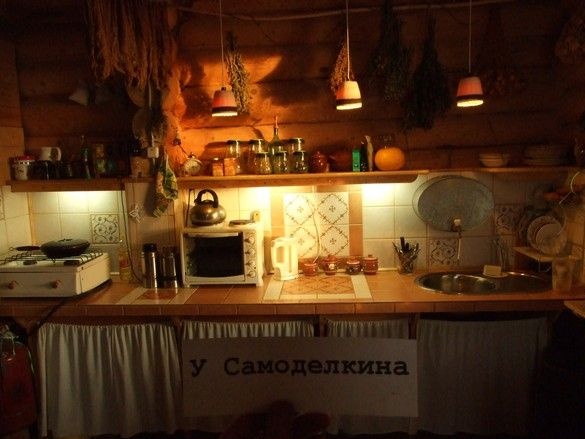
Of course, there is still room for improvement, for example, instead of the curtains below, gather your courage and make beautiful doors. Actually, the location of the table supports initially assumed precisely the doors, and in the narrow part - drawers for small items. From above, sooner or later there will be lockers.

