

On the eve of the men's holiday I want to bring to your attention an original souvenir for the “Real Man” - a beer mug made of wooden clothespins. You can also drink kvass from it, so non-drinkers will also like it.
To make a mug we need:
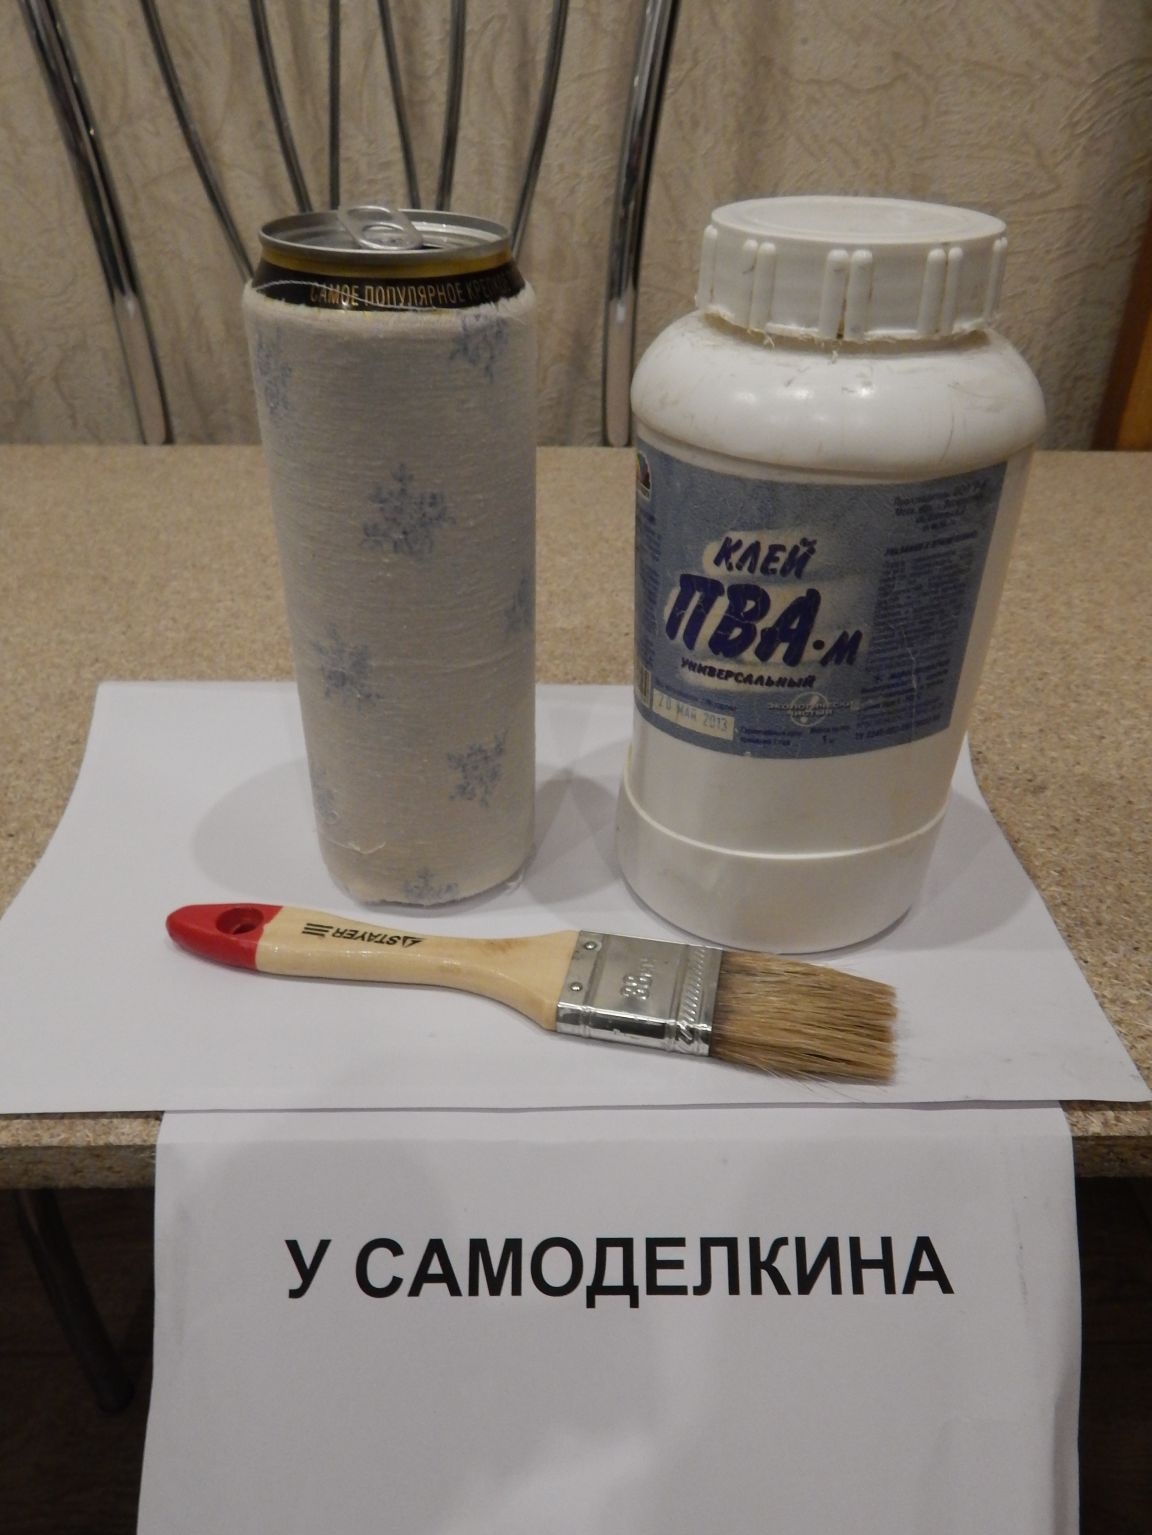
1. Empty (although full) tin can.
2. Linen wooden clothespins - 12-15pcs.
3. Board 20mm. thick, hardwood.
4. Cotton fabric - wrap the jar twice.
5. Well, to fill the space between the clothespins, a filler, who has some kind of fantasy, from river sand with shells to rhinestones from Swarovski. I will have this jute twine.
6. Wooden rulers for the bottom.
7. PVA glue
8. Varnish PF-170
From the tool:
1. Very sharp knife
2. Jigsaw
3. Propane burner
4. Sandpaper of different grit
5. Soft bristle brush
So let's get down to creativity.
1. First, wrap the jar in two layers with a cloth soaked in PVA glue.
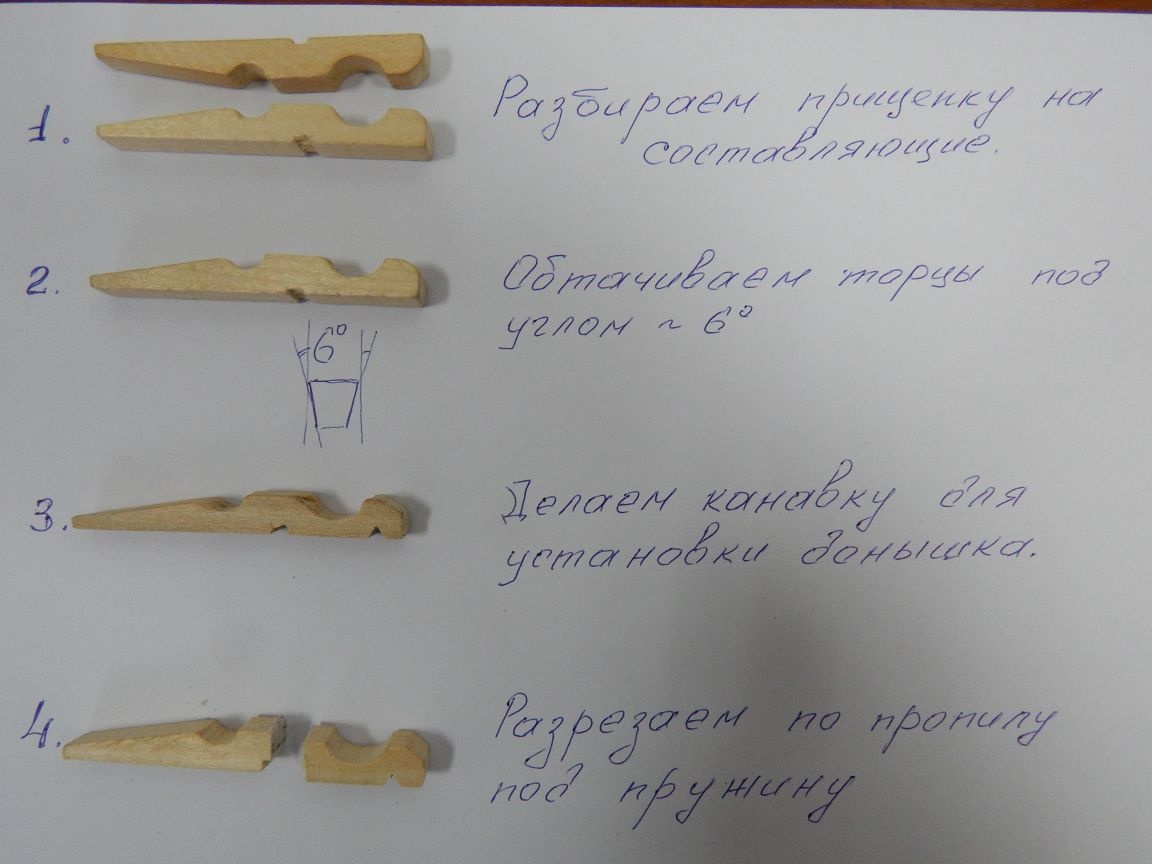
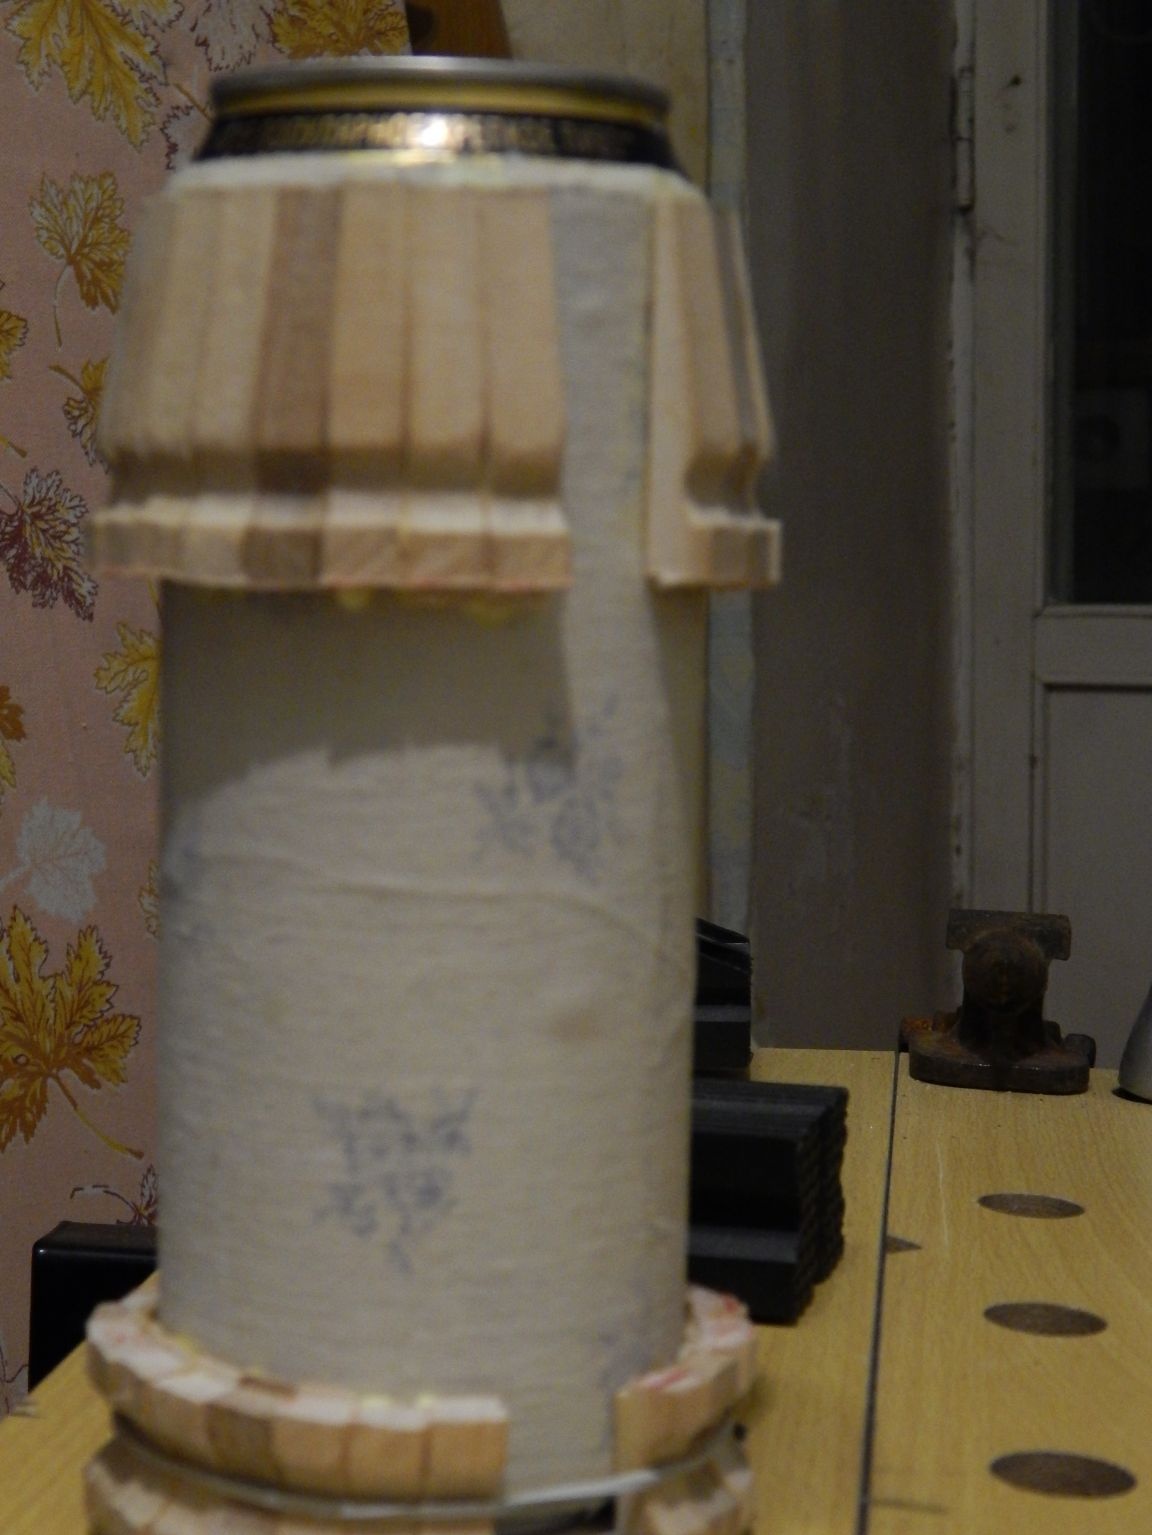
2. Clothespins disassemble into components. We need only wooden parts. We grind the ends on a large emery cloth to the appearance of a trapezoid with angles at the base of about 6 degrees so that there are no cracks after gluing. Next, we make a groove for the bottom on the side that will stick to the bank. We cut the clothespin along the recess for the spring, it is better, of course, according to the additional marking, so that then it is less to grind at the end. And I advise you to cut it immediately before gluing, so that the upper part matches the width, color and pattern.
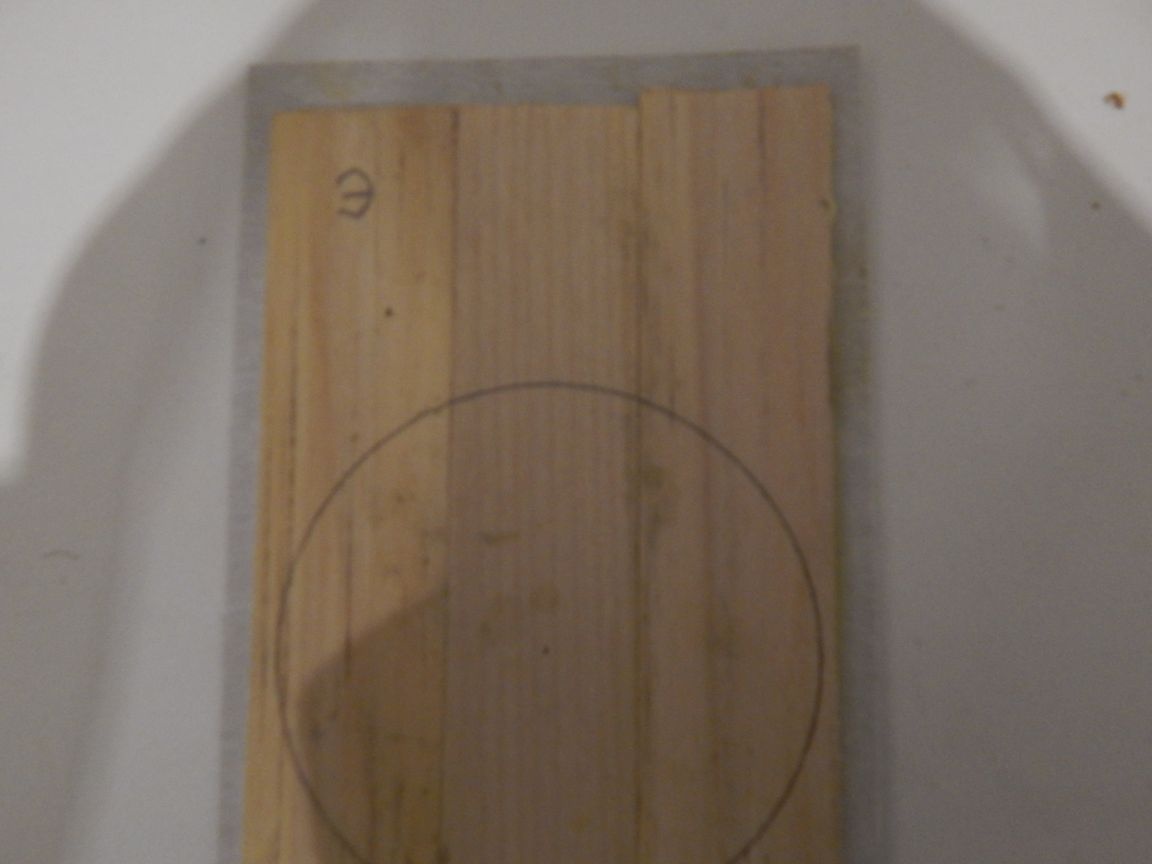
3. From the wooden rulers we make the bottom of the mug. Glue pieces of 7cm on the paper in the joint, draw a circle of 67mm, cut the bottom with a jigsaw and remove the chamfer with a knife.
4. Paste the jar with cut clothespins. We cut the clothespin, apply the bottom and the lower half, greased with glue, to the jar so that the bottom fits into the cut groove. We glue the upper part opposite the lower one, checking their parallelism by attaching a ruler (this is to then properly stick the handle).
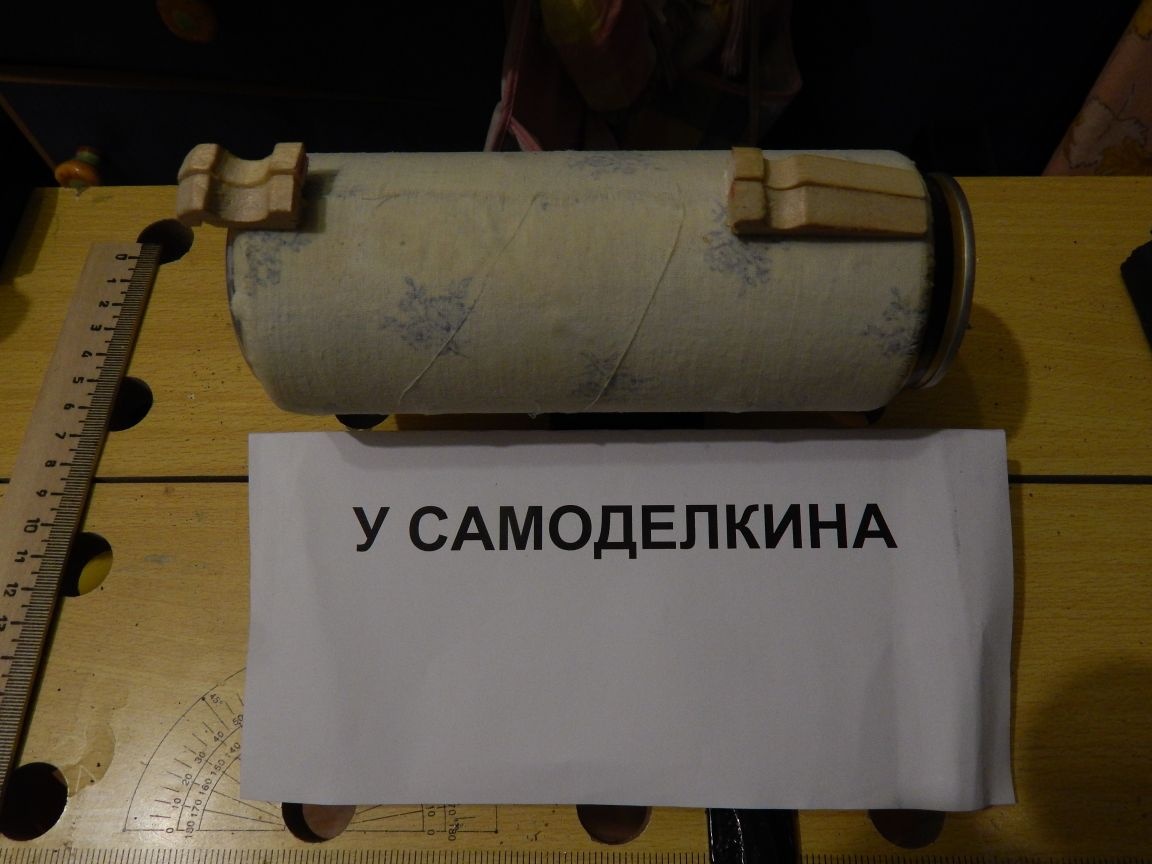
Further, in the same order around the entire perimeter of the can, without gluing until it is completely filled, about 20 mm for the handle (two clothes pegs).
5. Now proceed to the manufacture of pens. I will have it in the form of a fish. On a sheet of paper we draw a line on which we outline a segment equal to the height of the circle (from the lower to upper ends of the glued halves of the clothespins). We attach a clothespin and draw a contour to get a section profile of a circle.
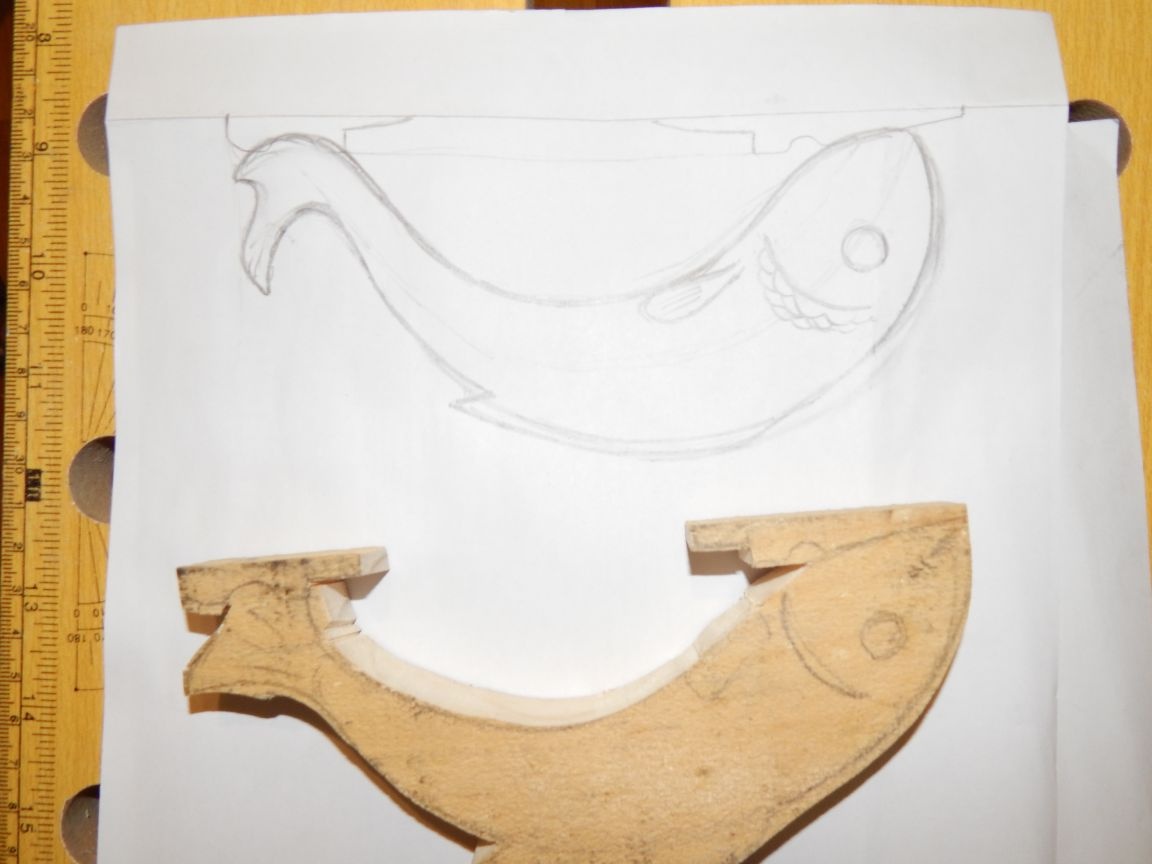
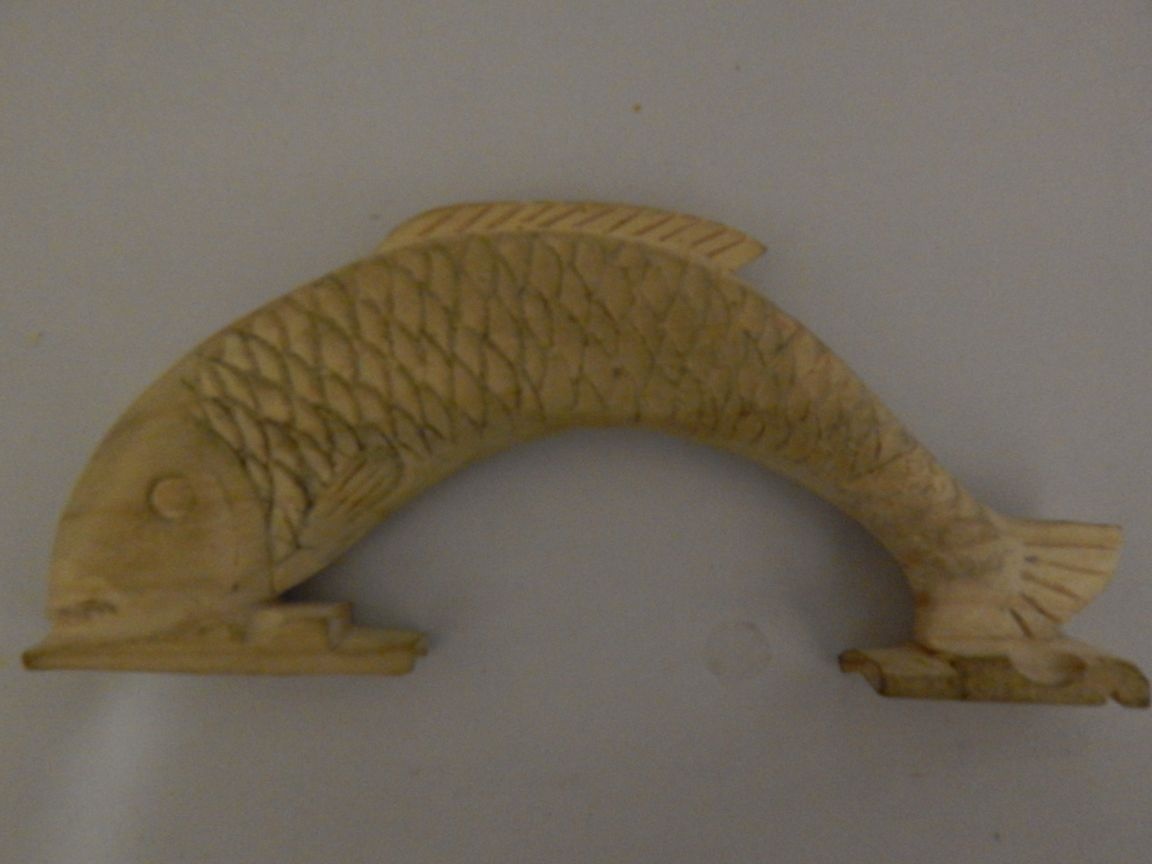
Next, draw a sketch, inscribing the dimensions of the pen into the size of the profile, translate it onto the board, cut it out, plan it, grind it and cut out the eyes, gills, fins and scales (it makes no sense to describe woodcarving).
6. Glue the handle to the mug where you need to trim, or glue pieces of clothespins to remove the cracks. After the glue has completely dried, we process the product with sandpaper over the entire area, including small nooks and crannies.
7. Now the crucial moment is burning wood, it’s better not to rush here, it’s very easy to spoil an almost finished product, it’s much more difficult to fix it (Eastern wisdom: “If you drive a horse in vain, you’re on foot”). We burn the fish only from the back side, imitating its color, clothes pegs as you please, you just need to keep in mind that in the hollows firing occurs worse and light spots are obtained.
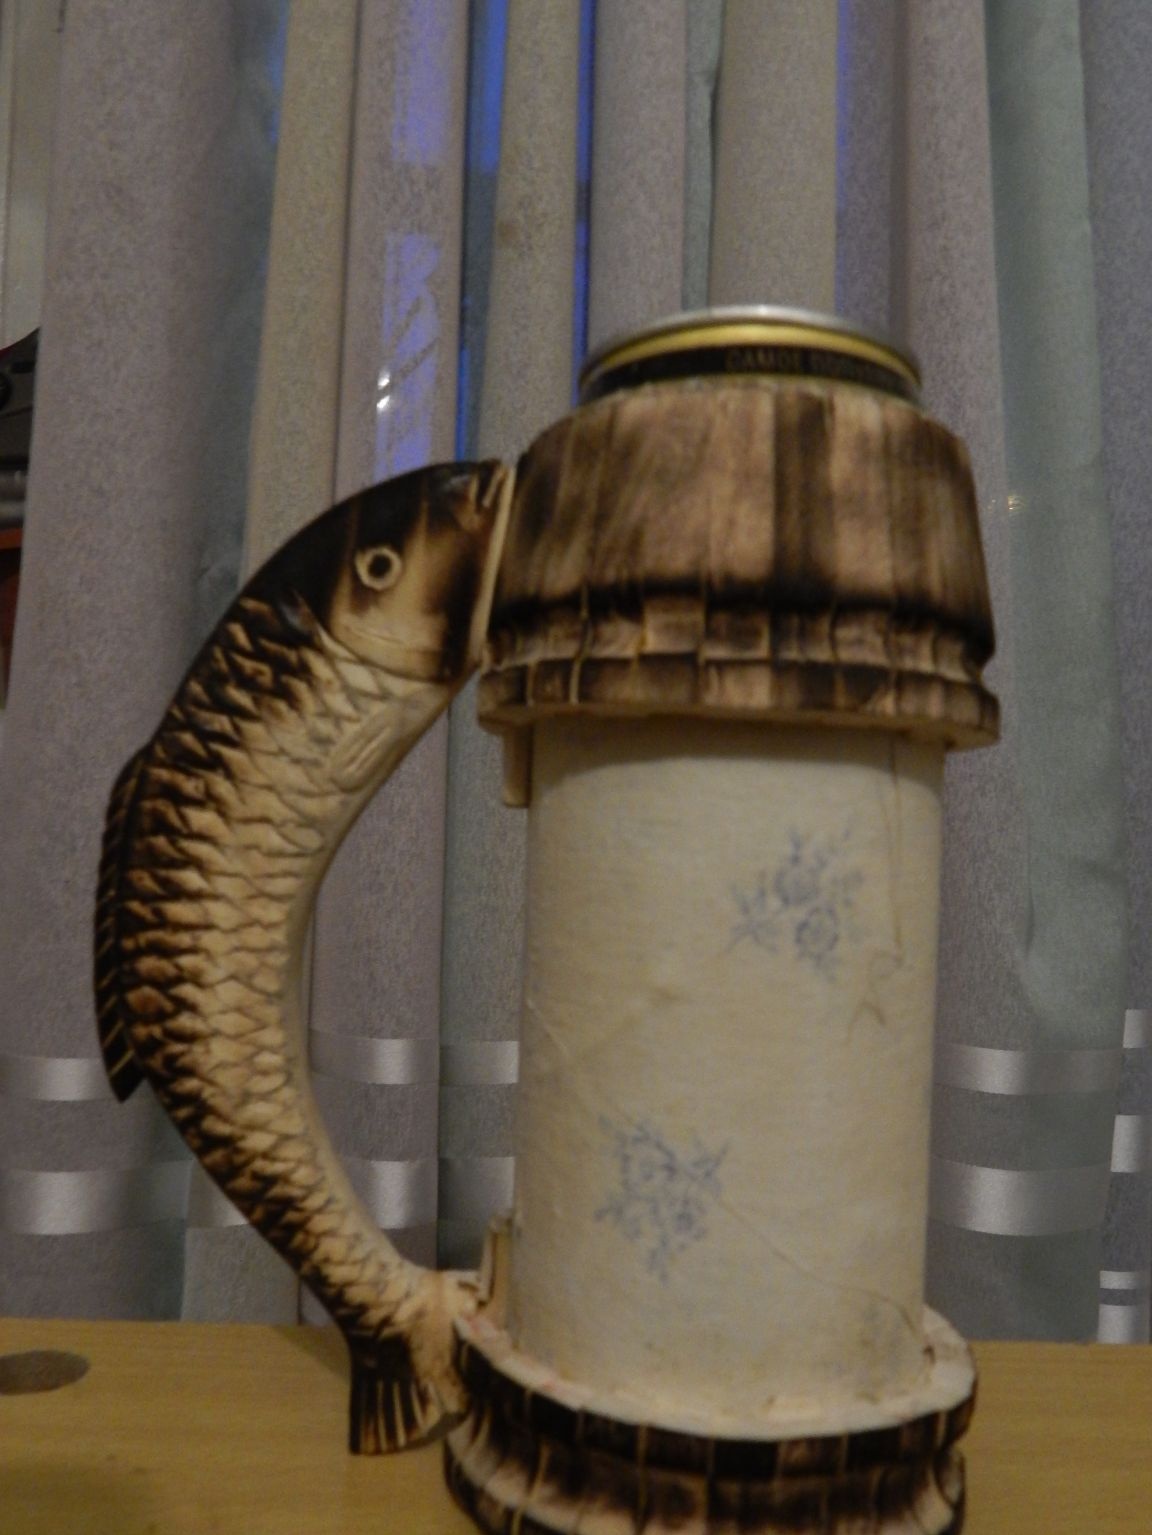
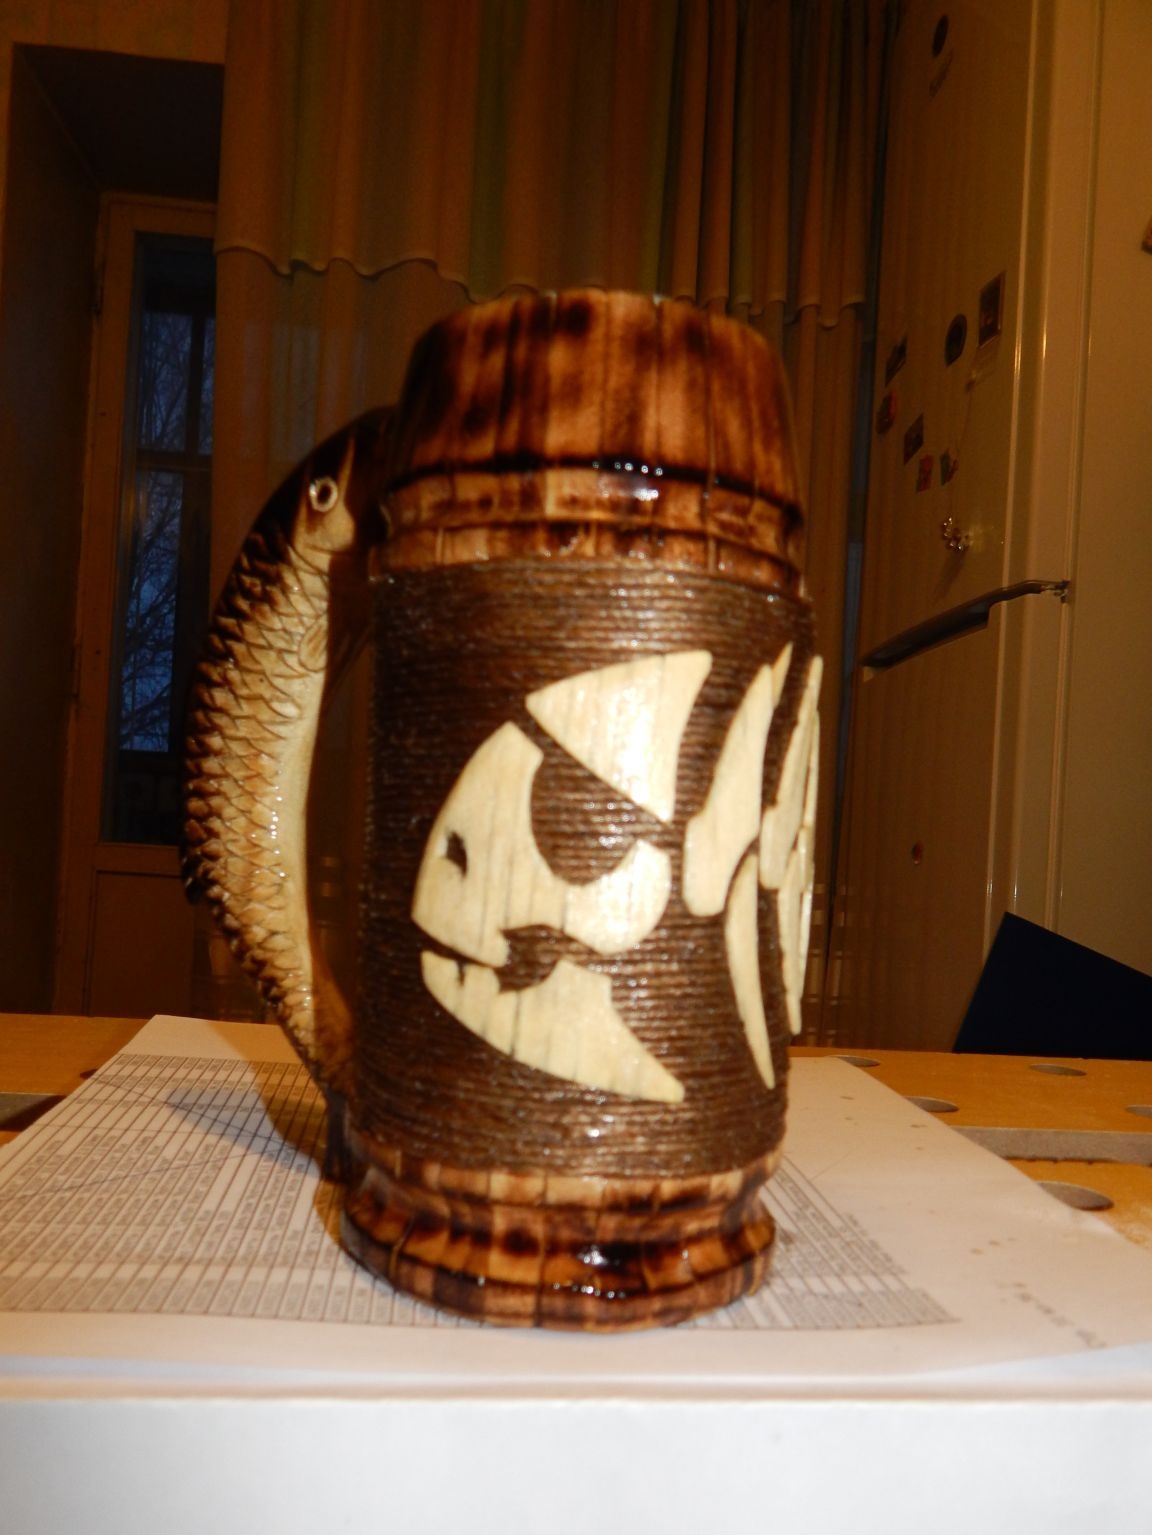
8. Let's start filling the space between the upper and lower parts of the glued clothespins. As I already wrote, it all depends on the imagination - you can fill it with river sand soaked with glue, you can paste over with pebbles, shells, jewelry, coins, nutshells and so on, I’ll have jute twine - it matches the color and looks not very bad. In order not to wind the entire bobbin and save twine, he simply filled the excess space with waste paper by gluing several layers to the remaining thickness of the twine, and only then glued the twine, wrapping it round to round. By the way, now you can cut off the top of the can, because of the glued clothespins, the stiffness is much increased, and there is no longer any danger of deforming the edges of the mug.
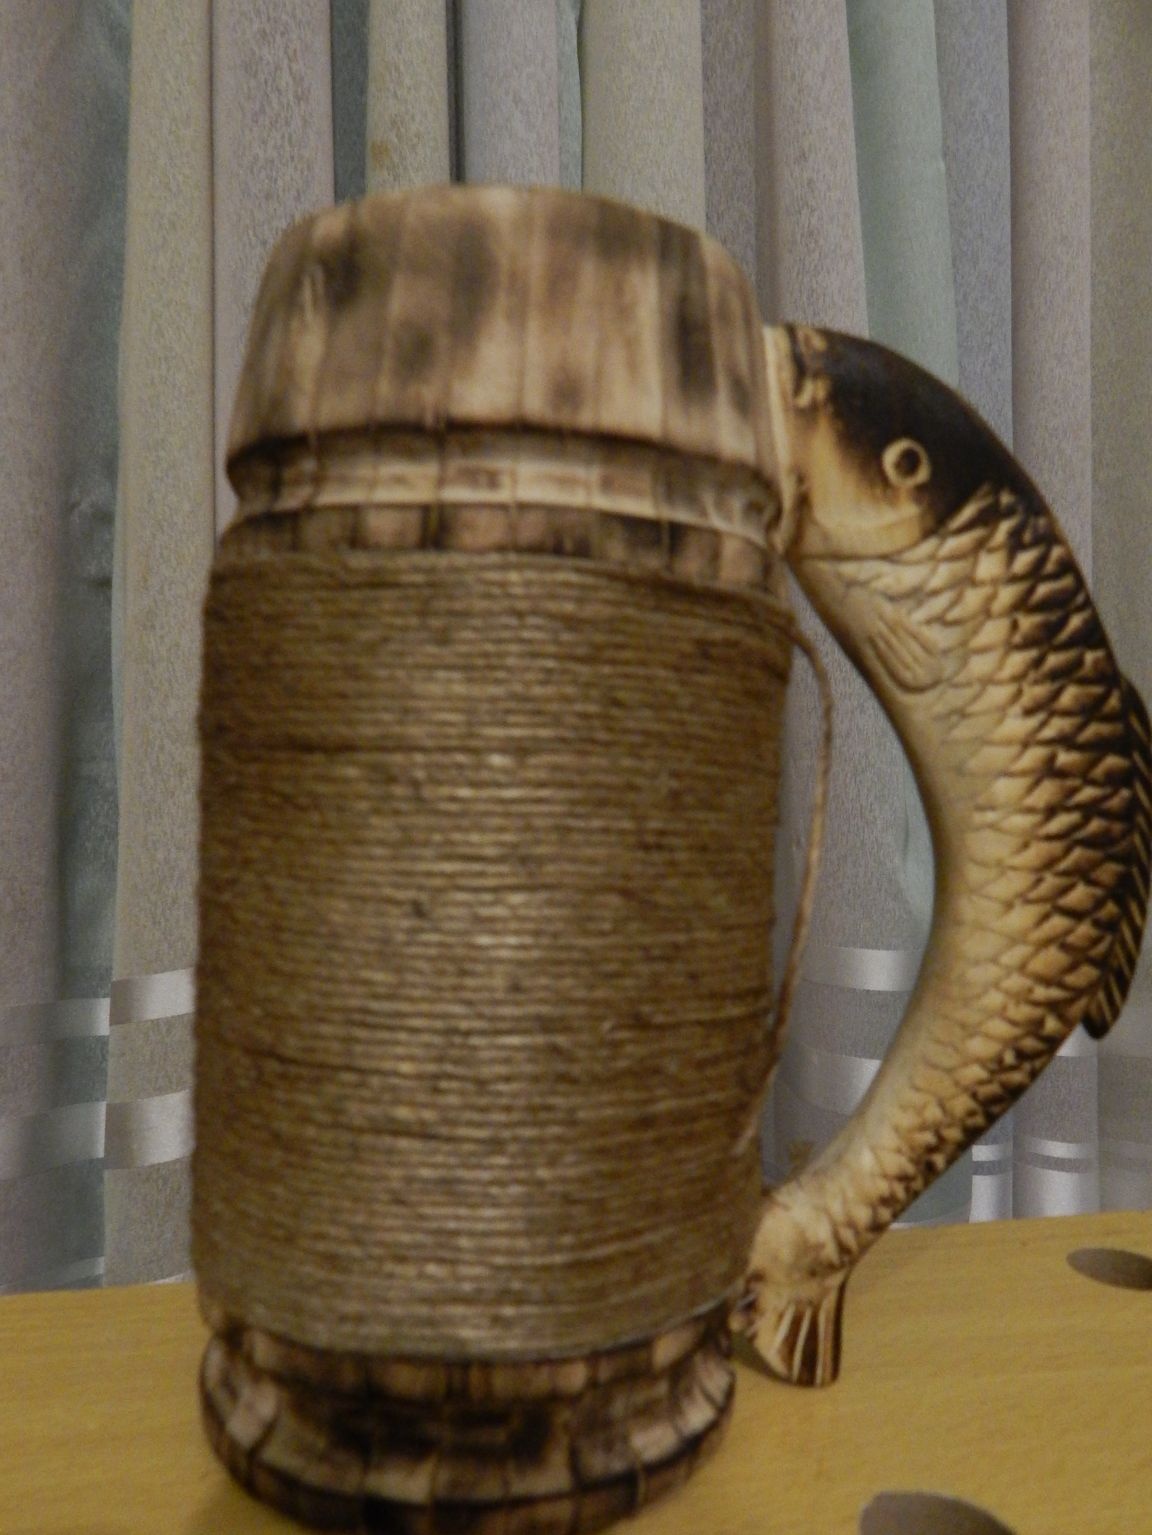
9. And finally, the last stroke of decoration. In the beginning I didn’t want to sculpt anything at all, but the mug looked too modest; I didn’t pull it on a souvenir. Therefore, I chose a simple drawing of the skeleton of the fish again, cut it out of white veneer and pasted on the facade of the mug. Of course I went too far with the size, but I think the one to whom I give will not be in complaints (in the worst case, the picture will be torn off).
Well, that’s all, I coated the outside with two layers of PF-170 varnish, if you believe the Internet, then they use wooden spoons in the factories without any problems, and the can from the factory is coated with varnish for food.