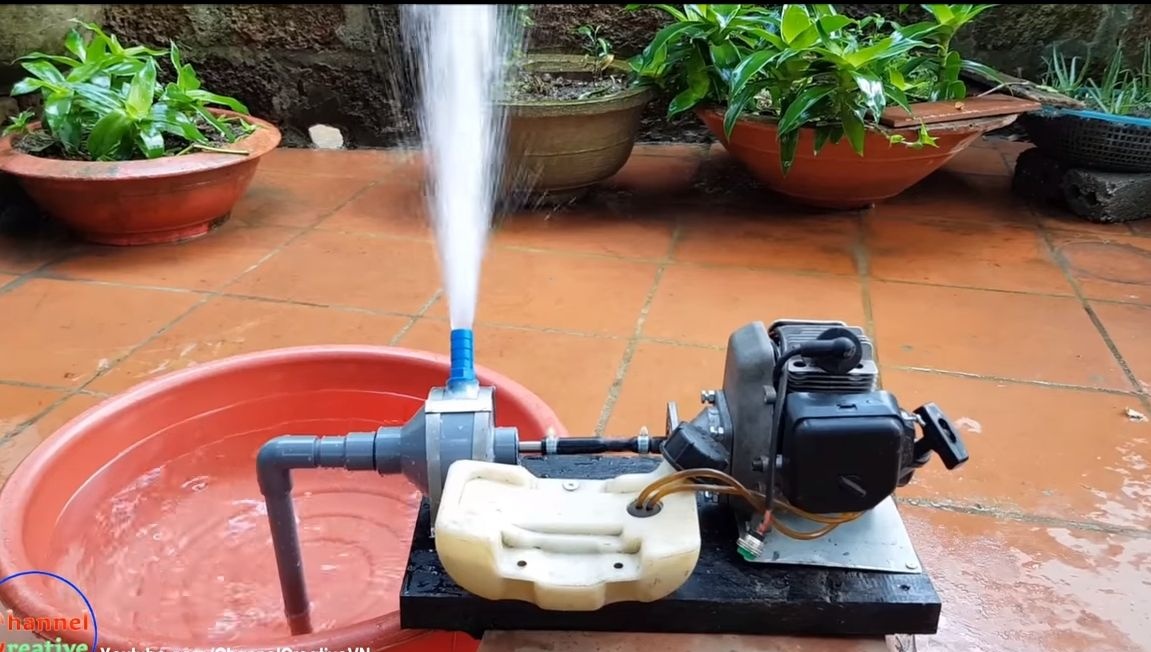
Do you often have a problem with pumping water? Watering the garden or other similar problems? This manufacturing instruction homemade will help solve them. I bring to your attention a simple gas pump, it consumes little fuel, and it works very efficiently. The pump itself is assembled from scratch, inexpensive materials are used here, the body is made of accessories for PVC pipes.
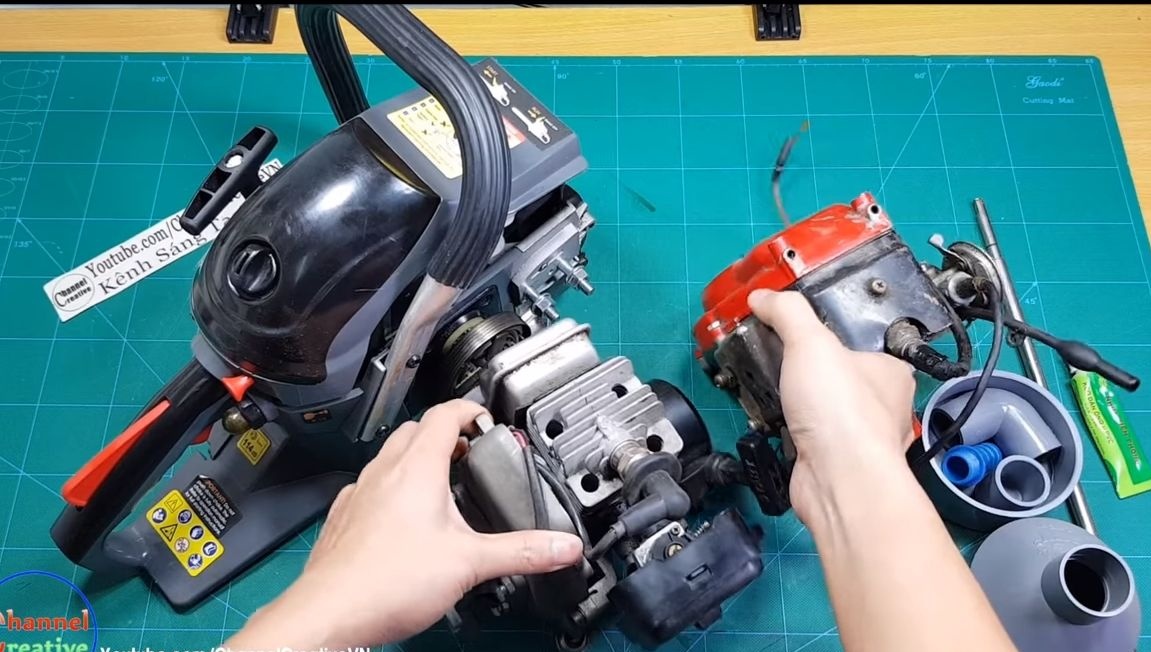
The most expensive element of homemade work can be considered an engine from a brushcutter. However, we won’t break it, so if you wish, you can always turn the pump back into a gas brush. Motors from chainsaws and similar equipment are also suitable.
Materials and tools used by the author:
Material List:
- engine from a brushcutter;
- steel plate (for impeller);
- wood board (for the base);
- steel axis;
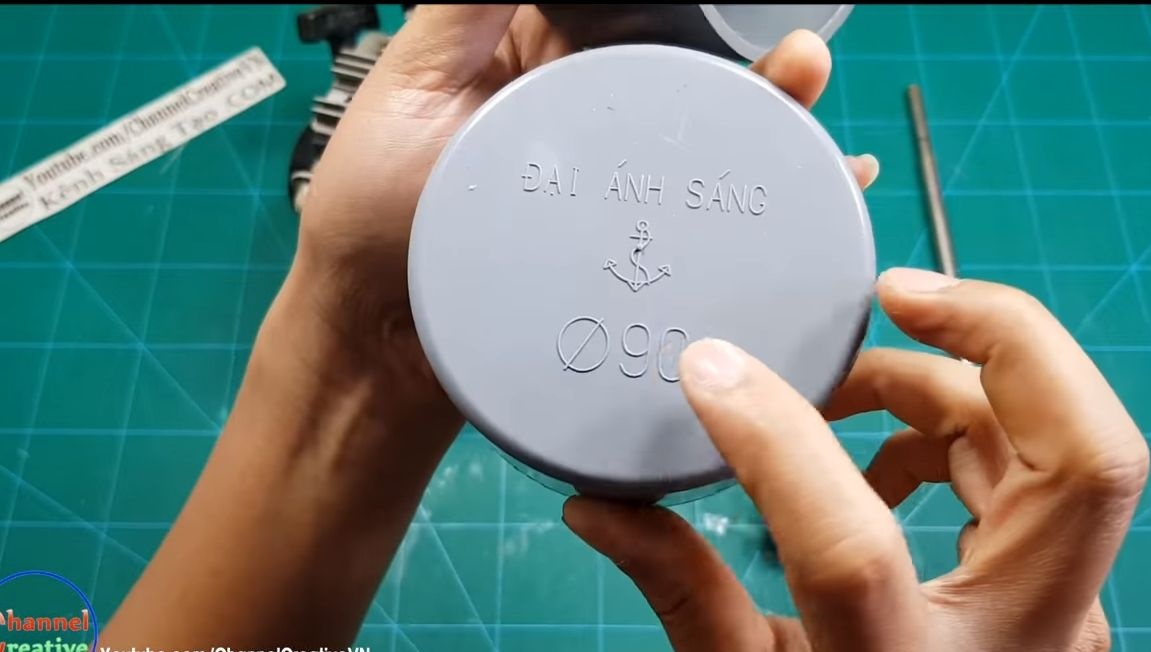
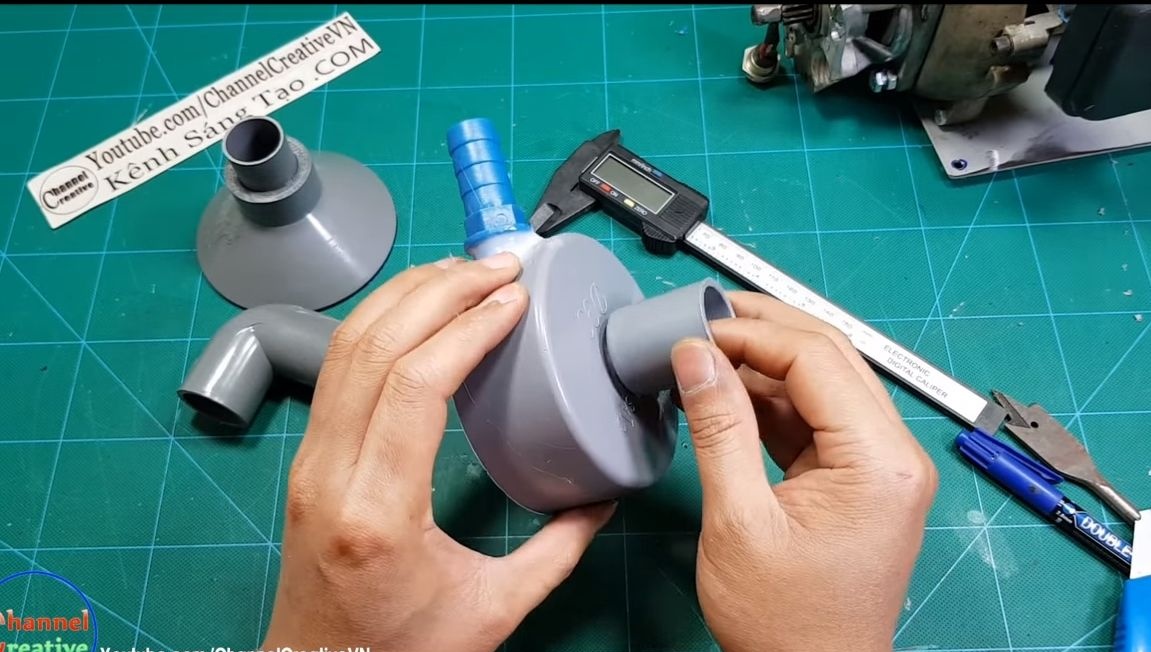
- a cap for a pipe on 90 (PVC);
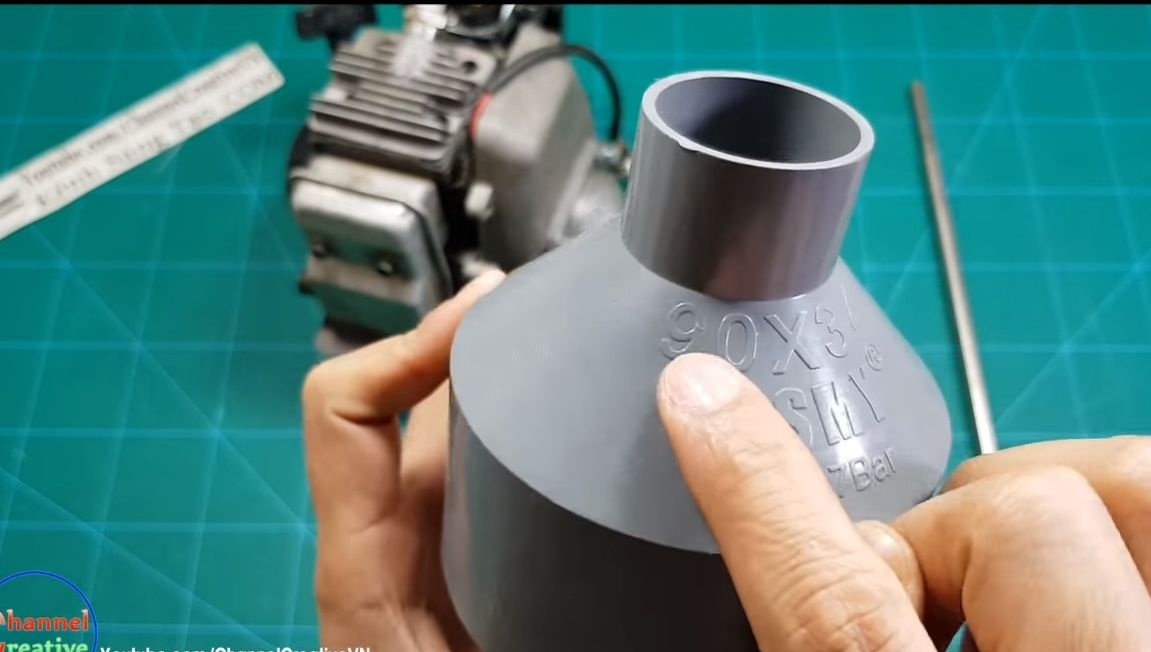
- adapter 90X34 (PVC);
- a corner and a piece of pipe (PVC);
- fitting for the hose (to the pump);
- bearing;
- Super glue;
- epoxy;
- copper sleeve;
- a piece of hose (for coupling);
- cogs, screws and other little things.
Tool List:
- drill ();
- screwdriver;
- welding ();
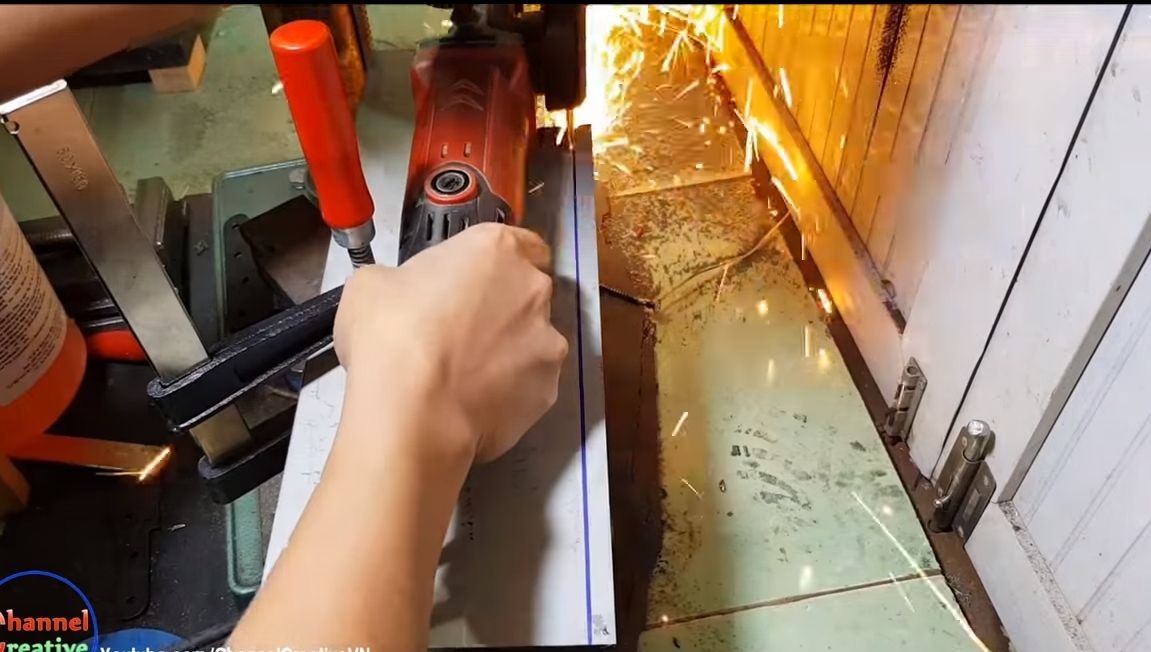
- grinder ();
- dremel;
- vernier caliper (digital by the author);
- bits for drilling, screwdrivers, pliers and so on.
Pump manufacturing process:
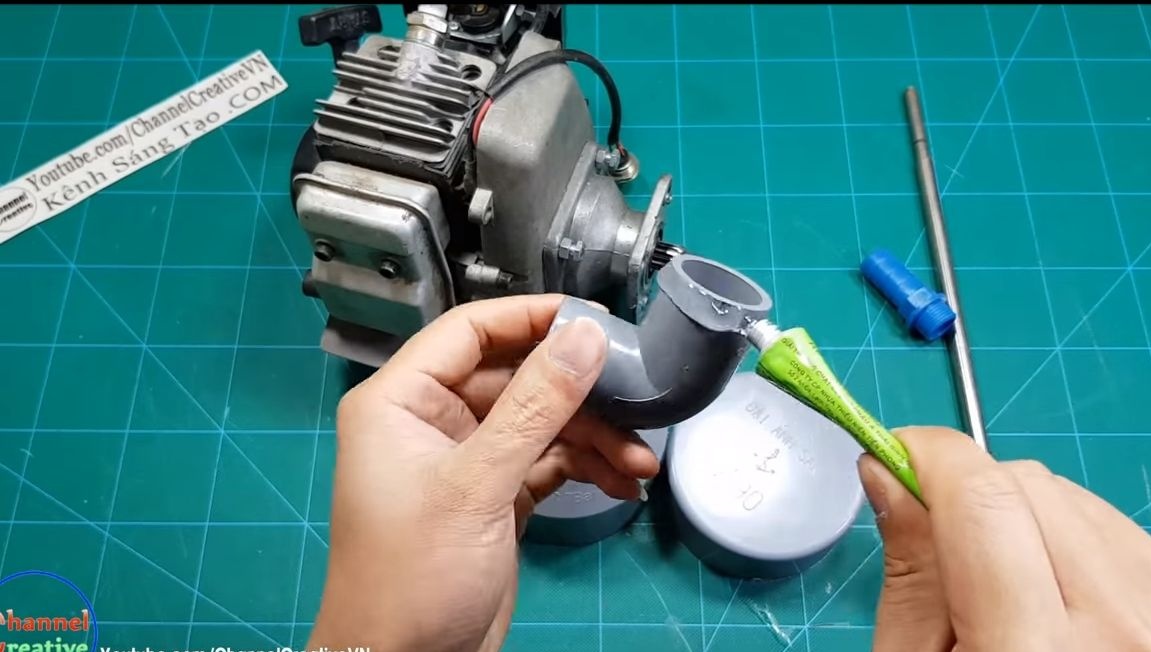
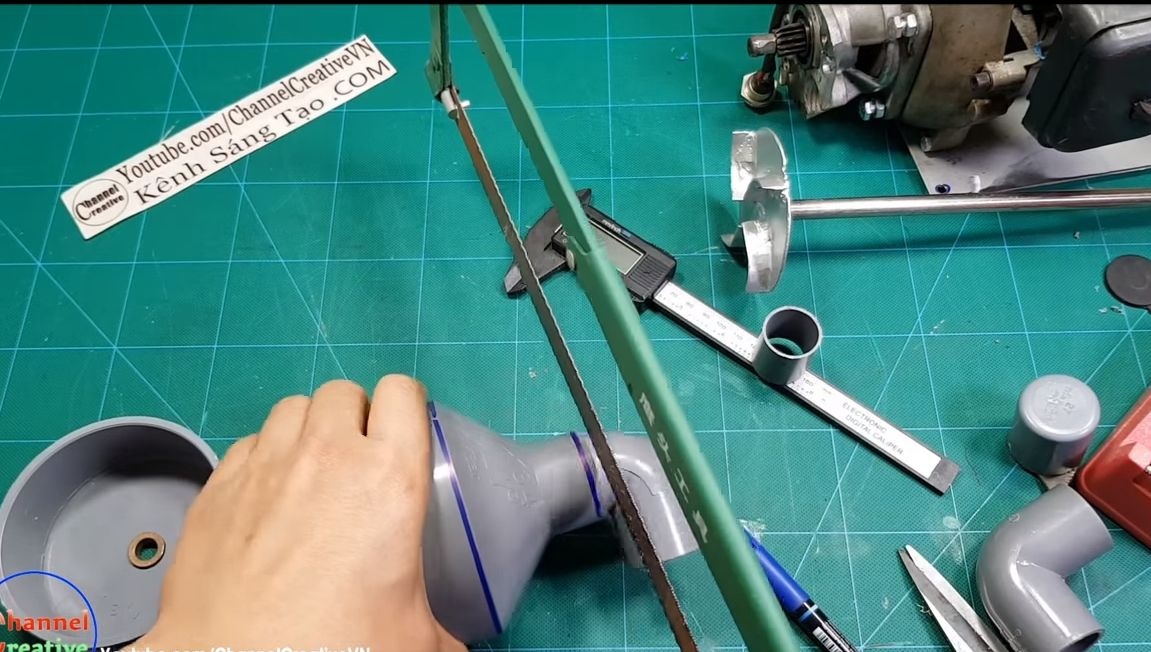
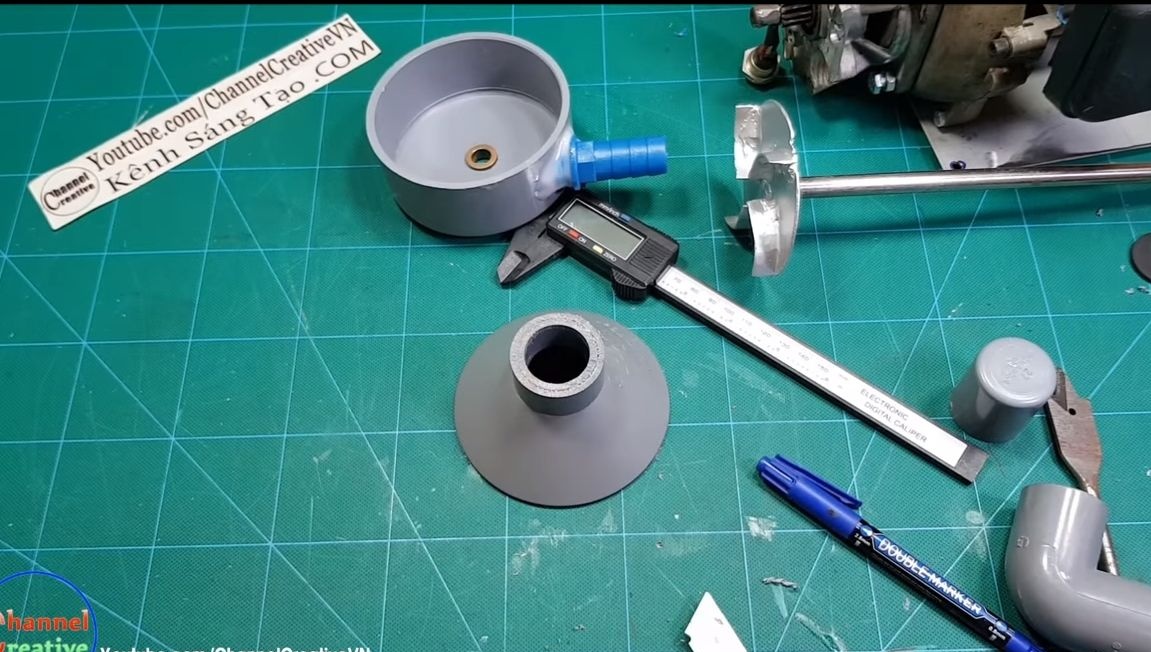
Step one. Case blank
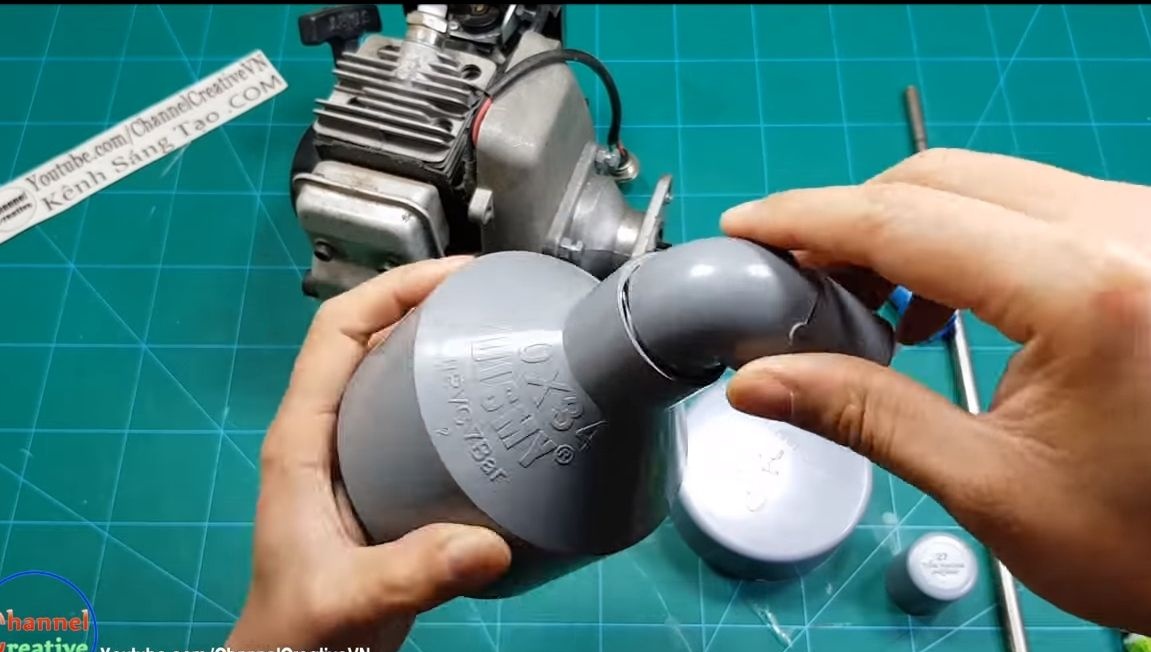
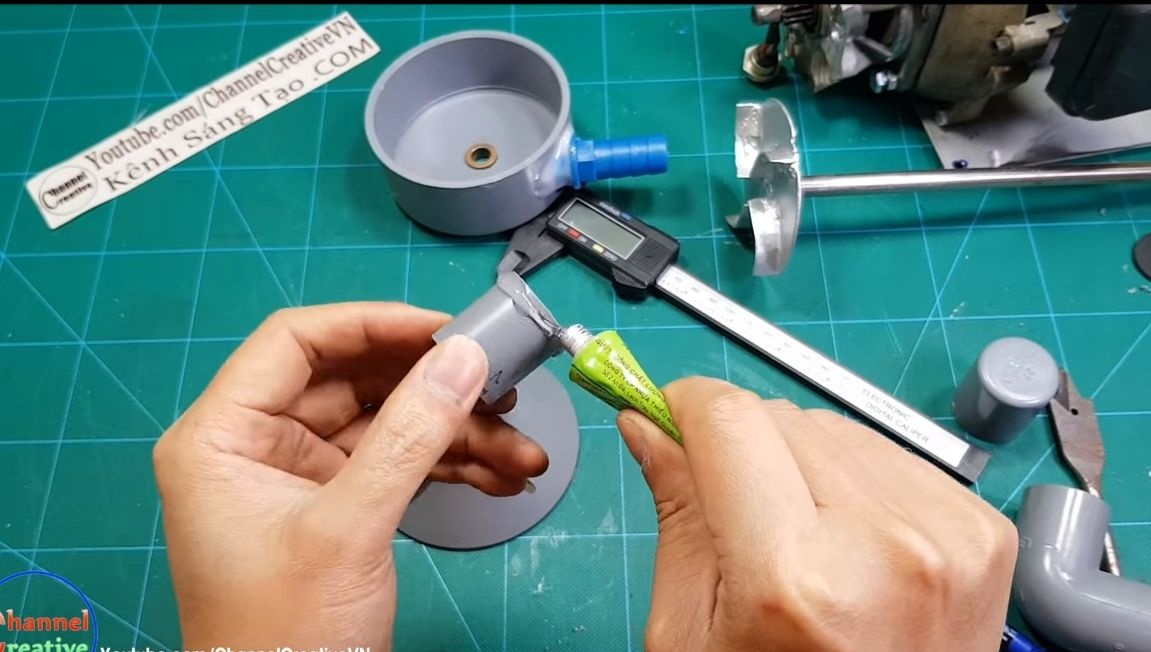
You will need a part 90X34, as well as a corner. We take glue and glue the corner. While putting off this detail.

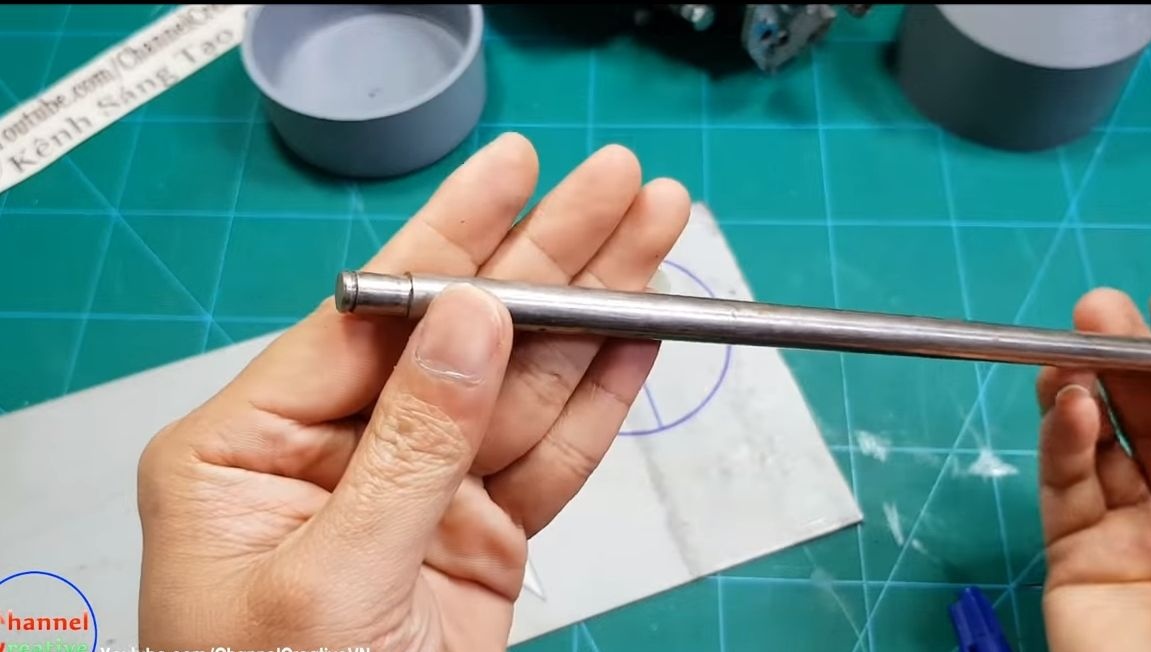
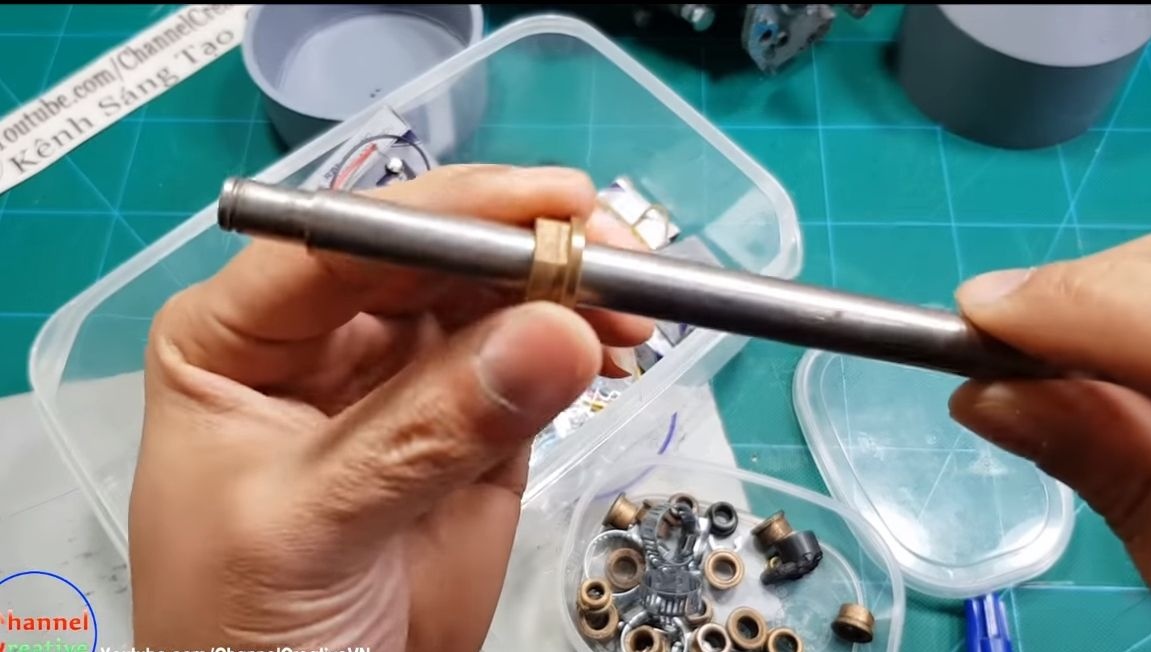
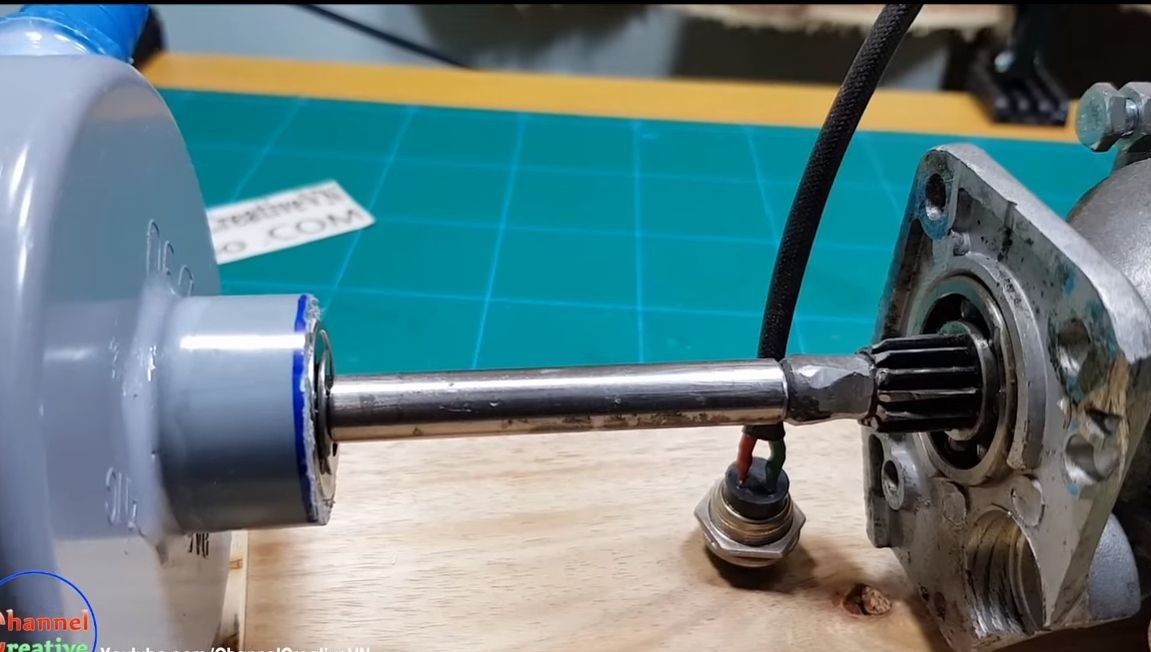
Step Two Axis preparation
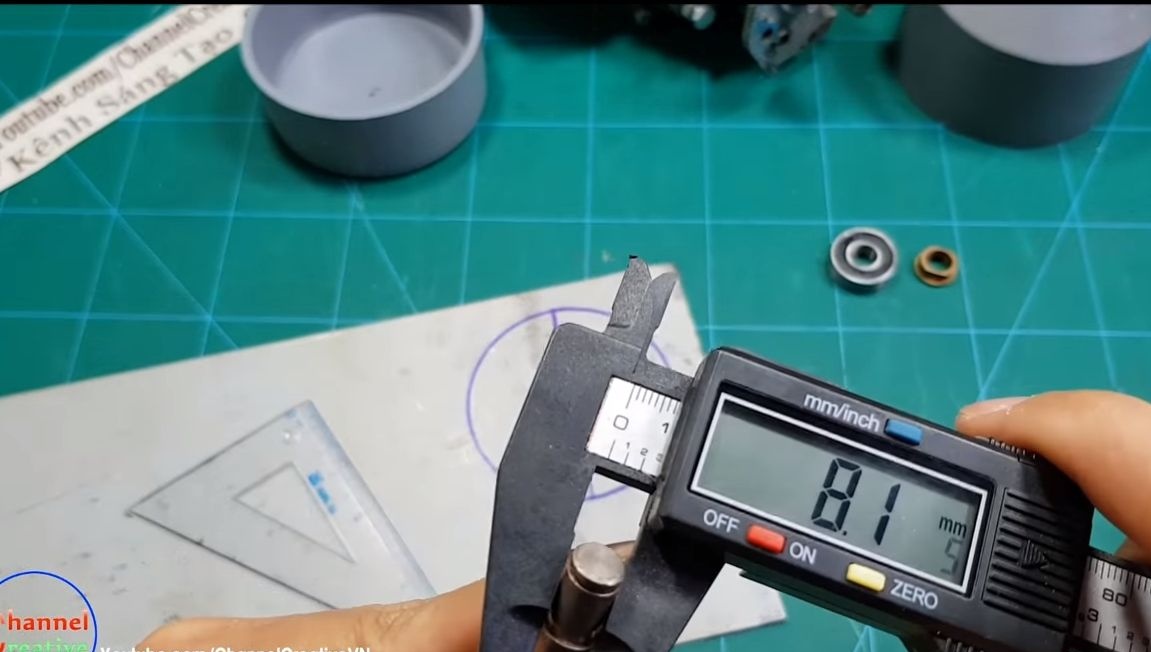
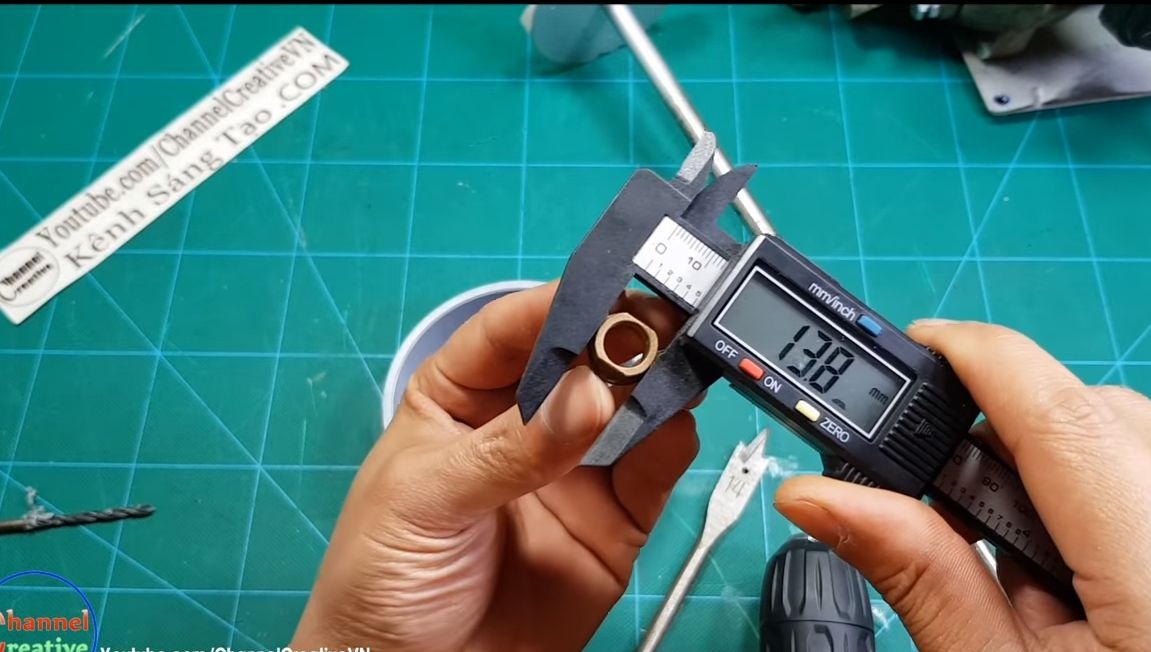
You need to find a good axis. It will rotate on the bearing, and to seal the system you will need a sleeve made of brass or copper, which between the axis will form the smallest possible gap.
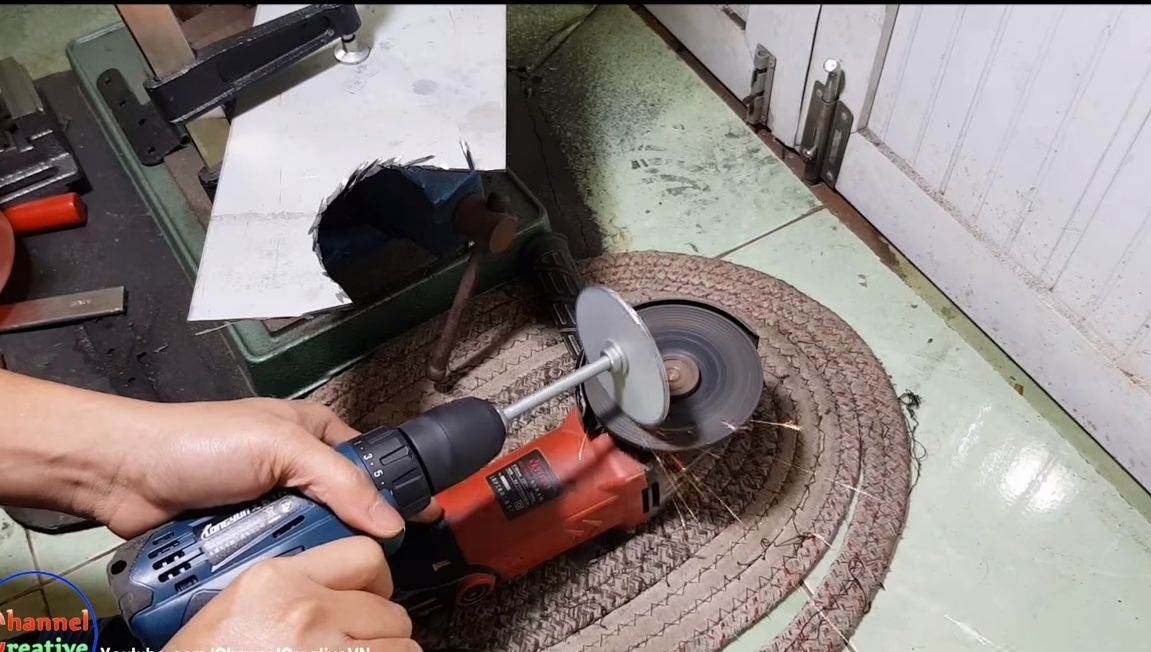
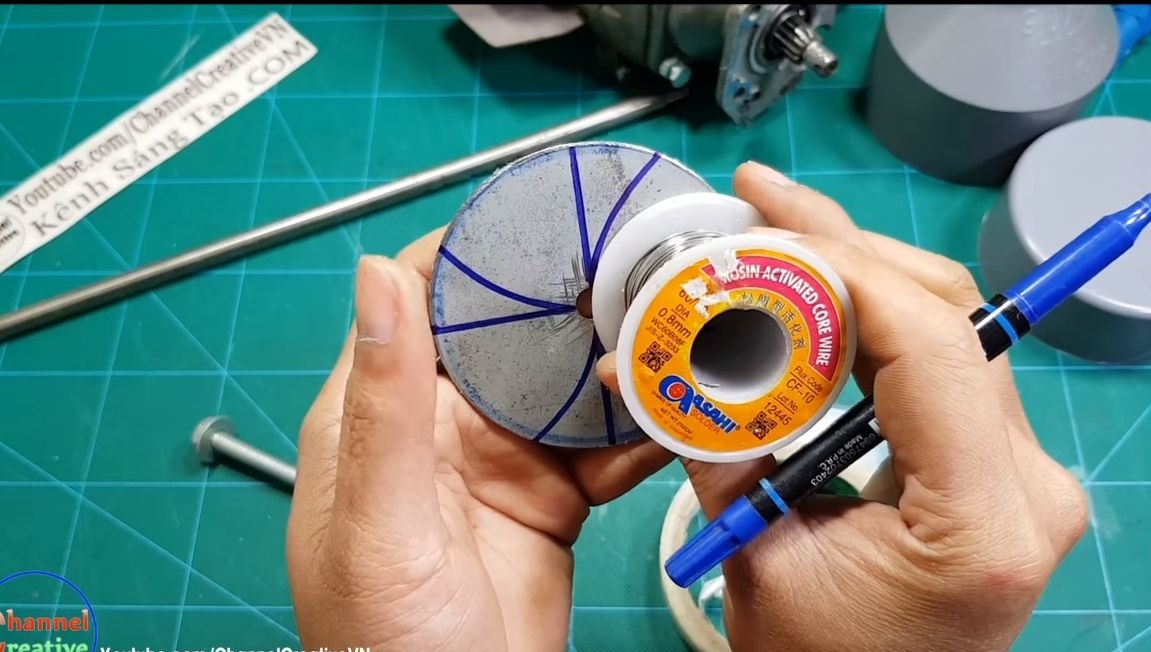
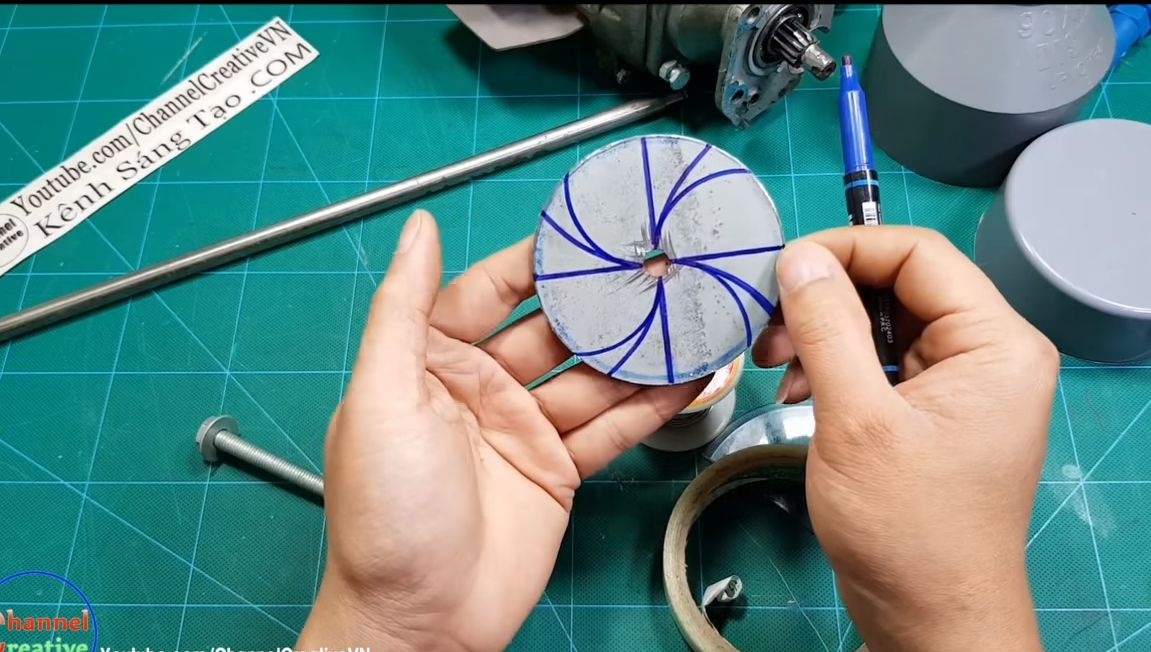
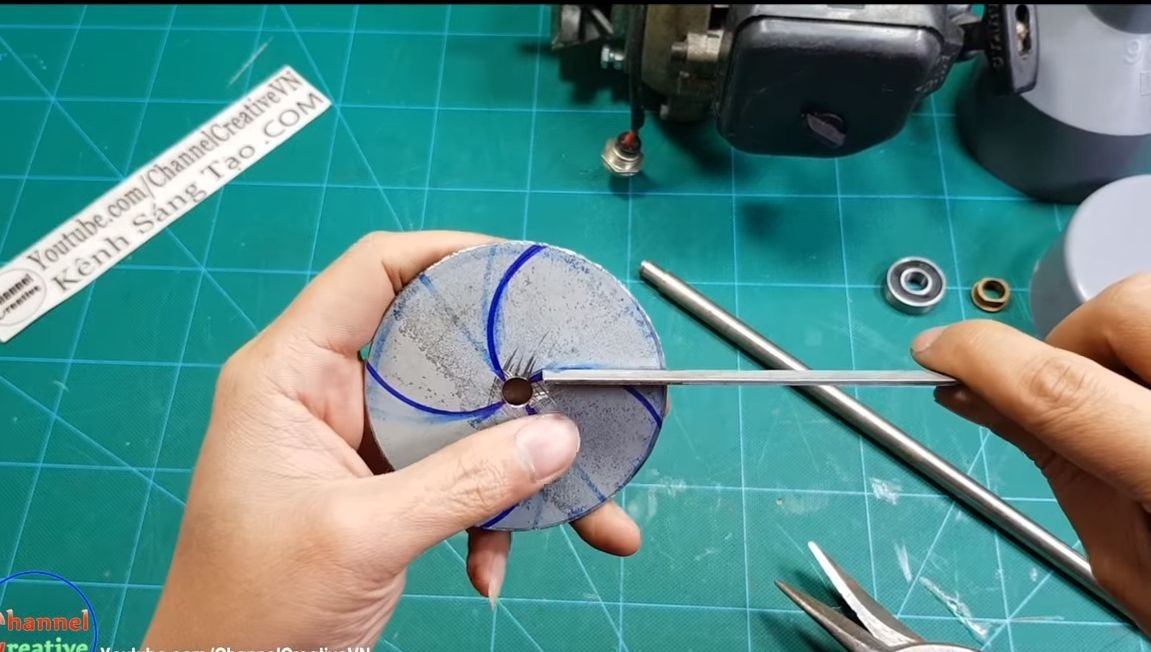
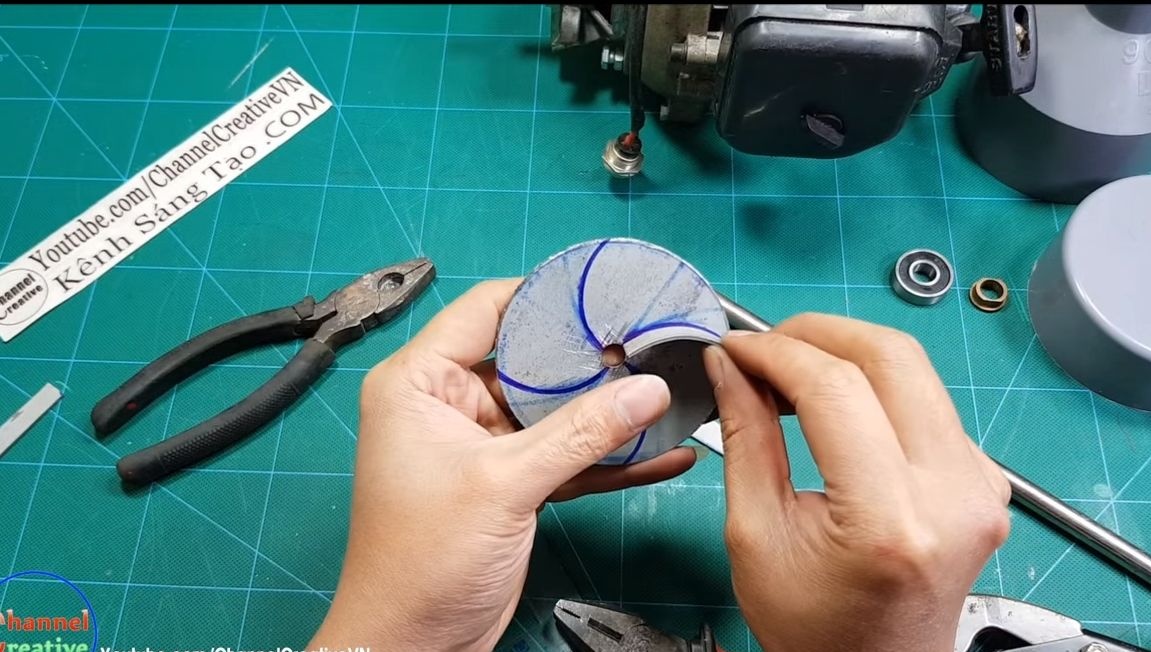
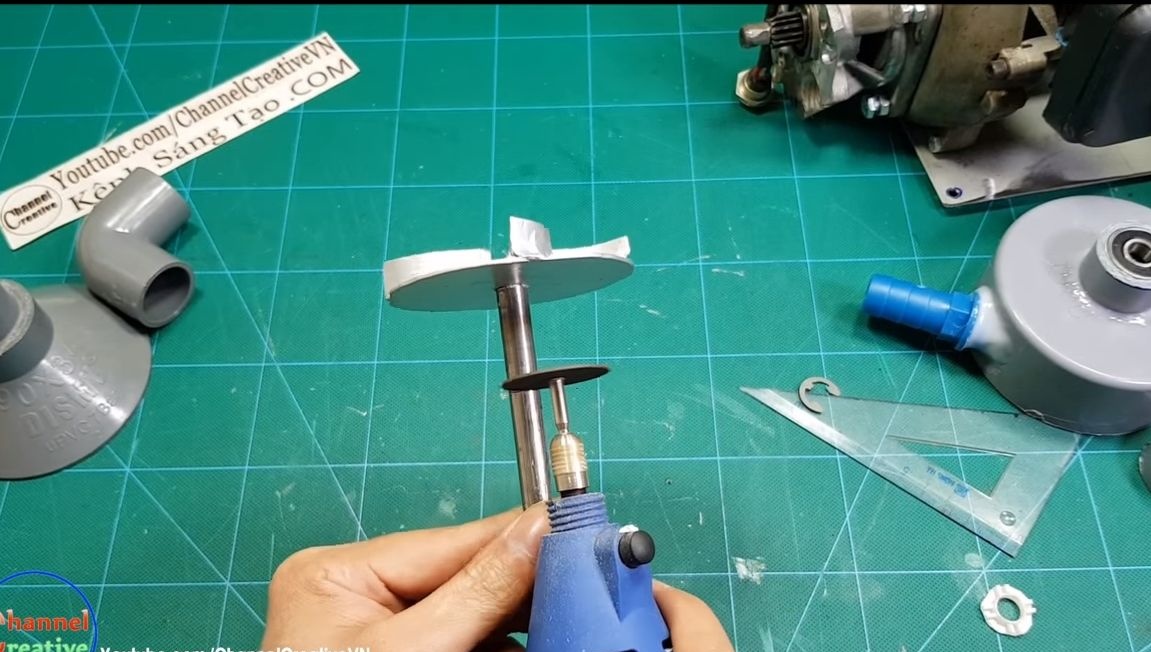
Step Three We make an impeller
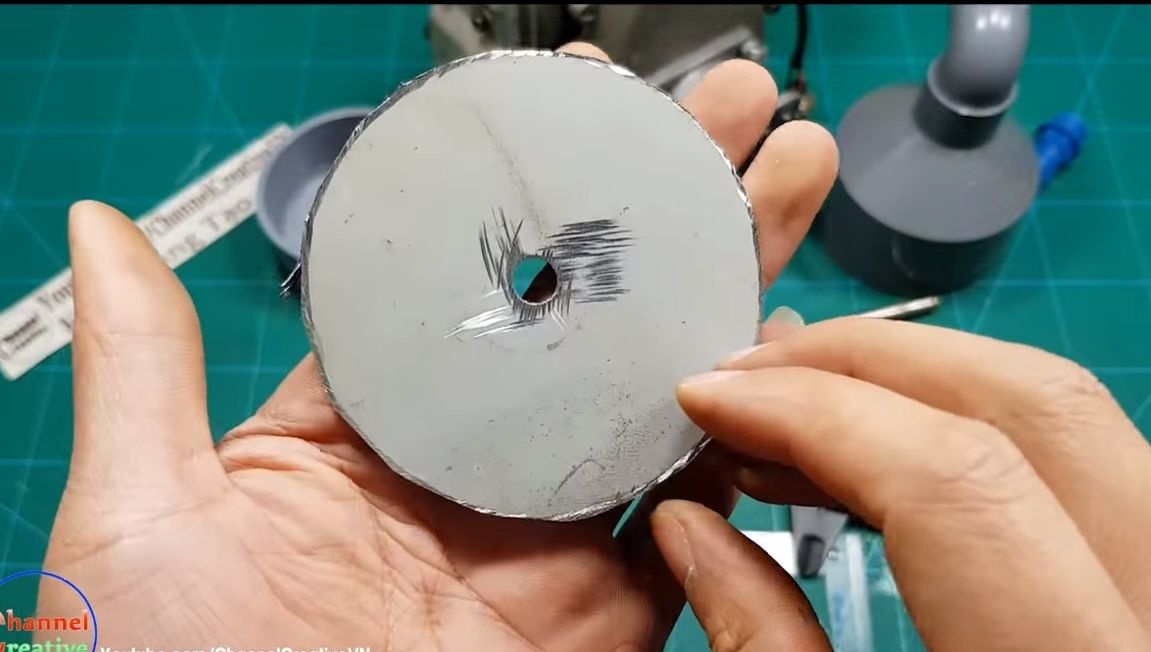
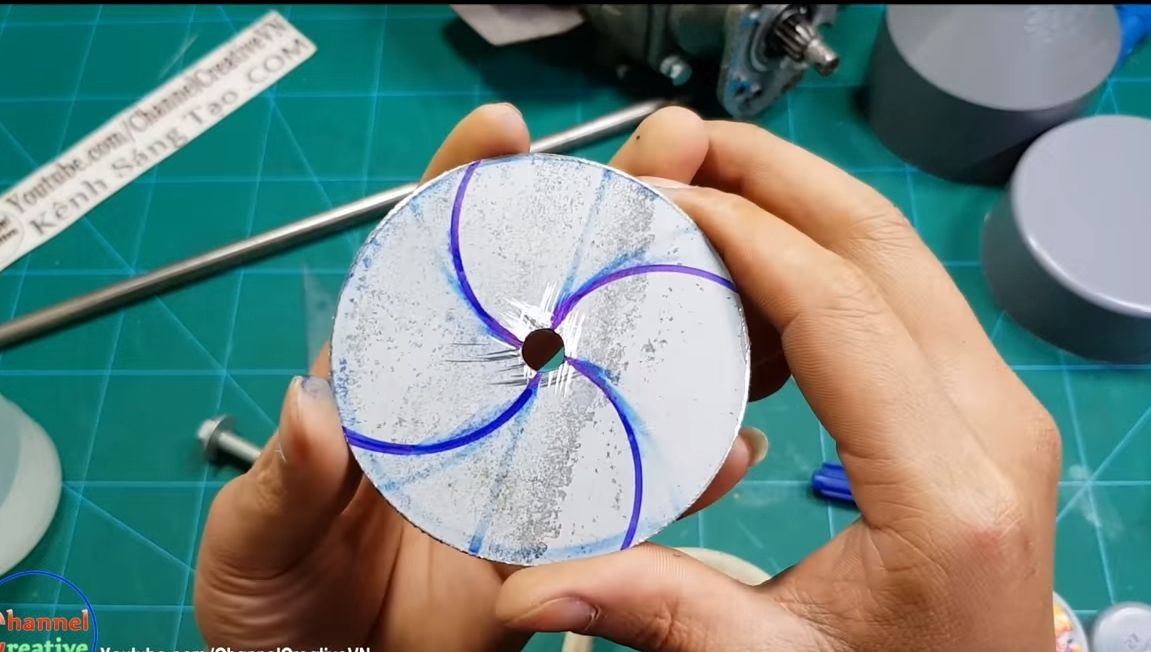
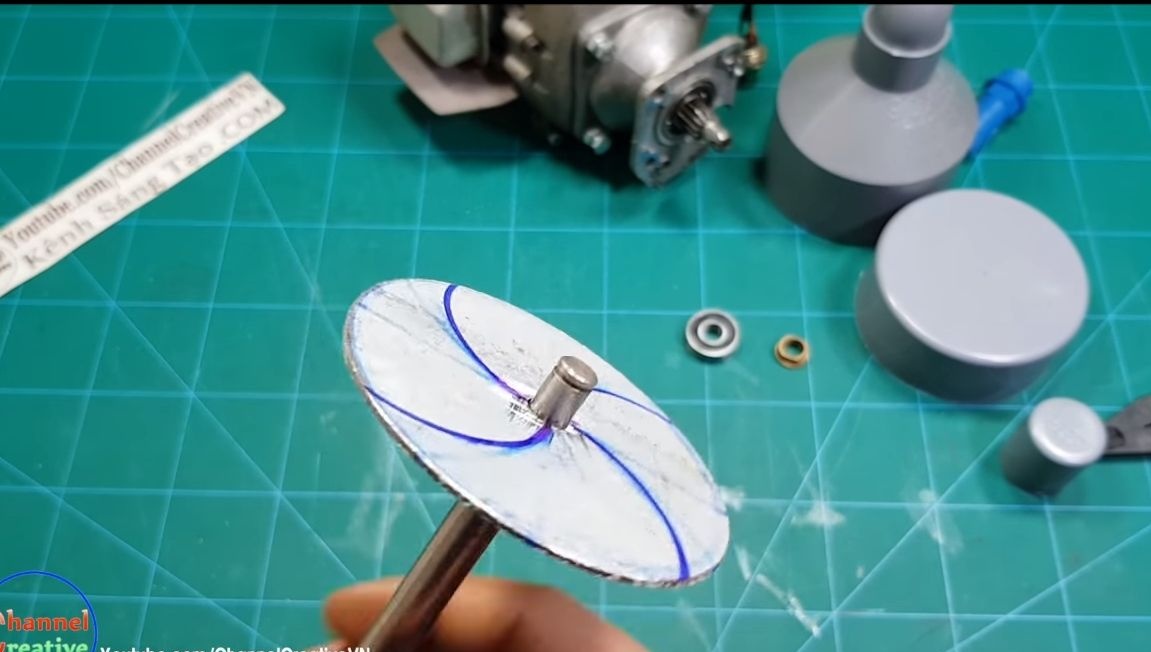
The author has a centrifugal impeller; it is made of sheet steel, including the blades themselves. First of all, you will need to cut the disc according to the inner diameter of the case. The author first cuts it out with a grinder, and then brings it to an ideal, using a drill and grinder.

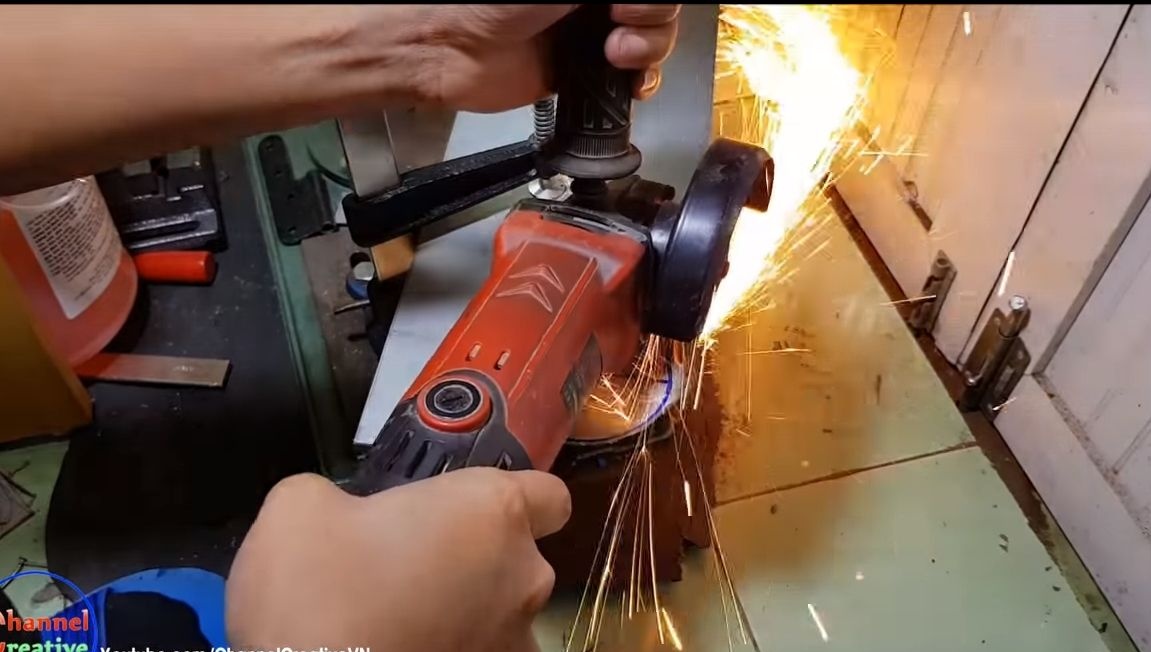
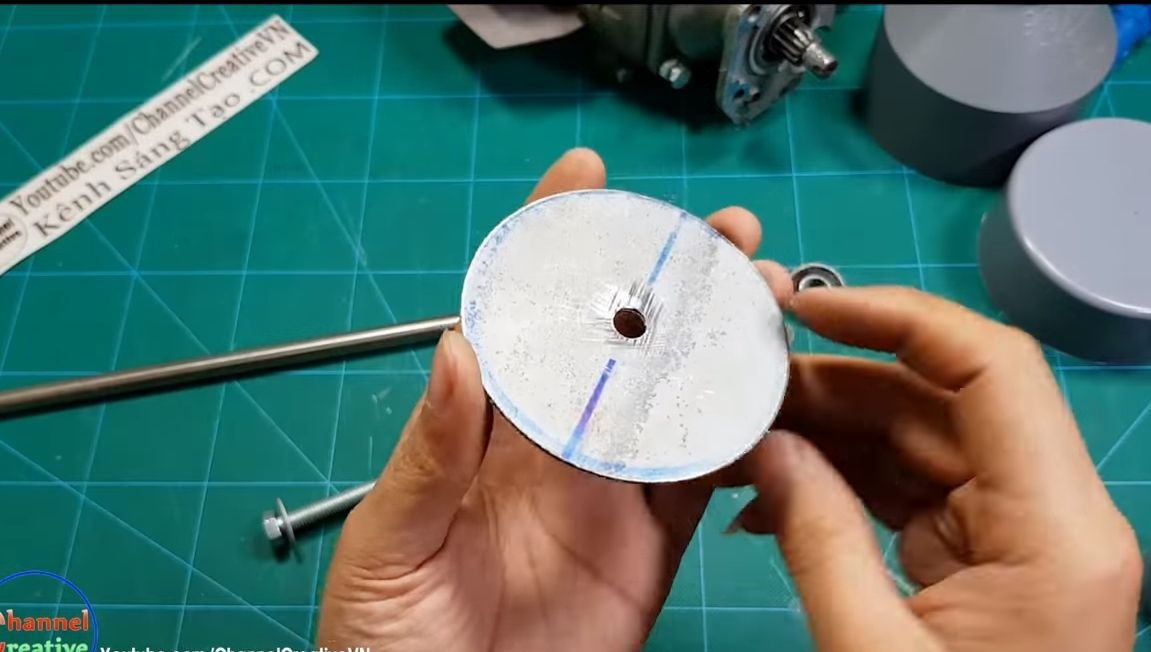
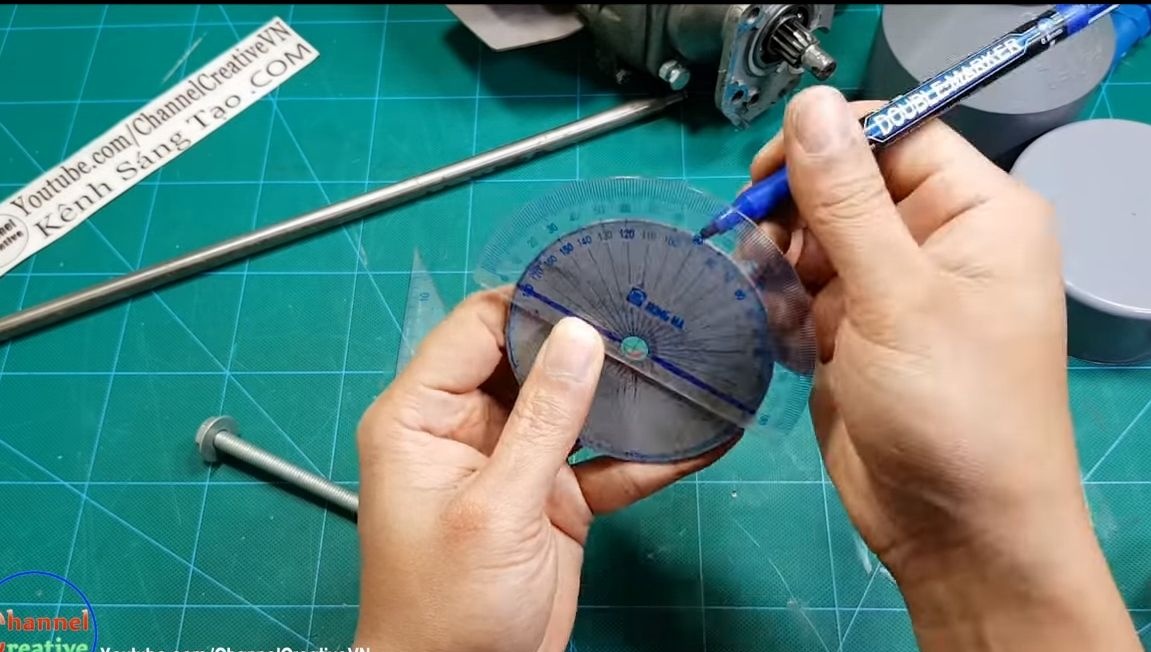
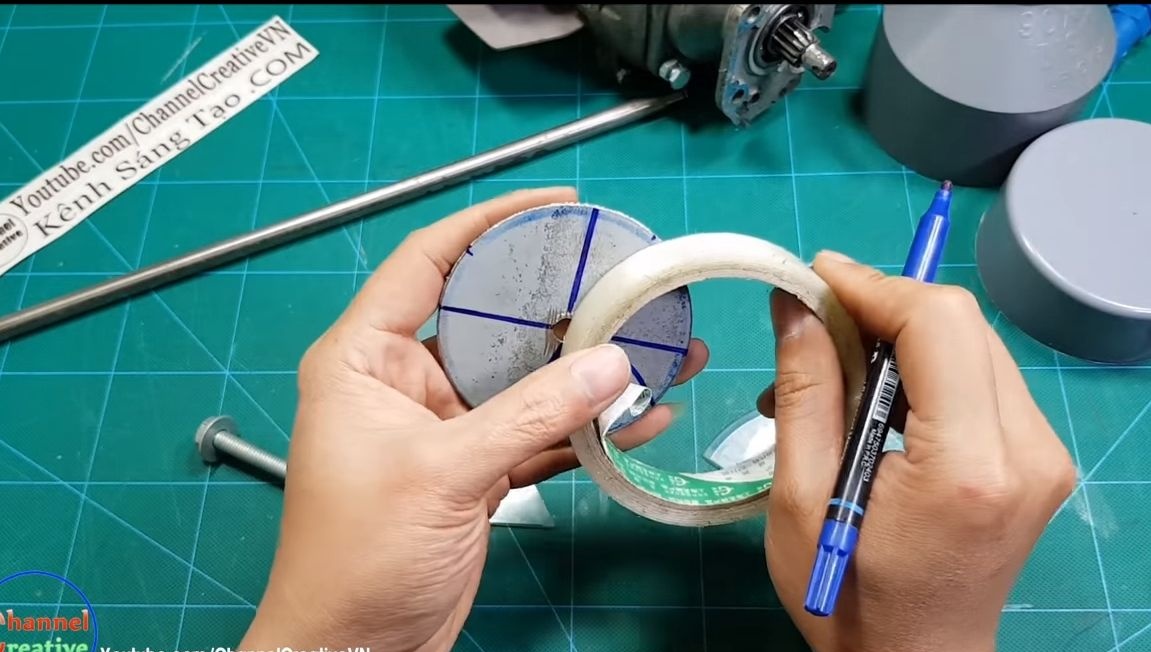
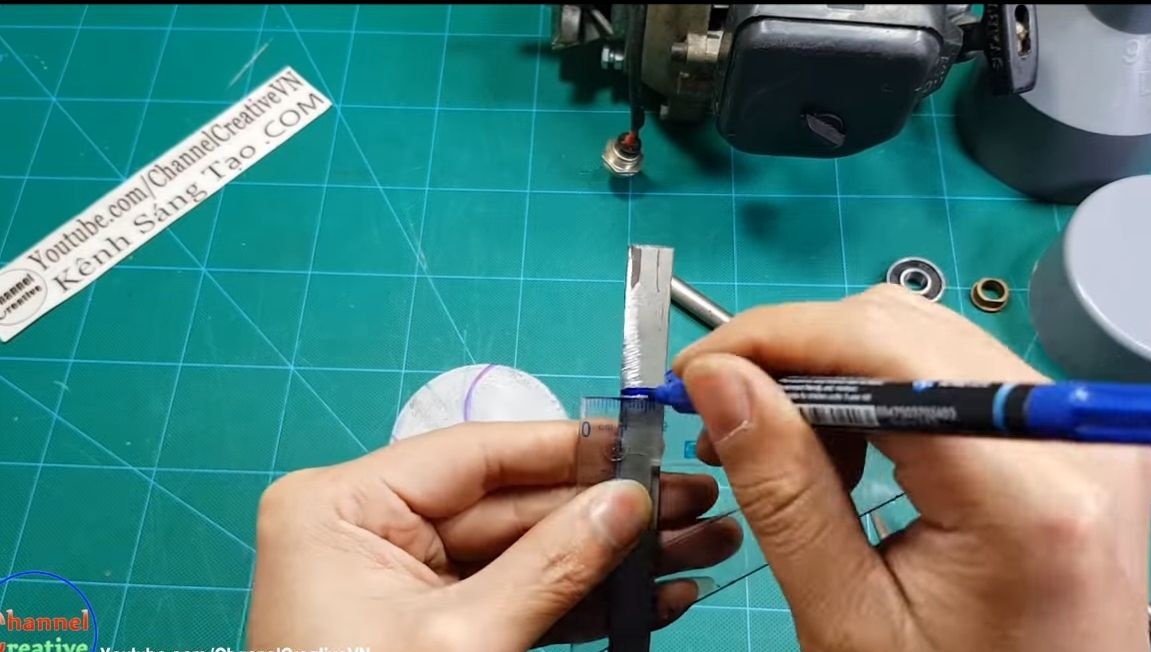
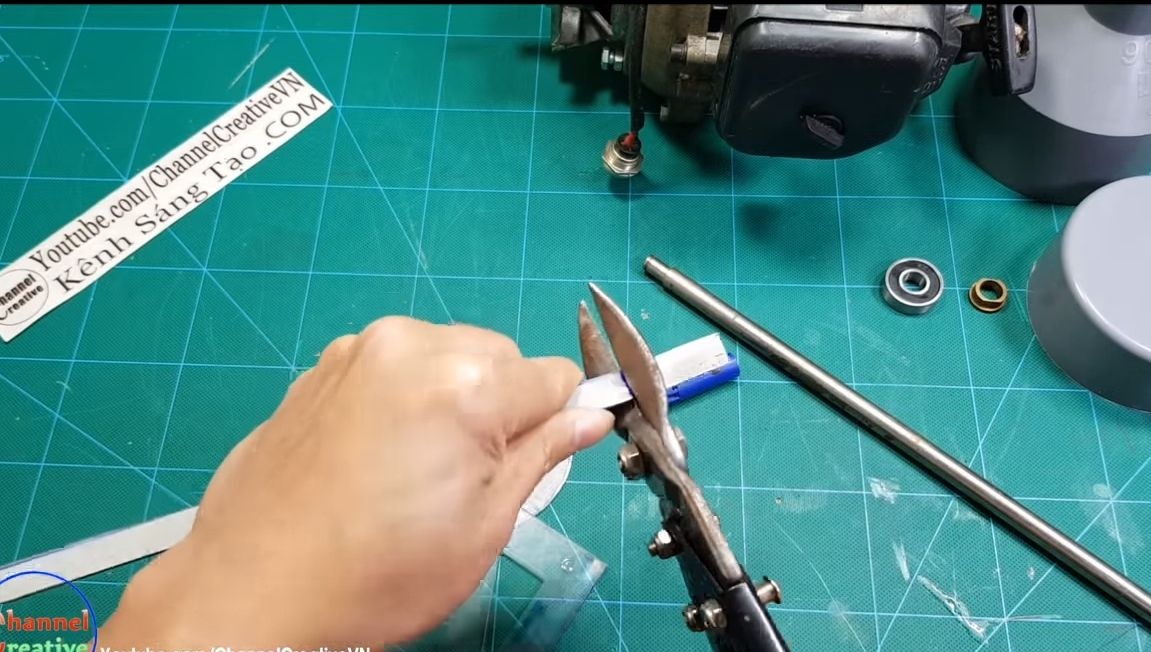
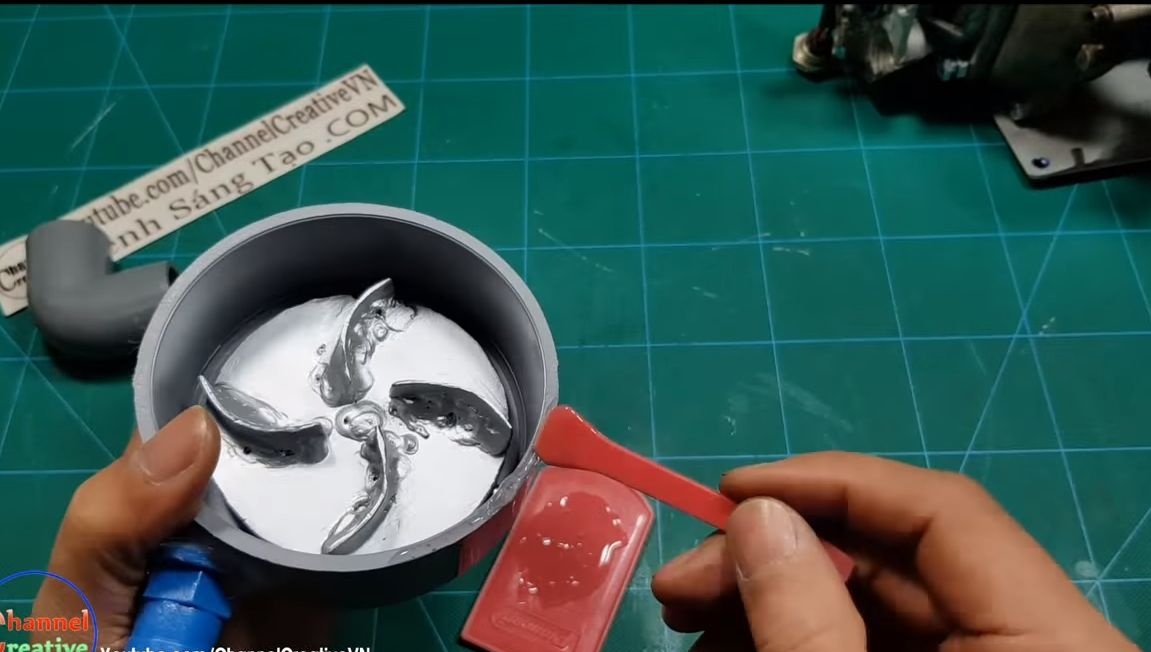
The disk is ready, now the most painful part begins. Through many cunning manipulations, the author draws a profile of the blades on the disk. Once the drawings are ready, you can make the blades. Again, take sheet steel and cut into strips of the desired thickness. We cut 4 pieces of suitable length and with the help of pliers we form the profile of the blades.


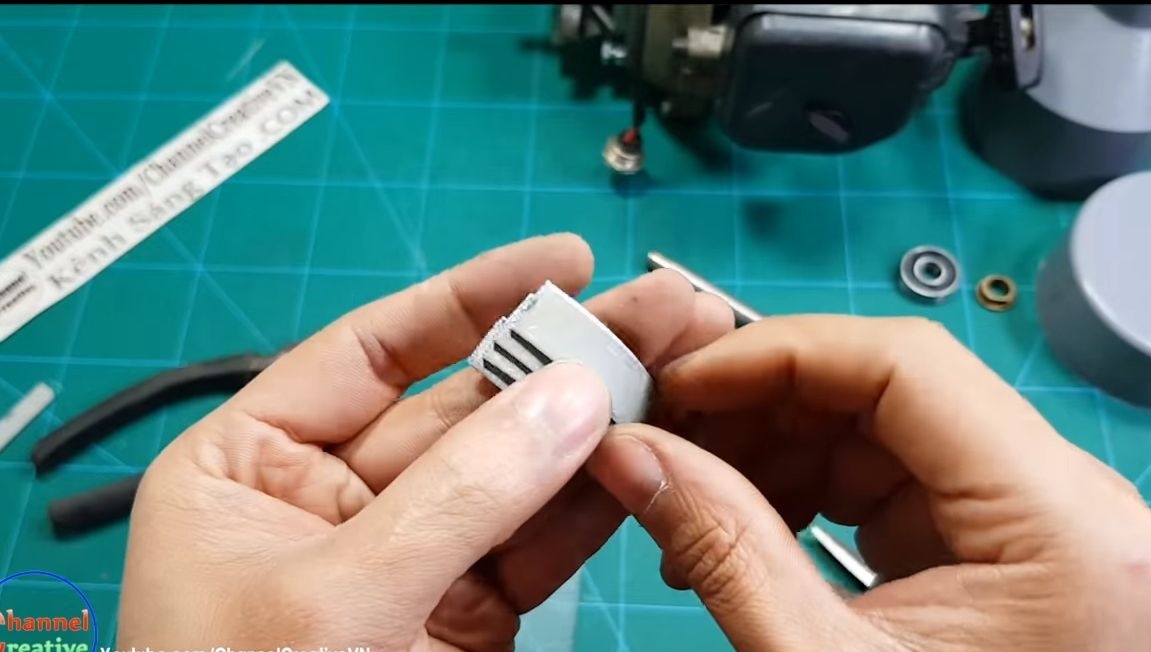
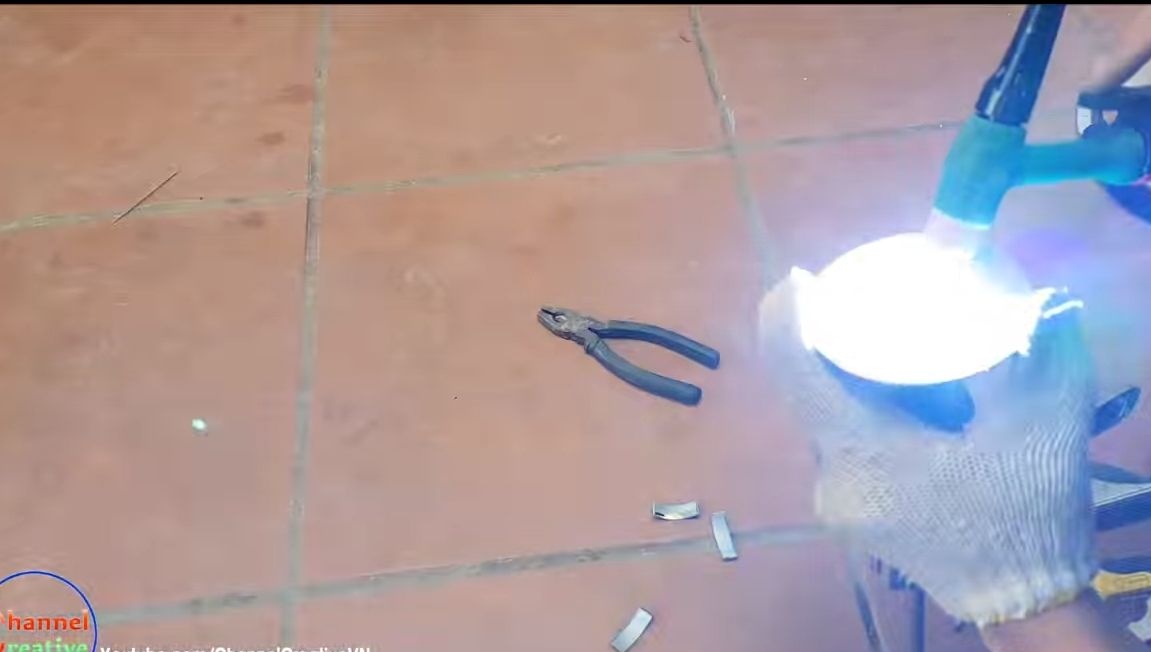
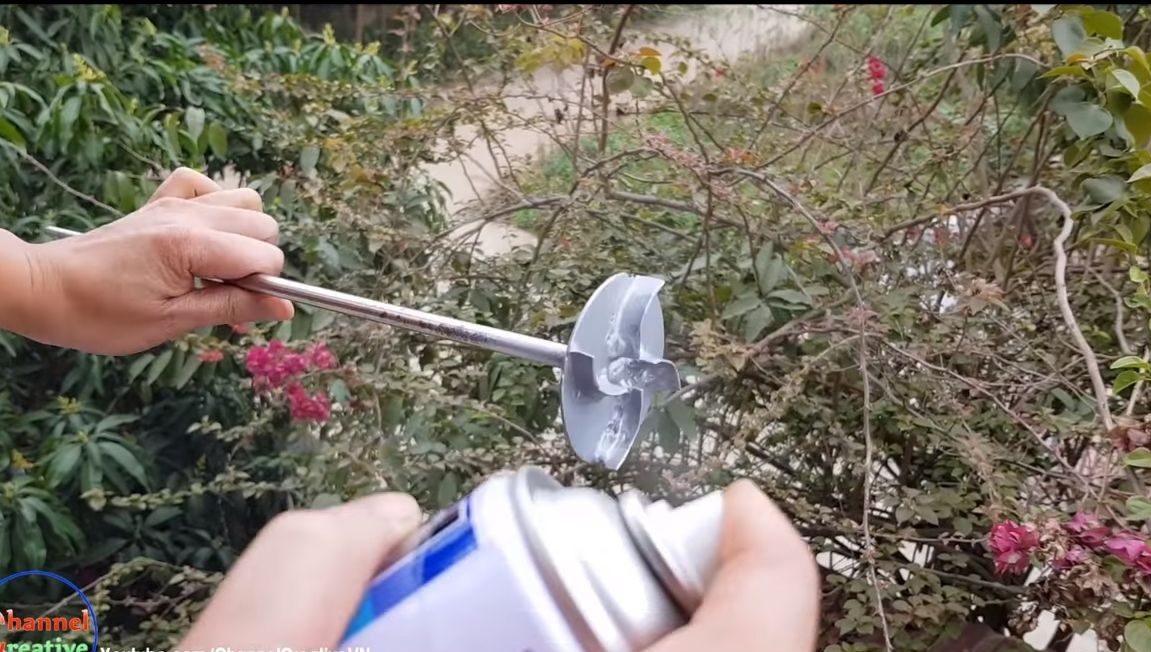
Once the blades are ready, they can be welded.You need to weld well, since the loads are considerable, and in the event of a breakdown, the entire pump can fly to pieces. Finally, paint the impeller well. Do not forget that it will constantly come into contact with water that is possibly dirty, so that its rust will attack not weakly.
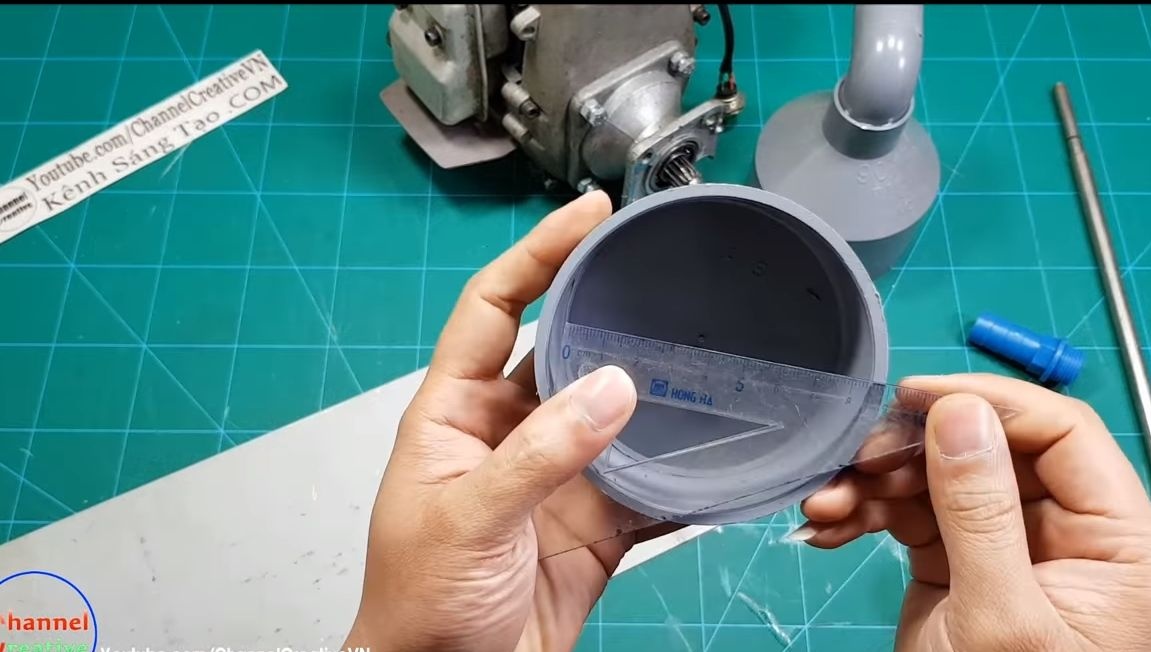
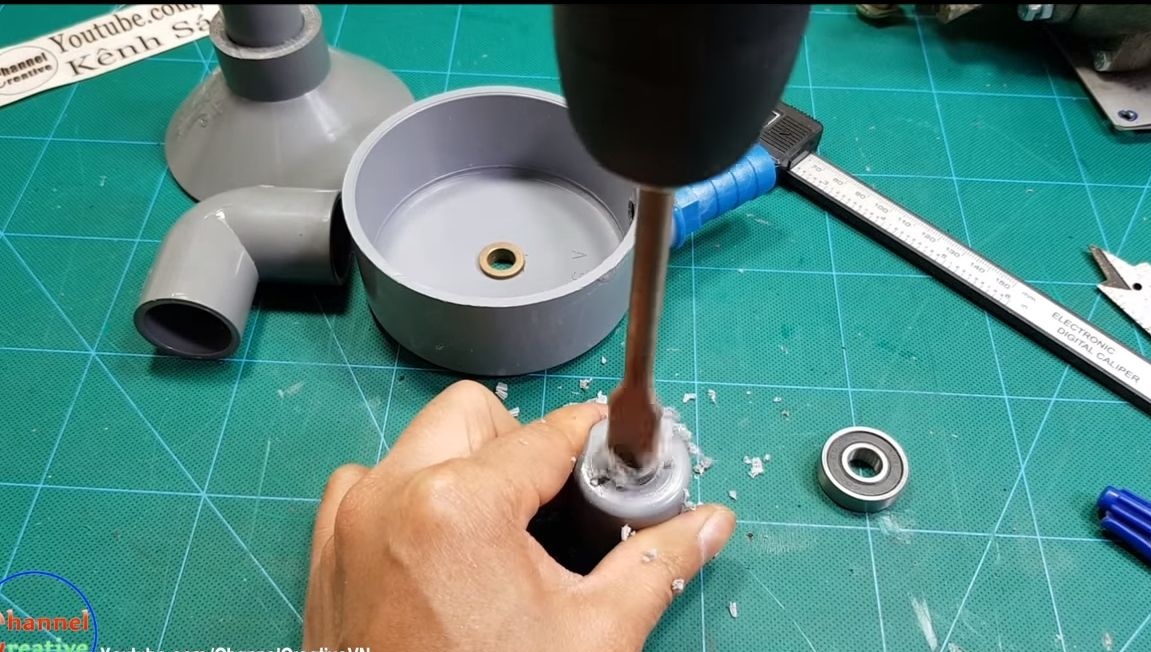
Step Four We prepare the second half of the body
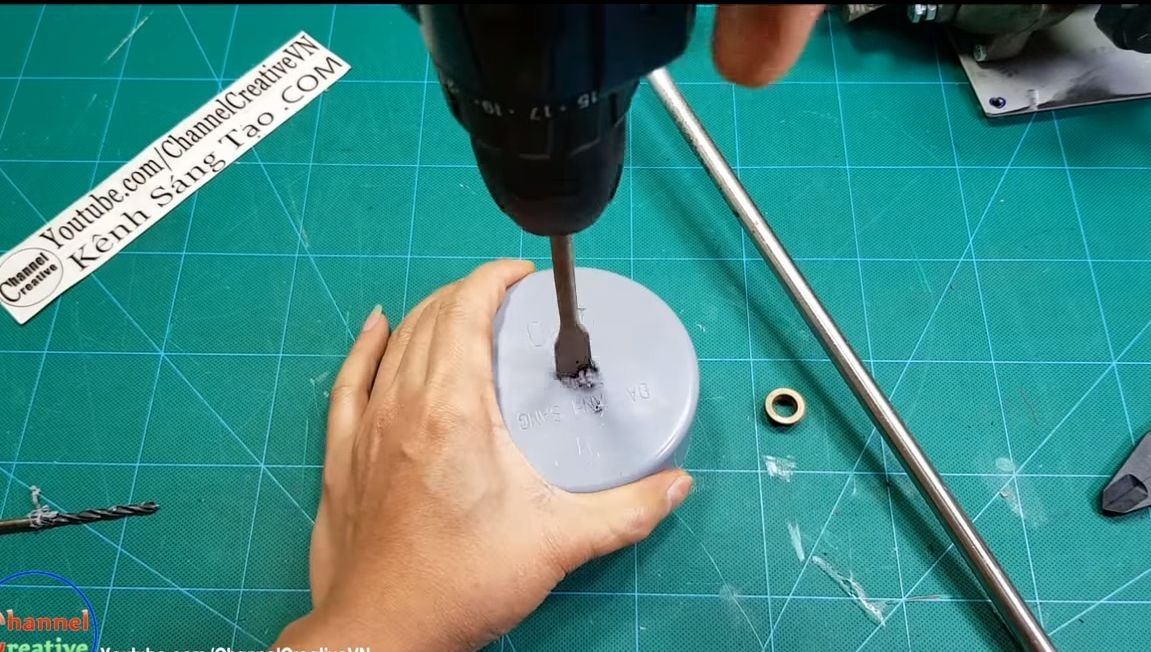
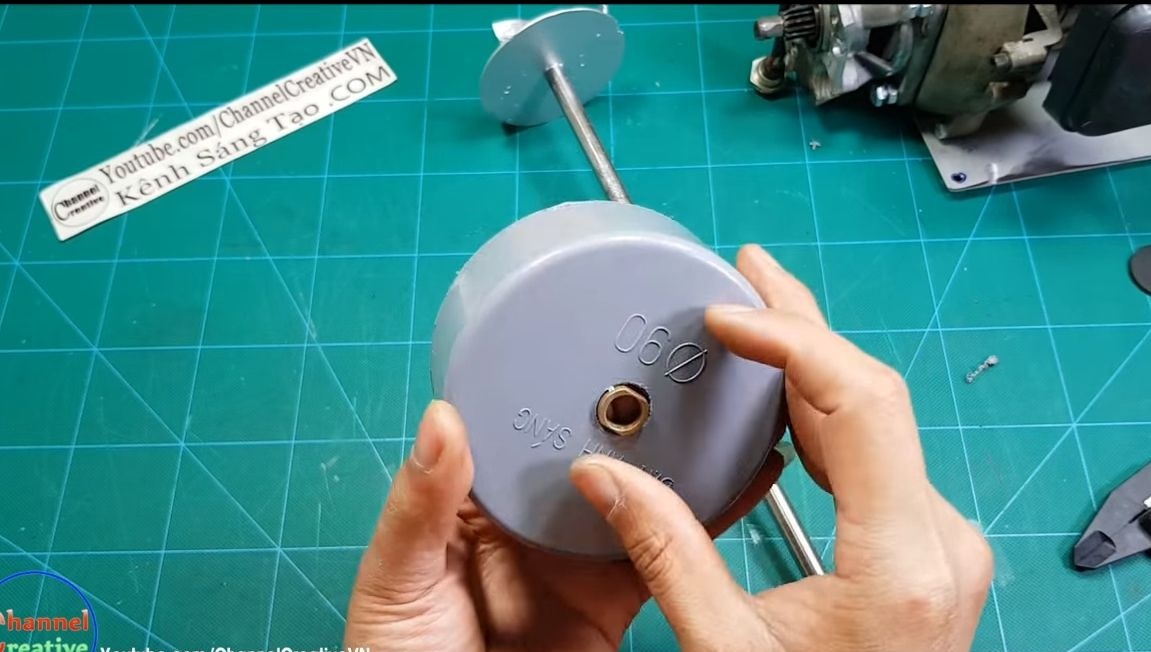
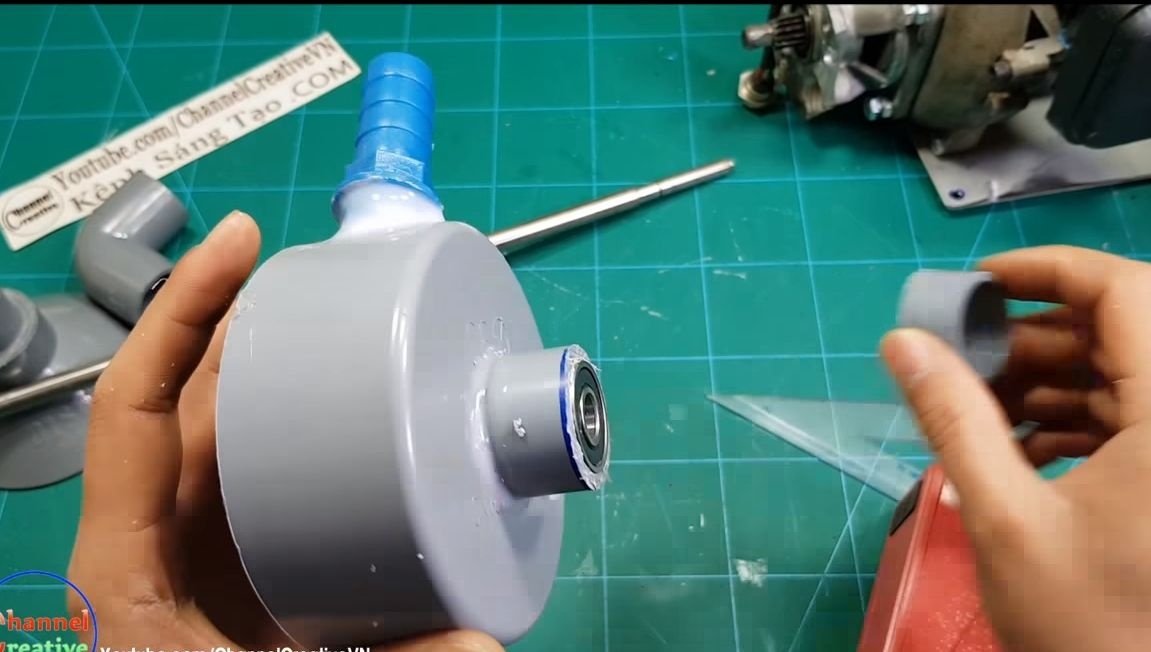
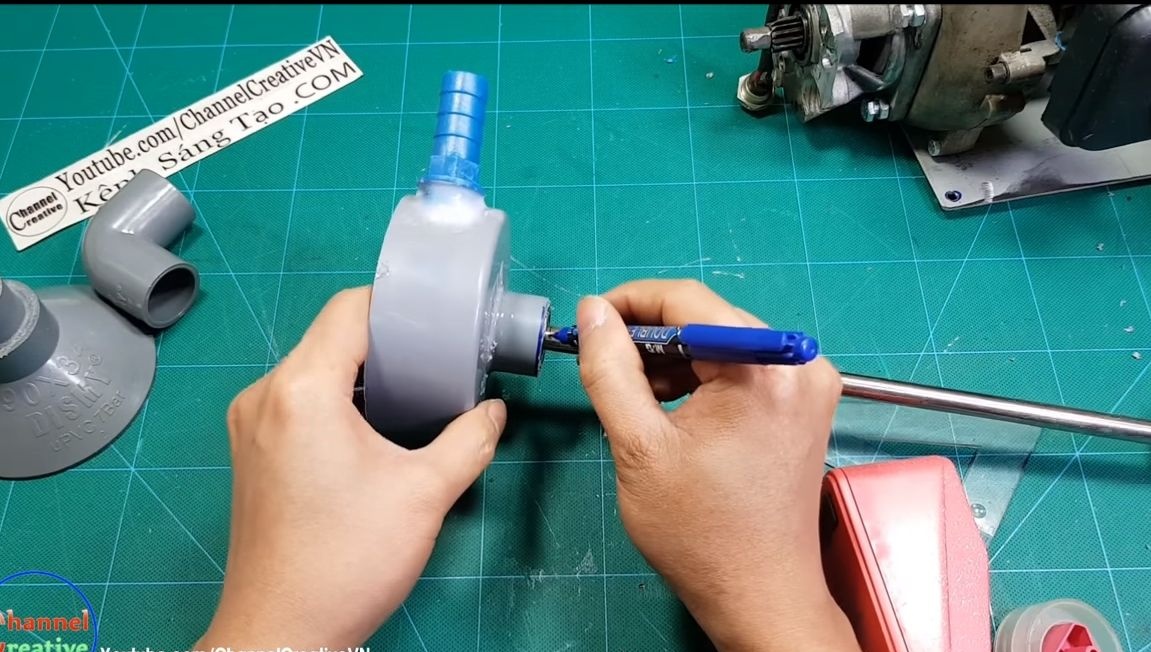
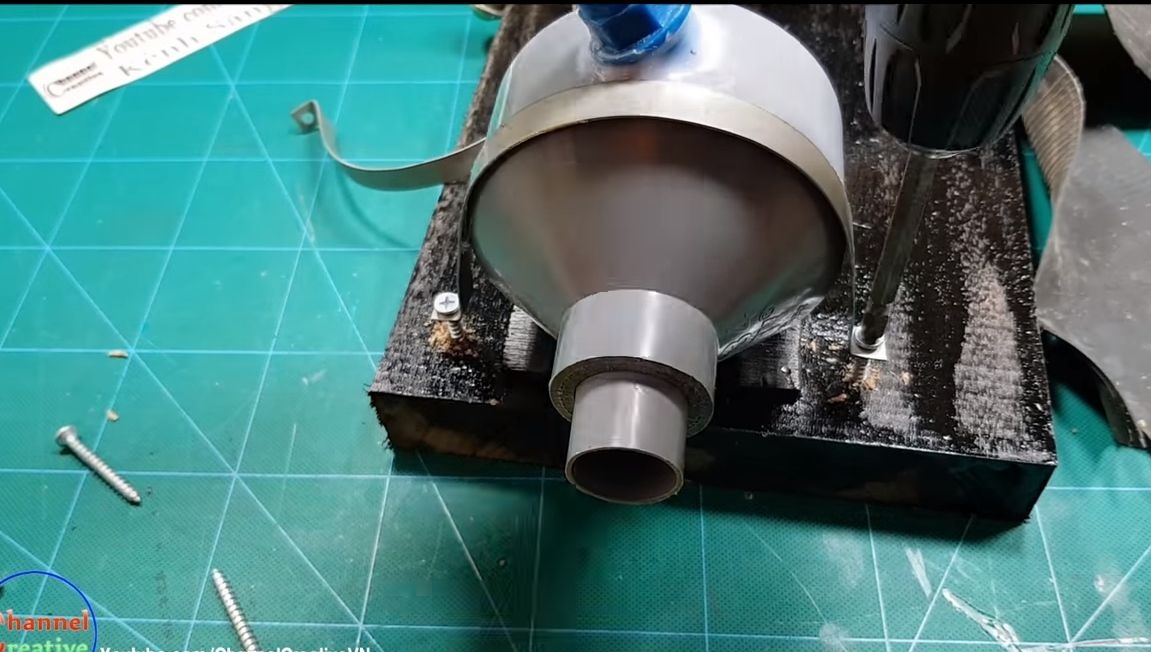
In this half of the case there will be an impeller; for its manufacture, you need a plug for the pipe at “90”. First of all, we drill a hole clearly in the center, there will be an axis. Drill a hole so that a copper sleeve comes into it.
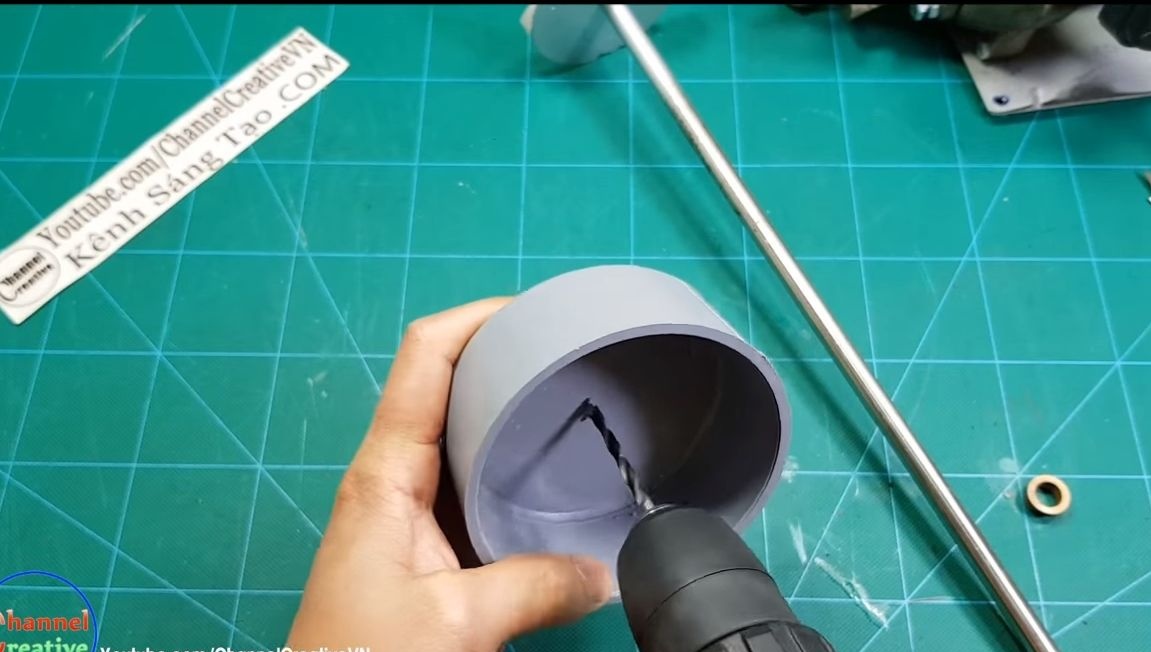
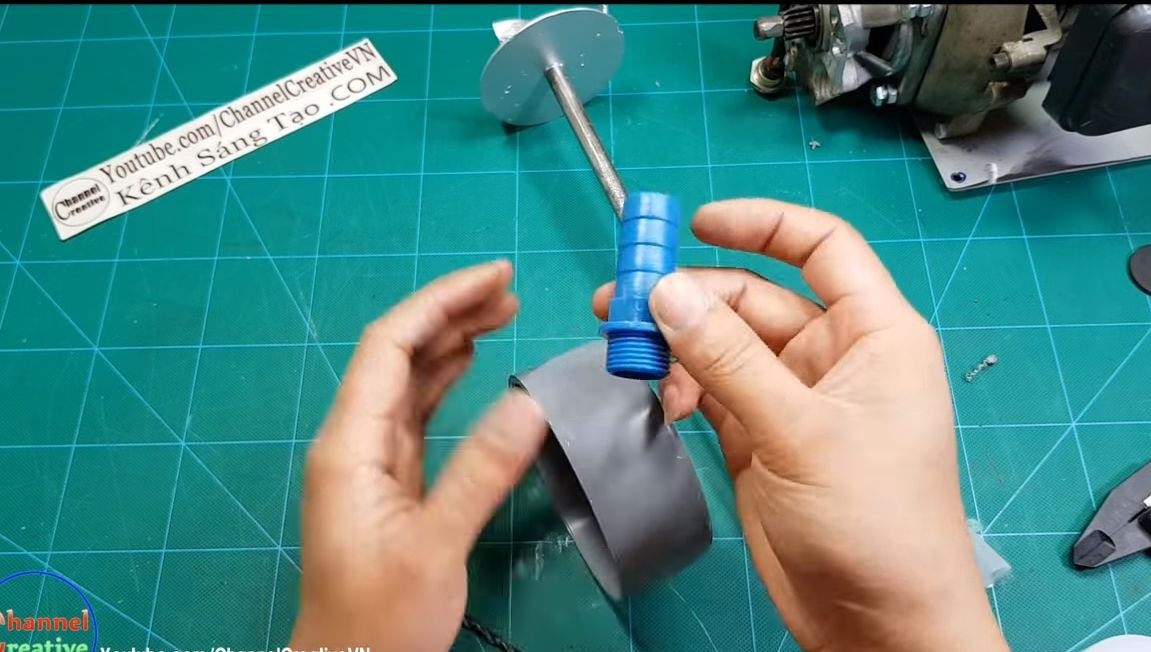
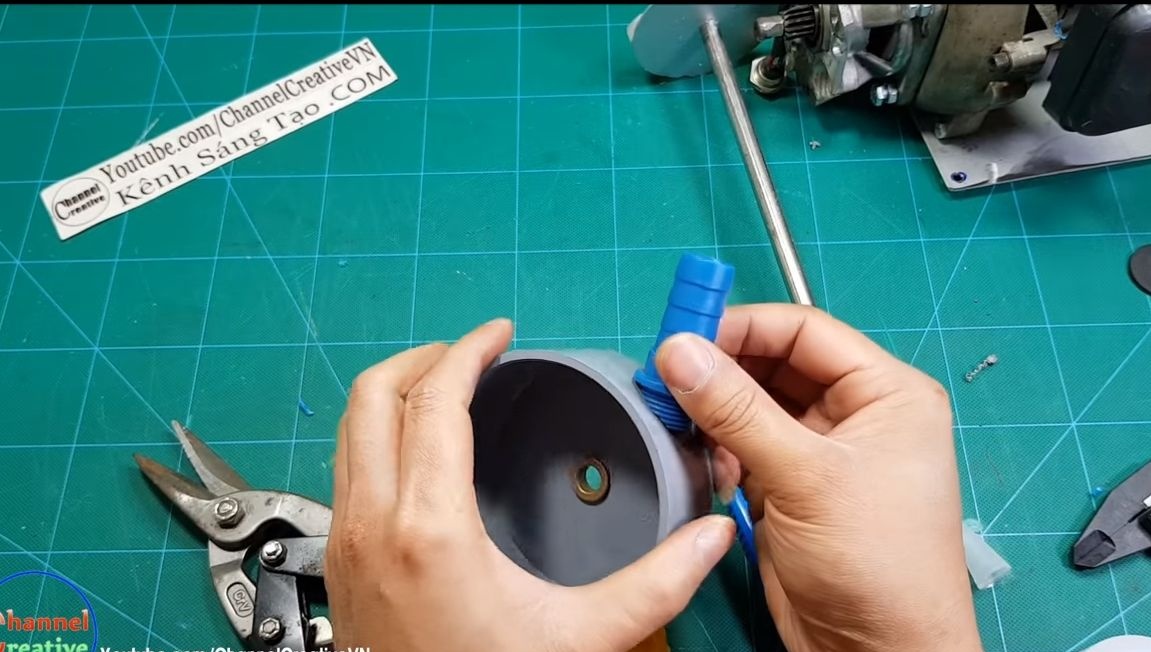
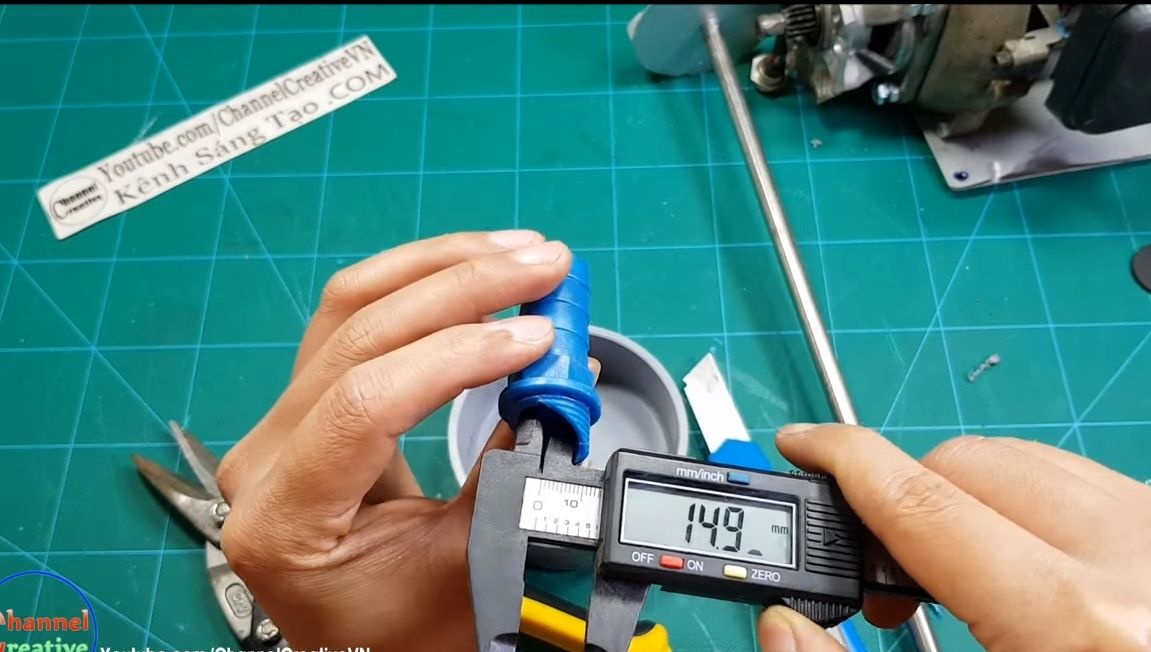
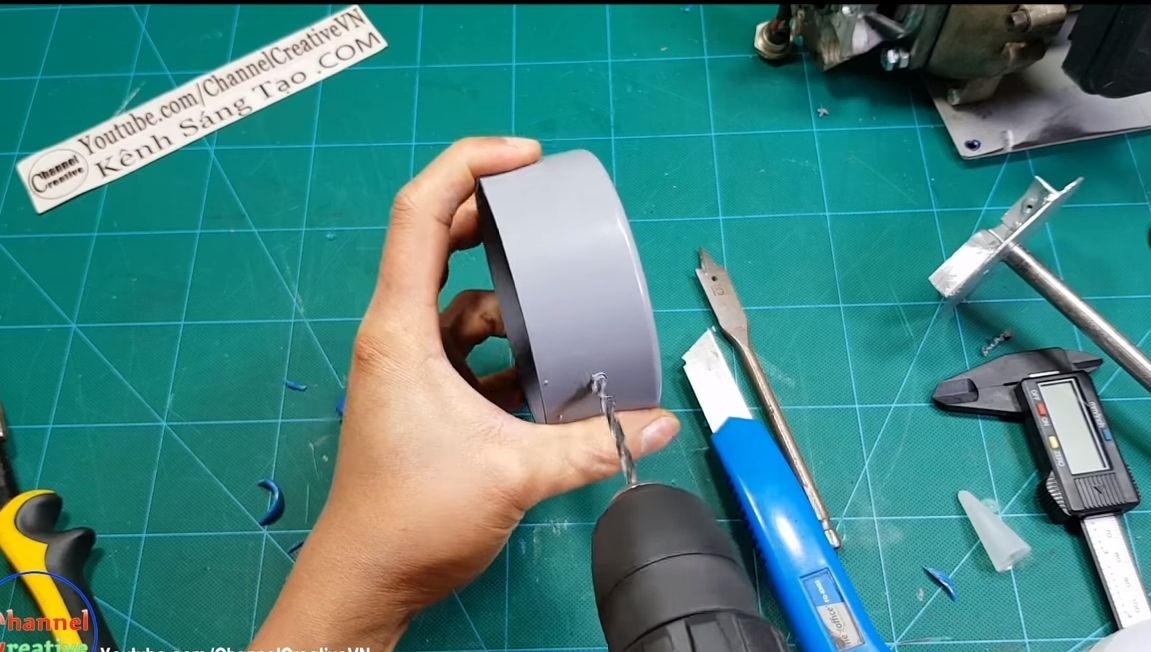
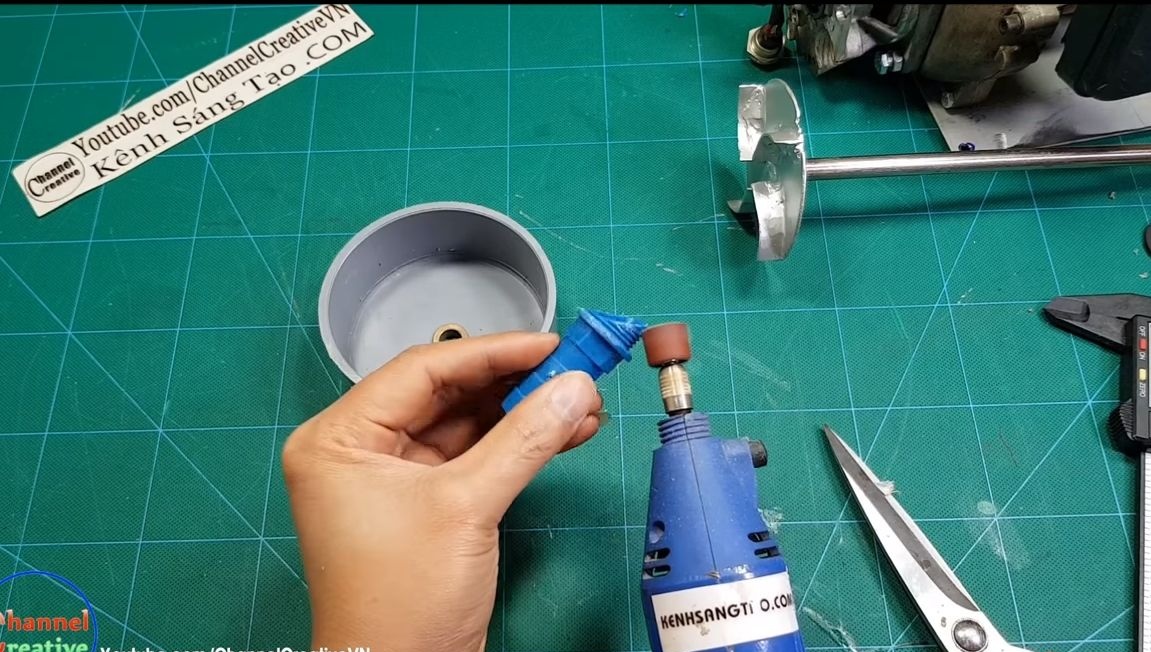
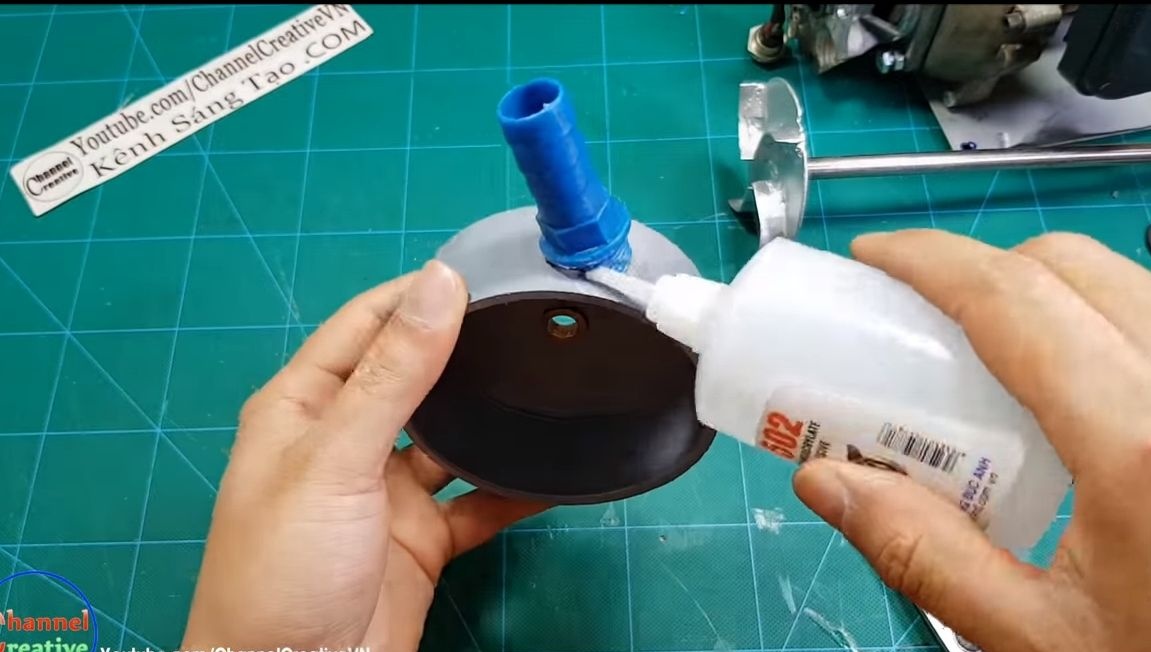
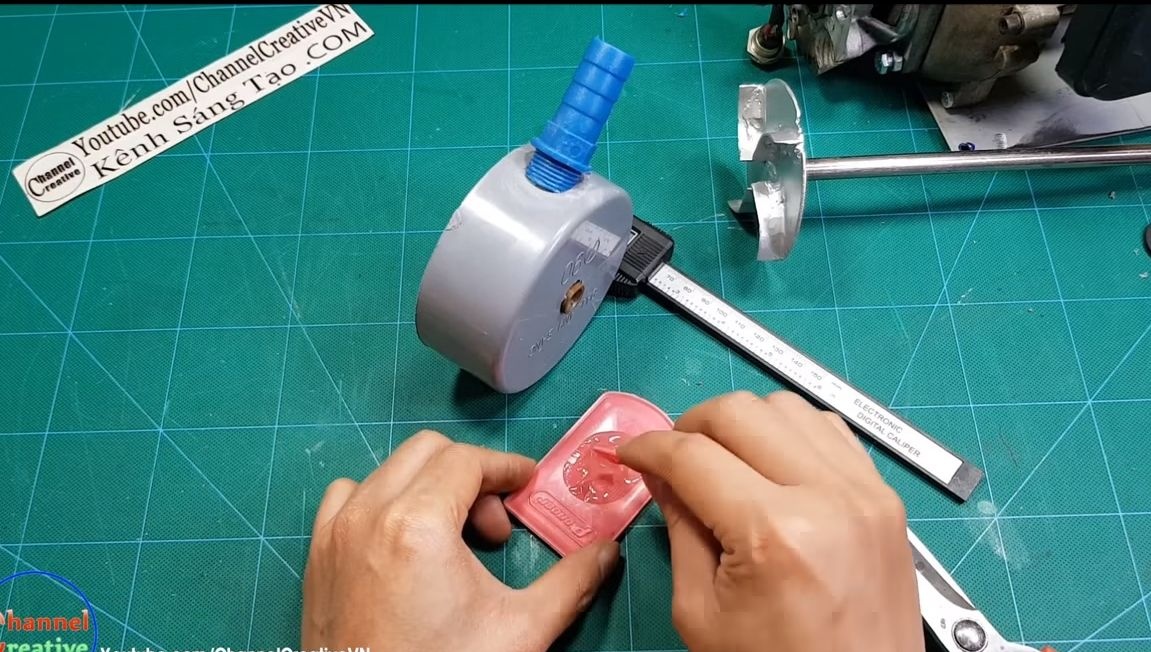
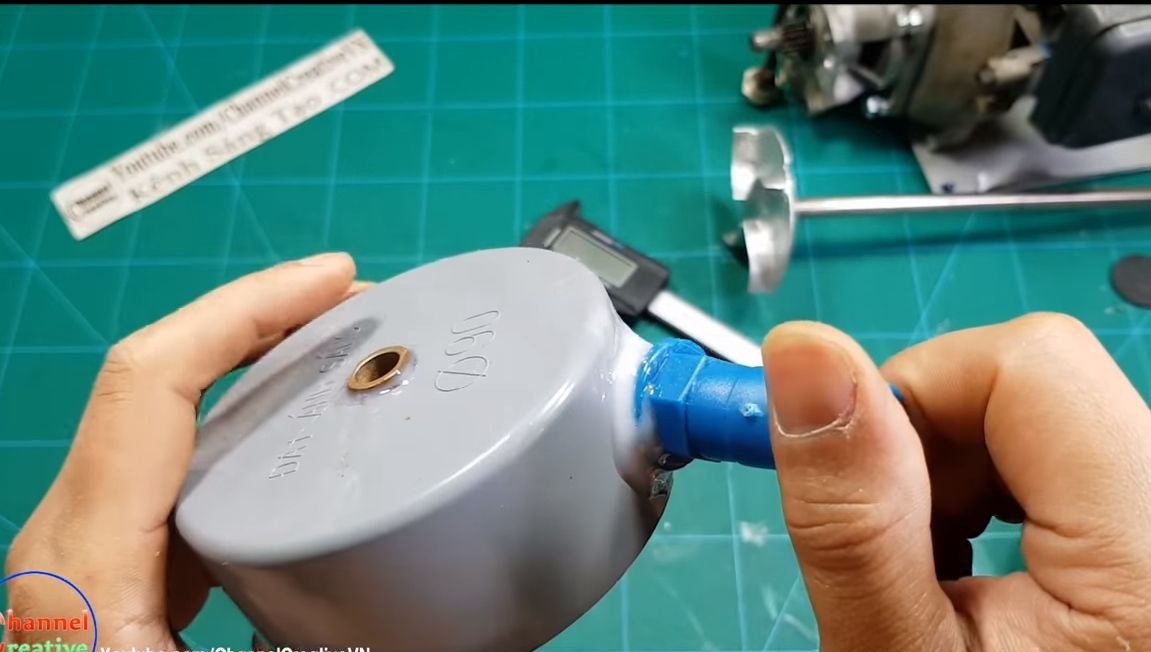
Next, we need to bring out a tube through which water will go. We take a plastic fitting and cut it at the right angle. Drill a hole under the fitting. All parts are temporarily fixed with superglue.
At the end, we dilute the epoxy resin and carefully apply it to the attachment points. Grab more area so that the glue holds as securely as possible. Set the product aside for 24 hours and let the glue dry completely.
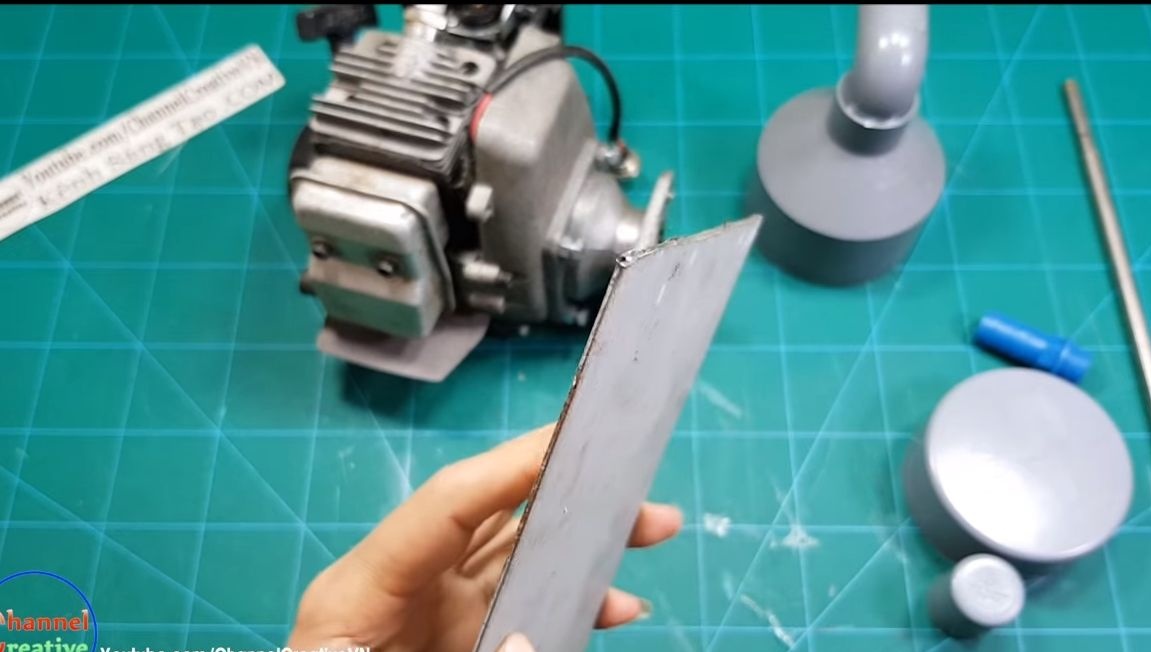
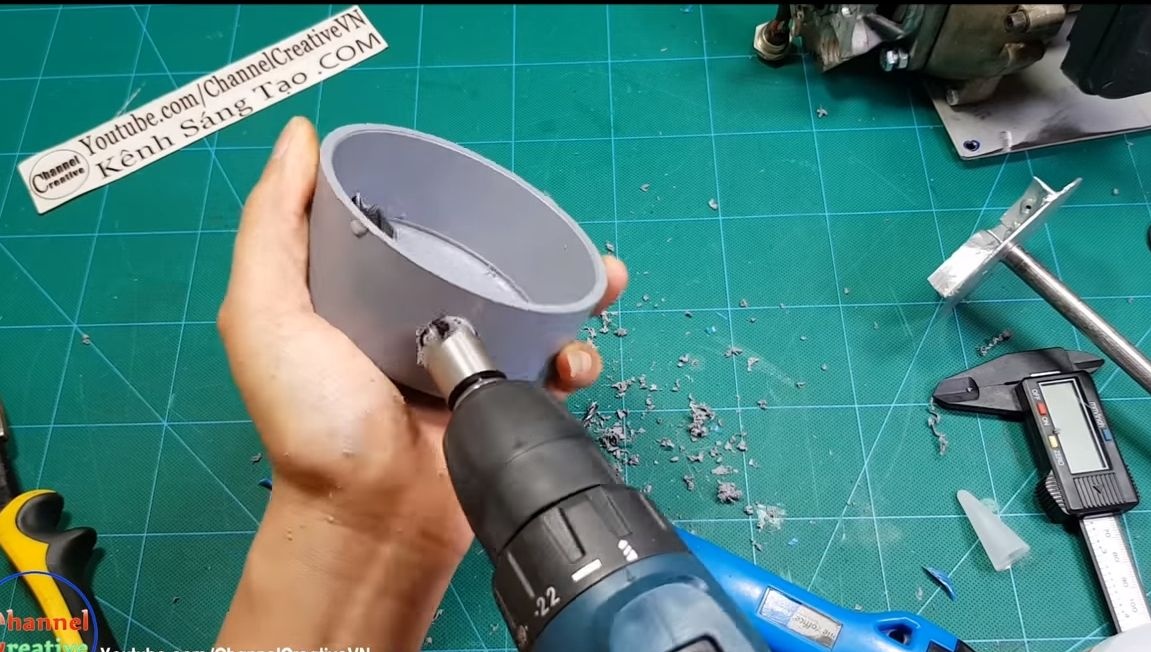
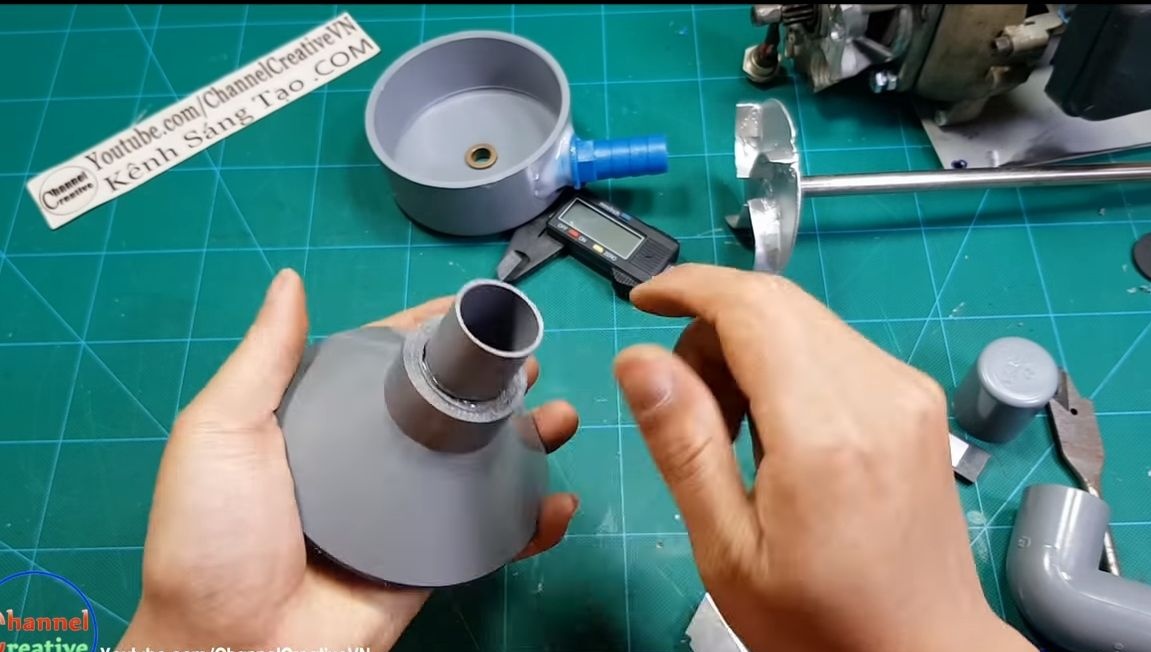
Step Five Modifying the other half of the pump
We made this detail at the first step. Now that the glue has dried, take a hacksaw for metal and cut the part as the author did. Install the fitting for the intake pipe using glue.
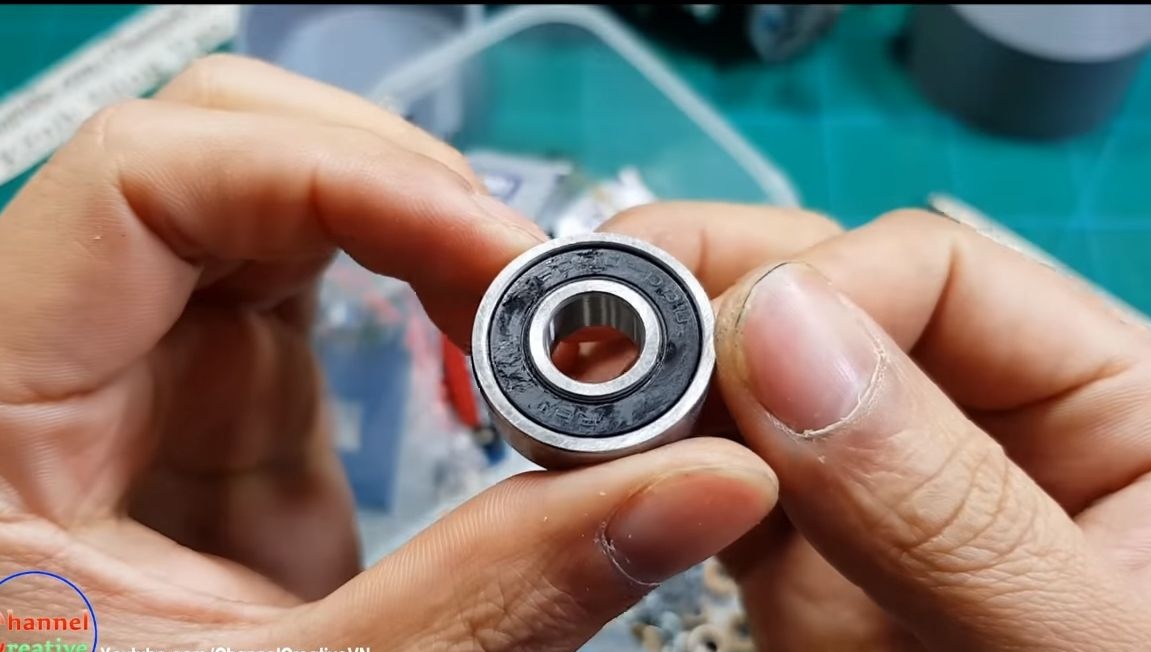
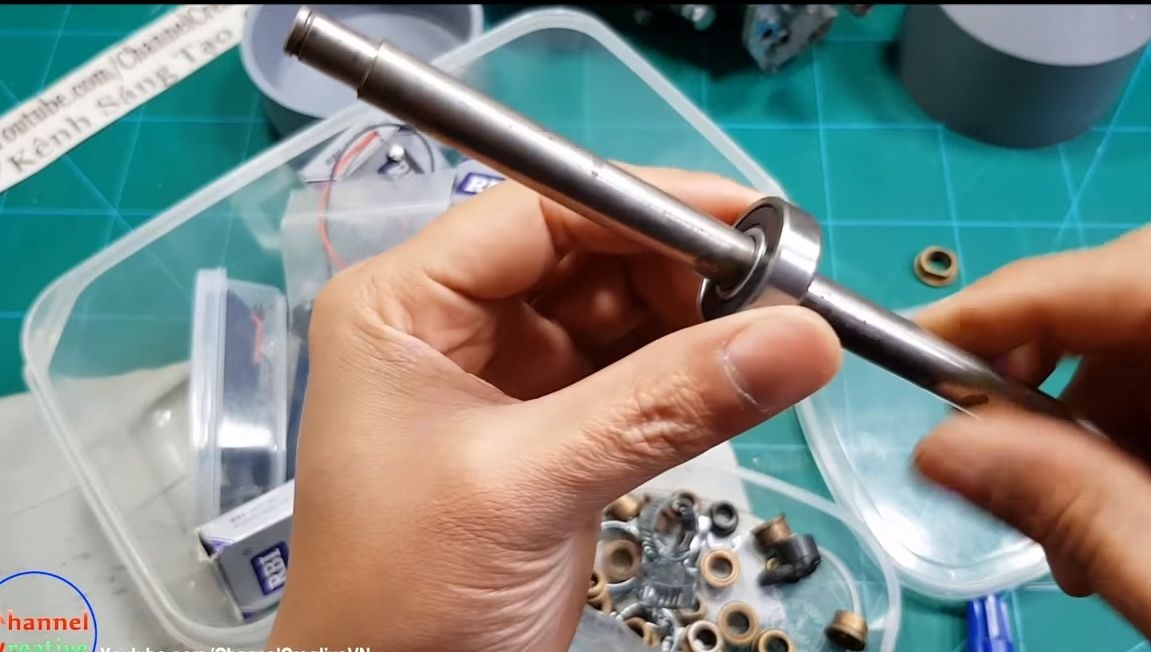
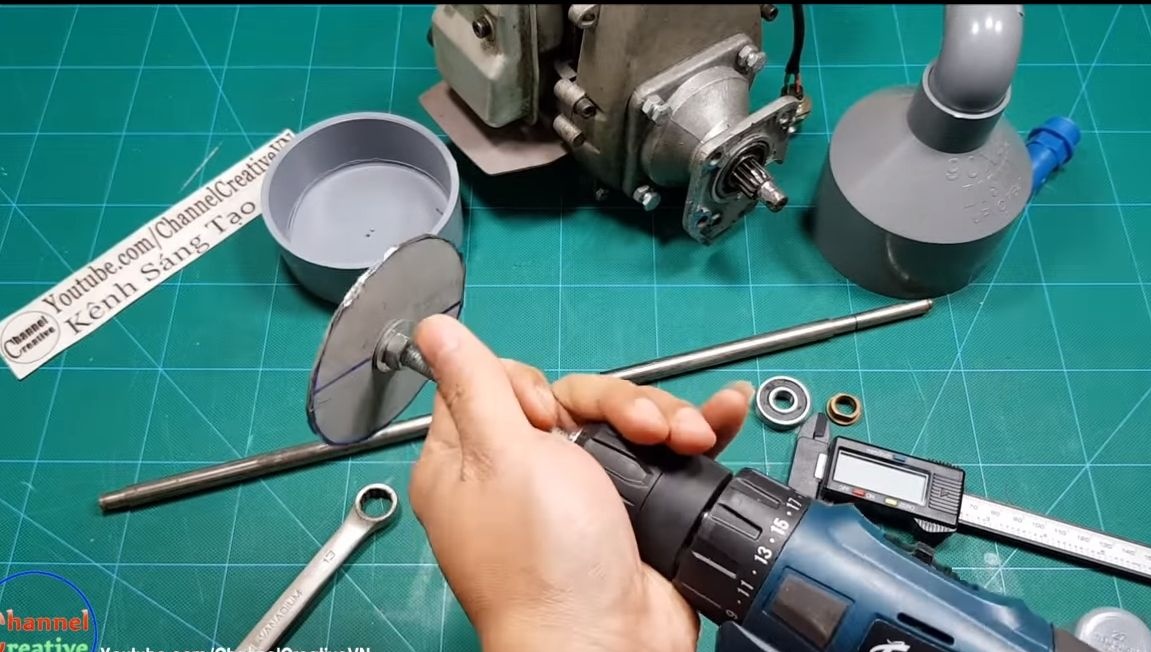
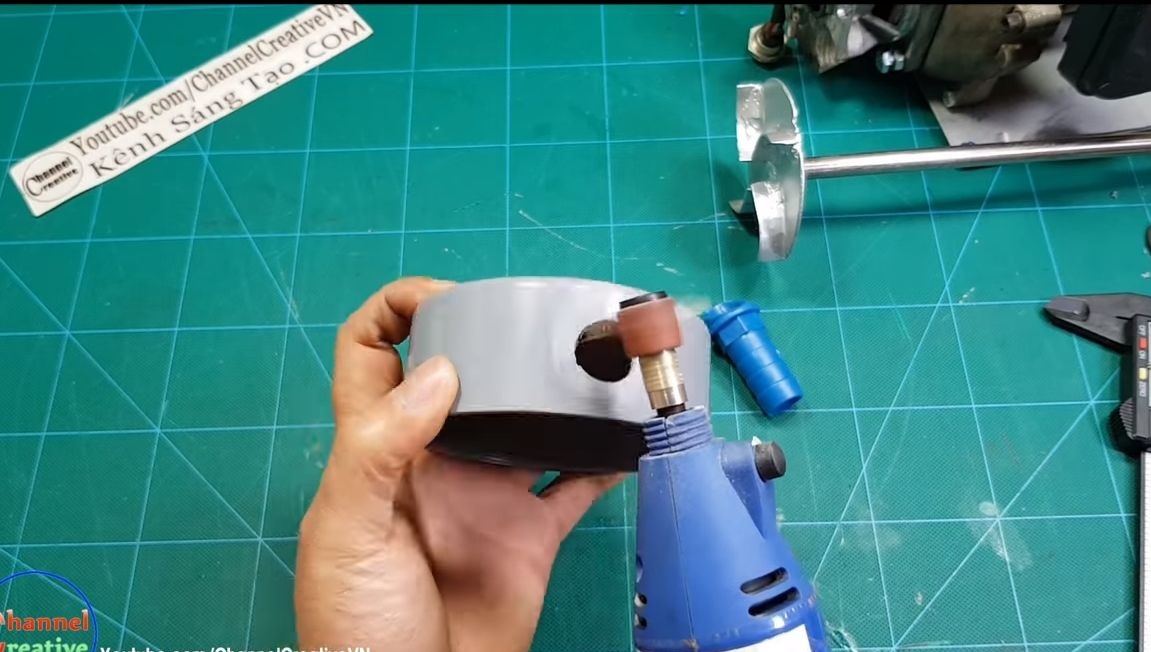
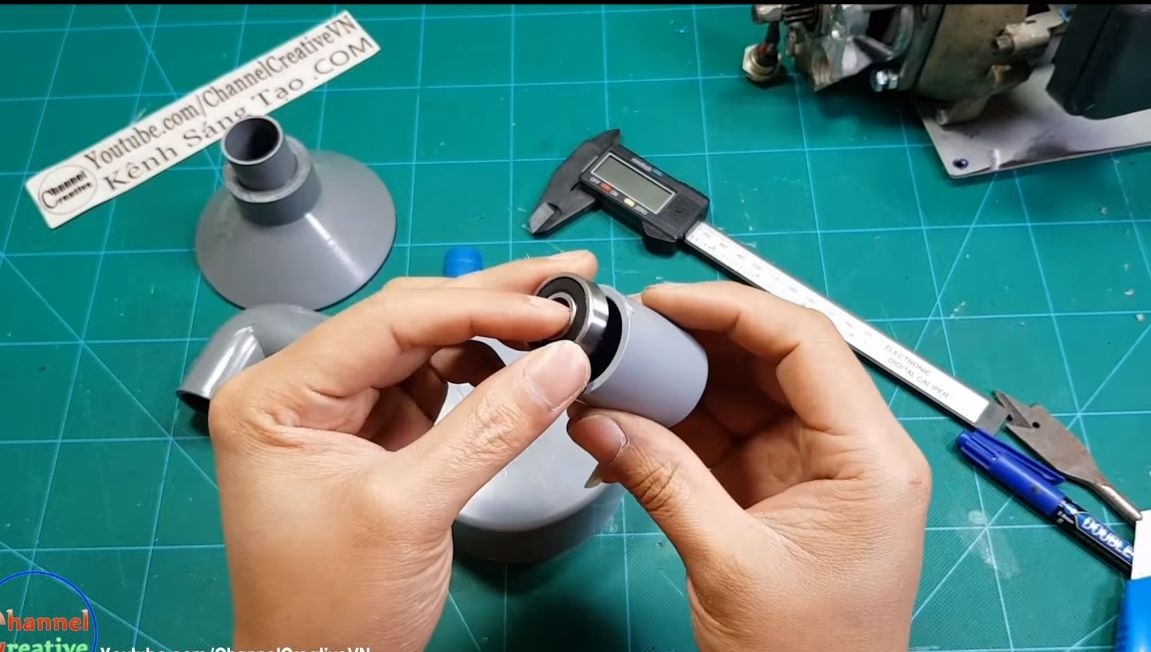
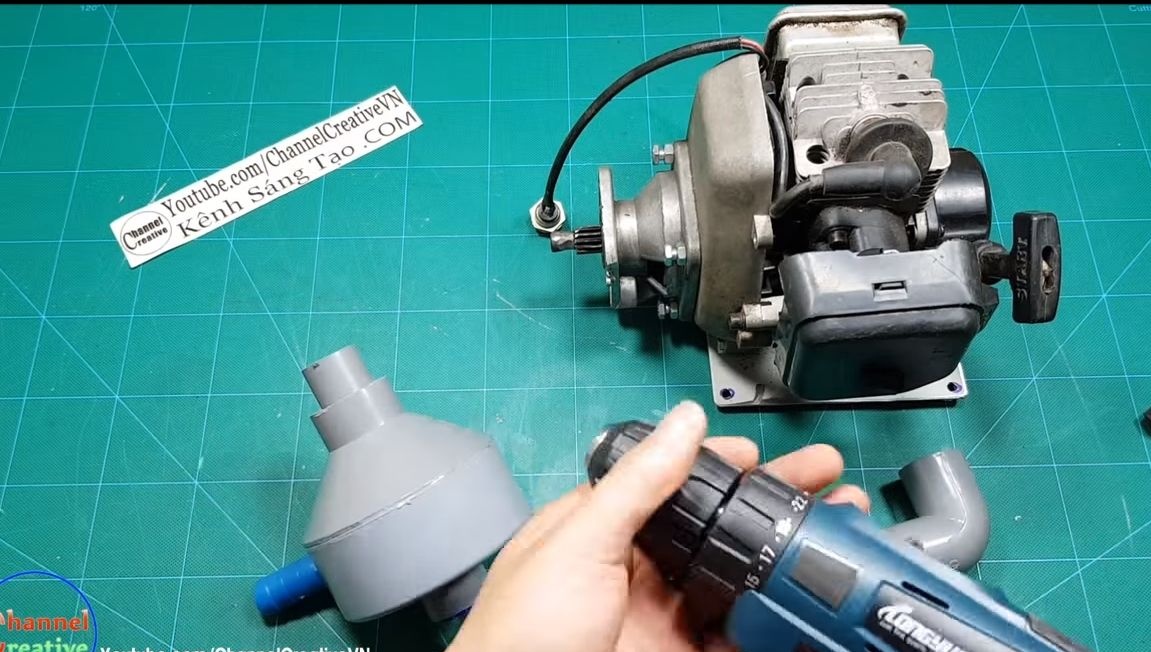
Step Six Installing an impeller axis
We take the second half of the pump and prepare the mounting location for the bearing. To do this, we need a plug for the pipe of a suitable bearing. We drill a hole for the axis in it, install the bearing, and then glue it to the body using epoxy glue.
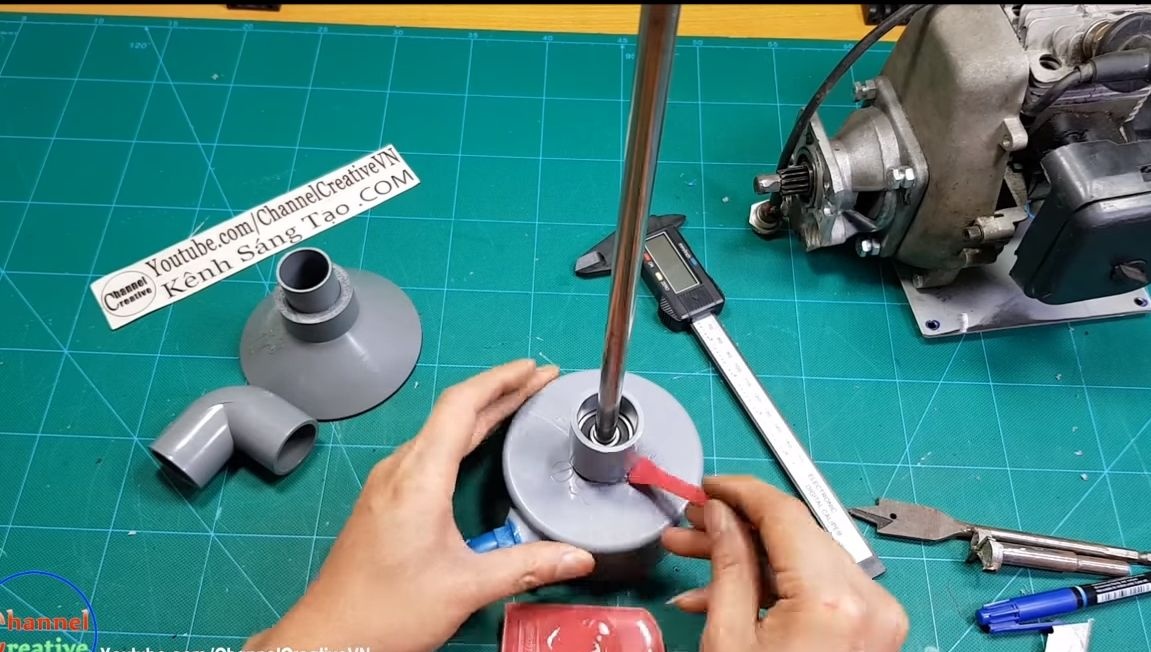
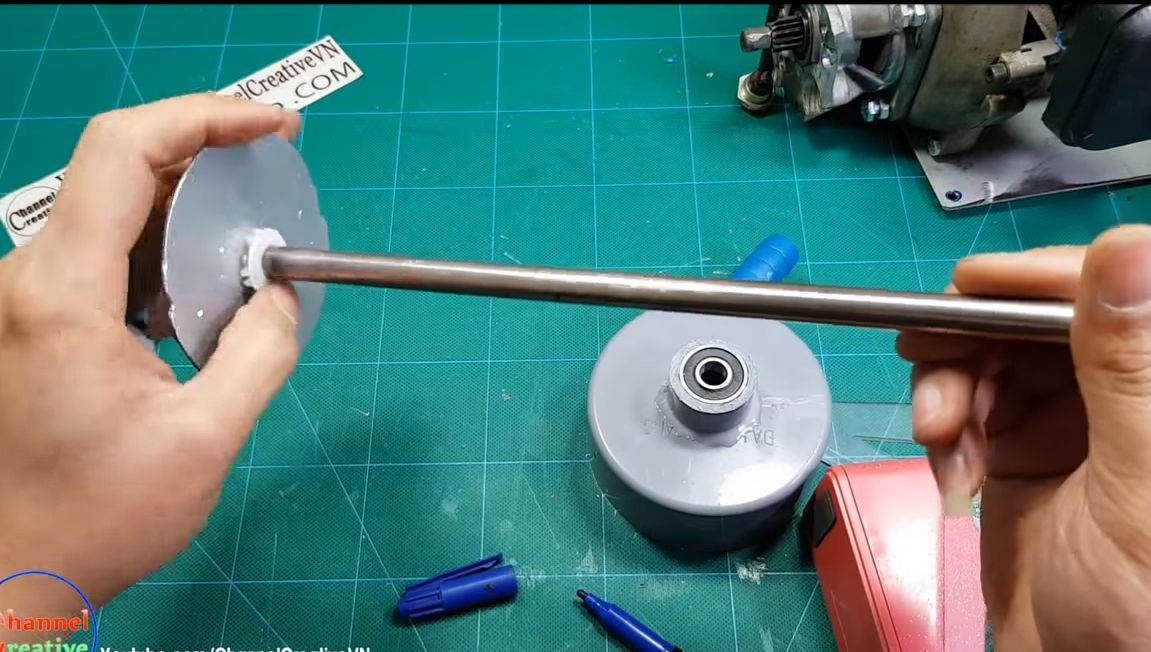
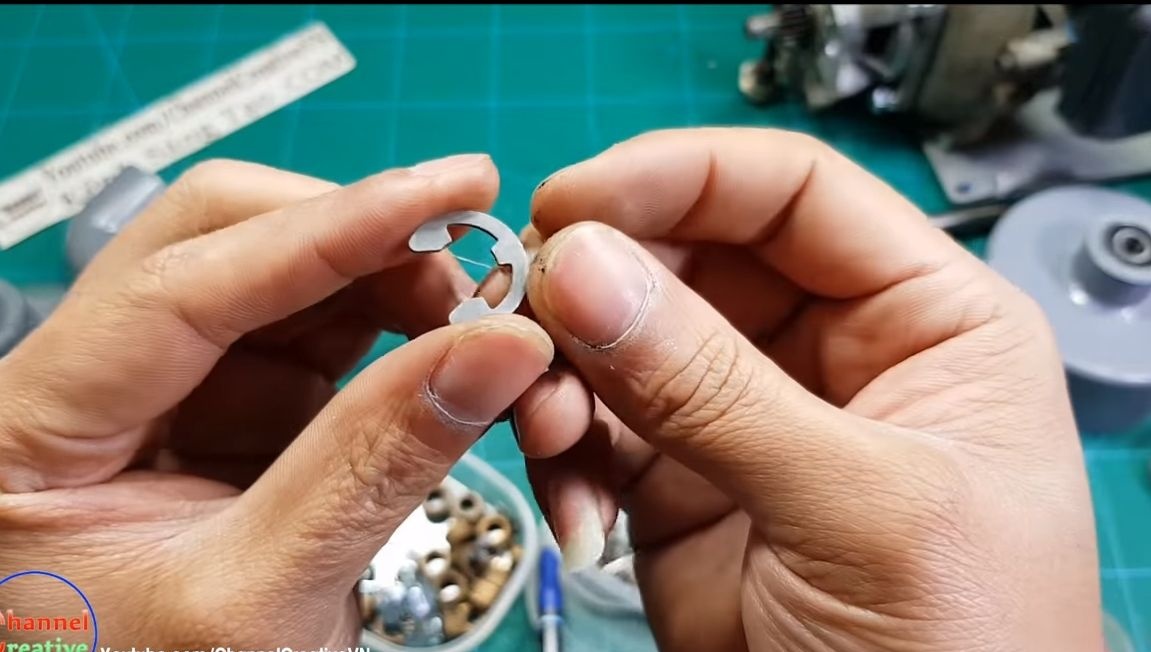
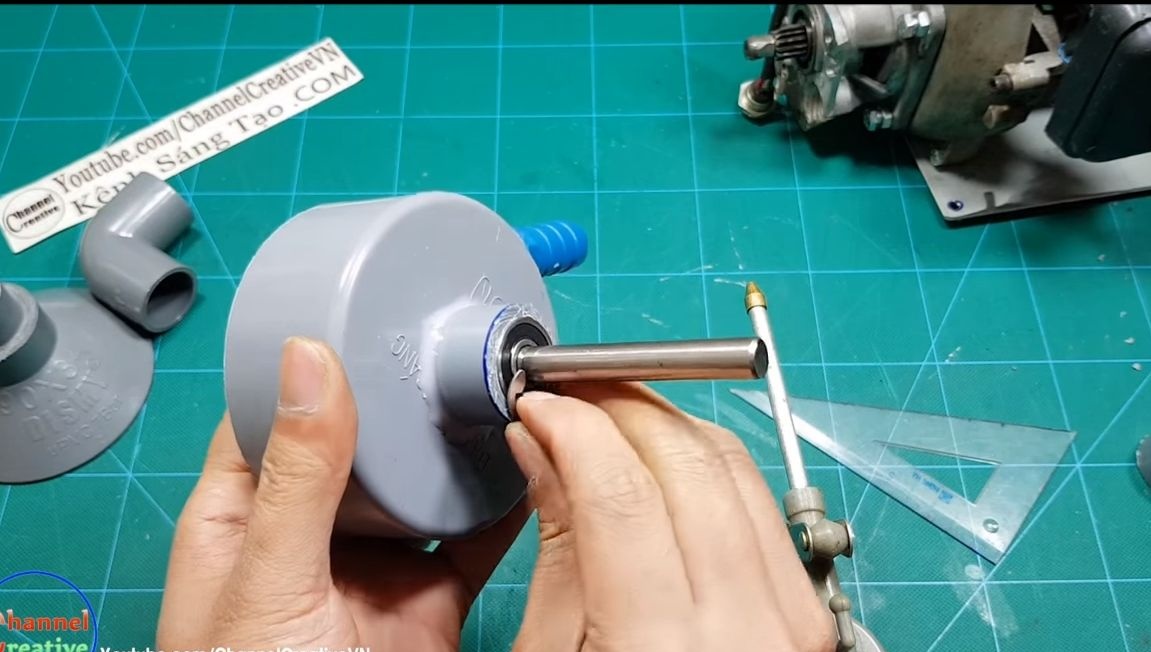
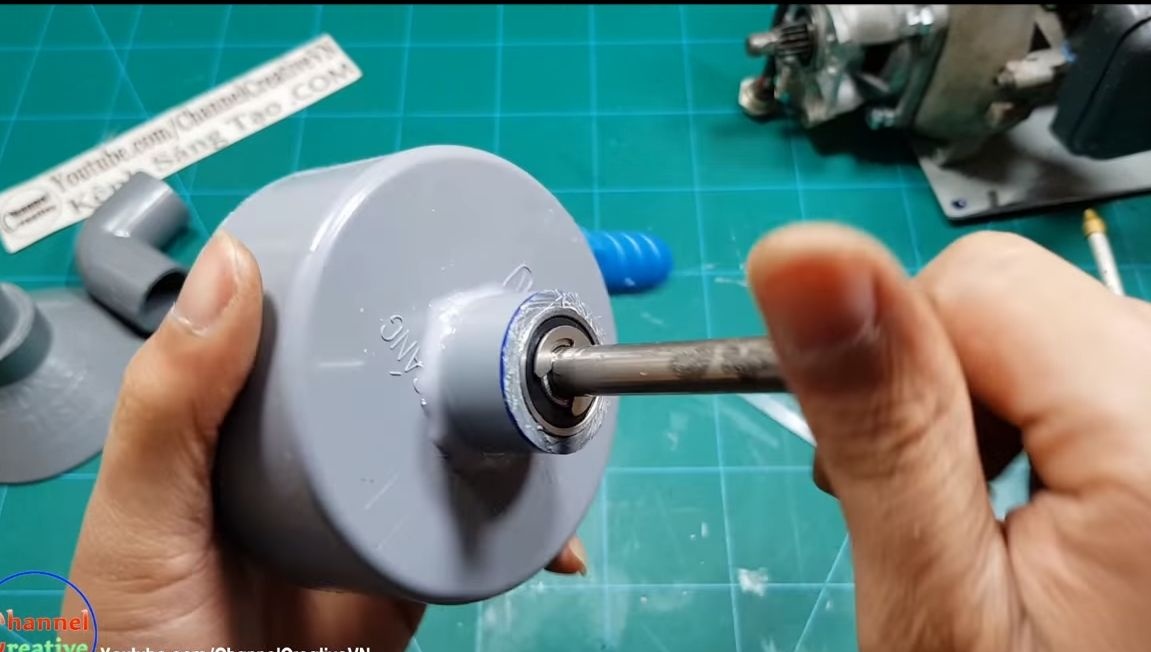
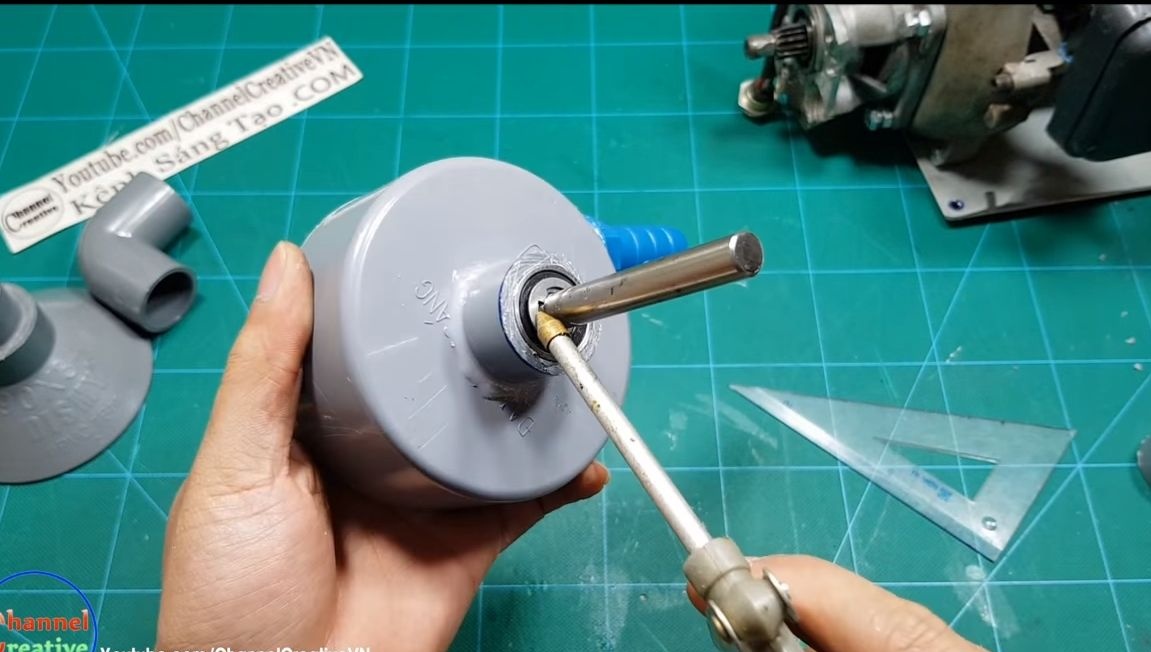
To fix the axis, it is necessary to groove a groove under the counter washer in it, the author uses a dremel for this. From the inside, under the impeller, you need to put a plastic washer on the axis so that it additionally seals the system and acts as a thrust washer. Cut the axis to the desired length and set it in its place. We fix it with a counter washer. When assembling, be sure to lubricate the bearing well with engine oil, preferably synthetic.
Seventh step. We connect both halves of the pump
We take epoxy glue and glue both halves. Do not spare glue, the design must hold tight.
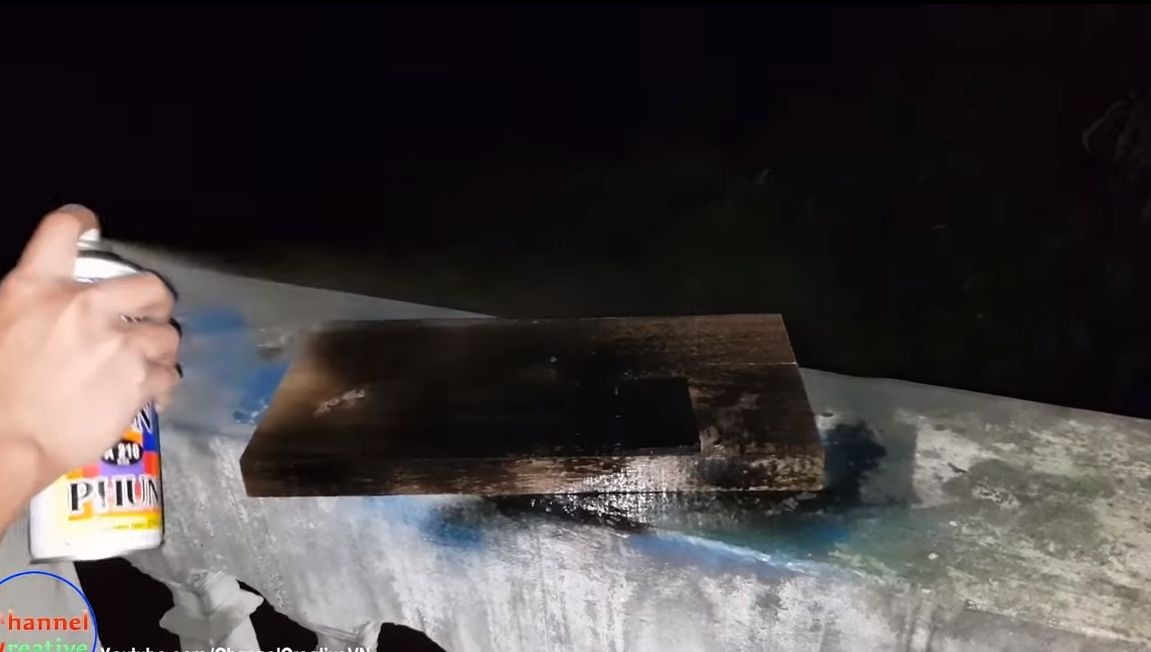
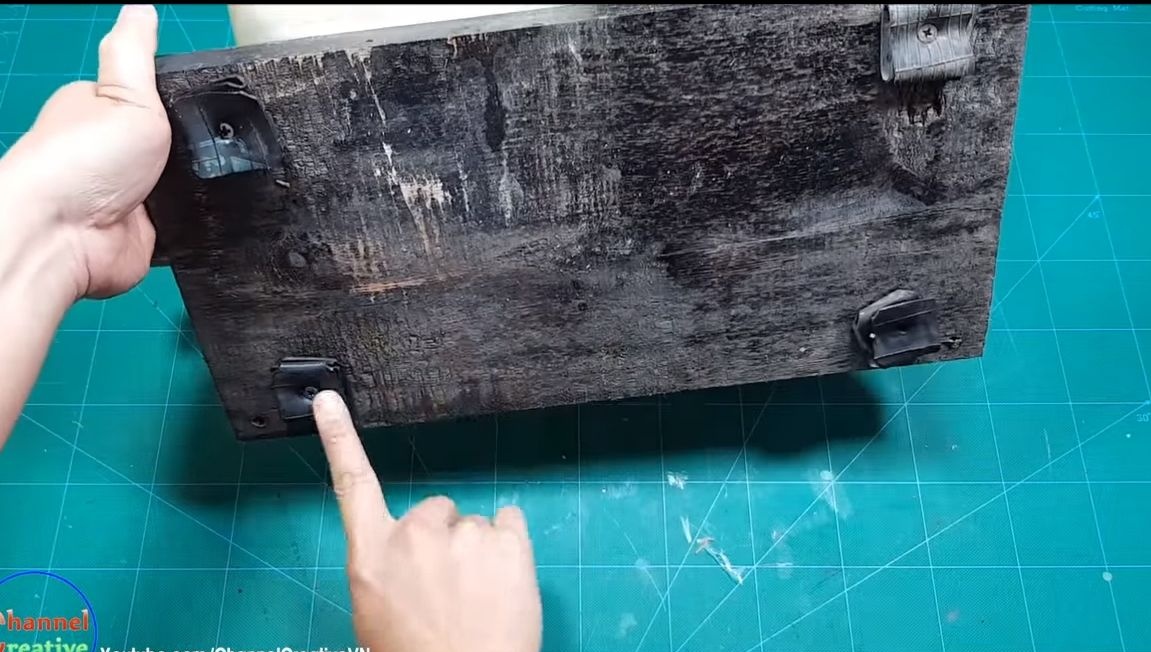
Step Eight. We prepare the base and install the components
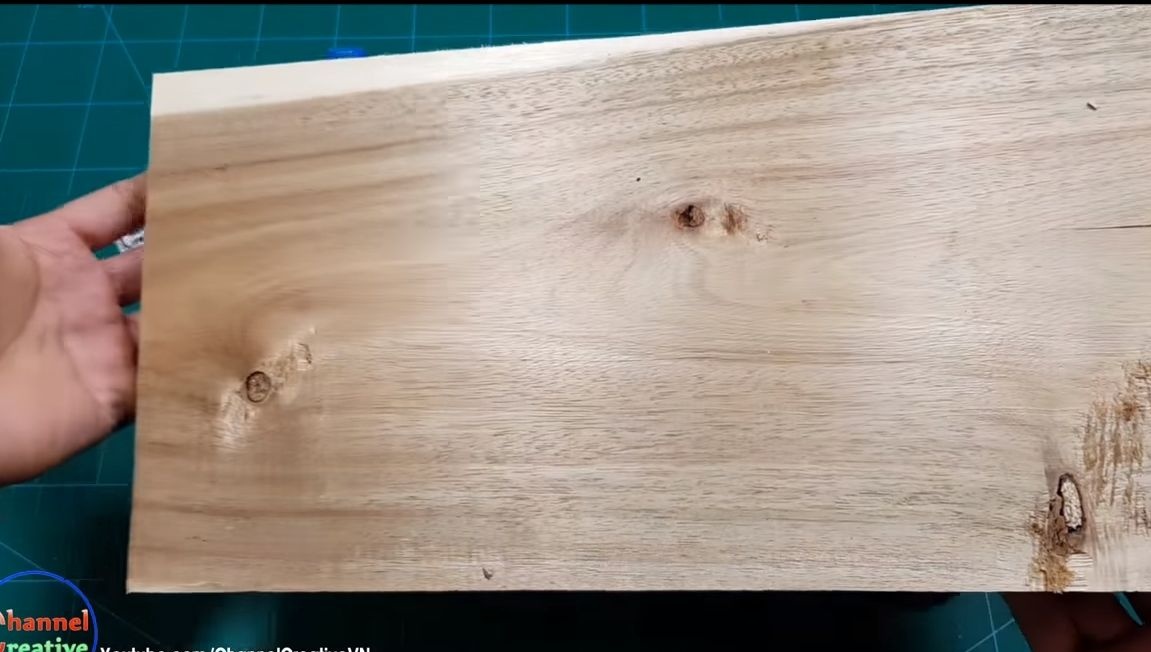
As a base, a wood slab, plywood and so on are suitable, it is advisable to take such material that is not afraid of water. If the choice nevertheless fell on a tree, it must be well painted, and it is better to soak in oil.
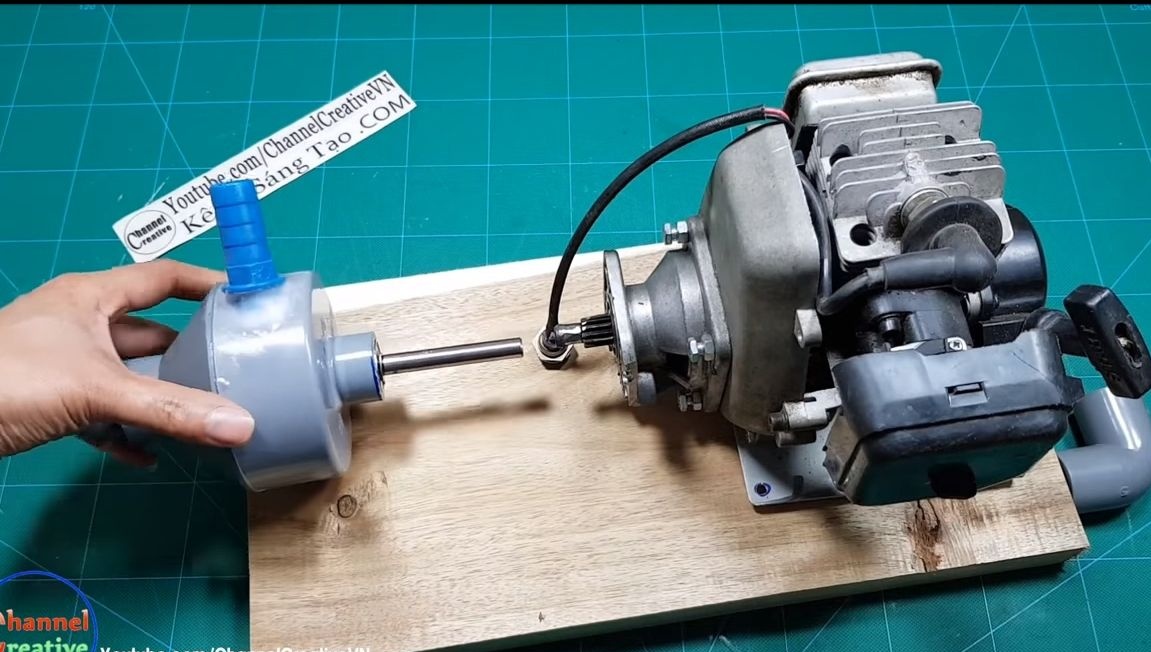
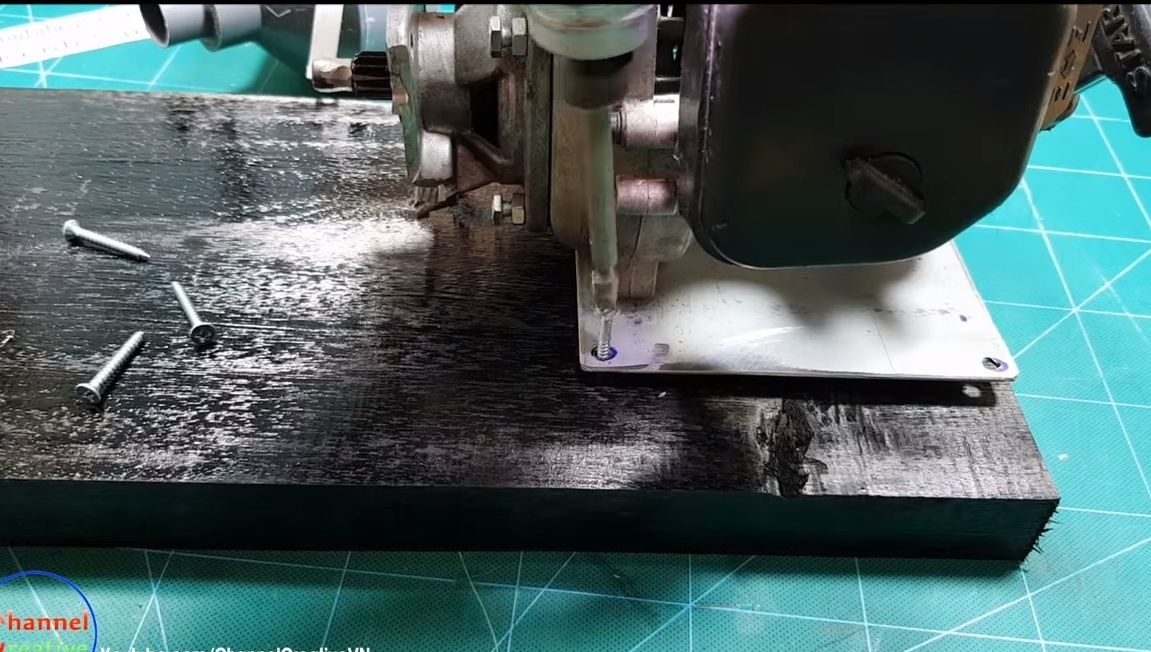
We proceed to install the engine. We remove the gas tank, which is located below, from the motor, and fasten the engine with screws or screws.
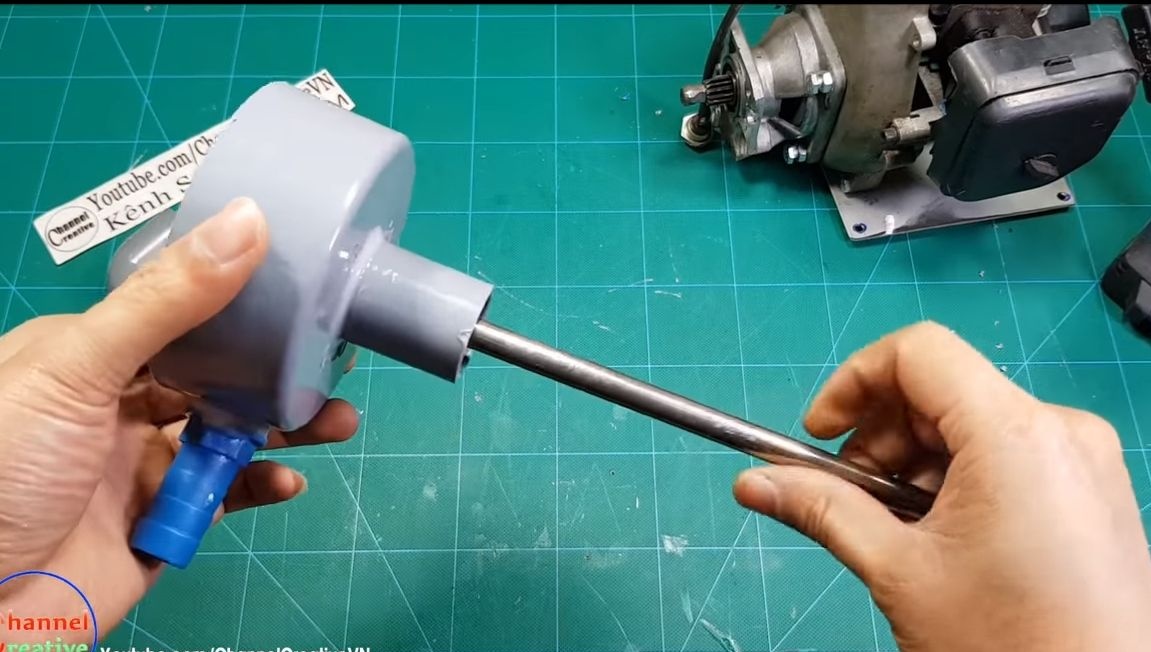
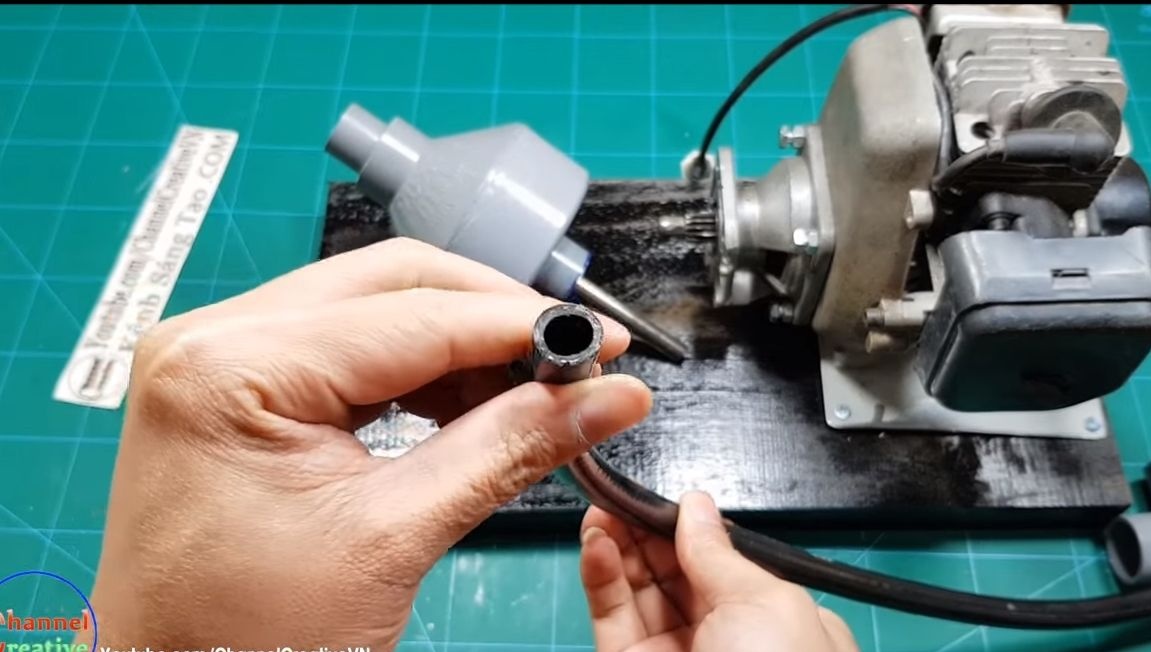
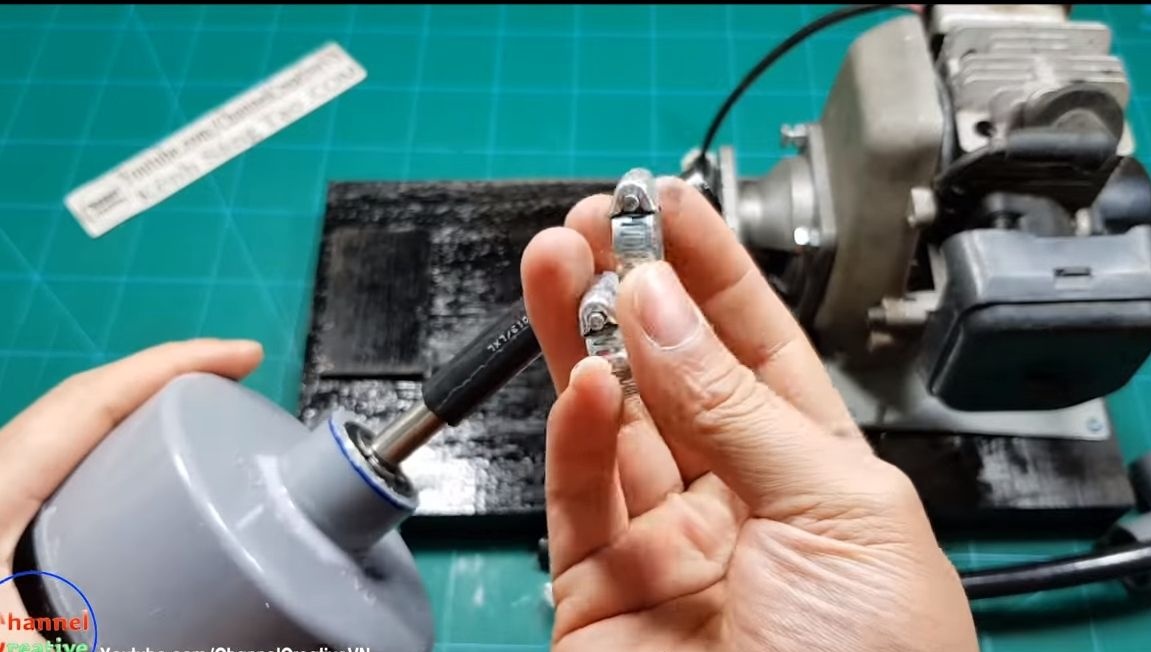
We proceed to the installation of the pump, first we cut off a piece of the hose and with it we connect the axis of the engine to the axis of the pump. This whole thing is fixed with the help of steel clamps. The result is a simple, reliable connection.

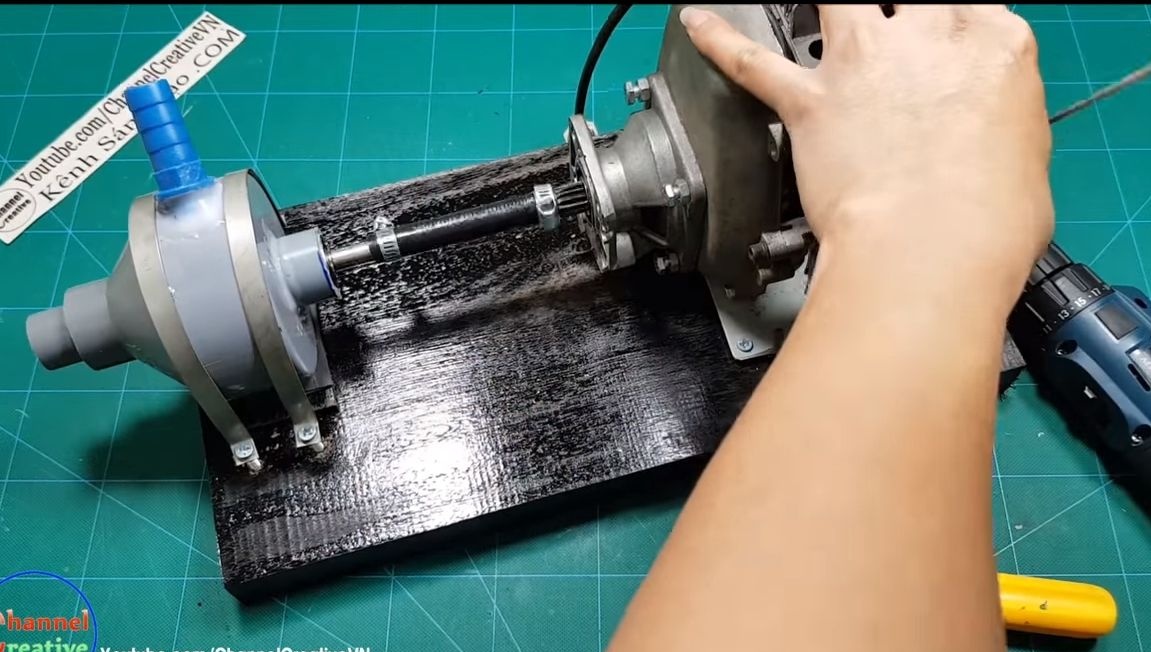
Now you can fix the pump. First of all, you will need thin plywood, trims and rubber, with the help of these gaskets you need to align the pump at the same level with the axis of the engine. We put a rubber gasket under the pump to reduce vibration, and also because of this, the pump will not slip.
We fix the pump using two metal clamps and screws. The author has two clamps so that they can separate, he additionally installed mounting plates between them.
Step Nine. Final build phase
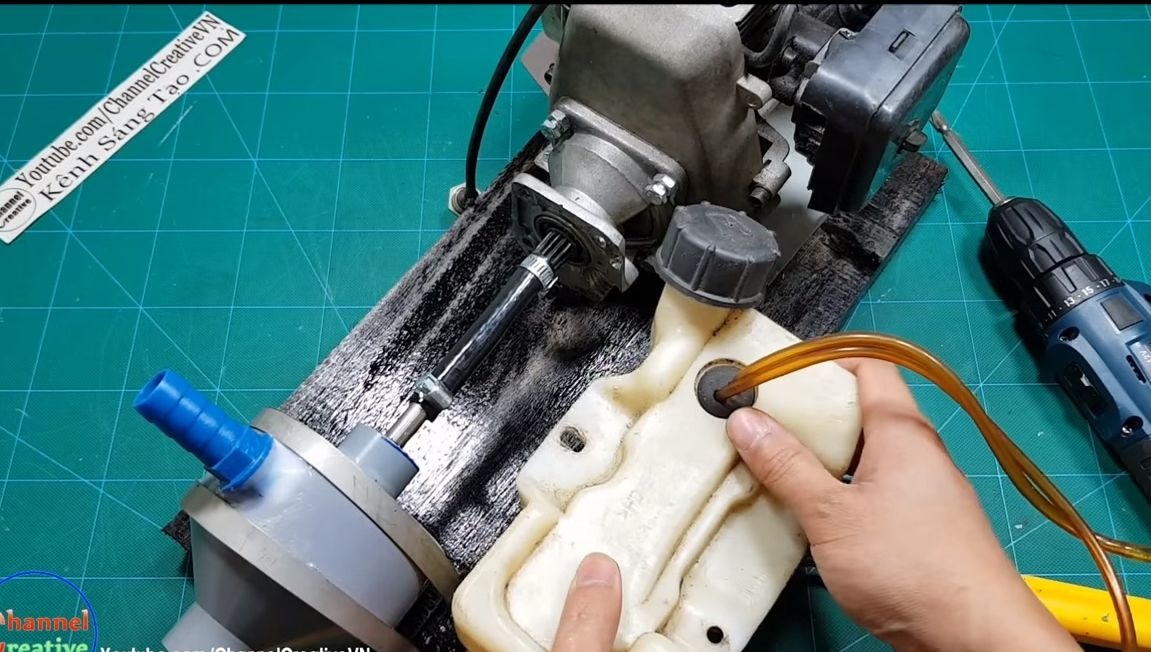
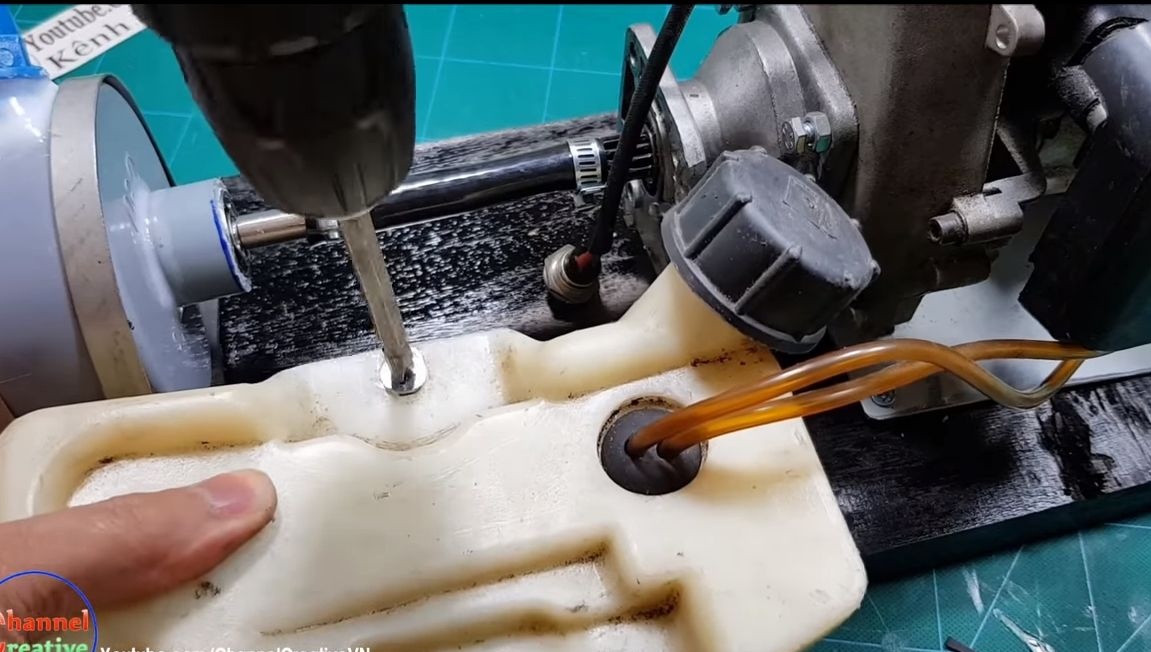
Now you have to connect the gas tank. We fix it to the base with a self-tapping screw for one eye. It is desirable, of course, to fix it more securely, since the plastic here is usually fragile. It is extremely important for the installation to make the legs so that it does not go from vibration. We make the legs of rubber, a car camera, a piece of a bicycle tire, and so on are suitable.
Do not forget to install a button on the engine that will allow it to be muffled comfortably.
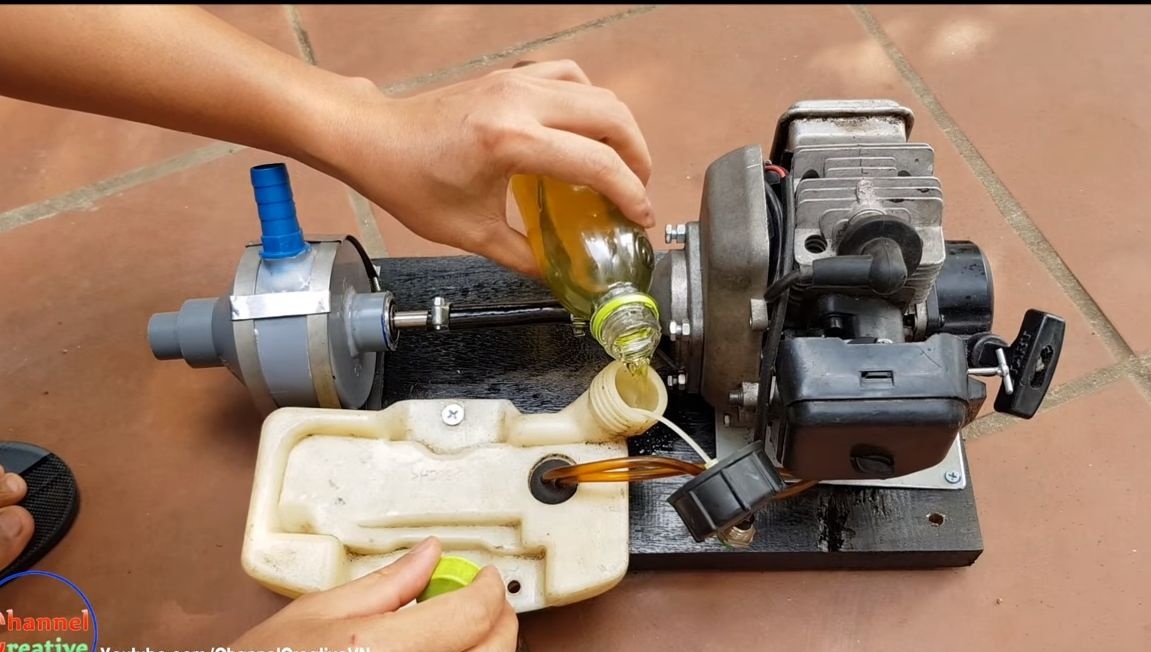
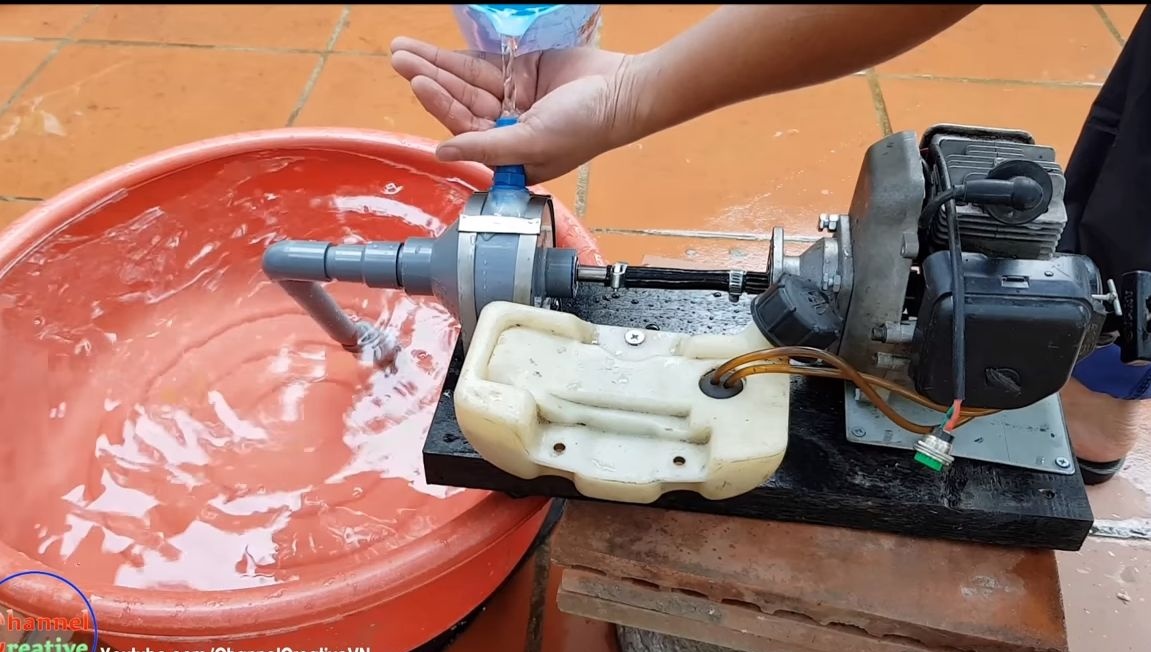
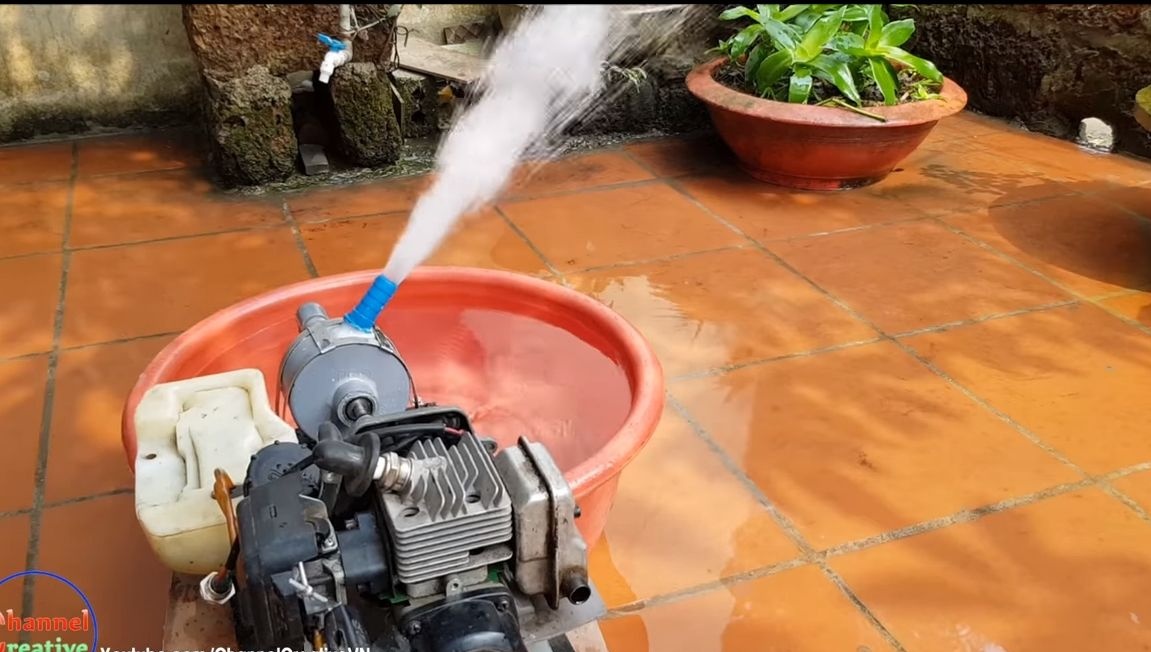
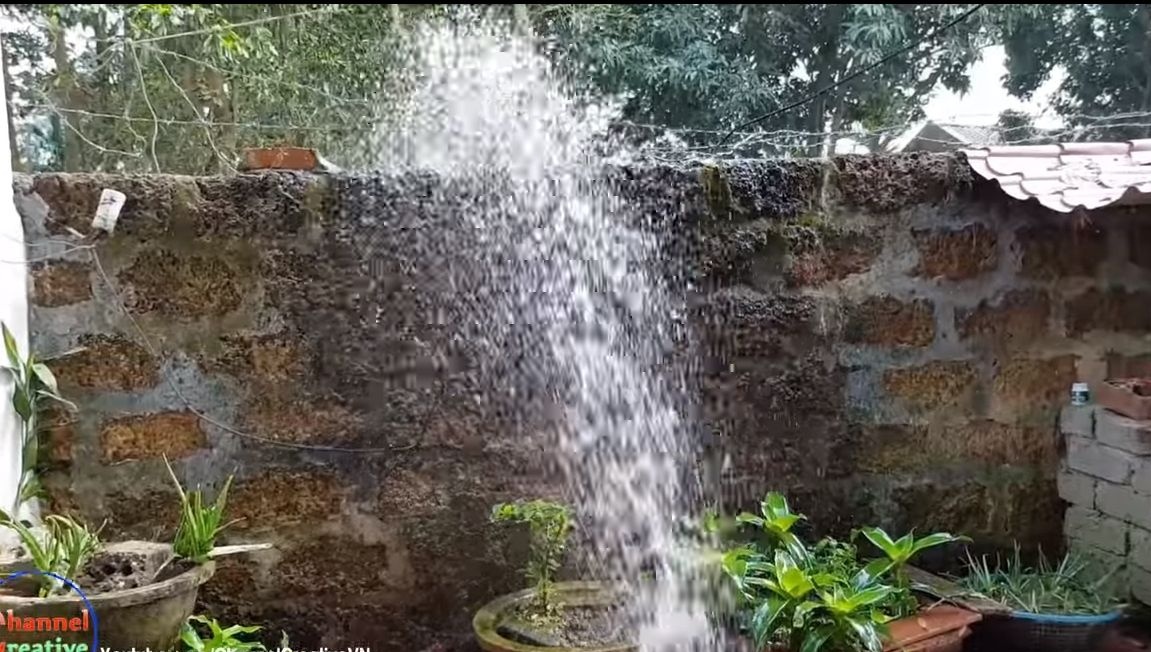
Homemade is ready, you can test! We fill the tank with gasoline, remembering to add oil for two-stroke engines to it. You need to pour a little water into the pump, this is necessary for an easy start, because the air is much harder to pump than water. We start the engine and enjoy the work of our brainchild. The pressure is considerable, and the engine speed is not very large. You can put on a hose and water the garden, on or pump out water, who needs what. Good luck