Oddly enough, but there are several types of stained glass techniques - glass, real. The similarities of colored adhesive film and paints are not taken into account - they discredit the idea itself. And when performing a stained-glass window in any of the techniques, one way or another, you will have to pretty accurately adjust the edges of the colored glasses. It seems to be especially relevant in the stained glass technique "Tiffany".
There was such a French friend, dragonflies were very fond of. And he came up with a simplified, “kneeled” method of manufacturing stained glass windows. Its general meaning is as follows: the edges of the glasses, after an exact fit, are glued with a strip of sticky copper tape, folded and soldered. So, the thickness of the seams and the appearance of the stained-glass window will directly depend on the accuracy of the fit. Moreover, gluing a copper tape to the uneven edge of the glass is simply very difficult.
So let's get started.
1. Analysis of analogues, statement of the problem, preliminary design.
2. Assembly. Mechanical part.
3. Electrical part, general debugging.
Analysis of analogues, statement of the problem, preliminary design.
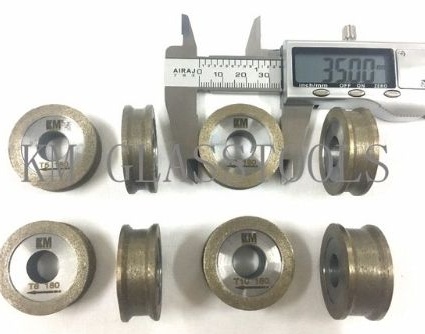
That is, without polishing the edges of the glass fragments, with decorative glass, you can’t do anything. Here, as with any glass processing, diamond tools are used. When working, you should certainly wash it continuously with water - both cooling (increasing the resource) and washing off glass dust (the tool works better, there is no dust formation "He put diamond dust in your grease! You will have to change the grease"). Practice has shown that for processing smooth bends of glass, all the time found in stained-glass windows, it is more convenient to use a tool with a vertical working shaft and a spindle. The diameter of the diamond tool, for relatively small stained-glass windows, is about an inch (2.54 cm). We take this as a point of departure and take a look at what industry, in this sense, offers us.
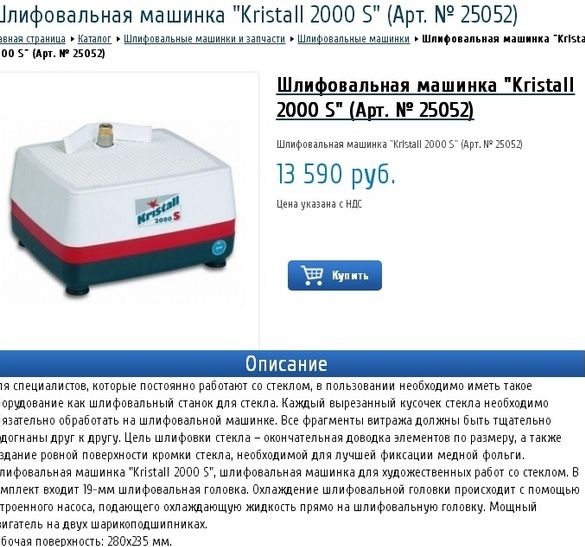
Well what to say. Basically, for some reason, the stained glass cases of the masters use a German typewriter, the Crystal brand. We’ll be curious.
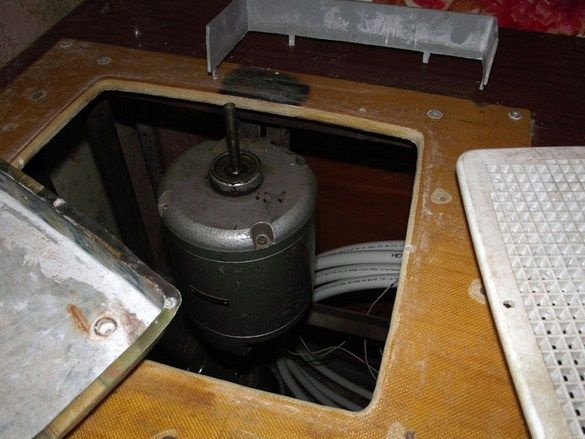
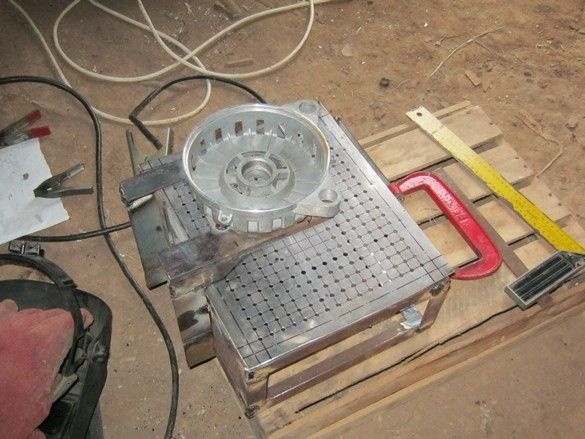
Take a look inside.
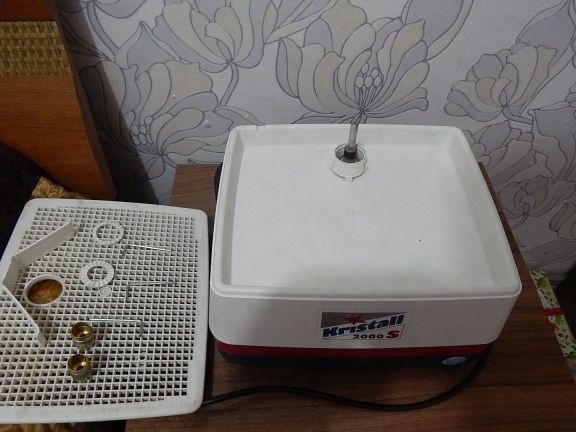
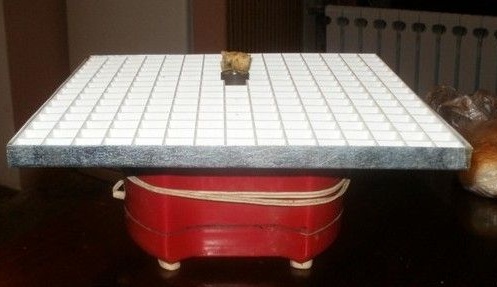
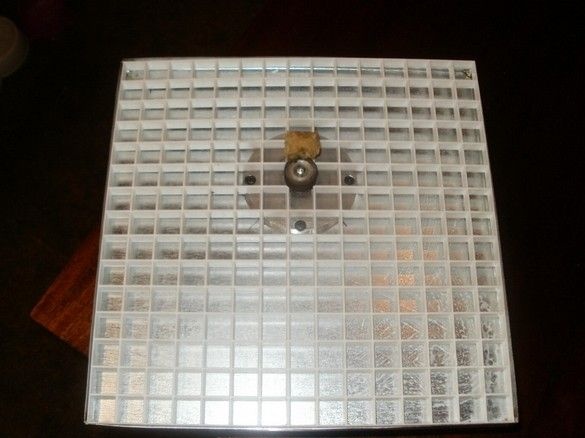
Nothing particularly outstanding either - a grating table, a small trough under it, on the motor shaft there is a kind of blades and a cup without a bottom, all this splashes out water directed upward on the working tool.Somewhere I saw a photo and a motor - caseless, as in a household mixer or an electric meat grinder. Most likely also collector. Behind the diamond “bat”, a piece of sponge is placed, it wets the tool, like a wick.
So, the device is clearly a “hobby” class, not intended for prolonged and / or intensive use. The trough is very shallow, the volume of water in it is small, I suppose that the glass sludge in it settles weakly. An improvised pump does not allow you to adjust the water supply, neither its flow rate nor the place of washing. Lack of regular “local” lighting. The location of the electric motor under a trough with water seems to be not the most reliable.
The advantages include compactness, ease of maintenance, a good overview of the place of work. You can purchase additional accessories that slightly increase the usability.

An analogue from the Middle Kingdom, on all beloved and dear AliExpress. Half cheaper, significantly less desktop, the principle is the same.
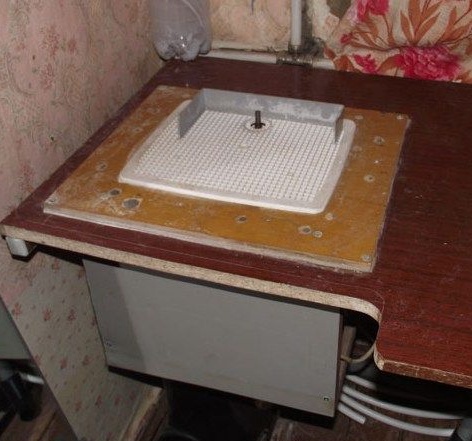
It doesn’t hurt to take a look at the work of fellow settlers of our sites.
Option 1.
Option 2
Option 3
What to say? In general - the repetition of industrial design from their materials, affordable means. All the same sponge-wick and a trough in two centimeters deep. Colleagues, by the way, came up with a rather ingenious way to somewhat protect themselves from the flow of water through the gland, in structures of this kind.
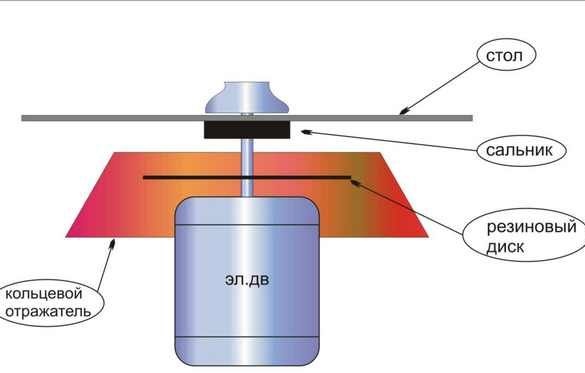
The standard design is supplemented by a disk that sits tightly on the motor shaft, in the figure it is a "rubber disk". With the probable flow of water through the gland, it flows onto this disk and is sprayed by centrifugal force. An “annular reflector” prevents droplets from scattering throughout the casing. However, I have not seen a practical implementation.
Input data.
We accept:
- a metal case or frame - and for massiveness, vibration reduction is useful, and special options, in fact, are no more;
- a deep trough-pallet - there is a chance that the glass slurry will settle in one place, and not hang out in the entire volume of water, again the mass is larger and this is good;
- water supply by a separate pump - it will be possible to regulate;
- no electrics under the trough with water - you will have to place the motor upstairs and look under it like a magpie in moslak, however, let it be, it will be calmer;
- local light, it is by all means;
- revolutions - about 3000, I tried half as much, the glass certainly nibbles, but very sluggish;
- motor power - from 100 W, but without fanaticism, all the same dimensions and excess electricity consumption, of course, asynchronous;
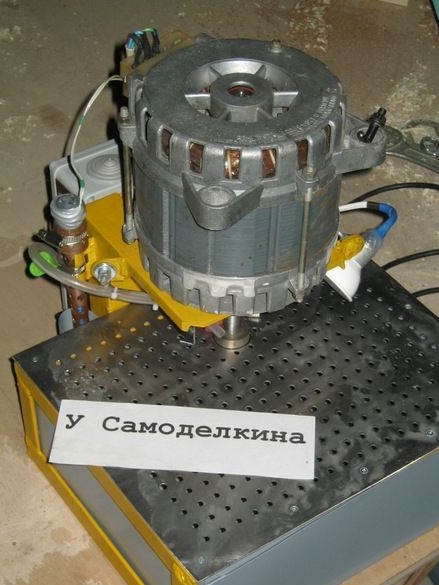
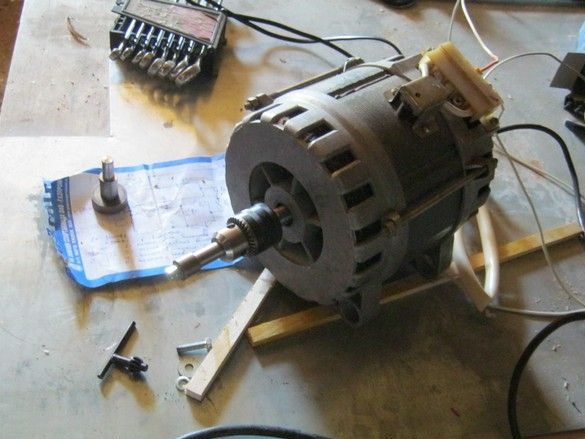
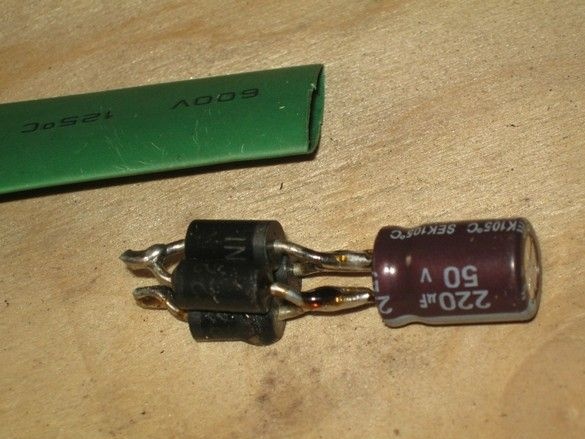
I rummaged in bins, gathered up suitable pieces of iron. It was decided to solder the trough from galvanized steel roofing, and decide on the place of water supply, the simplest option is an aquarium submersible mini-pump, which is switched on simultaneously with the engine. But with the last snag, it was not possible to find a revving electric motor of suitable power and size. I had to dissect the old washing machine-semiautomatic device and apply the motor from it. Everything would be fine, but the two-speed engine and with modest power is huge, I had to come to terms with it.
DASM-2, 120/60 W, 2900/425 rpm, weight - 12.8 kg.
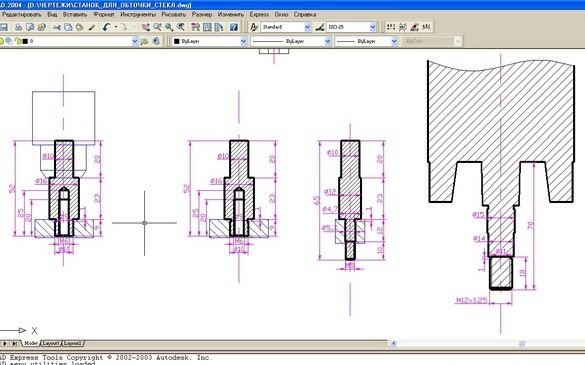
It was decided not to limit oneself in the choice of a working tool - full-time diamond “bits” offered for use in factory machines, despite the high cost, have a very low resource and meager assortment. In addition, there is a tool that significantly expands the capabilities of the machine.

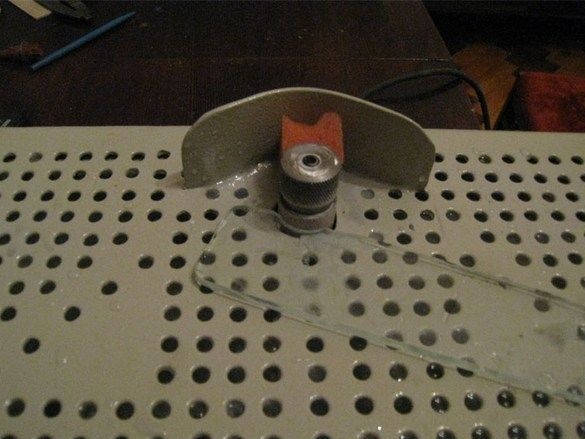
For example, such wheels with a C-shaped working surface make it possible to accurately chamfer glass.
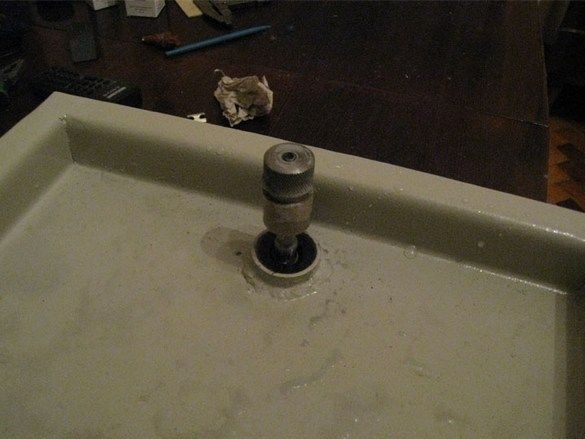
For the first time, I used the “industrial” diamond tool purchased on the occasion. Among other things, its diamond layer is made on a metal bond, which promises long-term operation. In general, in order to be able to use almost any diamond tool of a suitable size, it was decided to fix a drill chuck on the shaft.
The motor was disassembled, washed, cleaned with gasoline, the rotor with the “squirrel cage” was given to the turner for revision - the shaft was slightly shortened, a groove was made, a thread was cut for screwing a small three-cam drill chuck. The maximum diameter of the rod that it can clamp is 10mm. At the same time, two adapters were ordered and honed for the existing “cue ball”.
When assembling, taking this opportunity, changed the bearings.
I sketched the general layout in the CAD, however, here, on the sketch, a frame from a rectangular pipe. Then he changed it to a corner, it turned out to be somewhat more compact.
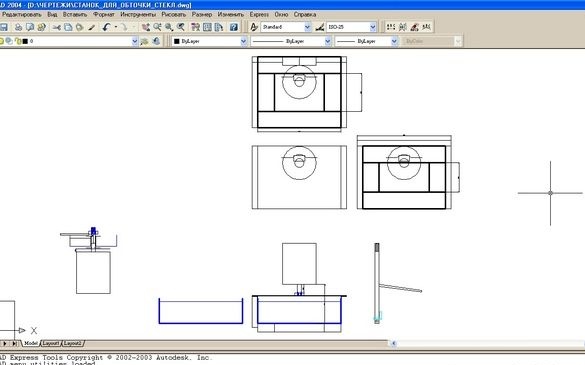
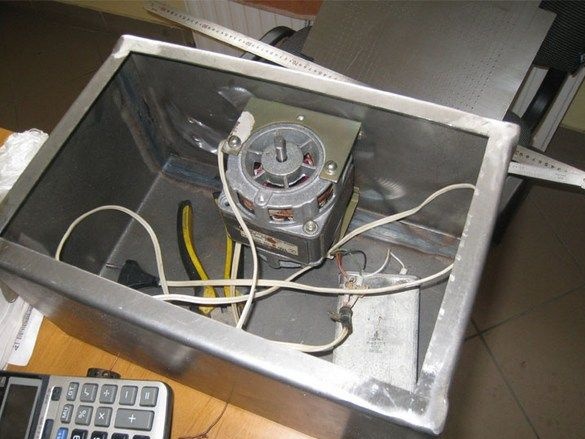
By the way, the option with the lower, as in the storefront, arrangement of the motor was also considered.
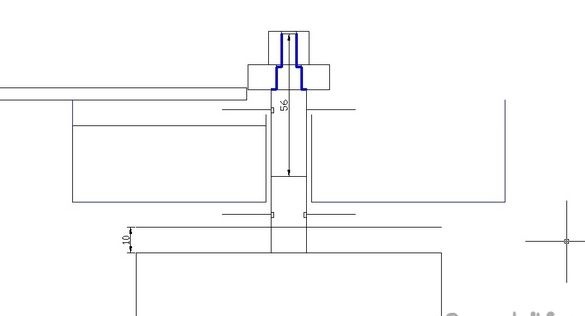
Something like this, with two spatter washers and without an oil seal, but decided to abandon it.
Assembly. The mechanical part.
What was used.
Instruments.
A set of bench tools, tools for threading, greatly facilitated the work of power tools - drill, cutting machine (angle grinder), drilling machine. Welder with accessories. Small gas burner for soldering.
Materials
We used standard metal rolling, threaded rods, hardware. Electric motor. Some pieces of metal from scrap metal. Galvanized steel roofing. Solder and flux for soldering. LMB, brushes, rags.
Marking, cutting blanks. Angle grinder, in a large vice, with a thin cutting disc, headphones, safety glasses.
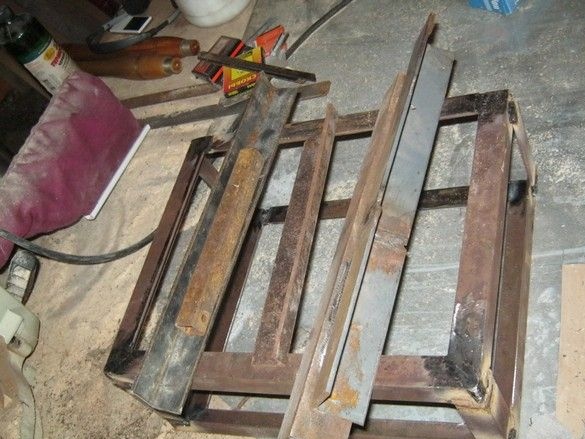
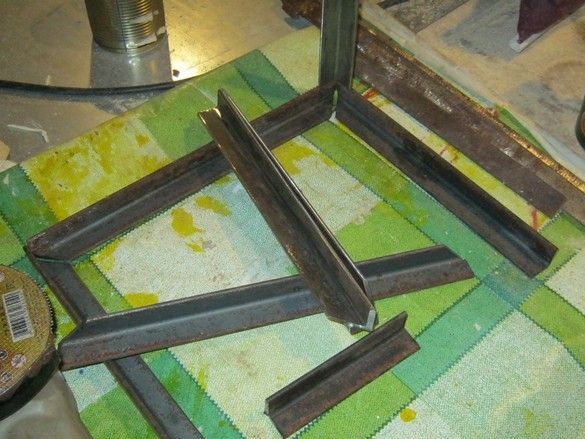
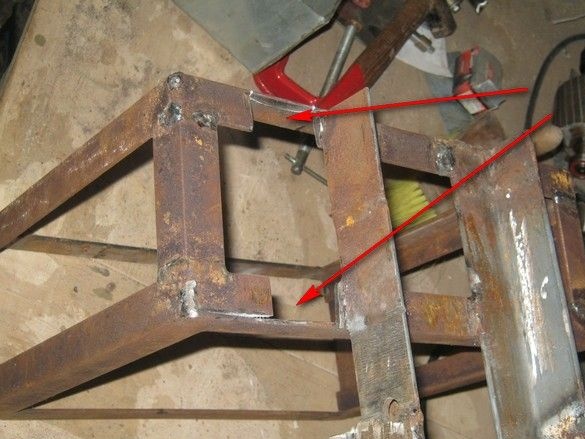
Welding the main frame, cleaning the seams. From scraps, welded blanks for the engine bracket.
The finished brackets sawed off part of the lower shelves at the upper platforms so as not to worsen the already brilliant view on the desktop.
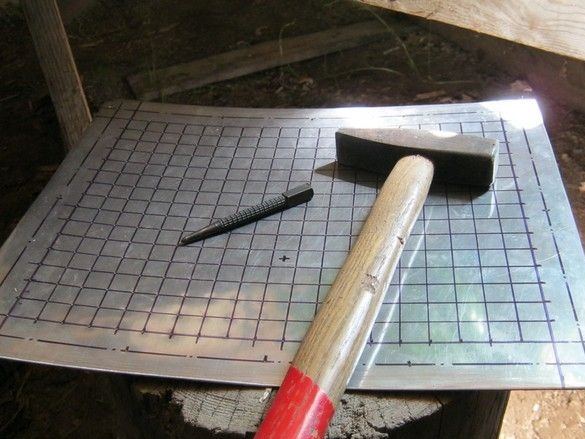
According to the size of the frame, I cut a blank for the desktop. From a piece of stainless steel 1.5 mm thick. Marked, nakrilil centers of future holes. Now, drill all this - ohohonyushki!
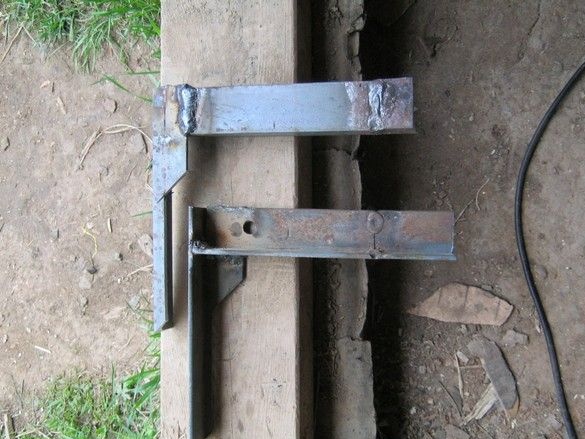
I welded the brackets for the motor, drilled holes where I could reach on a drilling machine. There is little left in the middle, it does not matter, then I will drill with a hand drill.

It is already possible to remove the exact dimensions for the trough which is pushed under the desktop. Drew a scan, cut, bent. Soldered by a gas burner. I was greedy on two sides - I decided to save a special solder and solder it with an ordinary pic, and with flux paste for tin-copper. With difficulty I achieved tightness - all the same, the flux must be selected under solder so that they both work at close temperatures.
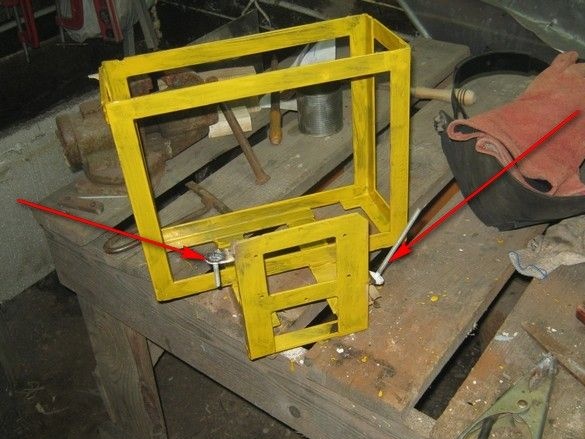
Turned the resulting design this way and that, and the washer concept was born - a certain homemade pump, on a high leg, inserted into a communicating protrusion-pocket on the side of the water tank and communicating with it. Having found a convenient place and having estimated the size and method of fastening, he soldered a small pump of copper pipes and brass rubbish.
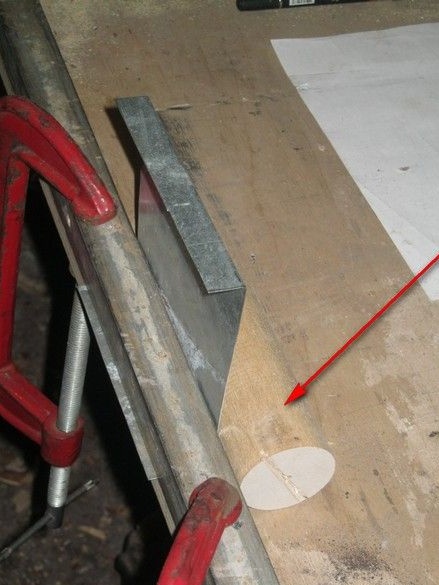
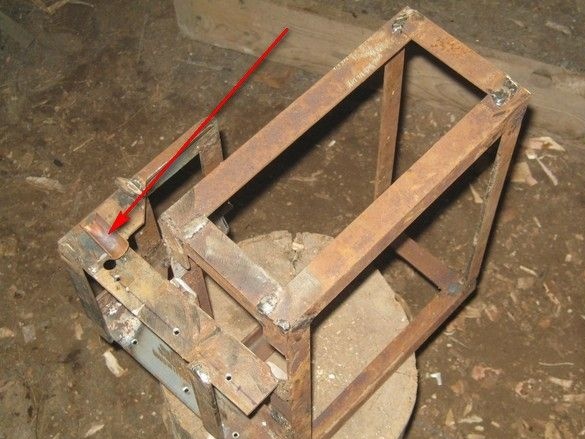
To mold a tin “pocket”, I carved a blank from a piece of birch (arrow in the photo).
I soldered it in the right place of the tank, made and soldered the bottom of the “pocket” from a piece of the same “galvanization”. Tin-copper solder with a native flux in the form of a paste. For burner soldering, it is used for installation of copper water supply.
I checked the tank for leaks, washed the remaining acid flux, dried. I drilled two holes in the tank wall, for the "communication" of the tank with the pump "pocket". I cleaned the spots of oxides with sandpaper, degreased, painted in two layers. I applied primer-enamel on gray rust - it is very covering and gives a dense strong coating.
The machine frame had to be finalized - to cut openings for the "pocket" of the tank. I got a little grinder. Then, of course, with a file.
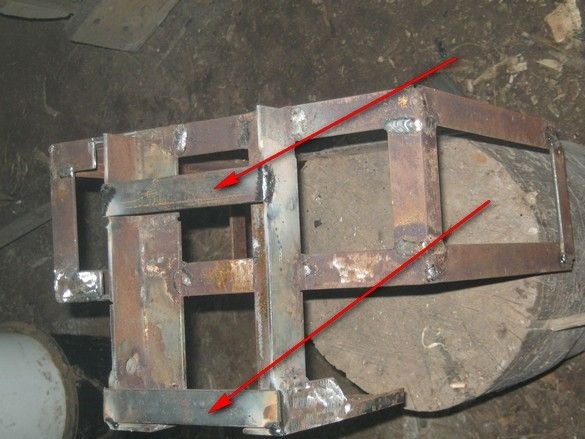
Welded two pieces of steel strip - the seat of the electrical box. I cut the excess, cleaned everything up.
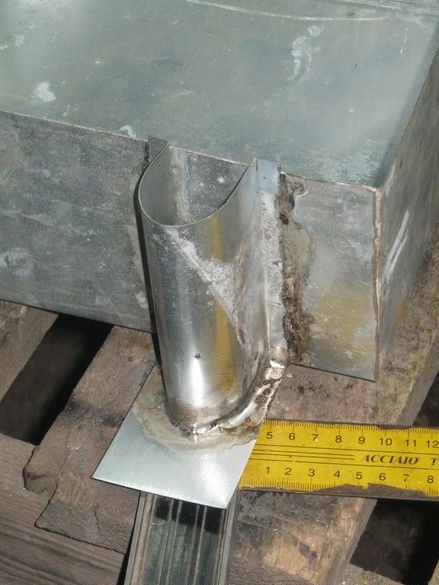
The pump decided to fasten by the "leg", for this purpose such a fastening was invented.
A certain gutter, of suitable diameter, the tubular “foot” of the pump fits into it, is fixed in position by a stainless steel screw clamp (galvanized is not allowed - a copper tube).
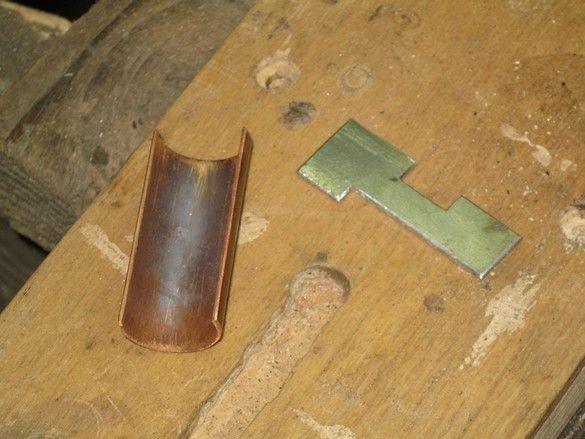
The gutter made of a part of a suitable copper tube, the bracket for its installation in stainless steel. He drank in the middle of the bracket to pass a clamp through it.The bracket is welded to the rest of the glands, the copper groove is soldered to it. Burner.
The pump mount is positioned to hold the pump over an open tank pocket. At the same time, I welded the ears for attaching the LED desktop backlight on one side and the bracket holding the water supply hose from the pump on the other.
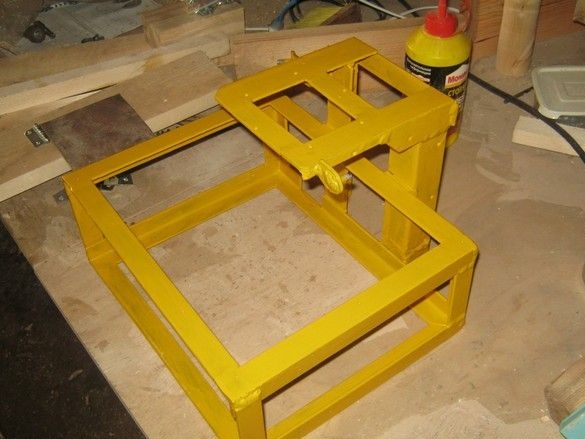
All. The piece of iron was thoroughly cleaned with a angle grinder, where it was not possible to get it - with a large sandpaper, degreased, painted. The same primer-enamel on rust, but yellow and from another manufacturer, cheaper. It turned out to be thinner, more or less even color without translucent dark spots, it was possible to achieve only on the third layer.
After the first layer, trying on a light bulb, I came up with how it is more convenient to organize its fasteners, I had to clean the paint and weld two pieces of the M6 hairpin. To use one hand or key, not two.
All. The main piece of iron is ready, take on the soldering iron.
Electrical part, general debugging.
What was used.
Tool.
A set of small bench tools, a tool for threading. Tool kit for electrical installation, medium power soldering iron with accessories. Do not do without a probe or multimeter. Used exhaust rivets, hot glue. Something for drilling holes, a jewelry jigsaw came in handy. Construction hair dryer for working with thermotubes.
Materials
In addition to radio and installation elements, I needed a piece of textolite, galvanized steel. Hardware, thin assembly wire, thermotubes, nylon ties, adhesive tape. Silicone hose.
Let me remind you that I used the DASM-2 engine, 120/60 W, 2900/425 rpm. Two-speed, from an old semi-automatic washing machine.
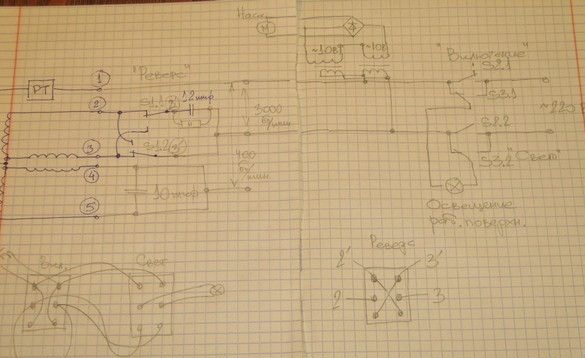
Schematic diagram of the electrical machine. The motor is involved only high speed. The possibility of reversing the direction of rotation is used. Turning on the backlight can be in two modes - together with the motor or continuous, while the machine is connected to the network. The water supply is constantly on while the large motor is running.
The switch used to turn on the power, the same type with the rest - three-position. The middle position is “Off”, switching in any direction is “On”.
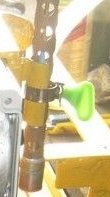
There were switches with two groups of powerful switching contacts, in three positions. Neutral in the middle and two in one direction and the other spring-loaded (returning to the middle position). The switches look good - silver-plated powerful contacts, carbolite non-consumable case, reliable design.
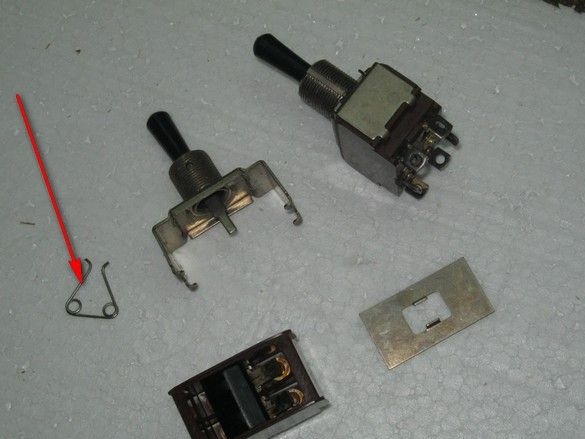
After removing two springs (one marked in the photo, the second flew away), the switches became possible to use in our design. Connection diagrams of all three above.
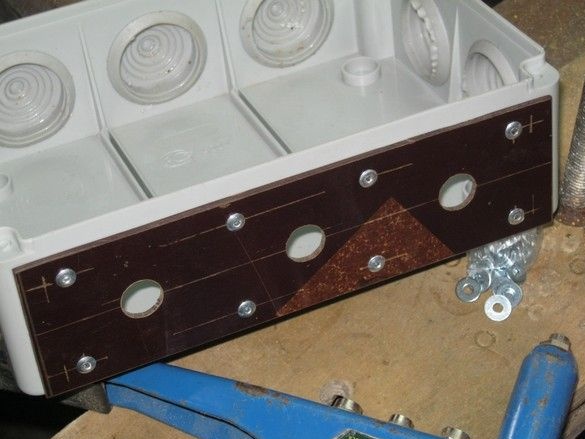
Electric "locker" - a junction box from the electrical goods store. The plastic on the sides, where it was just convenient to install the switches, is quite soft, also with enormous cable holes. I had to "sew up" a plate of textolite.

Fastening with aluminum rivets. Their operating principle, assumes a fairly strong sheet material, whether soft or not strong enough, you can use my trick - before “pulling”, a metal washer is worn on the inside of each rivet, preferably “reinforced” or “body”. On small rivets with a diameter of 3.2 mm, M3 washers fit well.
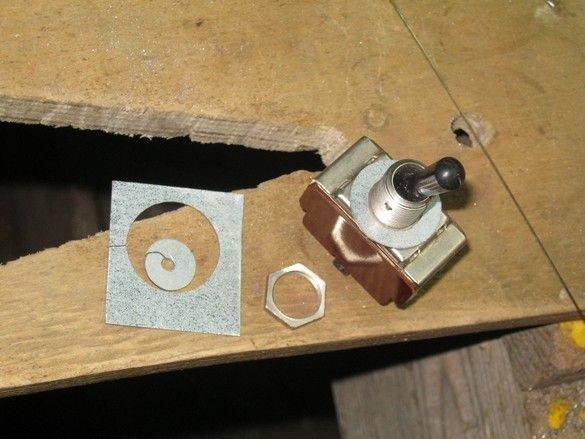
My toggle switches were without fasteners - to each, a kit should be attached - two nuts, two washers, a lock washer. He found the nuts, had to cut the outer washers with a jewelry jigsaw made of galvanized steel.
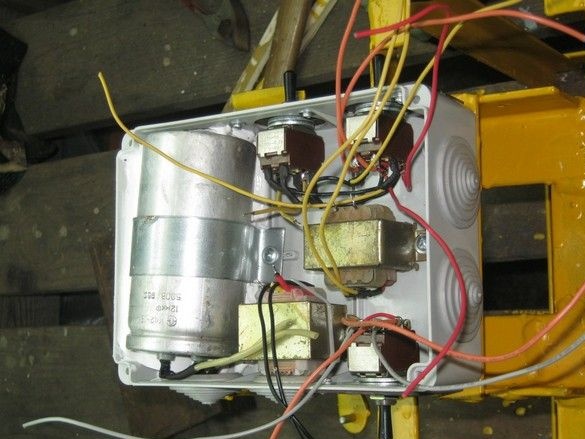
The box is fixed in a regular place, the first passengers on board are one of the transformers for powering the pump motor.
The motor starting capacitor is fixed. Tin staple, so as not to flounder, but for reliability, plunged acrylic sealant under it. Initially, the capacitor was supposed to be installed differently, but the transformers did not fit. I had to turn it over and transfer one of the toggle switches to the other wall of the box.
The petals of the toggle switches are cleaned and tinned, everything that can be soldered in advance “on the table” is soldered.
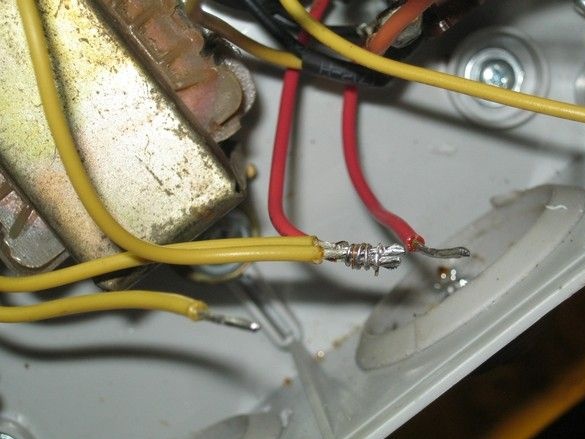
Often you have to connect several wires at one point.This is done easily and elegantly - the ends of the wires are cleaned from insulation, tinned, gathered in a bundle, tightly wrapped with a thin tinned wire. A flux is applied, the beam is carefully soldered. The place of soldering, of course, is isolated. Better thermotube.
To illuminate the workplace, an LED lamp with a reflector was used. The cut ends of the wires are simply soldered to the T-shaped terminals, the place of soldering and the place of cutting are insulated with heat pipes and filled with hot glue for greater tightness. The lamp is mounted on the machine, with a tin clamp around its cylindrical part.
Before installing the engine, I completed some little things, so that later I would not turn the machine with a heavy motor. I drilled small “approximate” holes on the frame to the required diameter (2.5 mm), cut M3 thread in each, for fastening the “desktop” grid.

The motor was equipped with special mounts, something like two pairs of “ears”, on which it hung inside the washing machine. Here, the mount is made for the bottom cover, with six M5 screws. A pair of “ears” on this cover was cut so as not to interfere. Top left.
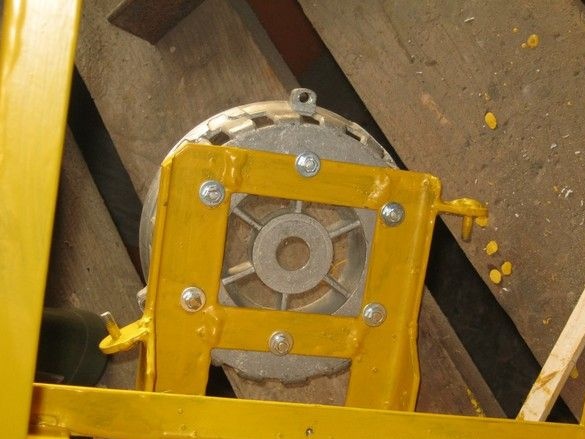
Washer-stopper-nut - everything is like in people.
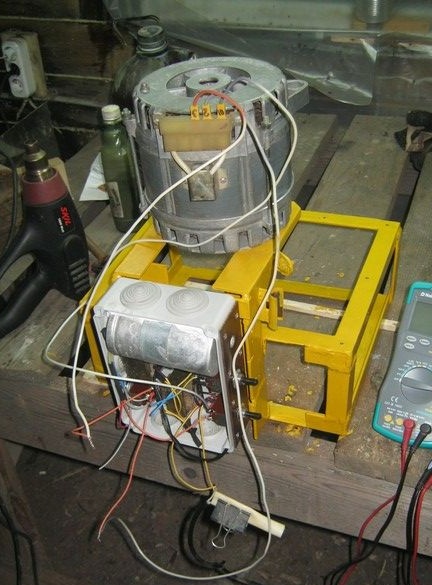
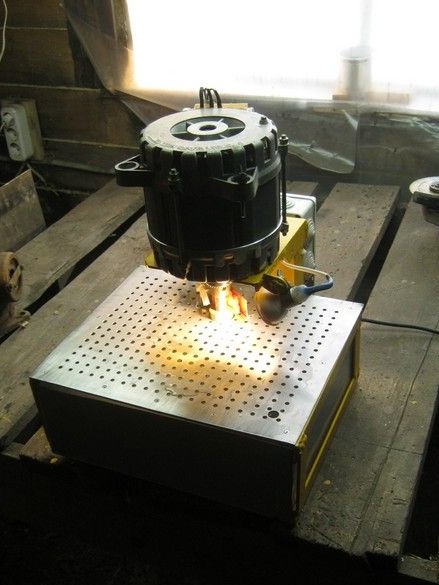
After assembling the motor, my hands scratched trying to turn it on, again check the installation in the box. Conclusions from the motor made "on a living thread". Nothing, earned as nice. And here and there, with and without light.
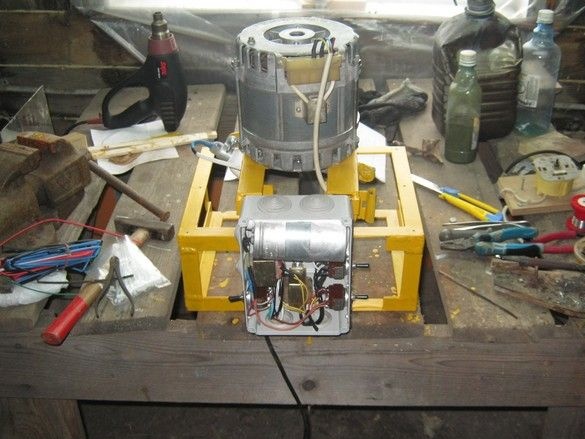
All temporary cultured - come to godfather to admire!
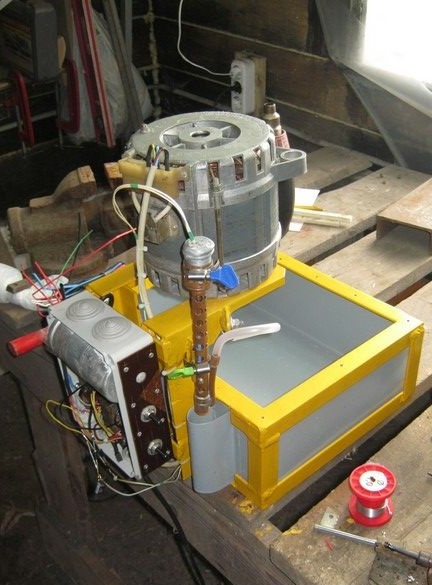
Now the water supply. I hooked the pump into place, poured a bucket of water and began to pick up the voltage on the micromotor. The motor there is DPM-25 – H1-04 (27 Volts, 2500 rpm, 220 mA). Two transformers are installed in the box, the secondary winding of each of them produces 10 volts at idle. The windings were connected in series, and connected to the rectifier, made according to the bridge circuit. The capacitor capacity could, within small limits, select the desired voltage on the motor, so that the fountain would not beat or drip. Such a small stream so flowed.
After selection, the rectifier is soldered so that it fits into the heat pipe.

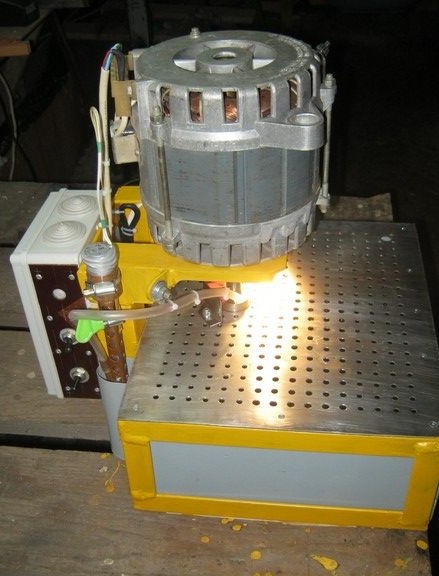

The bracket for holding the water supply hose is made of stainless steel strip, the silicone hose is fixed on it with nylon ties. The design allows you to very accurately direct the stream of water in the right place. The sponge is held in the corner of a small chipper screwed to the desktop and lightly pressed against a rotating tool. Its function, in contrast to factory analogues, is only in preventing water splashing.
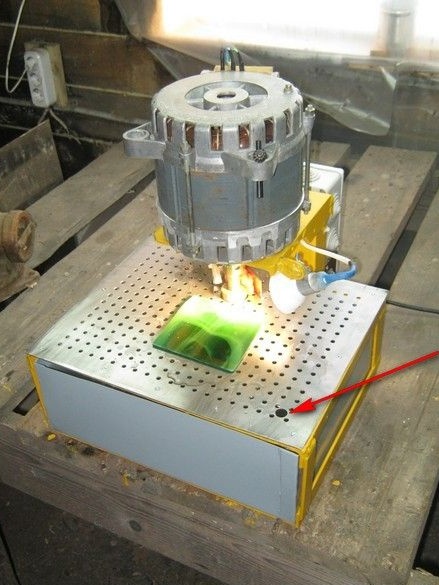
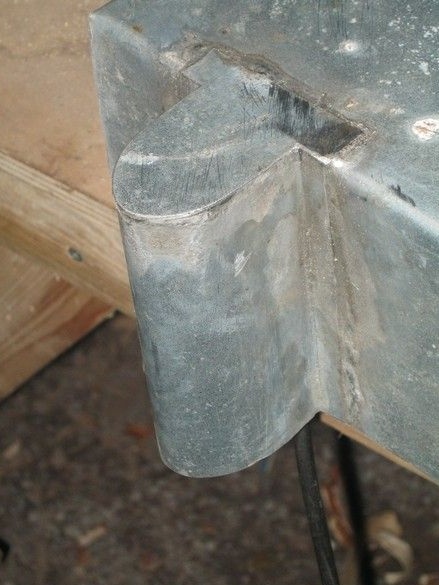
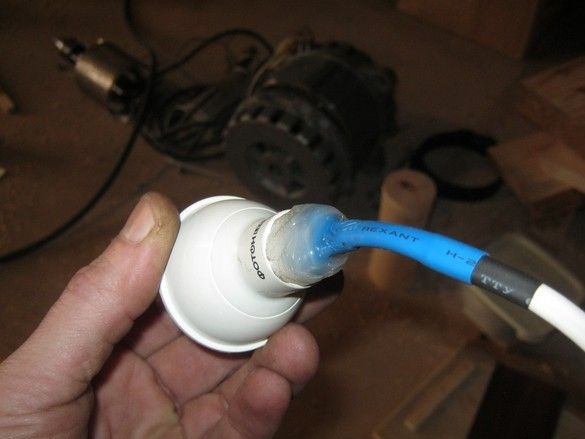
A hole in the corner of the desktop allows you to use a piece of hose with a diameter of 12 mm. They can be drained or added without disassembling the structure.
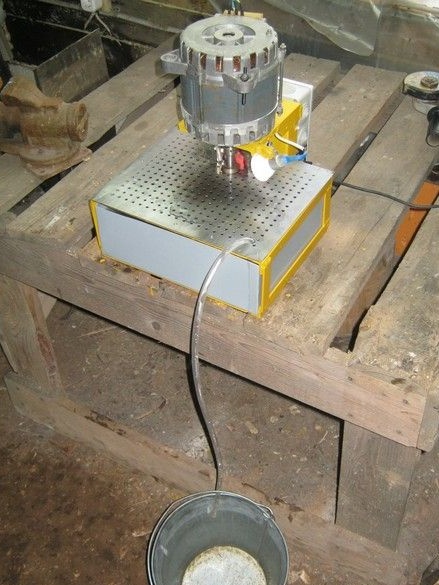
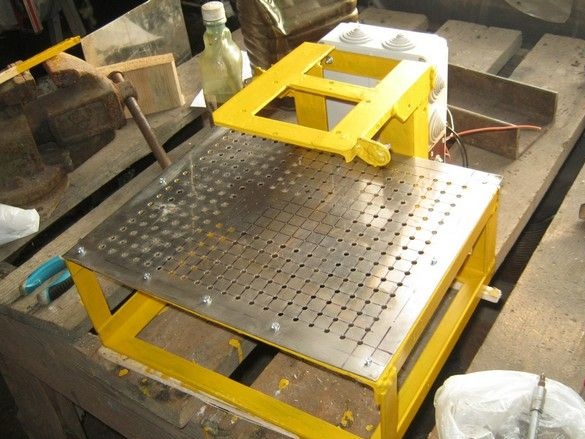
The overview of the desktop, more than the expectations, turned out to be quite decent, the motor on top does not cause any particular inconvenience. It’s quite convenient to work. The only drawback of the design is that it is difficult to change the working tool, for this you have to drain the water and pull out the container with water, however, changing the tool is likely to be infrequent and you can easily come to terms with this. The machine at work is like a glove - a large mass, no vibration. The noise is also very moderate, it is very comfortable to work. There is enough power, the motor does not heat up even with prolonged operation.