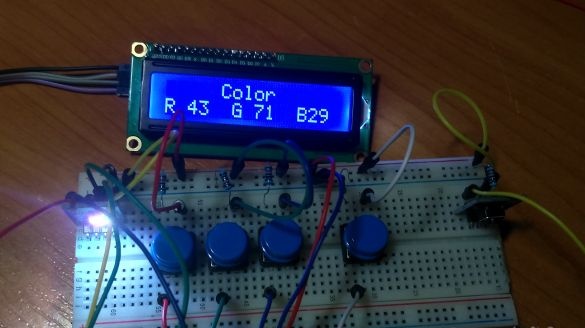
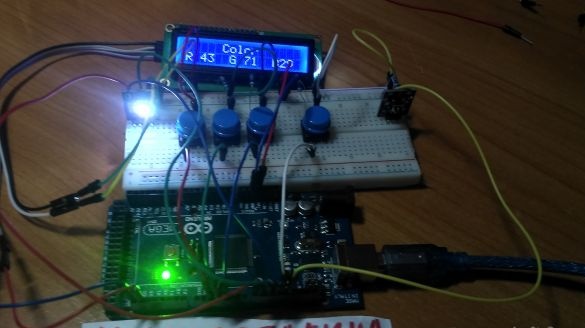
Using this homemade you can make any color in the RGB system with five buttons
1 - add red
2 - Add Green
3 - Add Blue
4 - Random (random color)
5 - Reset
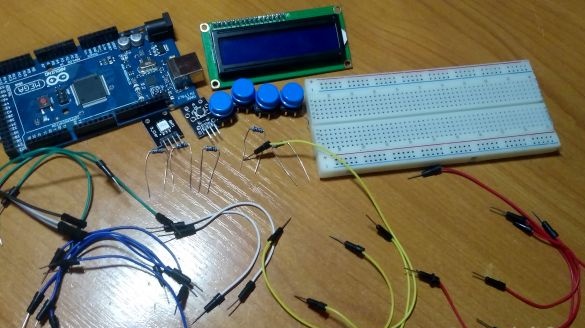
What we need:
1. Arduino (in my case arduino mega)
2. Development board
3. Jumper type: dad mom and dad dad
4. LCD 1602 (2 lines of 16 characters)
5. Buttons 5 pieces
6. SMD RGB LED
7. Resistor for 10 Kom 5 pieces
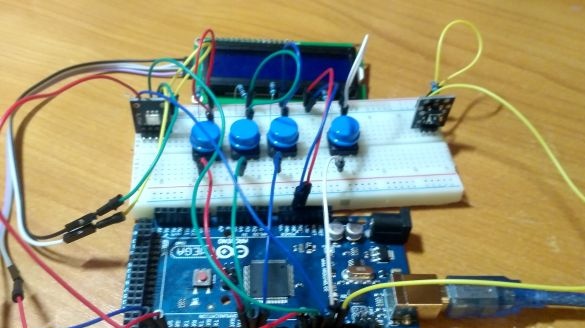
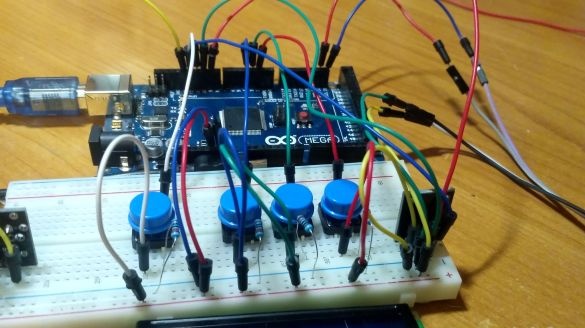
To start, we connect the RGB LED (in the absence of a resistor, put a resistor at 220 ohms).
Next, we put 5 buttons: one button leg to the 5V pin, and the other through a 10K resistor to the ground and the same leg to the arduino.
We connect the LCD 1602 display to SDA and SCL (I2C).
All this is connected to arduino contacts (GND, 5V, SDA SCL, 2, 3, 4, 9, 10, 11, 12, 13) as in the picture.
Well, actually the sketch itself
#include "LiquidCrustal_I2C.h" // connect the library to work with the display via I2C
#include "Wire.h" // Connect the library to work with I2C
int R = 9;
int G = 10;
int B = 11;
// RGB colors
int BR = 0;
int BG = 0;
int BB = 0;
// variables to save the value
int KR = 2; // red button
int KG = 3; // button is green
int KB = 4; // blue button
int C = 13; // reset button
int RS = 12; // button random
LiquidCrystal_I2C lcd (0x27.16.2); // Connect the display (address, columns, lines)
void setup () {// run once
    pinMode (R, OUTPUT);
    pinMode (G, OUTPUT);
    pinMode (B, OUTPUT);
// connect the RGB LED
    }
void loop () {// repeat endlessly
    delay (10); // delay 10 ms
        lcd.init (); // define the display
lcd.backlight (); // turn on the display backlight
    lcd.clear (); // clear the display
lcd.setCursor (5, 0); // put the cursor on the 6th column and 0th row
lcd.print ("Color"); // write color
lcd.setCursor (0, 1);
lcd.print ("R"); // write R
lcd.setCursor (6, 1);
lcd.print ("G"); / write G
lcd.setCursor (12, 1);
lcd.print ("B"); write B
lcd.print (BB); // print the blue value
    lcd.setCursor (2, 1);
lcd.print (BR); // print the value of red
    lcd.setCursor (8, 1);
lcd.print (BG); // print the green value
    lcd.setCursor (13, 1);
    if (digitalRead (KR) == HIGH) {BR + = 15; } // if the R button is pressed, then the value of R +15
    if (digitalRead (KG) == HIGH) {BG + = 15; } // if the G button is pressed, then the value of G +15
    if (digitalRead (KB) == HIGH) {BB + = 15; } // if button B is pressed, then the value B +15
     if (digitalRead (C) == HIGH) {BR - = 254; } // if the C button is pressed, then the value of R -254
    if (digitalRead (C) == HIGH) {BG - = 254; } // if the C button is pressed, then the value of G -254
    if (digitalRead (C) == HIGH) {BB - = 254; } // if the C button is pressed, then the value B -254
    if (digitalRead (RS) == HIGH) {BR = random (0, 254); } // if the RS button is pressed, then the value of R is from 0 to 254
     if (digitalRead (RS) == HIGH) {BG = random (0, 254); } // if the RS button is pressed, then the value of G is from 0 to 254
     if (digitalRead (RS) == HIGH) {BB = random (0, 254); } // if the RS button is pressed, then the value of B is from 0 to 254

  BR = constrain (BR, 0, 254); // BR = (value, from, to)
    analogWrite (R, BR); // using PWM modulation we adjust the brightness from 0 to 254


  BG = constrain (BG, 0, 254); // BG = (value, from, to)
    analogWrite (G, BG); // using PWM modulation we adjust the brightness from 0 to 254


  BB = constrain (BB, 0, 254); // BB = (value, from, to)
    analogWrite (B, BB); // using PWM modulation we adjust the brightness from 0 to 254

    }
Download sketch:
That's what it should be!
Write in the comments that it is not clear that I will answer all questions


