Some time ago, wiring and manufacturing a printed circuit board for your device was a mandatory skill of almost any radio amateur. On the one hand, there’s nowhere to go - no one will do it for you, and on the other, the process, involves a fair amount of knowledge and practical skills that will not be superfluous. And remember how these printed circuit boards painted ... Where there is ink drawing on tracing paper, which plagued more than one generation of students in universities of technical areas.
Indeed, there are several methods for manufacturing a printed circuit board, if we talk about the chemical dissolution of unprotected sections of copper on foil laminated plastic, then historically the first was the method of manual drawing - a vulgar drawing pen, often a special glass one. Also used were plastic capillaries drawn from a thick-walled replaceable ampoule from a ballpoint pen or, better, metal ones from medical syringe needles. There were a number of special techniques related to ink drawing, allowing you to draw even tracks, special rulers with legs or a raised edge, so as not to smear the tracks. Walked around the hands recipes for easy-to-draw compositions - not drying in the needle and not smeared.
When personal computers ceased to be exotic, it turned out that along with games, there were a number of very useful, rather complex programs - the so-called "CAD" (computer-aided design systems), among them there were also those oriented towards our amateur radio affairs, in particular electronic industry as a whole. At the very beginning, during the time of the “286s” and “386s”, when “frog A jumps further than frog B”, I remember there were simple programs that made it possible, nevertheless, to considerably simplify the work of “tracing” the boards - before them they painted on graph paper or simply on a leaf in a box.Moreover, it was possible to print the finished drawing on a scale of 1: 1 (there were always not enough cartridges on a carbon copy matrix printer) and fastened it with adhesive tape to the foil fiberglass blank, tint the centers of future holes on the printout - as a result, the holes on the board were much more even and more precisely, which was very important for microcircuits. All the same, the paths were drawn with hands, all the same with a route marker.
A little later, dot-matrix printers sunk into oblivion and were replaced by laser and inkjet printers. I suspect that from the very beginning of drawing printed circuit boards on a computer, the amateur people were tormented by the question - how would I transfer this beauty right like this, from the screen, otherwise it painfully came out "there" and clumsy "here", something with it had to be done. When laser printers, the “miracle of hostile technology”, appeared, relatively speaking, not only in deans, but also in departments and people figured out what was happening, the technology was born with the transfer of molten toner, an iron, known as “LUT” (laser-ironing ) Well, soon specialized chemicals pulled themselves up.
The latter, allow you to organize a very simple means, at home, a process similar to the industrial and to achieve very good quality of the final products. Yes, as a device for printing photo masks, it is allowed and even more, it’s directly recommended that the printer is an inkjet printer - unlike a laser printer, it does not heat up paper and film when printing, and the printout very precisely matches the specified sizes. Well, the photo mask turns out to be more “dense” - that is, black, in the light, it is black, not gray.
So, we will consider in detail the whole process.
What was needed for him.
Instruments.
Requires access to a computer with a printer, a small bench tool, containers of the appropriate size for development and etching. You will definitely need a UV lamp. Soft brush.
Materials
Transparent film for printing on the type of printer that you have access to, varnish-photoresist, chemicals for developing (NaOH, "Mole"), for etching (optionally ferric chloride, copper sulfate with salt, citric acid with hydrogen peroxide) , in fact, the workpiece itself.
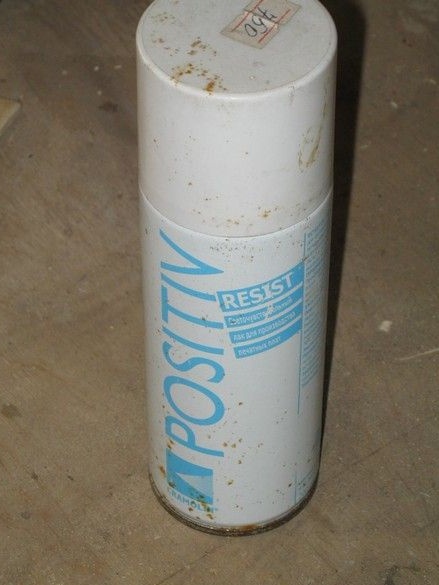
I got such a photoresist varnish in an aerosol package. “Positive” is in the sense that when printing a photomask, it is not necessary to translate the image into negative - everything that is black on the template will be varnished from the etching solution and will remain in the form of bulges on the blank.
The first thing we do is cut the workpiece. If this is a piece of iron, then everything is clear, if it is laminated plastic with a layer of foil, then you should take care of a simple tool that makes it possible to greatly facilitate the process.
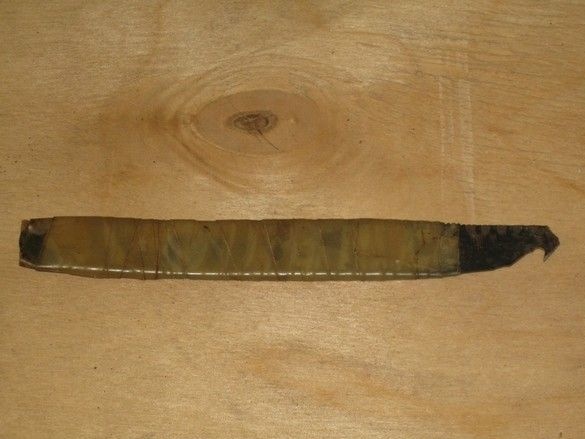
The cutter is made of a broken hacksaw blade, the tooth is cut with a “grinder”, a handle is necessary, but it is not worth aesthetizing - the tool is not too durable, the “claw” needs to be regularly updated - fiberglass is abrasive.
The blank should be cut with an “allowance” - ten millimeters on each side turn out to be unsuitable for a quality print.
After cutting the workpiece, it is thoroughly sanded with fine emery paper several times, alternating between grinding directions. The surface of the workpiece should be flat, matte. You can’t touch the prepared surface with your hands - greasy spots will not allow the varnish to stick firmly. It is better, even before grinding, to put on a left hand a clean glove and hold the workpiece only to it.
After grinding, varnish is applied to the prepared surface. Thin layer (a common mistake is to pour fatter, the layer should be slightly visible and only). It is better to tilt the workpiece so that excess liquid varnish drains. It is clear in a ventilated place or on the street and in dim lighting, so as not to immediately light up. After draining the excess, the workpiece is laid horizontally in a previously prepared opaque drying box.
Drying. There are two options - “natural” - at least a day, at room temperature and “forced” - in an oven at 75 degrees Celsius, a quarter of an hour.In this case, the drying cabinet must be equipped with a PID controller, otherwise a substantial “run-out” of temperature cannot be avoided and the workpiece will most likely be damaged. In factory conditions, they do not like to dry at room temperature - for a long time there is a high risk of catching dust particles on the sticky surface. We are in a hurry, as if there is nowhere.
While the workpiece dries, print a photo template. On a transparent film designed for printing on our type of printer. From the program where the drawing was developed. Print quality should be set to maximum. In principle, one pass is enough, but small “sores” are visible on the large field of the finished product. To minimize them, you should take the exposure interval as small as possible and count it very accurately, preferably by a stopwatch.
A denser photo mask that allows more liberties can be double-printed in one place if the mechanism of our printer swallows the sheets in exactly the same way. If not, it is better to make two copies and lay them on top of each other with pieces of adhesive tape. Take a look at that.
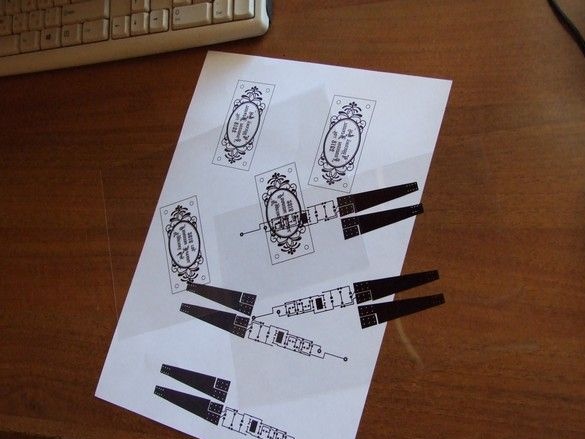
Two identical photo masks are printed. Mirror Both. In order to attach them to the workpiece with the ink side - a measure that positively affects the resolution of the future print.
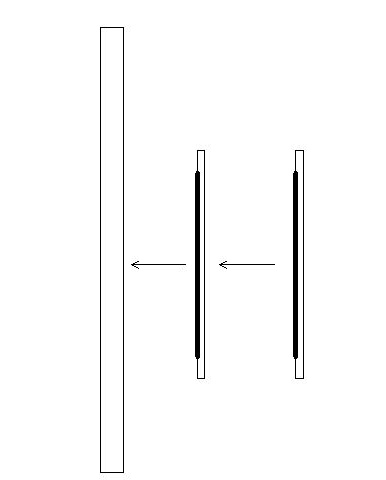
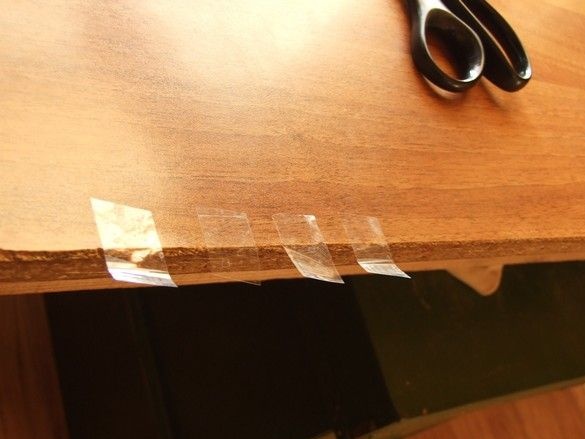
Printed patterns are cut with scissors, and one of the copies, it is better to make a little less than the second - it will be more convenient to fix it with tape. Four pieces of narrow tape, a few centimeters long, are cut in advance and glued to the edge of the desktop.
A template with large margins is placed on a sheet of white paper, with an ink layer on the paper. A template with smaller fields is placed at the top and shifting it, we precisely combine the drawing. On a white background a sheet of paper, doing this is very convenient. Holding the upper template with one hand, we fix its edges with the prepared pieces of adhesive tape. Order.
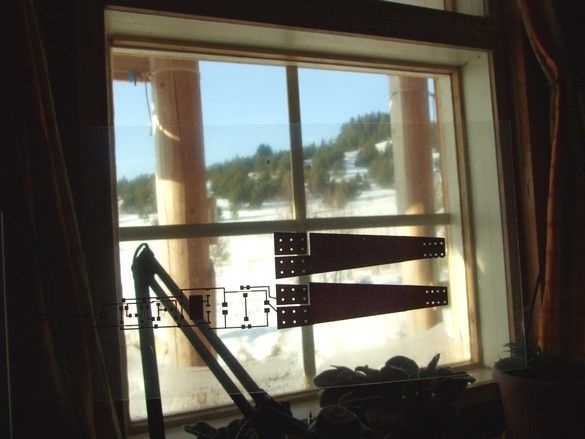
With a single-layer photo mask, against the background of snow outside the window, it can be seen that it shines through a bit.
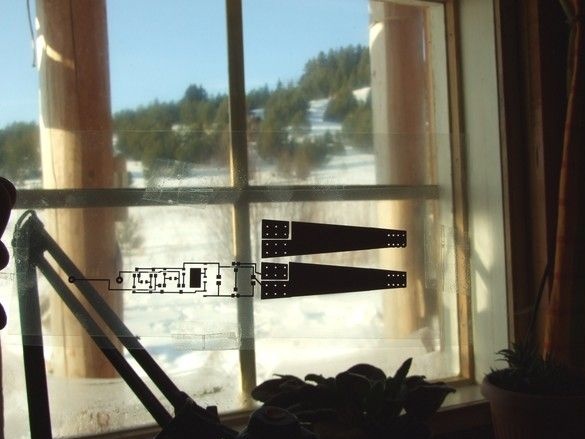
With two layers, the black color, against the background of the same snow, remains black.
After drying the workpiece, take it out in poor lighting, inspect. The surface should be transparent, shiny, lacquered, slightly purple. Most likely, small smudges formed on the edges, but there was an allowance for that. The slightest dullness of the film indicates that the coating is not suitable for further evolutions. You can rinse off such acetone, without regret, only time will be saved.
Exposure. Our varnish is sensitive to ultraviolet light (UV). The most convenient source of UV light is perhaps a lamp like energy-saving. It is enough to screw it into any table lamp with a suitable base and the "irradiator" is ready.
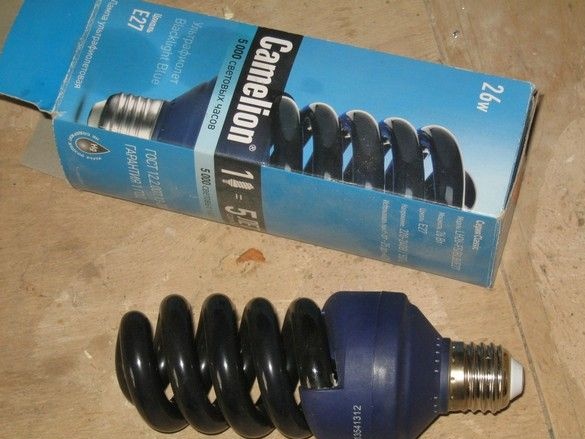
Such a lamp manages to expose workpieces up to 200 mm in length. In one sitting, if you bake to light up a longer one, you can use a military trick - expose in parts, closing the finished one with an opaque plate.
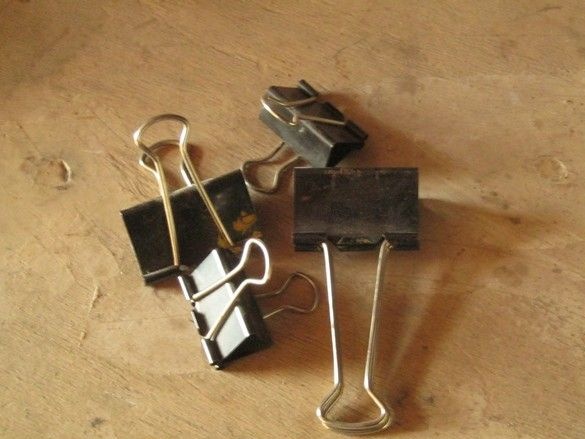
Exposure. The blank is placed on a flat surface, on top of it the corresponding side of the photomask and all this stuff is pressed by glass. It is convenient to cut two identical glasses and place a blank with a photo template between them. The edges of the glasses can be temporarily fixed with office clips.
But the best results are obtained with an elastic transparent "pillow". In most cases, on small workpieces, it is convenient to use a sealed bag with a zipper.
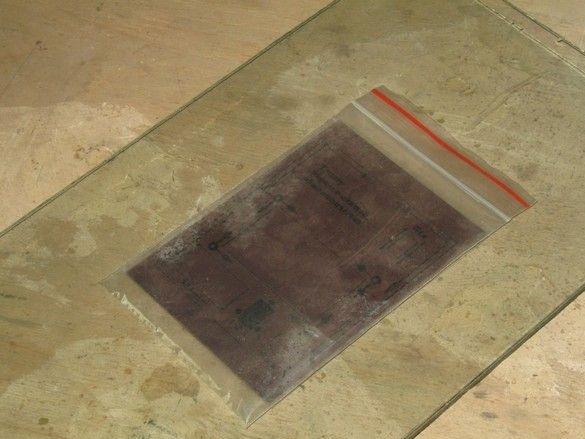
We inflate it a little bit and close the fastener. So, to get a sort of "mattress". It is laid between the upper glass and the photomask. The essence of its application is a uniform tight clip of the photomask to the workpiece. There is still a method of pressing by vacuum, but it is incomparably simpler. When the size of the bag with the clasp is not enough, you can solder such a mattress yourself from a regular bag or just polyethylene.
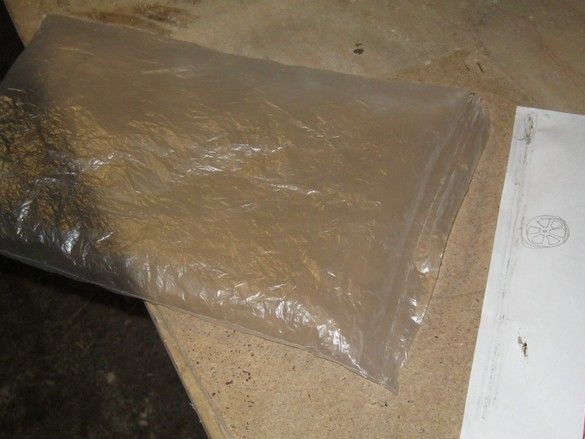
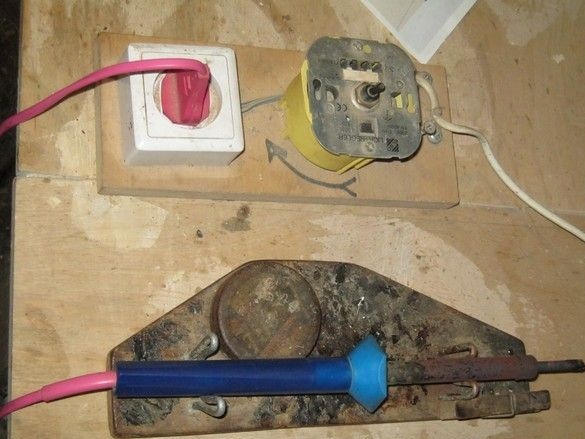
A strip of paper is placed on the place to be welded and a heated soldering iron tip is stretched over it. Speed and temperature should be selected in advance. A soldering iron is desirable average ~ 40 watts, power and temperature control tip.
The exposure time should be selected in advance by a simple experiment - a photo varnish is applied to the blank and a template is printed - 10min, 9min, 8min, 7min ... Then, a blank with such a “temporary” photomask is placed under the UV lamp, on which everything except “10min” is covered, well, let's say - a piece of tin. After a minute, we shift the plate, exposing the inscription “9min”, then, after another minute, add “8min” to them and so on. Then, after developing, we examine the result and write in the workbook and on the box with the UV lamp, the period of time at which the clearest prints are obtained.

It should be remembered that the exposure conditions should be completely repeated - the same lamp, the same distance to the workpiece, the same glass. Another important point - like all fluorescent (energy-saving) lamps, our UV smoothly enters the operating mode. That is, you need to turn on the lamp, wait a couple of minutes, then poke a blank with a photo template under it. It is certainly a pity - it would be tempting to use a time switch for photo printing, but incandescent lamps were used there.
After exposure, we put the workpiece again in a lightproof box, for 5 ... 10 min. It is important.
After exposure in the dark - development.
The development of my varnish, carried out by alkali - NaOH, is sold in dry stores in radio stores. It is soluble in water. It is possible and even better to use a solution of a pipe cleaner, such as “MOLE”, which includes this alkali. Firstly, it is cheap and affordable, and secondly, the effect of such a cleaning solution is much milder. True, not all variants of the “MOLE” include this alkali. Concentration - 60 ml per 1 liter of water. A shawl or a piece of our piece of iron is dipped in a suitable trough with an alkali solution and after waiting a couple of minutes, we slightly fan the surface of the piece in solution with a very soft brush. The areas of varnish that were under the transparent areas of the mask should begin to dissolve. In the end, there will be a fairly well-marked, clear imprint.
We immediately wash the workpiece in clean water and place it in the pickling solution.
There are several recipes for etching copper and its alloys. Recently, a recipe with hydrogen peroxide and citric acid seems to have gained popularity. Ladies', such a solution - so as not to stain anything at home and buy ingredients in the usual grocery store and pharmacy. On this, his advantages are exhausted. The cost of components, in terms of the required volume, is no cheaper than ferric chloride. The last one is a textbook recipe. It works quickly, especially when heated, now it is quite affordable. It is necessary to work carefully - the fabric and hands are very colored. And finally, the cheapest recipe is two parts of table salt, one part of copper sulfate. The latter is sold in hardware stores with a garden bias. With good heating, it works no worse than ferric chloride. True, copper compounds are poisonous - not “mustard-sarin-soman”, of course, an insulating gas mask is not needed, but washing your hands after work will not hurt.
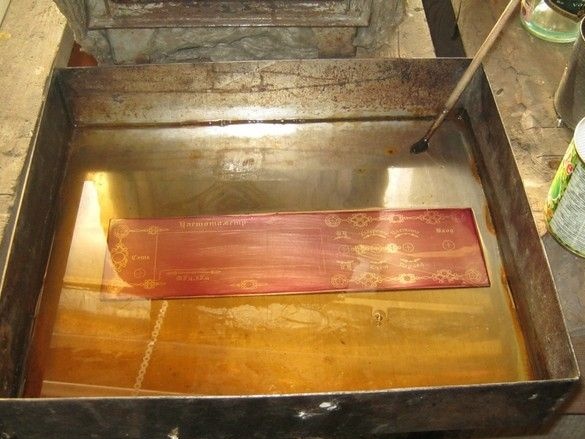
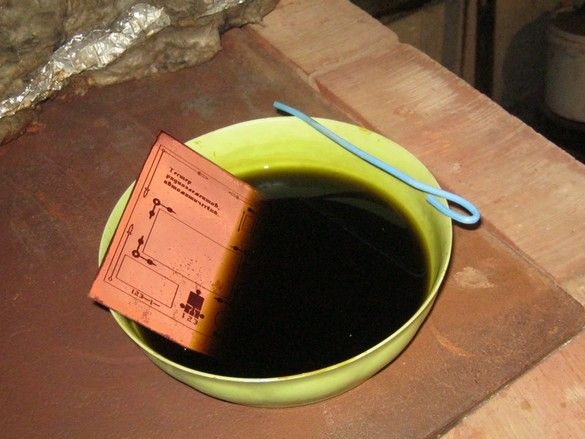
So, the chemicals and utensils are pre-selected, the solution is prepared. We place the developed blank in it. Yes, if this is a piece of iron, the back side should not be corroded by the solution, and the solution itself should be protected from unnecessary consumption - protect the surface from the access to it of the etching solution, for example, nitro-varnish. It is appropriate to do this before coating the varnish photo. That is, the reverse side of the billet of our piece of iron is coated with nitro-varnish, not forgetting to coat the ends as well. In a couple of layers, the benefit is that it dries quickly. After complete drying, we clean the working surface with a fine sandpaper and apply sensitive varnish from a spray can.
During etching, a layer of reaction products forms on the surface of the workpiece, which prevents good access to fresh solution and the reaction slows down. The process will go much faster when washing products, there are several tried and tested methods - placing the workpiece in the solution layer upside down, for example, fixing it on a floating float from a piece of foam.There are several ways to agitate the solution - from special magnetic stirrers, such as chemical ones, to air bubbles and vibration of a powerful speaker or speaker system connected to an amplifier in the generator in generation mode. Of course, the process will go on like this, but much longer, in this case, it is worth placing the cuvette nearby and shaking the solution more often.
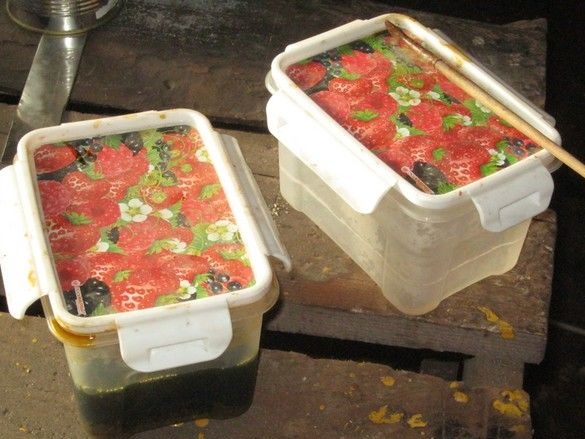
Speaking of cuvettes, if there is not a container of a suitable size, you can make the sides of the blocks and line the inside with polyethylene. Working solutions (pickling and developing), it is convenient to store in plastic rectangular containers with a sealed lid, otherwise they will evaporate.
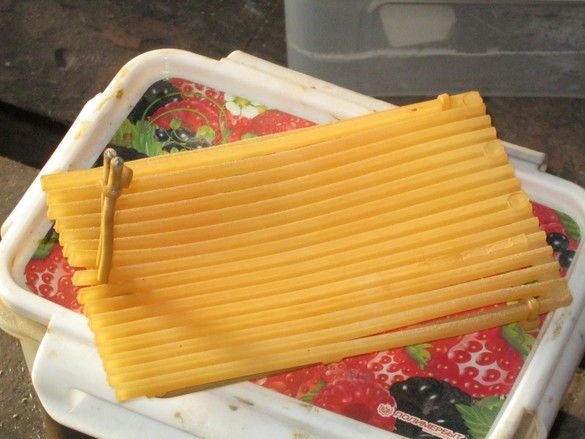
Small workpieces can be processed directly in containers, for this a lattice with a handle made of wire in insulation is made from a piece of a bee collector of propolis.
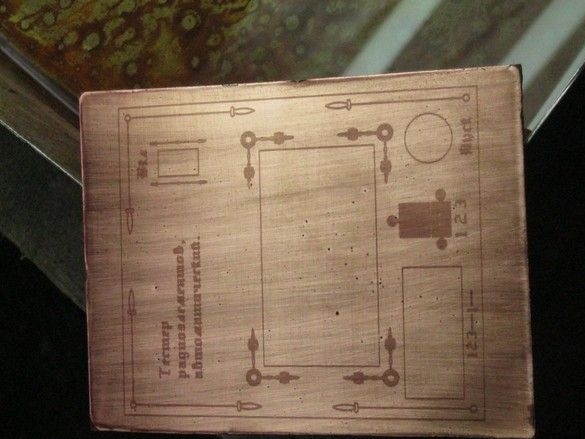
When the etching is completed, copper is completely dissolved in the unprotected sections of the printed circuit board, a drawing of sufficient depth is etched in steel cases, the workpiece is thoroughly washed with water and dried. A layer of protective varnish is erased with a piece of rags moistened with acetone, or cleaned mechanically with a medium-sized sanding cloth.
If the workpiece is a printed circuit board, it remains to saw off the allowances, drill holes and, if desired, tin.
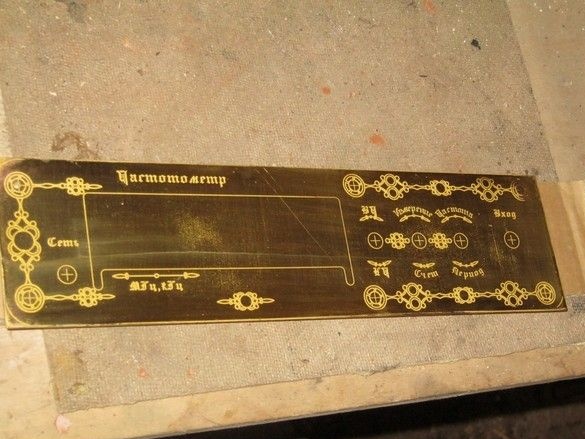
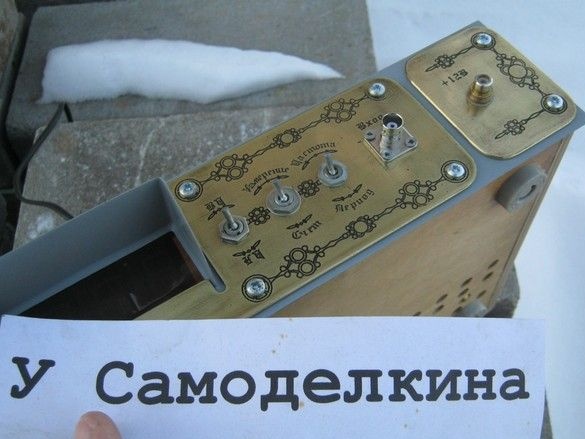
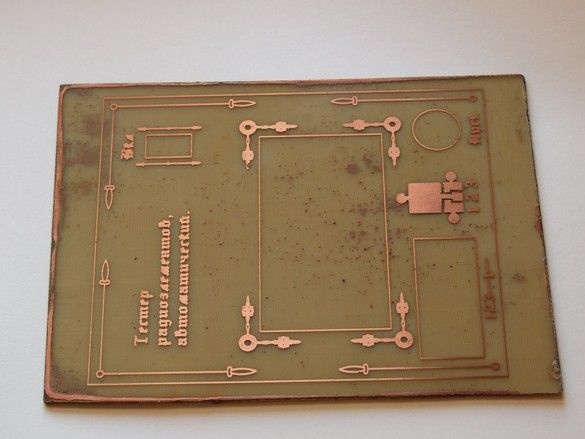
If the workpiece is a piece of iron (scale, nameplate, panel), the etched drawing is “to show” - fill the recesses with a dark one against a light background. It is best to do this with patination - applying an artificial patina. Patination is another interesting story.