

Outlet control via IR remote
We will do a socket that turns on and off with the help of an infrared remote control.
I must say right away if something is not clear I will explain everything in the comments.
Warning voltage 220 V
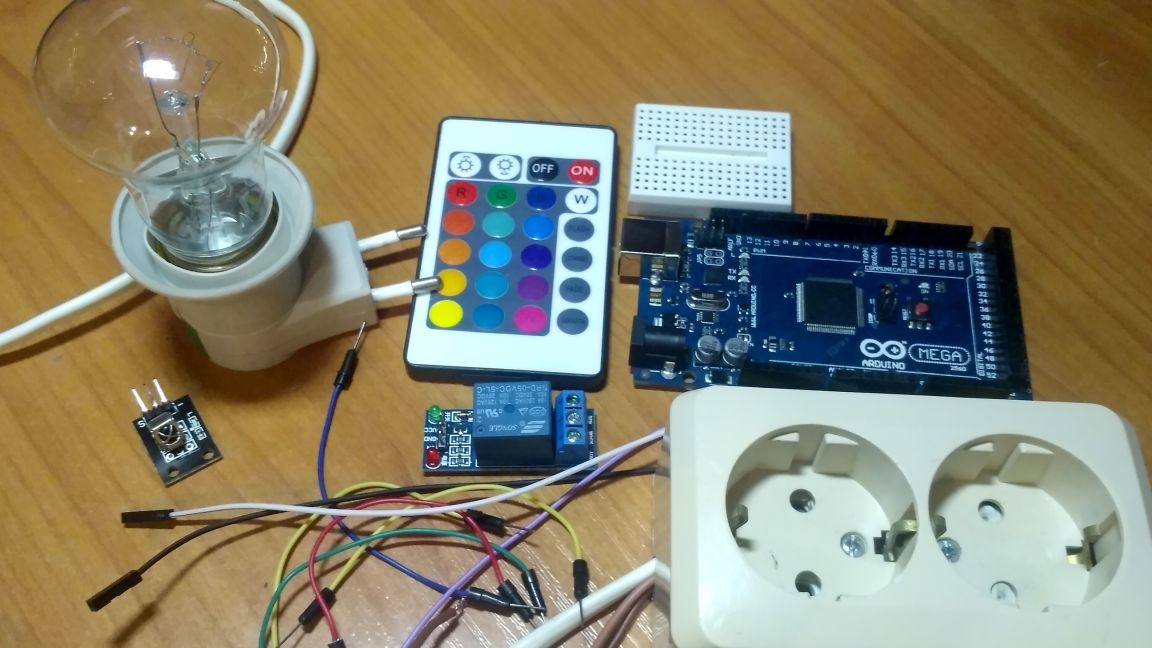
What we need:
- Arduino
- IR receiver
- IR remote
- Jumpers like dad mom and dad dad
- 220 V solid state relay
- Socket with one torn wire
- Bread board
- Bulb with bulb holder
Putting it all together
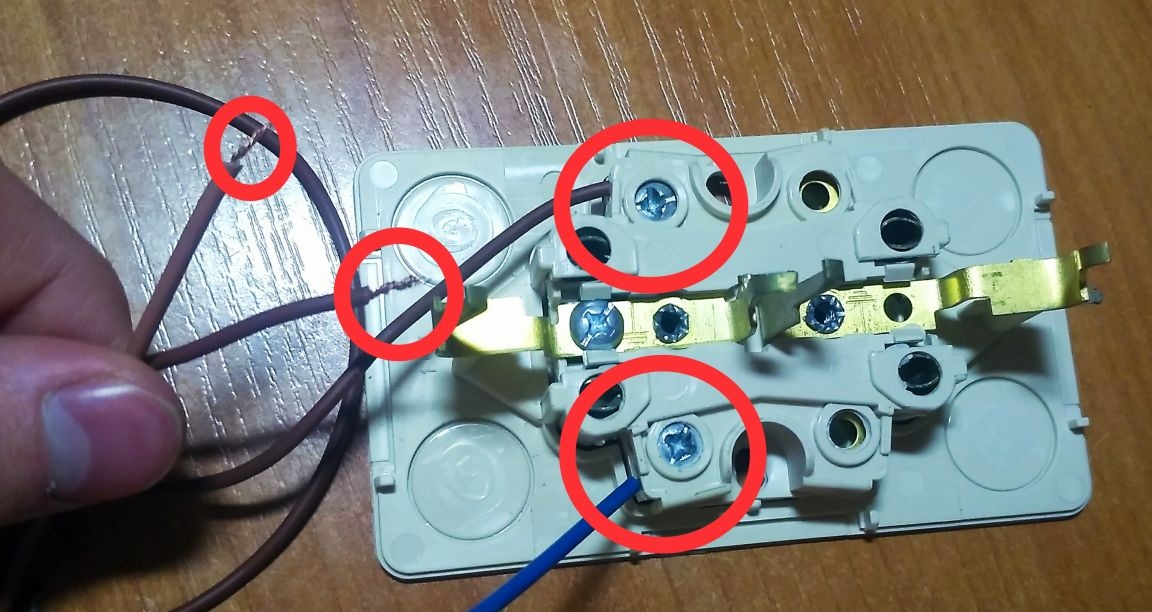
To get started, we'll take the socket, unscrew the 2 screws and open it.

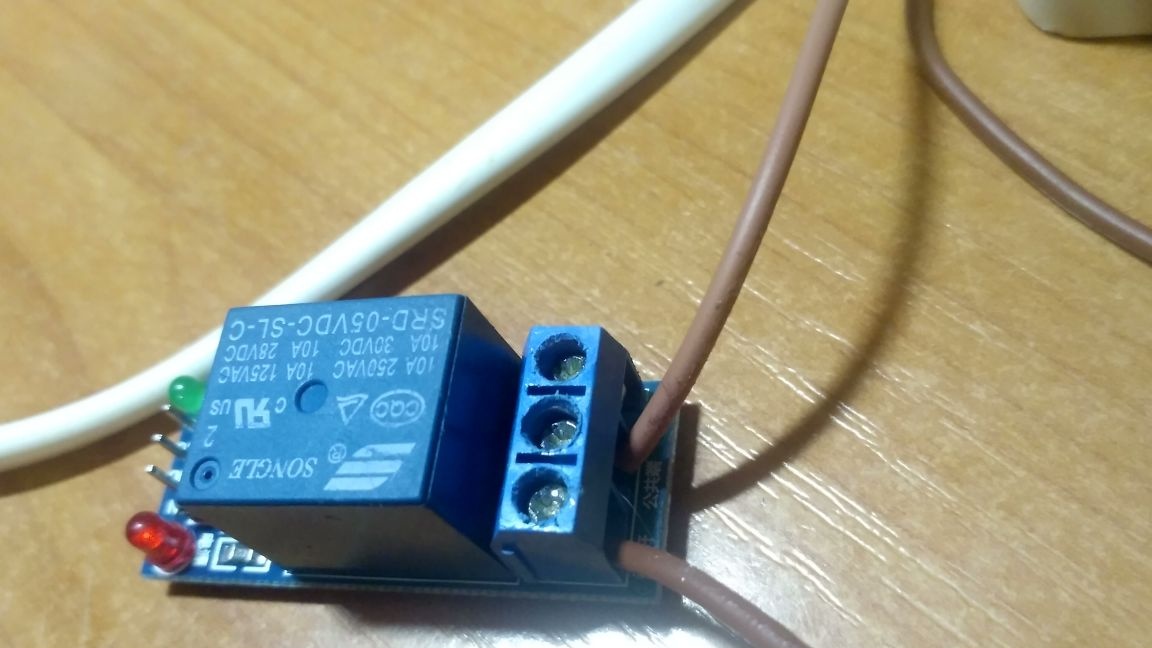
Then we clamp 2 wires in two terminals with a screwdriver and cut one wire in half. So that it turns out like in the picture.
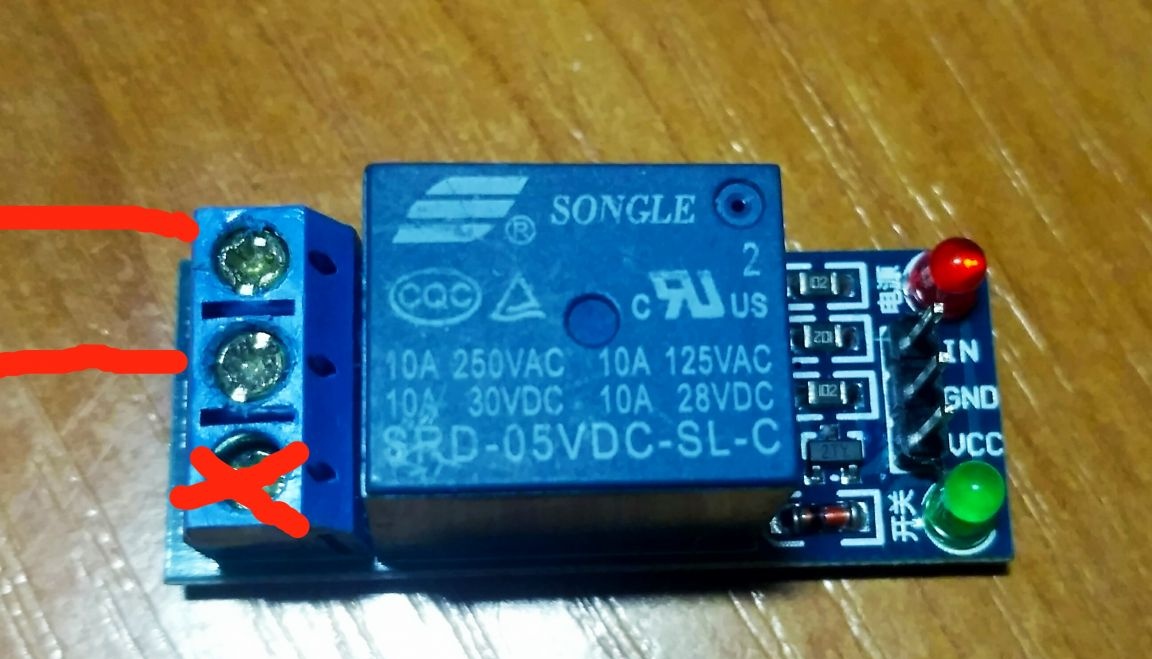
Next, insert the two wires that we cut into a solid-state relay for 220 V as shown in the picture just the opposite!

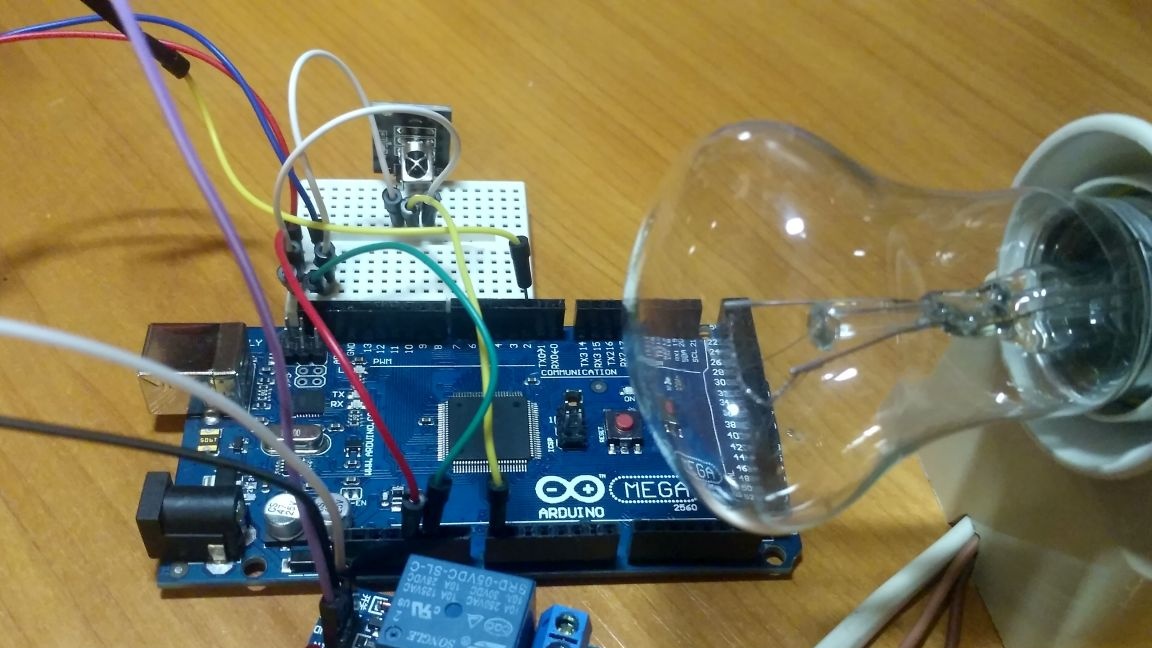
Now we connect everything as in the picture.
IR sensor:
- GND left foot
- middle leg 5V
- right leg A0
220 V solid state relay
- vcc - 5V
- gnd - GND
- IN - D9
And here is the sketch itself
#include  // connect the library to work with the IR receiver

IRrecv irrecv (A0); // indicate the pin to which the IR receiver is connected
decode_results results;

void setup () // setup procedure
{
irrecv.enableIRIn (); // start receiving the infrared signal
pinMode (9, OUTPUT); // pin 9 will be the output (eng. "output")
pinMode (A0, INPUT); // pin A0 will be an input (English "intput")

Serial.begin (9600); // connect port monitor
}

void loop () // loop procedure
{
if (irrecv.decode (& results)) // if the data arrived, execute the commands
{
Serial.println (results.value); // send the received data to the port

// turn on and off the LEDs, depending on the received signal

if (results.value == 16754775) {
digitalWrite (9, HIGH); // turn off the light
}
if (results.value == 16775175) {
digitalWrite (9, LOW); // turn on the light
}

irrecv.resume (); // receive the next signal on the IR receiver
}
}
Download sketch
After the sketch is uploaded, open the port monitor and press the button on the IR remote control. The result of a single press is written instead
if (results.value == 16775175) {
digitalWrite (9, LOW);
}
Now again you can fill in the sketch and use it!
Use carefully! I am not responsible for your injuries!