As you know, a floor lamp is a lamp standing on the floor and supporting a lampshade using a bar. The word "floor lamp" came to us from the French language, which in translation means "torch". Of the whole variety of lighting devices, floor lamps are, without a doubt, the most homely, cozy and comfortable. Soft, scattering light calmly pours out from under the lampshade and pleasantly illuminates the space.
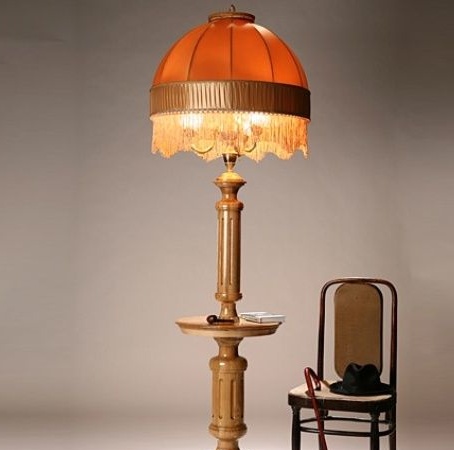
Ever since the time when the grandmother’s floor lamp with a shelf on the leg, the lampshade of which was decorated with fringe, was a family heirloom, passing from generation to generation, the soothing light of the floor lamp has been associated with pacification and homeliness. After some oblivion, floor lamps experience a period of rebirth. Now they can be seen again in almost every house. Bright, sometimes even blinding light, like loud noises can not only tire, but also annoy, so twilight is sometimes simply necessary. A floor lamp in this sense, a miracle, is how good and quite capable of bringing peace of mind and calm to life.
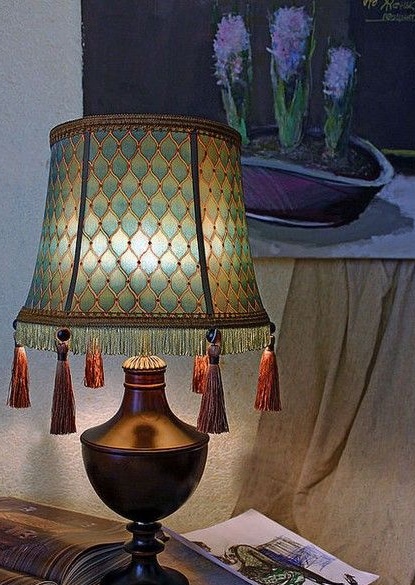
Lighting the room is almost the main aspect in the interior. By combining light with shadow, we somehow create a mood in the house. Central lighting, with all its attractiveness and economy, to illuminate the whole room once and for all, does not create coziness and a certain, hmm ... sincereness is a completely different matter, lamps with dim lights, all kinds of sconces, table lamps and, of course, floor lamps. The latter, well, just the same aristocracy among the lamps.
Of course, the main function of a floor lamp is to provide a certain level of illumination of a room or part of it, but their usefulness does not end there. Whatever it may be, it will be remembered for dinner, the designer would say that the floor lamp helps to “zonate” the space. Obviously, the area in which the floor lamp is located is intended for relaxation - with a book, in a soft armchair and with a cat on his lap. In addition to the obvious functions, there is also an underlying functional - decoration. You can choose an option for any style of interior. There are models that successfully fit into the interior, and will not distract attention to themselves, in contrast to them there are many floor lamps that can become a sort of raisin of the interior of the living room or bedroom, and even the pantry.It all depends on what effect we expect from the presence of a floor lamp in the room.
If we talk about the advantages of floor lamps in comparison with wall or table lamps, then they have a number of obvious advantages:
to install a floor lamp there is no need to drill holes in the wall (as in the case of wall lights - sconces);
the floor lamp is mobile, we can transfer it to any place, turn it in any direction, if only there is a place to put a socket in the vicinity;
depending on the height of the floor lamp, it is able to visually increase the height of the room.
Floor lamps with a lampshade, this is the most classic version of a floor lamp, consisting of a stand, a high tripod and a lampshade fixed at its peak. It is the lampshade that is responsible for the technical characteristics of the device, the level of dispersion and background illumination. Well, the main contribution to the attractiveness of the lamp as a whole, as a rule, is behind it, behind the lampshade.
A lot of materials are traditionally used as a material for making a lampshade - fabric, fiberglass, glass, paper, ceramics, metal and plastic, and well, all sorts of designers with residents of our sites who are not deprived of imagination, sometimes they will use it so that even take out the saints.
Thinking of making a small table lamp, we were faced with the task of making a lampshade. It was decided to make it rag, for this a wire frame was needed. Since there was wooden formused her.
What was used in the work.
Instruments.
A set of small bench tools, mallet, scissors for metal. Good nippers. 65W soldering iron with heating controller, accessories for it. Without fail a compass. Jewelry jigsaw with accessories. Small brush for flux, sandpaper. For coating with varnish - dishes, brush.
Materials
Galvanized steel wire with a diameter of 2 mm. POS-40 solder, flux - “soldering acid” (zinc chloride). A small piece of galvanized steel. LMB, rags.
Such lampshades in the factory are traditionally made by the method of resistance welding, here, for the lack of such, soldering is used.
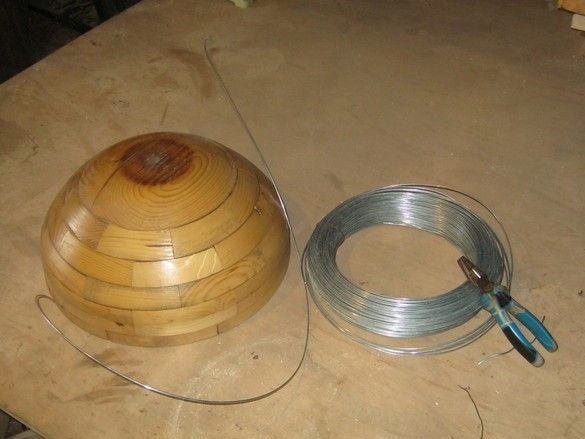
The wire was first used galvanized steel. The previous frame and similar work was made of brass, for convenient soldering. But the cost of brass wire that went to one frame was approximately equal to the cost of a whole galvanized steel bay, from which you can make more than a dozen such gizmos. Practice has shown that the assembly is no less convenient, it is soldered, galvanized steel, it is good when choosing the appropriate flux. Was used "soldering acid" - zinc chloride. And the usual tin-lead POS-40.
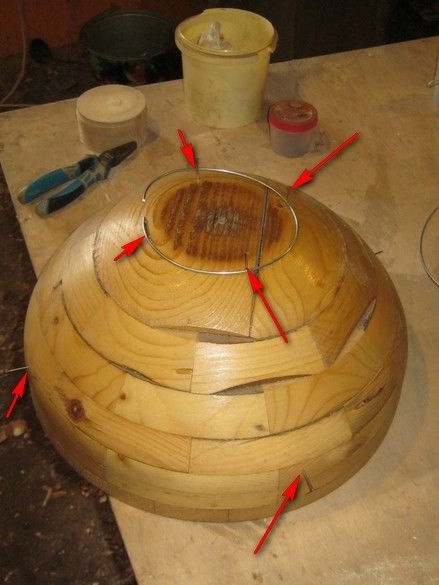
First of all, we form “parallels” - rings. The wire was sold in the form of a small bay, and the cut pieces were already striving to curl into a ring, they should only be slightly corrected. To fix the “parallels” in their places, small carnations are hammered into the wooden template, they do not allow the rings to slide.
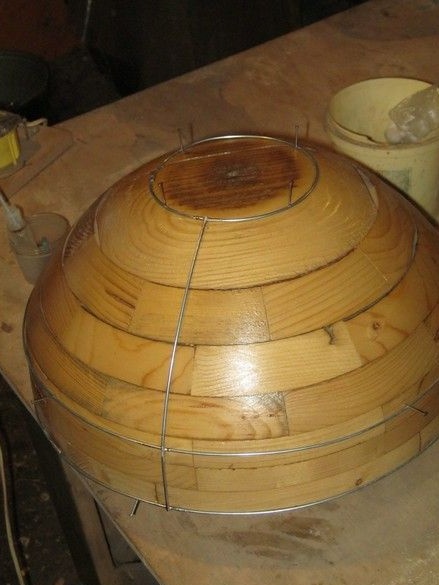
The “parallel” rings are formed and soldered, we proceed to the “meridians”. It is convenient to measure the length with a rope, bit off the wire a bit with a margin. Directly on the template, the "meridian" formed. On the arcuate part, the workpiece had to be straightened a little, reducing its radius; in the lower part, the workpiece was straightened almost completely. Marks were made with a pencil on a wooden disc, the wire of the “parallels” in these places was cleaned with a medium-sized sandpaper and tinned with zinc chloride. Then, the soldering spots of the “meridian” blanks were cleaned and polished; there was no need to mark them - two ends and a middle bend. “Meridian” was applied in the right place, with the left hand in a rag glove, the middle was pressed, a flux was applied and soldering was done. Then the ends of the “meridian” were soldered, it was even easier, the workpiece was molded so that the middle almost reached its place. After soldering, the ends pressed tightly to their "parallels".
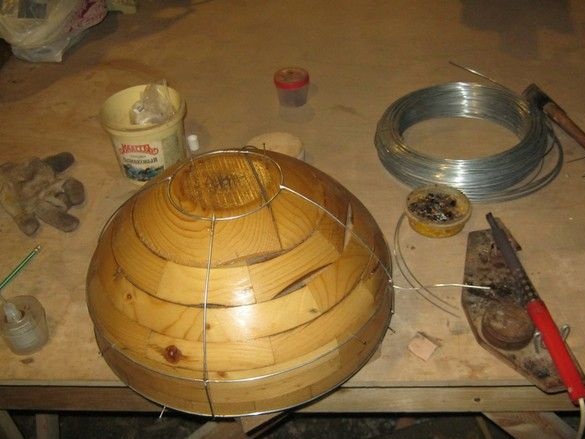
For simplicity, the workpiece was marked “visually”, by eye, that is. Soldered four "meridians", two, one opposite the other.The angle is 90 degrees, it is well defined by the eye, further, the "meridians" are soldered into the middle of empty sections, where the marking task is also very simple - divide the segment in half.
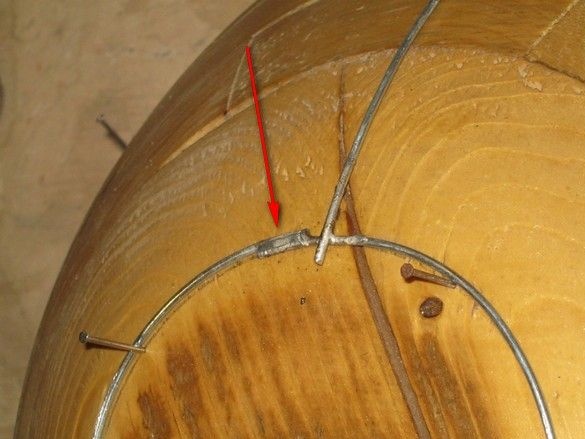
Such difficulties were encountered several times - a new soldering, next to the old one. No "step soldering" with different solders, just "old" soldering, an additional heat sink was organized in the form of pliers sponges. There was not enough heat to melt the solder and all that was needed remained in place.
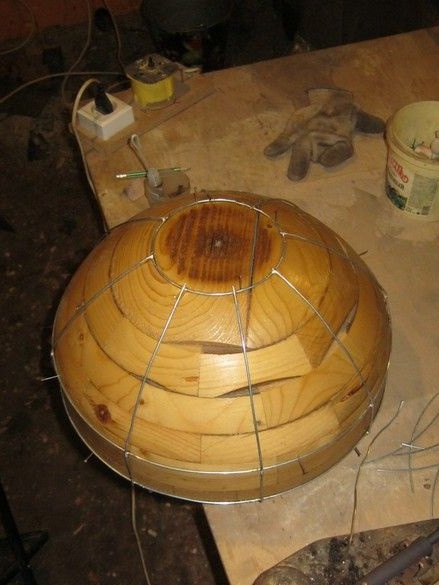
Well, with the "meridians", the entire disc is evenly covered, but something is rare. I wanted the finished rag lampshade to have no egregious “faceting”. It was decided to add “meridians” in between.
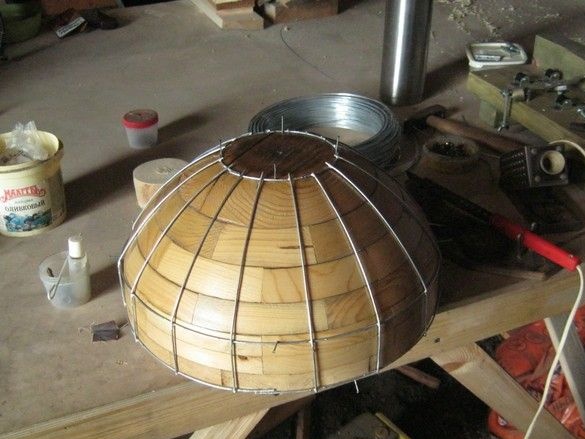
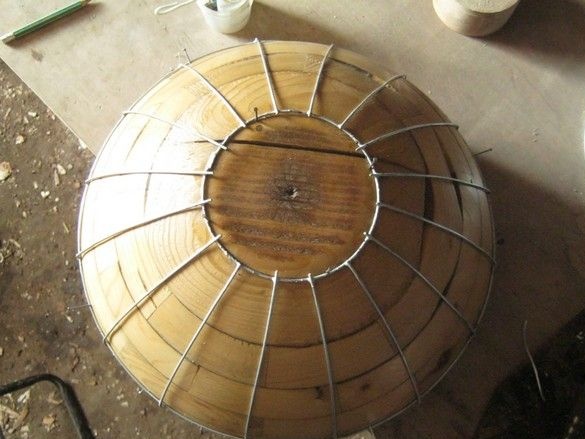
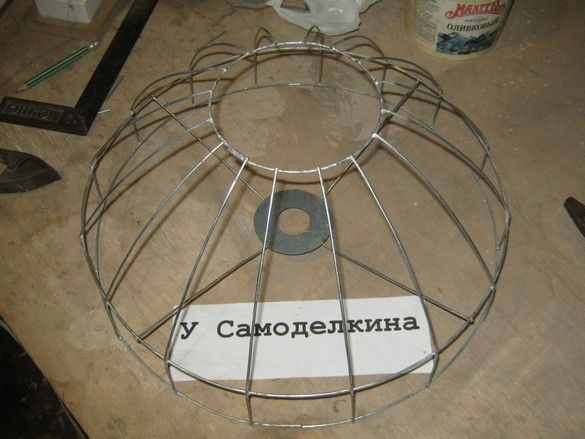
Well, this is more like a hemisphere. Leave it. Small cloves are pulled out and the frame is carefully removed from the blank.
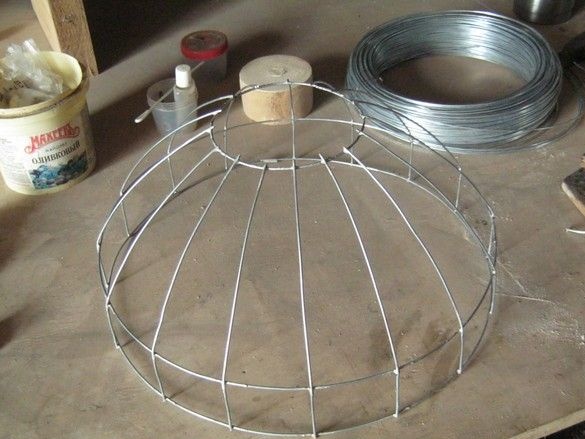
Now you should take care of mounting it on the lamp. Cartridge in a lamp with a small E14 socket, with a thread on the outside and a large carbolite nut on it. With this nut, the lampshade is clamped onto the lamp.
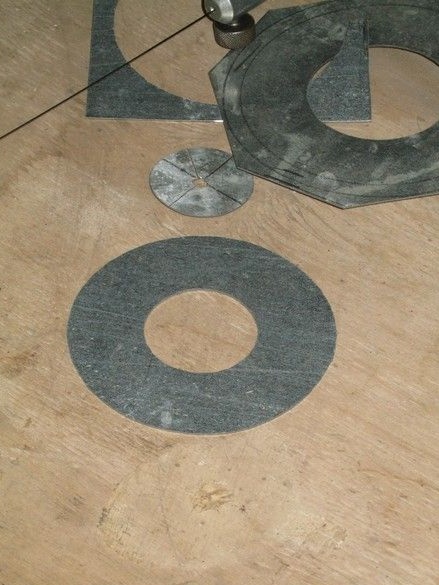
The platform for the nut is cut out with your favorite tool - a jewelry jigsaw with a large nail file. From galvanized "roofing" steel 0.5mm. A square blank is cut out with scissors for metal, diagonally drawn, at the intersection, the blank is slightly tiled. In this hole confidently, without slipping, the leg of the compass is installed.
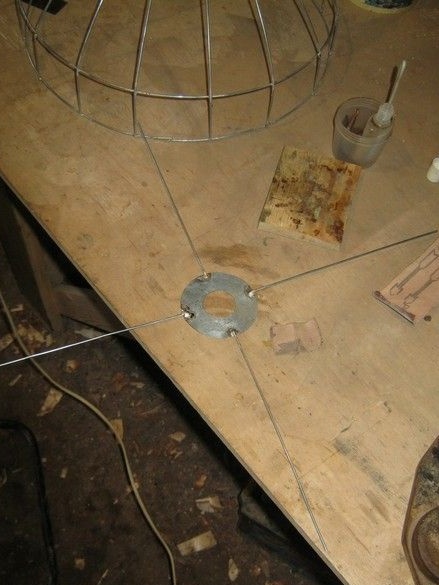
Paradoxical as it may seem, direct procrastination turned out to be not so easy to obtain - I had to work pretty hard with a mallet on a wooden stump. It was decided to make fasteners at four points so as not to be measured with the corners of the protractor (usually, they are made by three - they save wire and it is somewhat easier to get to the light bulb).
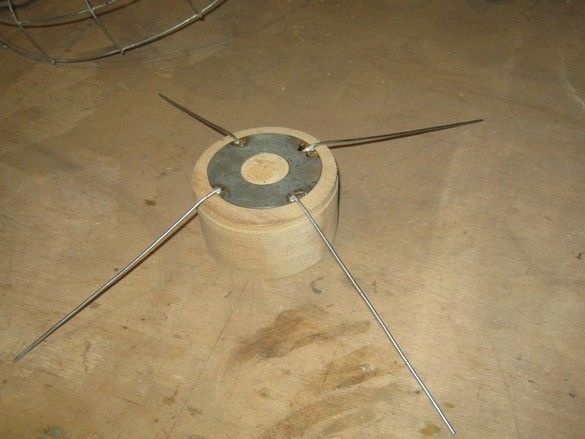
Trying on a light bulb showed that the most attractive one would be its location not flush with the bottom edge, but somewhat recessed inside. The fastening wires were molded on a suitable block, left over from some turning work. Perfectly suitable and square, if only it was smooth. By bending the wires, we achieve their uniform contact with the table lying on a piece of iron on an iron ring.
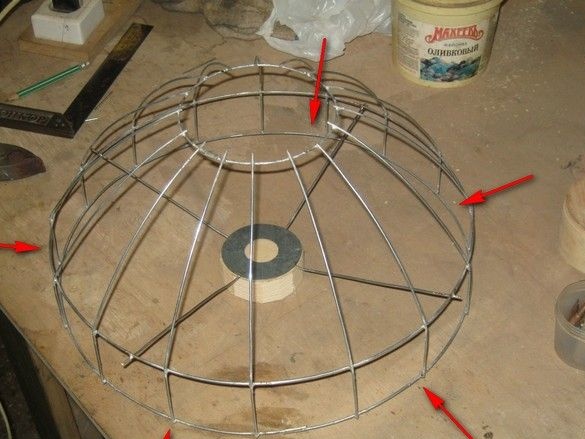
We place the mount on a regular place, it is convenient to control the evenness by slightly raising the edge of the lampshade so that there is a gap of a centimeter or two between its lower edge and the table. By adjusting the position of the lampshade on the mounting wires, we achieve an even gap between the edge and the table. The wires on the second parallel from the bottom can be temporarily fixed with clothespins. We solder, bite off the excess.
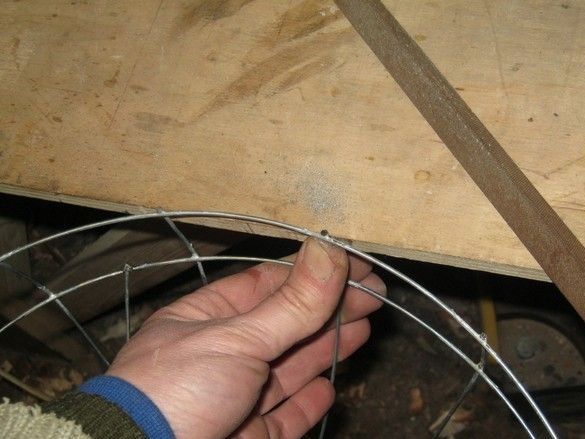
We examine the almost finished lampshade, bite all the sticking wires, dull with a file everything that can be scrambled.
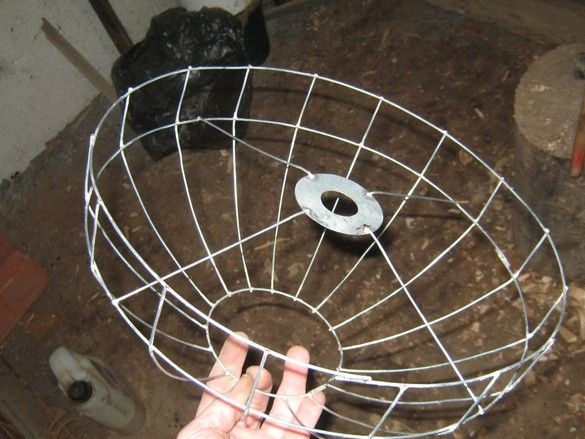
The frame is ready and solemnly handed over to women’s hands, for tailoring beautiful "clothes", as usual, with ruffles.
The manufacturing process itself is very simple, the materials are common and not expensive. Not ordinary, only a blank form, however, if you slightly reduce the requirements for aesthetics and allow a direct generatrix (the shape is a truncated cone), the blank is significantly simplified and looks like two circles of plywood with a “leg” stick between them.

