
Do not try to throw files and other similar tools, even if they are already rusty, have a lot of flaws or are completely broken. In the manufacture of tools, durable steel is used that contains a high amount of carbon. Thanks to such properties of tool steel, you can harden the knife, and it will not be dull for a long time, even if they cut metals.
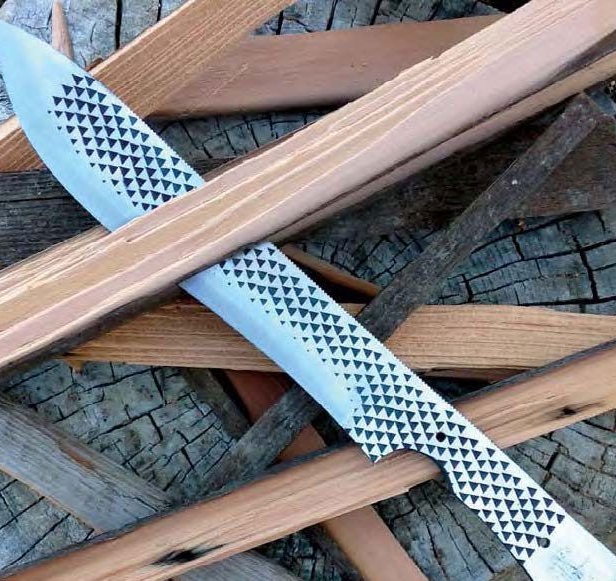
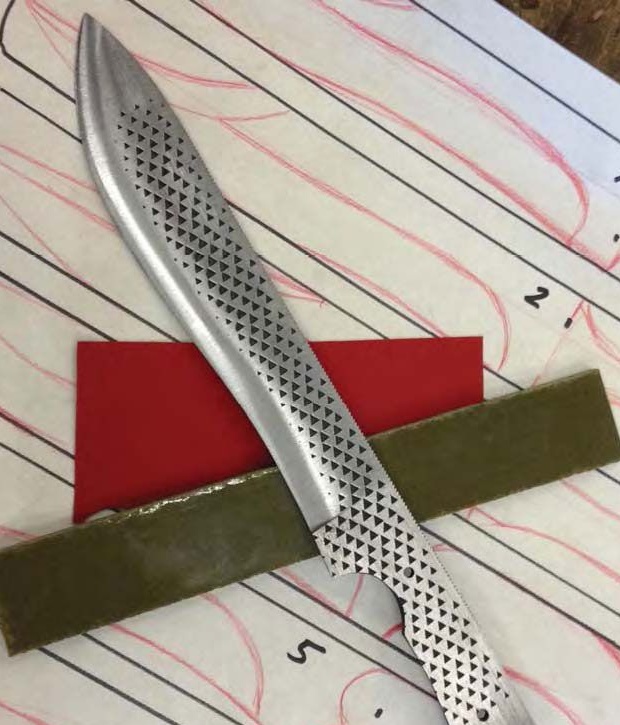
In this guide, we will go over how to make a powerful Bowie knife. do it yourself from the rasp. Used in the manufacture will be quite common tools. The main processing work can be quite a grinder. So, we will consider how to make such a wonderful, reliable and strong knife.
Materials and tools used by the author:
Material List:
- rasp;
- wood or other material for finishing the handle;
- brass rods or ordinary nails for the manufacture of pins;
- epoxy adhesive.
Tool List:
- ;
- drill;
- a stove or a good bonfire;
- oil for hardening;
- sandpaper;
- files;
- hammer;
- paper, marker, scissors for the manufacture of the template.
The process of making a knife:
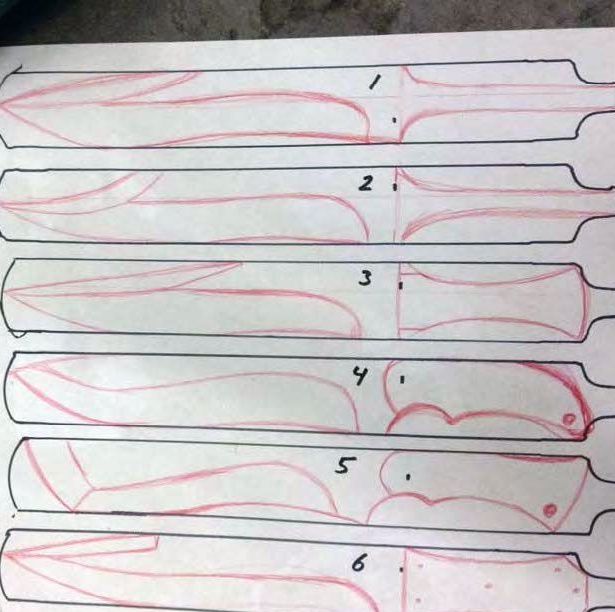
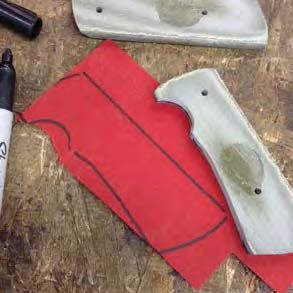
Step one. Template
Design a knife template, you can make it 100% unique. The easiest way is to cut the knife out of cardboard first. This will make it possible to hold the template in your hands and determine whether the knife will be convenient. The author came up with 6 versions of such a knife, you can choose what you like and make your own adjustments, well, or leave everything as it is.
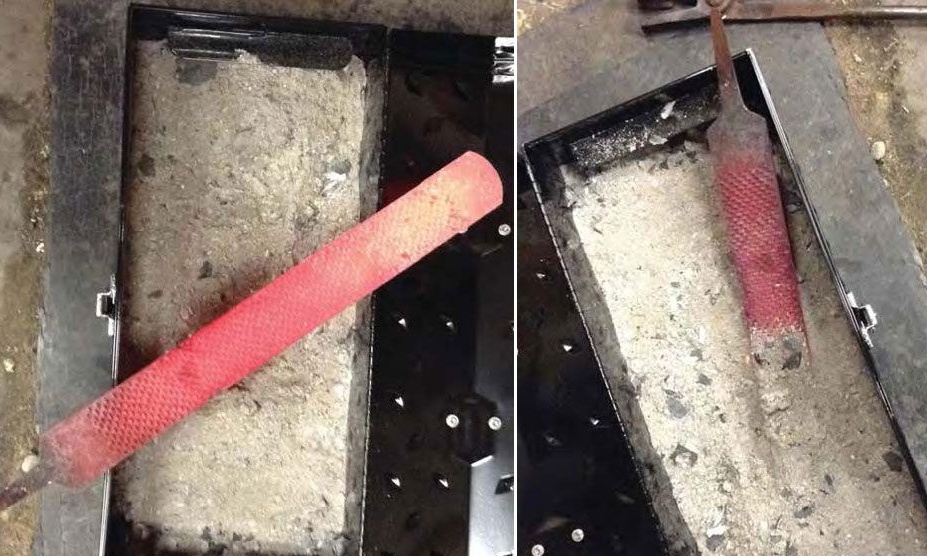
Step Two Annealing
How can I make a knife out of such strong metal as a file? Without heat treatment, it is impossible to do this at all or very hard. In any case, you will overheat the metal, after which it will not be as durable as a file.
In order for steel to become soft, it is necessary to heat the file red-hot and then let it cool in air. After this procedure, the metal will become so soft that it can be easily grinded with ordinary files. If it was not possible to make metal tempering the first time, heat the file again to a higher temperature and leave it in a fire, let it cool down with it.
Step Three Cleaning and transferring a template
After heating, a scale forms on the file, and besides, there will certainly be rust, since hardly anyone wants to donate a new file. We take large emery paper and carefully grind the file to a shine. To make sandpaper work better, soak it in water, and best of all in soapy water.Thanks to water, you clean the dirt from the grooves on the file.
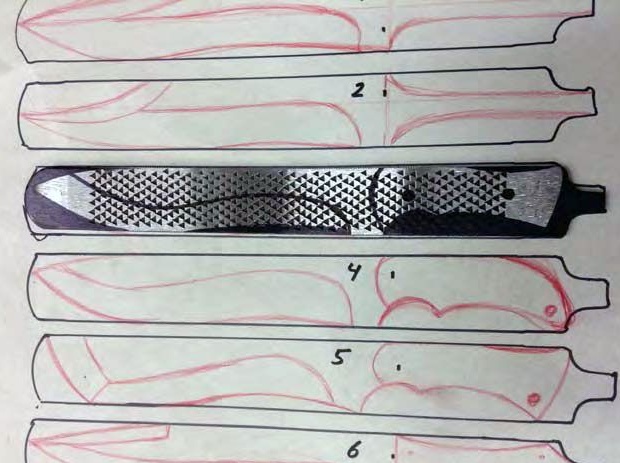
When the workpiece is ready, transfer the template to it. We attach it to the file and draw a marker around the contour. It is better to use the marker as thin as possible so that the outline is clearly visible.
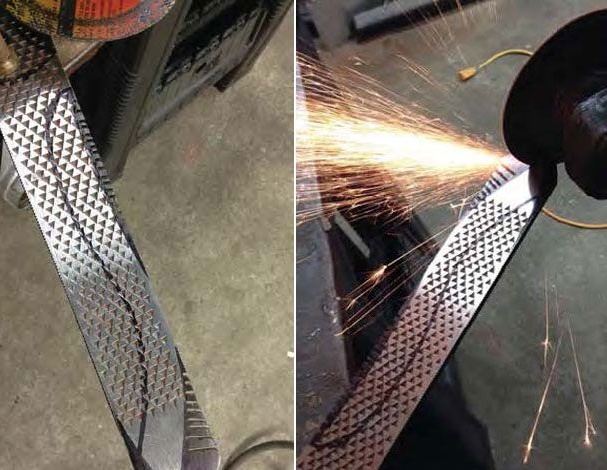
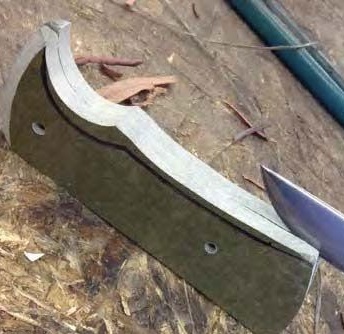
Step Four Cut out the main contour
To cut the main contour, the author uses an ordinary grinder. You can easily do this with a hacksaw. Band saws are best suited for such purposes, as they allow cutting figuratively.
For convenience, clamp the workpiece in a vice or clamp and start cutting.
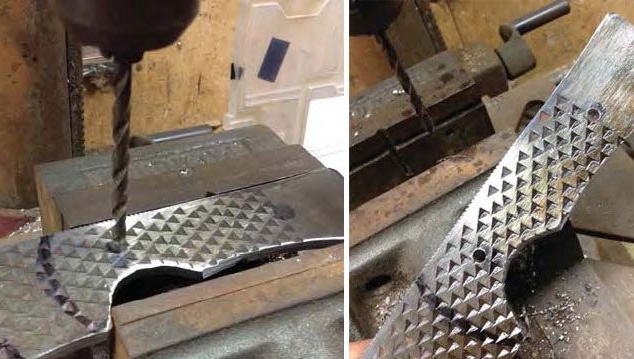
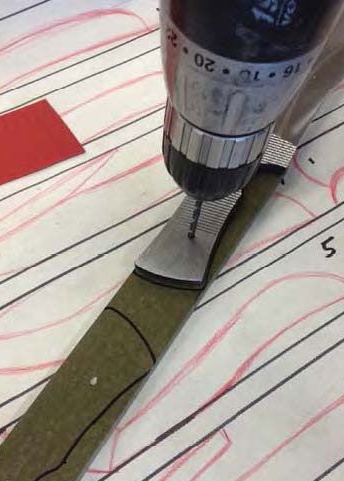
Step Five We drill holes for the pins
This procedure is extremely important to do before hardening, since then it will be simply impossible. Two pins are enough to securely attach the handle pads. But some beauty masters install more.
As for the diameter of the holes, it is also selected individually. For example, you can insert a copper tube into the handle, then you can attach a rope to this hole and so on.
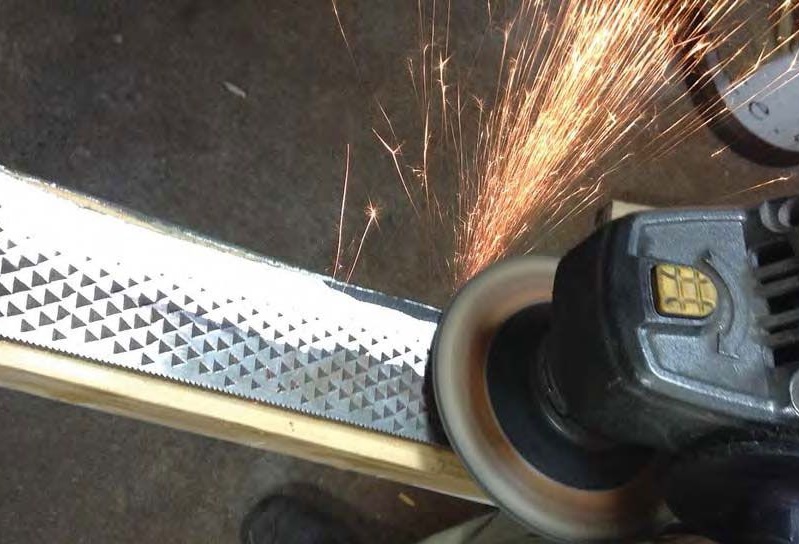
Step Six We form bevels
We proceed to the formation of bevels. They also come in various profiles. It is important to know one thing, the smoother the bevel will be, the sharper the blade will be, and the easier it will be sharpened. But if you are thinking of chopping something with such a knife and so on, make the angle smaller.
We clamp the workpiece on a bar with a clamp and take a grinder with a grinding wheel. If there is experience in manufacturing, then the bevels can be perfectly brought out by eye. A more professional solution would be pre-marking. At a minimum, you need to divide the future blade into two halves by drawing a centering line. As a result, you get symmetrical bevels.
Seventh step. Quenching and vacation
After all work with the blade, you can begin to harden the metal. To do this, we warm the blade to a red glow, and preferably to a yellowish one. For each steel, the quenching temperature is completely individual. Usually in the manufacture of rasps, steel from U8 to U11 is used. Such steel is usually heated to a temperature of around 800 ° C. You can cool the metal in water, oil is also well suited, the latter option is safer for metal.

By eye, the desired quenching temperature can be determined using a magnet. If it does not respond to hot steel, then it is heated to the desired temperature.
When hardening steel, try scratching it with another file. If there are no scratches on the blade, then the hardening was successful.

After hardening, it is imperative to perform metal tempering. This is done in order to soften the metal a little, otherwise it will be brittle. After vacation, the blade will begin to spring a little, as a result of which it will withstand heavy loads. For this procedure, we send the knife into the oven and "bake" at a temperature of 200-300 ° C for an hour or so. Then just turn off the oven and let the knife cool with it. After that, you should get a blade of excellent quality.
Step Eight. Installation of overlays on the handle
Lining can be made of wood, this is the most common material. The roots of trees, bones and horns of animals and more can be considered as more unique finishing material. There are several options for manufacturing pads, it all depends on the availability of the tool you have. If there is no jigsaw, you can simply glue overlays similar in shape, and when the glue dries, grind the excess to the contour of the handle.

If there is a jigsaw, cut out two pads. Then twist them together on the knife using screws with nuts. Now you have the opportunity to adjust the lining directly on the knife to the desired size. When this is done, the linings can be installed. Here you will need epoxy glue, as well as pins. In the classic version, brass rods are used as pins; they look good.
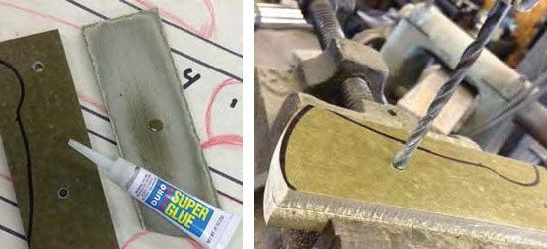
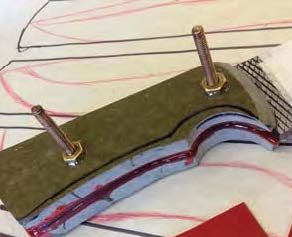
Before applying glue, carefully sand the adjacent side of the linings, as well as the metal, otherwise the glue may adhere badly. We install the pins, collect the pads and carefully clamp the whole “sandwich” with a few clamps. Epoxy glue dries at room temperature for about a day. When the glue has dried, the clamps can be removed and the protruding parts of the pins can be cut off.
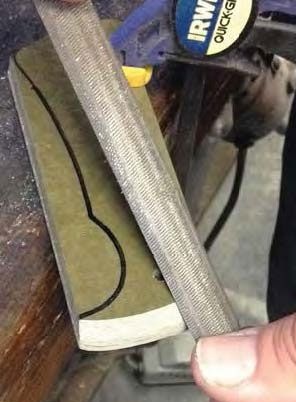
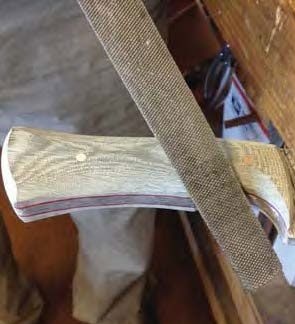
The final stage of processing is coming - this is grinding. Here sandpaper from the largest to the smallest will come to your aid. Gradually reduce the grain until you get the desired profile and smoothness.
At the end, soak the tree with linseed oil, Danish or the like. This will allow the tree not to absorb moisture, which quickly destroys it. After oiling, the pen can even be polished as desired.
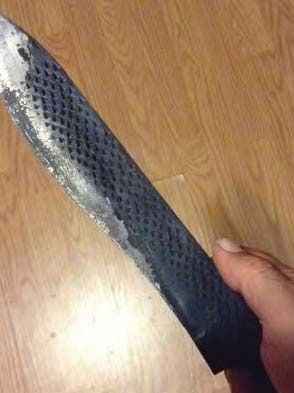
The knife is ready, it remains to sharpen it completely. Here you will be helped by fine sandpaper dipped in water. Also, specialized sharpening tools are quite suitable. Do not forget that carbon steel rusts quite quickly, so lubricate the blade for storage.
That's all, the gun is ready, use it only for good purposes. Good luck and take care!