If you care for plants, you will definitely need to periodically cut shrubs, mow grass and so on. But what if the cultivated area is small and ordinary oblique, then in principle there is nothing to do? There is a way out of this situation, you can make a miniature mower for yourself. The main advantage of this device can be considered that the mower is running on battery power, so there is no need for gasoline, nor for the presence of an outlet and extension cord. This spit also works very quietly, which greatly expands the scope of its application.
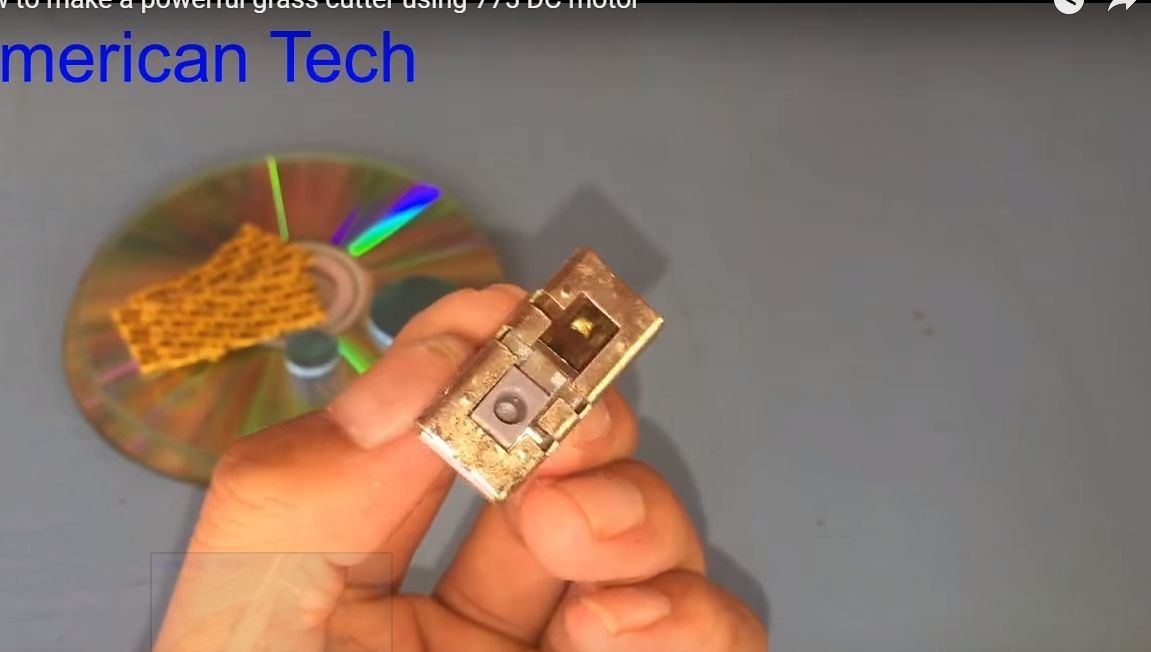
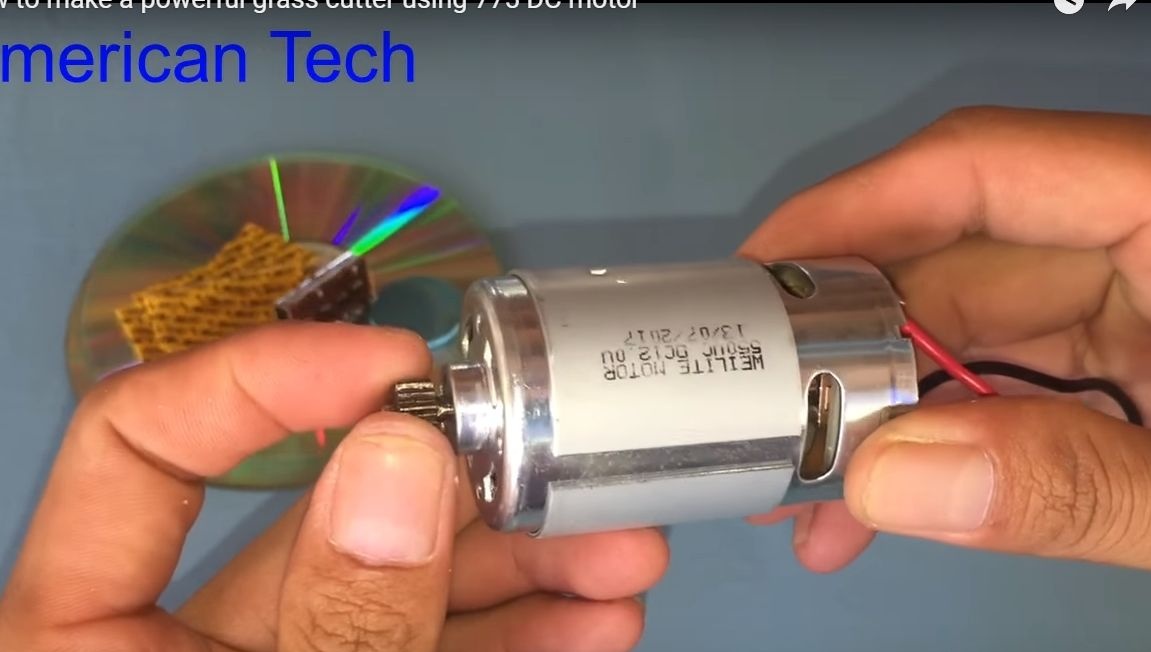
As the main power unit we will use. It is widely used in the manufacture of various home machine tools. The engine is equipped with bearings, and also has a built-in fan, which allows it to withstand heavy loads, and extends the life of the engine. The knife is also made quite simply, here the author used shaving blades and two plastic computer disks. A piece of plastic pipe and a corner are used as the body.
Materials and tools used by the author:
Material List:
- ;
- 12V battery;
- connector for connecting the battery;
- a piece of plastic pipe and a corner;
- wires;
- switch;
- heat shrink;
- blades;
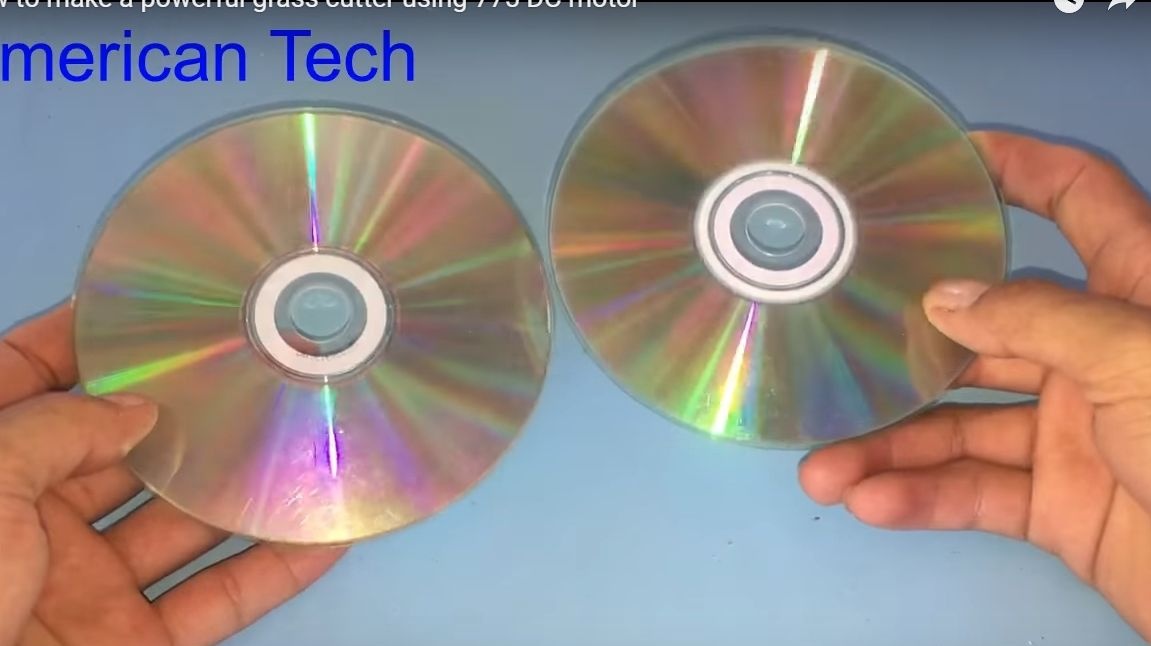
- two compact discs;
- plastic gears from toys or the like.
Tool List:
- a hacksaw for metal or a hacksaw blade;
- glue gun;
- drill;
- marker;
- ruler;
- soldering iron.
Mower manufacturing process:
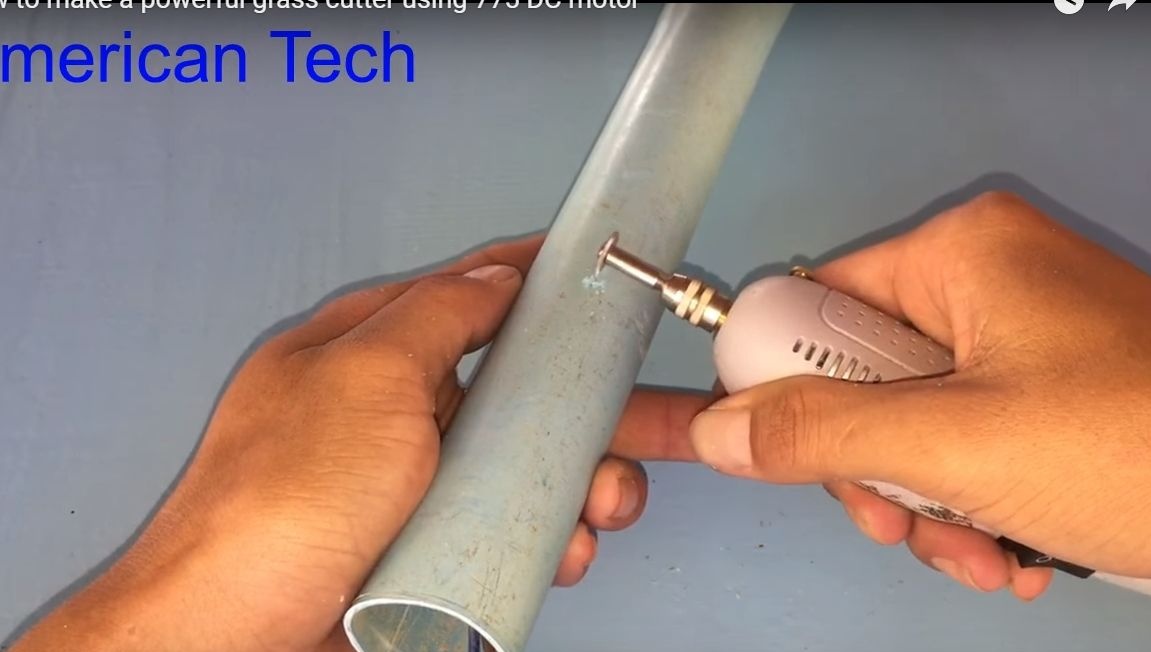
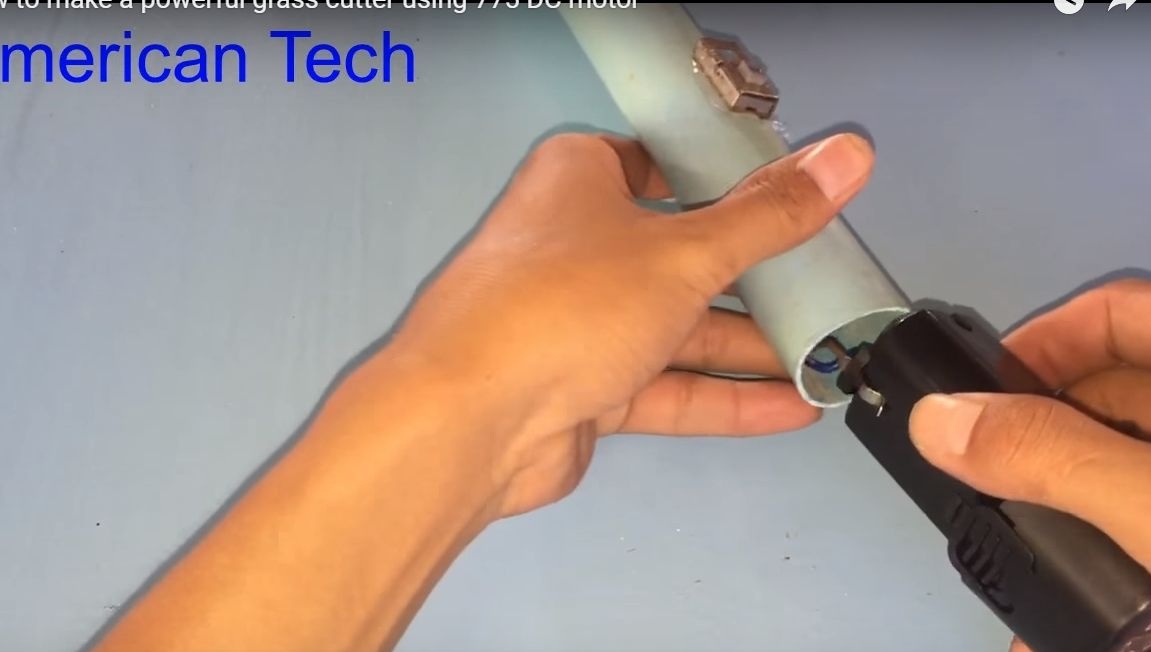
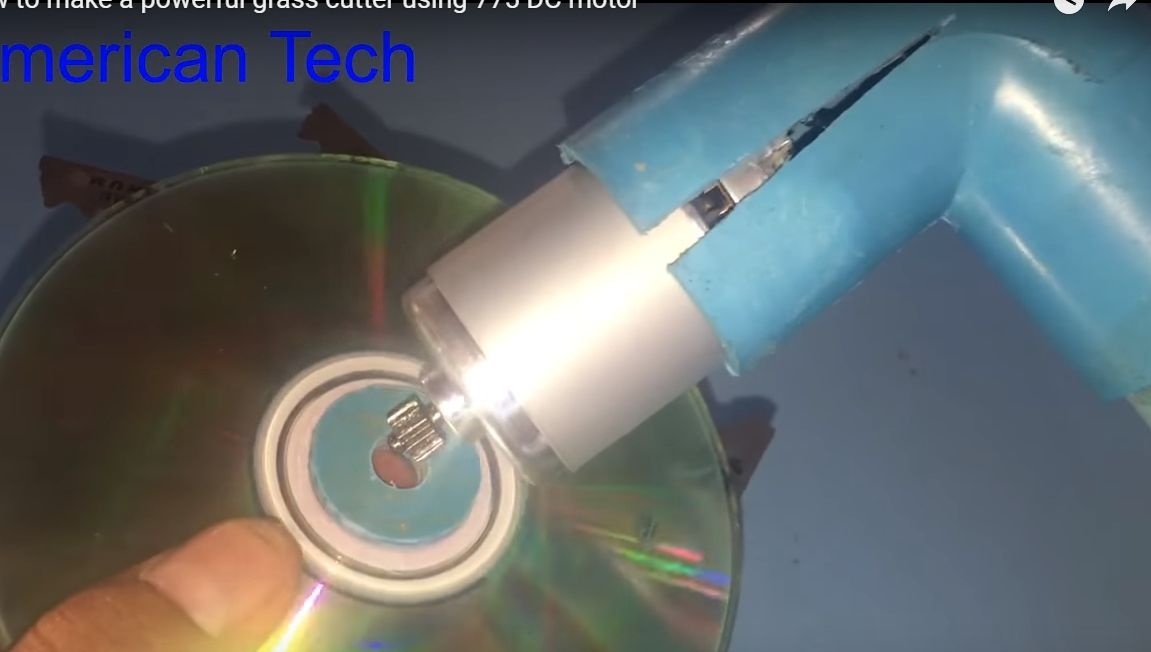
Step one. Install the engine
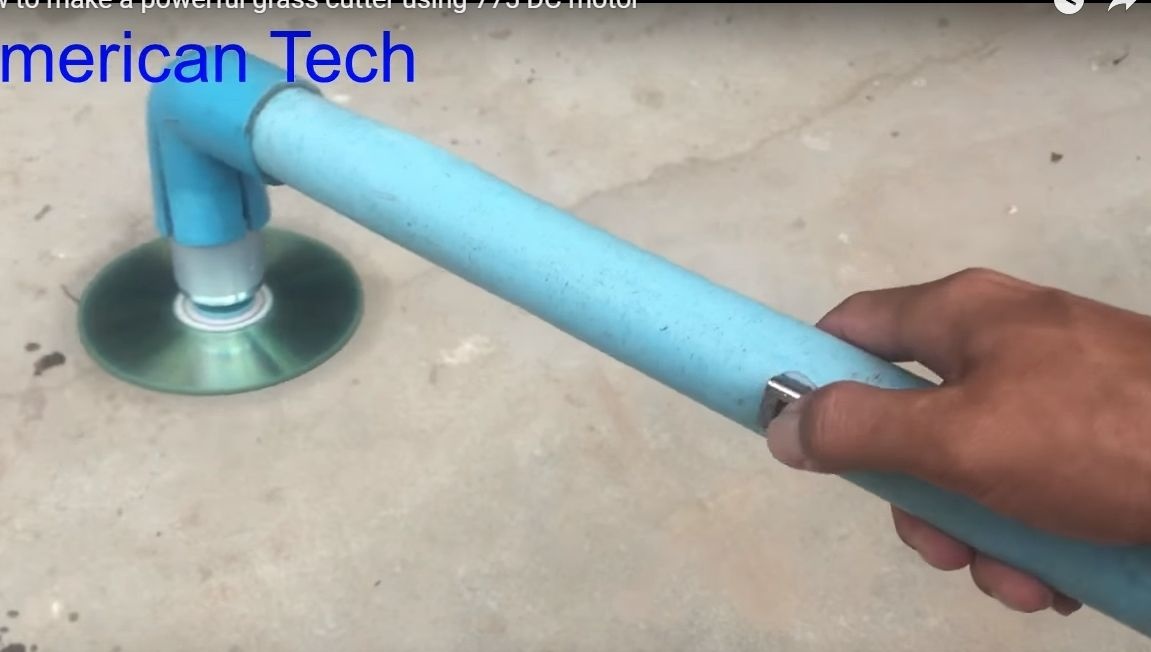
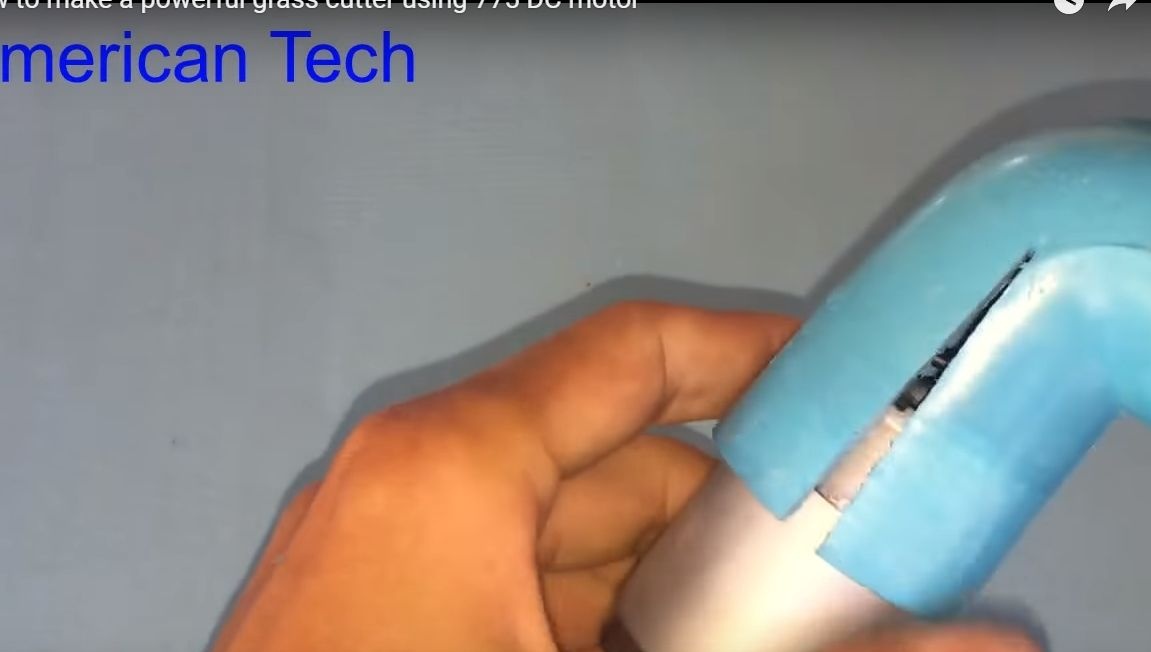
The author used a piece of plastic pipe with a corner fixed at the end as a body and handle. Take a pipe more genuine, so that it is safe to use the scythe. Although the blades are secured securely and weigh little, a blown blade can easily hurt you due to high revs. Therefore, you should always work in protective gloves and clothes made of thick fabric, and glasses, of course.
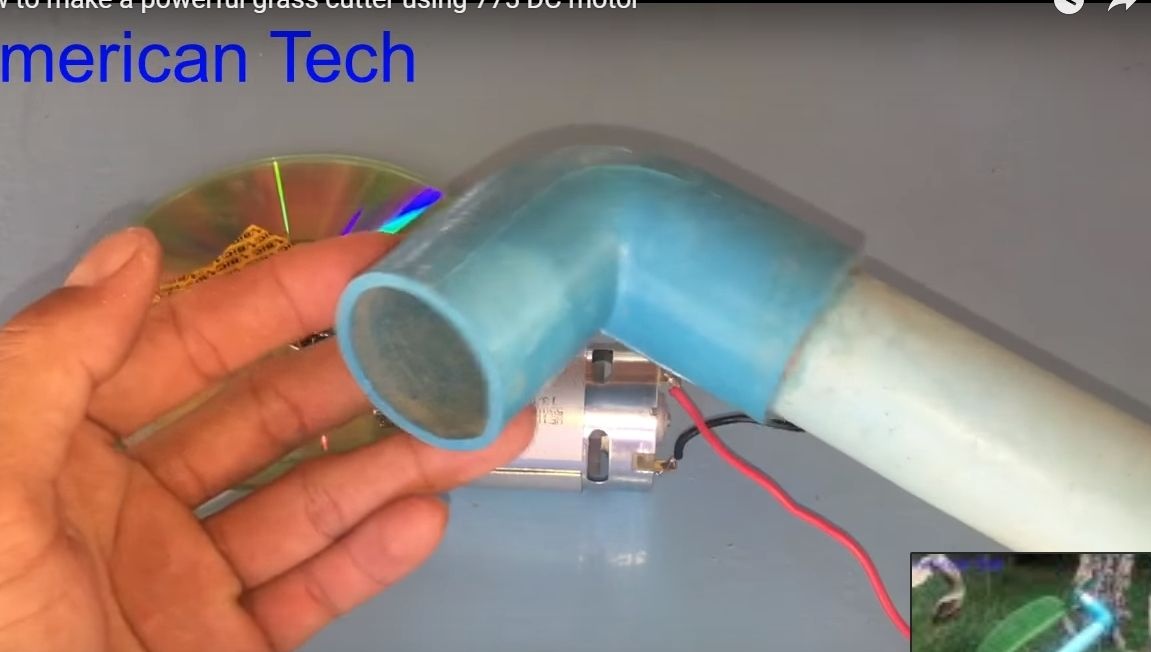
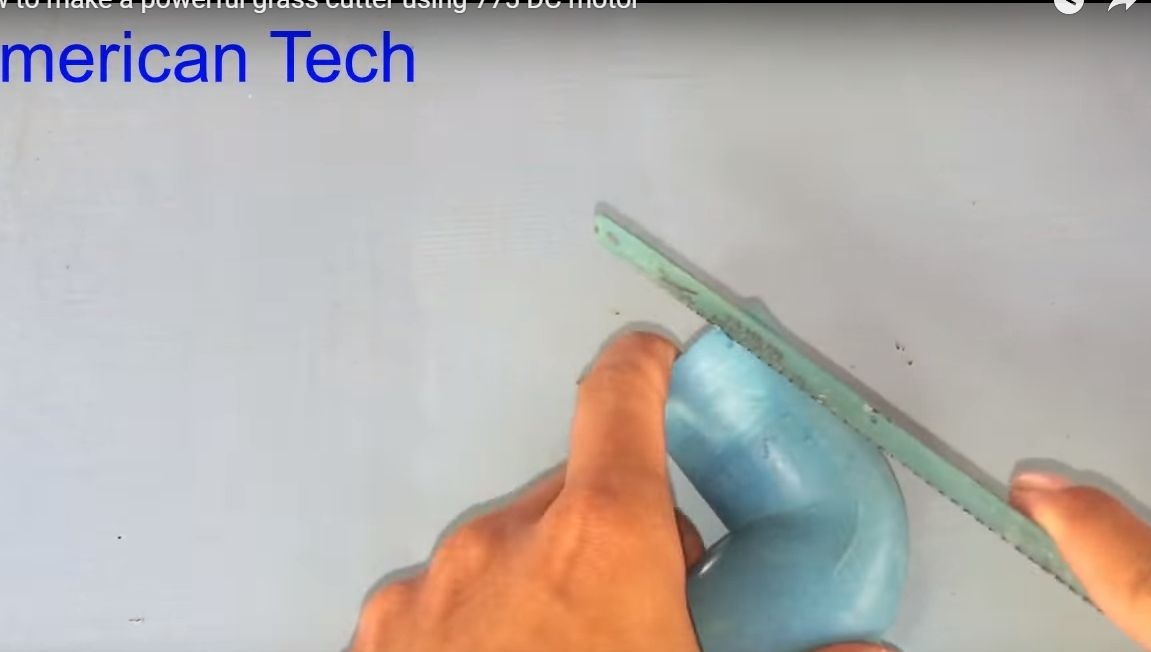
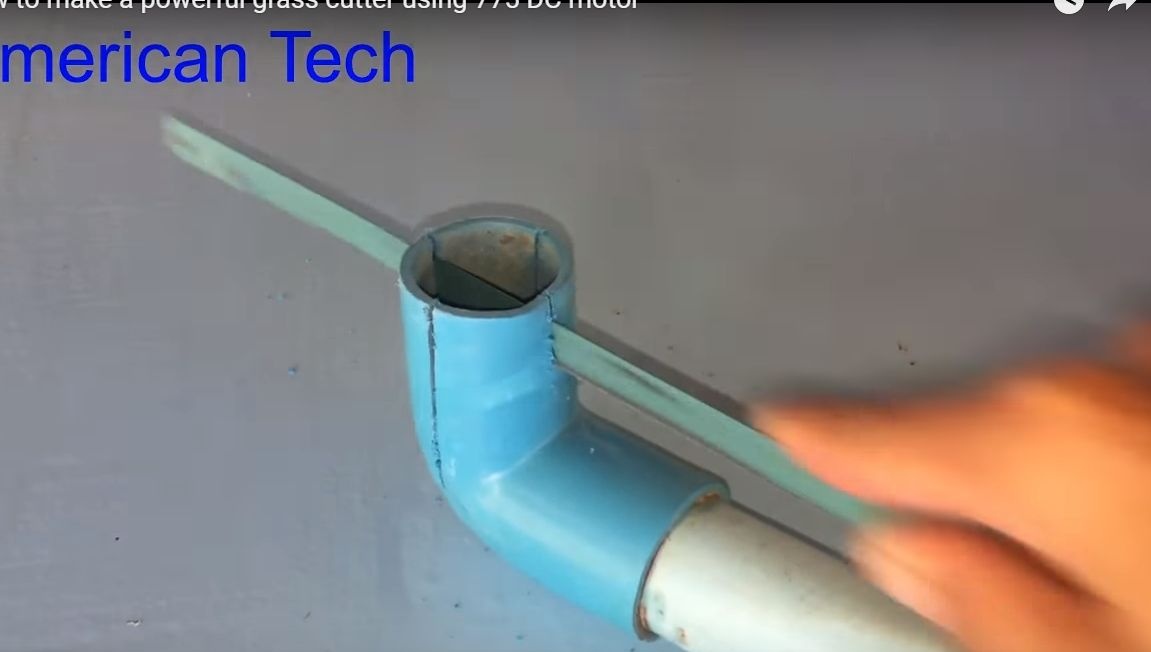
Take a hacksaw blade or a hacksaw for metal, use it to make 4 cuts in the corner of the pipe. As a result, we get an excellent bracket that clamps the engine after installation. It is highly recommended that you also cut out the ventilation holes for the engine, otherwise it will not be able to cool and burn efficiently.
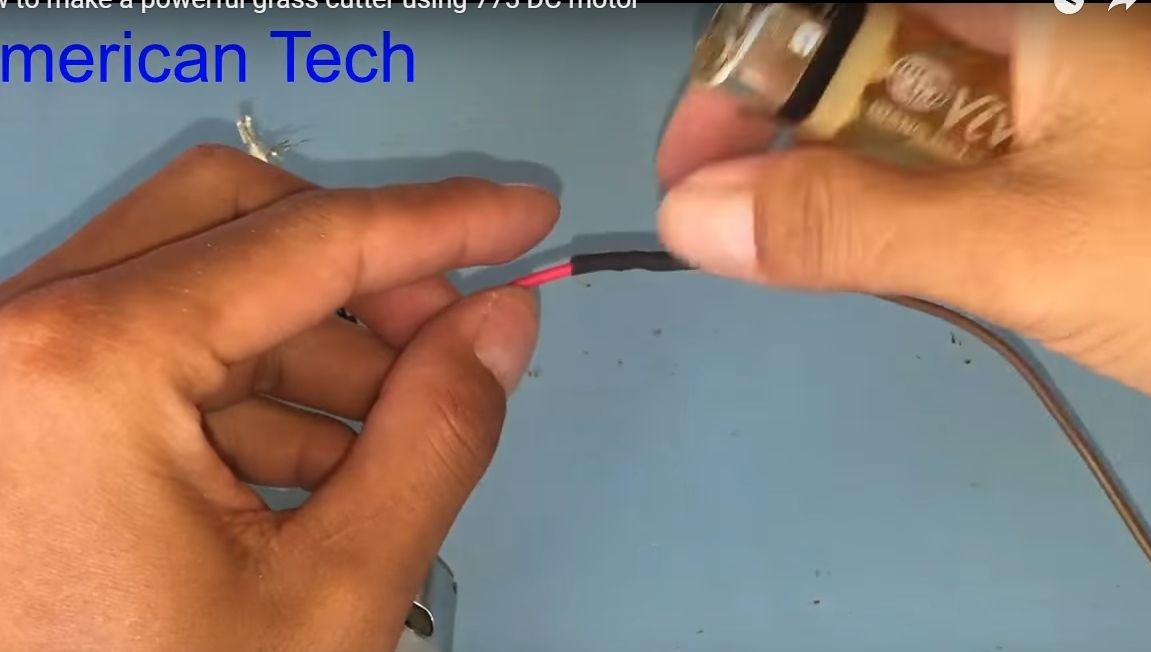
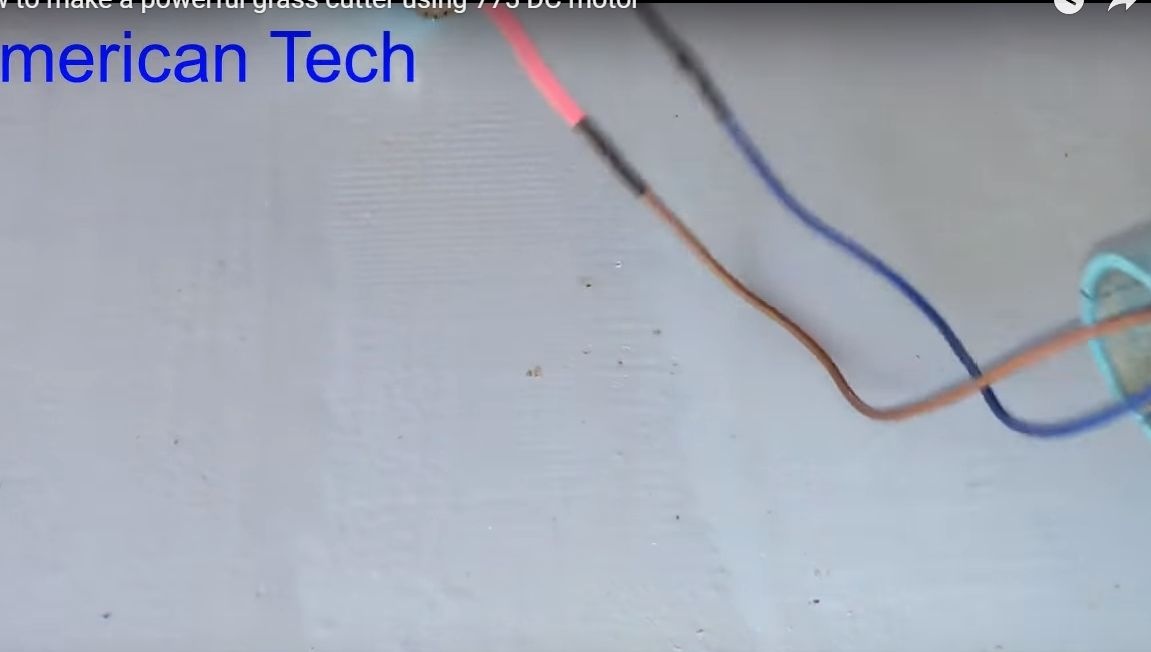
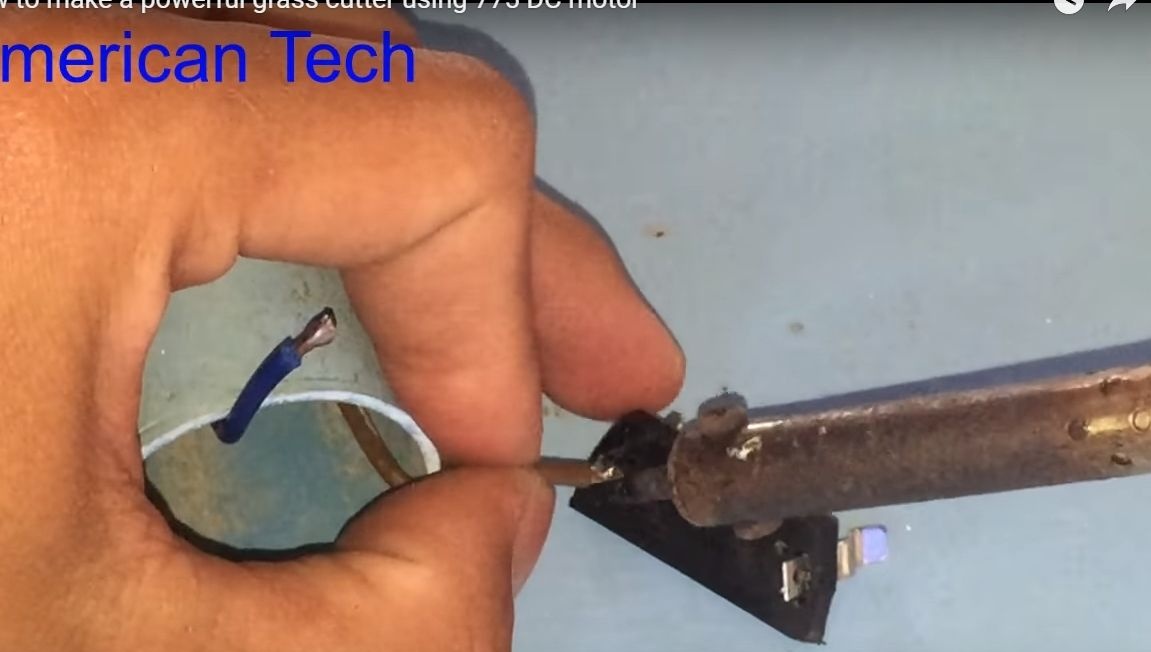
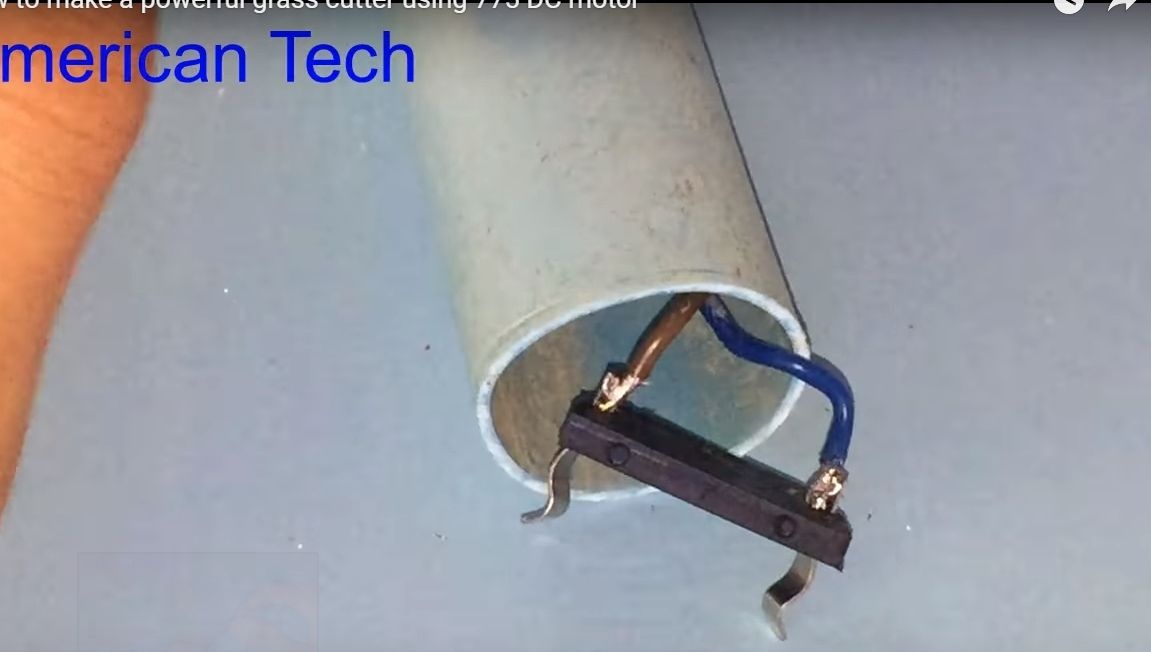
You have to solder wires of such a length to the engine that they can be drawn inside the pipe and removed from the other end to connect the battery.The joints are well insulated with heat shrink, or at worst with electrical tape.
That's all, now you can install the engine in its place, just insert it into the part of the pipe where you made the cuts. If desired, the engine can be additionally fixed with superglue so that it does not jump out from vibrations and blows of the knife.
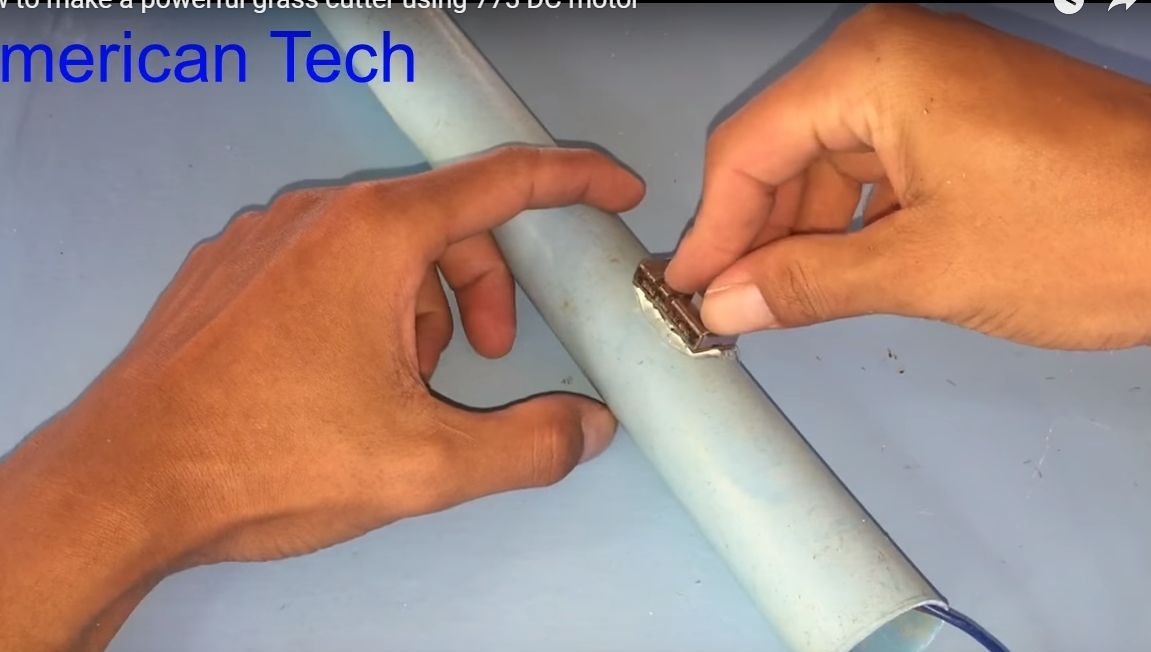
Step Two Set the switch
In a convenient part of the housing, we cut a hole for installing the switch. The author does this with a drill, but you can just burn a hole using a soldering iron or a hot nail. When everything is ready, use a wire to pull one of the wires out of the case, cut and solder the wires to the switch. Now the switch can be installed, for these purposes the author decided to use hot glue.


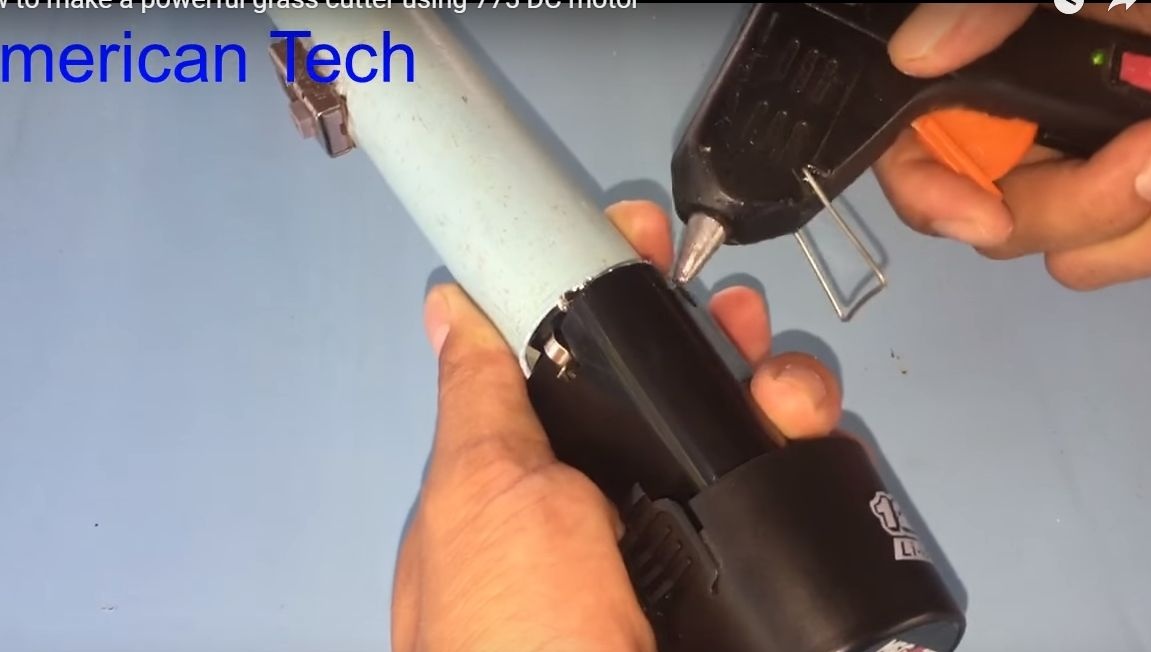
Step Three Install the battery
To connect the battery, solder a suitable connector to the wires leaving the pipe. Well, then we connect the battery and fix it with hot glue. Of course, this is not a very convenient design, but as an option it will do. Do not forget to make sure that access to the battery contacts is open, otherwise you will not be able to charge it.
Try to turn on the motor, if it worked, then everything is done correctly. Also, initially decide which way it rotates, since our knife has a direction of rotation. Move on.
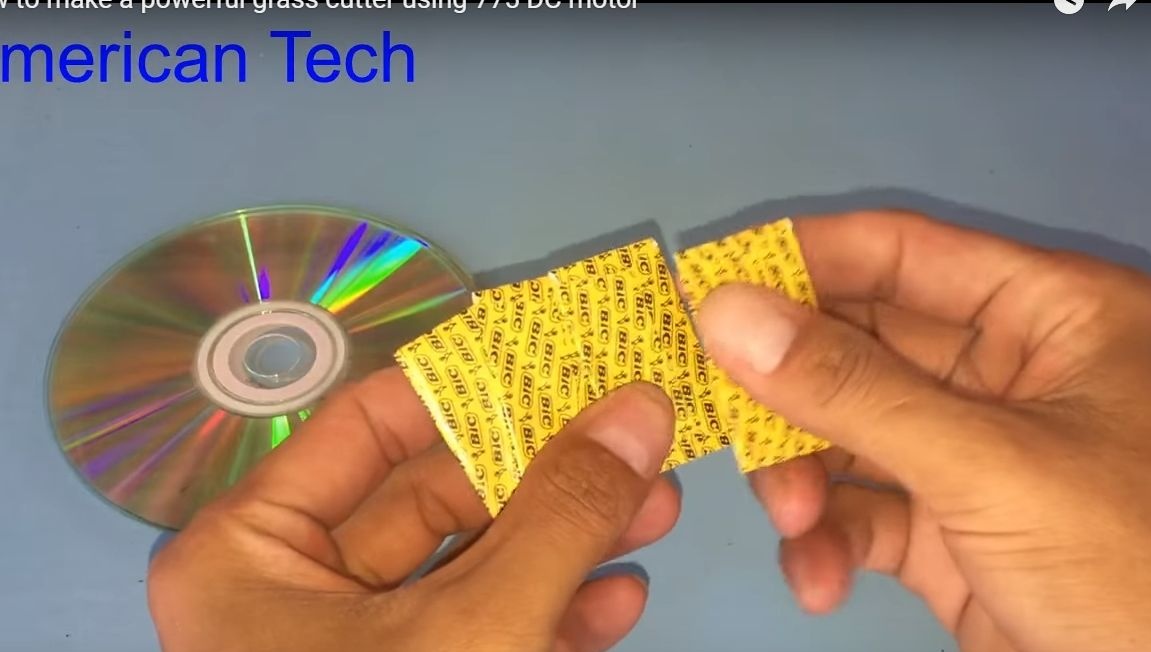
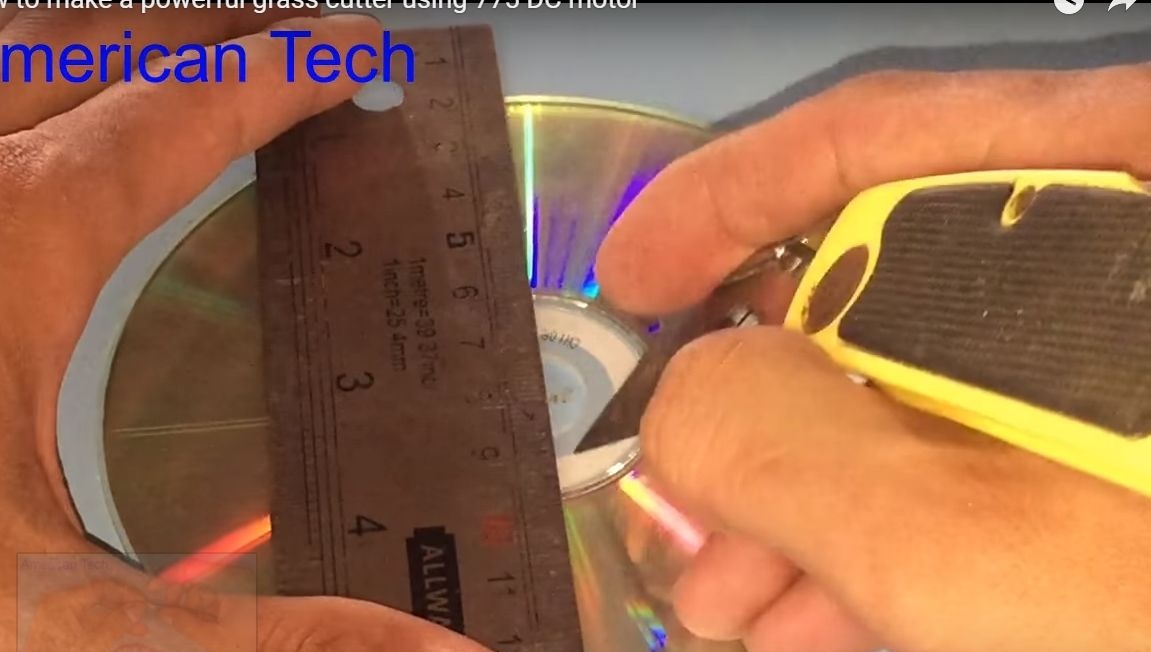
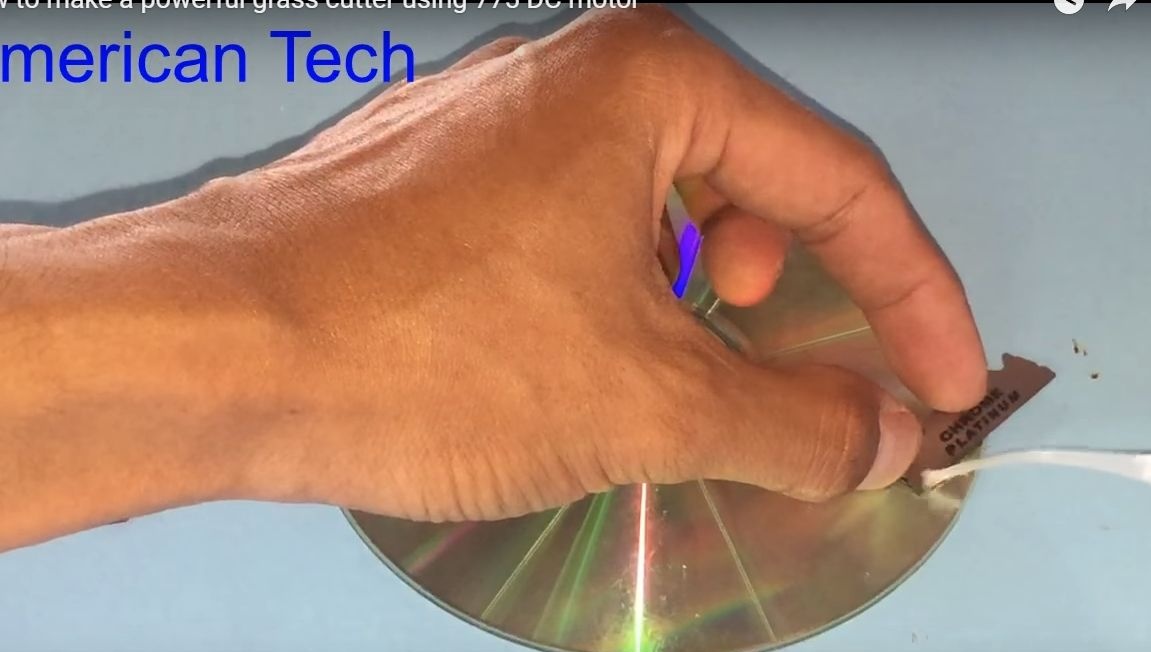
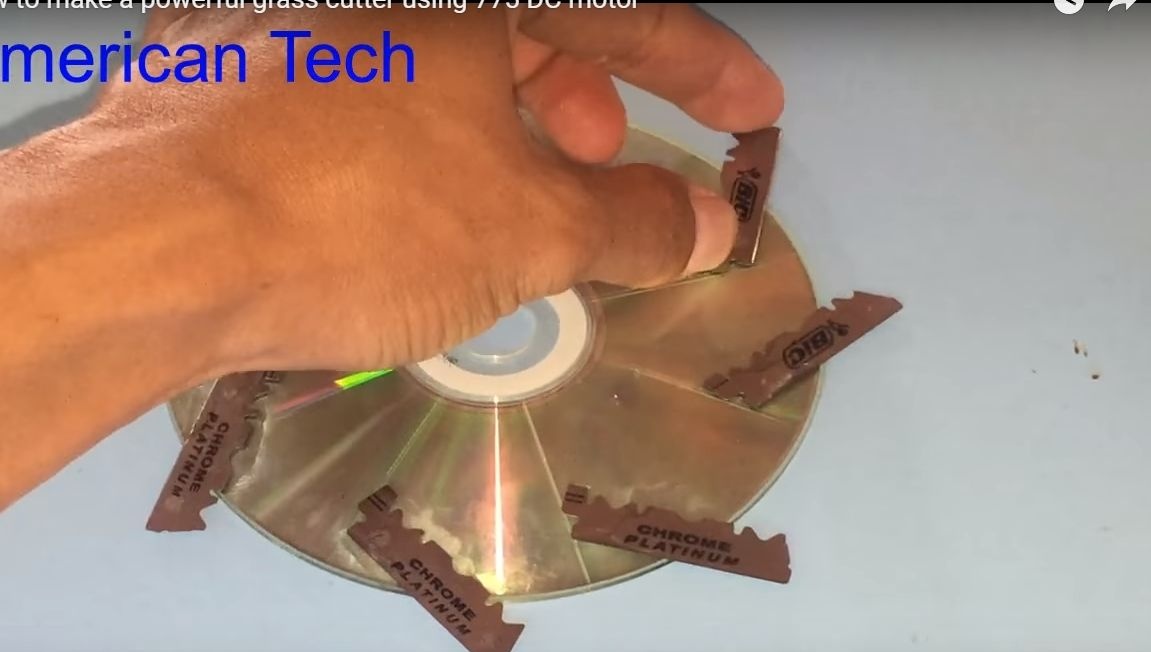
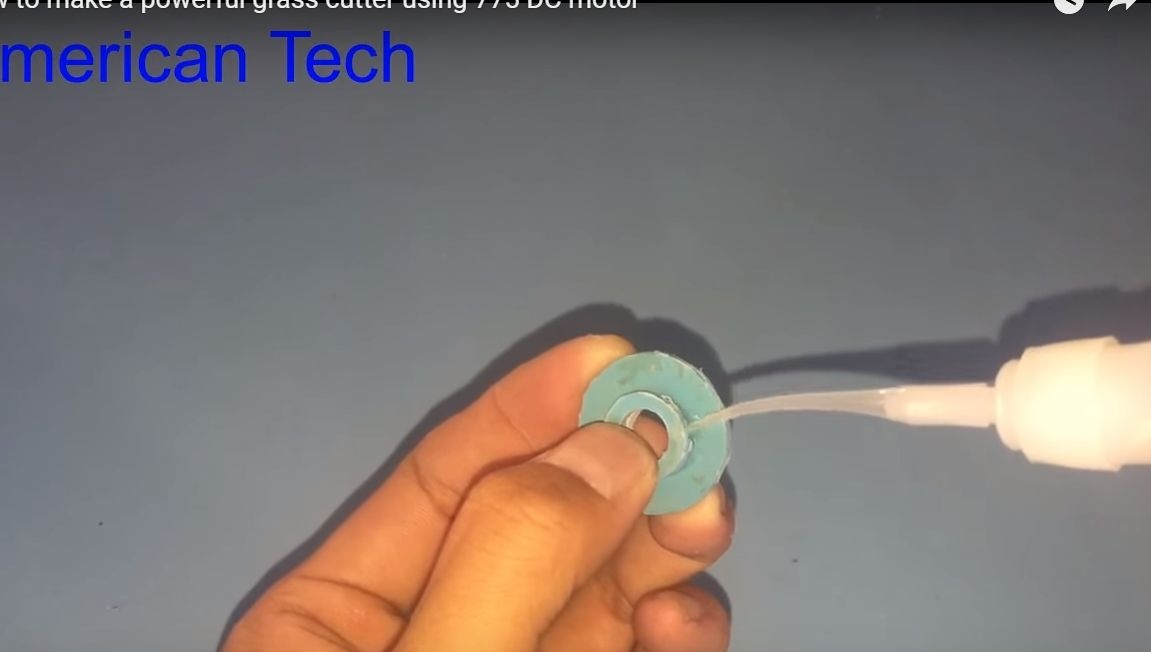
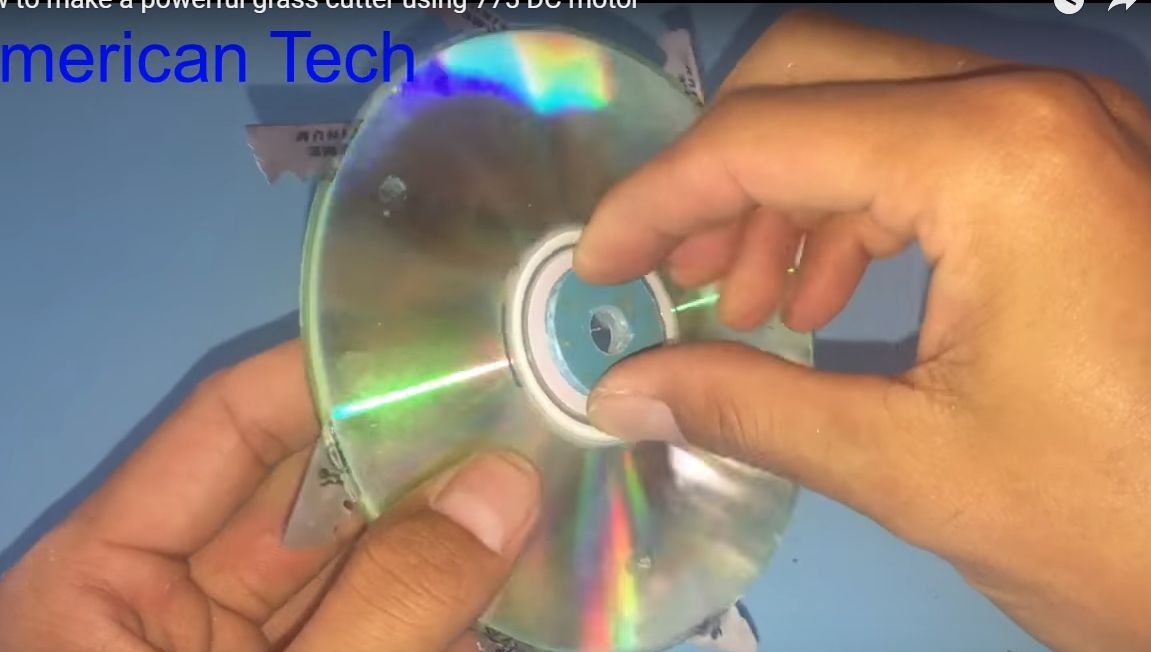
Step Four Assembling the cutting disc
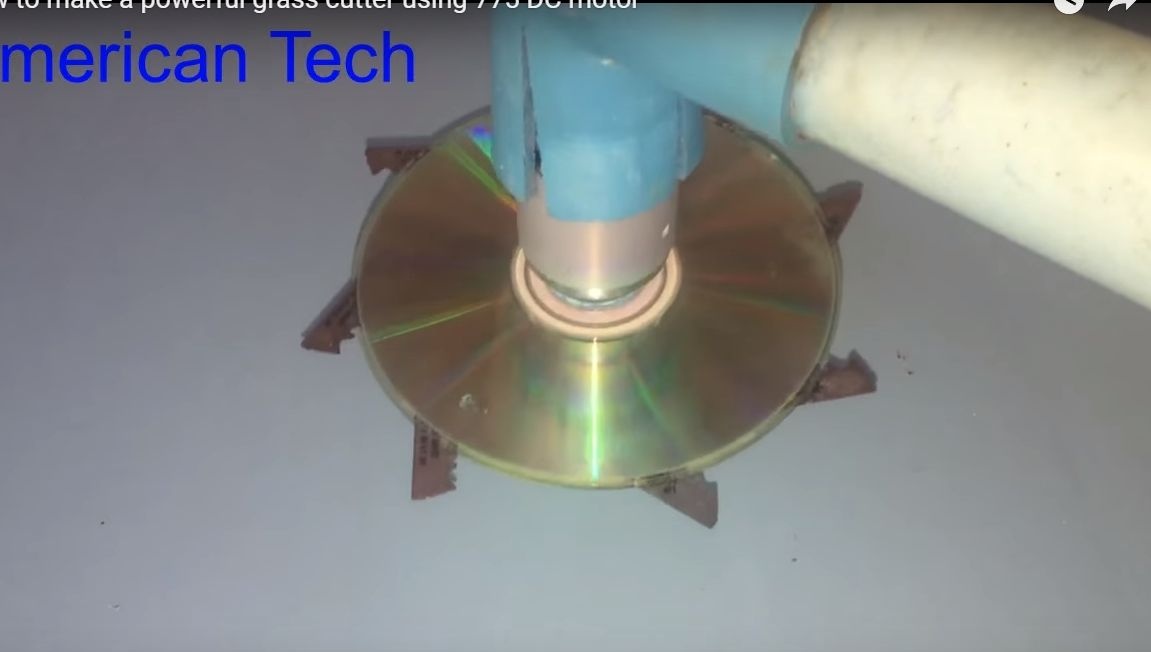
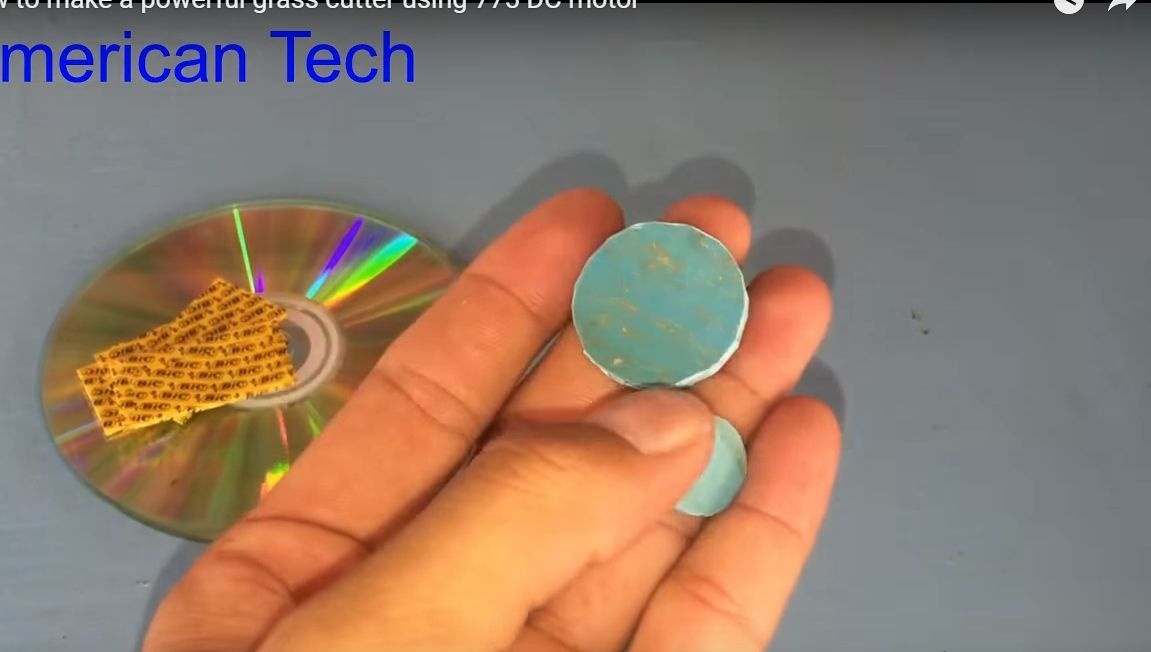
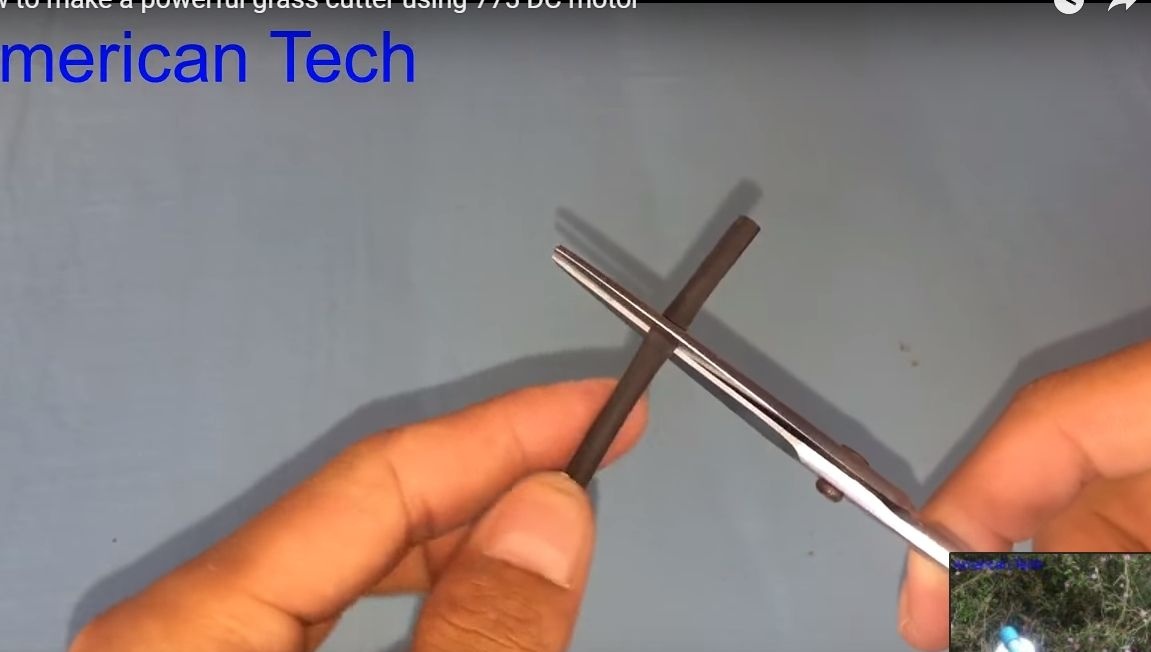
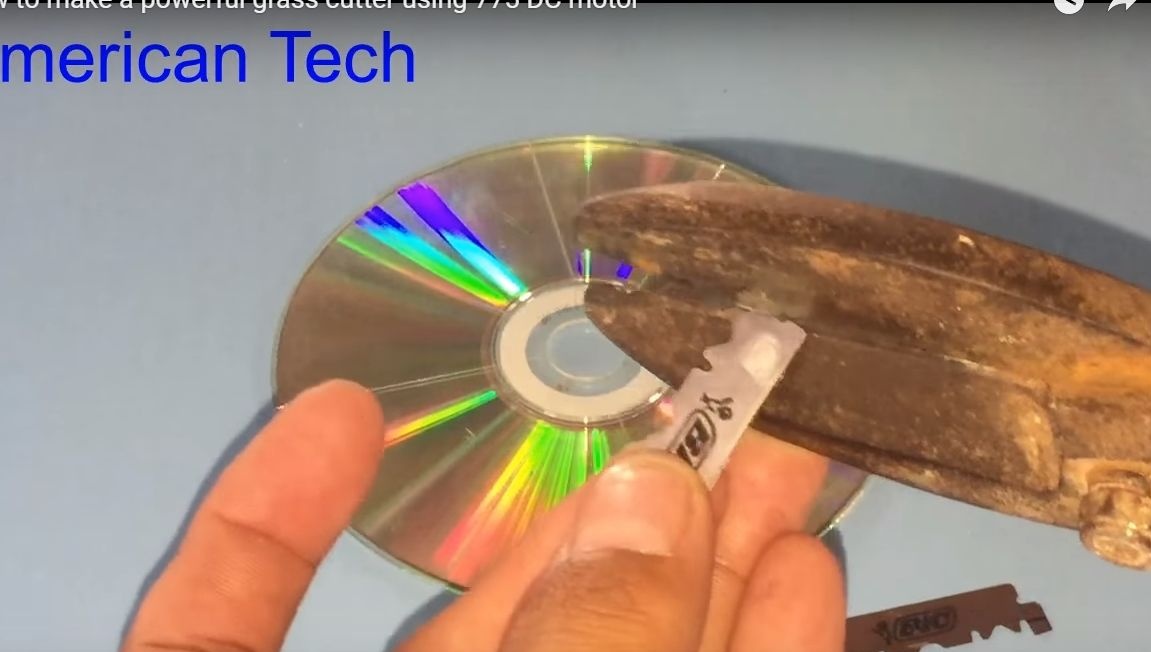
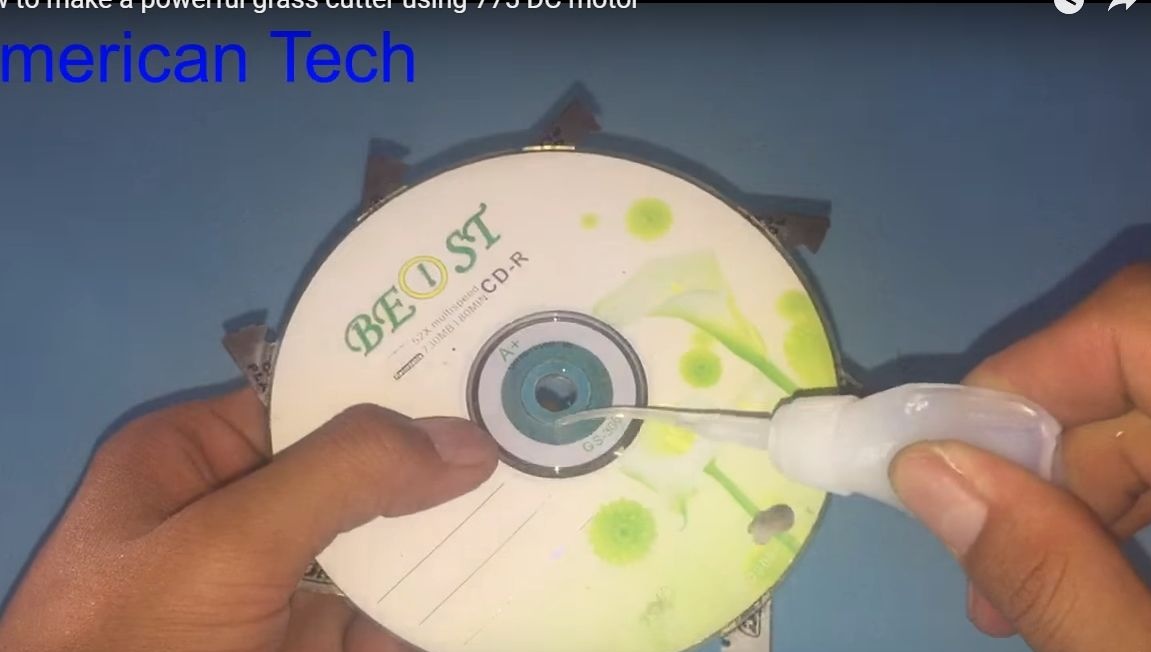
To make a knife, you will need several razor blades, as well as two CDs and superglue. We cut the blades lengthwise into two halves, and then cut the edges at an angle, as the author did.
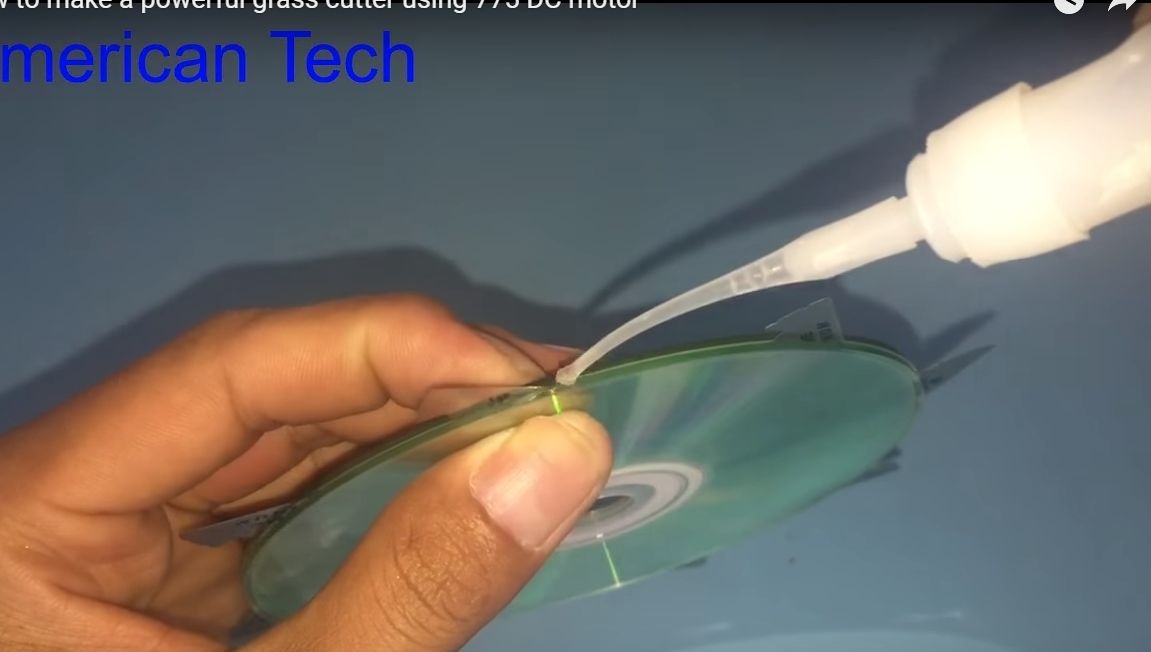
You need to pre-mark the disk to install the blades at the right angle and at the same distance from each other. Well, after that it remains only to glue the blades along the marked lines. Superglue is suitable for gluing.
Next, on top of the disk with mounted blades, glue another disk well. As a result, we get a disk with fairly securely fixed knives.

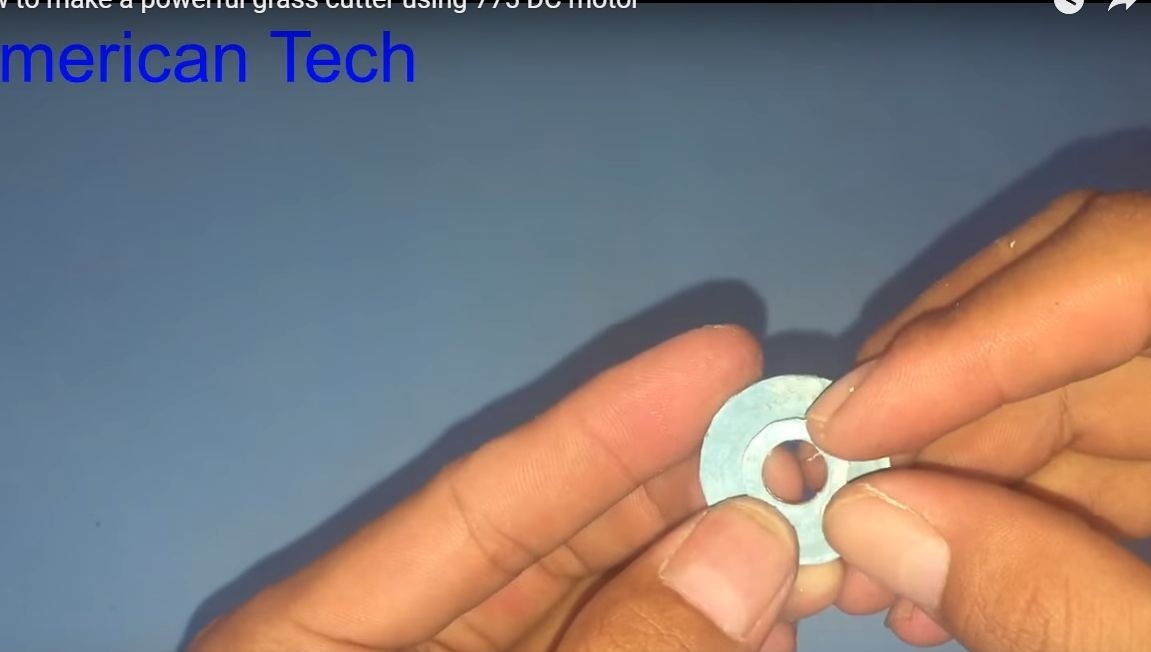
Step Five Install the cutting disc and test the scythe
To install the disk, you need a gear that is installed on the motor shaft. You will also need plastic gears from toys or something similar for the manufacture of the adapter. Well, now using superglue, we fix the disk on the gear of the motor. Do not spare the glue, as everything must be held securely.
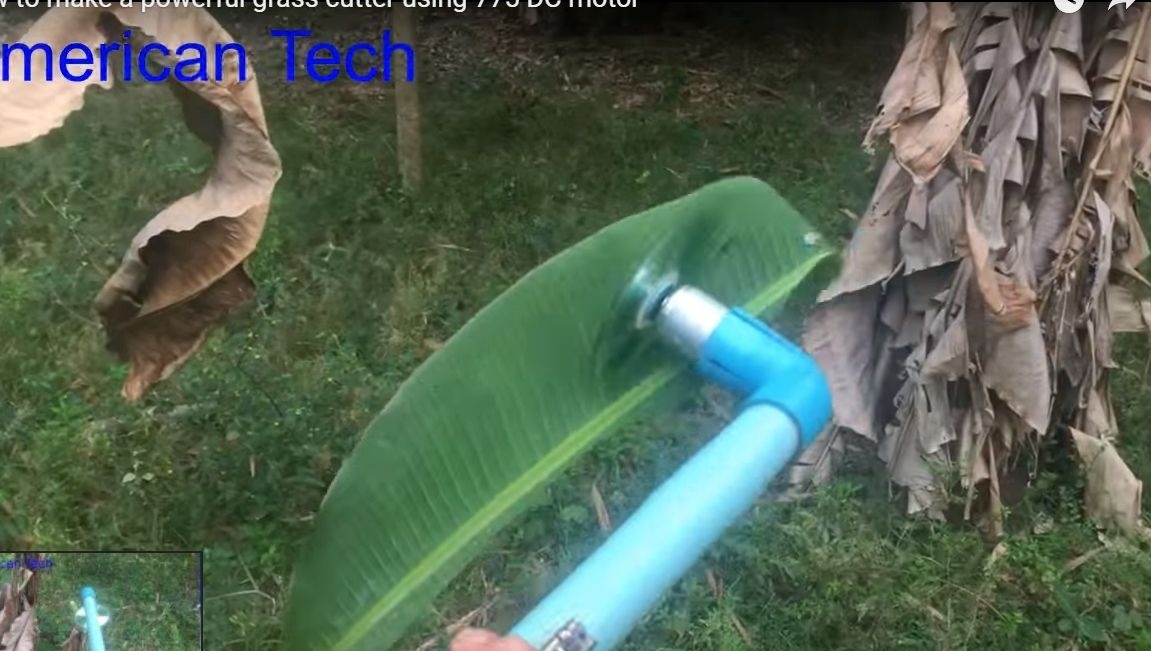
The mower can be tested! With it, you can easily trim various shrubs with soft branches, mow grass and much more. Do not treat this oblique plant with hard branches, otherwise the knives may bend or fly off altogether. Always remember safety precautions, if the blade suddenly comes off at full speed and flies into you, it can cause injuries. But if you are wearing clothes made of thick fabric, it will be almost impossible to get injured.
Also avoid getting water on the engine and battery. That's all, good luck and take care!