

Any vessel, a thing almost sacred, the Chinese, I remember, were very touching to them. Well, in general, an essential item, not without reason from an ancient person, one of the first concerns was the manufacture of dishes. Well, storage is also difficult without containers. In the present age, when standard glass containers are very cheap and can be said to be “given” and subject to return or disposal, it’s not a sin to use it. Glass is a kind of material - despite the complexity of processing, its use is often very decorative.
The use of standard glass containers “as is” is certainly justified and useful, but the scope for our homemadenot too big. Any of the devices for cutting glass bottles and cans somewhat increases our capabilities. The first thing that usually comes to mind is a vulgar glass, the value of which, however, is not too high - neither to you of the textured facets, nor to some openwork. They are usually used as a temporary substitute for normal utensils, a sort of garage-camping option. If at the same time you master several “knee-high” ways of cutting bottles - string-strings, then making a glass cup in three movements, literally five minutes after the command “lay down the newspaper!”, While the people cut the sausage and opens the sprat in tomato sauce with a knife, will help to win fame, if not Left-Handed, then certainly the all-rounder of the master (however, the sorcerer). Here is the very man who cooked a handful of potato soup for two generals.
The next thing that can be made from a piece of a bottle with a bottom is a small jar. Here it is already quite possible and necessary to achieve decorativeness and sympathy. It is only necessary to take care of a beautiful lid, cork.
Excellent blanks come out of dark “beer” bottles, but nevertheless, for storage and as an elegant trinket on a shelf, it’s worthwhile to take a bottle of clear glass. With a nice cork-lid, filled with some little things, it can be very decorative. If we are talking about a purely utilitarian application - storage, then transparent walls will allow you to quickly find what you need by looking at a number of jars, it is convenient to make explanatory inscriptions on small pieces of paper and simply put inward near the wall, of course, with the inscription outward.This allows you to quickly and easily change such pseudo tags, which is often convenient. In every workshop there are many homogeneous little things just right for such jars - one small fastener is worth it, and God ordered the radio elements to be stored like that. It goes especially well with SMD and others with short conclusions that “eat” volume.
What was used in the manufacture.
Tools, equipment.
Primarily bottle cutting. A wood lathe with accessories - some equipment, a set of cutters. Ax splitting ax, ordinary ax, hacksaw for wood with a small tooth, hammer, core. It is convenient if there is a pendulum saw at hand. For coating with varnish - dishes, brush.
Materials
First of all, suitable bottles. It used transparent, from local lemonade, completely transparent and with not too thick walls. Sandpaper. A piece of dense felt. For glass, it’s rather rough, on a rag basis, for wooden pieces the set is different - from medium to small, I usually use three numbers and the final smoothing out with a handful of chips. Harvesting a piece of wood, apple “log” is used here. Used a drilling machine. For varnishing of wood - paintwork, rags.
So.
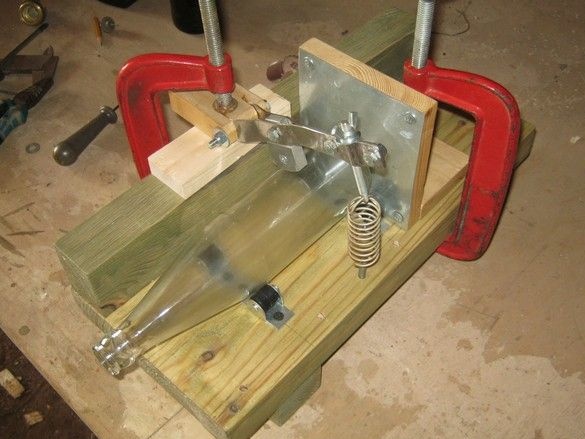
The first thing I cut off a fragment of a bottle with a bottom, its height depends on the possible application. If it is a decorative vessel, it is worth paying attention to the proportionality of sizes and their proximity to the "golden section". For utilitarian use - for small things convenient for taking with your fingers, it makes sense to make shallow vessels so that you can reach the bottom with these fingers. For very small items that either have to be shaken out completely or taken with tweezers, the height can be made larger.
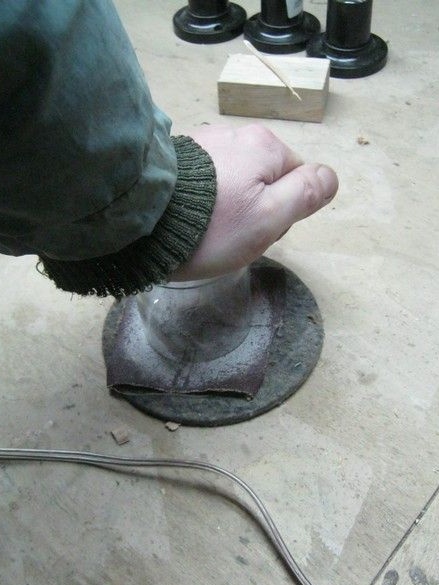
After drawing the surface with a glass cutter and a break, the edges of the cut remain not particularly smooth and very sharp. You can dull them on a medium or large sanding cloth on a woven basis. It’s better to put it on a piece of felt, then the edges of our jar will come out somewhat “littered” and it will become difficult to cut them.
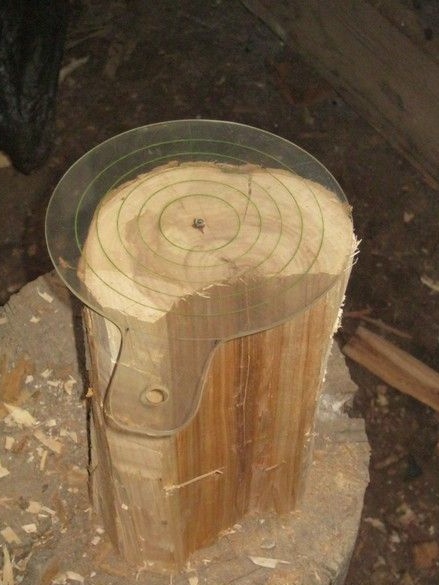
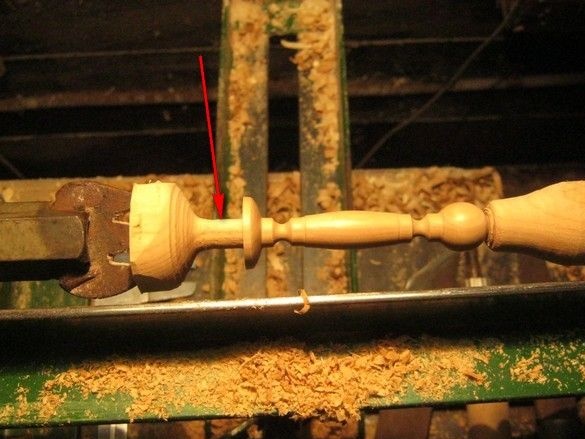
We pass to the cap. Having picked up a piece of wood, he chopped it with a cleaver, determined the center with the help of a center finder, and he cut off a strongly protruding ax with an ordinary ax.
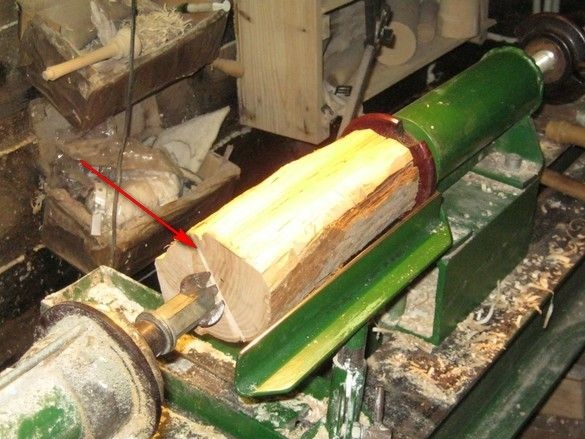
The wood blocks sawed off the ends on the pendulum “trimming”, noted the centers and dipped them. At the “leading” end, a hacksaw on a tree with a small tooth, he made a shallow, drank about 5 mm so as not to barbarously hammer a piece of wood into the leading “trident” with a hammer. At the back end, into the pit remaining from the core, he dripped oil so that the tree would not smoke from friction against the motionless cone.
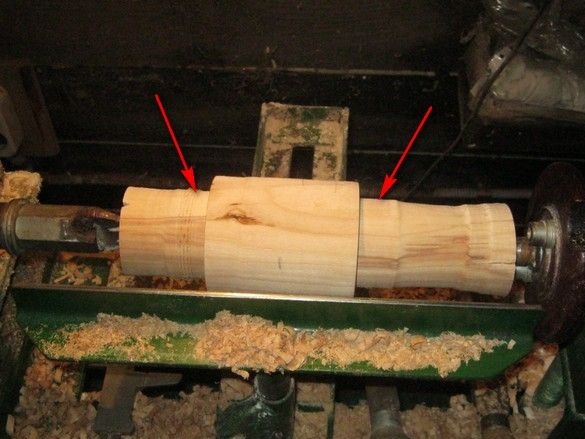
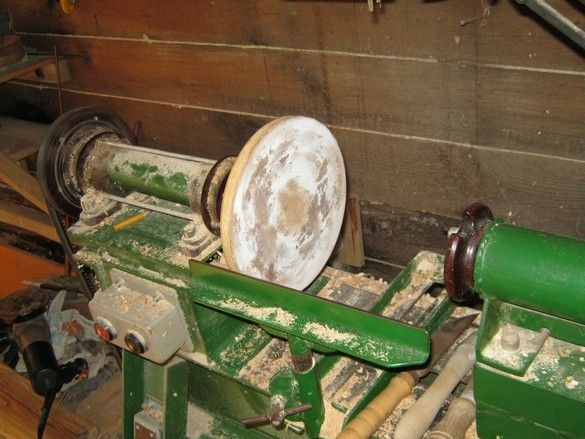
After "fooling", I machined two mounting sizes for installing blanks in another "clamp" - a glass, it allows you to sharpen medium-sized blanks without stopping the rear center.
On a pendulum saw, the workpiece was cut into the necessary parts.
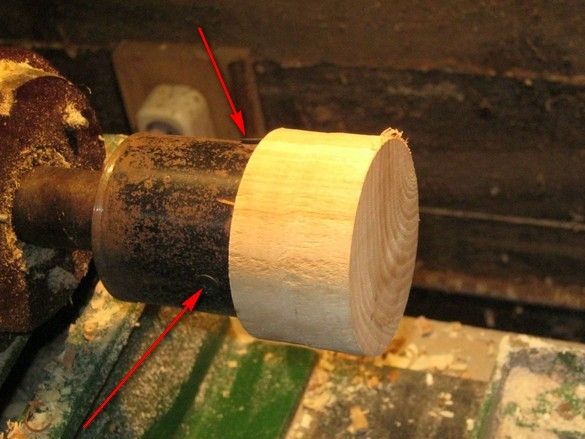
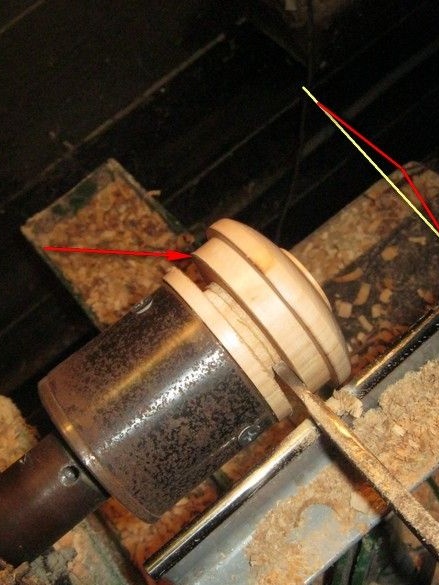
A “glass” is installed on the spindle of the machine, with a slight interference fit, with light blows of a mallet, the workpiece is clogged. With a tight fit, you can rewind paper tape. After installation, the workpiece was additionally fixed with three short screws. The tree is very dense and the edges are close - it is better for screws to drill holes with a diameter of several millimeters so that the workpiece does not burst.
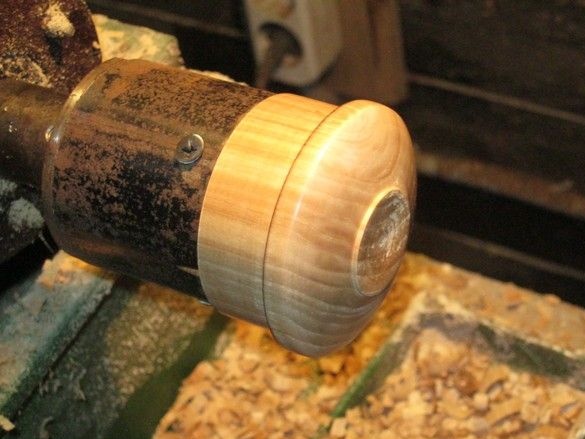
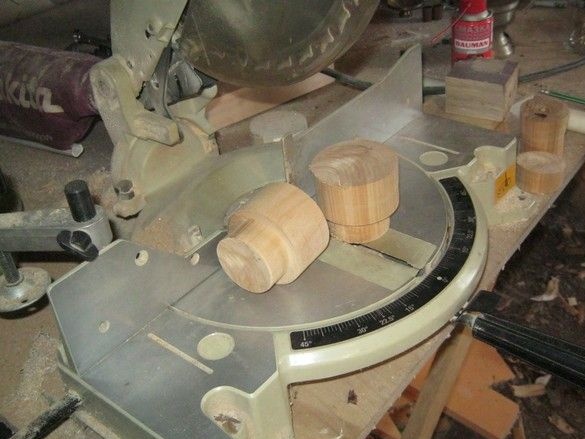
The lid is turned and sanded. The diameter of the base is provided for a not too tight fit on our jar.
I cut the workpiece. Make the bottom, it is best not flat, but a little tucked inward, like aerosol cans, then the workpiece will lie tight on a flat surface, leaning only on the rim of the edge, this is important when drilling holes for the handle.
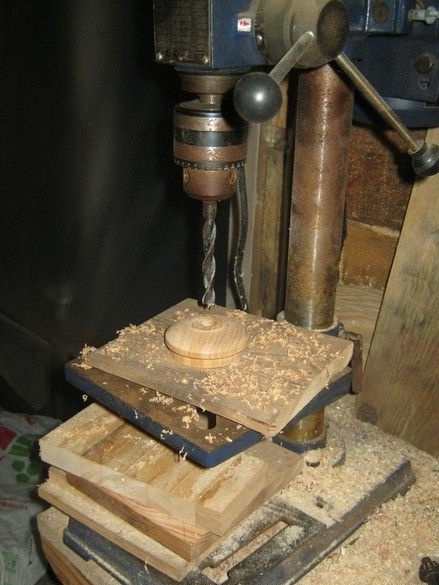
After trying on a jar, I drilled the blank. Drill on wood, with a spike, 10 mm in diameter. More turns, feed without fanaticism, so as not to smoke. Deeper, but not through.
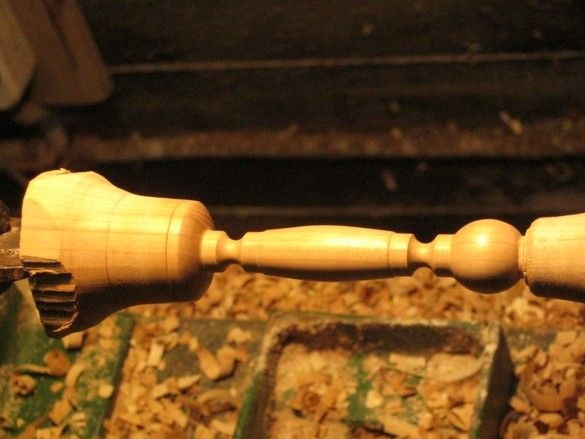
From a small stick, from the same block of wood, I turned the handle of the lid, after doing all the preparatory operations - he scrubbed it with an ax, aligned the ends, found the centers, sawed a groove one by one, and a couple of drops of engine oil in the other. After turning, three numbers of the skin from large to small, with each number skins twice, with forward and reverse rotation for better removal of protruding fibers. After the smallest skin, the piece of wood is covered - on the move a handful of shavings from the same tree are pressed against it. The surface becomes shiny.
After the final processing of the handle, I fastened the mounting spike. The hole on the lid for it, with a diameter of 10mm. It does not need to be skinned - it will stick better.

With a turned handle, removing a piece of wood from the machine, we cut off the excess. It is possible on the same pendulum saw, only very carefully. Try on the lid. Too large a thorn can be cut with a scalpel or a sharp knife, evenly removing thin chips around the circumference, too thin, wrap with cotton threads. The end of the ball at the end polished.
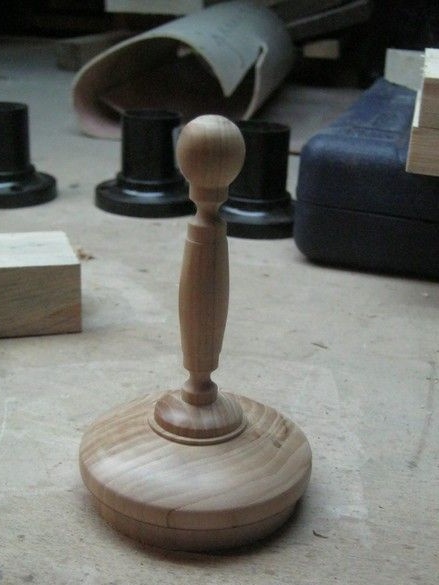
I glued the handle, greasing the nest and the spike with a thin layer of PVA carpentry glue, the protruding can be wiped off with a wet cloth.
A screw was screwed into the center of the bottom of the lid to hold on to it when varnishing. The coating is three layers of Finnish varnish “Yalo”, it is matte and gives a beautiful surface similar to waxed wood.
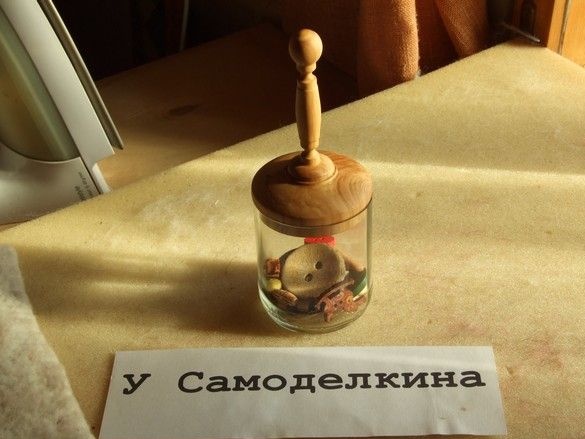
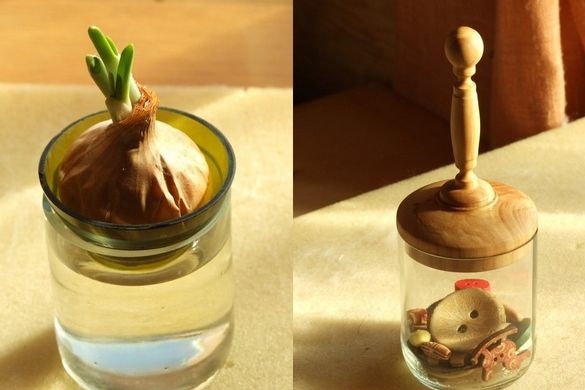
I decided that I would do it for the gadgets later, and more simply and gave it to my wife. It looks pretty pretty with beads, pins, or here it is, with buttons in the tummy.
Well, so as not to get up twice - another funny one is made from cut bottles. Figured it out myself. Actually, the idea to keep the onion sprouted as a kind of decor belongs to someone from Ikea, once, a hundred years ago, I saw in them a special jar-flask with a seat for the onion, and then they disappeared.
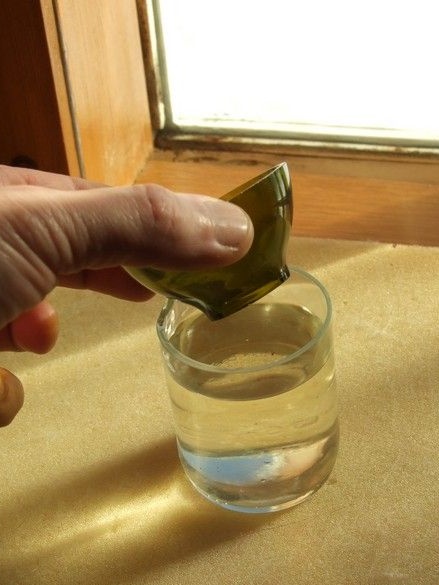
Part of the neck, especially from wine bottles - their “shoulders” are steeper, quite suitable for such a seat, it remains to adapt to the water tank and it's ready. The capacity can be taken from the same bottles - a cup. It looks better if the colors of the “neck” glass and the glass are different, for example, as in the photo. Of course, a narrower cup would look prettier, but it would be less stable and there is not enough room for roots.
I polished the ends of these glasses on a makeshift end sharpener, then shuffled them with my hands on a skin with felt, so as not to cut ourselves against the edges.
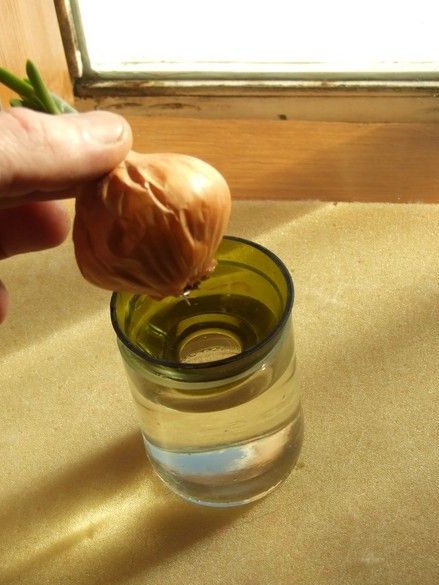
Well, plant Chipolino. I gave it to the child, she is delighted, every day she pulls out to see how much has grown, like Carlson an apricot kernel.

Nothing, the comrade took root, got used to it, now he is getting his roots to the bottom.