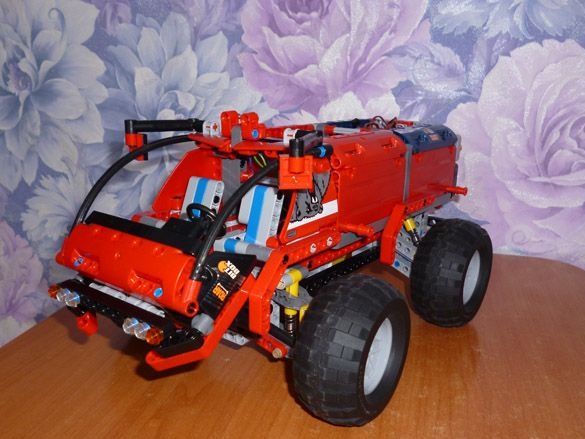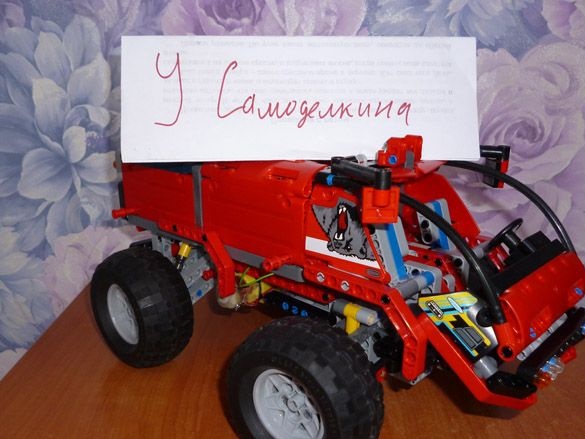
I continue modeling from Lego Technic and electrifying models through Arduino. This time I liked the Lego Technic 42068 fire truck. I redid it for the possibility of electrification and put it on big wheels, because, in my opinion, it looks better on big wheels. Based on my personal experience, the best way to control is Bluetooth.
To implement this homemade will need:
- Lego Technic 42068
- Lego Technic 42029
- 2 white LEDs and resistors matched to them
- Arduino Pro Mini 5v AT Mega 328
- L9110S engine driver
- 1 servo drive SG-90
- Bluetooth module HC-05 or equivalent
- USB-UART for Arduino firmware
- Clerical or just a sharp knife
- Motor gearbox 6v 1: 100
- Capacitor 10v 1000uF
- 2 single row combs PLS-40
- Inductor 68mkGn
- 2 Li-ion 18650 batteries
- Connector dad-mom two pin to wire
- Homutik
- Wires of different colors
- Solder, rosin, soldering iron
- Bolts 3x20, 3x40, 3x60 nuts and washers for them
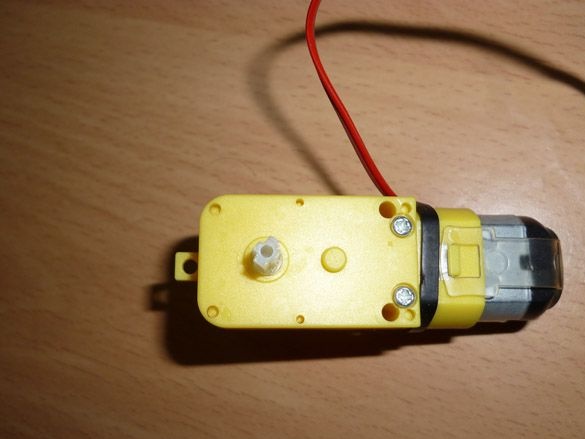
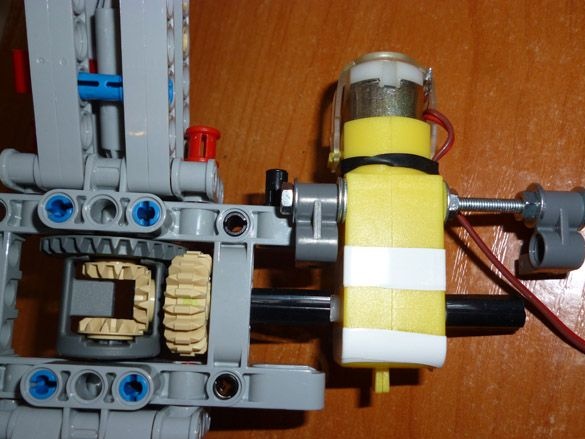
Step 1 Prepare the gear motor.
Our model will be driven by a 6-volt motor, which comes complete with a gear motor. The model was heavy, so it is best to use a gear motor with a gear ratio of 1: 100. The model rides not very fast, but confidently on any surface and overcomes quite large slides. Output shafts do not imply a connection with Lego parts, so we take a knife and give the shafts a cross shape, the dimensions as Lego parts:
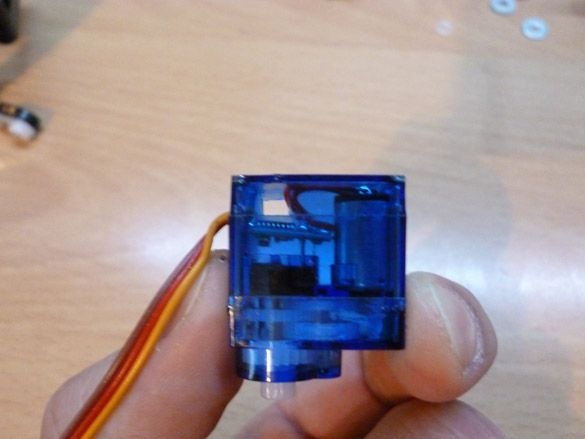
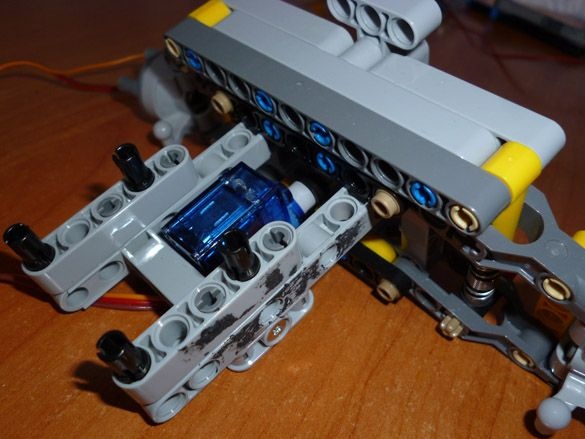
Step 2 Preparing the Servo.
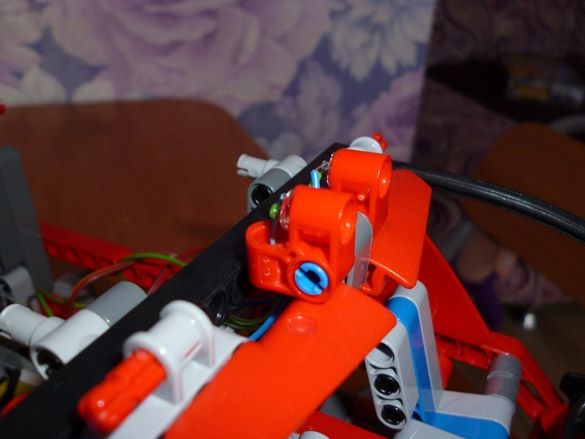
Despite the large wheels, the small SG-90 servo is enough to turn them. If possible, it is better to choose a servo with metal gears. We cut off his protruding “wings” for fastening. They will only interfere. Next, in the servo housing we drill a hole with a diameter of 3.2 mm or just cut it. Be careful! When performing this operation, the main thing is not to touch the internal chip.
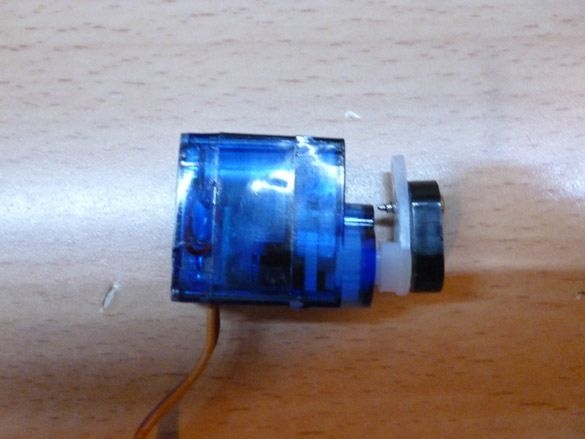
Included with the servo is a lever, put it on the shaft. We take the Lego part and use the self-tapping screw that comes with the servo drive, fasten it to the lever:
Step 3 Build the model.
To build the model we will use two instructions from Lego and. They come with the constructor, but if you lost them, you can always download from the official Lego website.
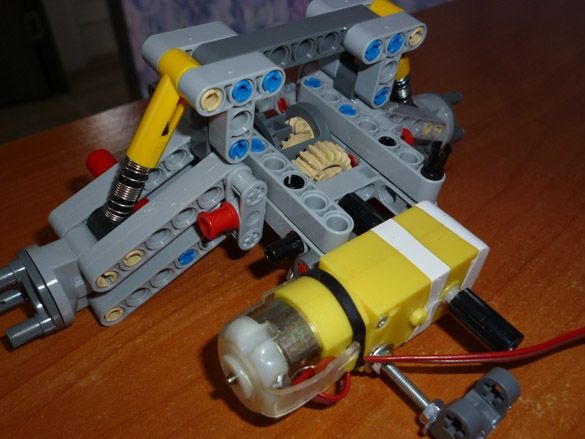
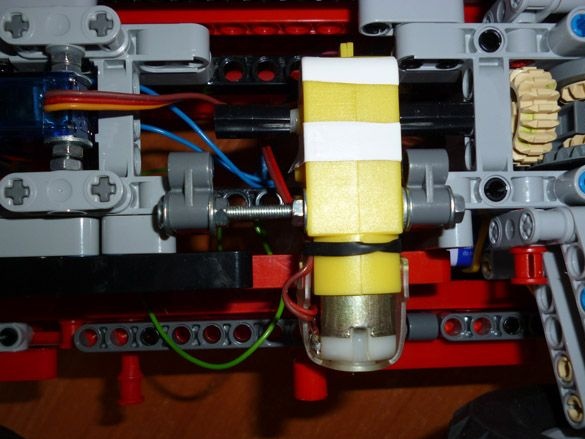
Download all the instructions and proceed to the assembly. First, we need instruction 42029, both parts. The rear axle is taken from the instructions Lego 42029 part 1, starting from 3 pages to 8 inclusive. Add t-shaped parts for attaching the springs. Having put the connecting sleeve on the output shaft of the gear motor, we fasten it with a 3x60 bolt as shown in the photo:
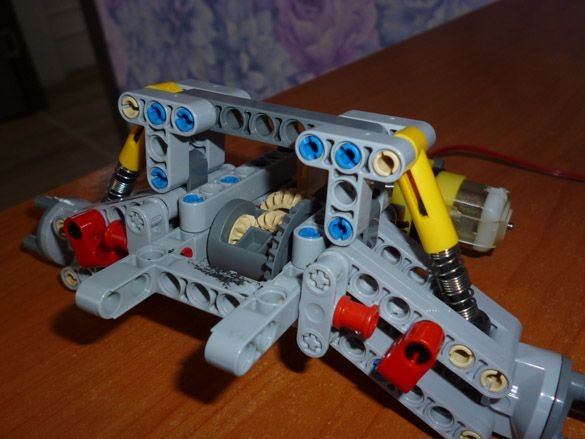
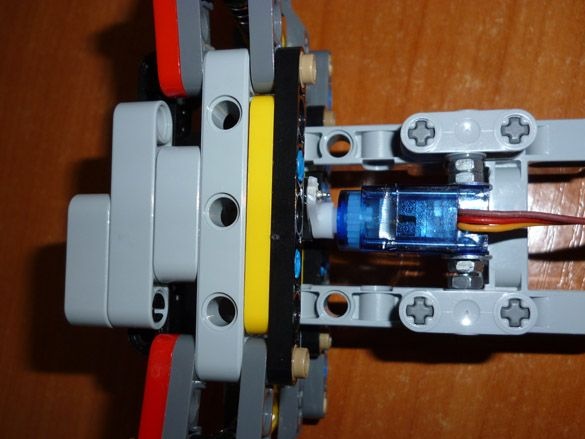
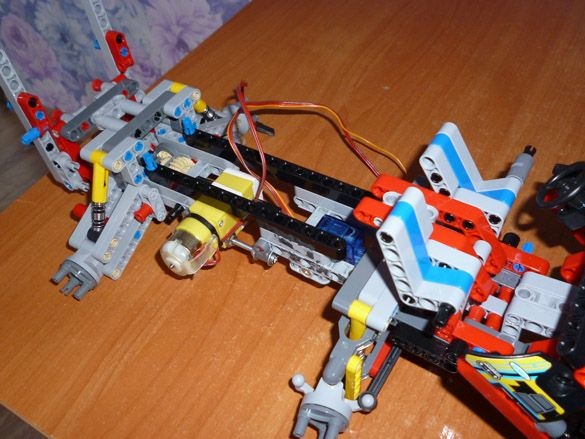
We assemble the front suspension according to the pages 21 to 23 of the Lego 42029 part 1. As well as pages 6 to 11 of the second part of Lego 42029. We fix the servo drive with a 3x40 bolt, as shown in the photo. Before connecting, it is necessary to turn the servo lever to a position of 90 degrees, and give the wheels a position parallel to the housing:
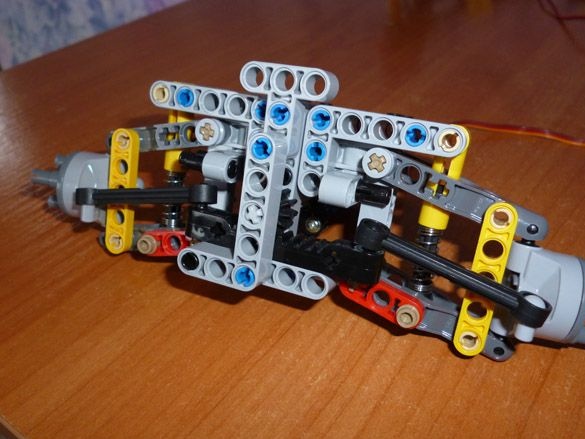
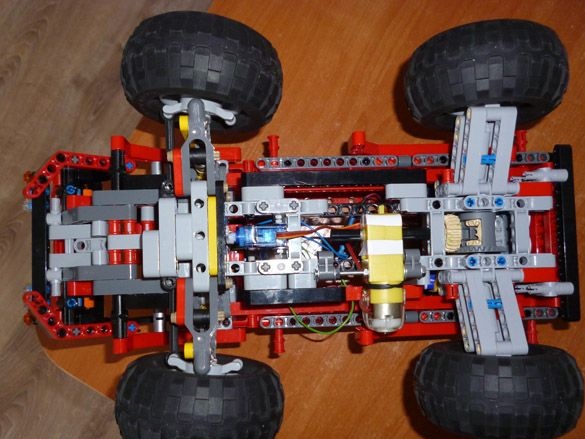
We connect both parts at the mounting point of the gear motor:
Now go to Lego 42068. We assemble the cabin first from pages 107 to 115. We put the resulting part on our base, add the racks in the photo to the rear:
Then continue on page 132 to 160:
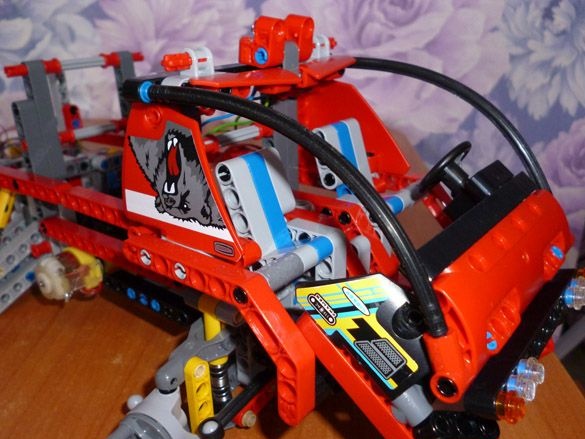
At the top we add the mount for the LEDs, do not forget to calculate the resistors for them and solder them into the open circuit:
According to the Lego Technic 42068 instructions, from pages 118 to 128 we assemble the top cover.
Step 4 Arduino.
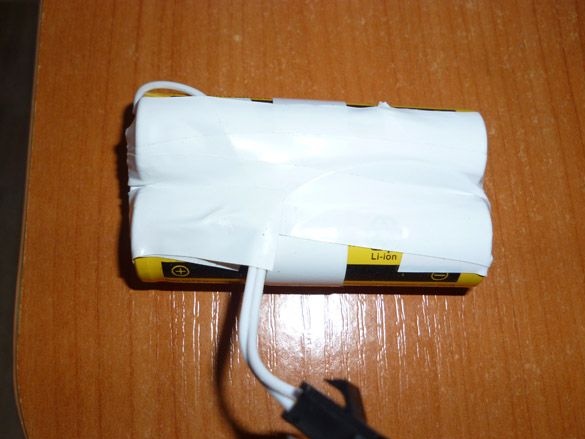
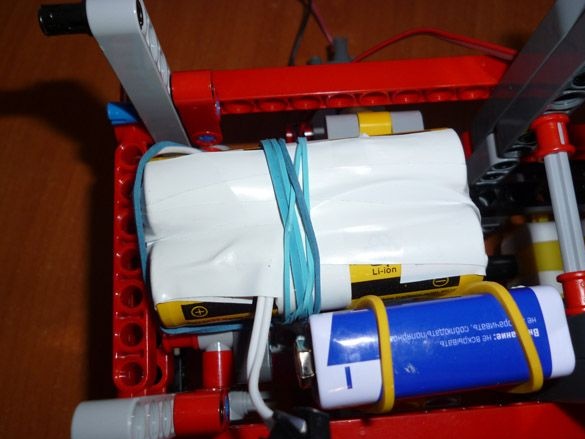
Nutrition models are a very important issue. The easiest (and most stable) way to share food. Use a 9 volt crown battery for the Arduino. And batteries for motors and a Bluetooth module. We solder two Li-ion 18650s in parallel. Solder the connecting connector for ease of connection, and twist them with electrical tape:
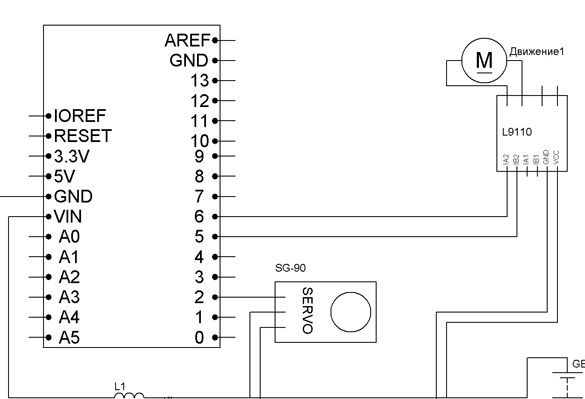
To use a single power supply, it is necessary to add a 68μH inductor to the gap of the Arduino positive power wire and connect a 10v 1000uF capacitor in parallel. We connect the signal wire of the servo to pin 2, the motor driver to pin 5 and 6, we connect the anodes of the LED headlights through resistors to 4 pin, the cathodes to GND. Resistors should be selected for the diodes you use.
I spread the scheme:
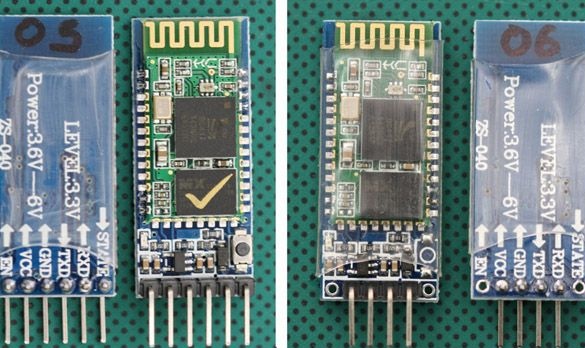
Bluetooth module can use HC-05 or HC-06. They are easy to purchase, and the price is reasonably reasonable. HC-05 works, depending on the settings, in master mode, that is, it creates a connection itself, or in slave mode, you can connect to it. HC-06 only works in slave mode. The module itself is a small board with a small distance between the contacts:
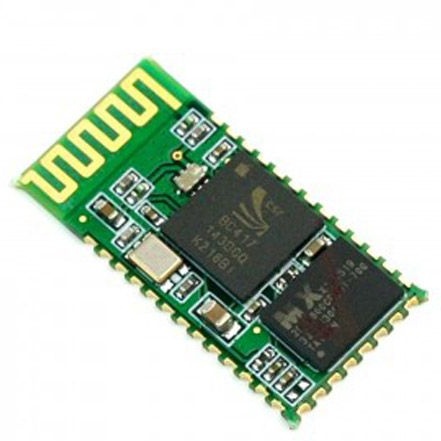
It is worth choosing an already prepared module in the form of two boards soldered together. A large board of them is a special breadboard with the necessary contacts and a voltage regulator 3.3 volts brought out to a convenient block to power the Bluetooth module itself:
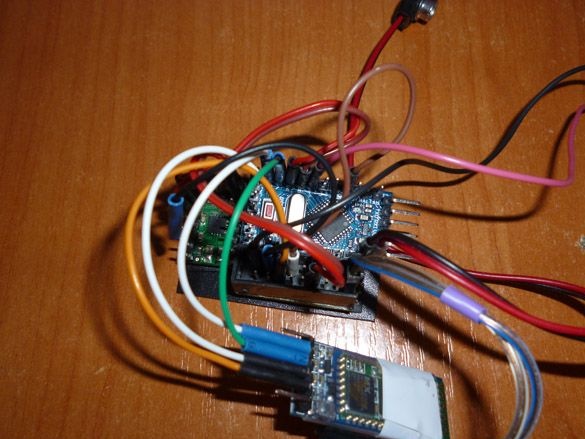
To keep the TX and RX Arduino contacts free to connect to a computer, we will connect the Bluetooth module through the SoftwareSerial library. Thereby we will create a software connection port. We connect the module as follows:
Arduino Pro Mini - Bluetooth
D7 - RX
D8 - TX
5V - VCC
GND –GND
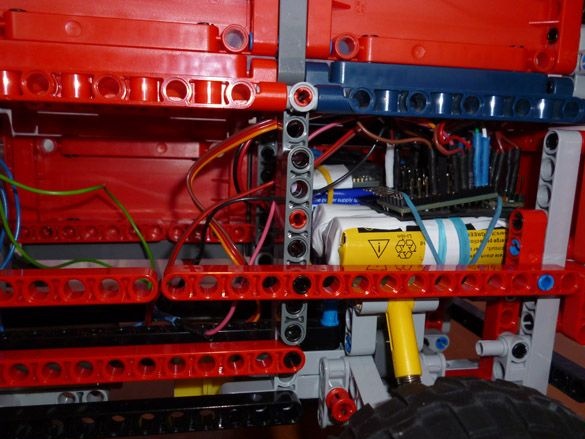
We place the batteries and 9 volt battery in the rear of the machine:
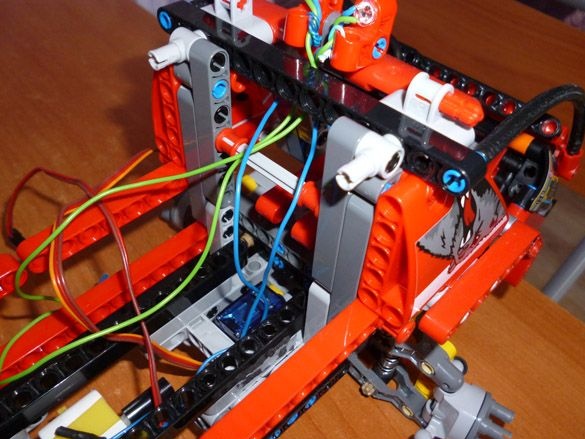
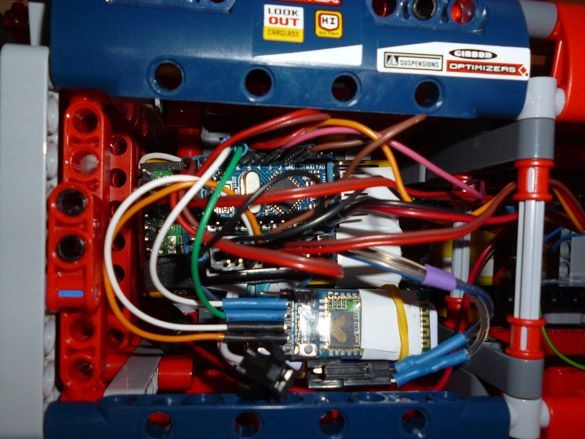
We assemble all the electrics according to the scheme, I use small wiring to connect:
We place an electrician on top of the batteries:
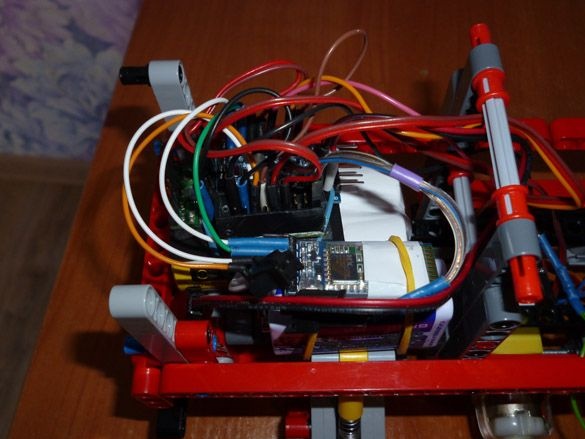
Now you can put on top the previously assembled top cover. There is no top at the location of the electrician, for convenient access to it:
The sides of the top cover rise up so that you can get to the electrics and from the side:

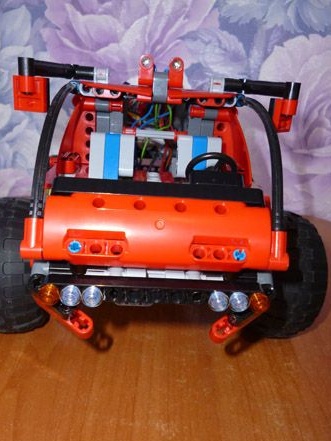
Now you can close the back completely:

And so it should look like below:
And in front:
Step 5 Install the programming environment and libraries.
The Arduino programming environment is the Arduino IDE. If you have it, check the relevance of its version. If not, it is necessary.
Then we add libraries. Servo.h is used to control the servo. SoftwareSerial.h creates a communication port for the Bluetooth module:
Download and unpack archives. Next, we move the unpacked files to the “libraries” folder located in the folder with the Arduino IDE installed. You can also add them to the programming environment without unpacking the archives. To do this, run the Arduino IDE, select Sketch - Connect Library from the menu. At the very top of the drop-down list, select the "Add .Zip library" item. It remains to indicate the location of the downloaded archives. After all the manipulations, you need to restart the Arduino IDE.
Step 5 Configuring the communication module.
The next step is to configure the Bluetooth module. To do this, fill in the following sketch in the Arduino board:
This sketch is used to connect a computer with a Bluetooth module. We will use the terminal window from the Arduino IDE. Select Tools - Port Monitor.
If you have HC-06, then set the speed to 9600, set the parameter without sending NL and CR, and enter the following commands:
"AT" (without quotes) should receive the answer "OK"
“AT + BAUD7” (without the quotes) the answer “OK57600” should come.
If you have HC-05, then set the speed to 38400, set the send parameter NL and CR and enter the following commands:
"AT" - entered without quotation marks, the answer "OK" should come. If you come, we continue to enter commands further.
“AT + UART = 57600,0,0” - set the speed to 57600 bps.
Step 6 Sketch.
And finally, fill in the sketch for our machine in Arduino:
Step 7 Configuring the control devices.
We will control our model using an android device. We go into the Bluetooth settings, find our Arduino module and connect using the password for the “1234” connection, maybe the password will be “0000”, it can be different for different models. Next, install the control program. Download the Arduino BT Joystick Free program from Google play. Running the program settings, install the following commands:
W - forward
S - back
A - left
D - right
F - stop
G - steering wheel
K - headlights
L - headlight off
You can also use a computer running Windows. Download the following program:
Then you need to establish a connection using the same password. Select the com-port of our Bluetooth module in the program. And configure the program for the same commands.