Glad to welcome you again. Today I will share instructions on how to make an original night lamp from an old broken toy. I once had a toy on the radio control "Illumivor Piranha".

She was interesting and stood out among other radio-controlled models. But all will ever come to an end, and here he comes to my piranha. After long attempts to repair, it turned out that the central controller burned out. There was no point in repairing further, but I did not want to throw away the original case. And then the idea came to make a night lamp out of the case.
To implement the idea we need:
- Radio-controlled toy "Illumivor Piranha"
- Old but working charge for the phone
- 2 white LEDs
- 2 resistors 62 Ohms
- Hand file for metal
- wires
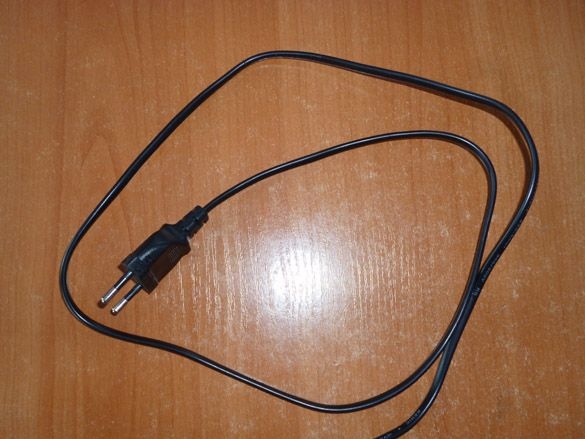
- 220 V plug or cable with plug
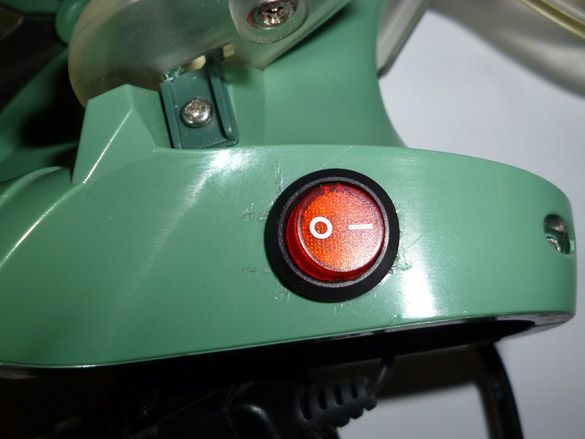
- 220 V switch
- Soldering iron, solder, rosin
- electrical tape
- Hot glue
Step 1 Preparing to charge.
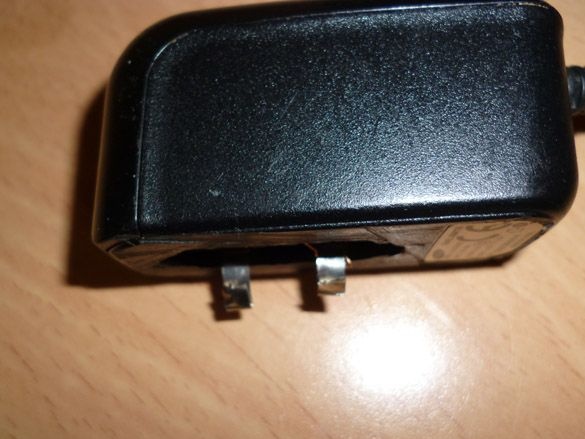
For this homemade we need the old charging from the phone, the main thing is that it be small in size and at 5 volts. Very old charging, with a large, step-down transformer inside, will not work for us because of its large size. It will be powered by several LEDs, so the current strength is not so important. I think any charge is capable of this. I was charging from a Samsung phone. The phone itself has long been broken, and the plug does not fit modern models. The charge is not collapsible, that is, it is glued tightly. It is quite difficult to disassemble it completely without damaging it. Therefore, we will go to the trick. Take a metal file and cut off the protruding part of the charge, where are the contacts inserted into the outlet. It is necessary to cut carefully, first we cut to the depth of the plastic, about 3 mm, on the one hand, then we do the same on the other hand, the main thing is to cut the contacts inside. Cutting in a circle, we move the cut off part as far as possible and bite off the contacts inside with pliers, leaving them as long as possible, for convenience:
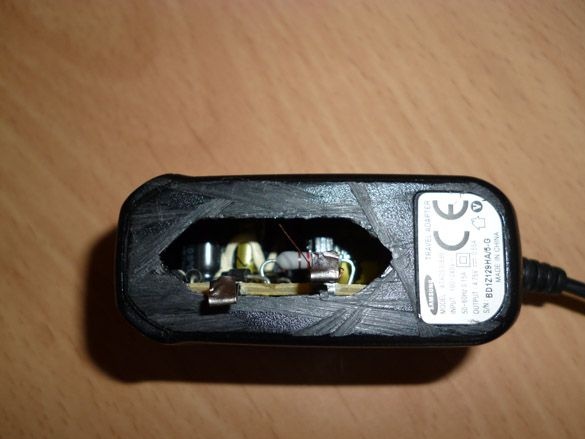
To these contacts we will solder the wire going to the outlet.The plug going to the phone is simply cut off closer to the plug. We clean these wires. The black wire, most often, will be a minus. But it is better to check with the device, just in case.
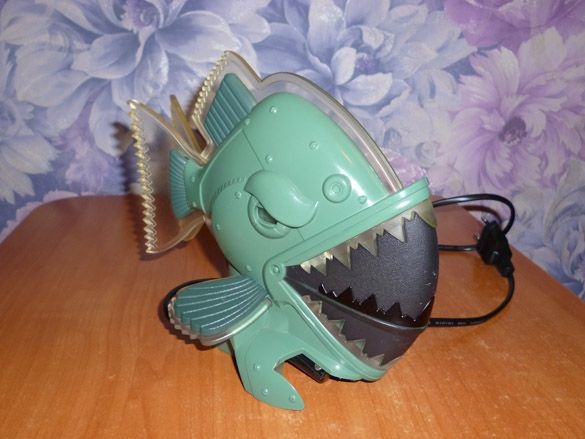
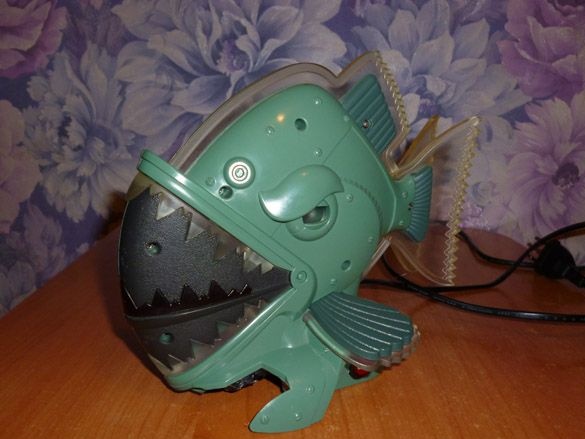
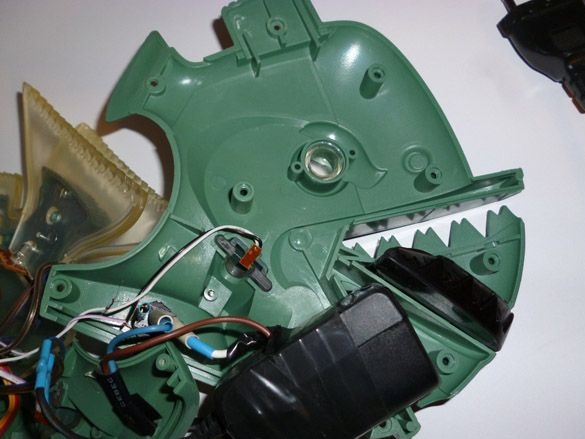
Step 2 Preparing the enclosure.
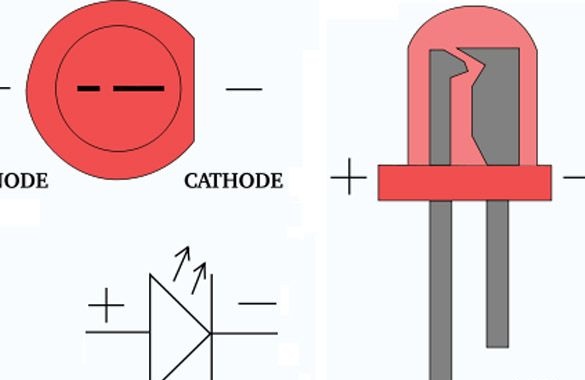
I want to say that according to this instruction, you can turn almost any building into a nightlight. To begin with, we disassemble the piranha and take out everything except the LEDs standing in it. It is best to cut the wires going to the LEDs closer to the control board. Now you need to determine the plus and minus, the anode and cathode of the LEDs. Most often, this can be done by wires coming from them. Black or white is usually a minus. Red, green or blue is a plus. If it is impossible to determine by wire, it is worth looking at the LED itself:
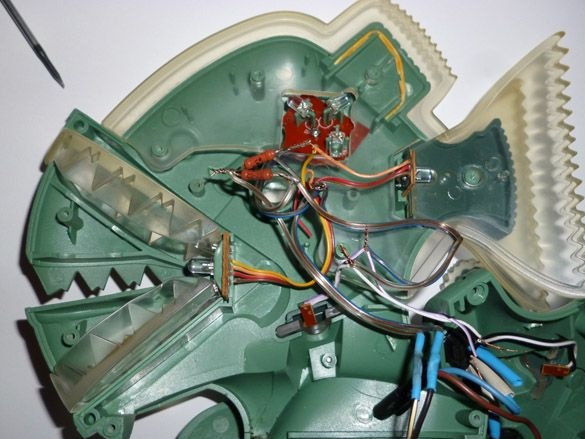
There were 6 LEDs in piranha. I added two more for greater brightness. It is also worth painting the middle jaws of a piranha with a black marker, otherwise a piranha with three jaws will look strange.
Step 3 Connecting everything together.
Having decided on the wire, it's time to calculate the resistor for them. The LED and the resistor are connected in series, and, accordingly, the current flowing through them is the same (I). The circuit is powered by charging voltage (U), that is, 5 volts. In the on state, a voltage drop occurs: on the resistor (UR) and on the LED (ULED). According to the second rule of Kirchhoff, the following equality is obtained:
U = UR + ULED
or
U = I * R + I * RLED.
Where R is the resistance of the calculated resistor (Ohm), RLED is the resistance of the LED (Ohm), U is the voltage (V). After the transformations, we obtain a formula for determining the resistance of a current-limiting resistor:
R = (U-ULED) / I, Ohm
ULED is a passport quantity, and different for each individual type of LED.
You can also use
To put a resistor on each LED, in my opinion, is unprofitable, and it is not necessary. We connect the anodes of 4 LEDs together and twist with a resistor, with the other 4 LEDs we do the same. We twist the cathodes of all LEDs together. We twist the cathodes with the minus going from charging, and the second outputs from the resistors with a positive charging wire:
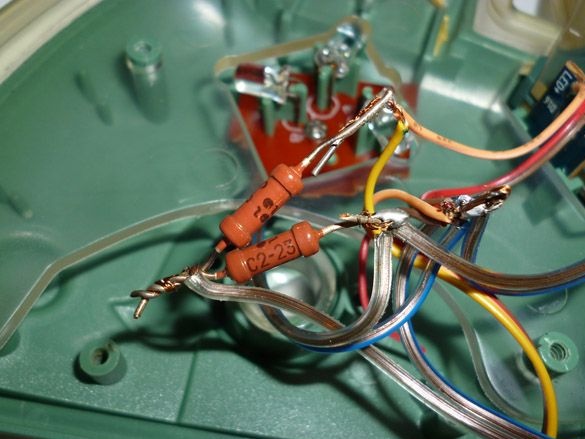
After twisting, do not forget to solder all the connections and insulate. Then you will need a 2x0.5 wire, copper, flexible and a plug. The plug must be fixed at one end of the wire. If there is a finished wire with a plug, for example, from an old, broken electrical appliance, you can use it:
Next, we drill a hole for the switch in the housing. Insert it there:
We solder one contact from the wire with the plug to charging, the second to the switch, and from the switch, with a small wire, to the second charging contact. Be sure to insulate everything:
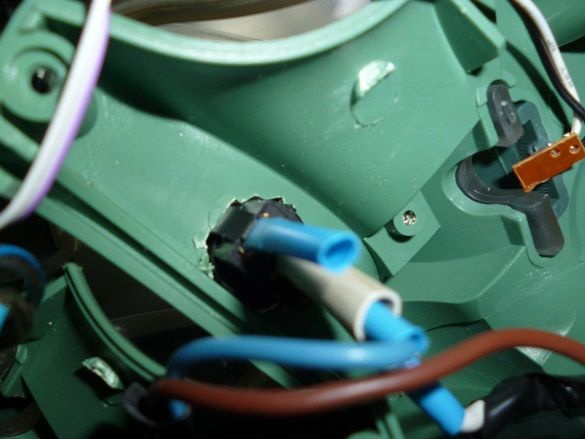
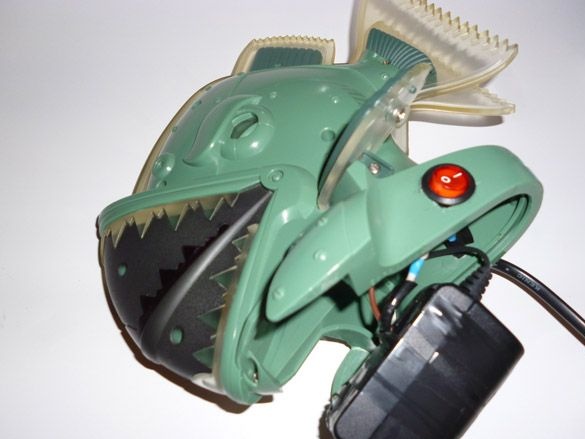
It should look something like this:
Step 4 Putting it together.
Having connected, soldered and insulated all the connections, you can plug the plug into a power outlet, thereby verifying that everything is working. All LEDs should be on. If everything is on, go to the assembly of the case. We assemble piranha by connecting both halves of the body and twisting them together. Be careful not to accidentally break the wires. The power supply, for now, just sticks out through the bottom hole:
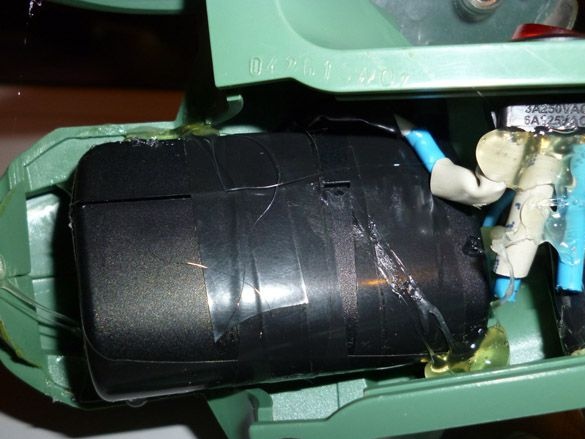
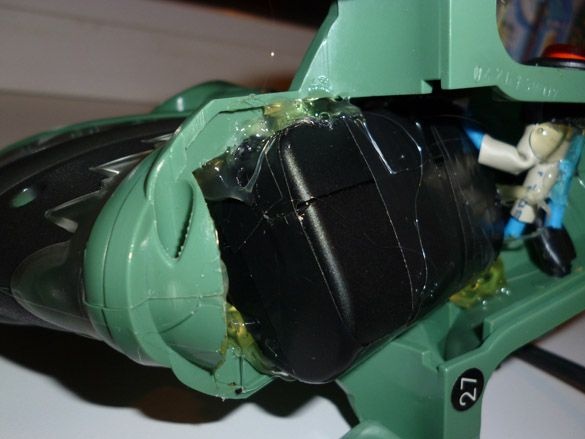
We insert the charge into the hole in which the motor with the gearbox was previously located. And fix it with hot glue:
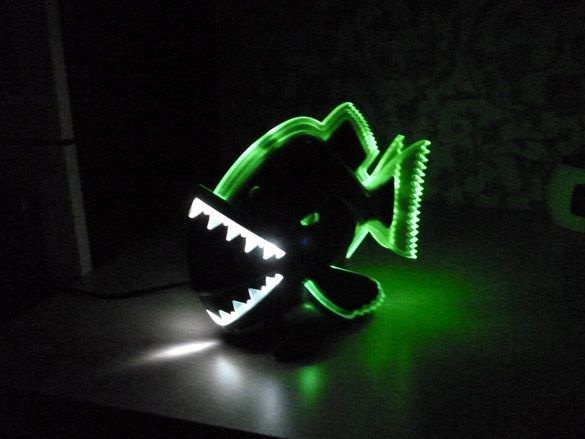
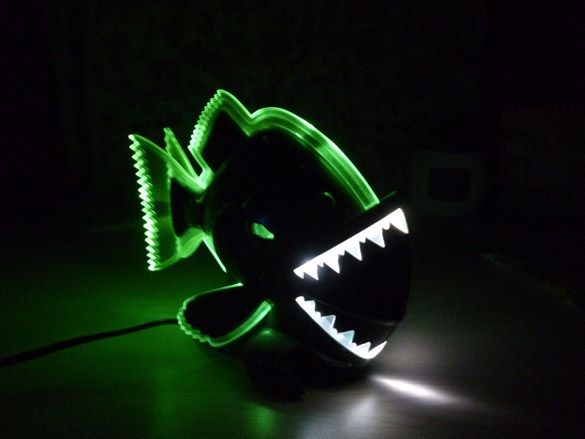
Our homemade product is ready. In the light, it does not look as spectacular as without it: