
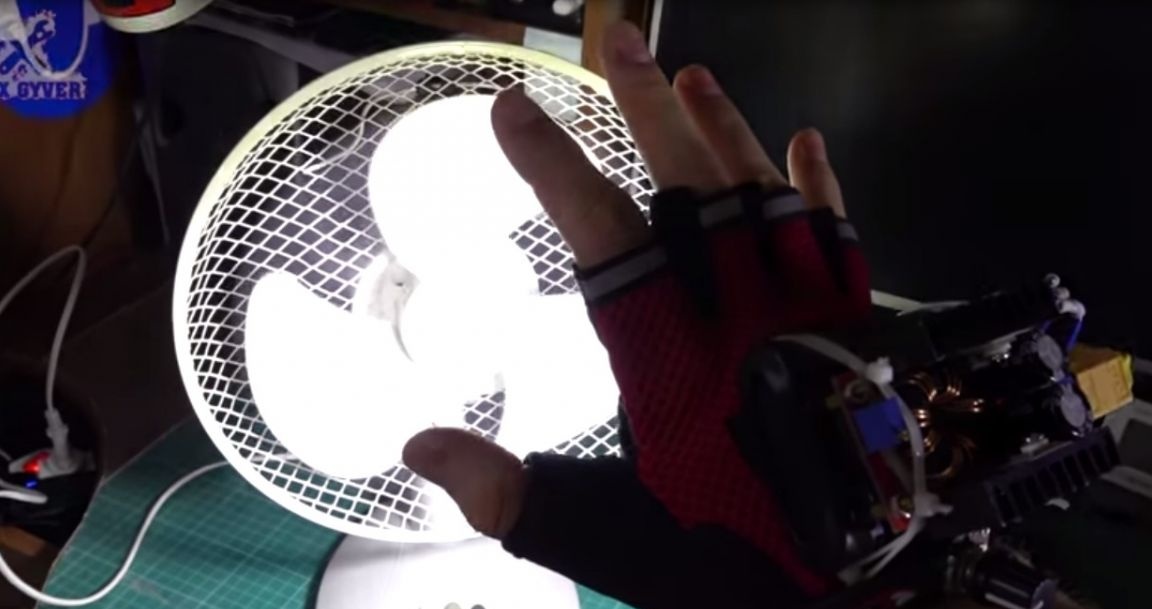
With the help of this simple device, it is possible to surprise humanitarians, old women and schoolchildren who did not watch "The Illusion of Deception 2".
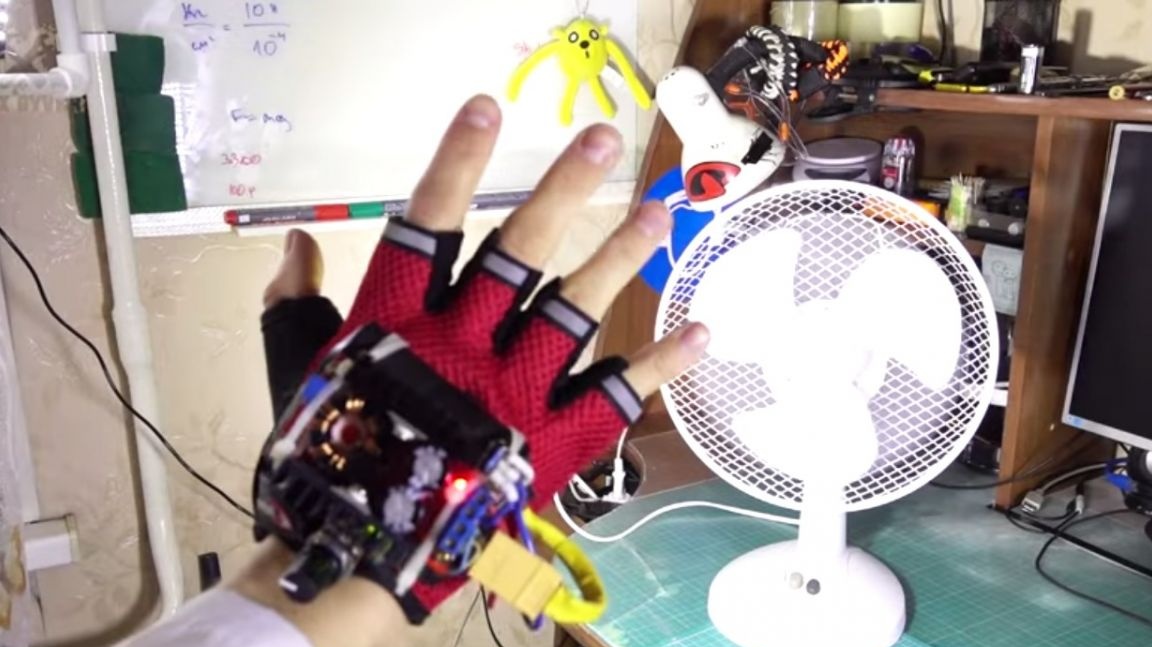
We point the glove at the fan, turn it on with a wave of the hand, adjust the frequency with the potentiometer, and the fan supposedly stops. The illusion is created complete, and an unprepared viewer can be quite astonishing.
Let's start with the principle of work. This thing is just a very powerful stroboscope, controlled by a gyroscope and an accelerometer. This glove can stop time for any periodically moving object. The whole point is that light flashes literally a couple of hundred microseconds. During this time, we have time to clearly see a moving object. But on such a flash, he seems to us motionless, as he simply does not have time to move. Next comes the shadow pause, during which our object manages to make one revolution of its movement. Then the light turns on again, and we see the same position of the object as last time, but adjusting this very shadow time, you can tune to any frequency and, accordingly, to any moving or shaking object. A rough adjustment of the frequency is made by turning the potentiometer, and an exact adjustment is done by tilting the arm. There is a module with an accelerometer and a gyroscope. It measures the angle of inclination from the vertical. Thanks to the same accelerometer, the inclusion of a glove by a sharp wave of the hand is implemented.
Well, let's get down to construction!
We will need:
1. The cheapest glove.
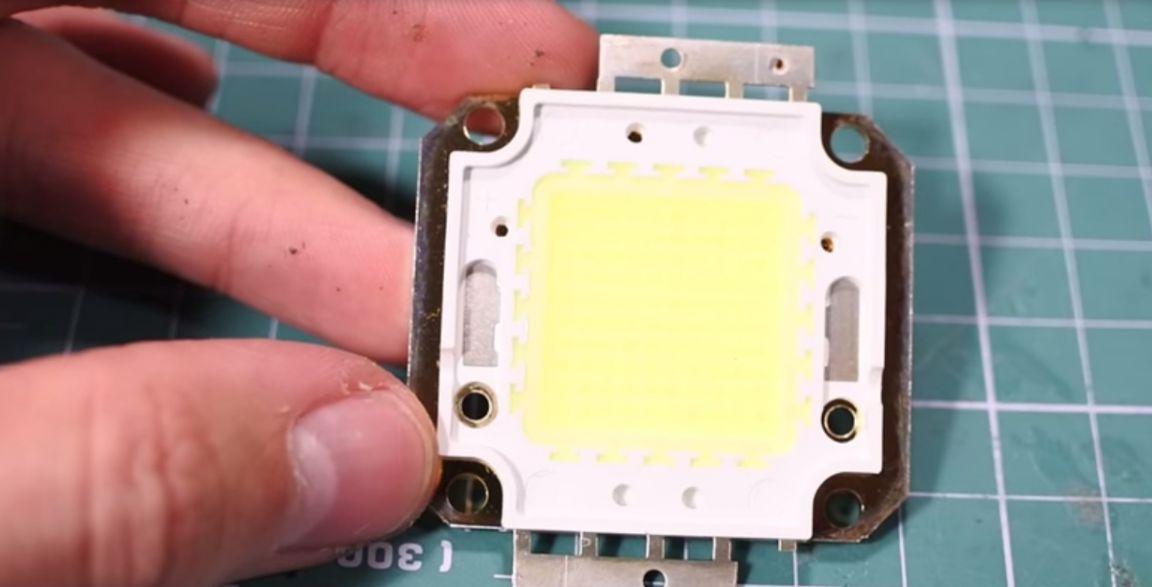
2. Powerful 100 Watt LED, as well as optics for it
3. Copper or aluminum plate
4. To power the LED, you need a powerful power source with a voltage of at least 12 volts.
5. Also, for power, you need a powerful 150 watts boost module
6. For control, the LED will be connected to the module through a mosfet transistor.
7. The mosfet will open and close at the signal from arduino
8.To adjust the frequency you will need any potentiometer
9. And for the magic wave of the hand - 6 axis sensor in which there is an accelerometer and a gyroscope.
The connection scheme is quite simple.

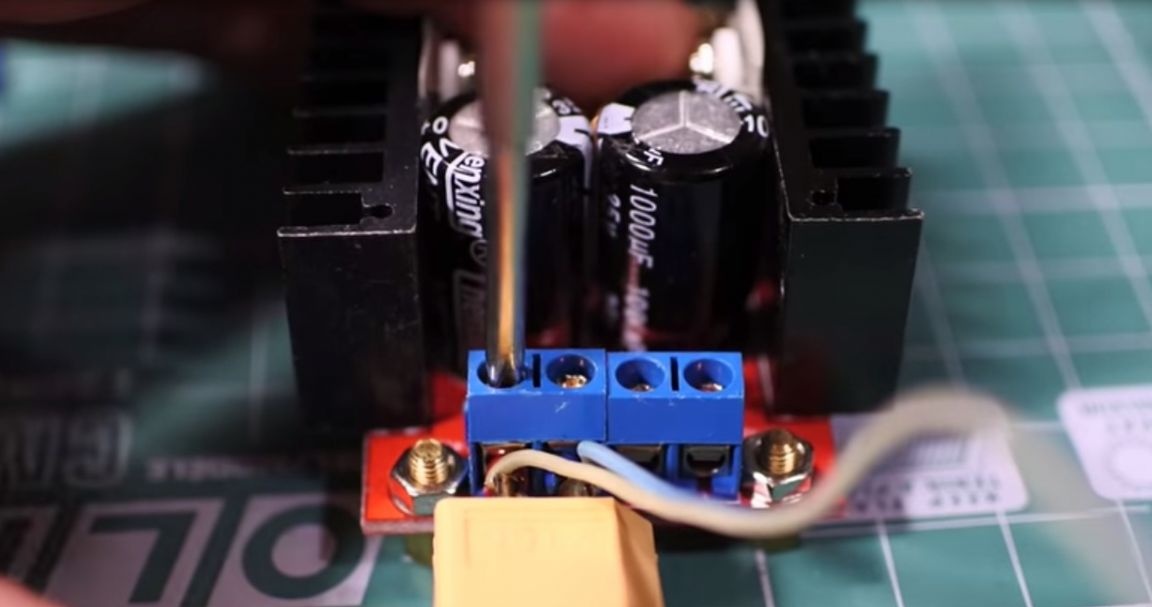
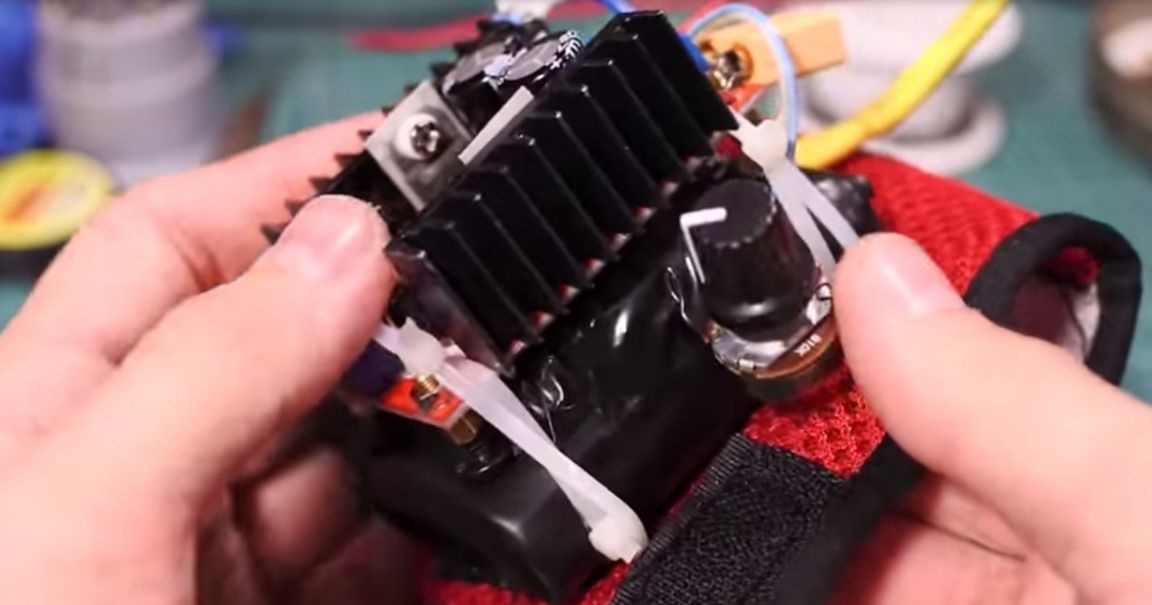
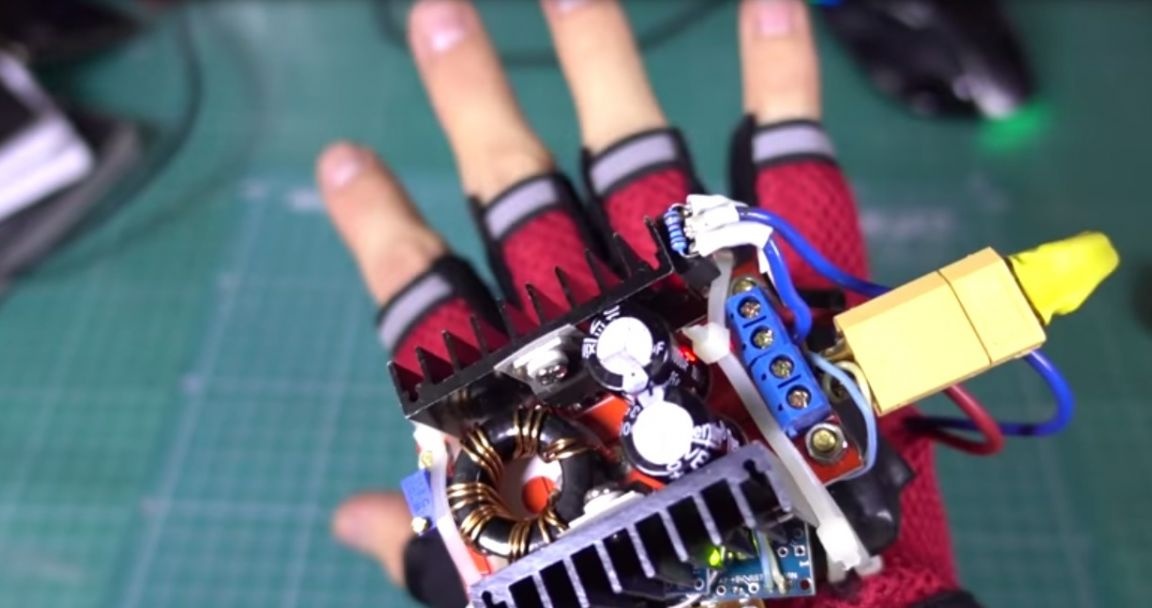
To start, power up the boost module. We solder the connector for the battery to it, and also output two wires from it to power the arduino.

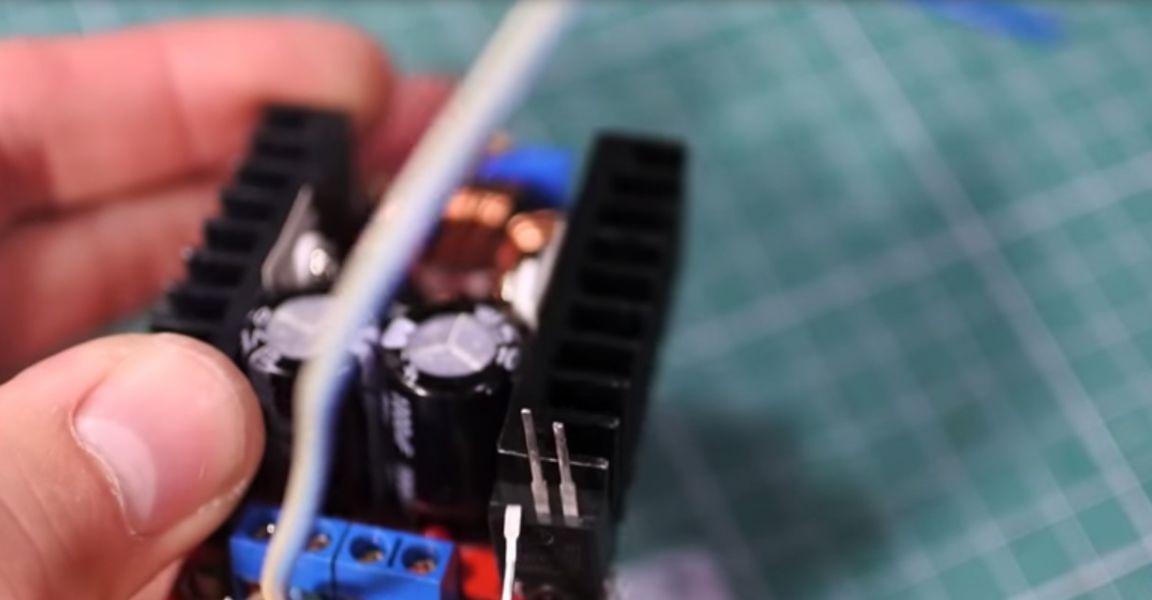
We insert the whole thing into the module inputs and tighten the screws.
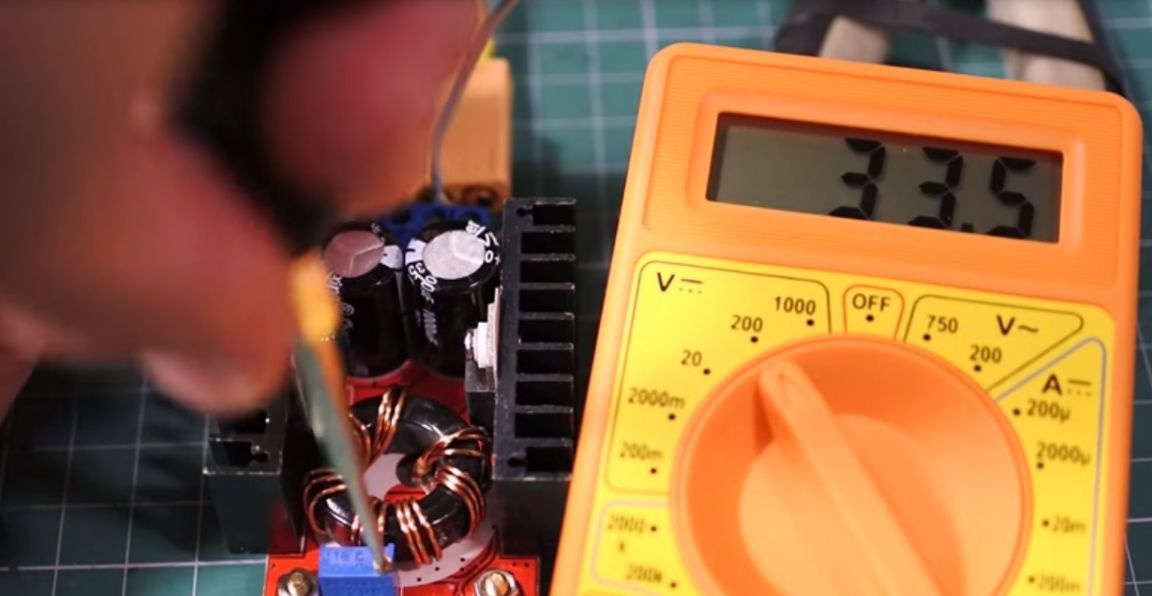
Now connect the power and adjust the output voltage by turning the potentiometer clockwise. The LED is powered from 32 to 34 volts.
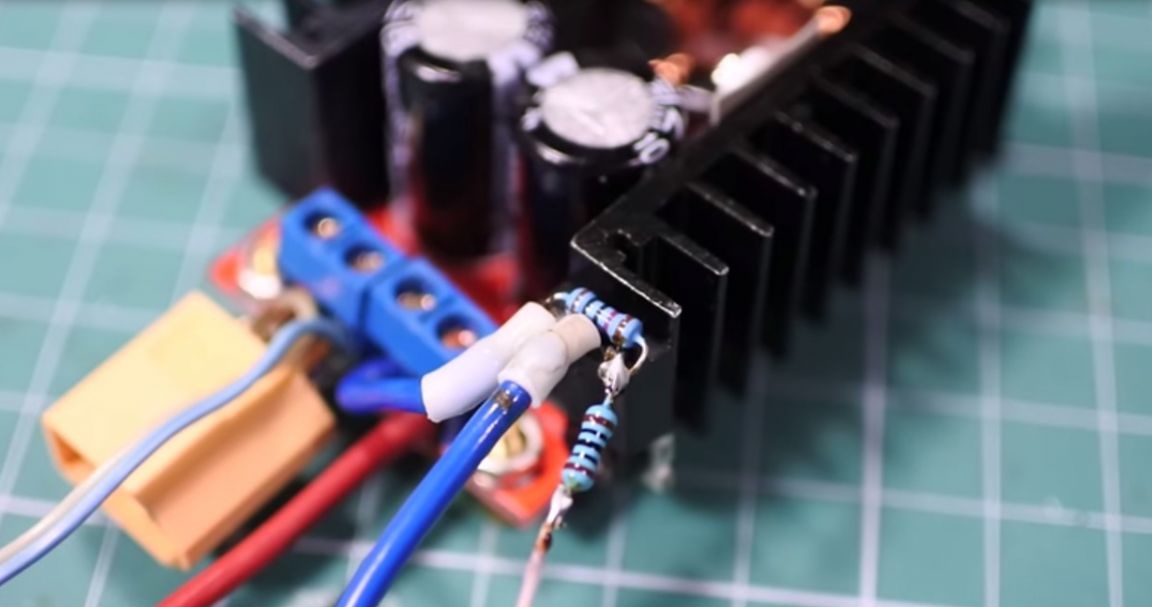
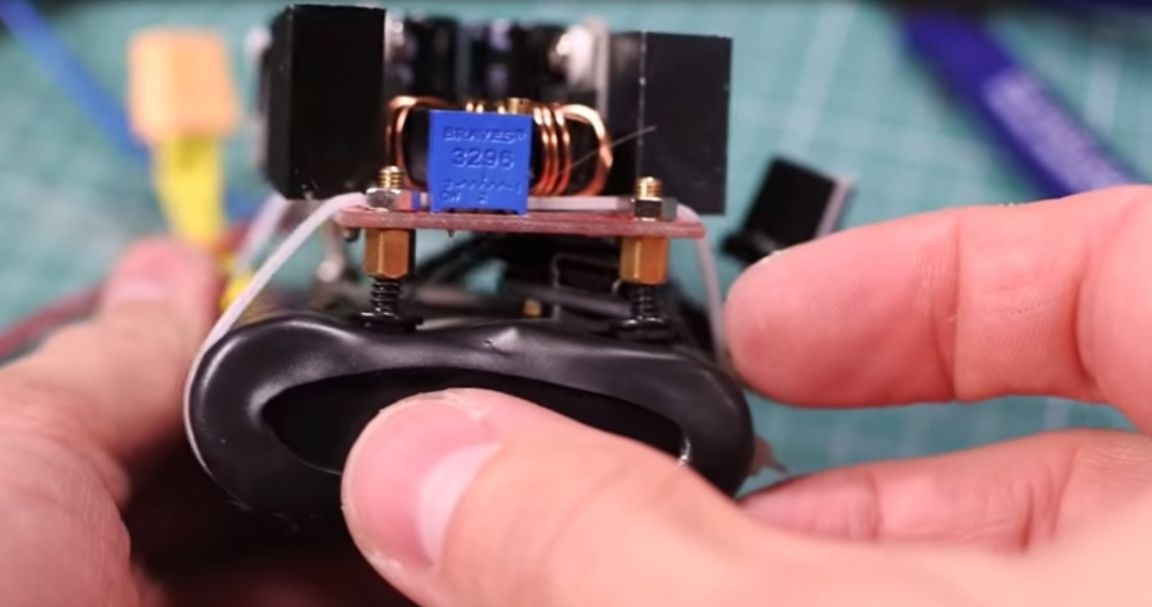
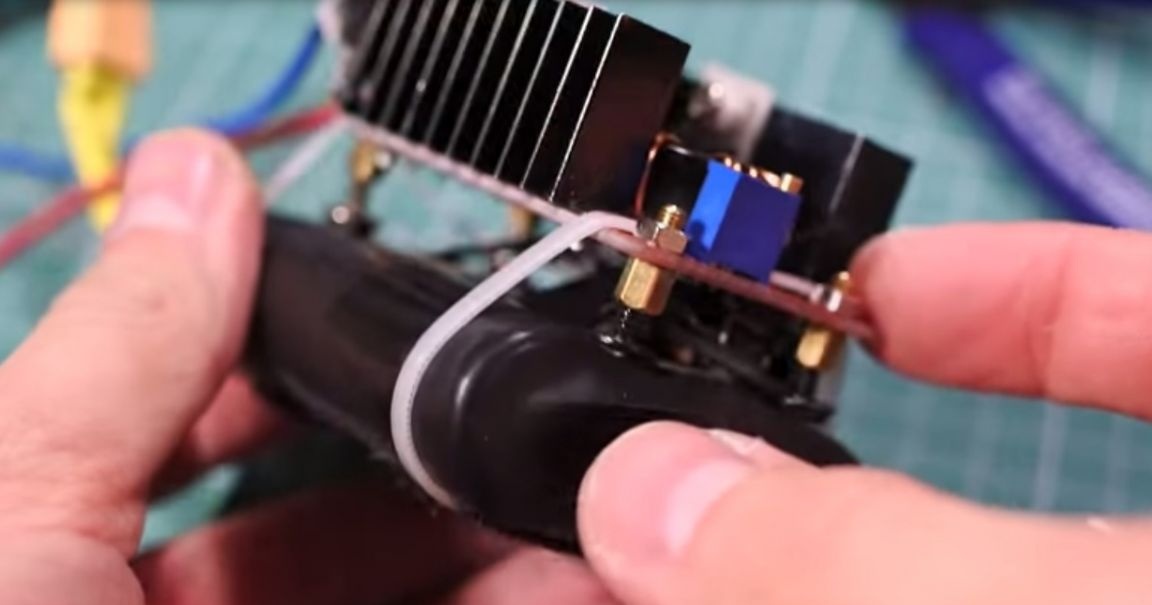
According to the scheme, the right leg of the mosfet will stick into the negative output from the module. So that it does not interfere, we fix it on the radiator and put our right foot on the minus exit.
Do not forget about the 10 kOhm resistor between the extreme legs of the mosfet.
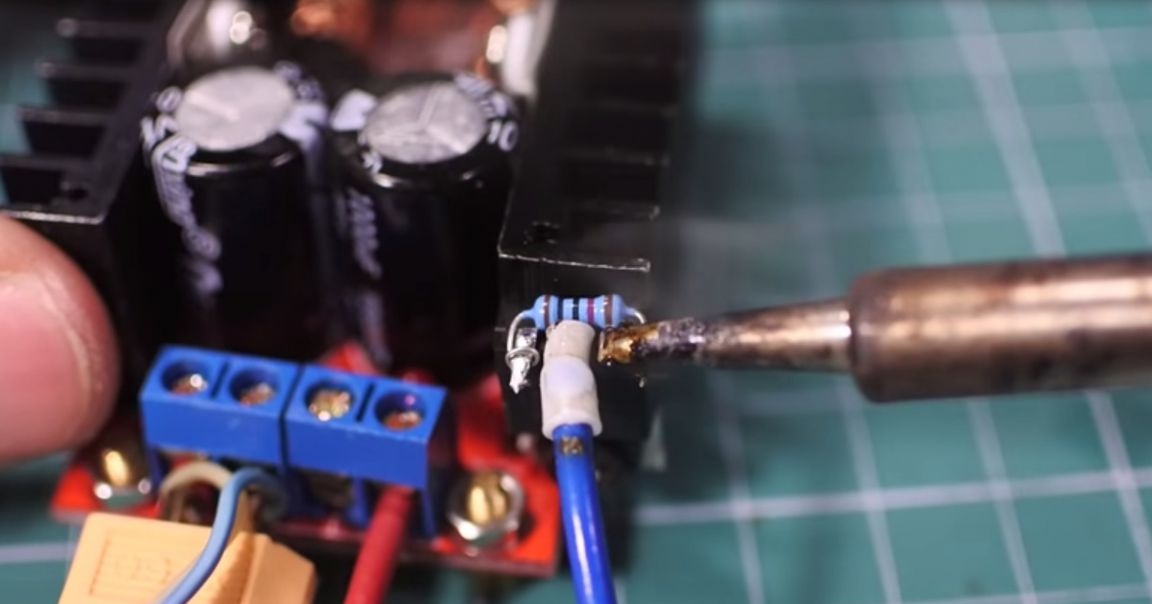
The middle leg goes to minus the LED, we output the wire. And from the plus of the module, we bring the plus wire to the plus of the LED. The last remaining leg of the mosfet is logical (goes to arduino through a 100 ohm resistor).
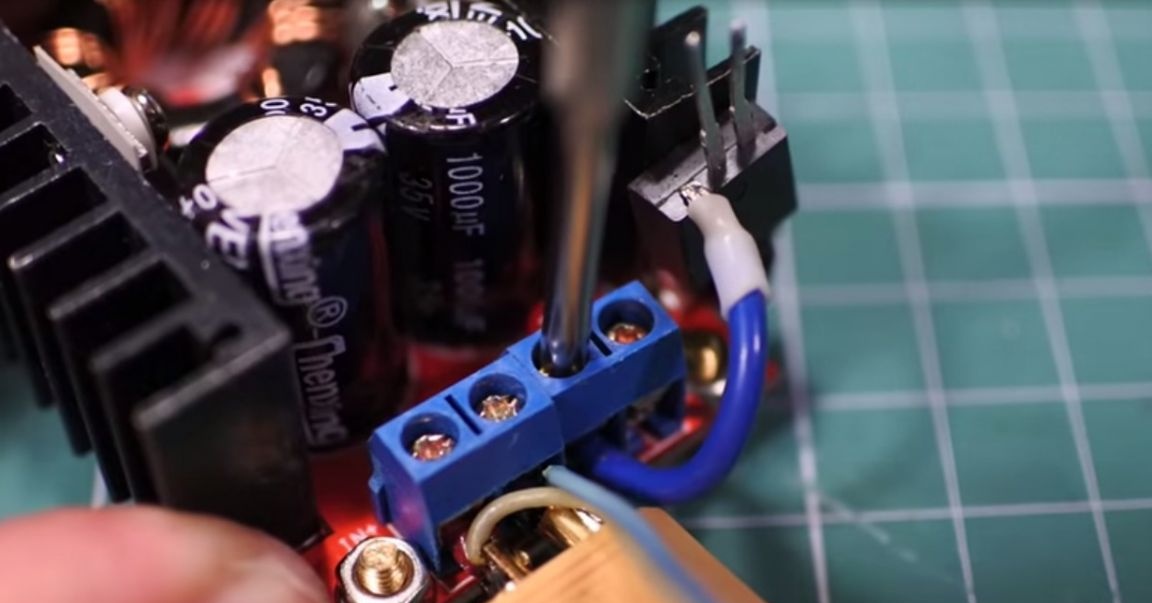
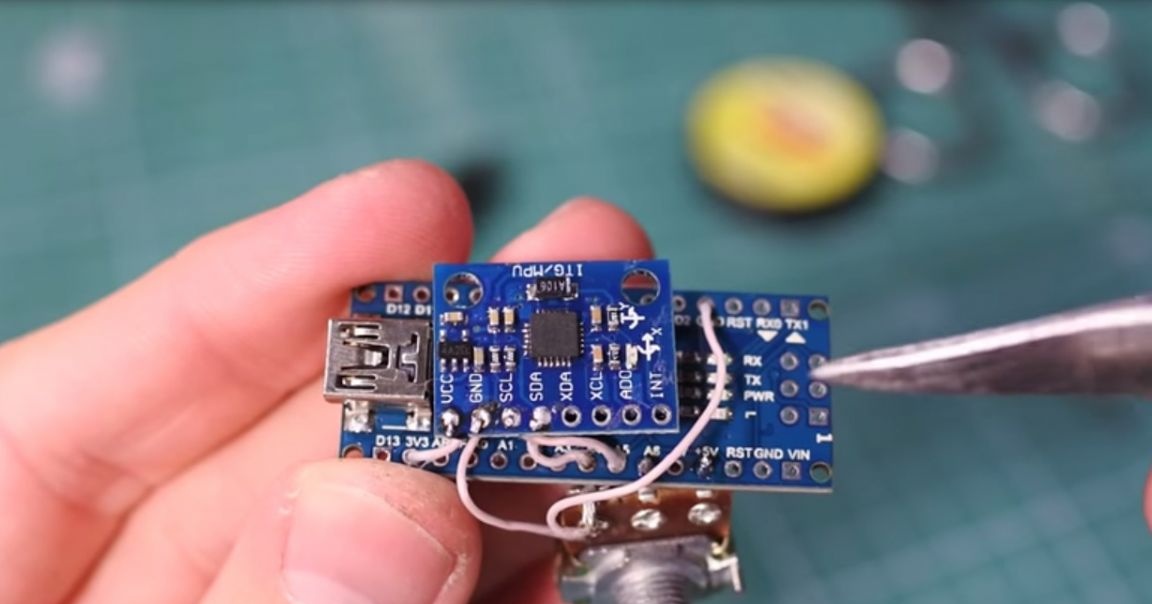
We take an arduino and a potentiometer. The central leg of the LED should go to the analog pin, and the extreme ones to the 5 Volt output and ground. Solder and bend the third leg.

Now solder the wires to the module with the accelerometer and solder them to the arduino according to the diagram. The wire from the GND port goes to the bent leg of the potentiometer, and then directly from the leg goes to GND on the arduino. It is advisable to fix the module directly to arduino (you can use hot glue).
Next, we attach the arduino to double-sided tape directly to the battery. The step-up module can be lifted above the battery using conventional screws and additionally reinforced with cable ties.
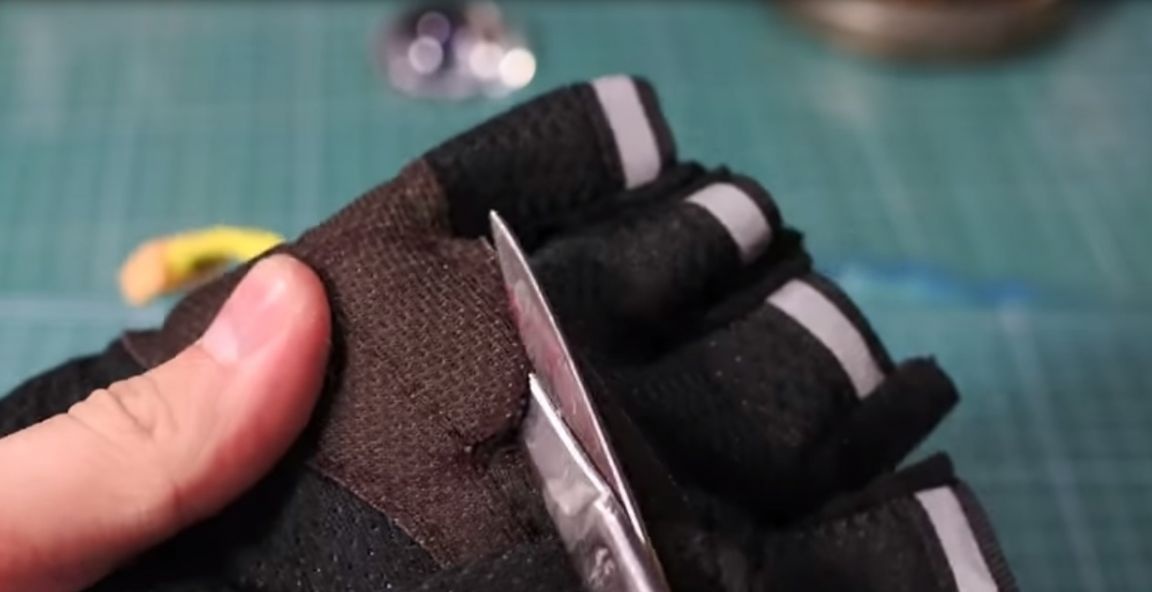
Now, to attach the entire structure to the glove, you need to make a supporting platform. From a plastic card we cut a small rectangle. It will be placed between the glove and the hand.
With another pair of cable ties, this entire structure is drawn directly through the glove. Thus, a smooth, rigid platform is obtained, which is tightly pressed to the hand.
Everything keeps just fine!
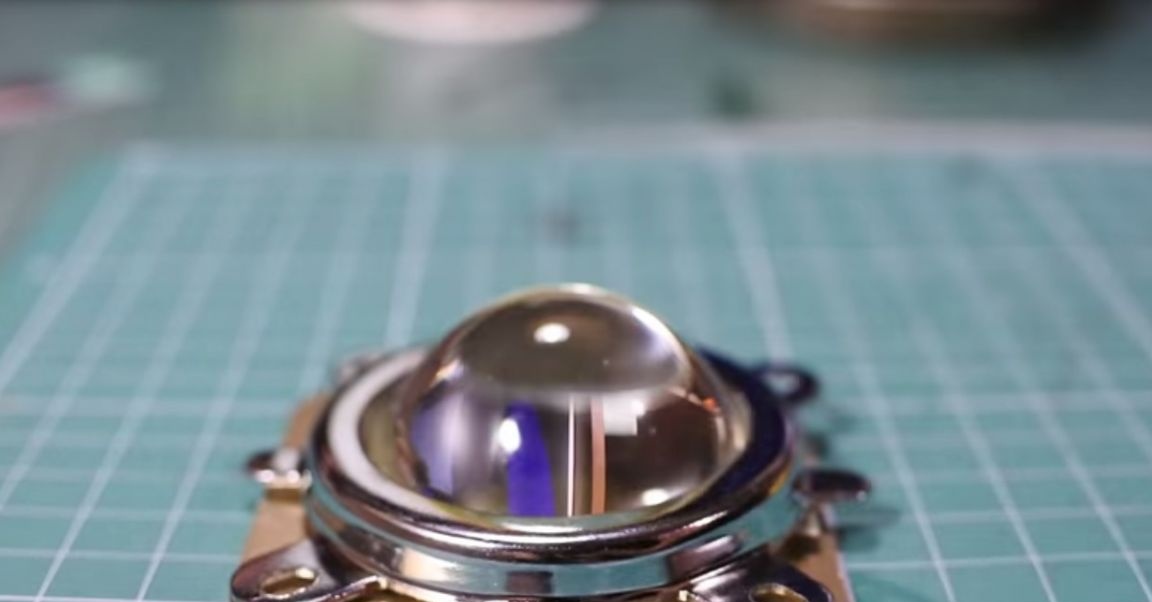
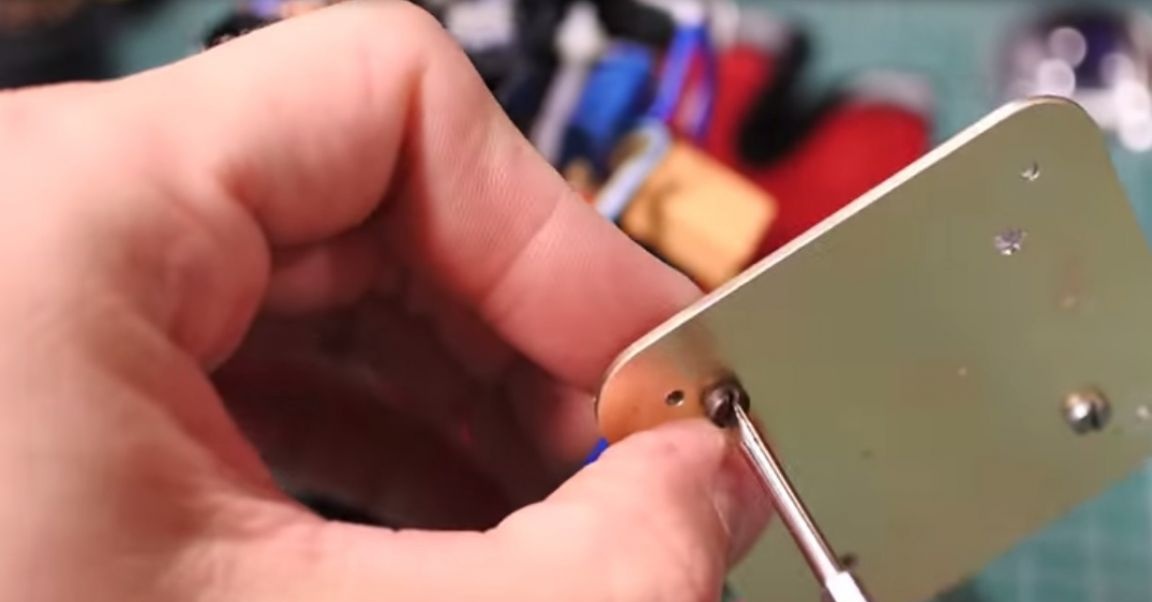
An LED will be fixed on the copper plate, the lens will lie on top of it and all this will be pulled by the lens mount.
Wires from the mosfet transistor we start in the glove. The positive contact of the LED is the one that is closer to the "+" icon vertically. We solder.
We make holes for mounting the LED module on the screws and nuts. Lubricate the plate with "heat-conducting mayonnaise" and sculpt the LED on top.
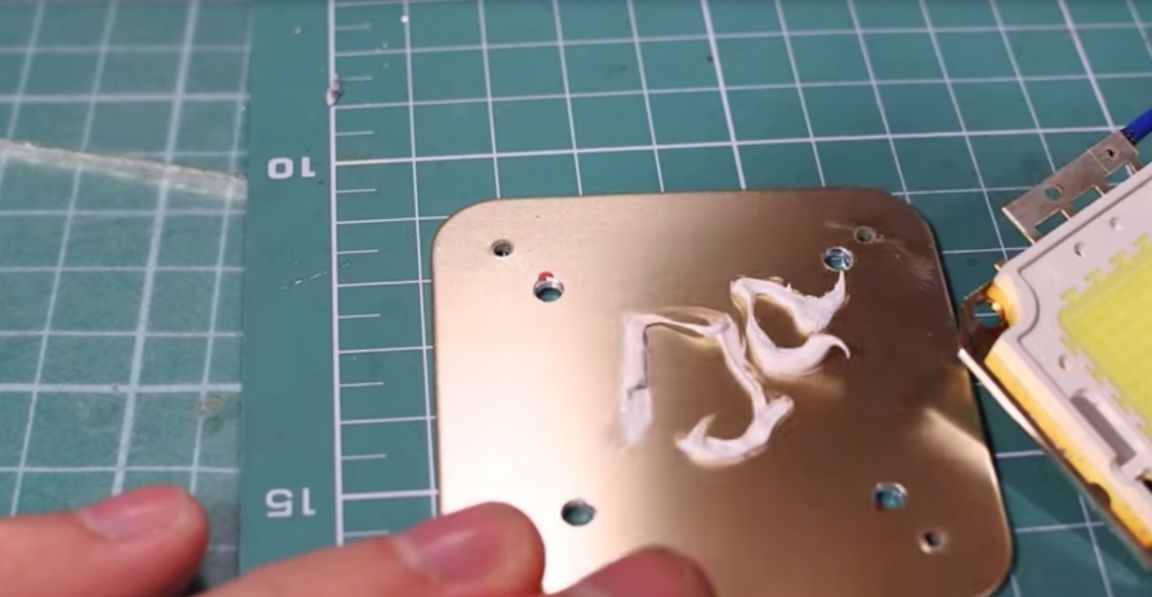
We fix on screws and nuts.
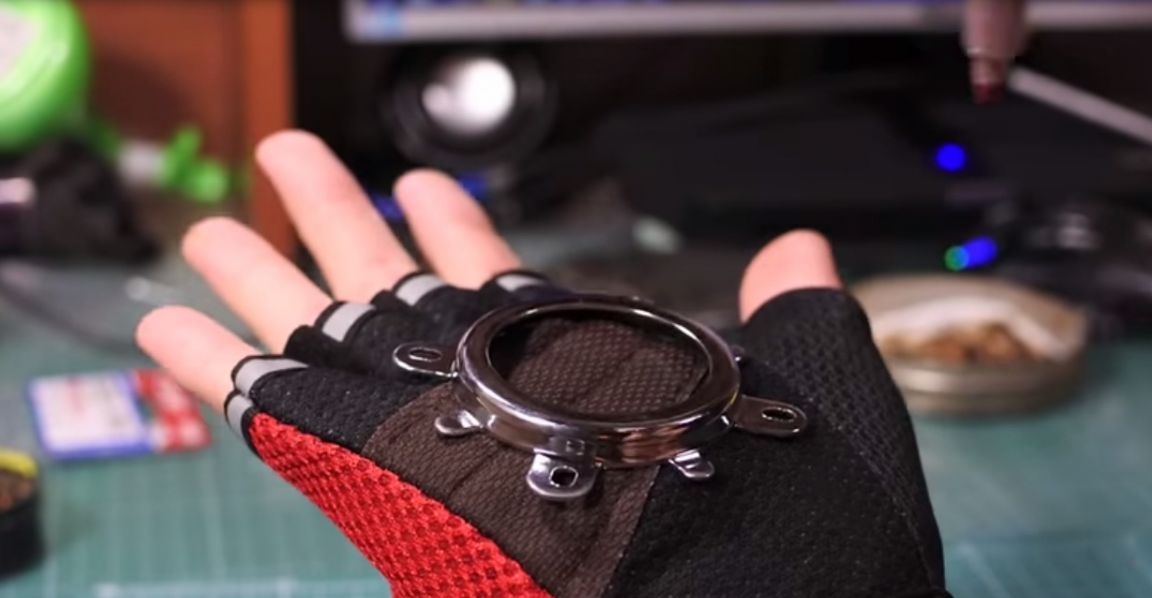
The entire light part will be fixed on the front of the glove (and only the LED with the lens will stick out from the outside). We position the plate so that the hand is comfortable. And mark the hole for the lens in the inner circle of the mount. Cut, assemble.

The glove is almost ready, it remains only to download the firmware. You can download it here:
Many will say that it is very dangerous to press a 100 Watt LED to a hand, but no. The LED operates in a pulsed light mode, it does not light at full brightness and heats up very weakly, respectively.
Here's a cool glove. With her, you can shock your friends by stopping their fans.
Thanks for attention!
Original video by the author: