
In general, the homemade product is very interesting, so we will not pull it. Let's go!
And so, for the "gun" firing paper planes, we need:
-corrugated cardboard
- double corrugated cardboard
-paper
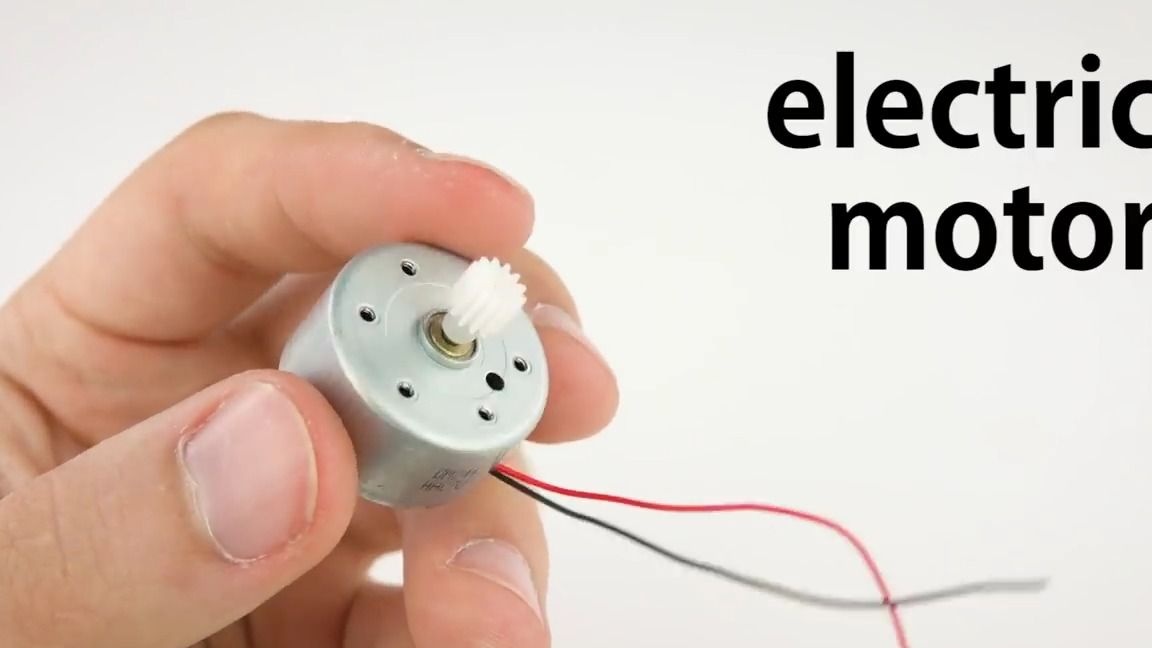
-Two electric motors (you can buy)
wire
-switch without latch
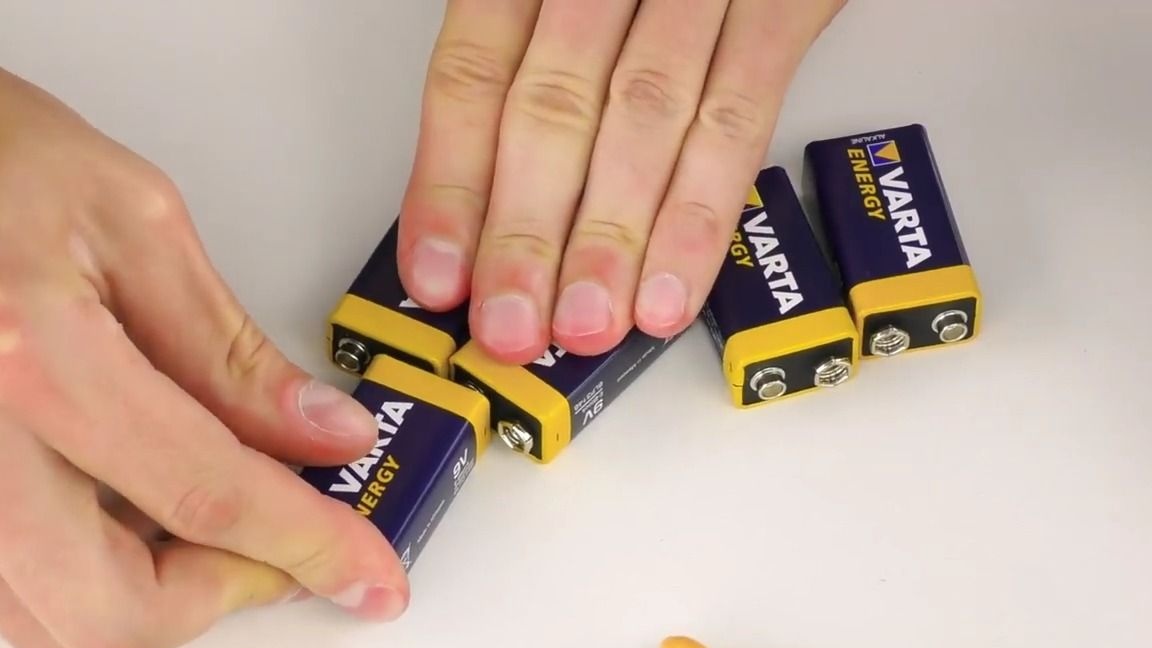
-5 batteries at 9 volts
connector for crown
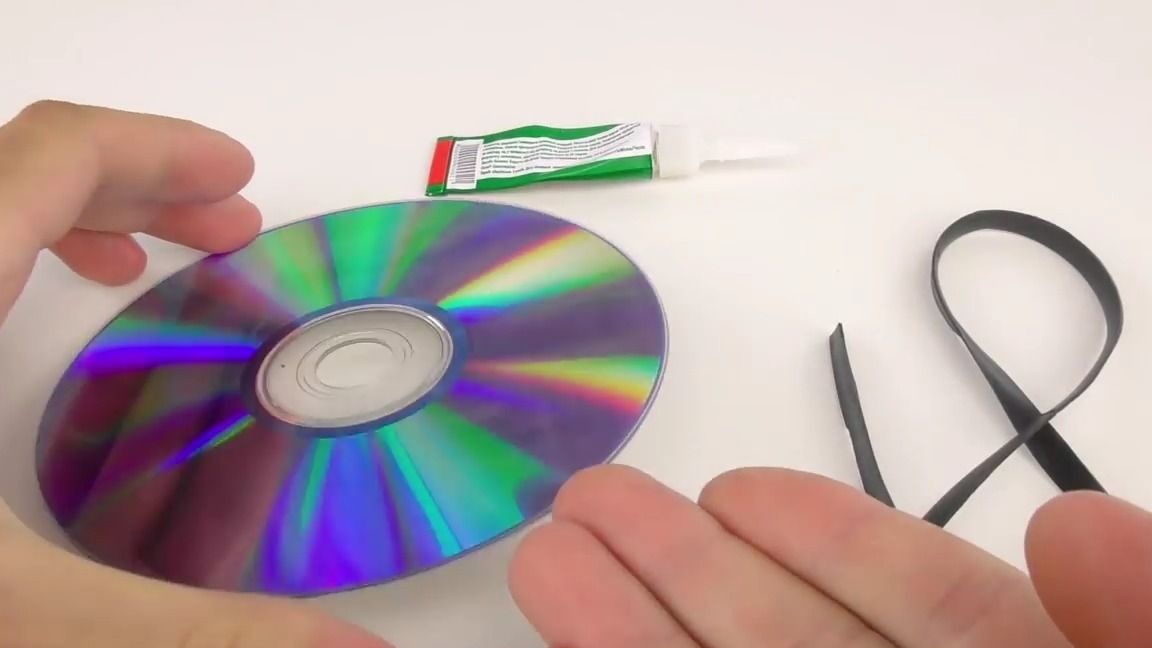
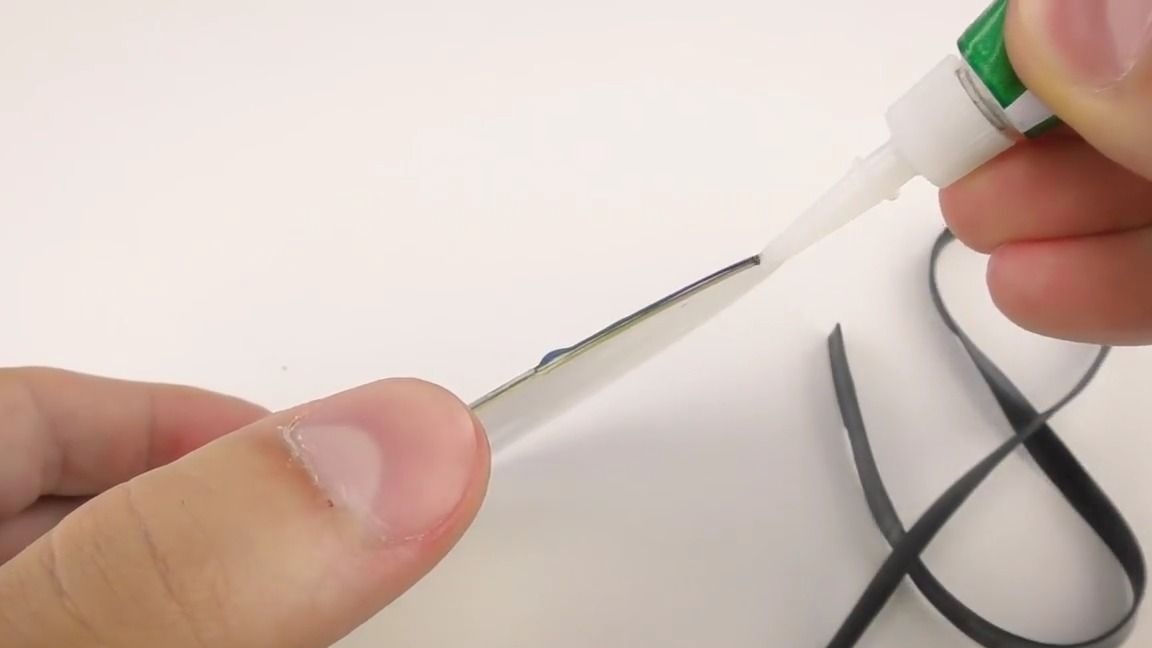
- two DVD discs
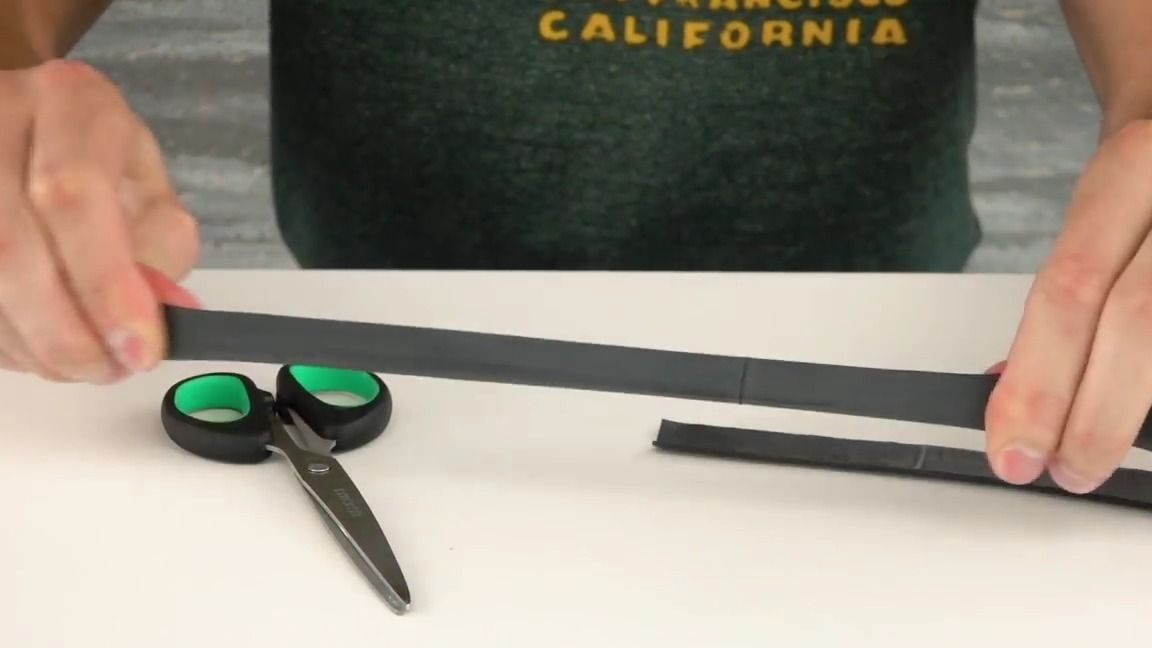
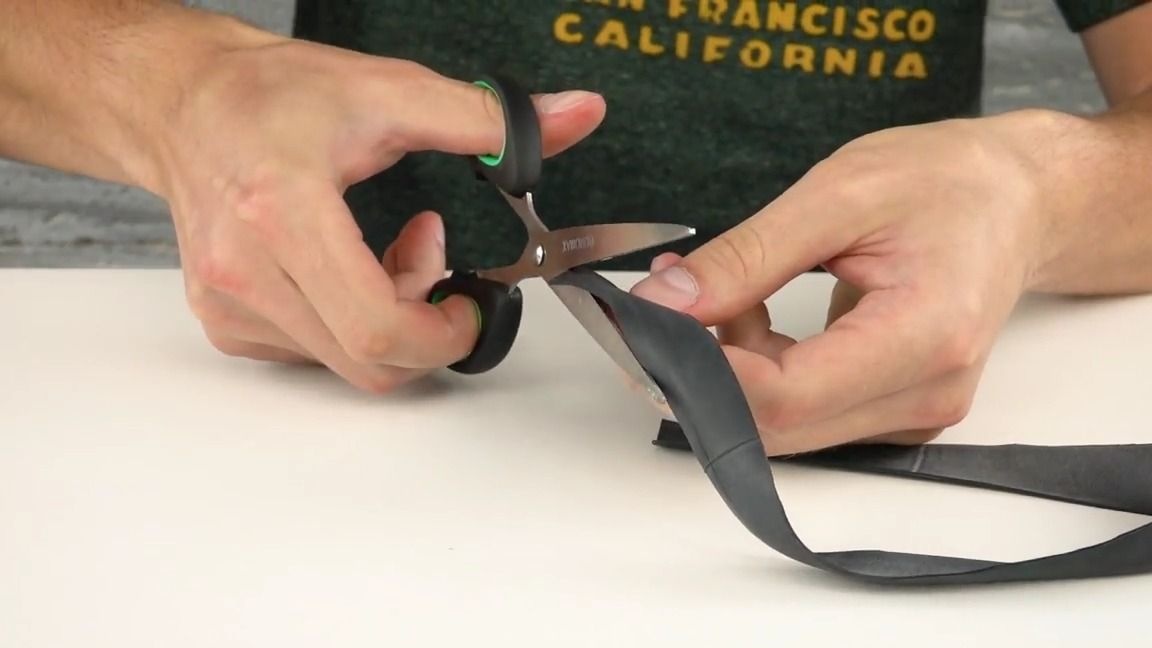
-bicycle camera
Of the tools we will also need:
soldering iron
-scissors
-stationery knife
line
thermal glue
-Super glue
nippers
-pencil
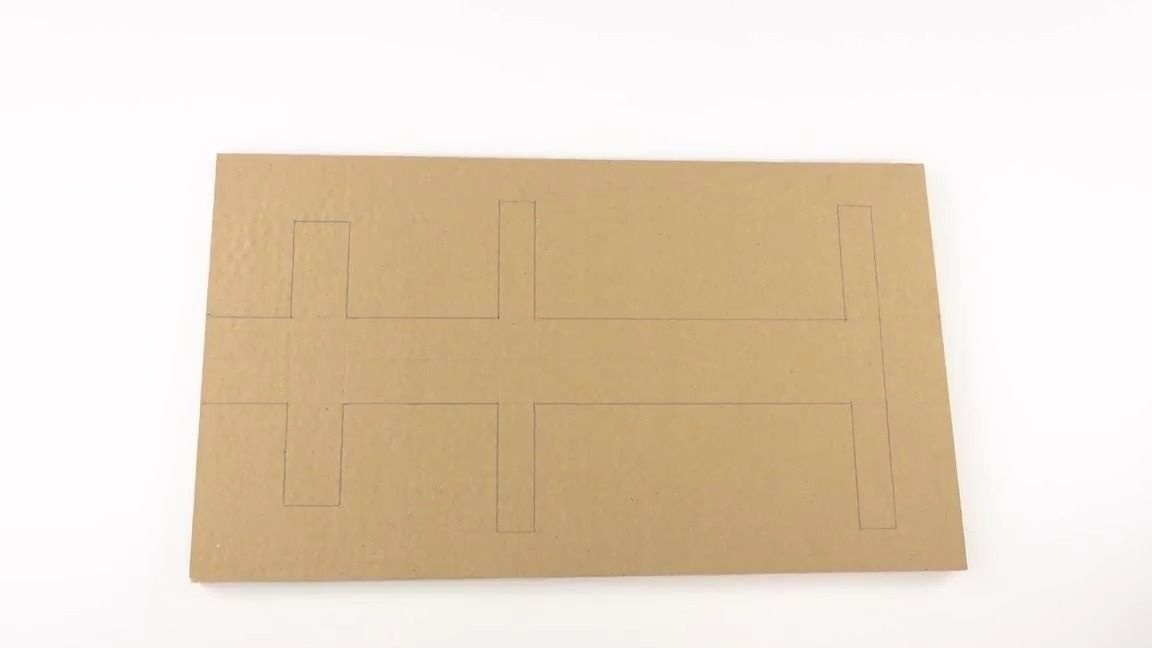
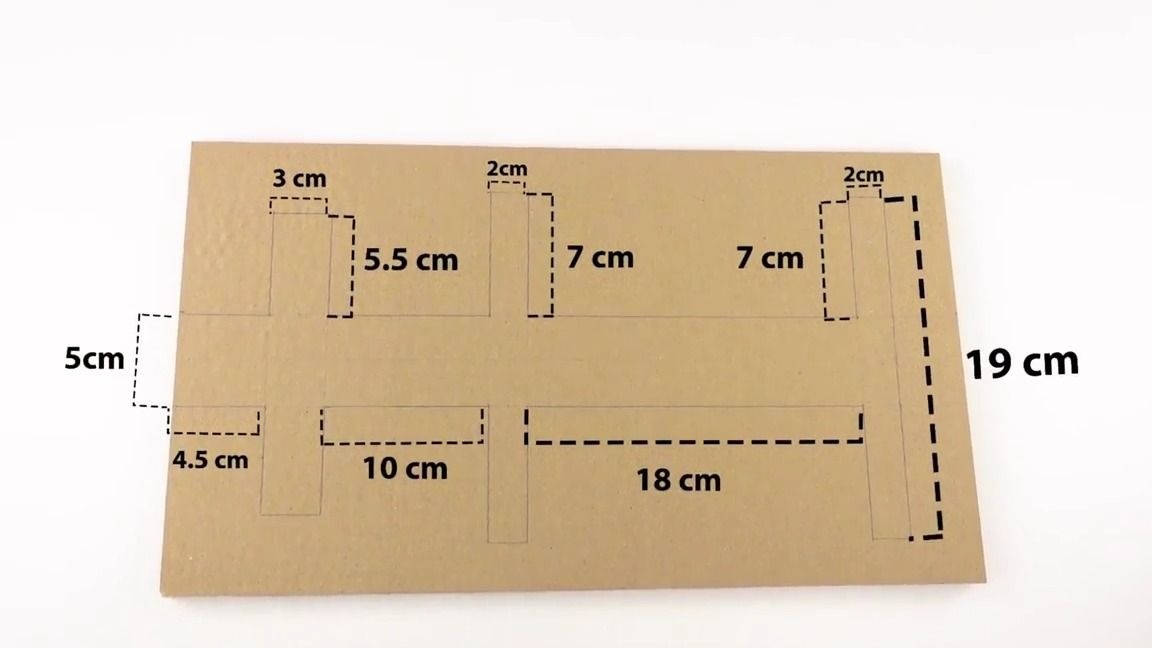
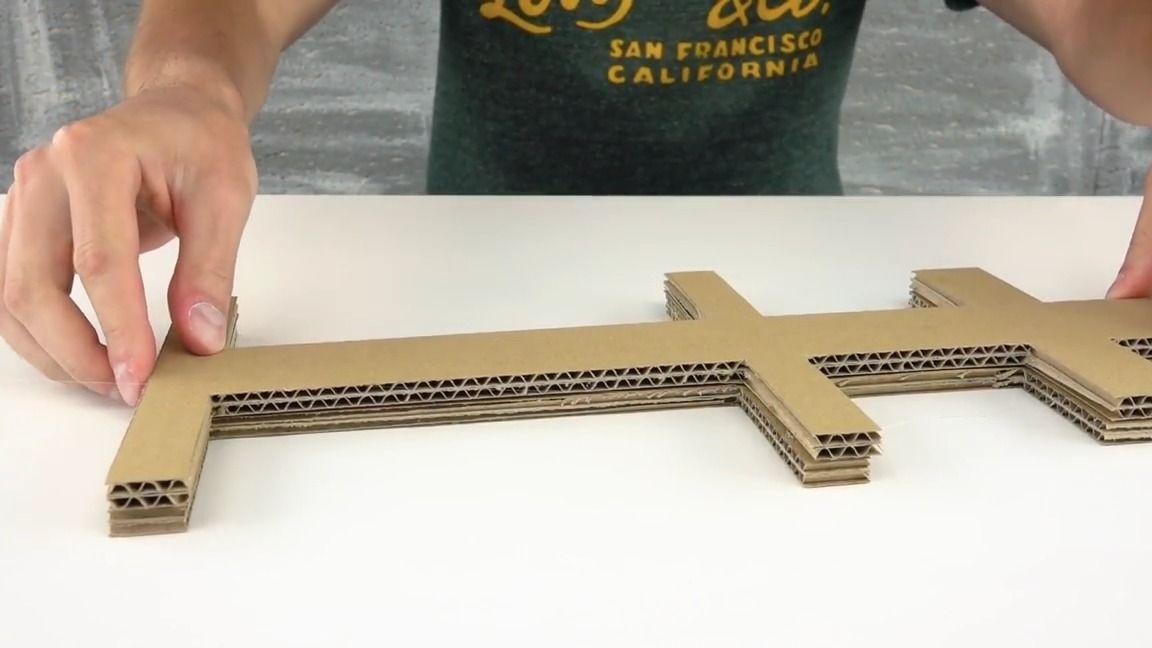
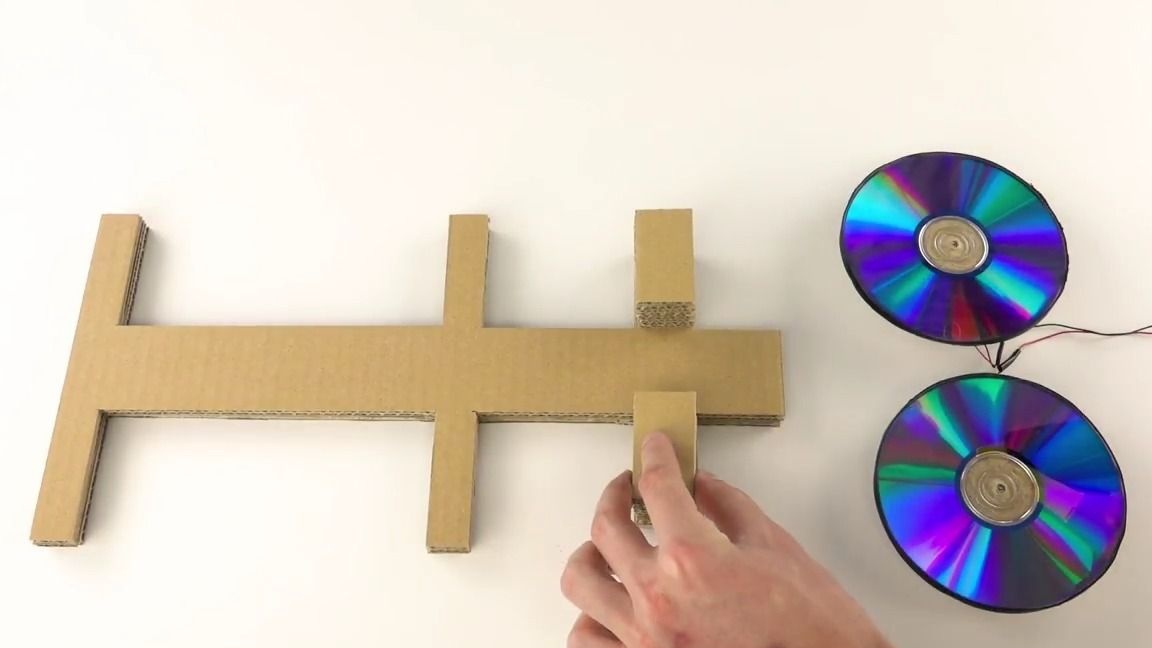
And so, first of all, it is necessary to draw the basis of the entire structure on a sheet of double corrugated cardboard, it is necessary to draw equally and accurately, in general, we do as shown in the photo. All sizes are also shown in the photo below:
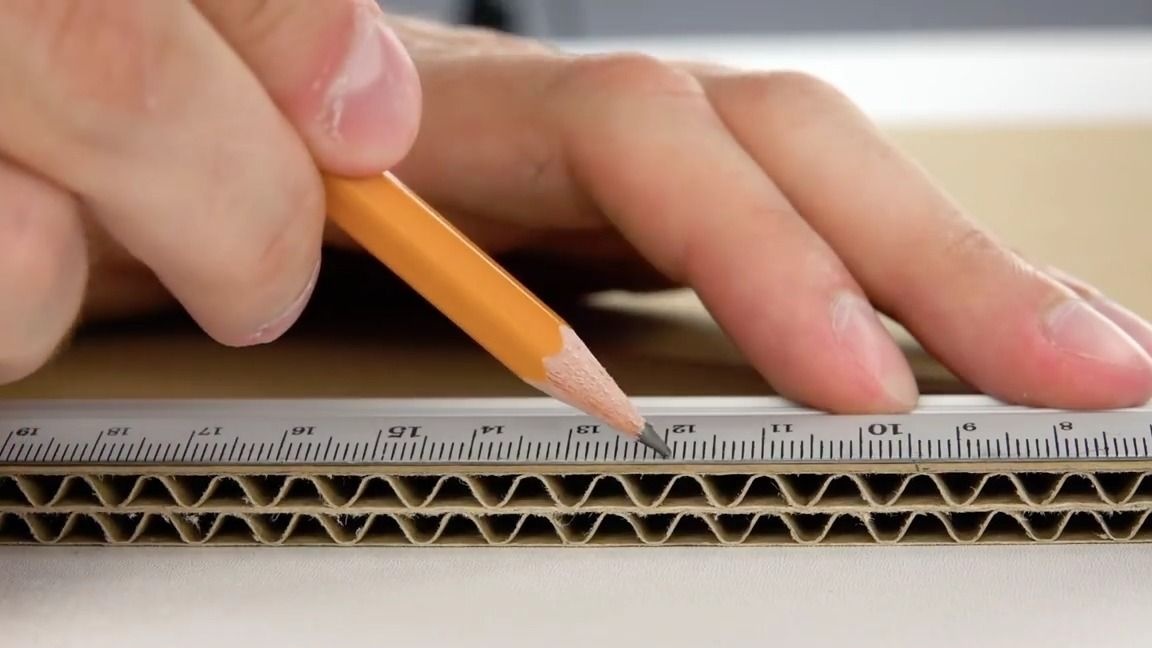
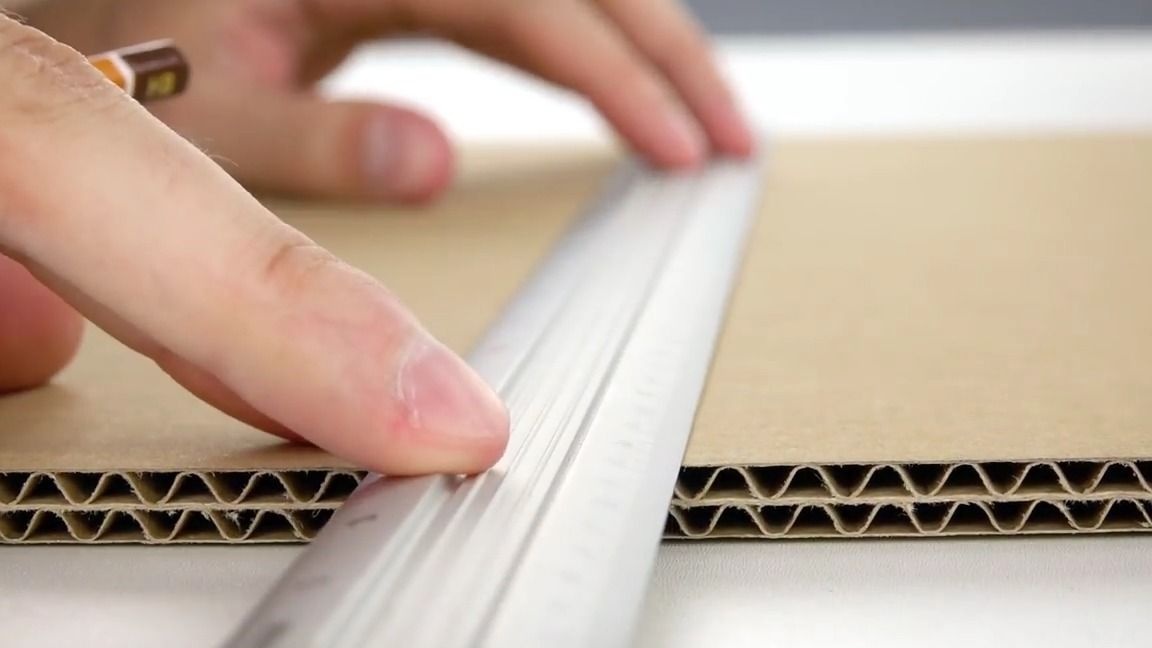
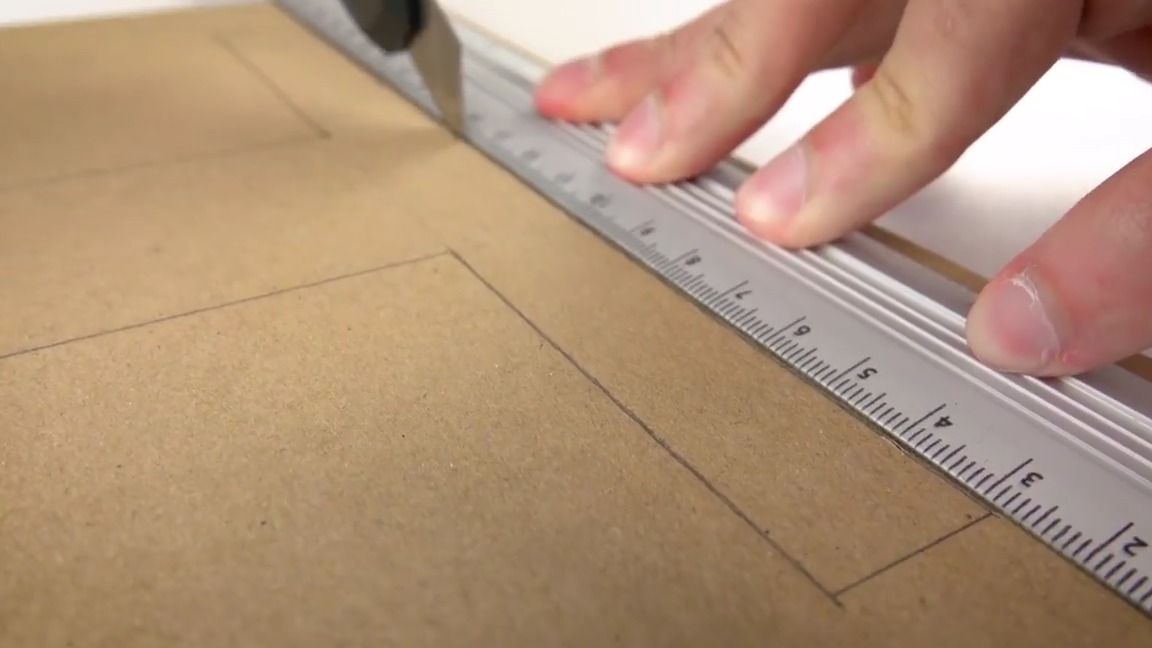
Cut using a clerical knife on a ruler:

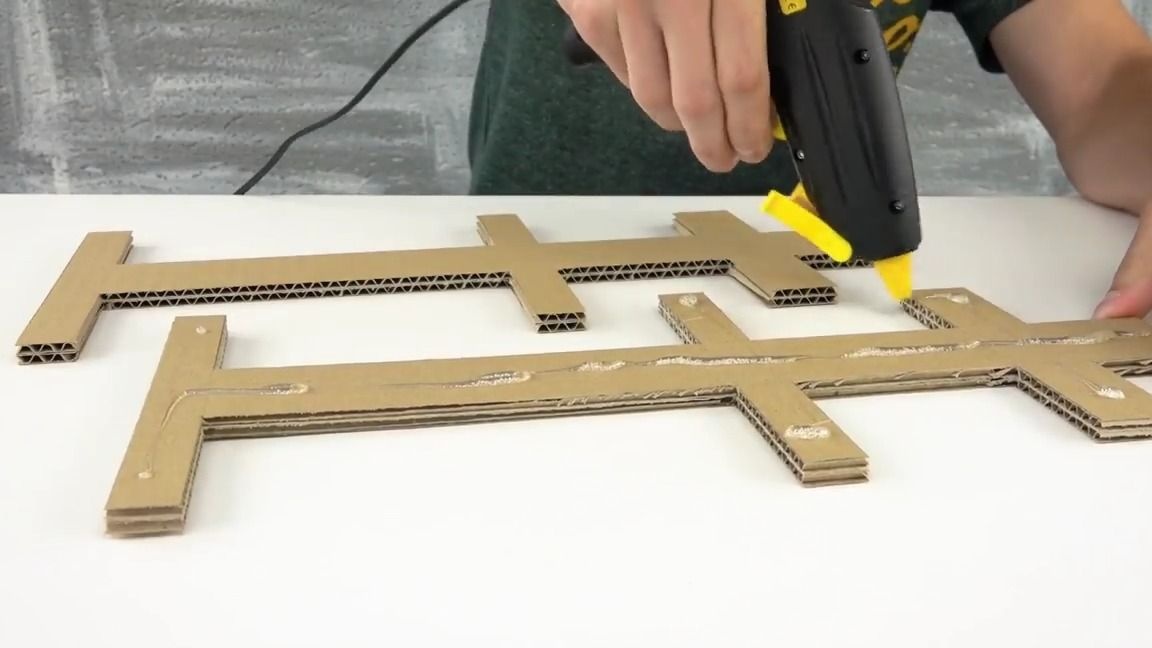
In total, 2 identical designs must be made:
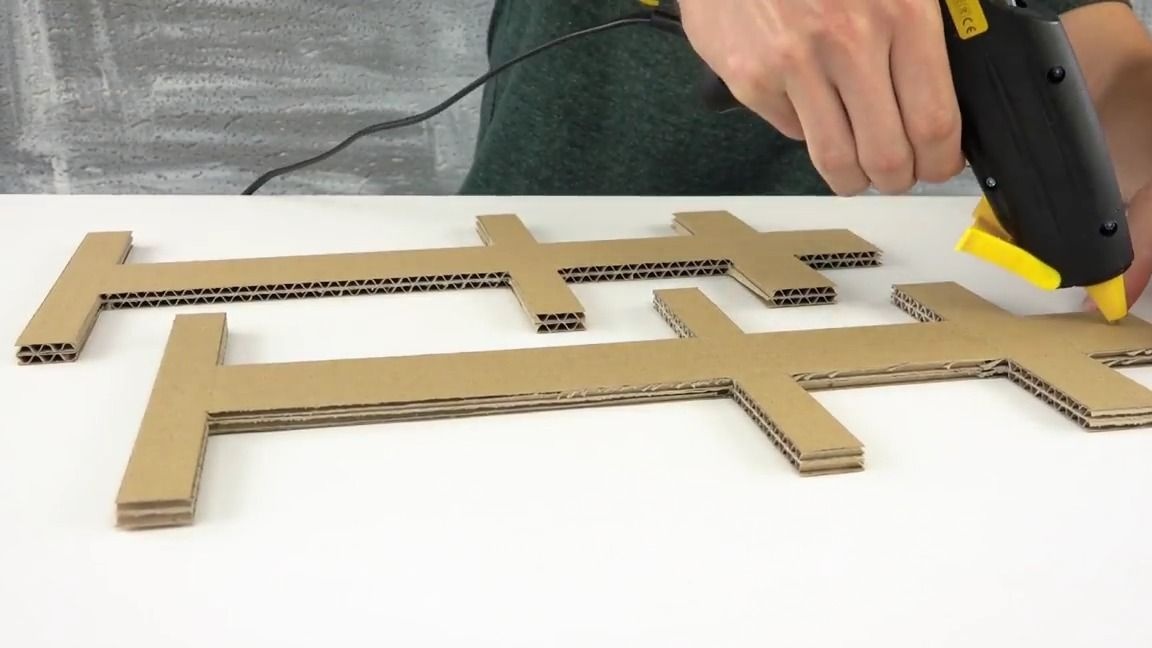
Then we apply thermo glue to one structure, and glue both halves:
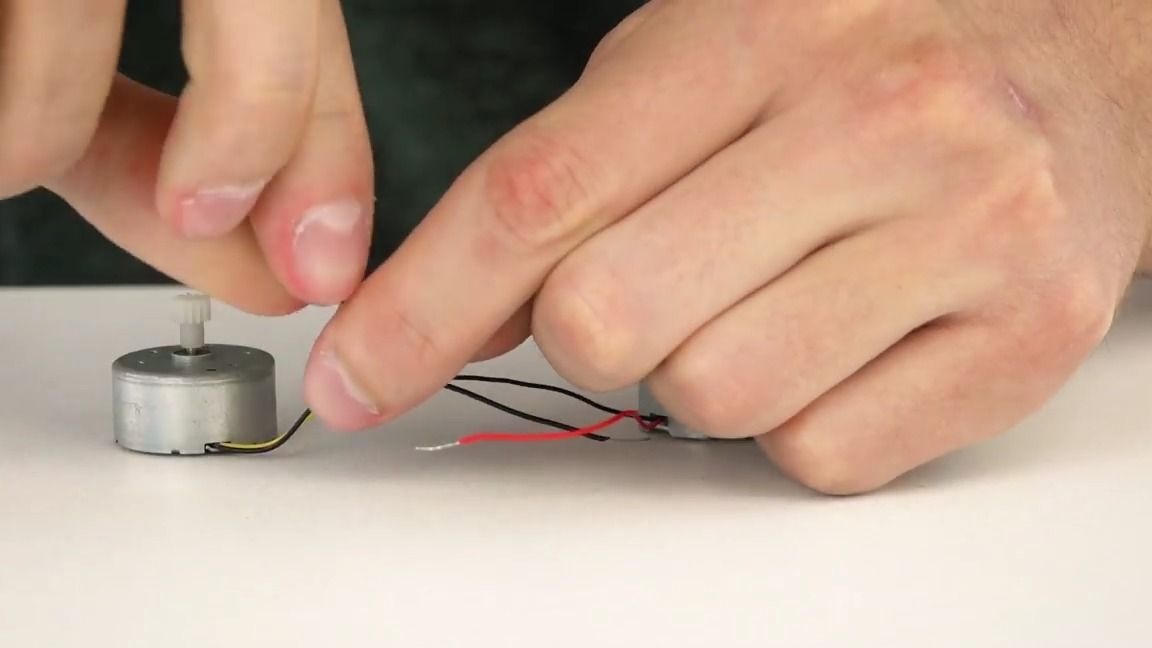
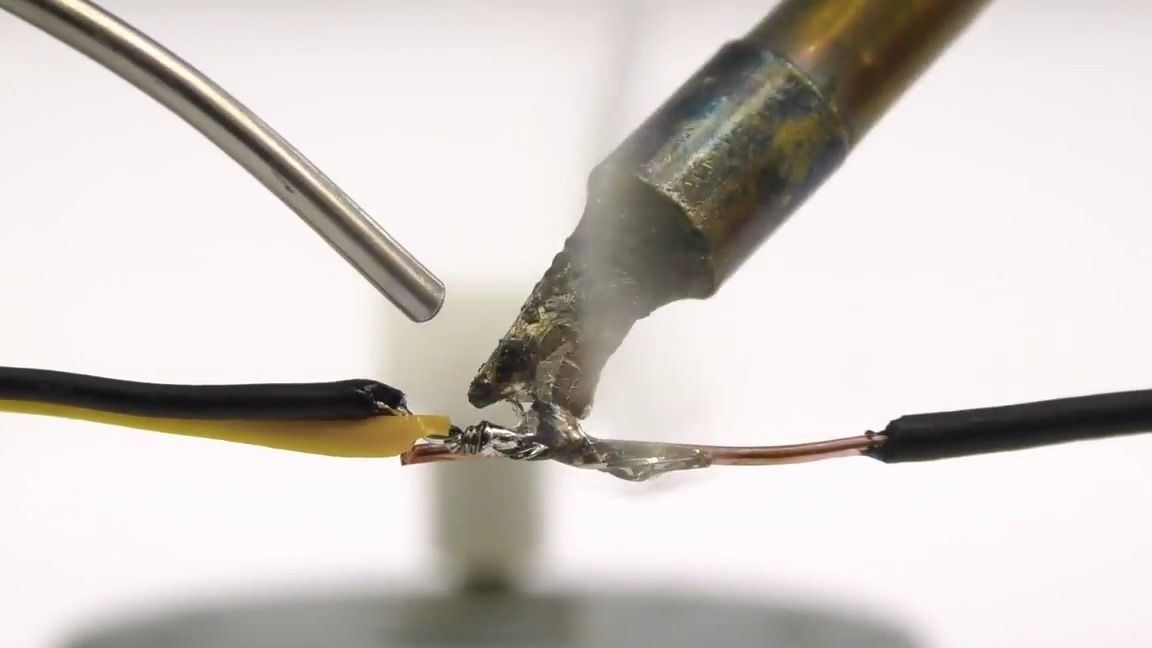
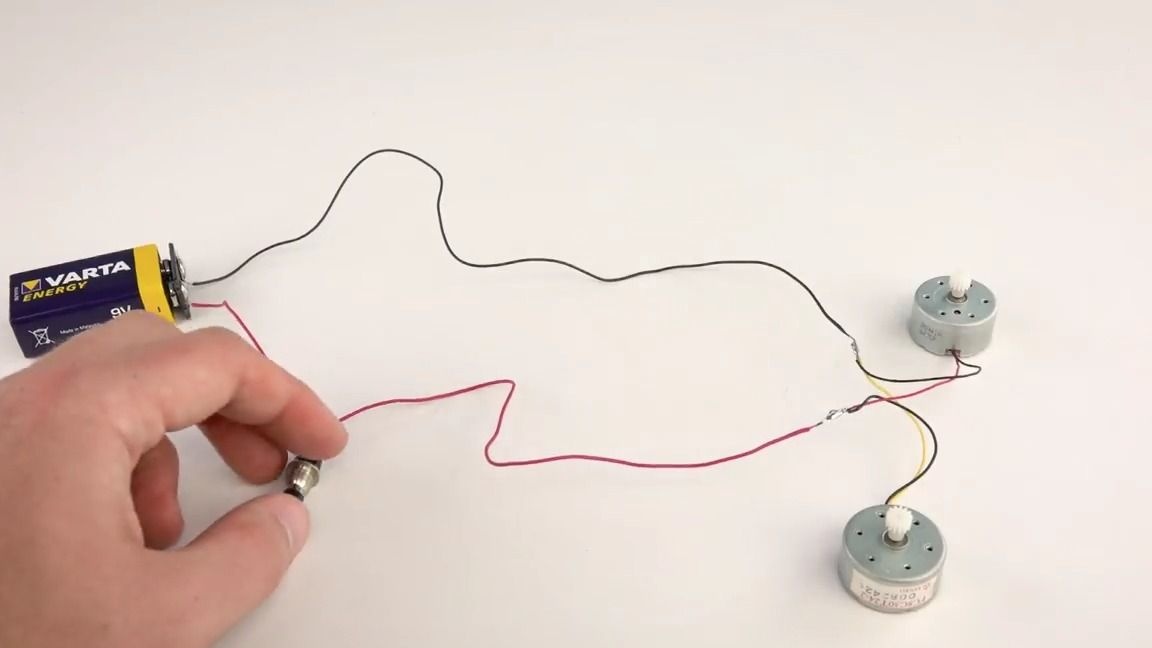
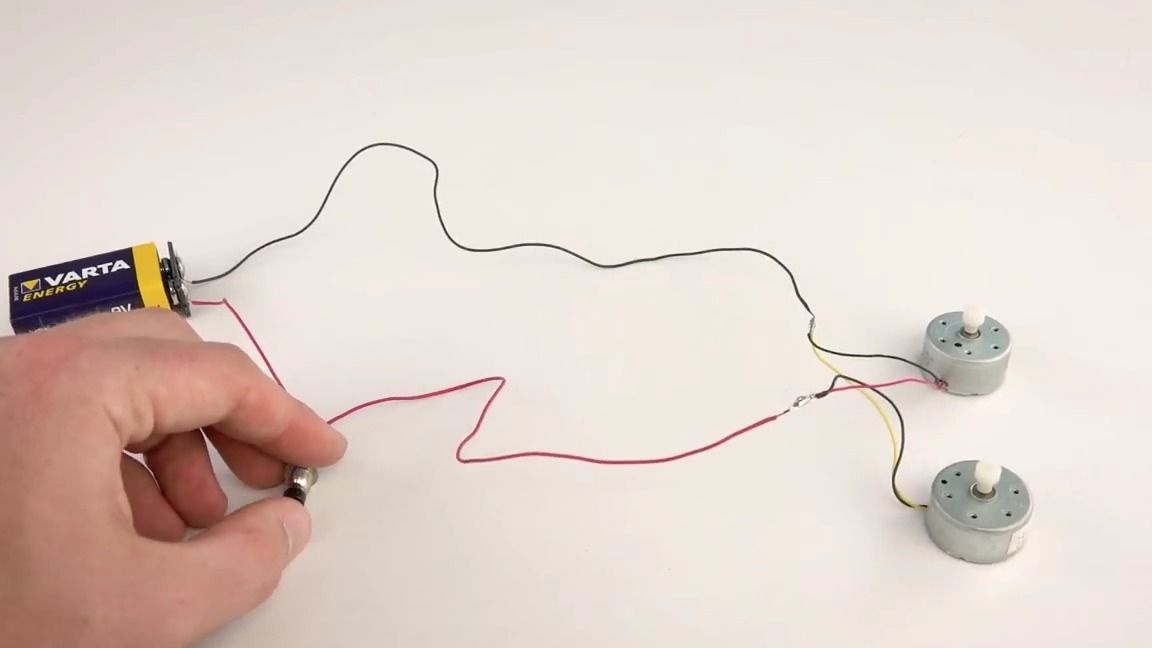
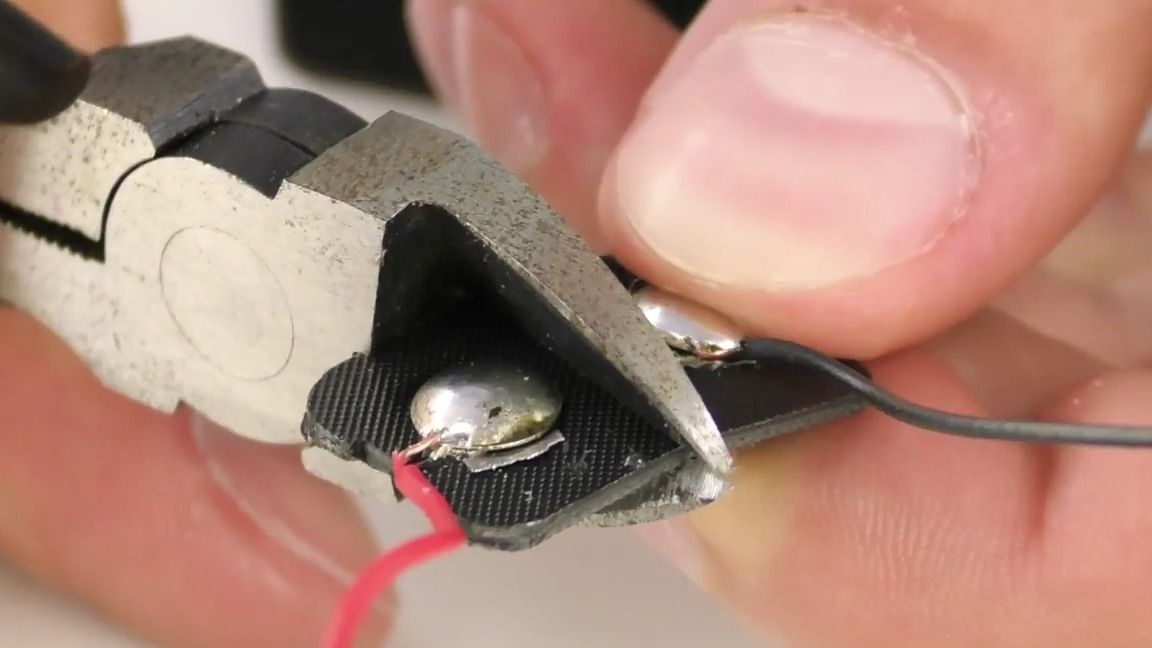
Now we need two electric motors, wires and a switch without a lock. We solder the motors in parallel to the connector for the crown and build in the circuit breaker. It is also necessary to insulate the exposed contacts with electrical tape or heat shrinkage, in order to avoid a short circuit. Then we test the circuit:
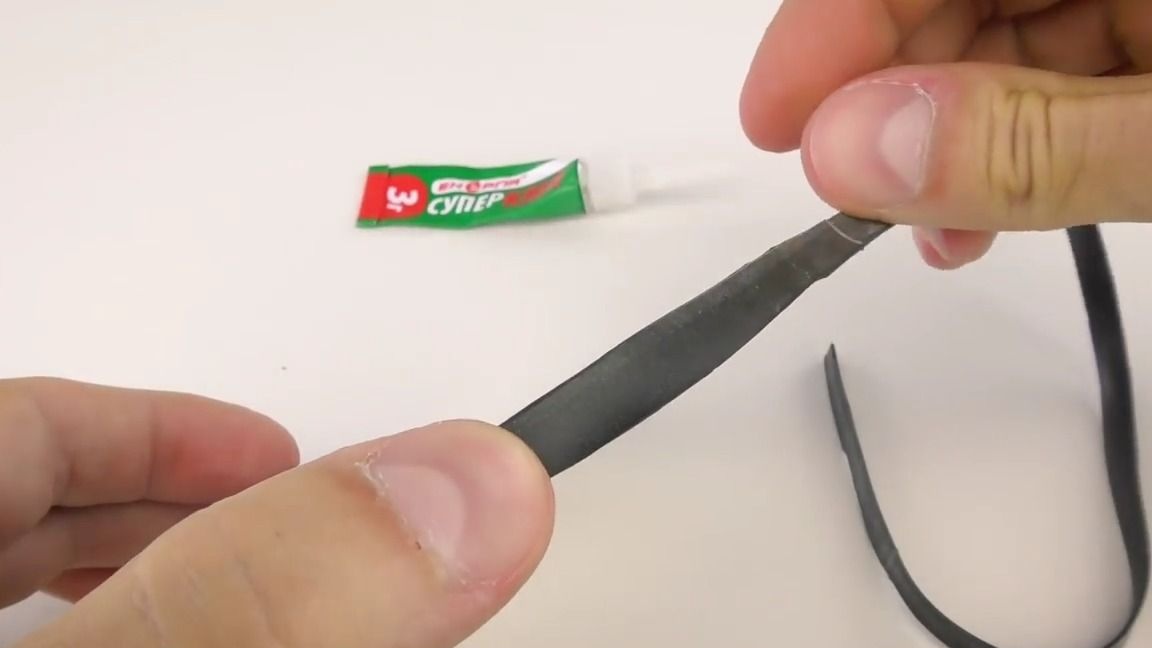
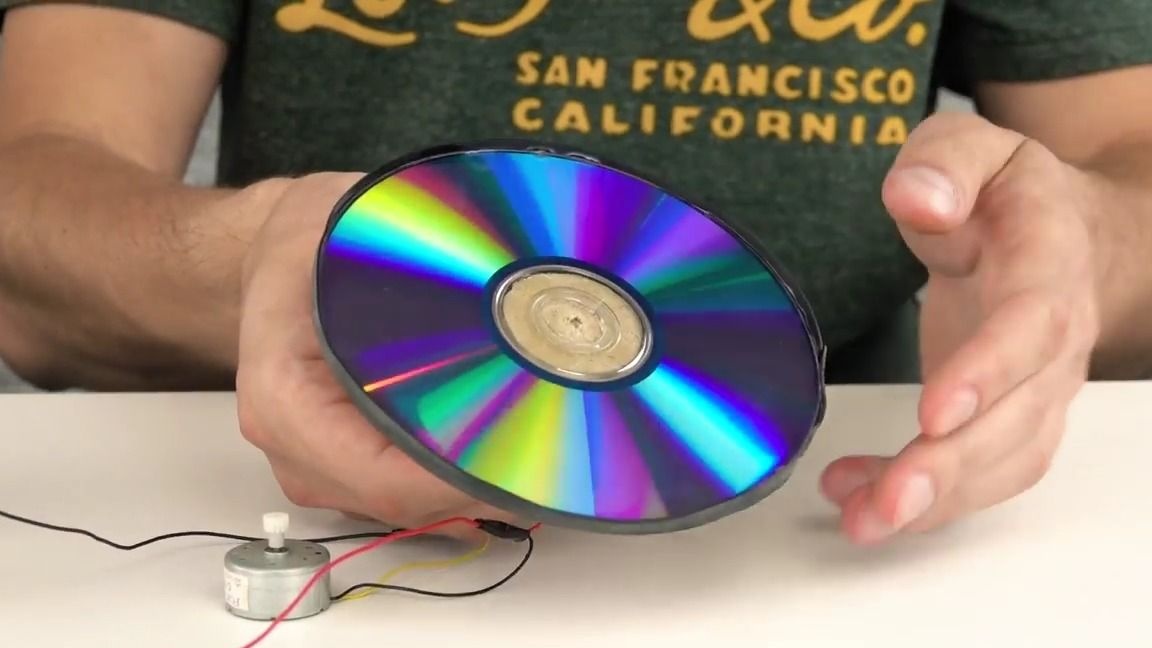
Take a bicycle camera and cut thin, long strips from it, 3-5 mm wide, then use super glue to glue them to the side of the disks, as shown in the photo:
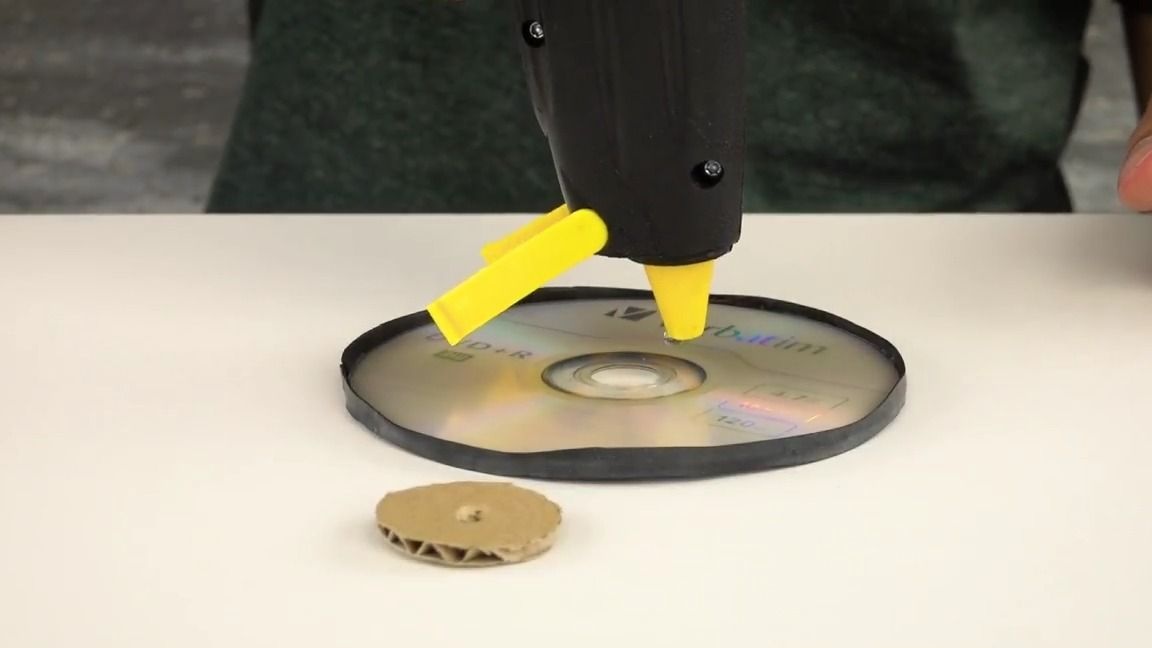
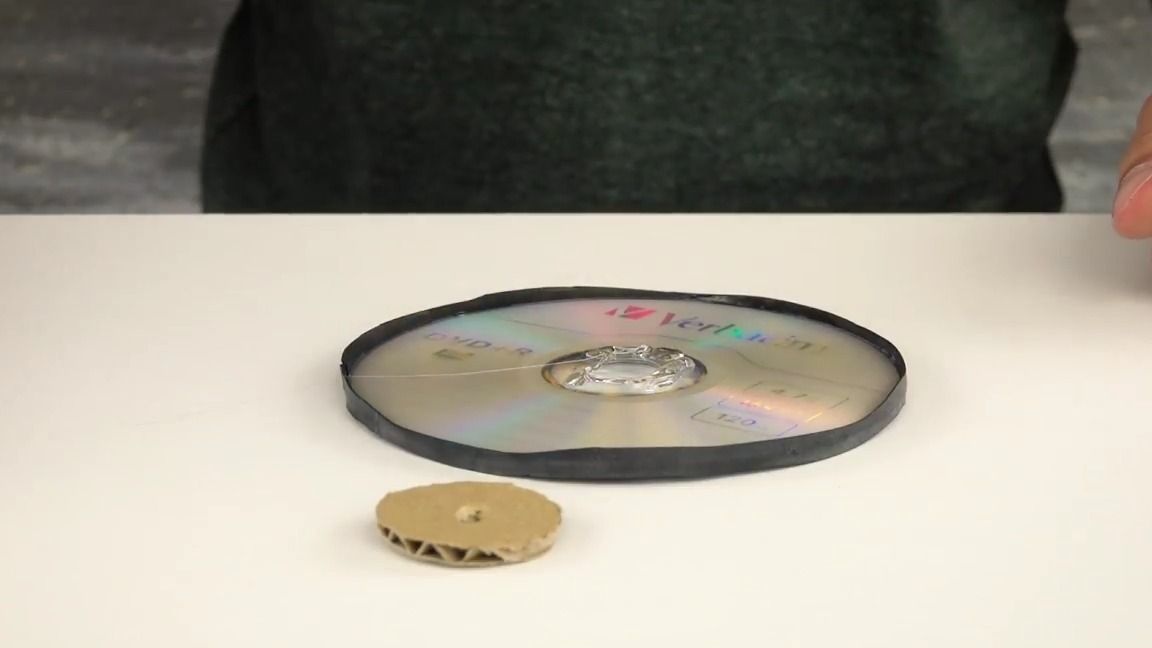
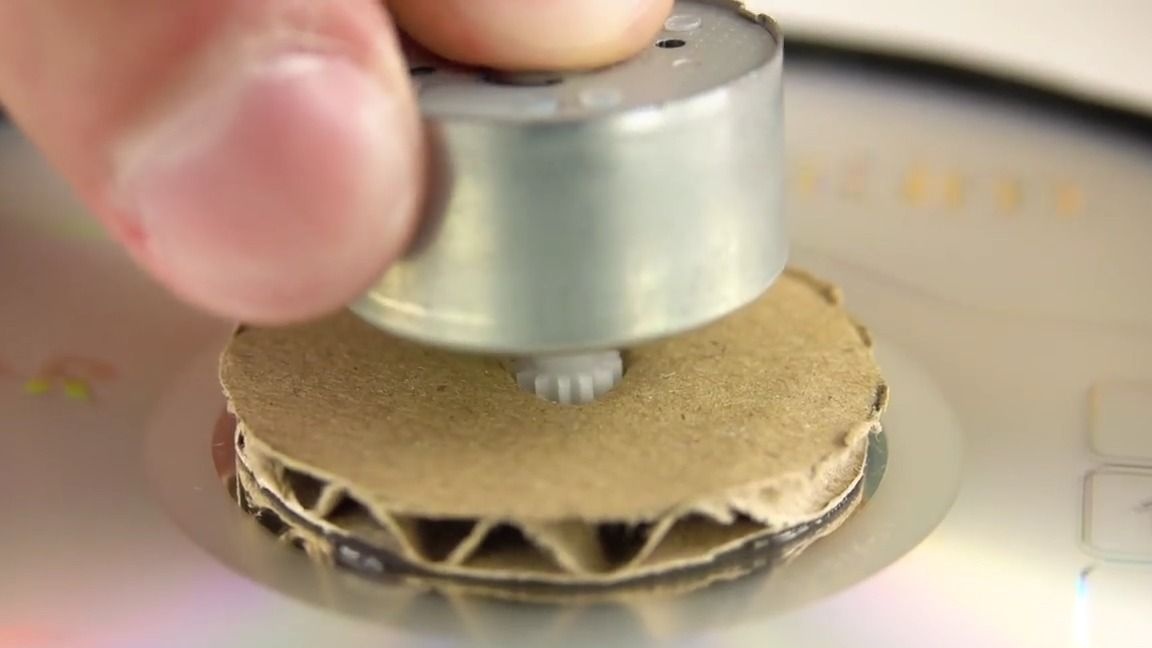
Now we cut out a small circle from the cardboard and make a hole in it exactly in the center, then glue it in the center of the DVD disc:
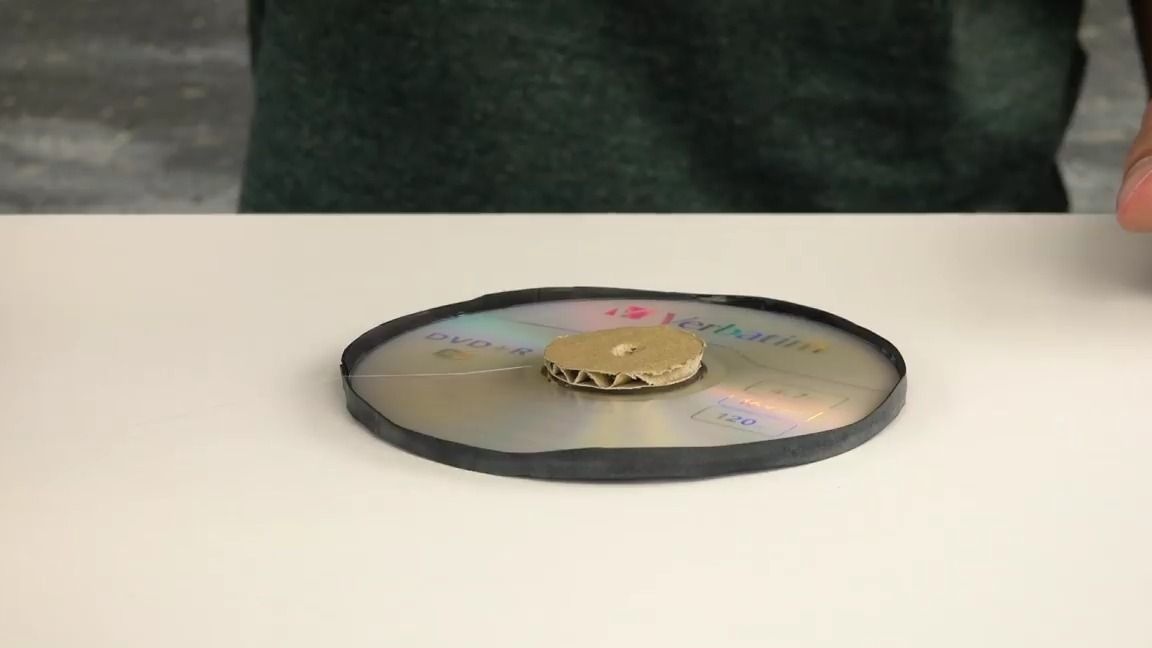
We insert the axis of the electric motor into the hole that we made earlier and preferably fix it with glue. In the same way, we insert the axis of the second motor into the second disk, after which you can test whether the motors are pulling the rotation of the disks:
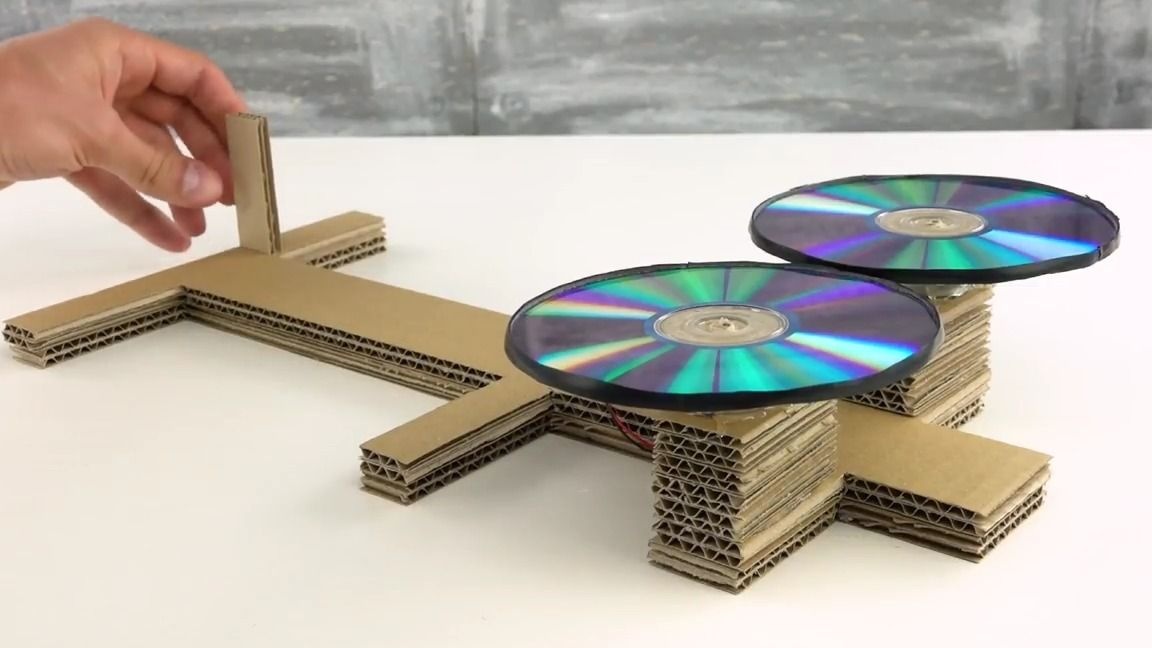
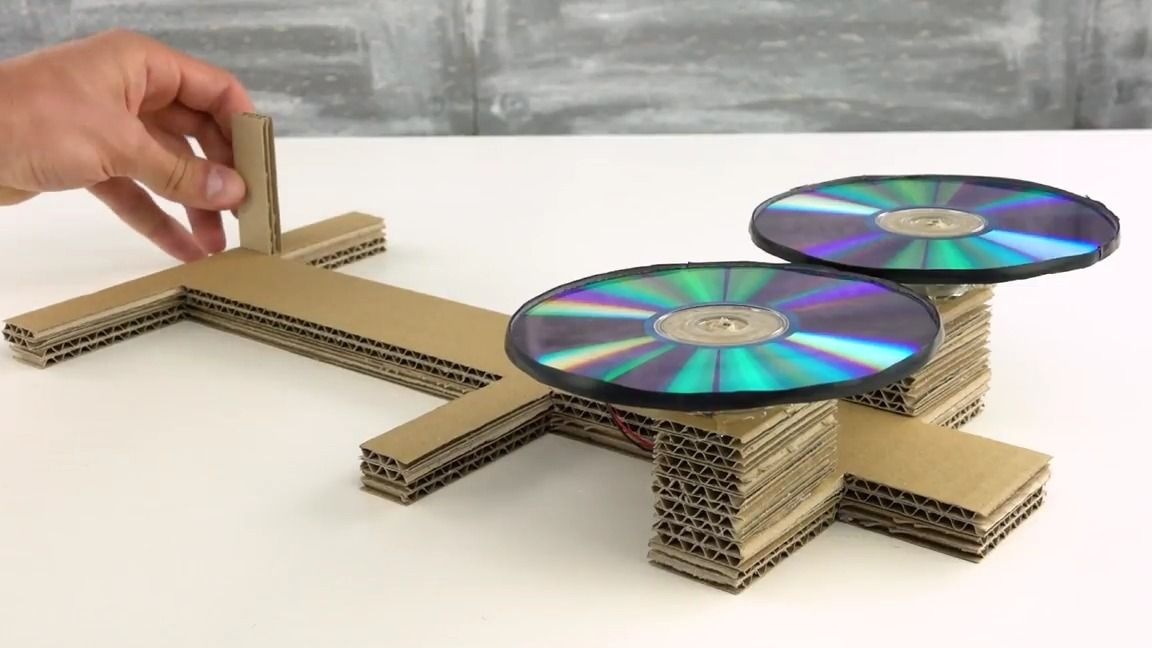
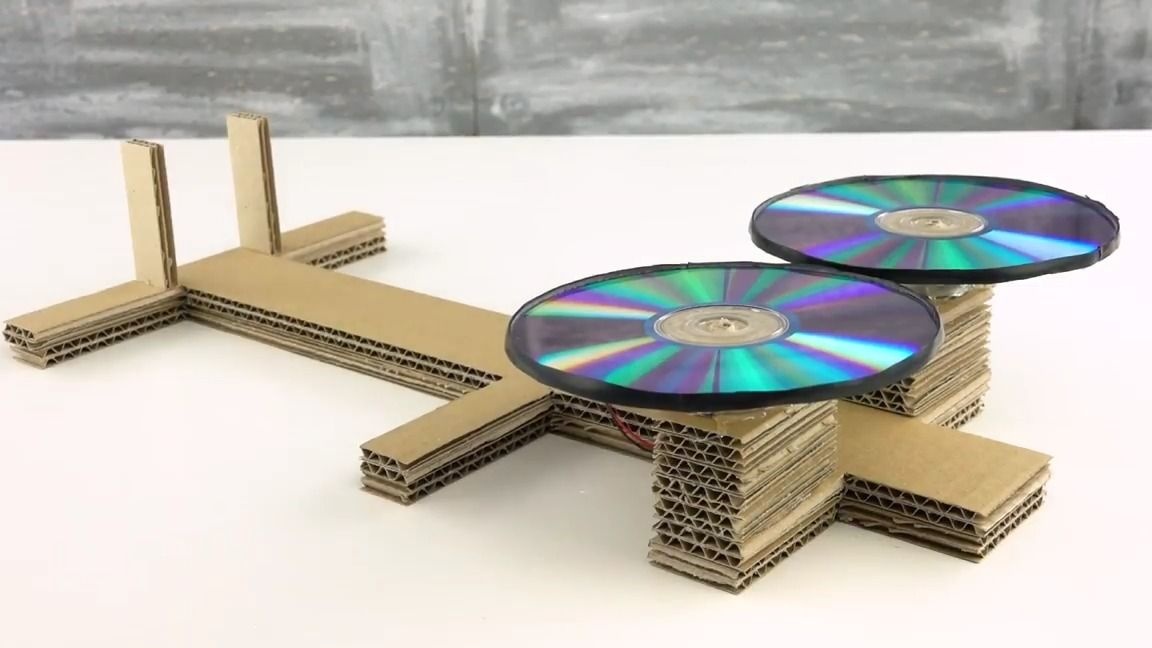
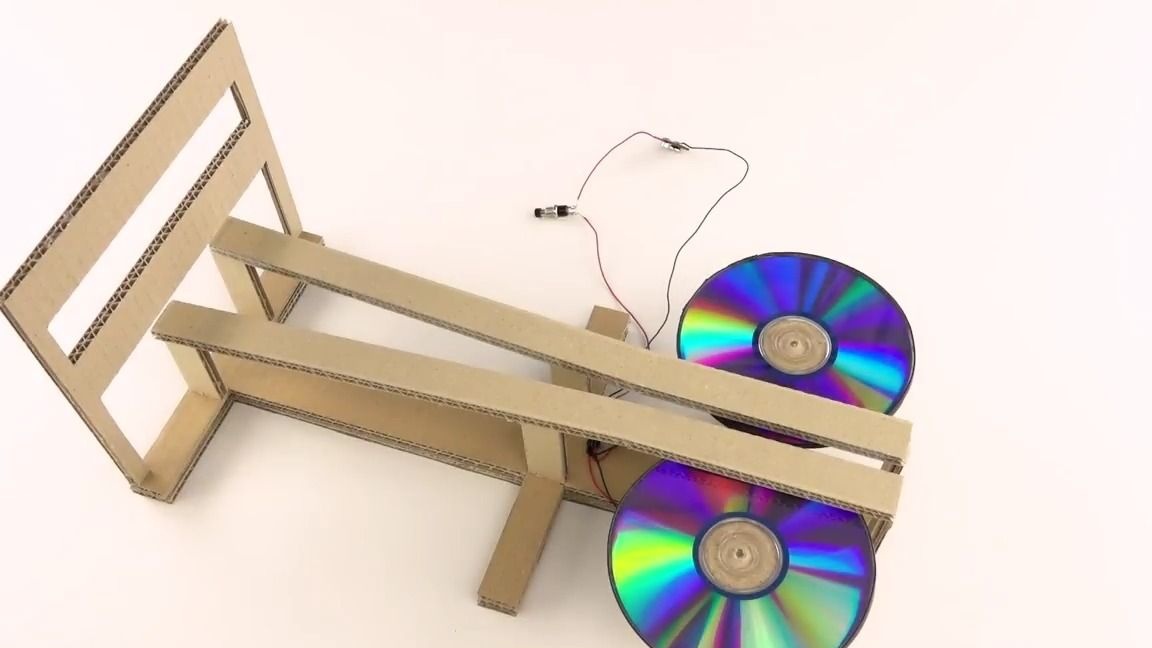
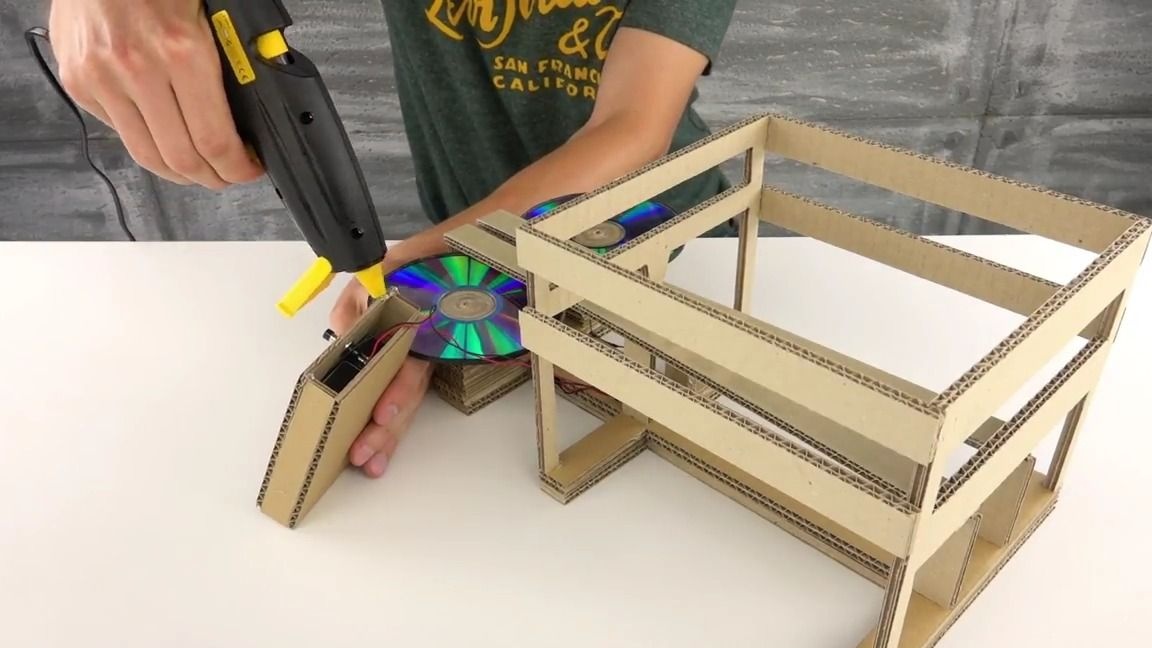
From corrugated cardboard we cut out several equal rectangles and glue them together so that we get two pieces of equal height, after which we glue them using thermal glue or glue glue as shown in the photo:
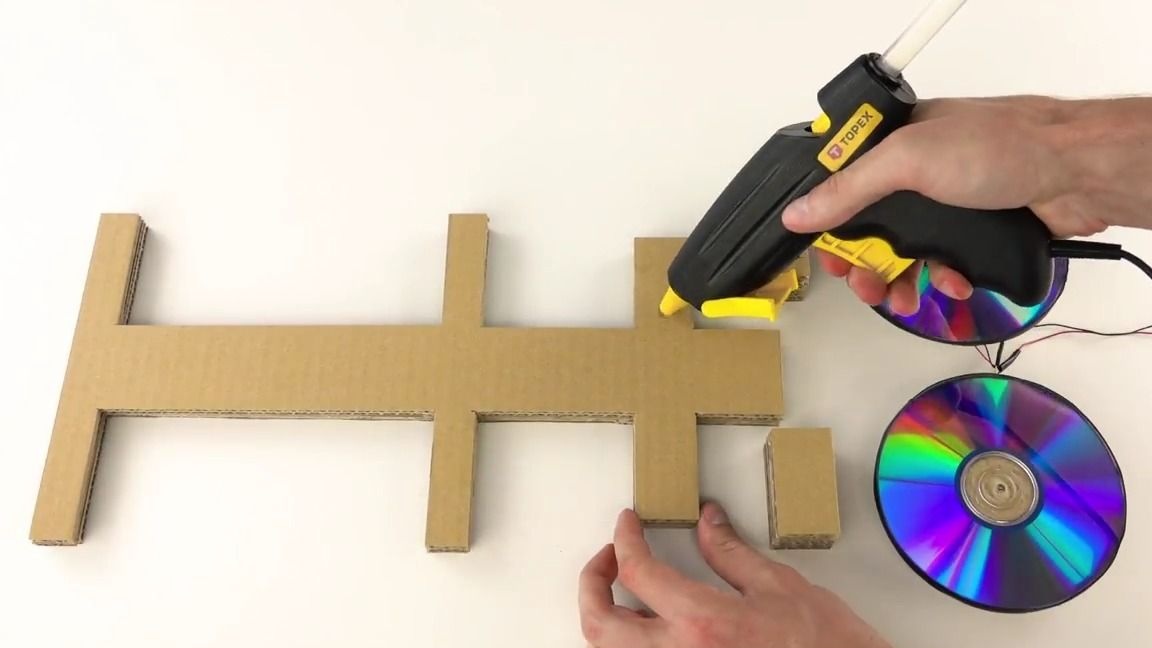
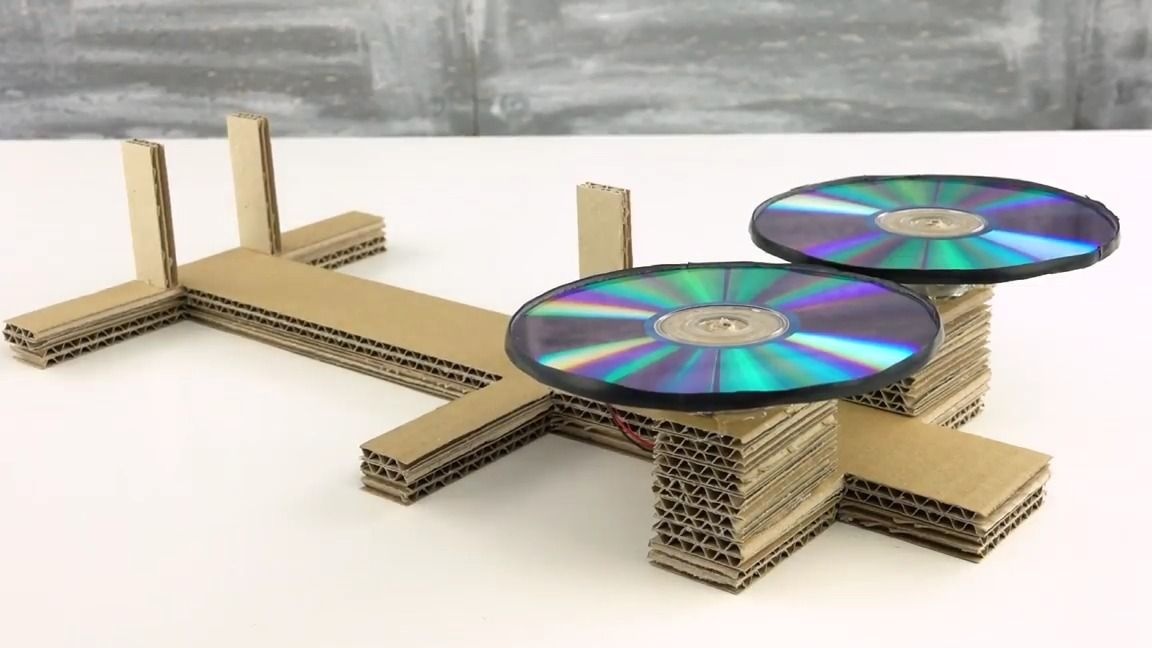
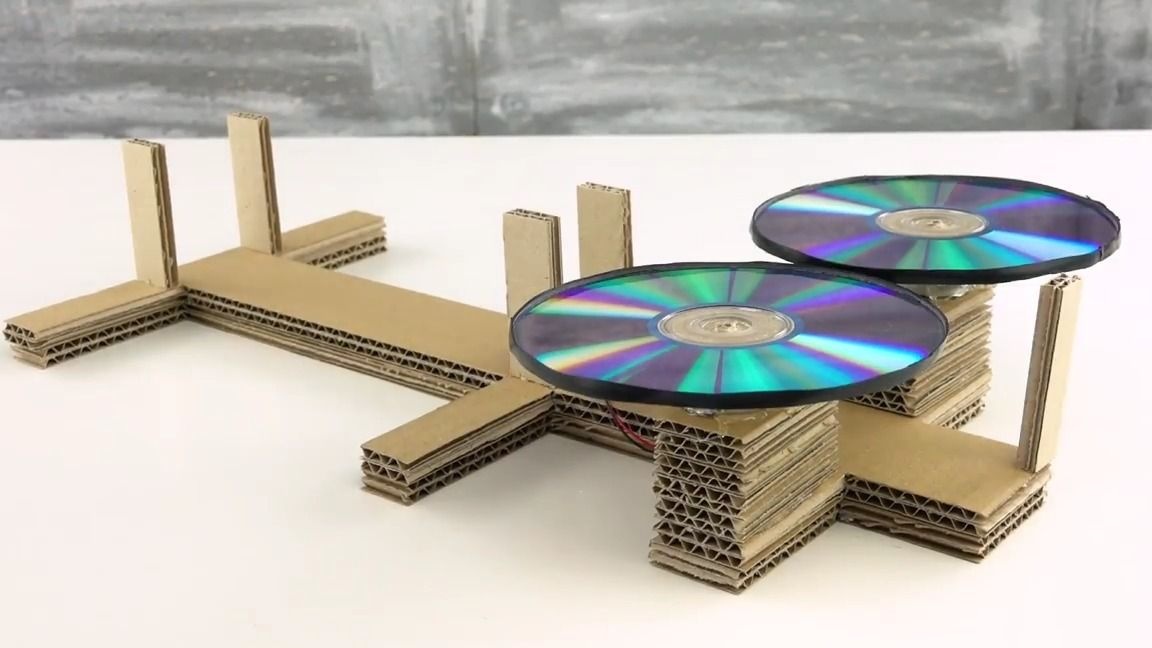
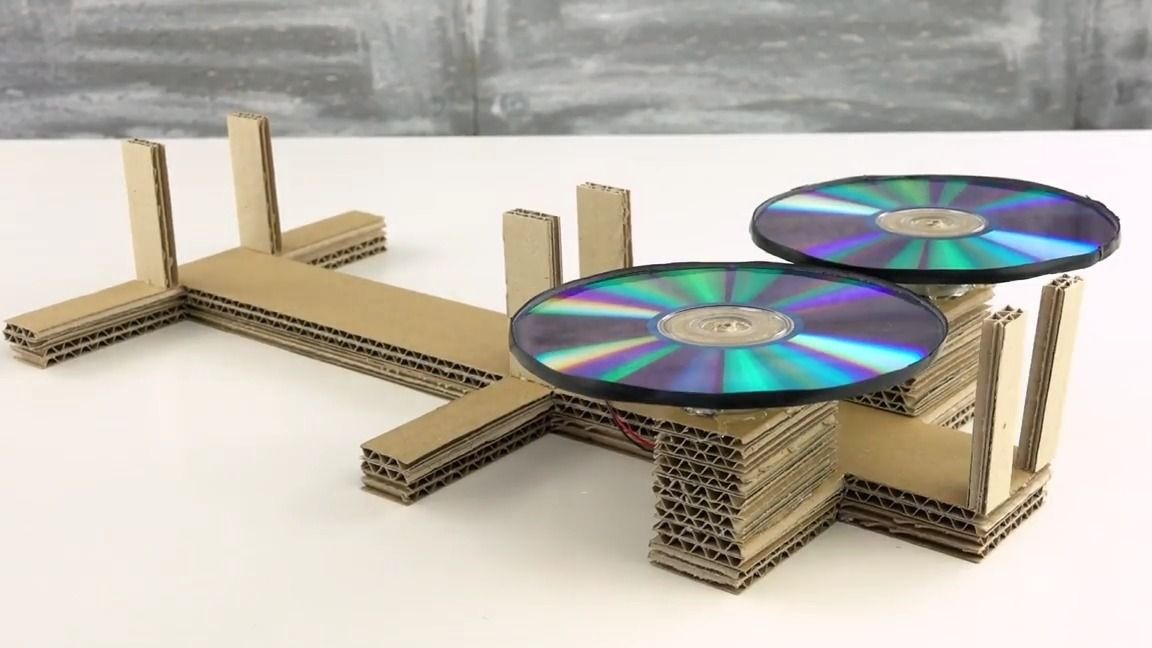
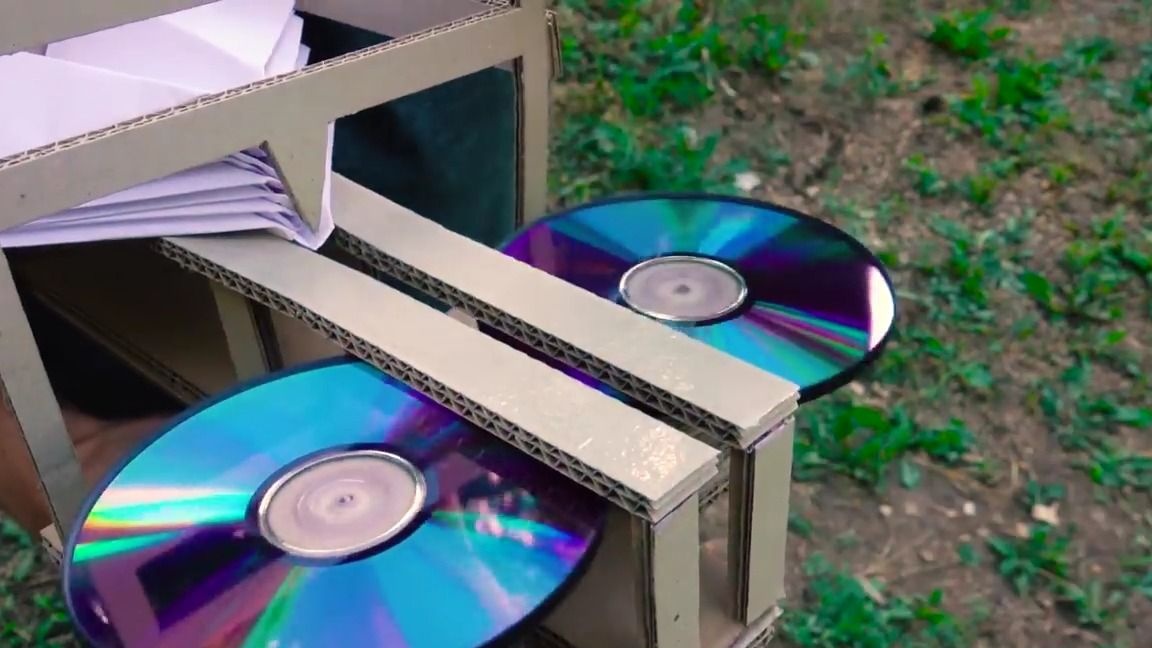
We also glue our motors on them, so that the disks rotate as if inside our design, that is, the first disk should spin clockwise, and the second one against, this is very important:

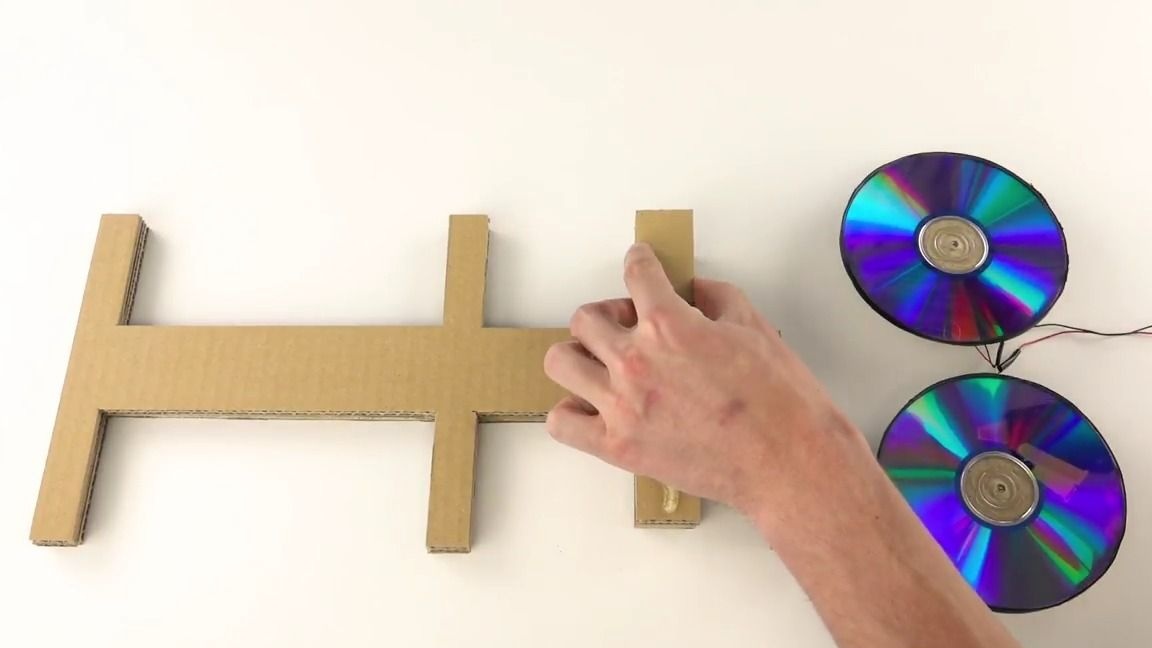
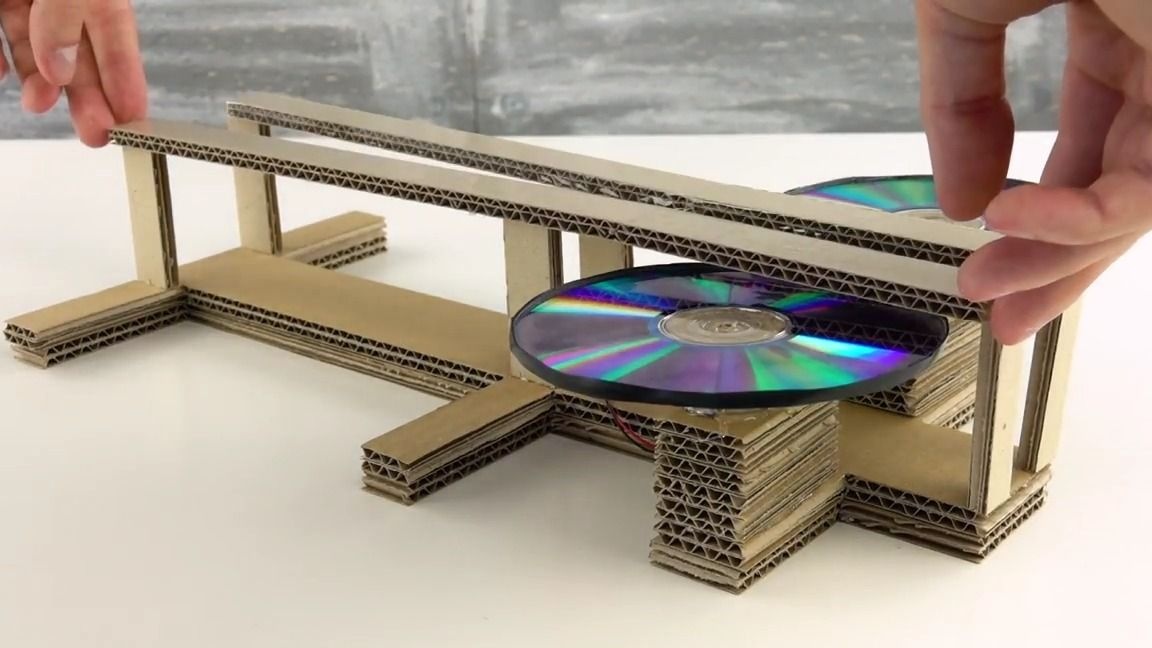
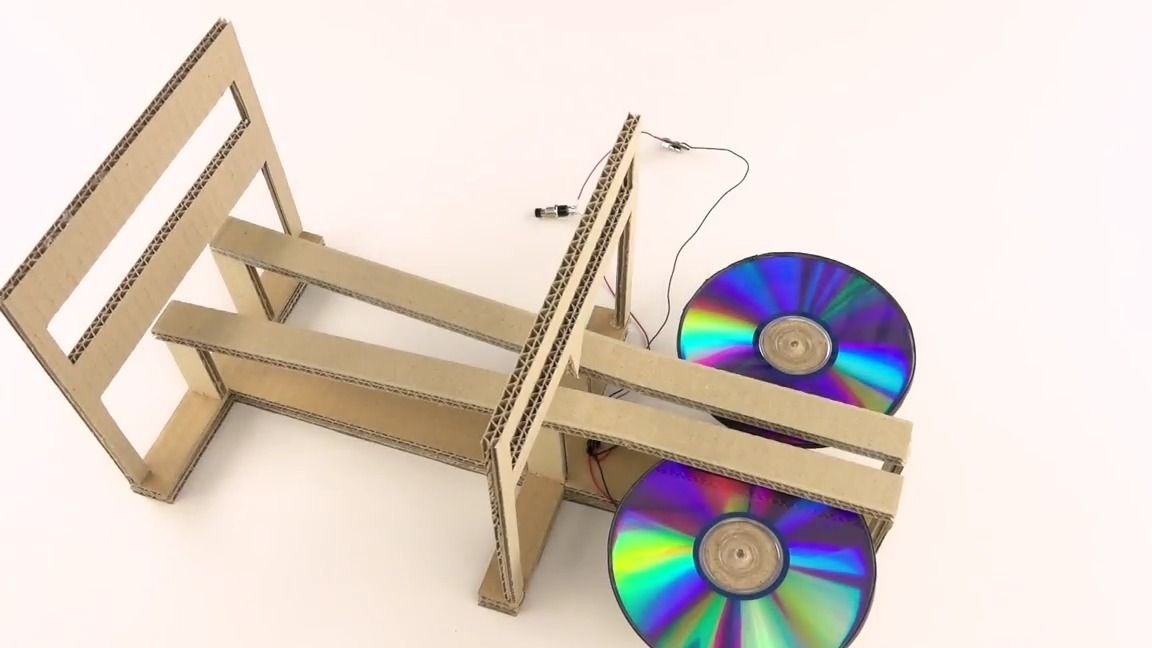
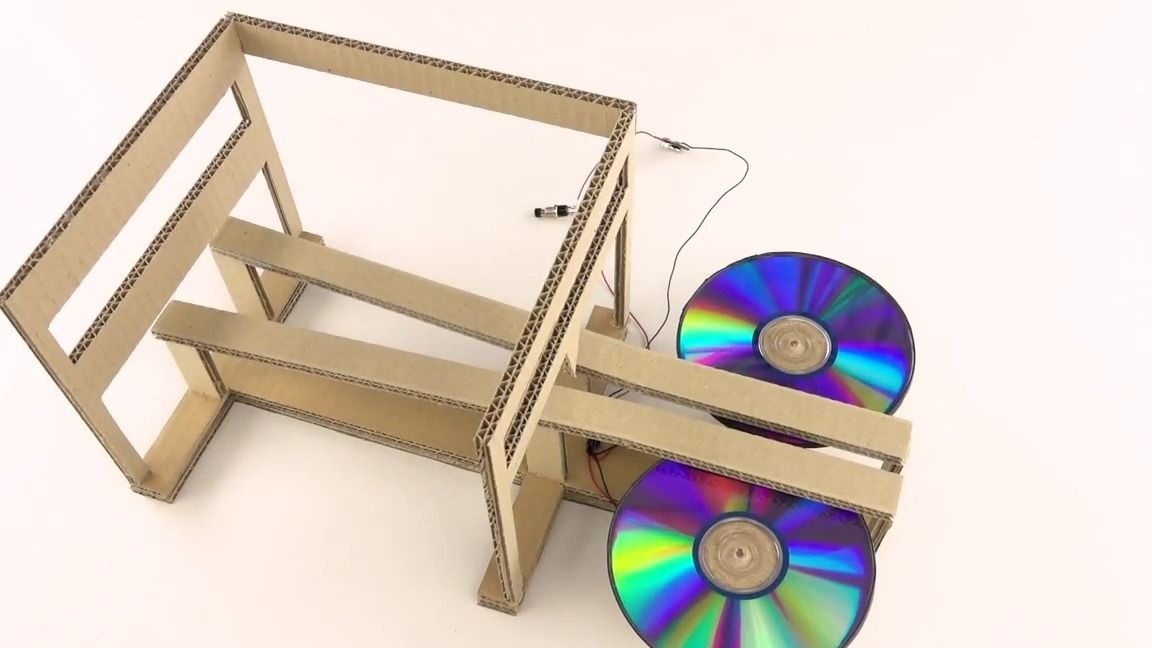
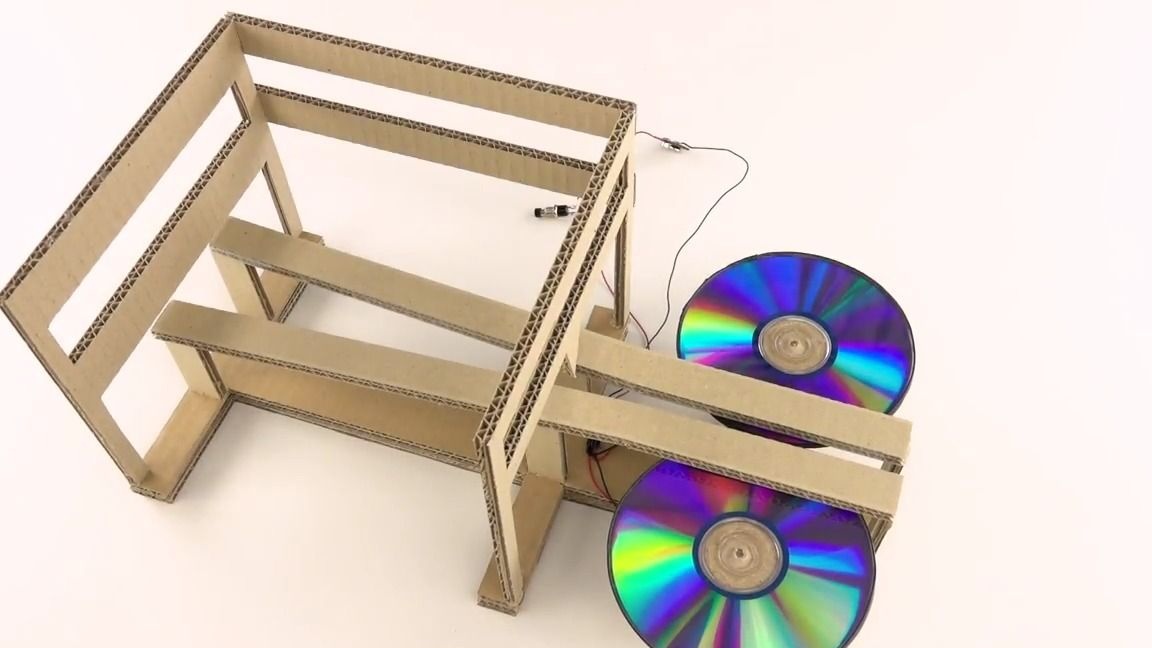
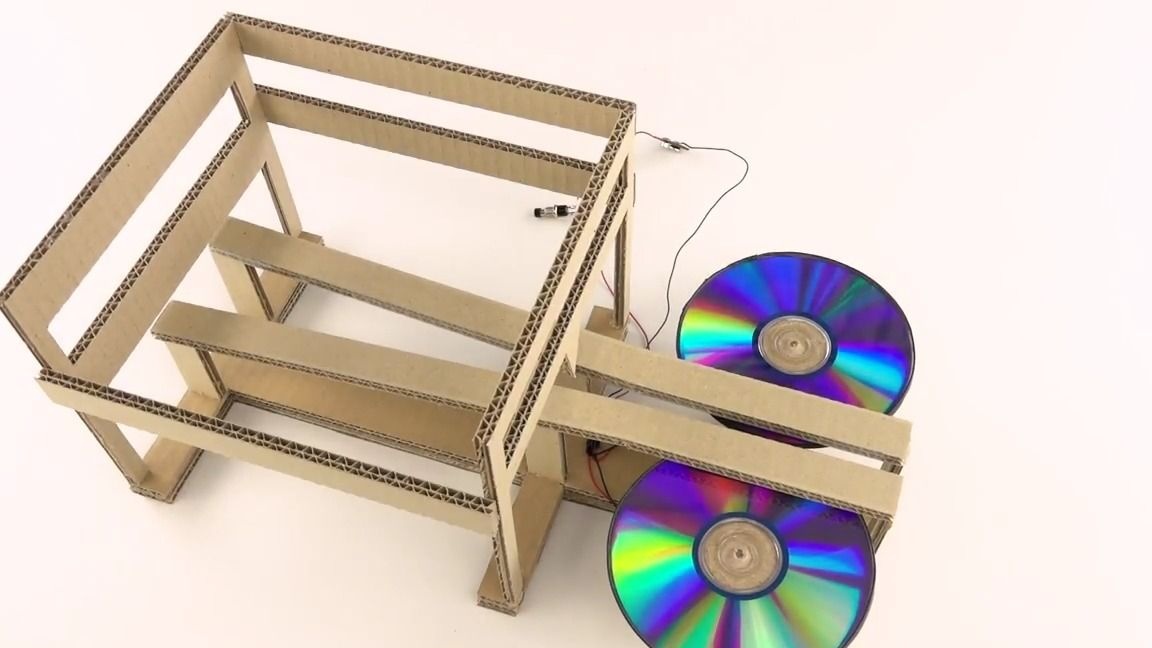
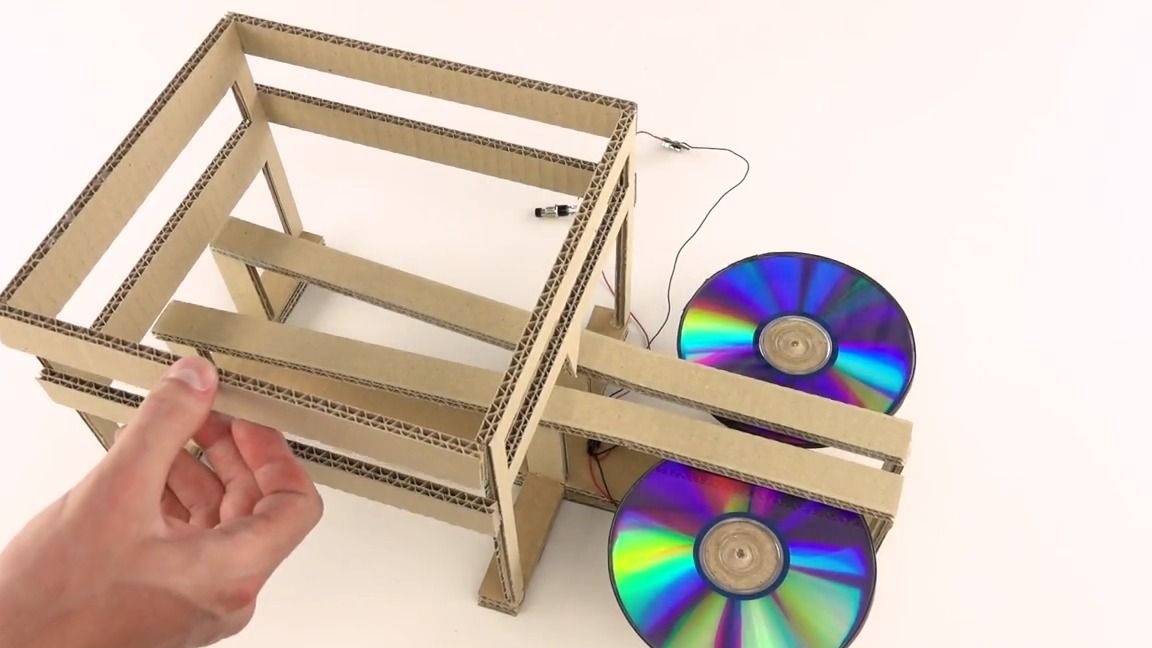
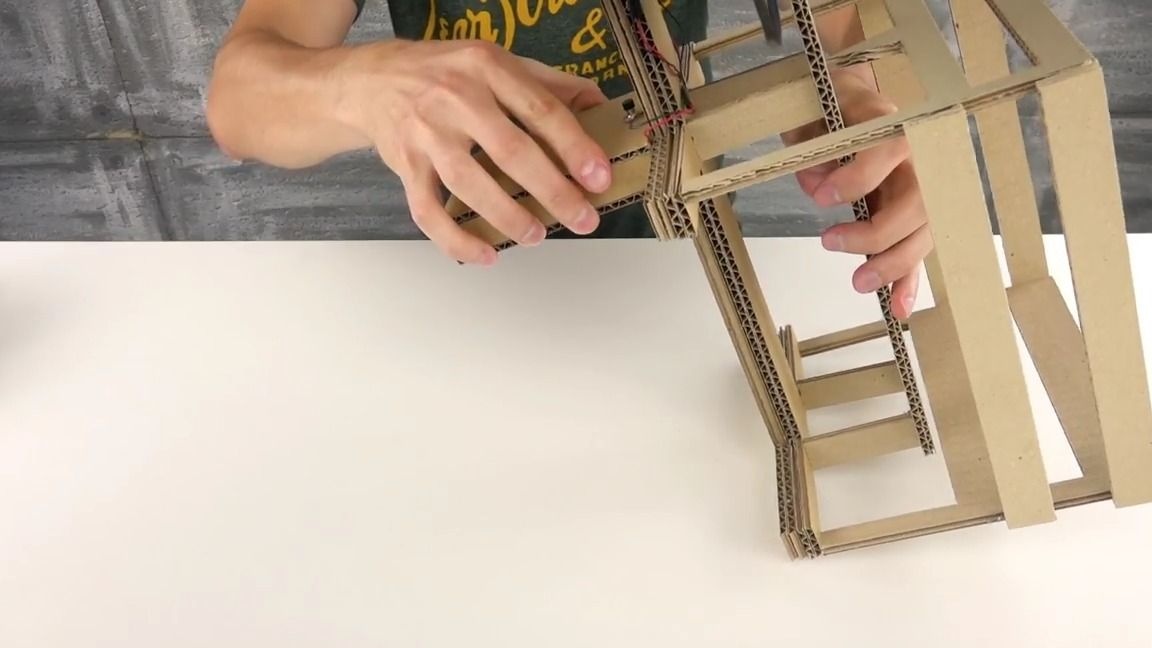
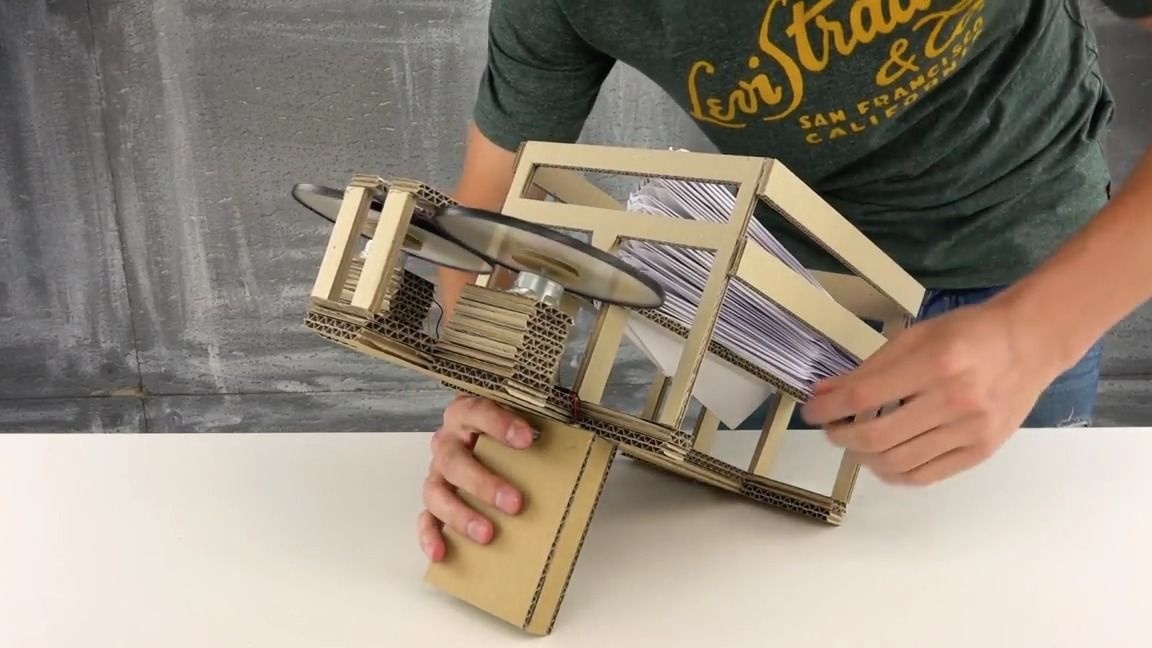
Now it is necessary to assemble our design before, there’s nothing complicated here, and it’s quite simple to do as shown in the photo, but it’s important to do everything smoothly and accurately so that there are no excesses on the cardboard parts. In general, we proceed:

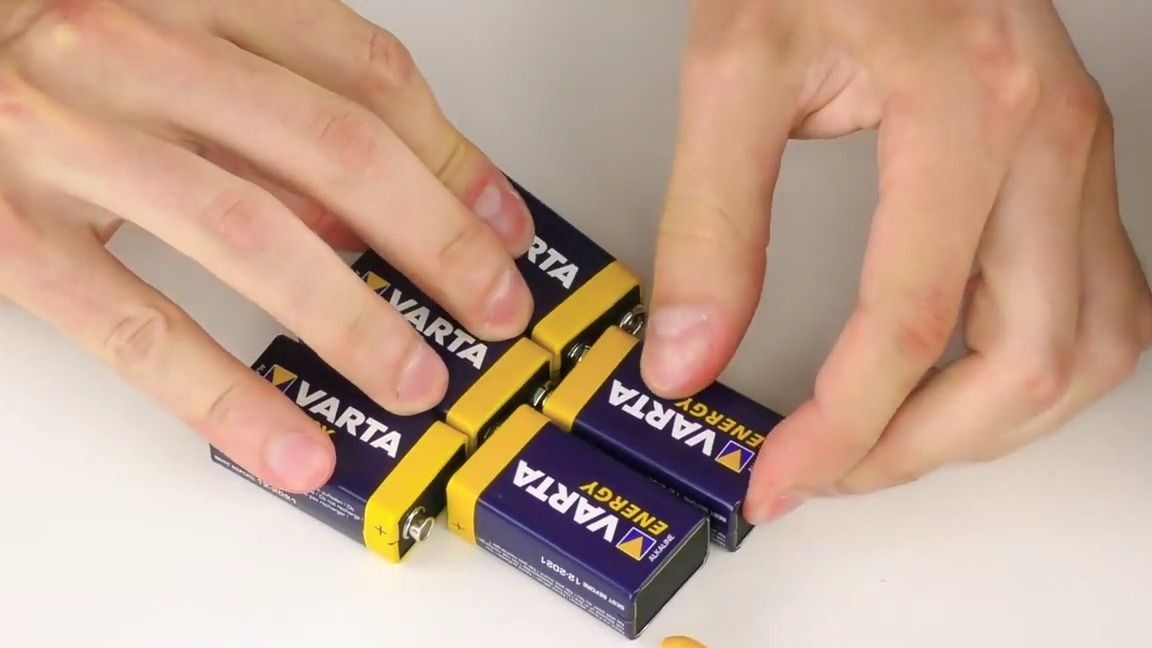
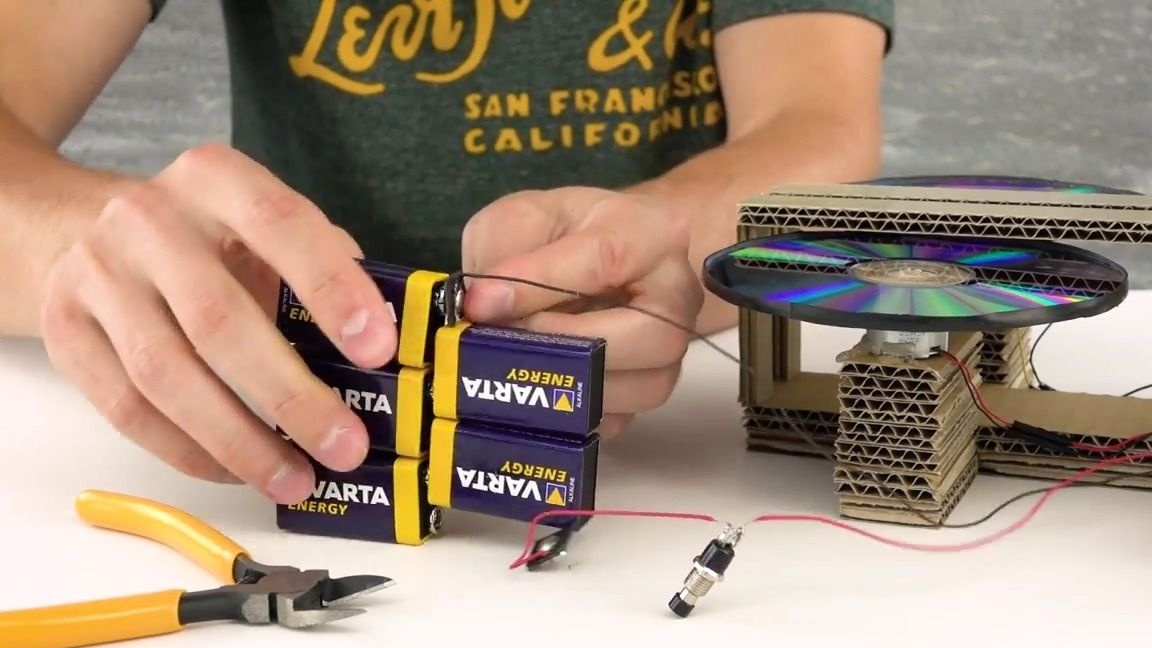
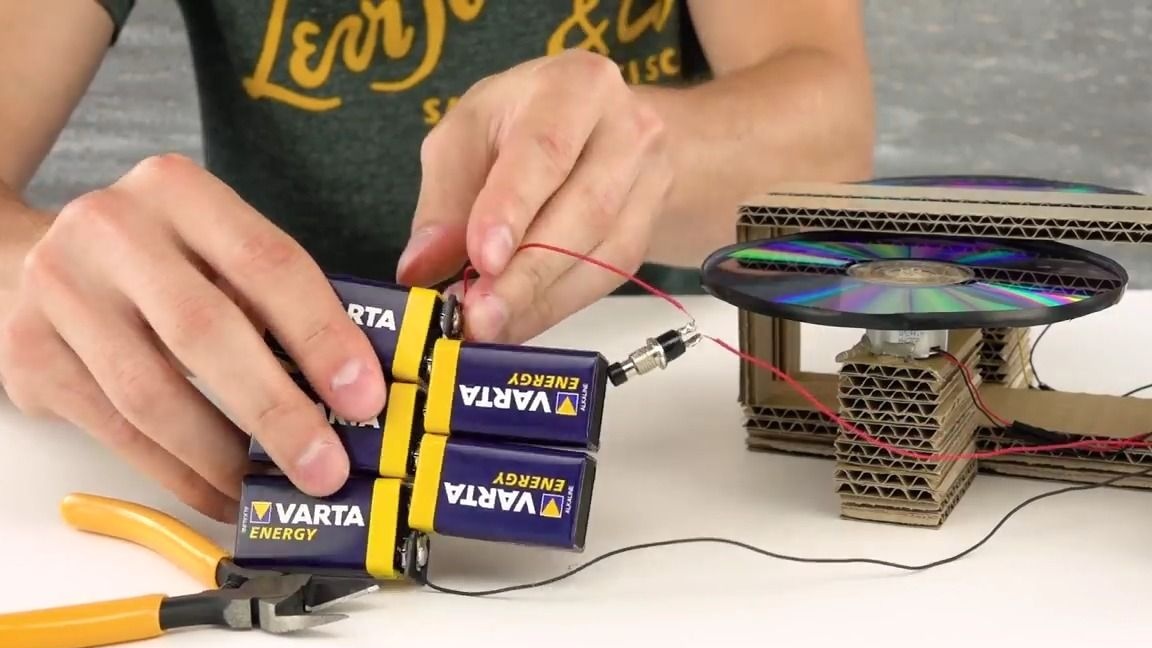
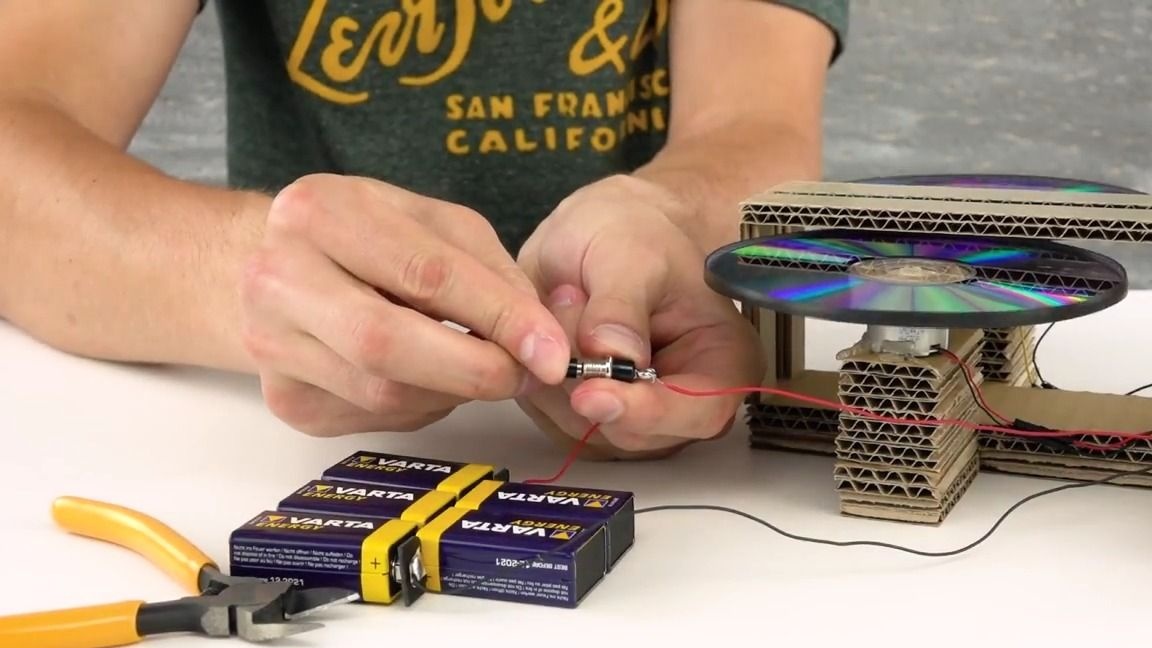
We take five batteries of the Crona type and connect them together in a sequential way, then we connect the connector on the circuit that we did earlier, divide it in sexes using nippers and connect them to the battery pack, observe the polarity, as shown in the photo, and then test:
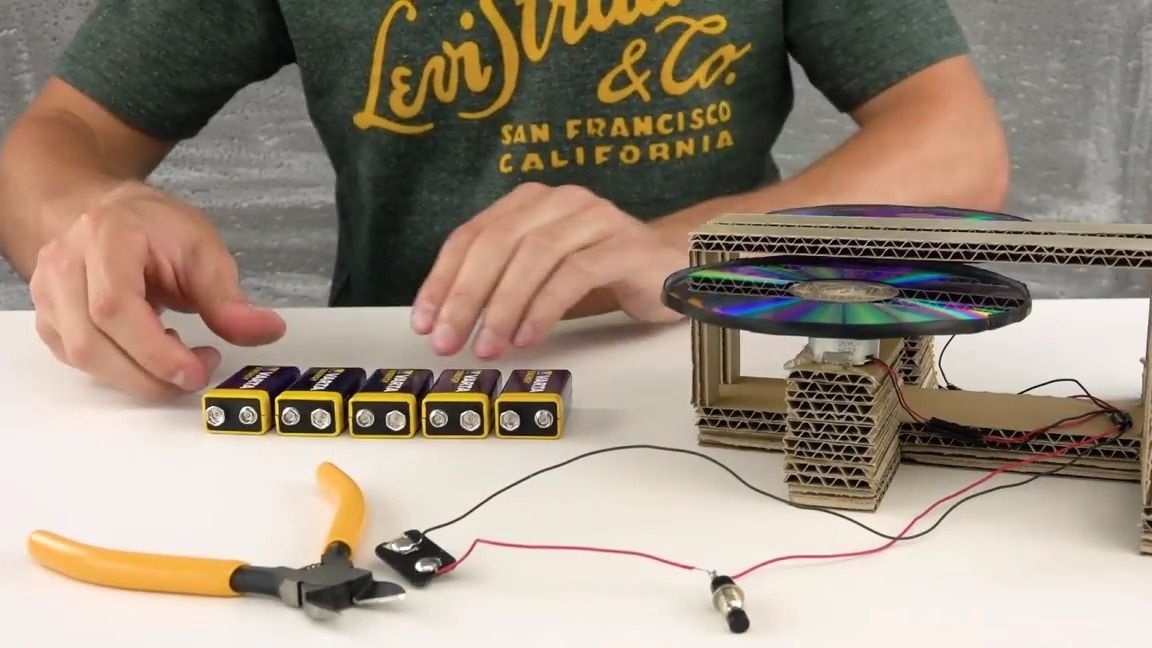
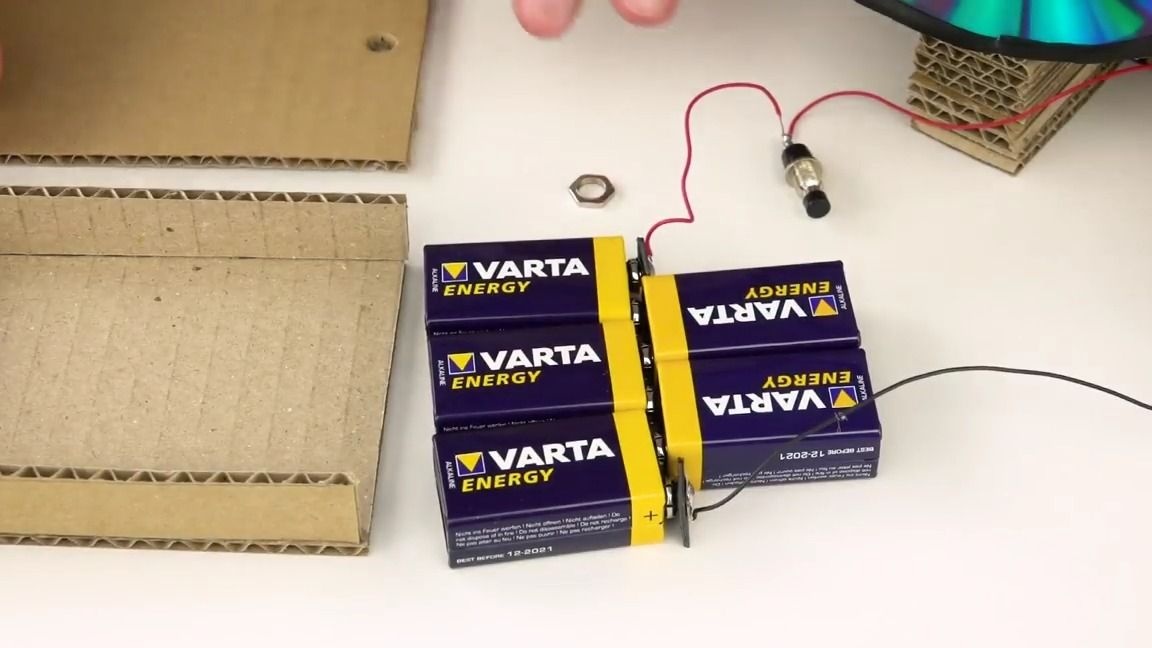
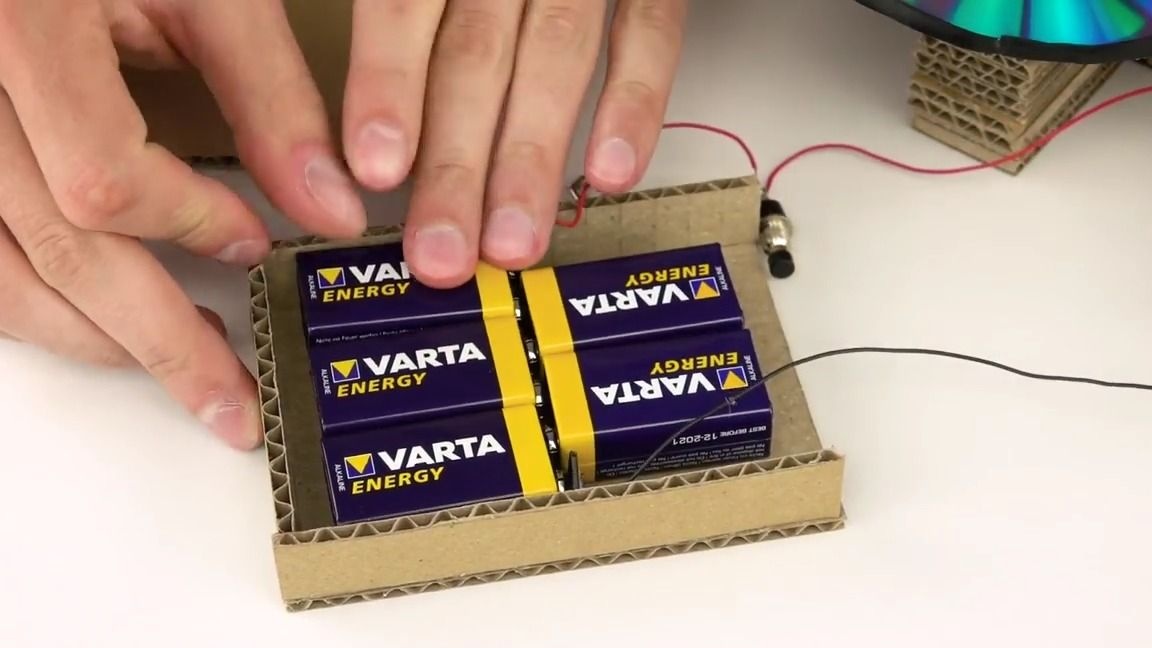
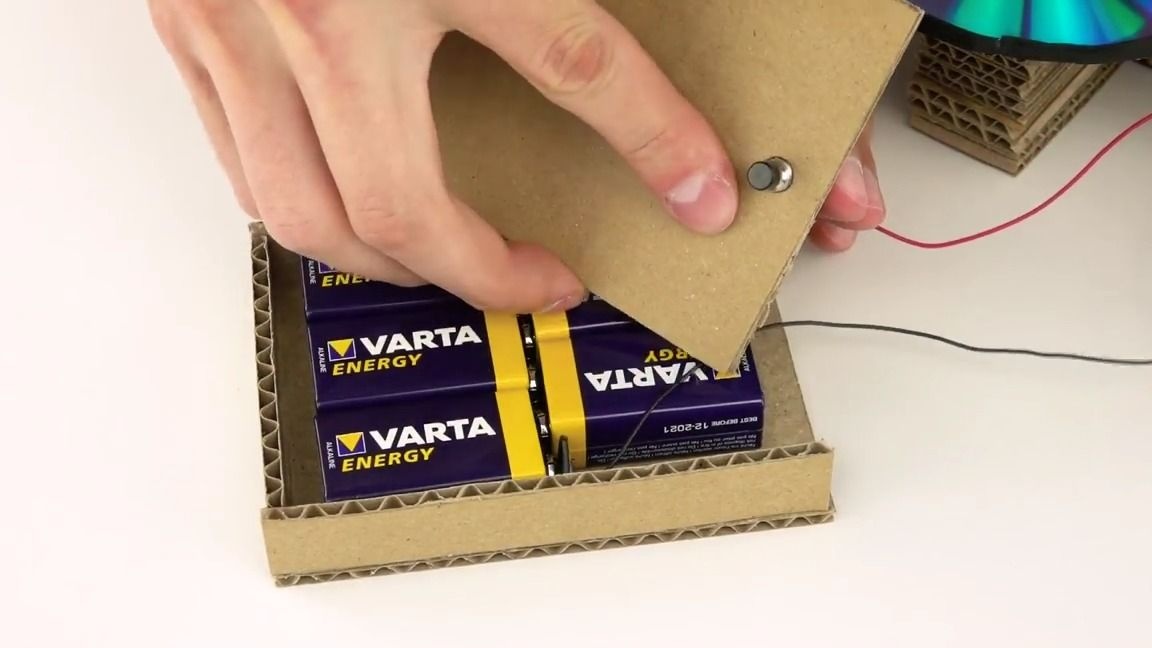
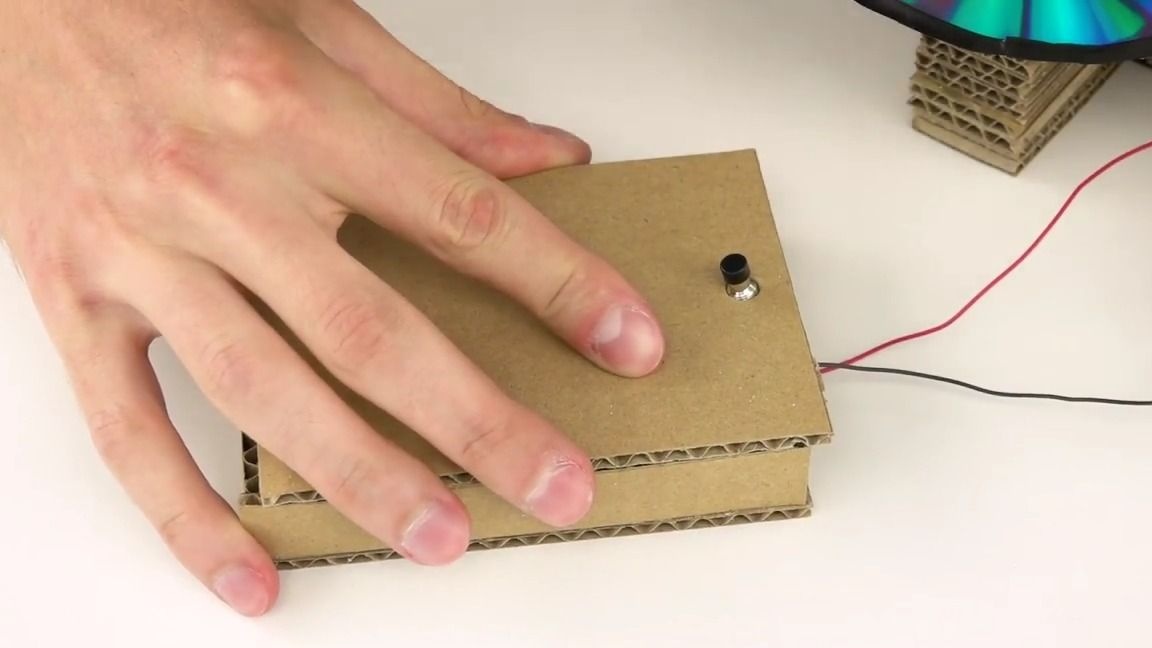
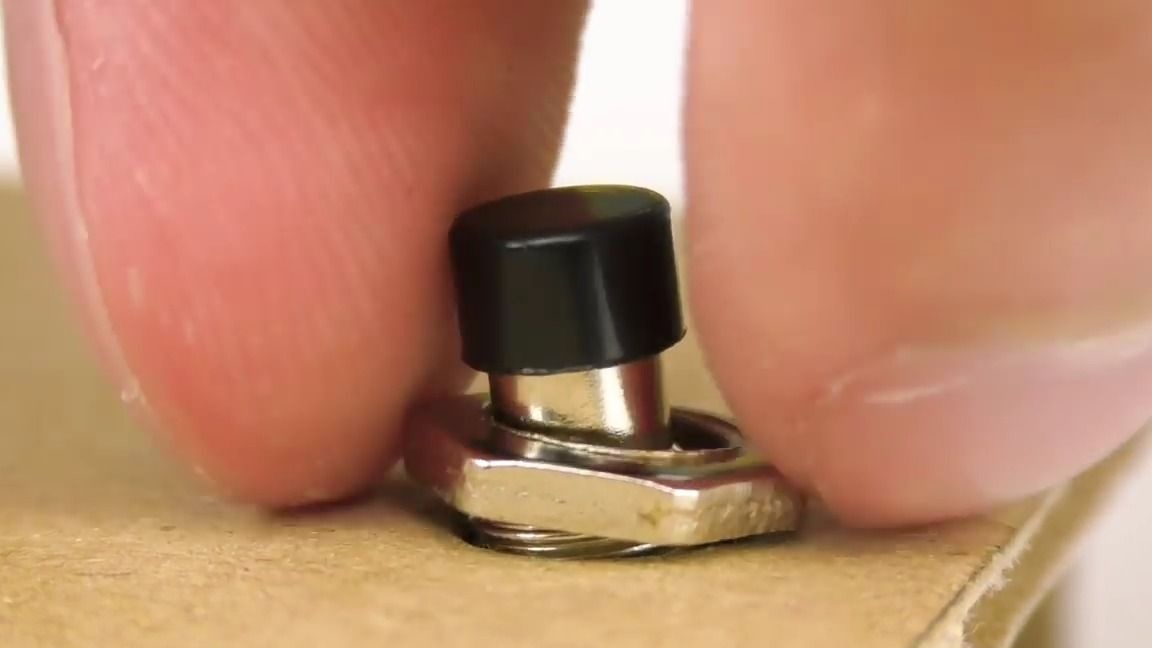
From cardboard, you need to make a small box under the battery block, put it in the box, make a hole in the box cover and insert the switch into it, glue the cover to the box, and fix the switch using a nut:
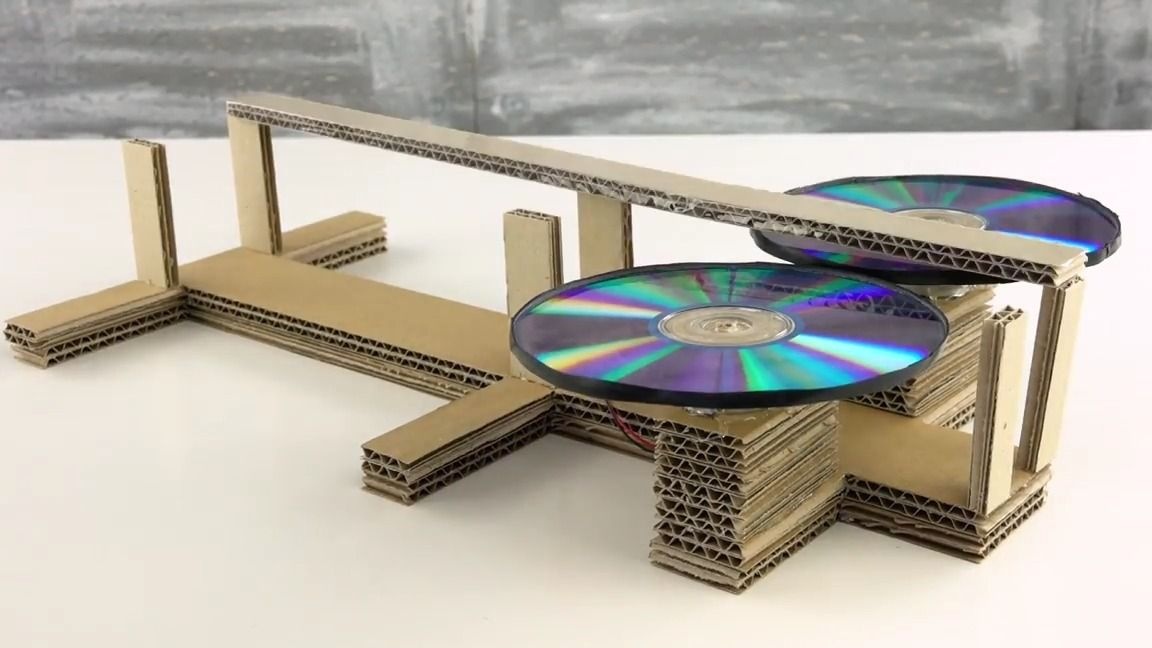
Glue our blank to the whole structure as follows:
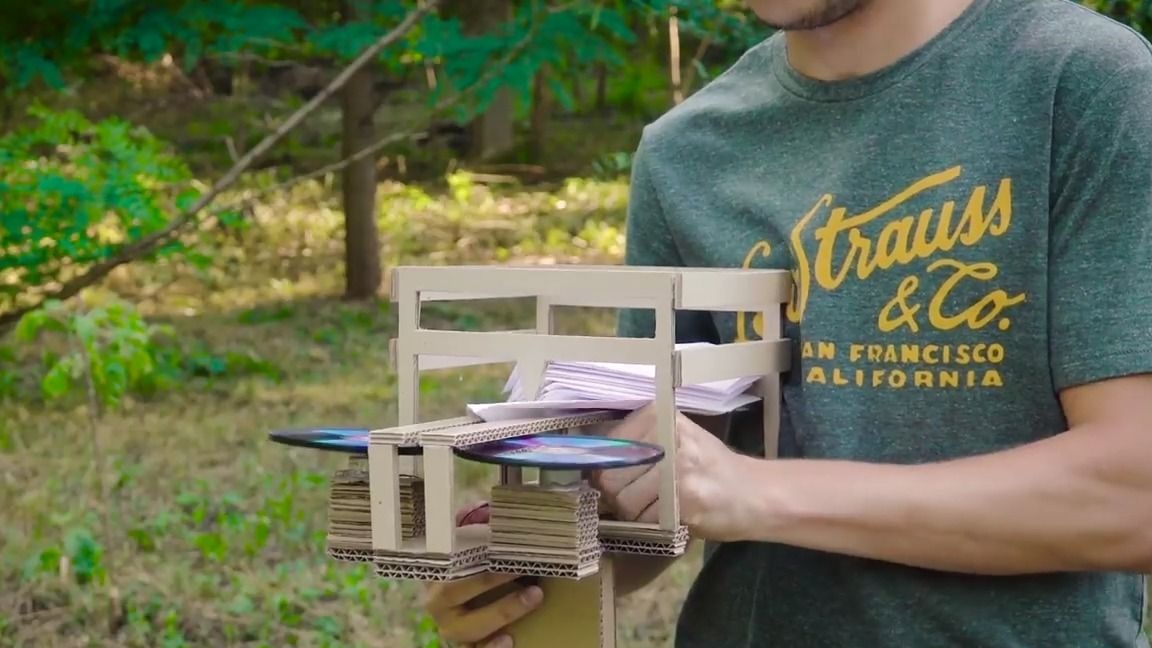
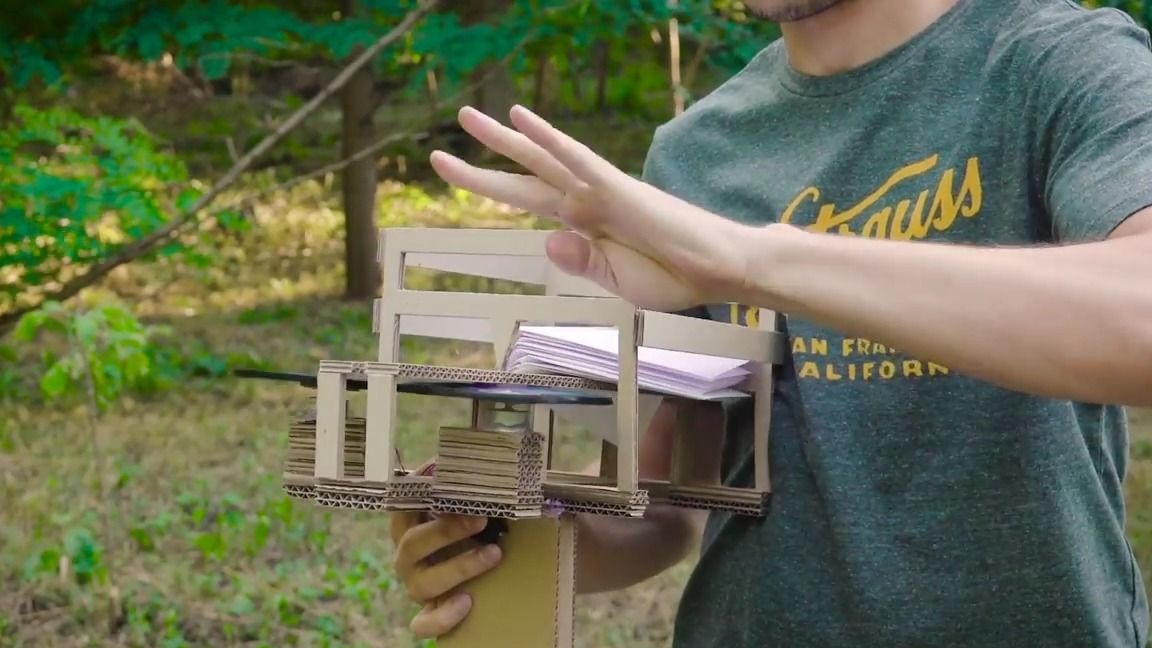
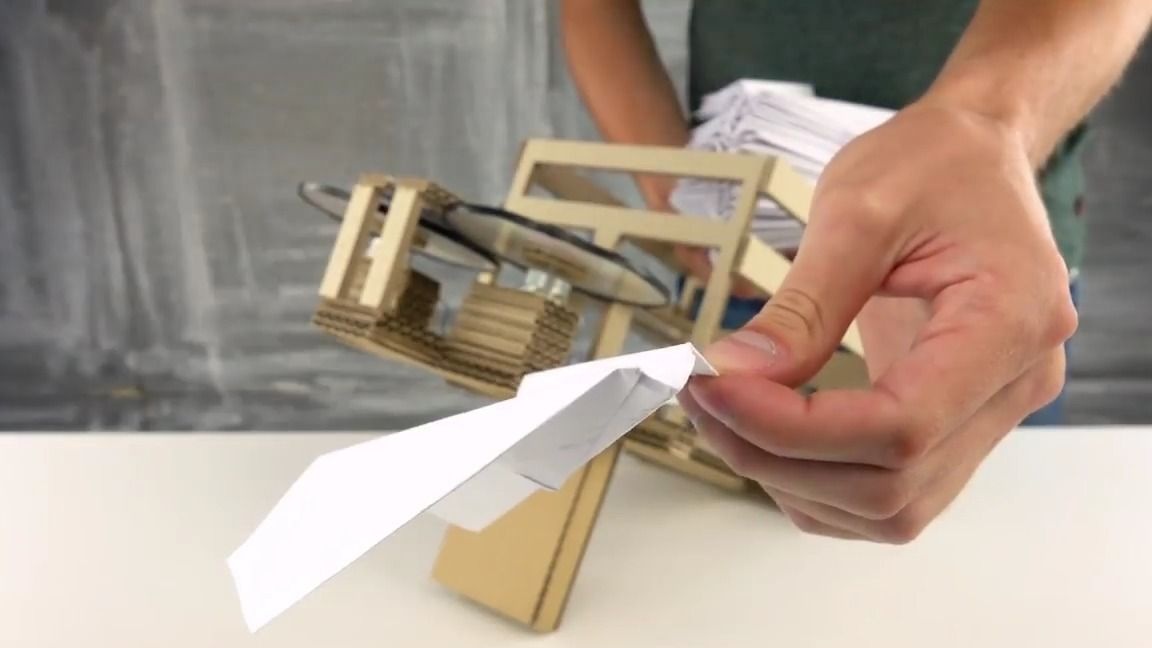
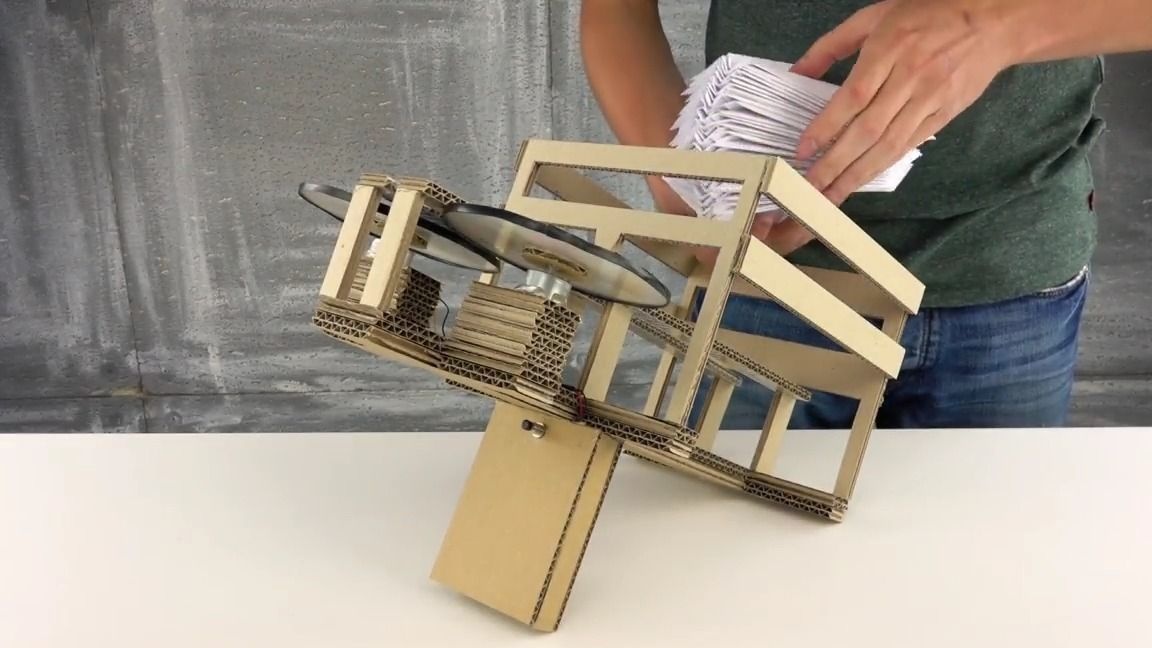
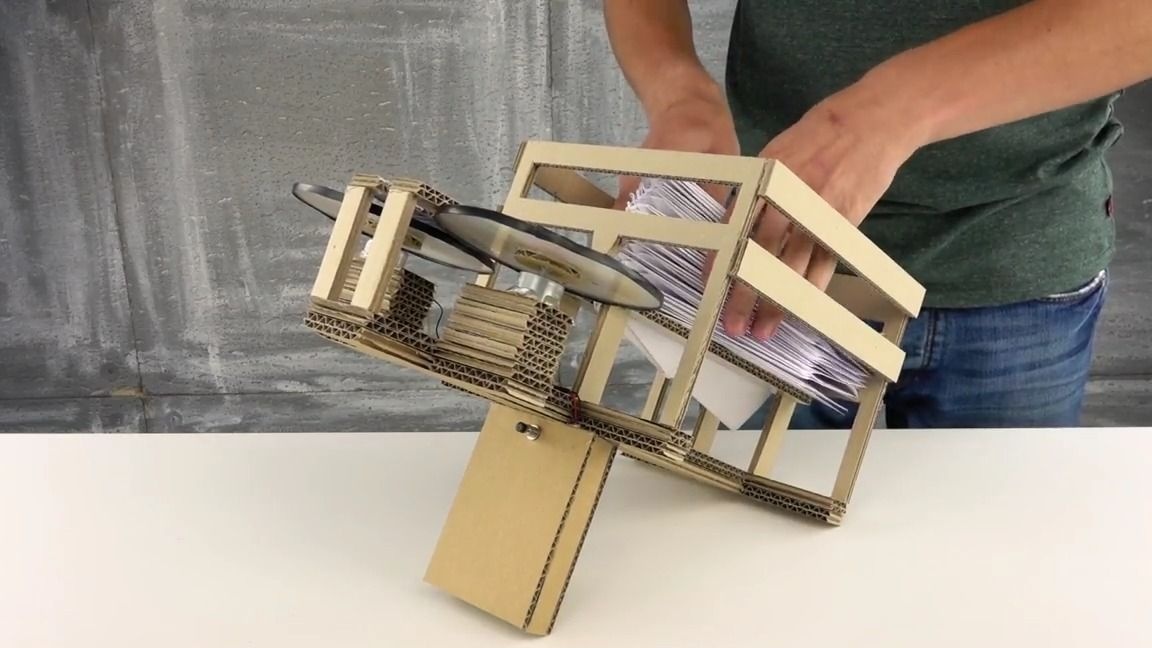
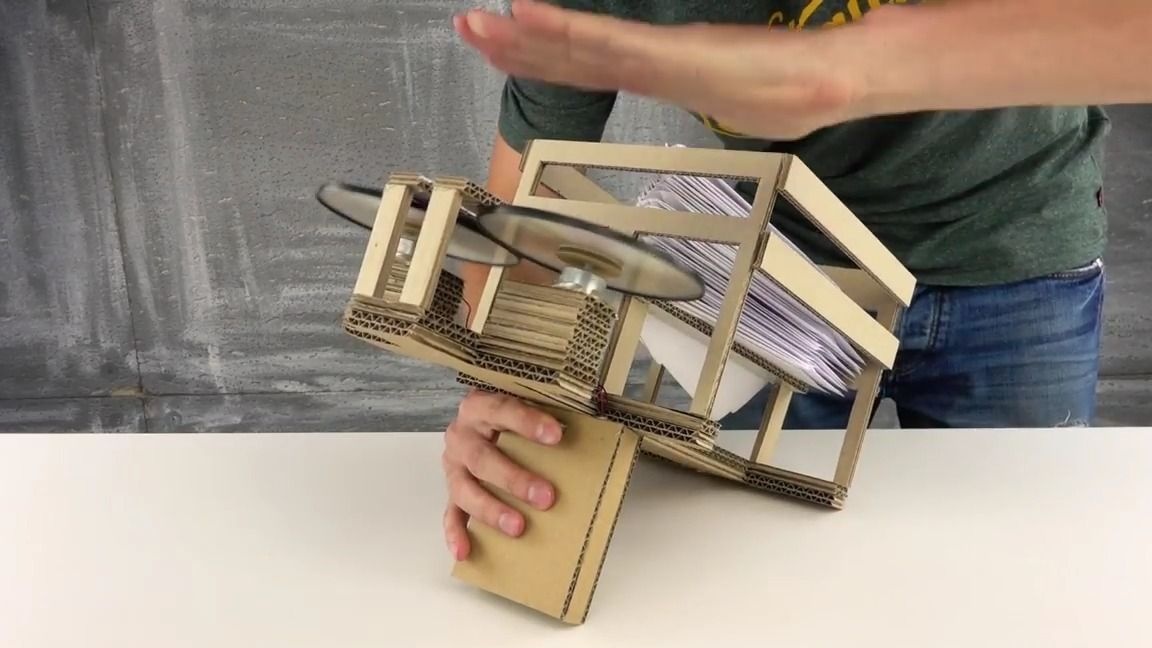
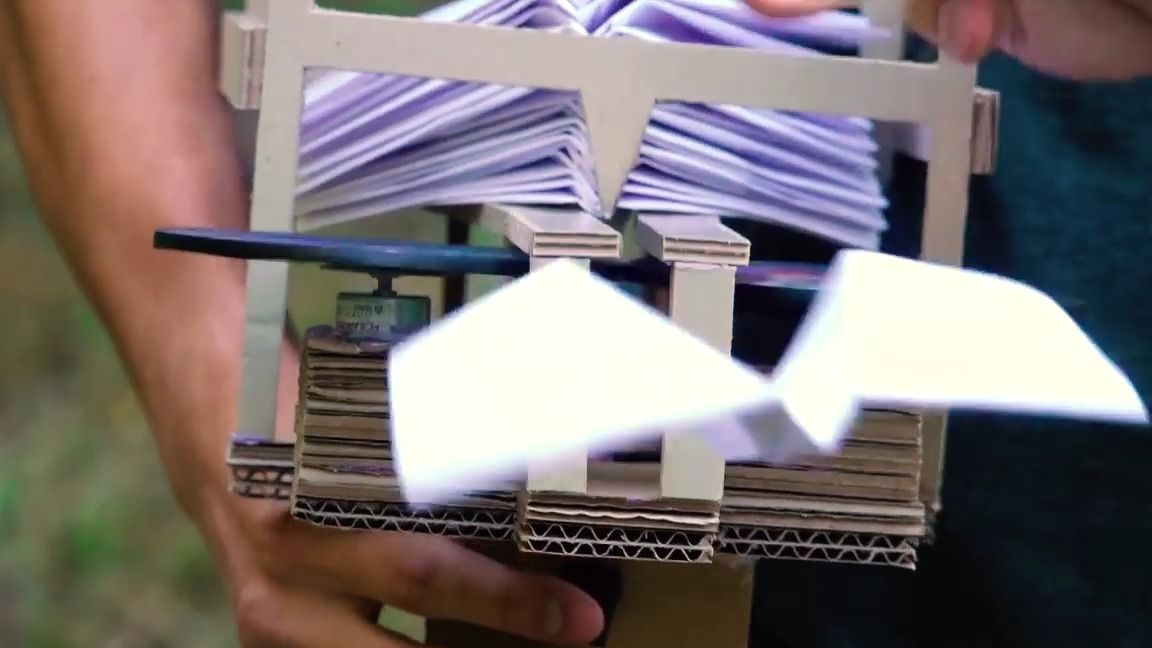
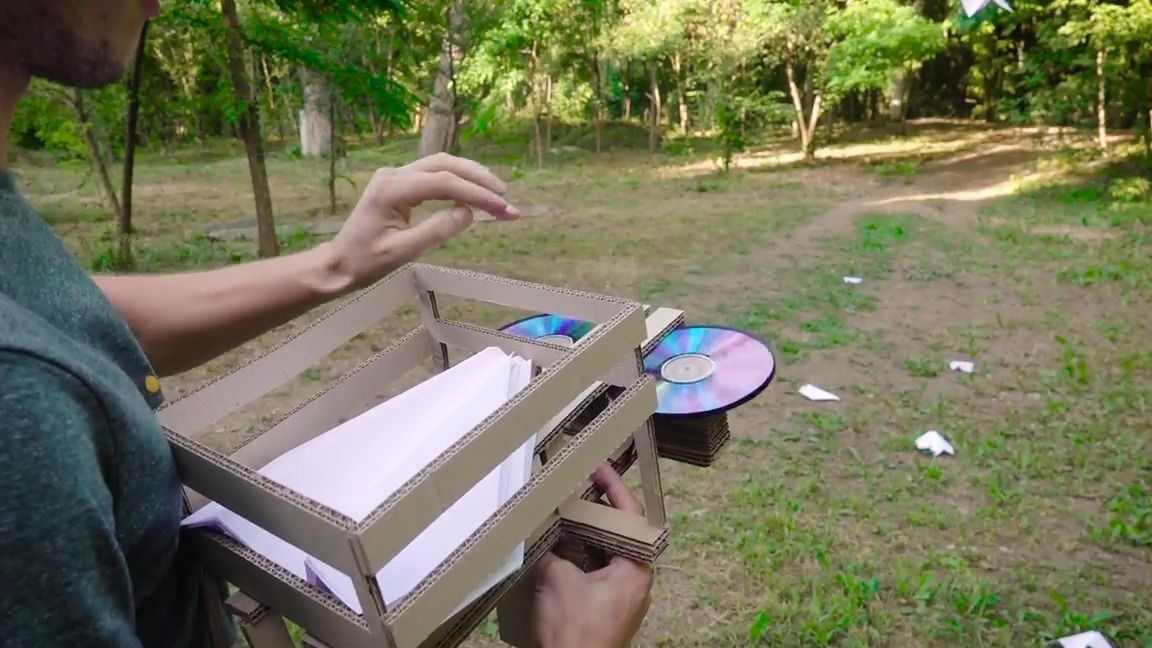
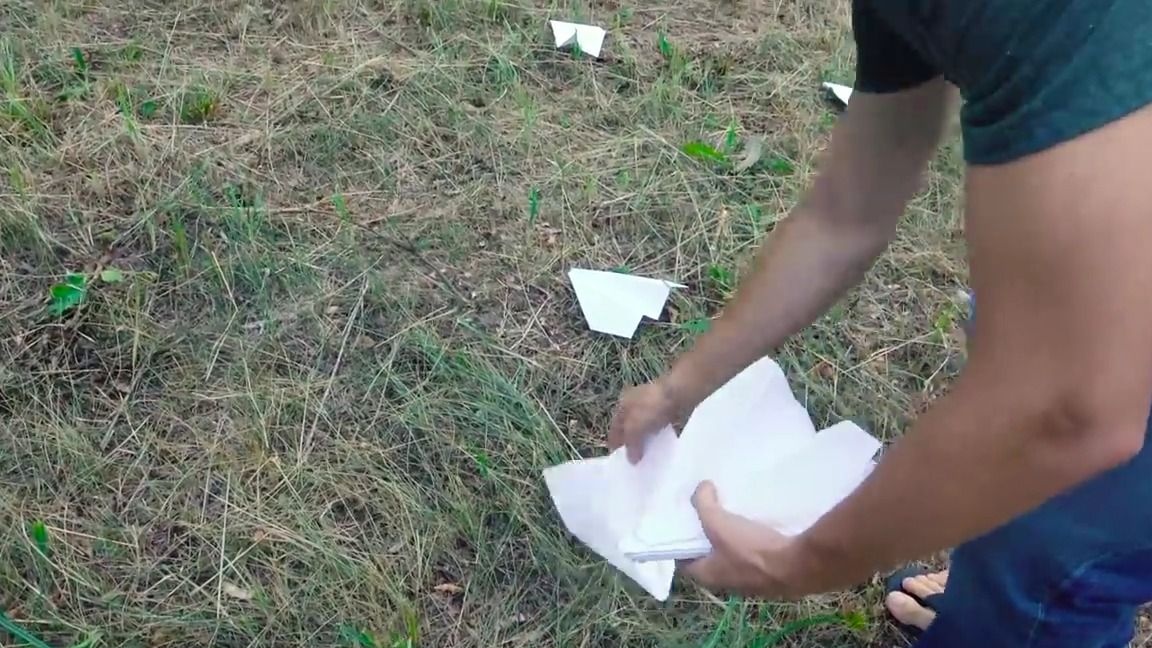
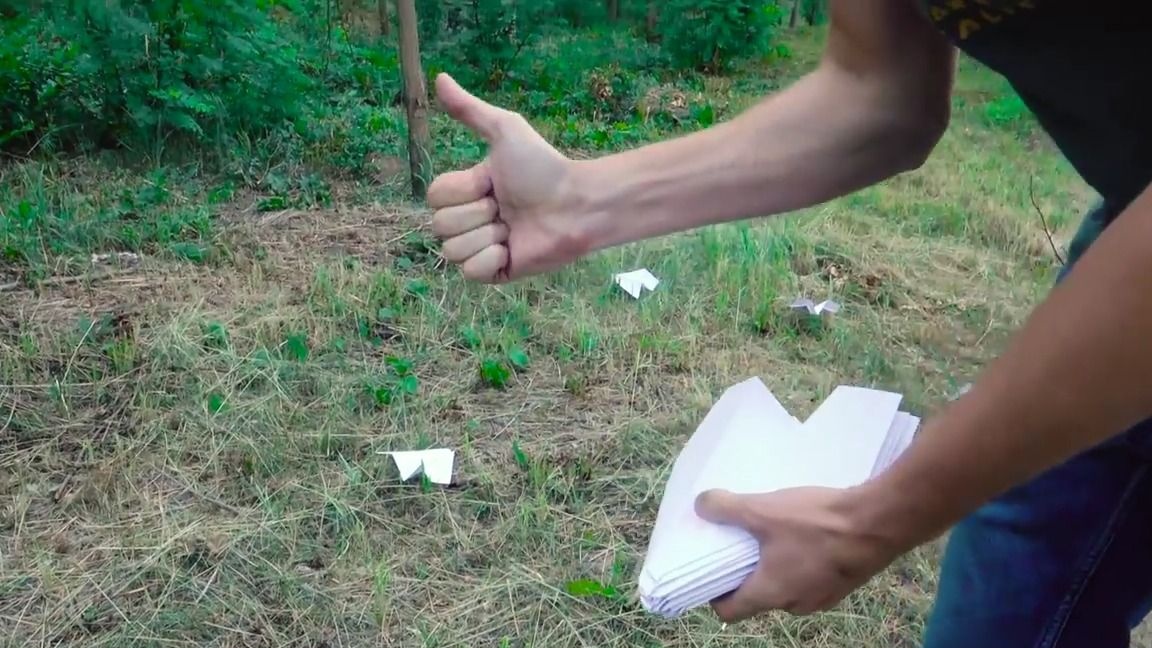
That's it! The installation for launching paper airplanes is ready and it remains only to test it. To do this, you need to make a lot of airplanes from sheets of A4 paper, after which we put them in the “store” of the installation, press the button and bring the lowest airplane to the rotating disks, after that the airplane will fly sharply forward, now you can go outside and launch airplanes with high speed and range. But do not forget to clean up after yourself)

Here is a detailed video from the author with the assembly and testing:
Well, thank you all for your attention!