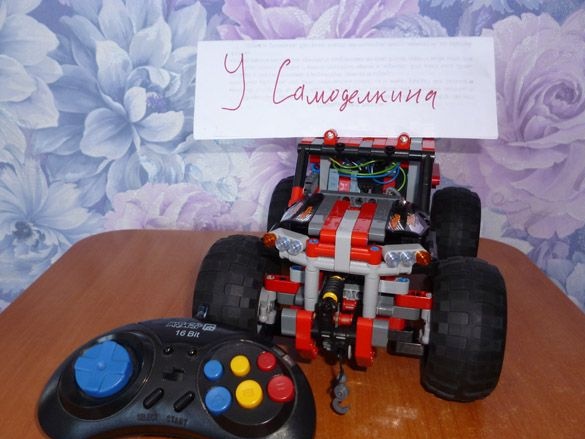
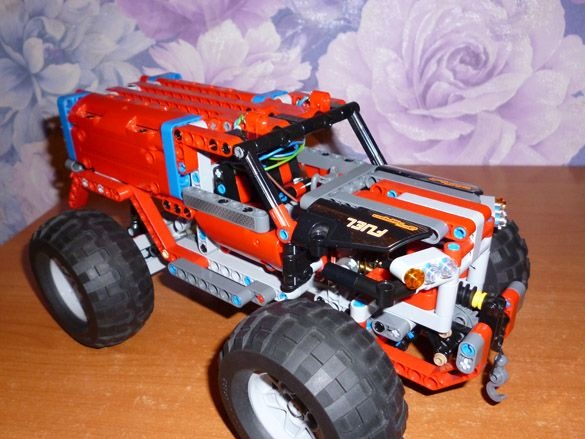
Good day to all. This time I came across Lego 42075, model SUV quick response service. I added a winch to it, put it on the big wheels from the Lego 42029 set and electrified it using Arduino Pro Mini. For control we will use the Bluetooth channel. In my opinion, this is the most convenient and stable way to manage models.
To create this model we will use:
- Lego Technic 42075
- Lego Technic 42029
- 2 white LEDs and resistors matched to them
- Mini 1:50 gear motor with 3 mm shaft
- Arduino Pro Mini 5v AT Mega 328
- L9110S engine driver
- 1 servo drive SG-90
- Bluetooth module HC-06 or equivalent
- USB-UART for Arduino firmware
- Clerical or just a sharp knife
- Motor gearbox 6v 1: 150
- Capacitor 10v 1000uF
- 2 single row combs PLS-40
- Inductor 68mkGn
- 2 Li-ion 18650 batteries
- drill
- Connector dad-mom two pin to wire
- Homutik
- Wires of different colors
- Solder, rosin, soldering iron
- Drill bit for metal 3.2 mm
- Bolts 3x20, 3x40, 3x60 nuts and washers for them
Step 1 Preparation of the mechanical part.
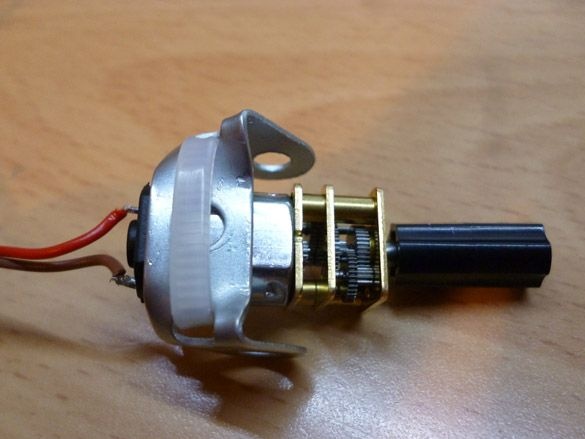
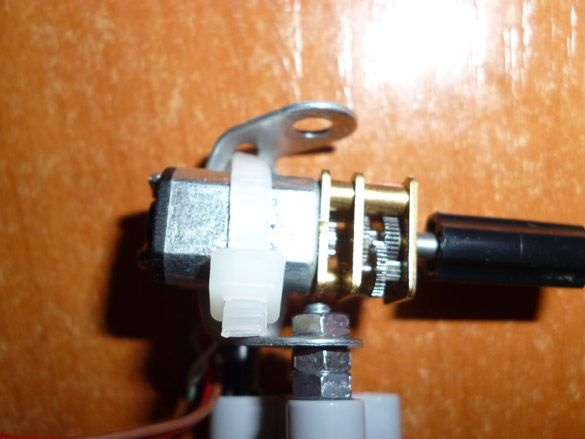
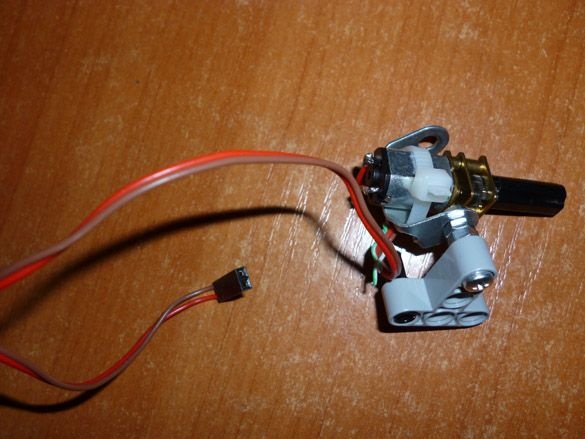
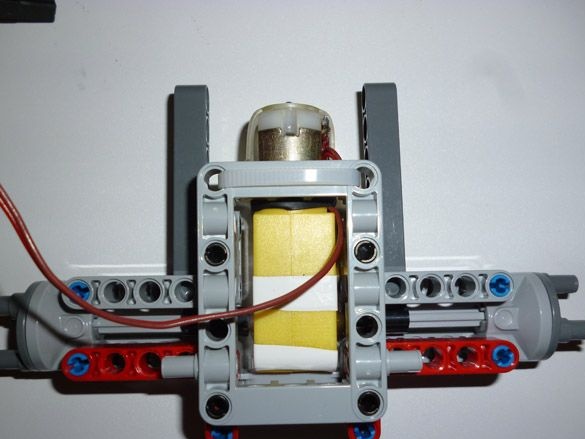
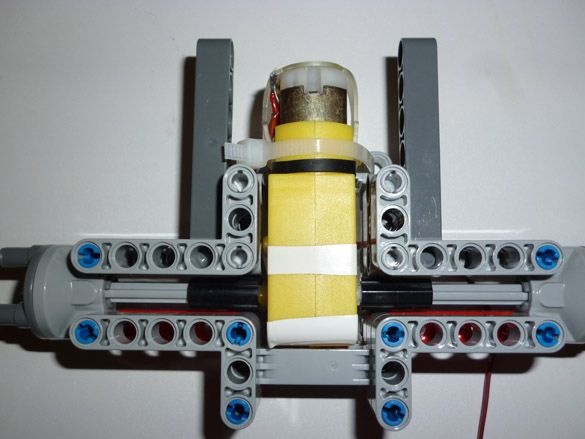
Let's start with a mini gear motor, it is necessary for a winch. You need to choose with a gear ratio of 1:50, turn slowly, but with a winch you can lift large loads. Also, the output shaft should be 3 mm in diameter. First you need to solder the wires to the motor. Next, on the output shaft, it is necessary to put on the connecting sleeve from Lego, inserting a match segment into one of the grooves of the sleeve. To connect with Lego parts, we take the part from the metal constructor, bending it in the shape of the letter "P" we connect it to the gear motor using a clamp:
Then we fasten, using 3x20 bolts, the gear motor to the Lego T-shaped part.
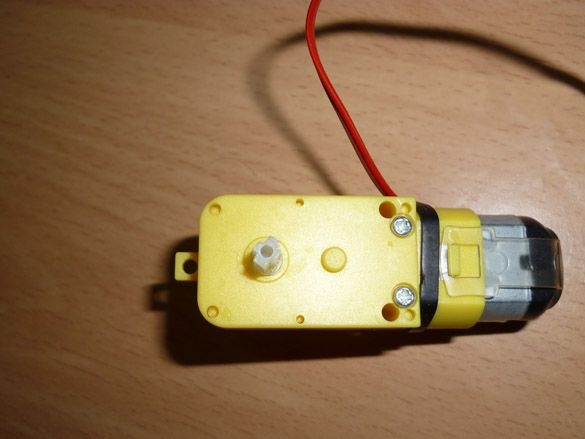
The driving axle of the SUV is the rear. The model is not very heavy, so you can use a gear motor with a gear ratio of 1: 150. And a 6 volt motor. Solder the wires to the motor before installing on the model. To connect the wheels to the shaft of the gearmotor, it is necessary to cut the output shafts with a knife. Trim the output shafts in the shape of a cross and the dimensions of the Lego part, namely the cross axis. It is necessary to trim both shafts:
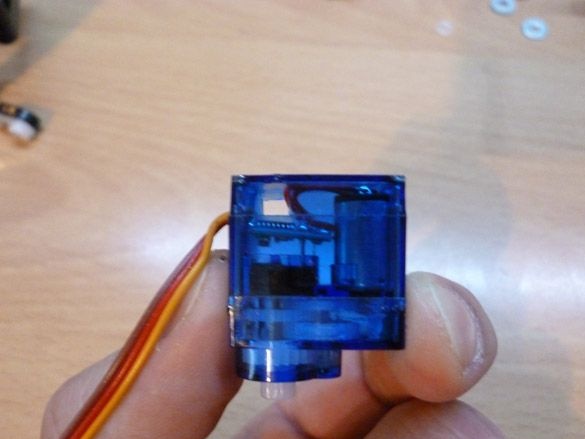
We pass to the mechanism of the front wheels. We take the servo SG-90. I recommend choosing with metal gears. We trim the protruding parts of the body necessary for fastening. We take a drill and drill a through hole with a diameter of 3.2 mm. If you don’t have a drill or the right drill at hand, just cut small holes in the case on both sides. The main thing is not to damage the internal mechanism and the counterter board:
We put on the shaft a small lever that comes complete with a servo drive.We fasten a small Lego part to the lever, it looks like an oval with two cross holes:
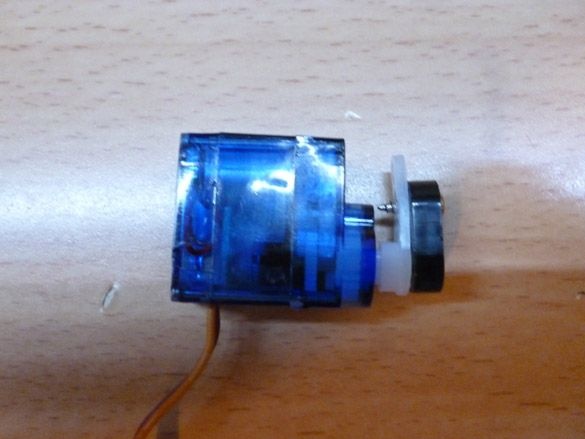
On this with the mechanics we are done.
Step 2 Build the model.
To assemble the model, we need the assembly instructions for the Lego Technic 42075. It comes with this kit. If you lost it or plan to assemble a model from parts from another designer, the instructions can always be downloaded to.
You need to download only 1 part.
You will also need instructions from Lego 42029. Only the second part. You can download it.
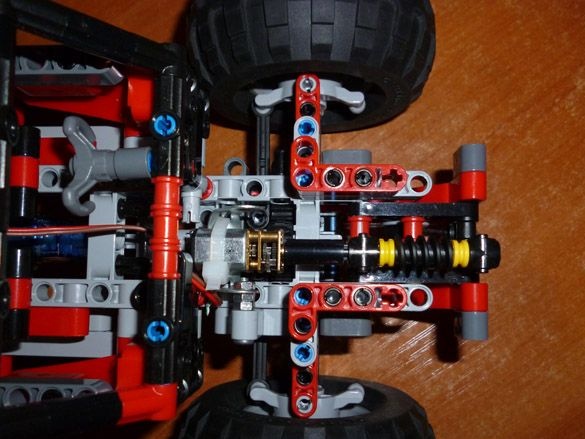
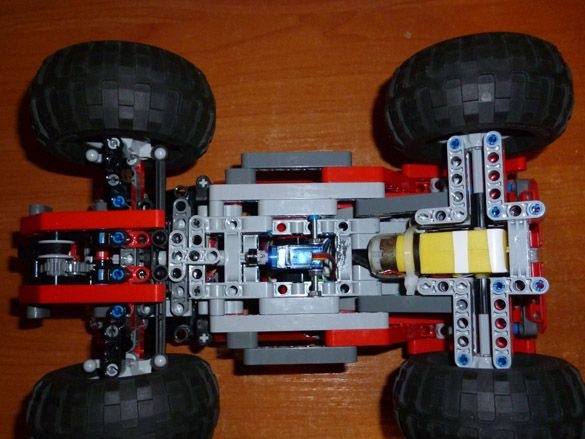
We proceed directly to the assembly. We take the instruction 42075. First, we collect from 1 to 15 page. We do everything according to the instructions, except the installation of gears. We do not need gears, but will only interfere. We pass to the rear axle. It must be collected from the photo. First, we install the motor gearbox, fasten it, and only after that we insert the cross shafts for connecting to the wheels:
With the wheels installed, it should look like this:
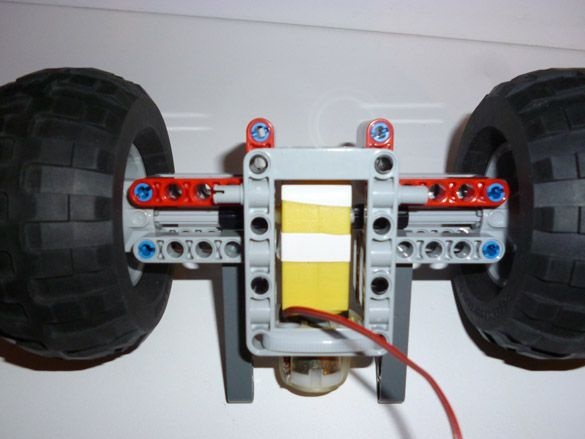
Install the rear axle on an already assembled base:
The front axle is also assembled from the photo.
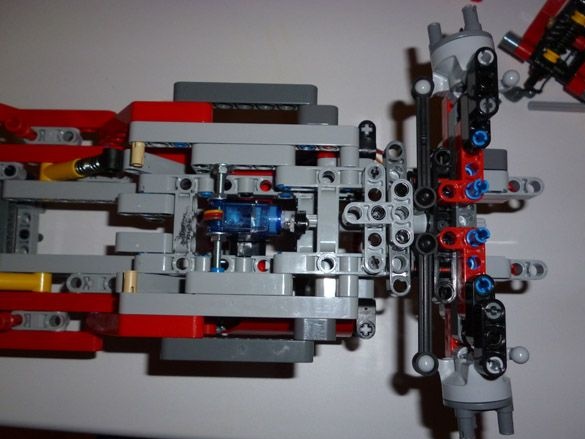
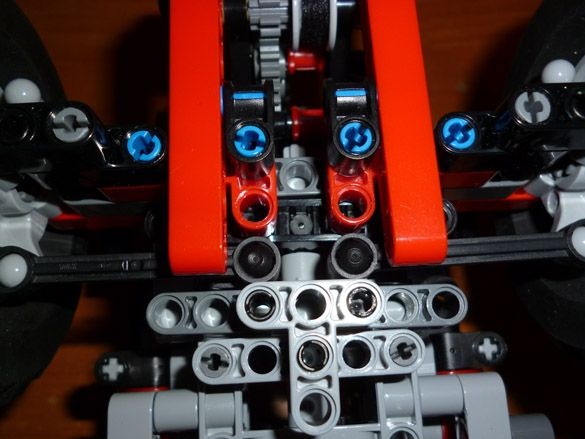
We fix the servo using 3x60 bolts and nuts to them:

Again we take the instructions and collect the back of the model from pages 41 to 62. Next, the doors and dashboards from pages 66 to 71. And also the cabin from pages 98 to 101:
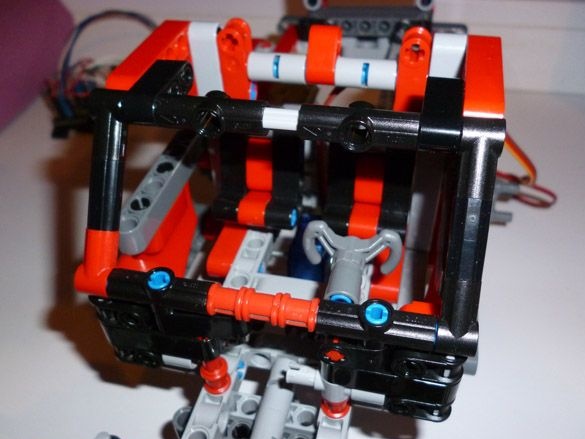
At this stage, it should look like this:
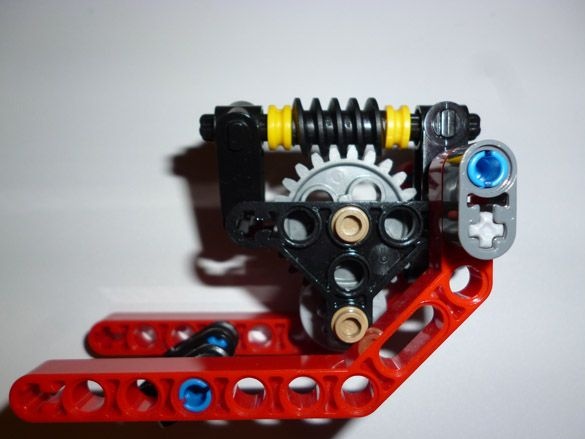
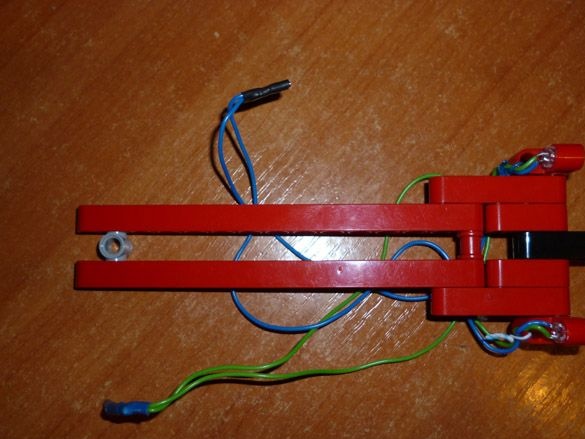
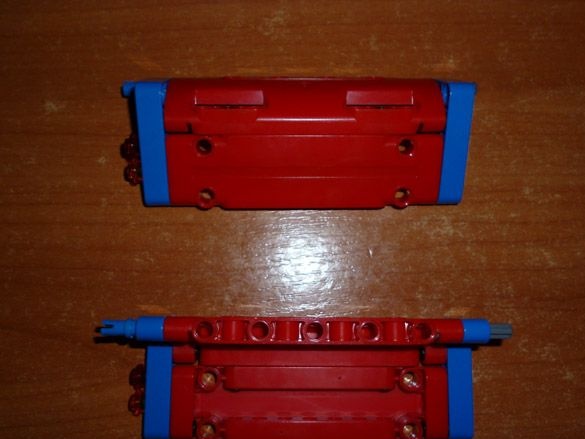
We assemble the winch according to the instructions from Lego 42029 part 2 from page 15 to 21. Add a couple of parts for attaching to this model:
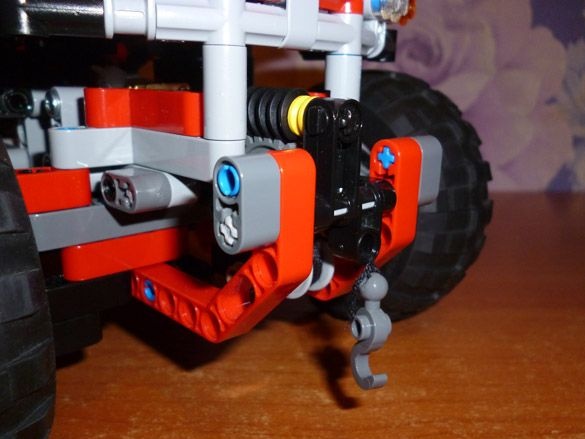
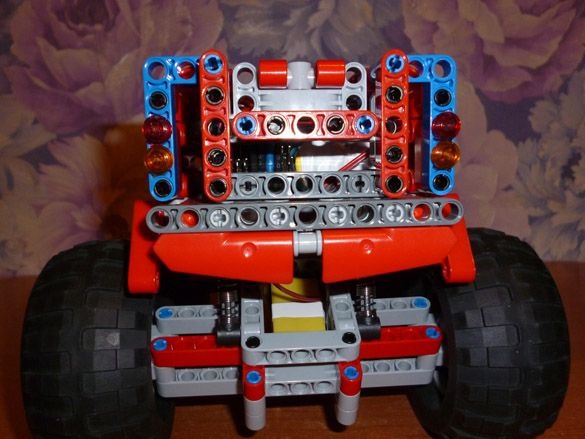
We fix the winch in front of the model:

At the bottom of the model, the winch is attached as follows:
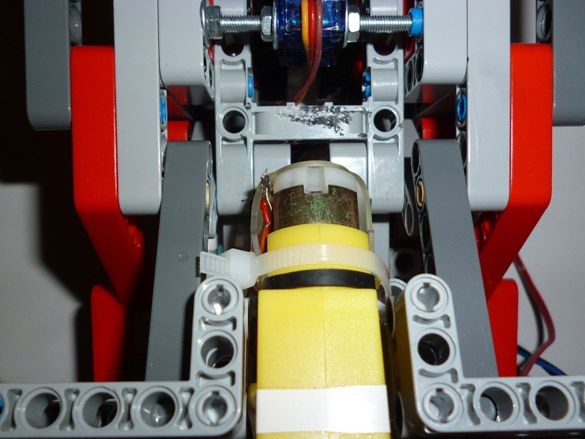
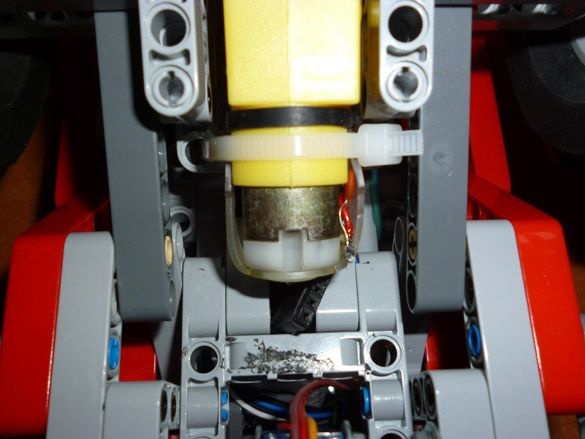
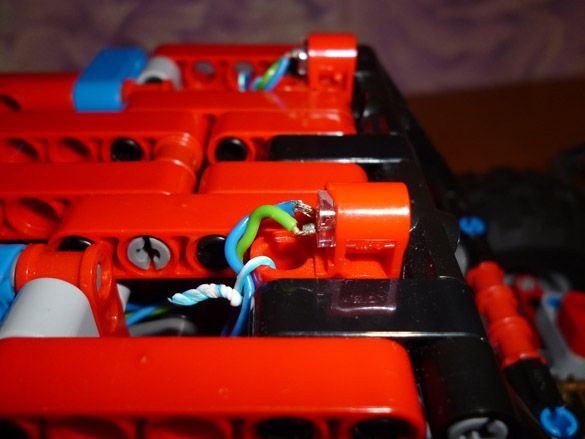
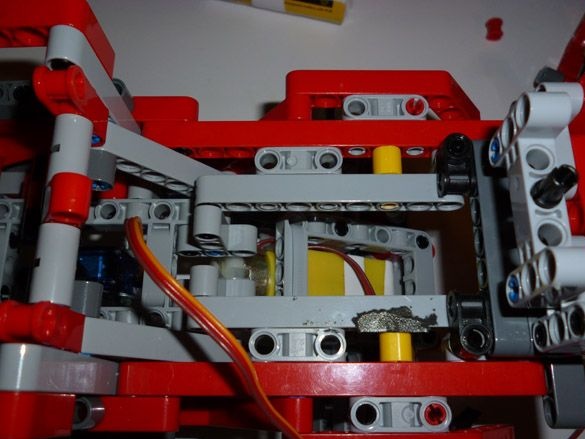
We install the winch drive, namely, the already prepared mini gear motor:
A fully finished winch looks like this:
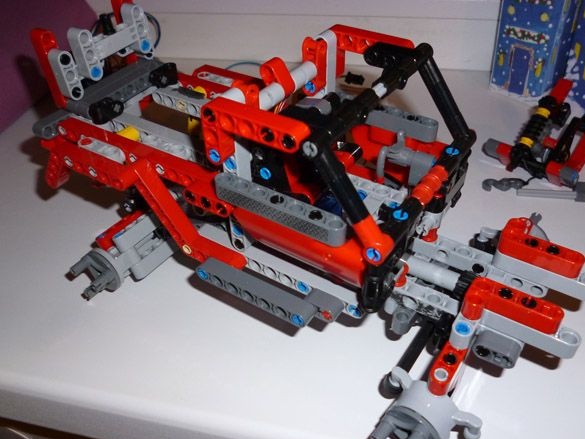
We assemble the hood according to instruction 42075 from pages 87 to 95. Having slightly changed the mount, as shown in the photo:
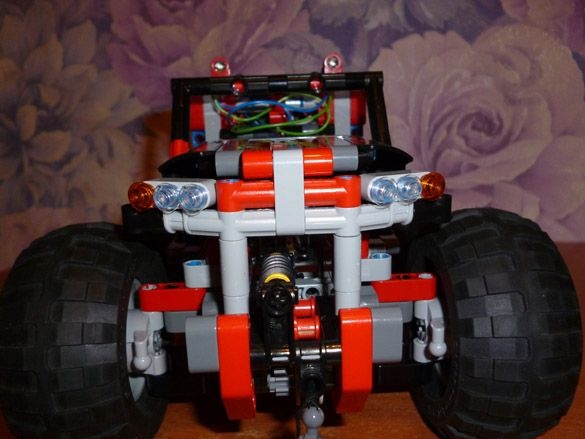
We put the hood in place, and proceed to the collection of a small roof. We put two LEDs on it, as headlights:
We put it on the model:
Again we turn to instruction 42075, this time we collect from pages 63 to 65 and from 104 to 105. We get the details that cover all the electrics:
Step 3 Electrification.
So, the most interesting. It is better to separate the power supply of Arduino and motors in order to avoid controller overload during power surges. The model is small and we will use a small A27 or A23 battery to power the Arduino. Press the wires to the battery contacts and fix them with electrical tape:

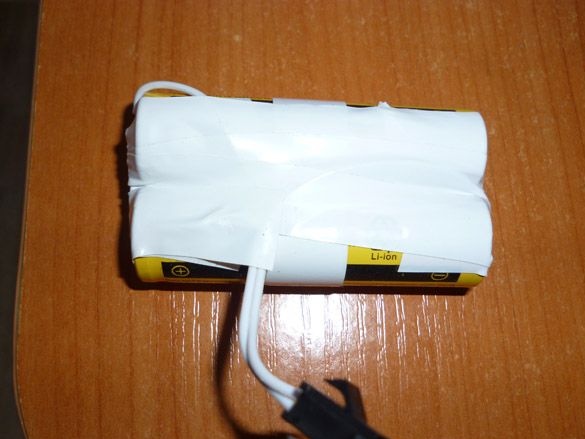
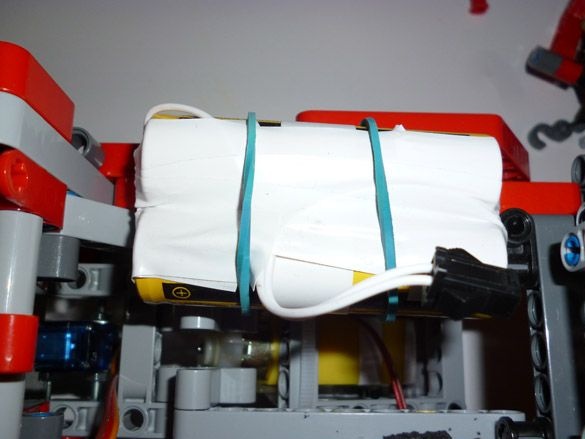
To power the motors, we take two Li-ion 18650. We solder them in parallel and isolate them, outputting the power connector:
If anyone is interested, you can power everything from the batteries, but then you need to put a 68μH inductor in the gap of the positive Arduino power wire. And also add a 10v 1000uF capacitor connected in parallel to the Arduino power supply. The scheme is as follows:
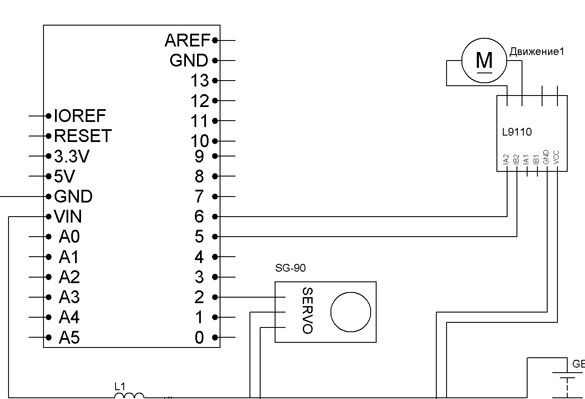
We pass to the union of everything together. We connect the signal wire from the servo drive to pin 2, contacts from the motor driver, wheel drive, to pin 5 and 6, from the winch driver to pin 9 and 10. Having calculated the necessary resistors for the LEDs, put them in the gap of the positive wire going to the LEDs. Anodes from the LEDs of the headlights going through the resistors are connected to 4 pin, the cathodes to GND.
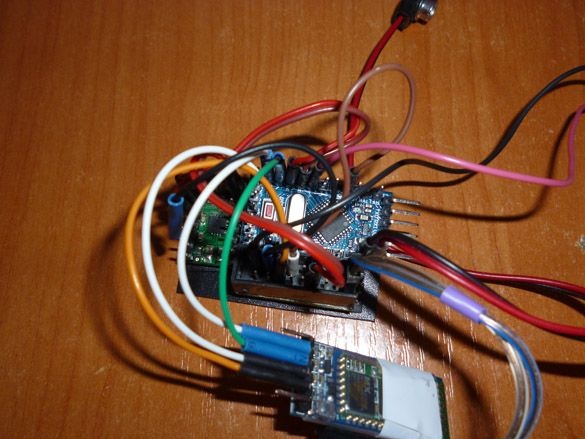
Arduino TX and RX contacts are needed to connect to a computer, so we’ll connect the Bluetooth module through the SoftwareSerial library. That is, through the created software com-port. The module connection is as follows:
Arduino Pro Mini - Bluetooth
D7 - RX
D8 - TX
5V - VCC
GND –GND
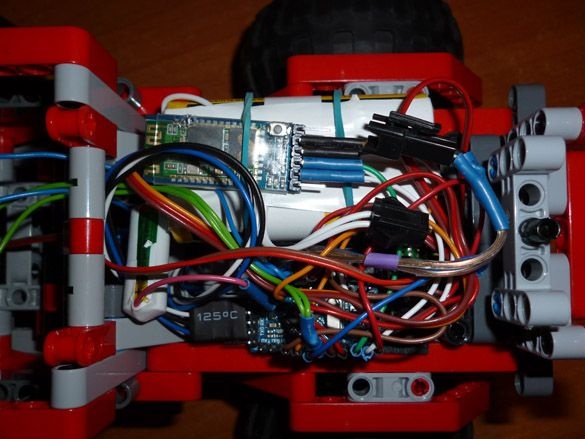
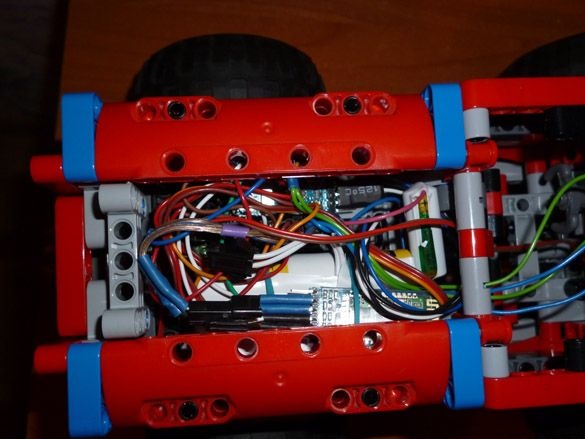
Putting all the electrics:
All this we will place in the rear of the model, above the rear axle:
First, we attach the batteries to double-sided tape or with a rubber band:
Next to them on a double-sided tape we fix the Arduino and the engine driver:
Now you can put the wheels on the model and attach the side parts that cover the electrics:
For the convenience of the subsequent filling of the sketches, output the wires to connect to the USB-TTL converter.
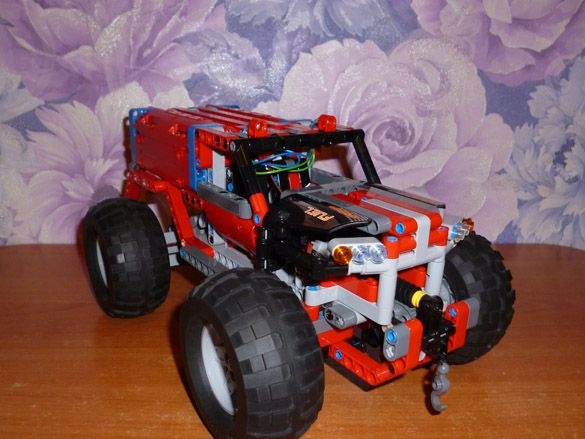
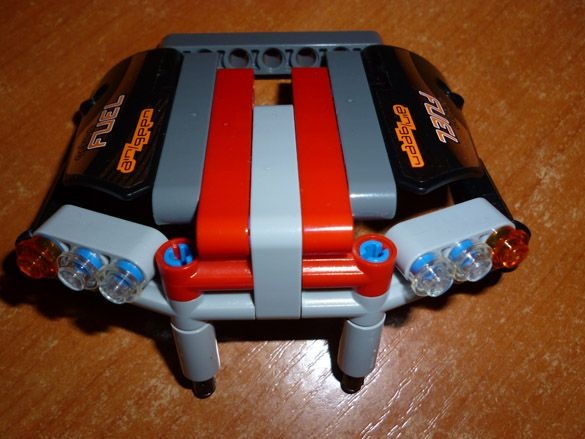
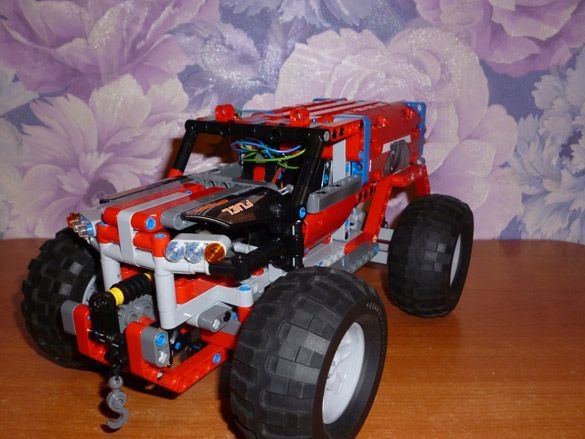
Step 4 We admire.
Take a break and enjoy the beauty of the model:
Step 5 Prepare the programming environment and fill the sketch.
To edit and fill sketches it is convenient to use the Arduino IDE.If you have it, check if it is up to date. Or download and install it from.
Next we need to add the following libraries. Servo.h library simplifies the work with the servo drive, and SoftwareSerial.h for creating a software communication port for the Bluetooth module:
Downloaded and unpacked archives must be moved to the “libraries” folder located in the folder with the Arduino IDE installed. You can go the other way, namely without unpacking the archives, add them to the programming environment. Launch the Arduino IDE, select Sketch - Connect Library from the menu. At the very top of the drop-down list, select the "Add .Zip library" item. We indicate the location of the downloaded archives. After all the steps, you need to restart the Arduino IDE.
Step 6 Configure the Bluetooth module.
Before use, the Bluetooth module must be configured. To do this, fill the following sketch into the Arduino board:
It is needed to connect the computer with a Bluetooth module. We use the terminal window from the Arduino IDE. Select Tools - Port Monitor.
For HC-05, set the speed to 38400, set the send parameter NL and CR and enter the following commands:
"AT" - entered without quotation marks, the answer "OK" should come. If you come, we continue to enter commands further.
“AT + UART = 57600,0,0” - set the speed to 57600 bps.
Step 7 Fill the sketch.
To make our model come to life, fill in the following sketch:
Step 8 Manage the model.
You can control the model in several ways. The easiest is to use an Android device as a remote control. First, add the bluetooth device of our model to Android. To do this, go to the Bluetooth settings, find our Arduino module and connect using the password for the “1234” connection, maybe the password will be “0000”, it can be different for different models. Then install the control program. Download the Arduino BT Joystick Free program from Google play. After installing and running the program settings, install following teams:
W - forward
S - back
A - left
D - right
F - stop
G - steering wheel
Y - winch down
T - winch up
H - stop winch
K - headlights
L - headlight off
If you are a fan of Windows devices, or just Android is not at hand, download the following program:
On a Windows device, you should first add a new device using the same password. And also configure the program for the same commands.
In my opinion, it is most convenient to use a physical remote control, since then a button is felt. I recommend making a remote control, following the instructions.
And add a Bluetooth module to it. Detailed process description.
I also add a video demonstrating the work of my model:
And the work of a separate winch: