
Today we will make a luminous model of an atomic explosion, and in combination it will be a small USB desktop lamp.
A lot of time and money was spent on its manufacture. I hope you will like it. It was based on the explosion of the most powerful explosive device created in the history of mankind - the AN602 thermonuclear aircraft bomb. She is better known to all under the name "king bomb." Bombanul really royally, I hope that on our planet it was the first and last explosion of such power, it’s better to live peacefully.


Materials and tools:
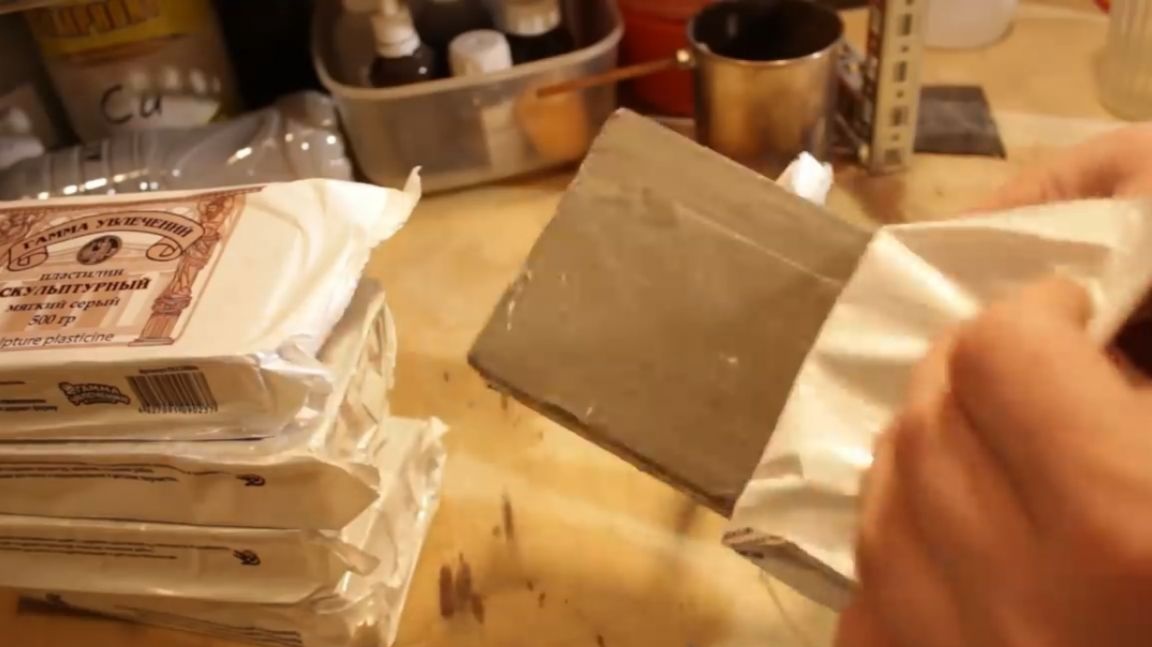
1. Sculptural clay
2. Epoxy
3. Collapsible silicone mold (manufacturing process: LINK)
4. Engraver
5. Paints
6. LED
7. Resistor
8. Usb cord
Let's get started.
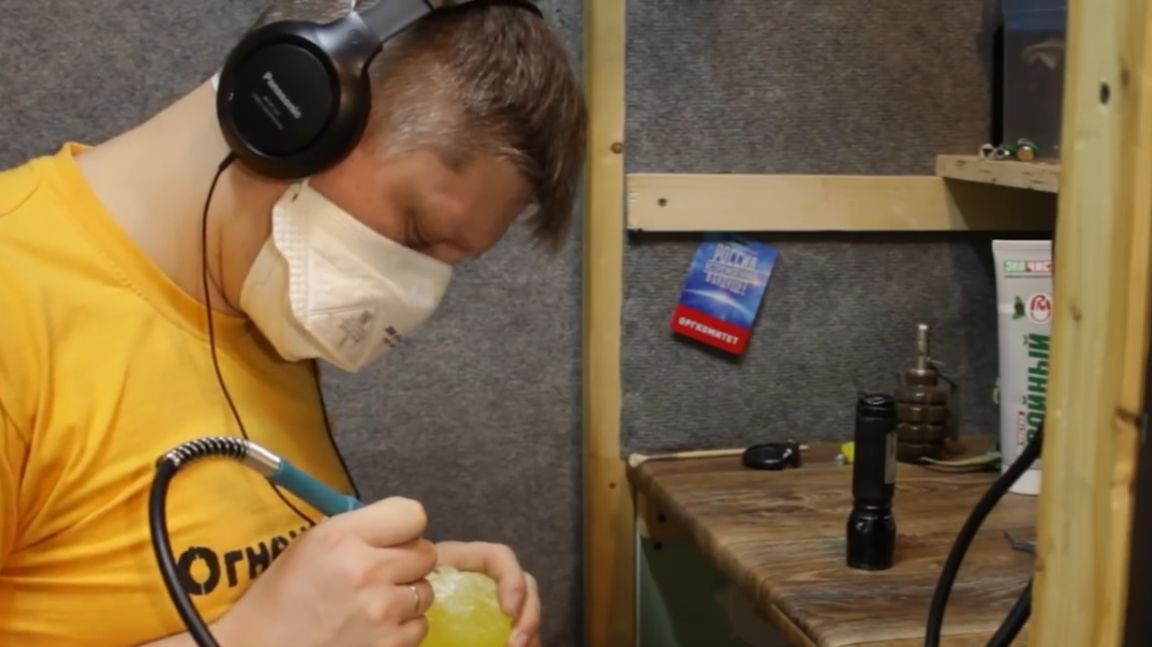
The model of the explosion will be made of sculptural plasticine. It is specially designed for these purposes and has the necessary rigidity to keep its shape well.
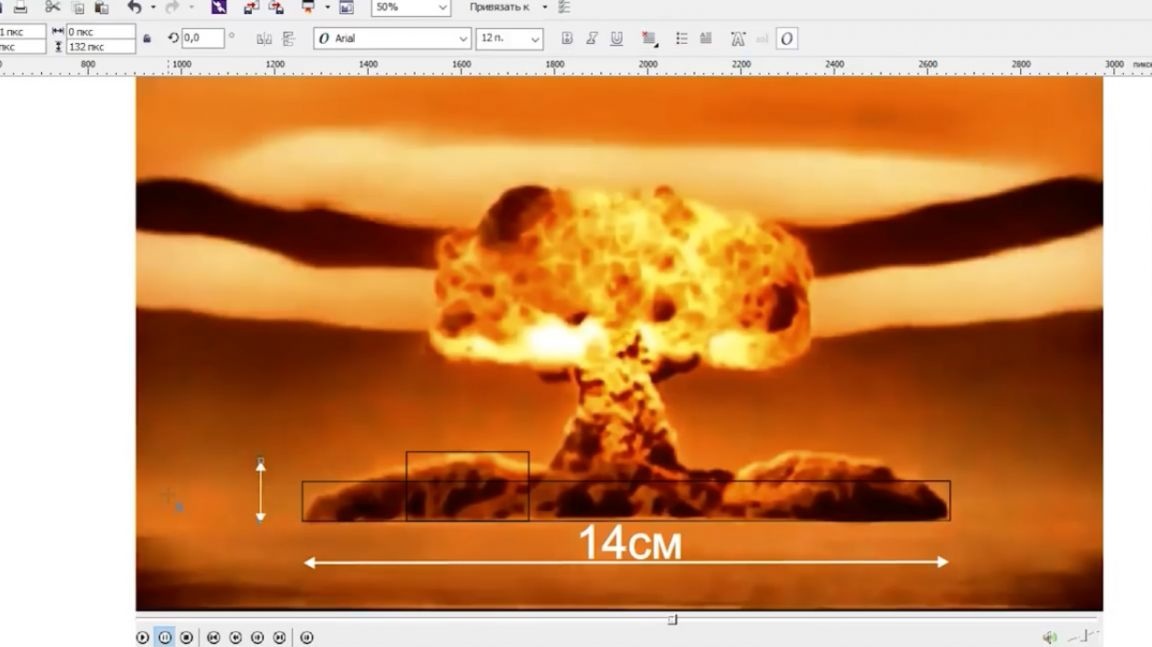
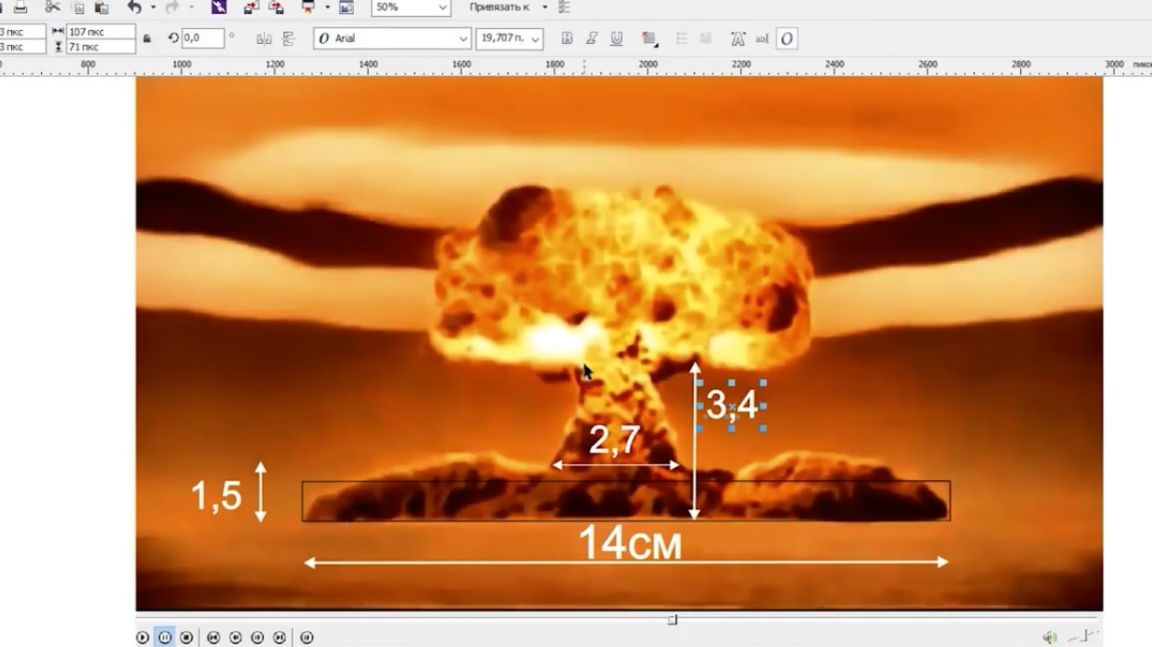
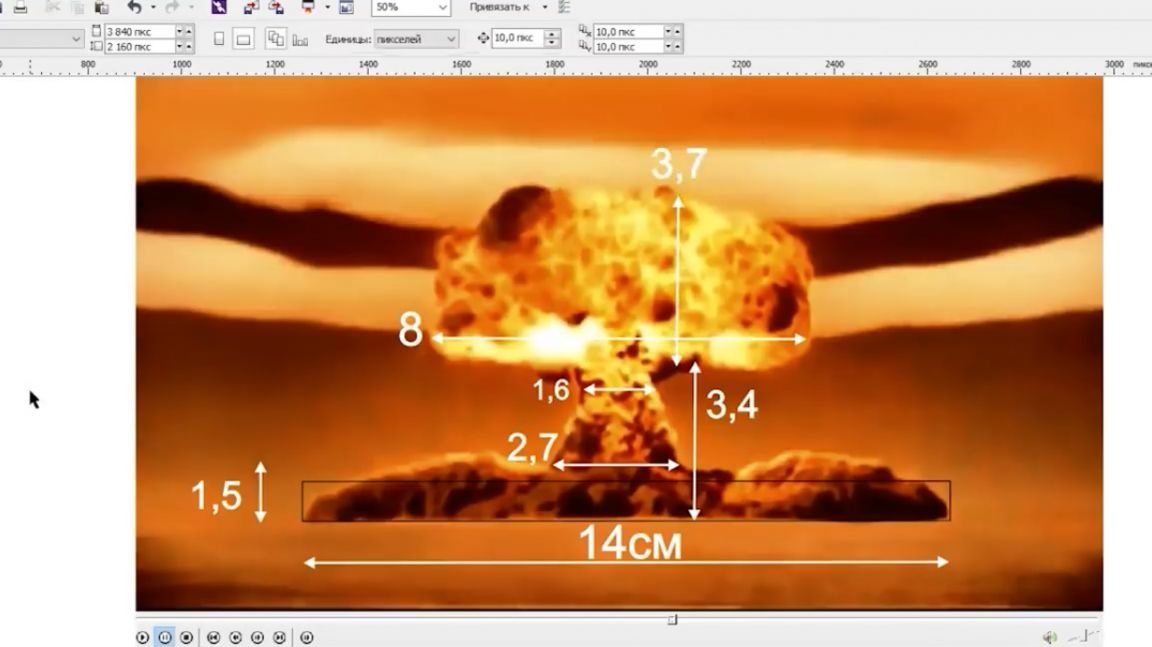
First you need to make a platform of plasticine on which the layout will be placed. We measure the width. It turned out about 14 cm.
Now you need to choose the most beautiful shot of a nuclear explosion. And with the help of some AutoCAD to put the relative dimensions, I focus on what is at the base model should be no more than 14 cm.
You need to start sculpting from the bottom of the model. To roughly orient in size, it is better to make a shaft of rough shape out of plasticine, and then slowly give it the necessary shape. The work is very painstaking.
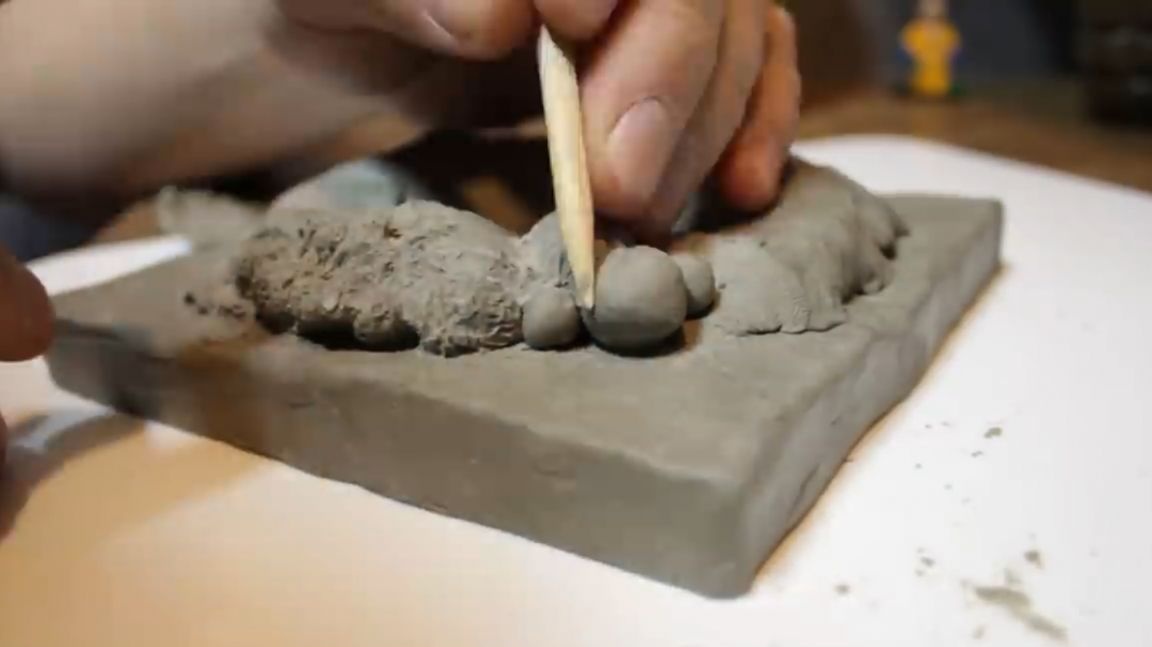
After making the lower part, focusing on the relative sizes, you need to make the leg of the mushroom. And only after it is already possible to proceed to the most interesting part.
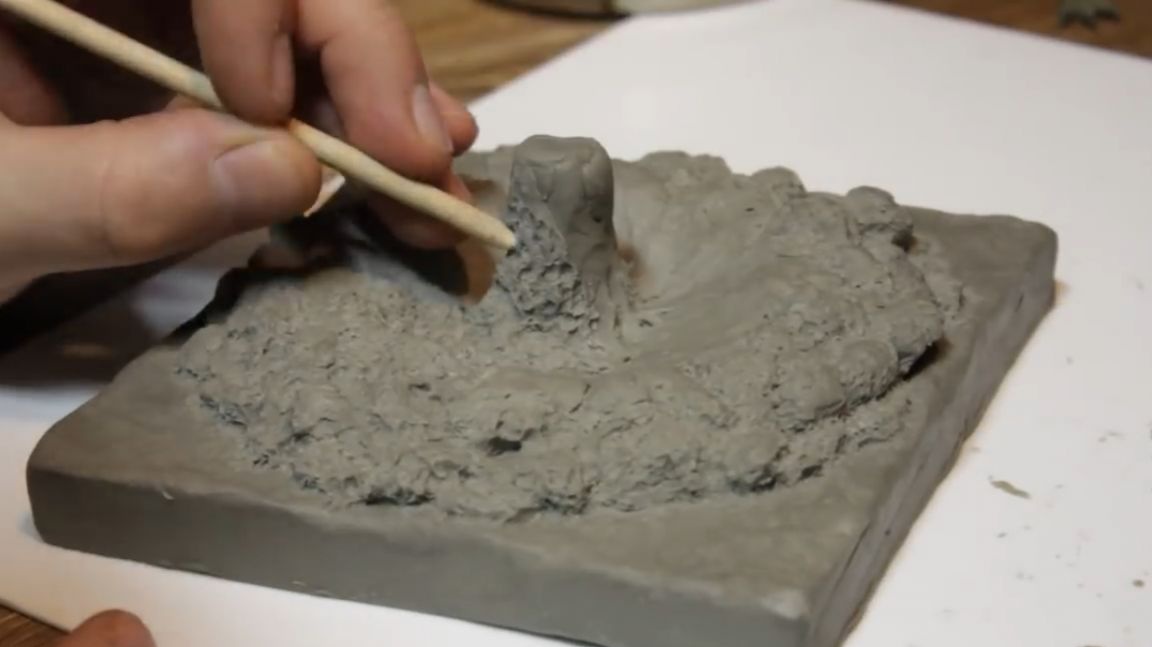
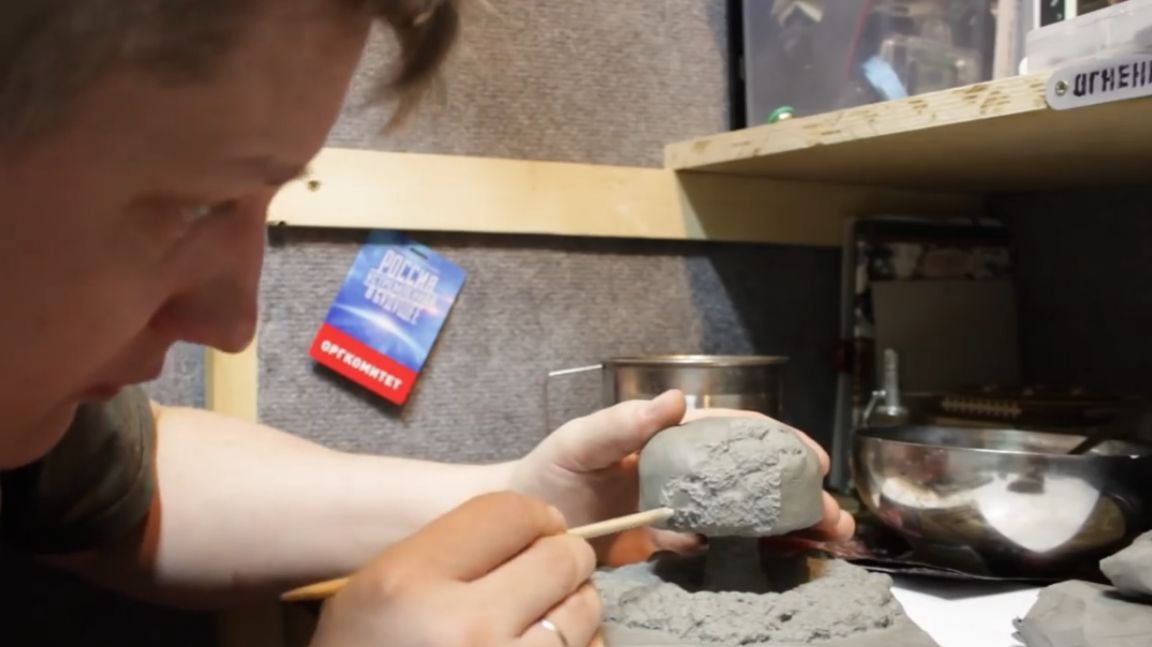
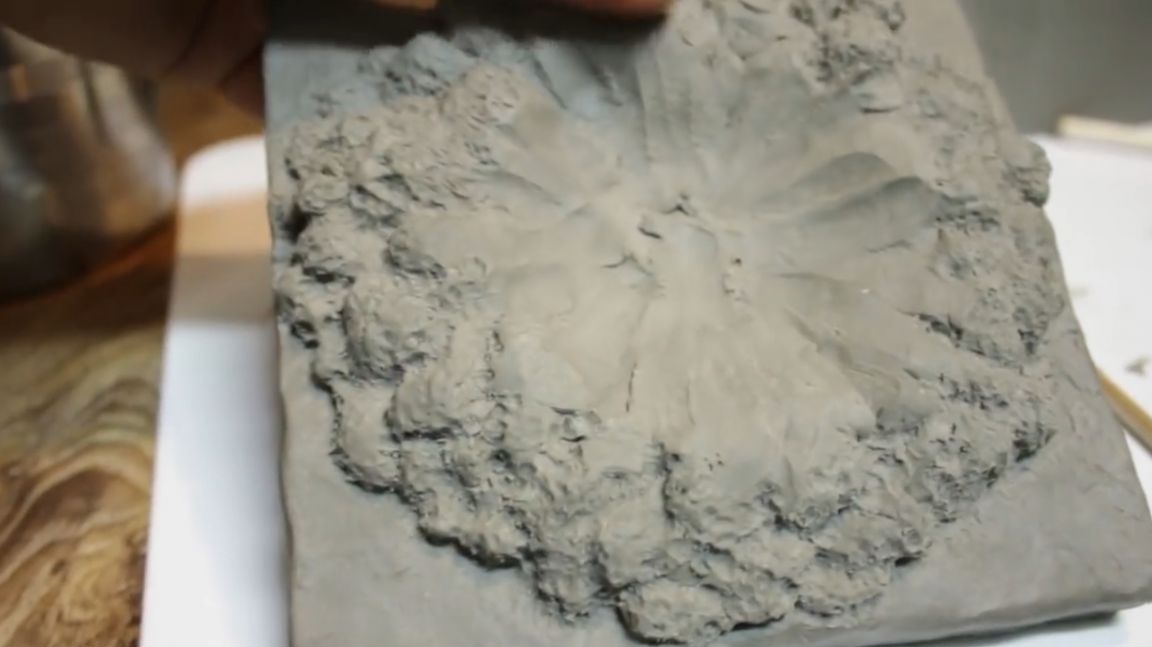
The more bumps there are, the better. In general, sculpting something like a cloud is not an easy task.
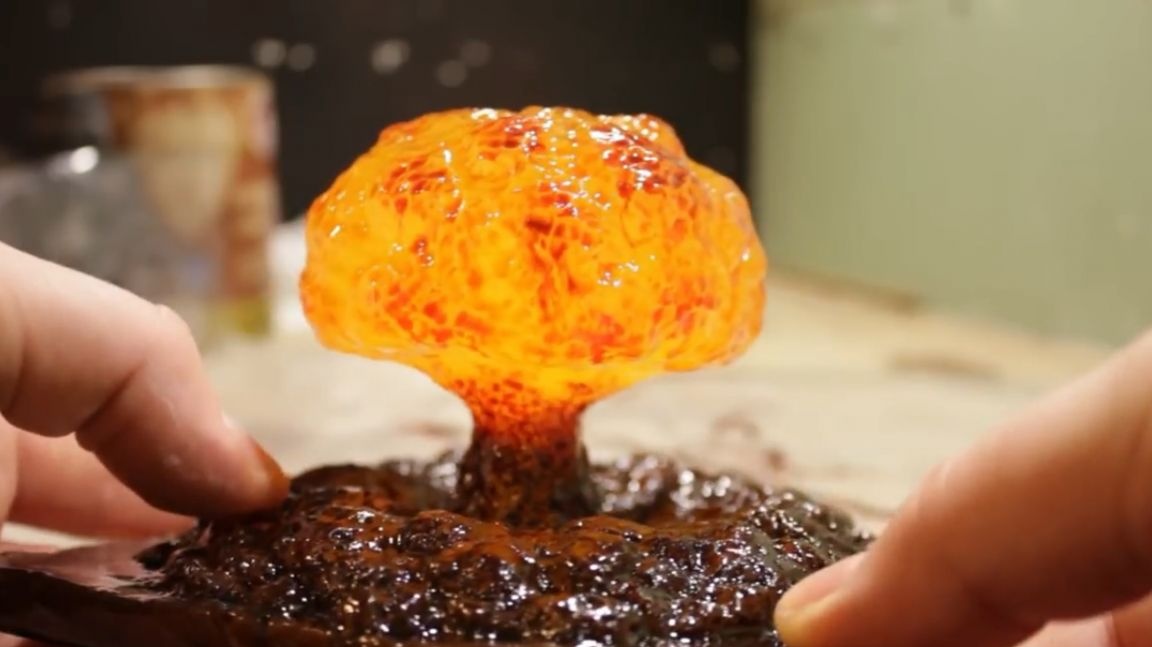
And here he is - a plasticine atomic explosion.
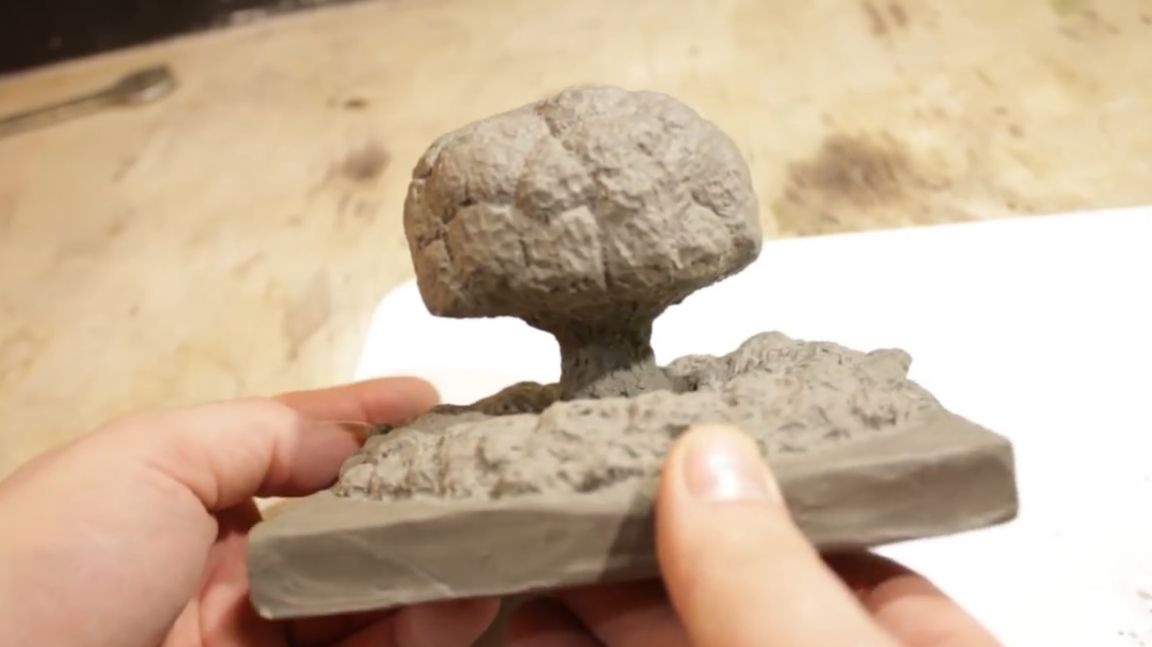
It seems that it turned out more or less similar. Further, the author needed to make a copy of this model using injection-molded silicone. You can find out how he did this by watching the following video:
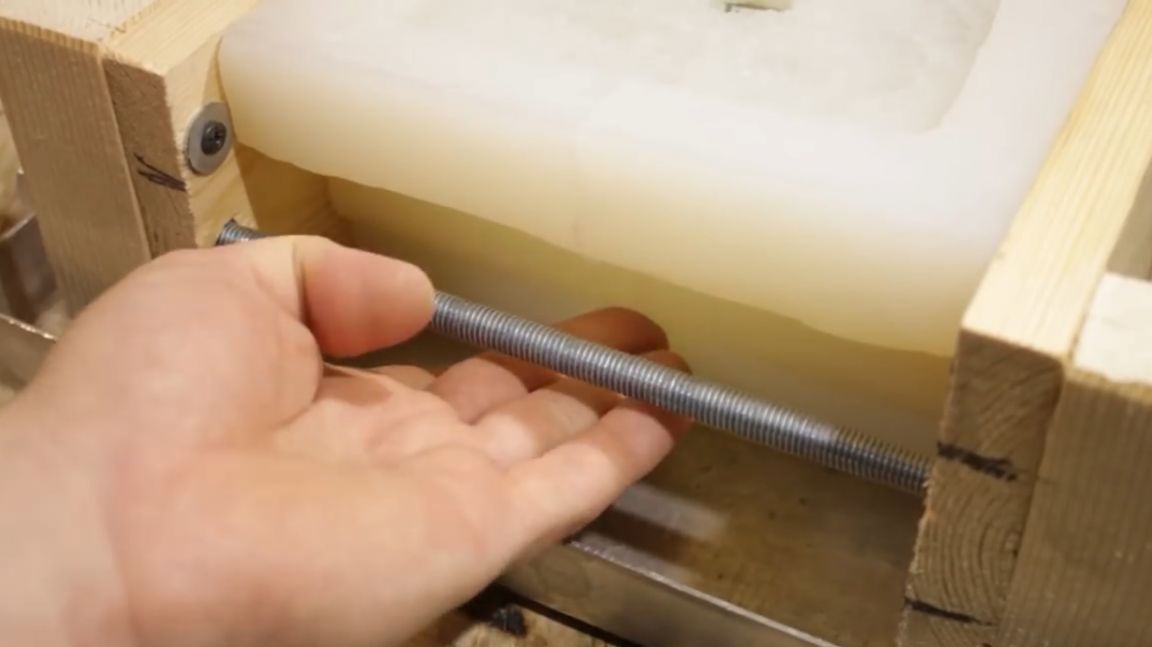
It’s just impossible to connect the two halves of the mold together, since when filling they will definitely disperse. In order to uniformly press the parts of the mold against each other, I had to build such a vice.
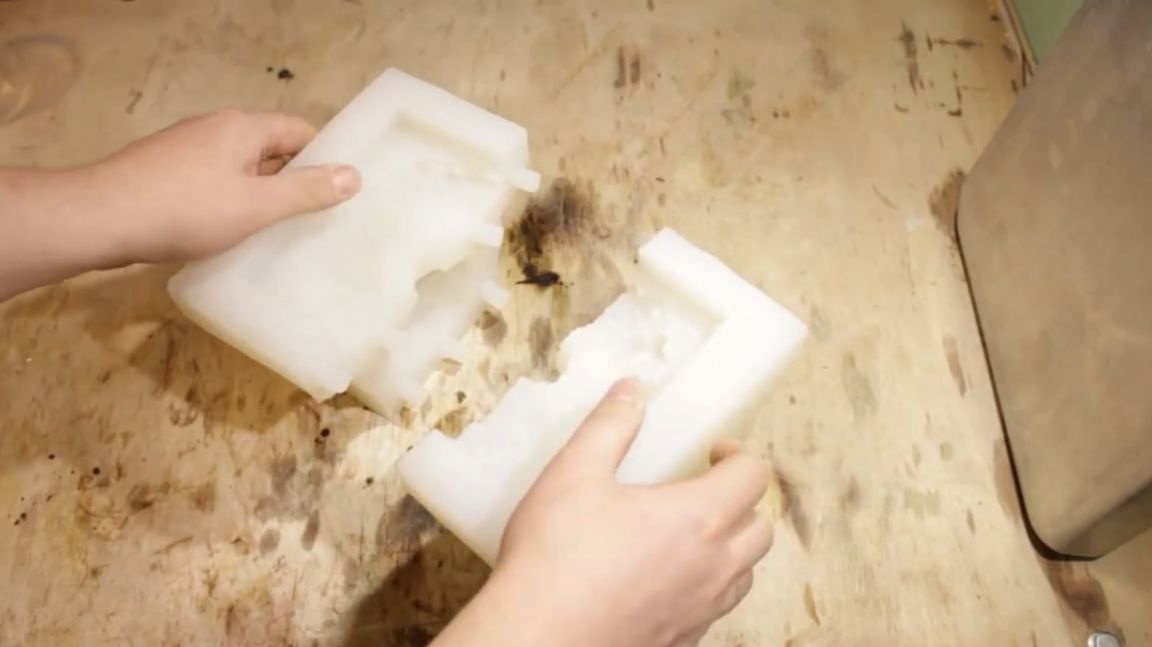
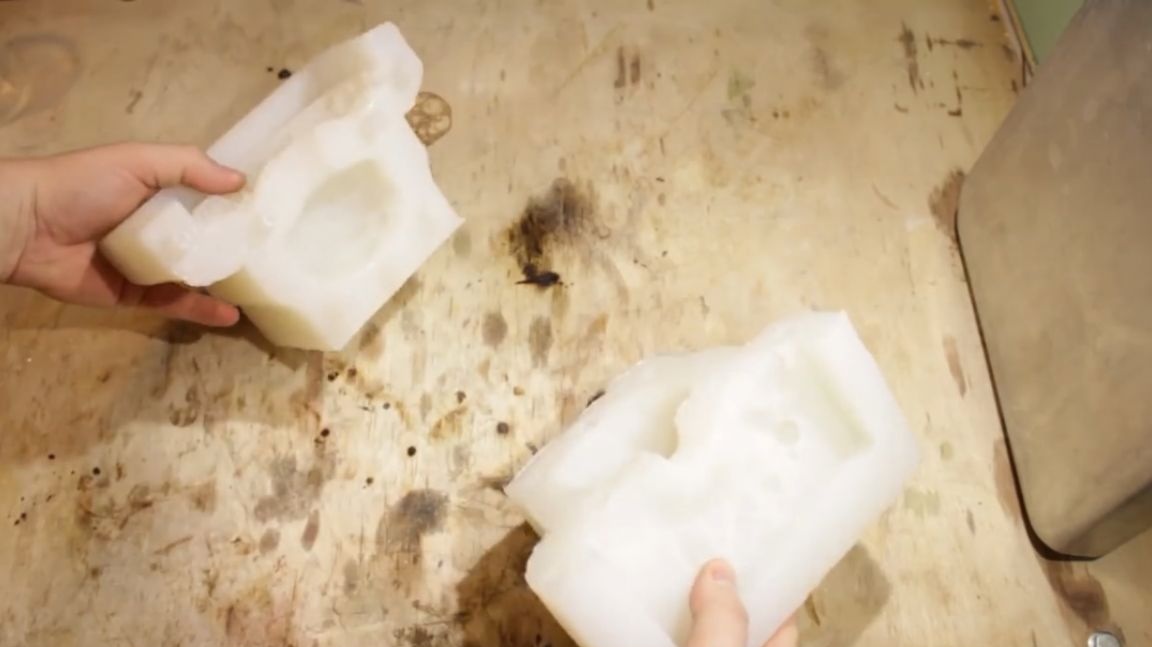
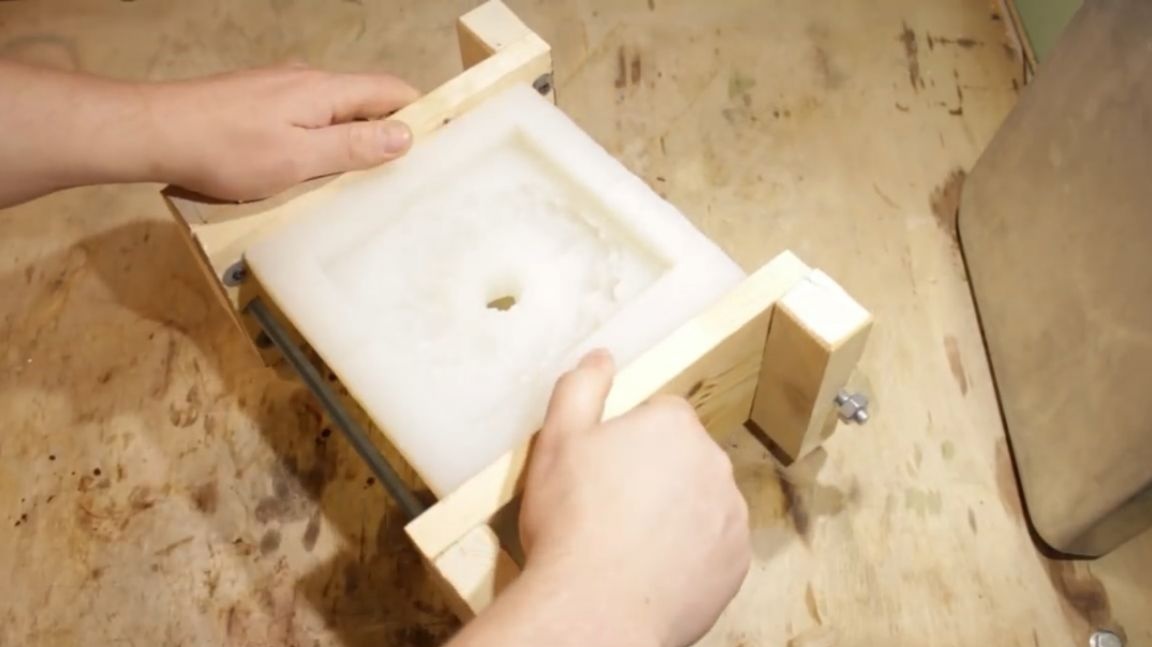
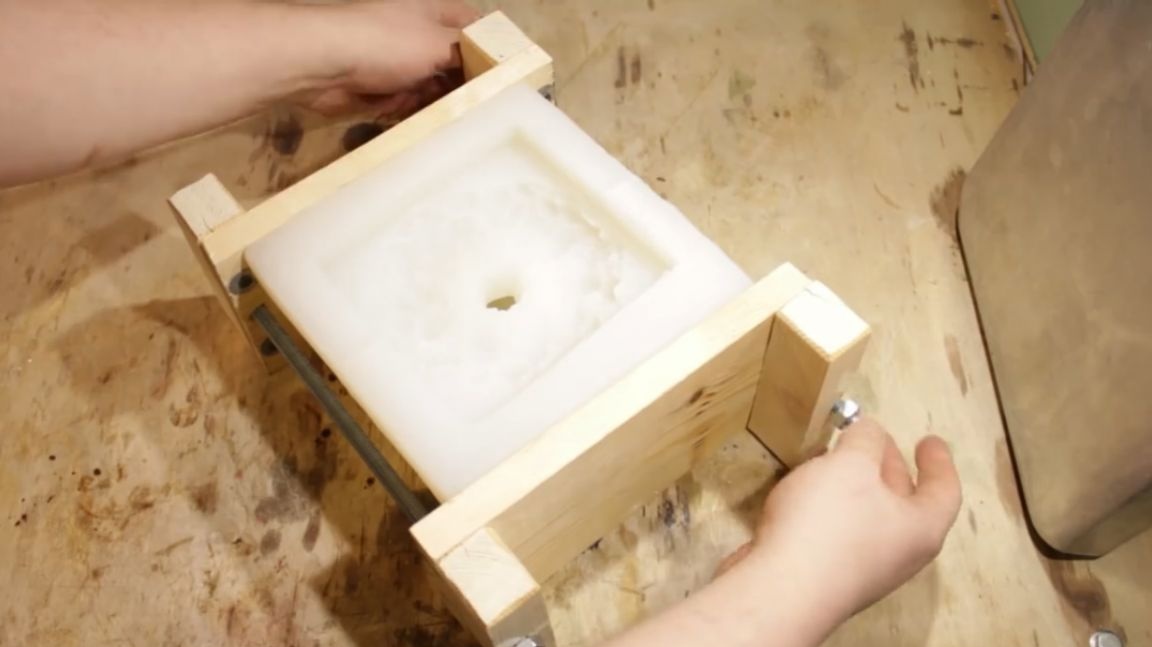
The edges of the board are reinforced with bars due to the fact that the boards themselves were slightly pot-bellied, and now they are almost perfectly flat. Of course, it is impossible to tighten it strongly, because the silicone is soft and the shape will be distorted.
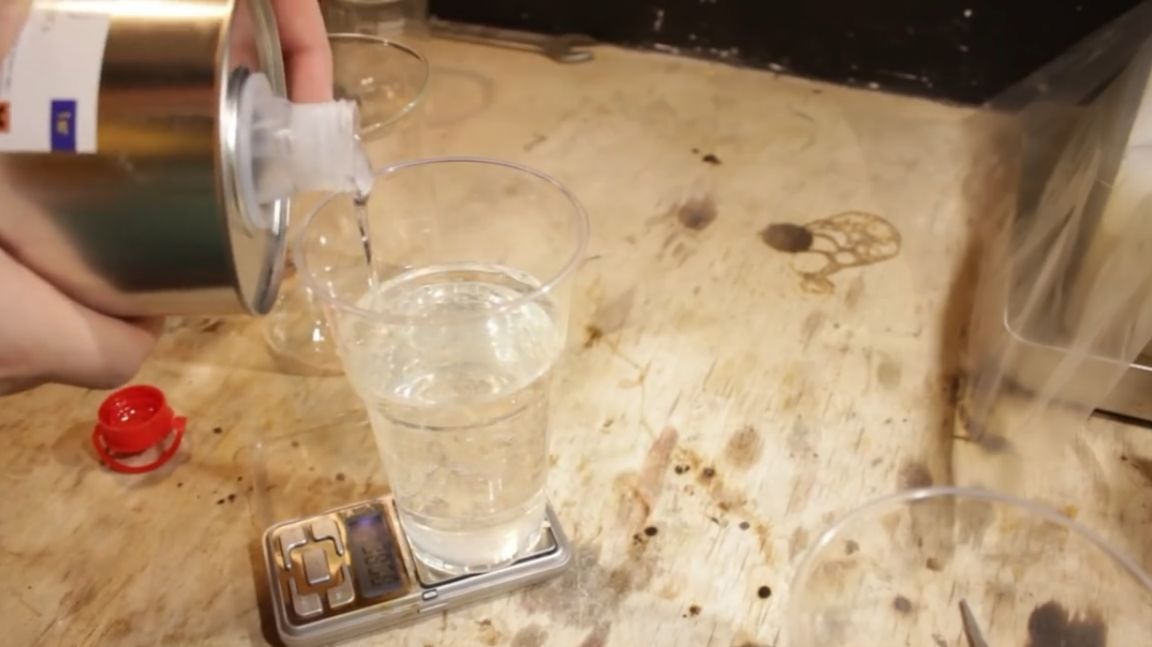
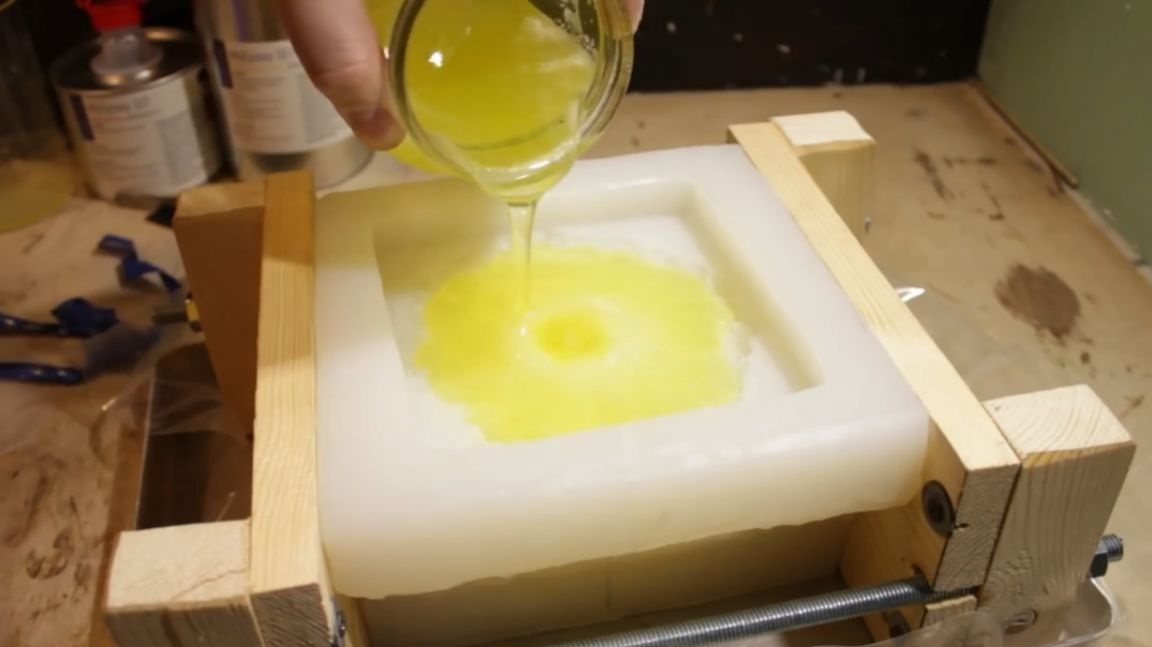
It is enough to tighten slightly and the two halves become one. Silicone halves fit perfectly together. We will fill in the form with a transparent epoxy resin.
She is very viscous and not at all cheap. Therefore, you need to measure the internal volume of the form and at the same time check whether the joint is leaking. To do this, fill the mold with water.

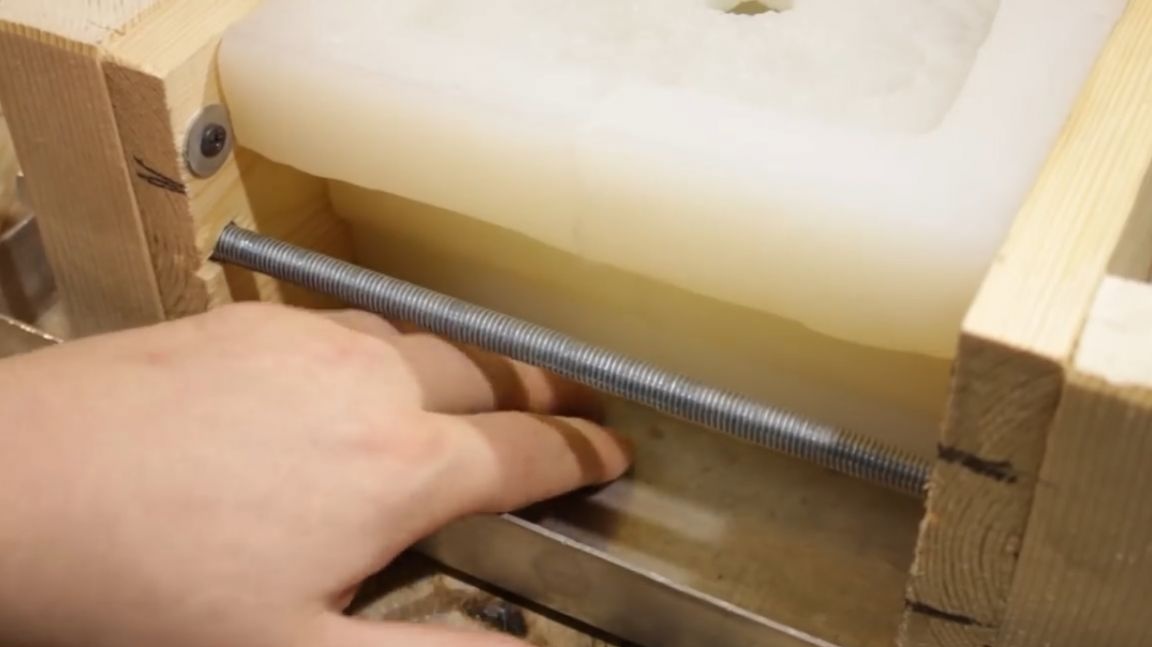
In 5 minutes, the water did not leak away, which means you can fill in the resin.
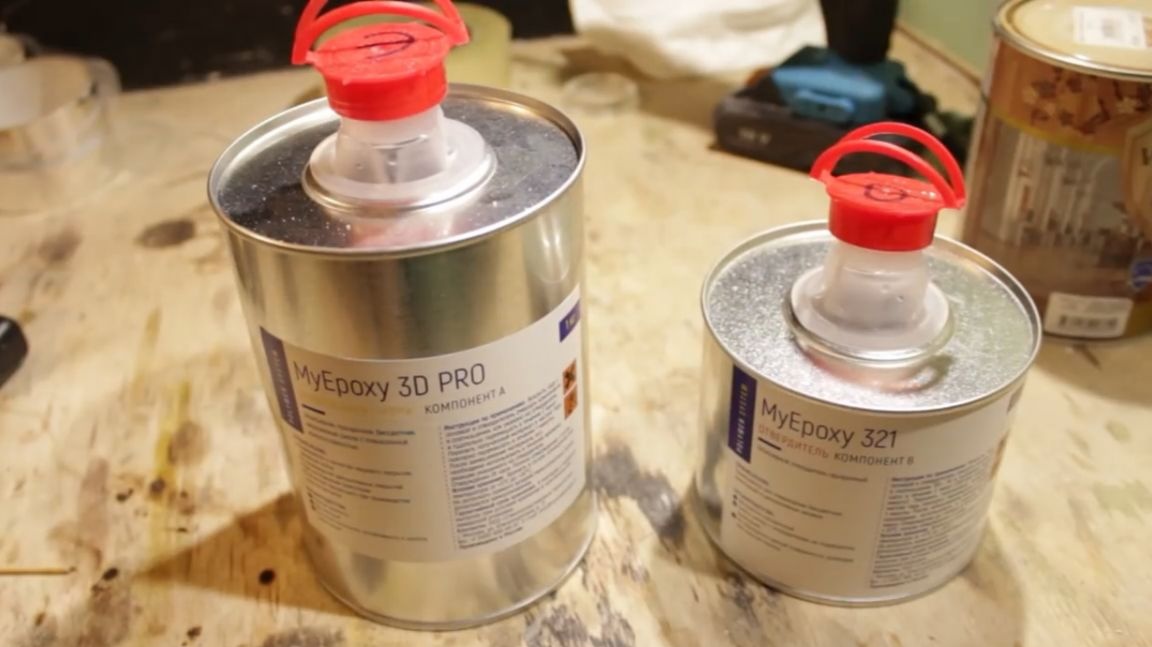
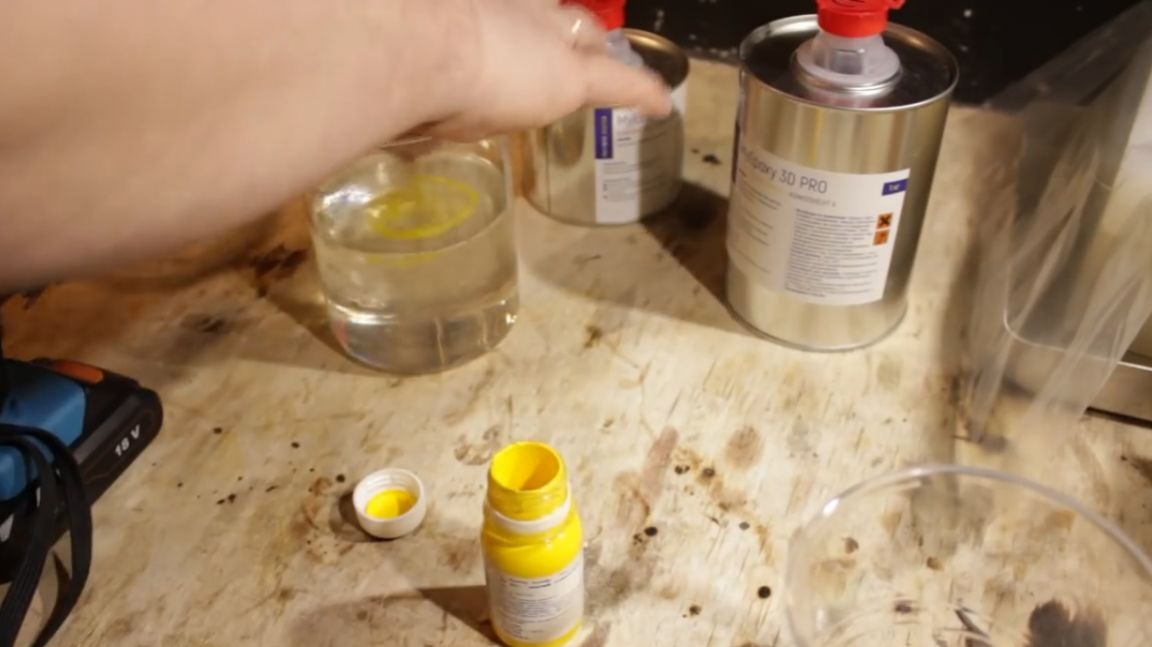
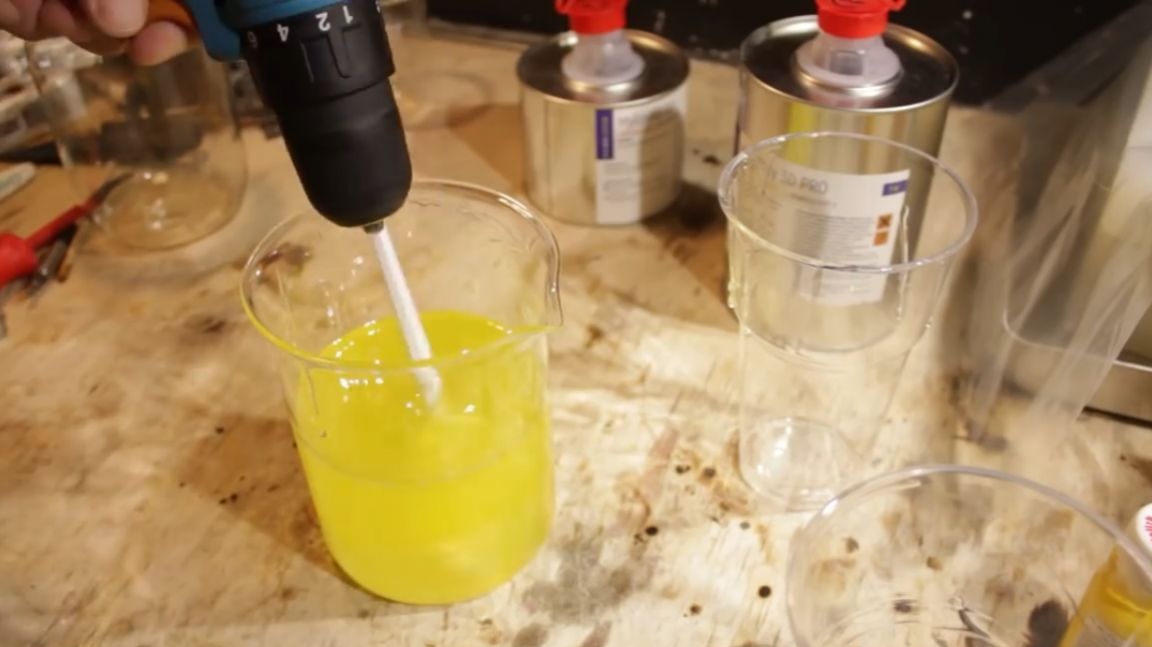
Epoxy is two-component. Specifically, this resin must be mixed with a hardener in a proportion of two to one. It is very convenient by the way and it is difficult to make a mistake with the proportion. We also add a drop of dye, the explosion is still opaque, but rather yellow. Now mix thoroughly for a couple of minutes.
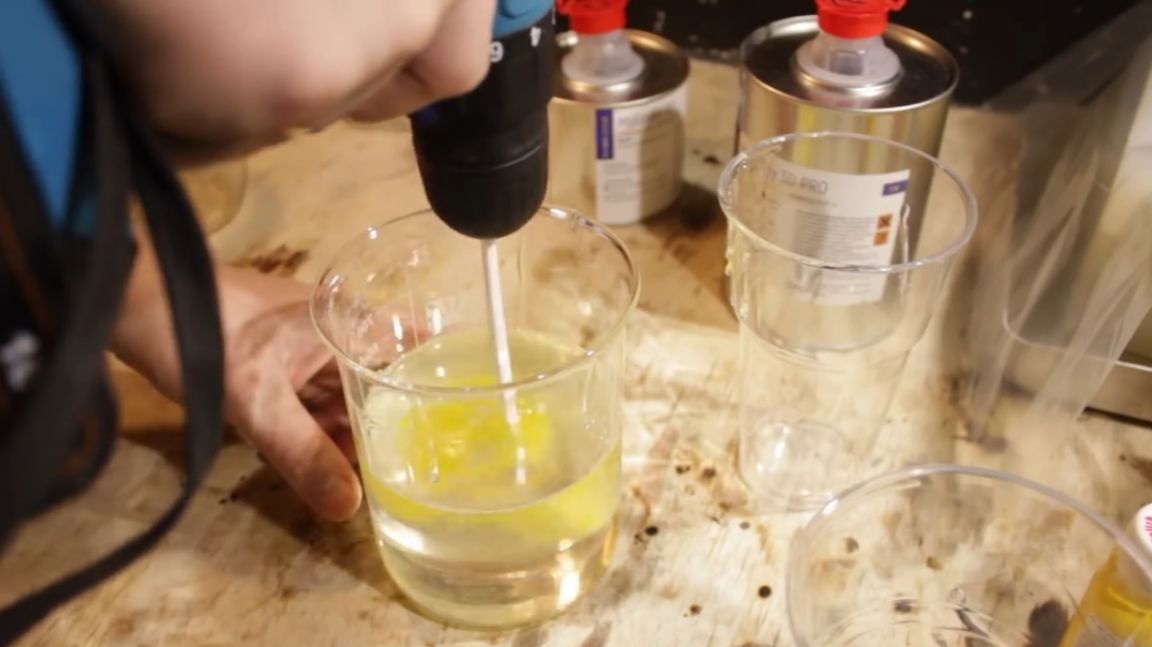
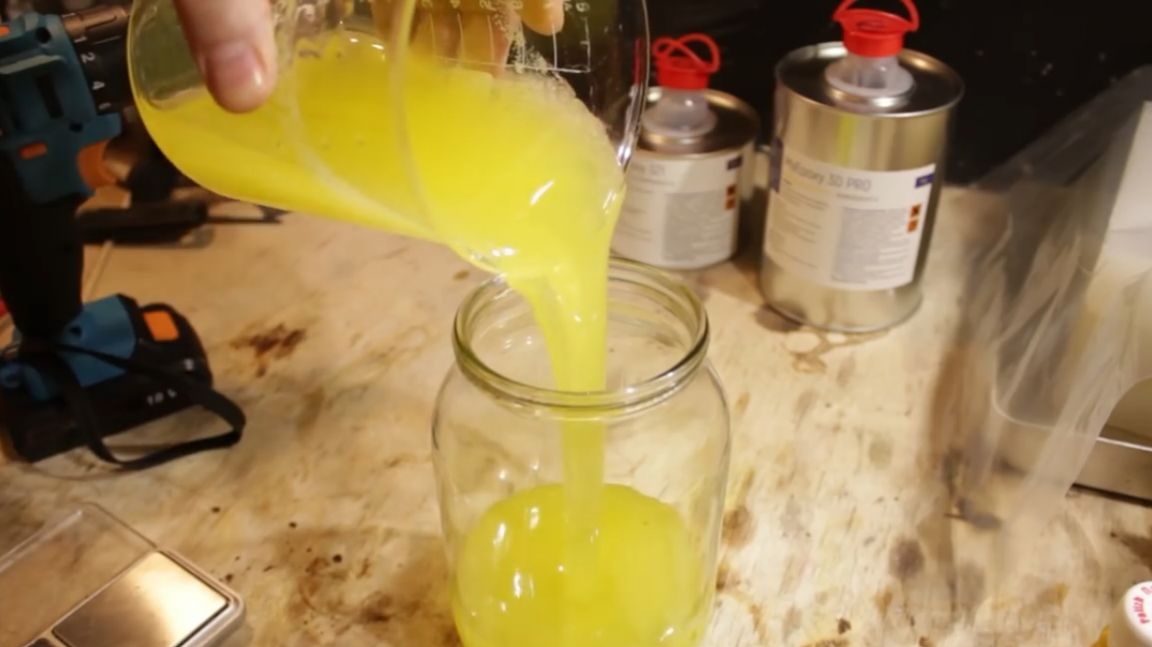
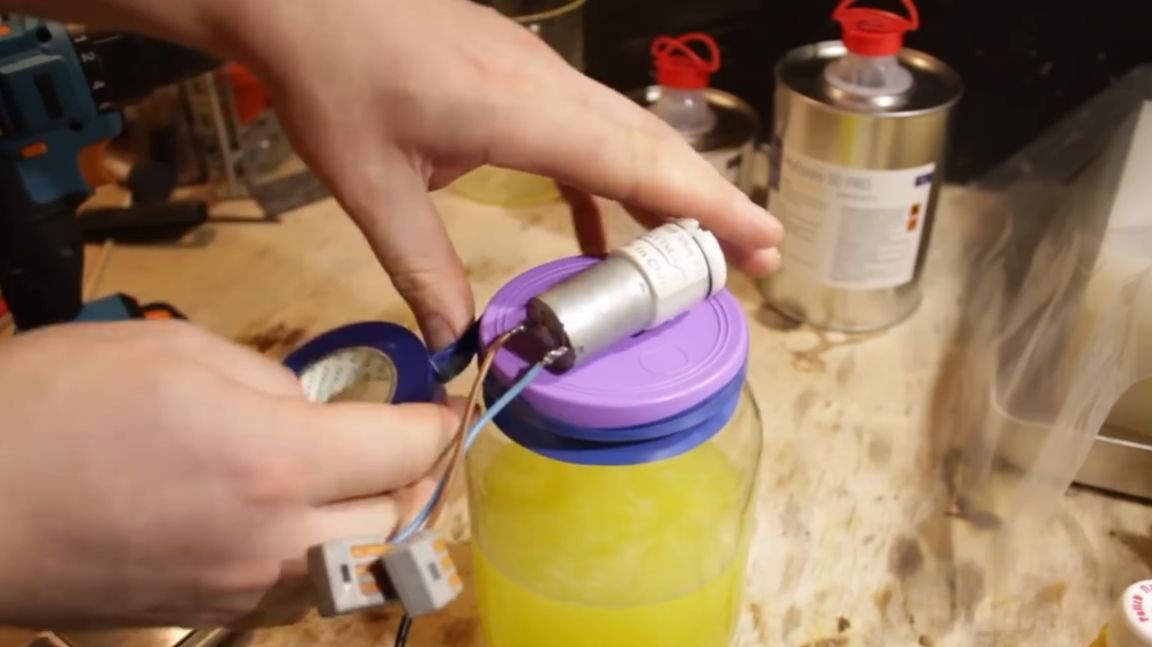
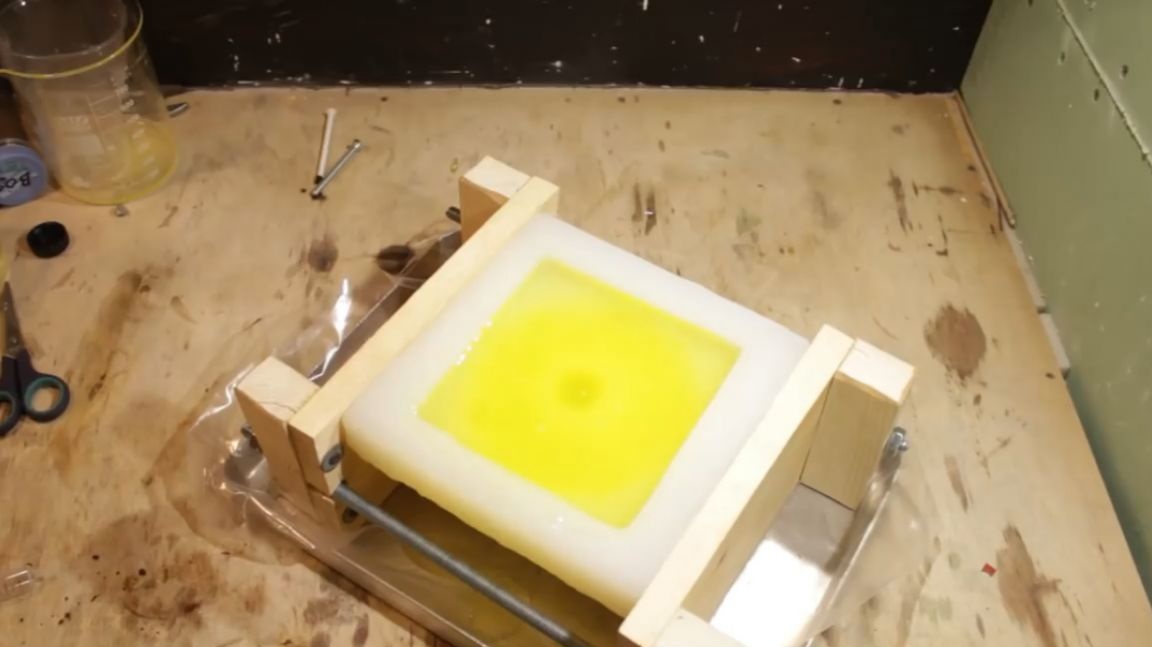
Then the author poured all this into another container. He decided to still try to vacuum the resin with his dead Chinese vacuum pump. In about five minutes he certainly blew out air, but by no means all. Foam rose and was in no hurry to burst.
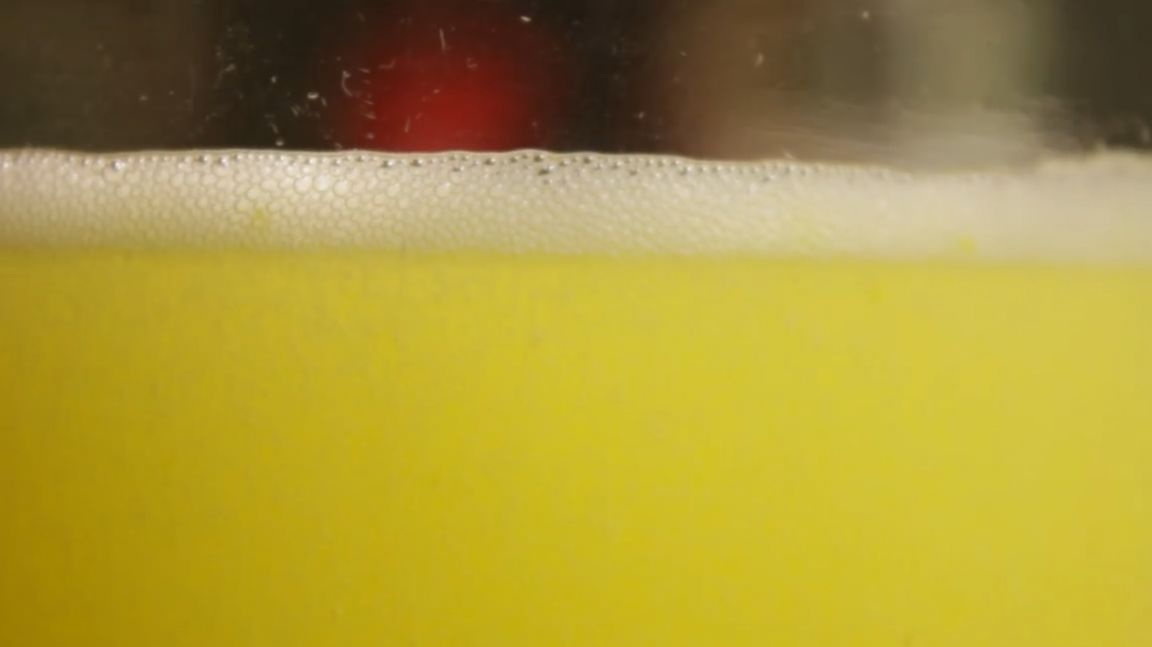
Still, we need a more powerful pump. Okay, leave it as it is. Be sure to shake, knock, stir with a spoon to expel the bubbles from the depths of the resin as much as possible. Bubbles pop up in huge numbers. Bubbles on the surface are not a problem. They can easily be removed with a piece of paper. The mixture begins to warm up, so you should remove it for a couple of hours in a cool place, and then remove it again and keep at room temperature for at least a day.
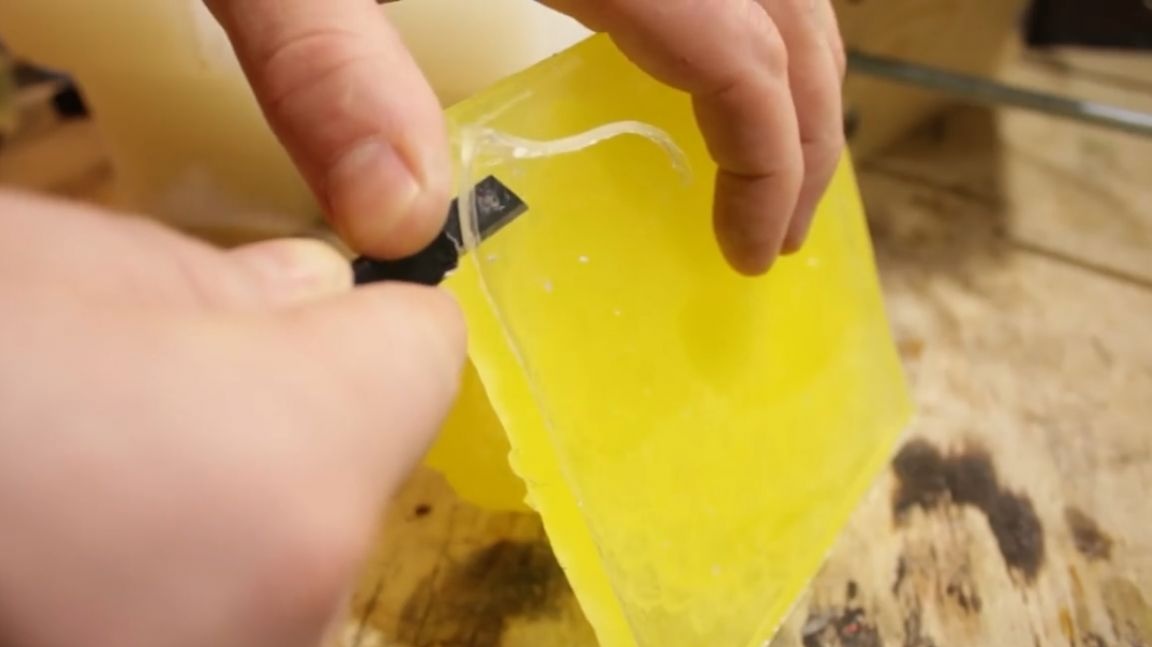
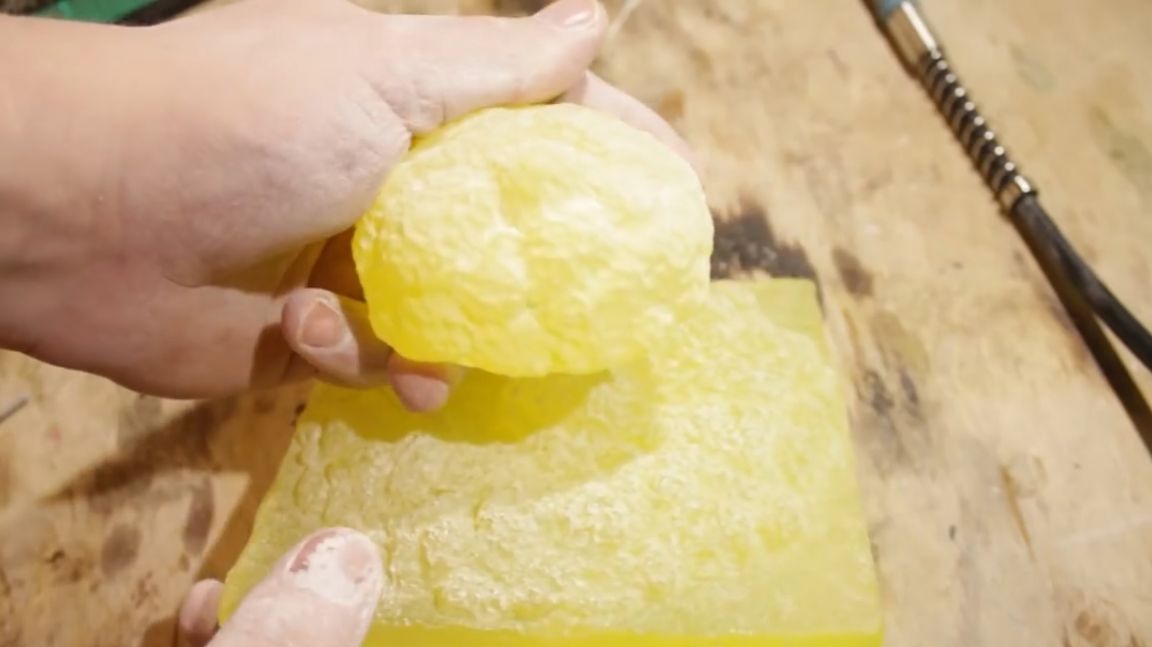
And now, the time has arrived. After a day, we disassemble the form. At least get this miracle out of form.
Immediately cut off the protruding edge obtained during pouring.
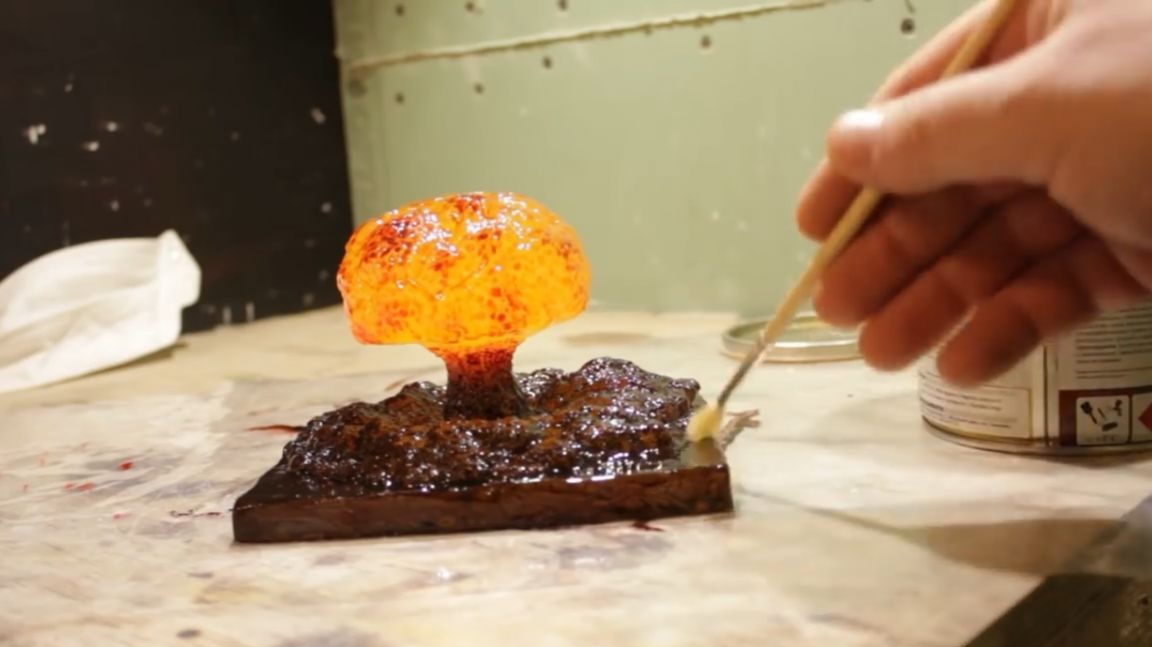
It turned out well, a lot of bubbles. The entire surface is in bubbles, and if the bottom is not critical, then the top should be as clean as possible because it will glow.
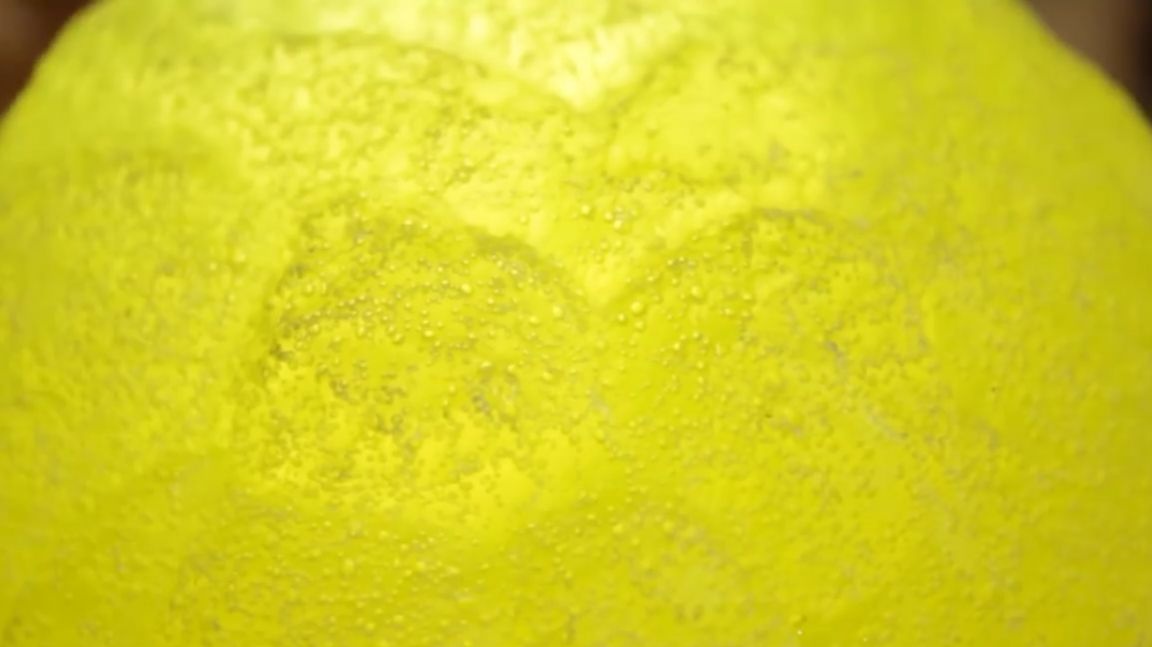
All bubbles to one are visible in the lumen. No problem. What does not kill us makes us smarter. Weeds are needed in order to fix them. Engraver open all the bubbles in the upper part of the model. It is necessary to remove about 1.5 - 2 mm epoxy. No deeper bubbles. They are all on the surface. Well, at least something pleases. And this is what happened after processing.
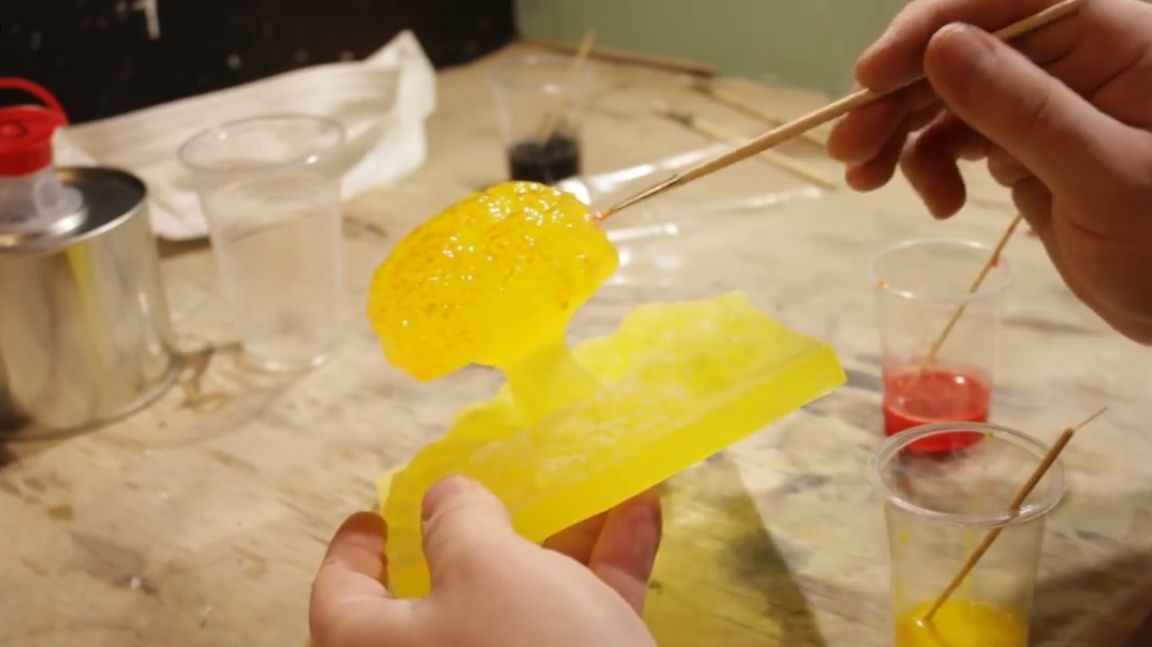
The engraver had to restore the relief as much as possible. The treated surface must be washed with a brush and soap and you can start painting. For painting we will use only 3 dyes: black, red and yellow.
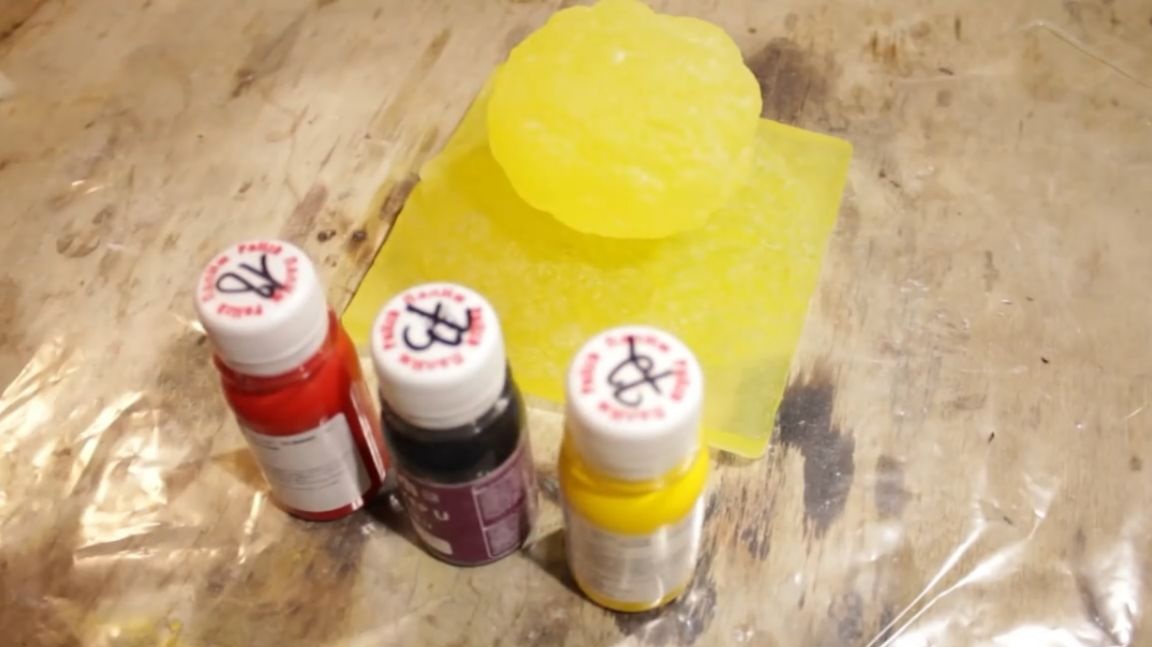
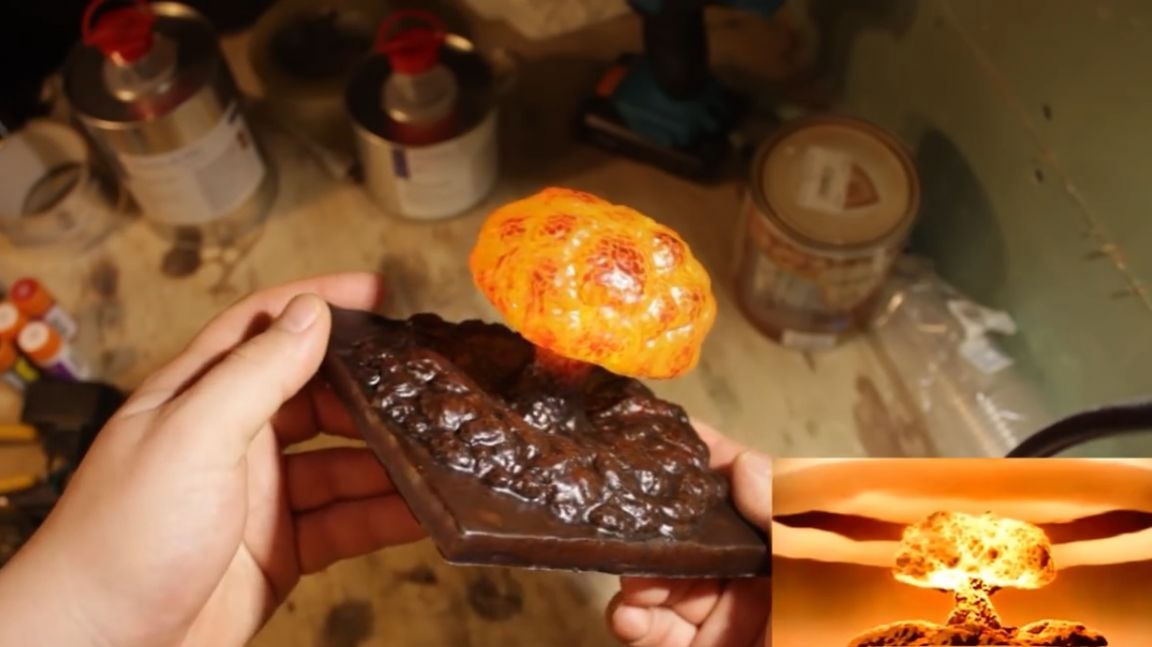
All dyes are mixed with epoxy. Here we will use them in this form. The tinted epoxy should adhere well and become practically one with the lamp. We cover the upper part with a yellow epoxy to restore the surface to its former gloss. Then add a little red epoxy, but not everywhere, but only on the protruding parts. Due to the surface tension of the epoxy, it seems to roll into the recess, which remained after processing by the engraver. Paint the bottom with a mixture of black and red. According to the author, the hot earth, raised into the air by an explosion, has approximately the same color. Now denote the most protruding parts of the red-hot cloud of a plasma nuclear mushroom with a thick red color. The edges of the red paint are enough to shade slightly and the epoxy itself takes place in the recesses of the model, creating a very believable color.
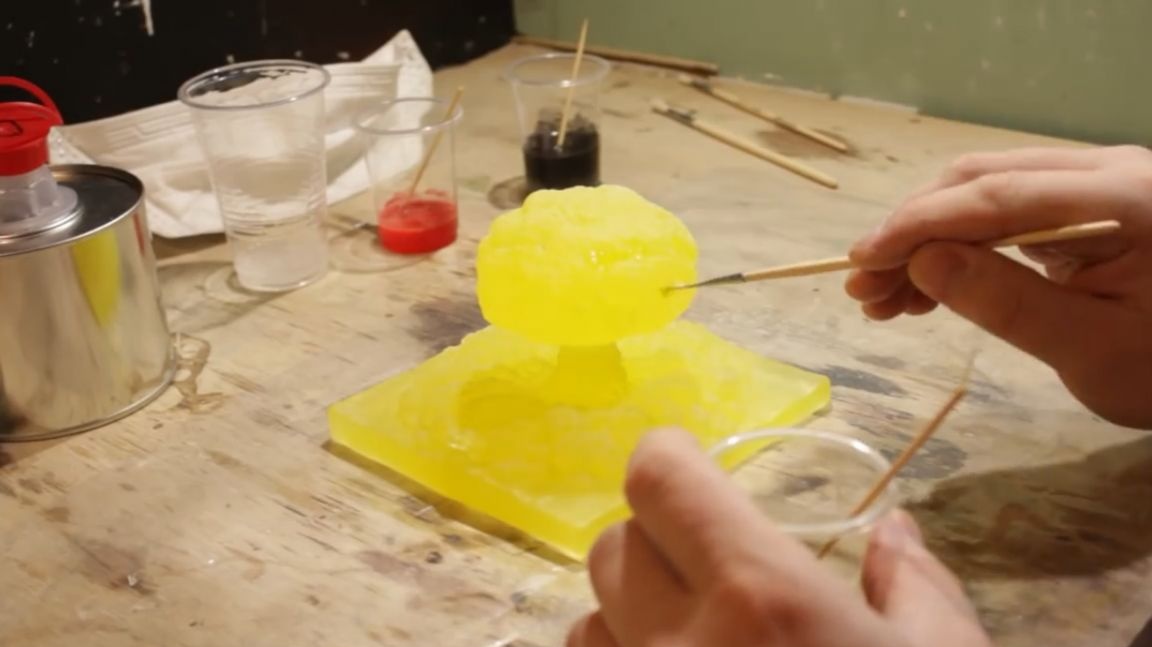
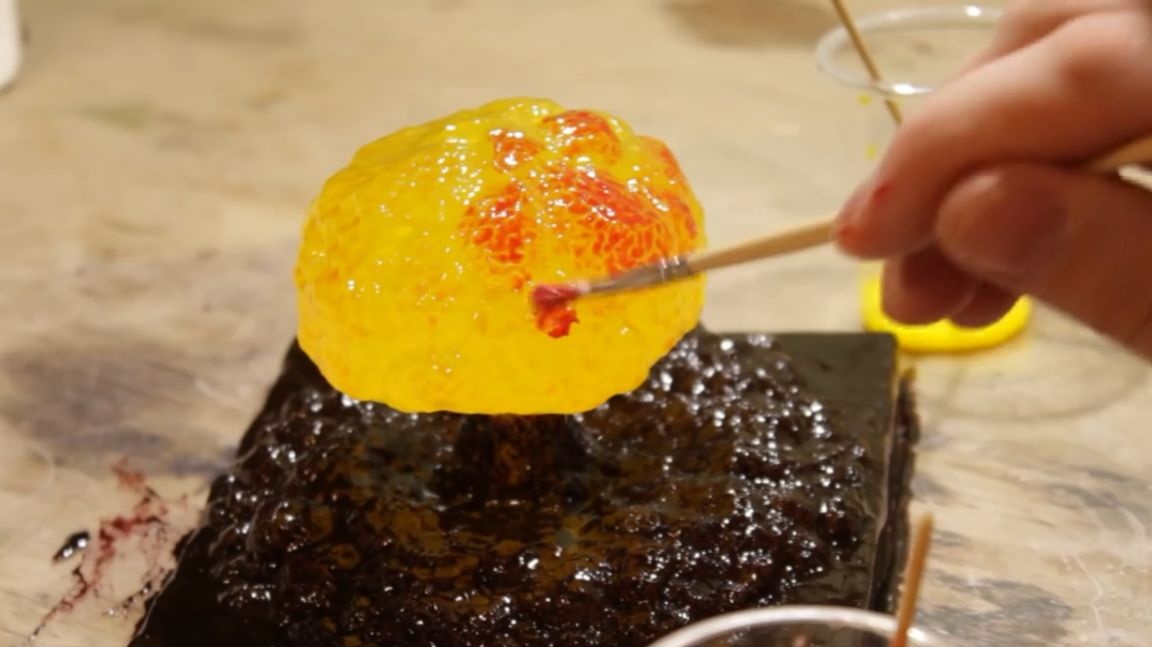
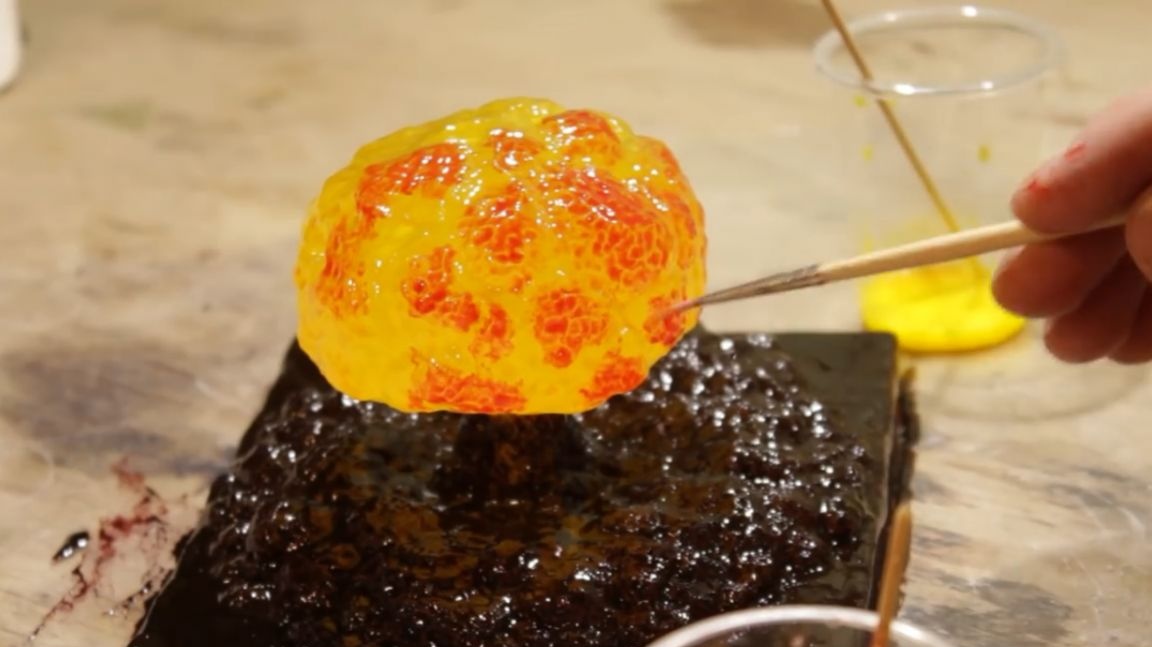
Directly real. It’s as if this is a real hot cloud. In some places it’s worth adding a little bit of brown. In dust clubs, add a little more red for greater relief.
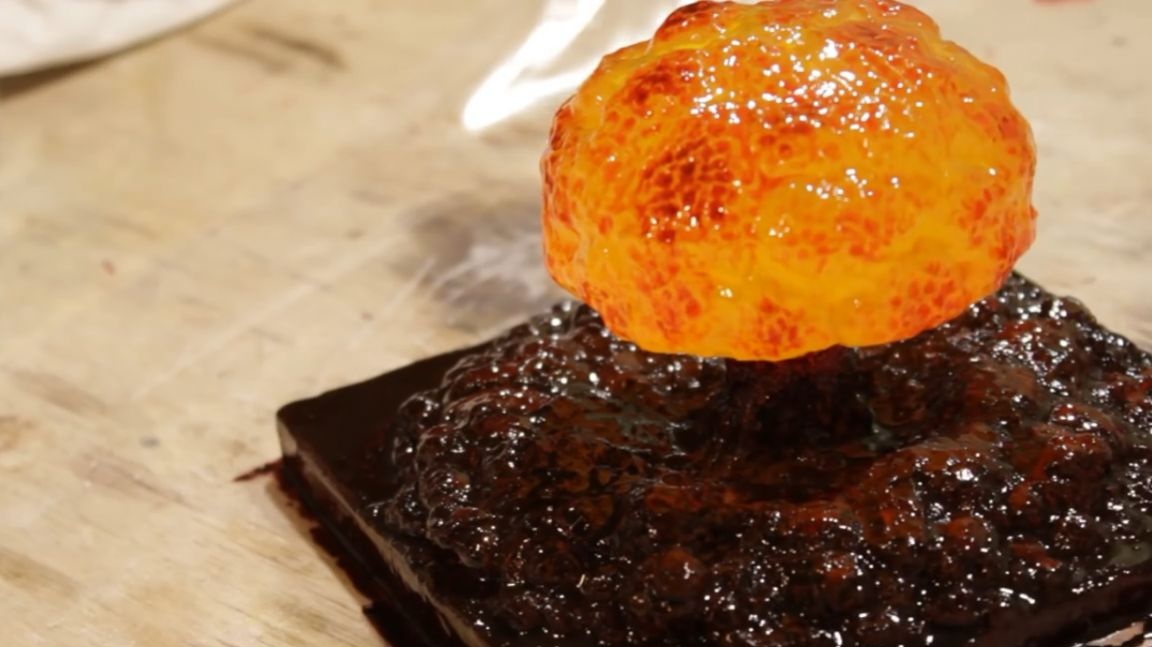
A day later, a new layer of epoxy was polymerized and the model glistened like glass. Straight very shiny. I had to cover it with alkyd-urethane matte varnish for parquet.
After drying, it will remove excess gloss.
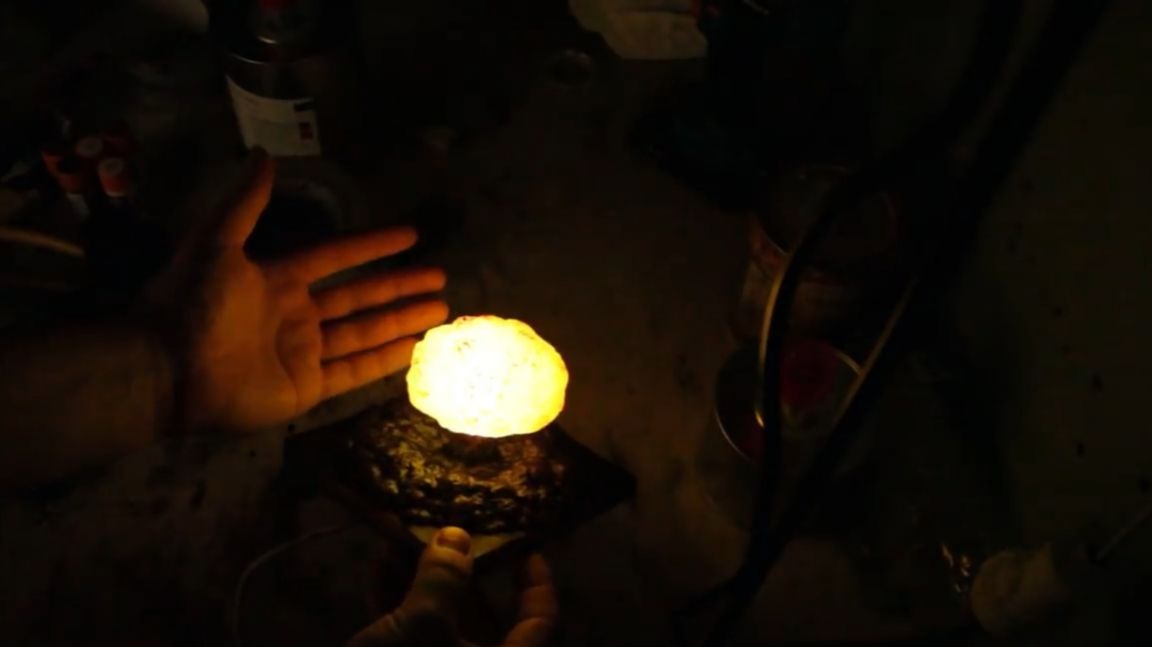
While it dries, you can make the backlight. The lamp will be connected via usb. So you have to sacrifice one of the cables.
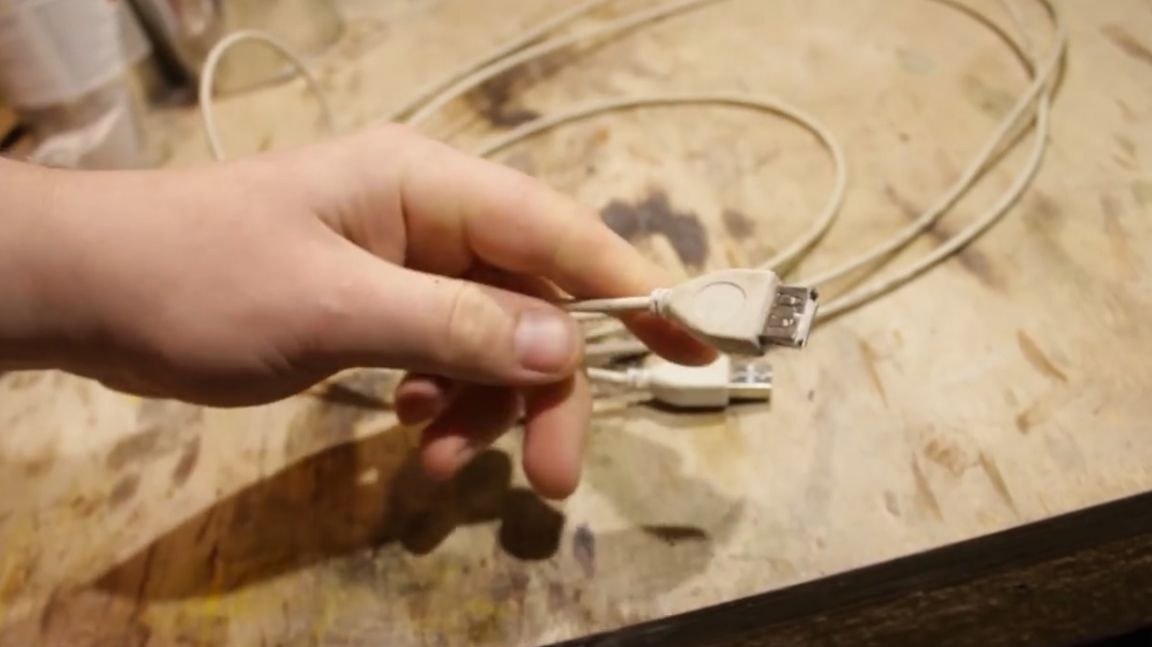
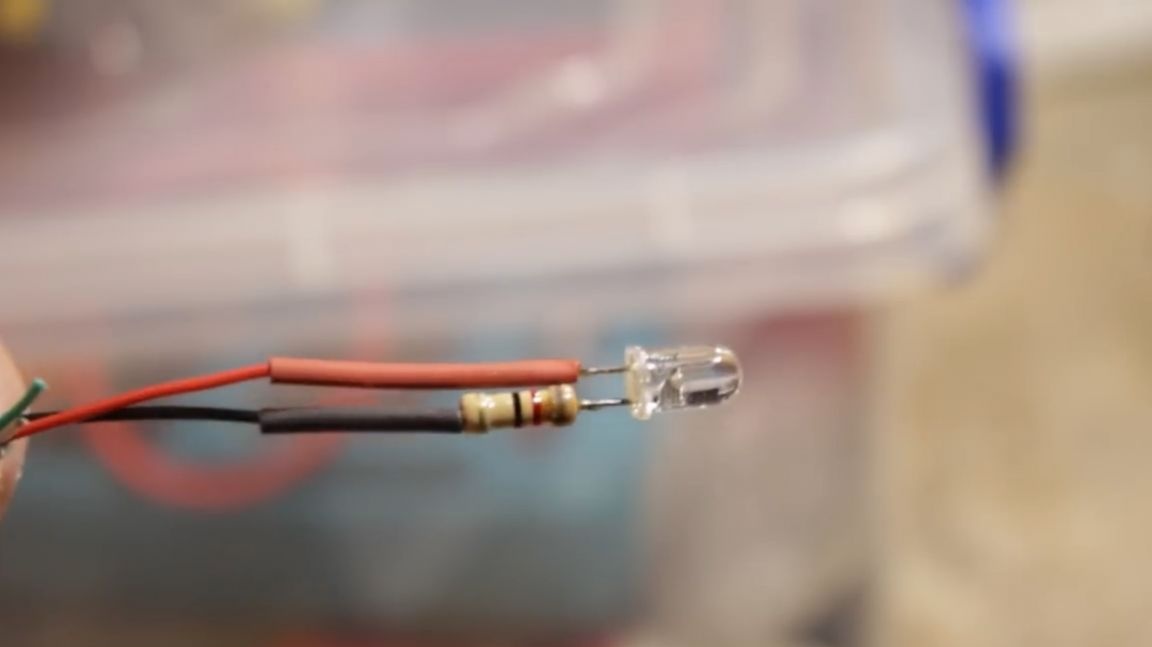
We will need black and red wires.As a rule, black is a minus and red is a plus. The author solders the brightest LED that he could find, and a resistor of 82 Ohms.
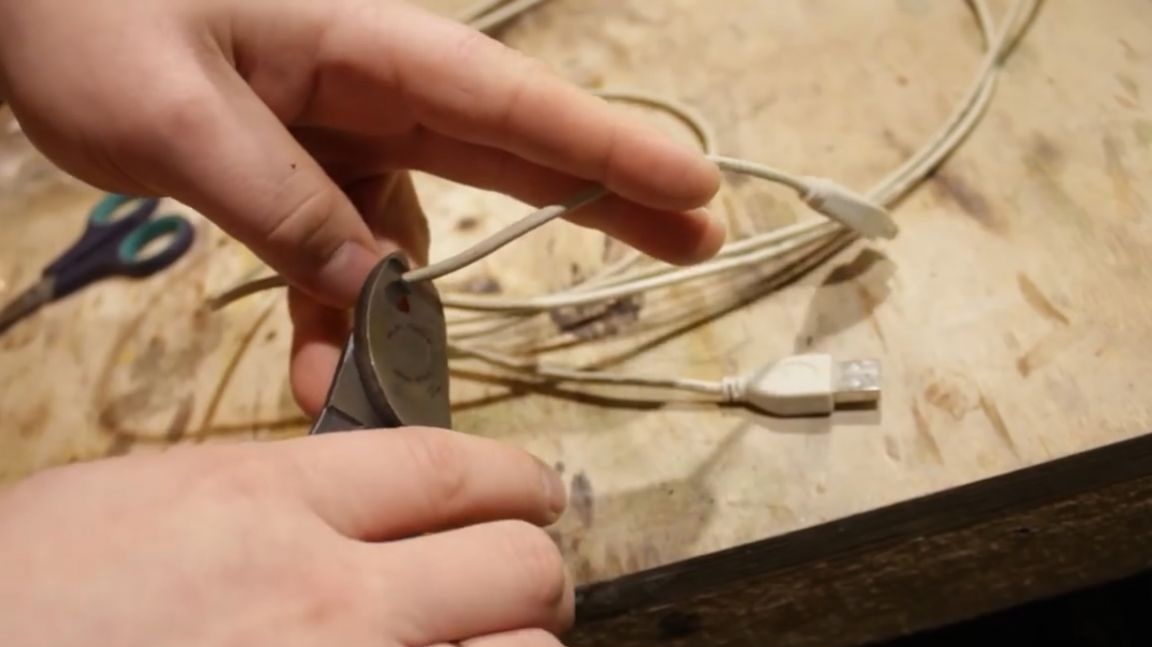
The backlight must be stuck deeper, closer to the mushroom hat. To do this, drill a hole to the required depth. We drill in two runs. First, a thin drill, and then six. This is in case if suddenly the first time it does not work out exactly, it will be possible to fix the joint at least somehow from the second.

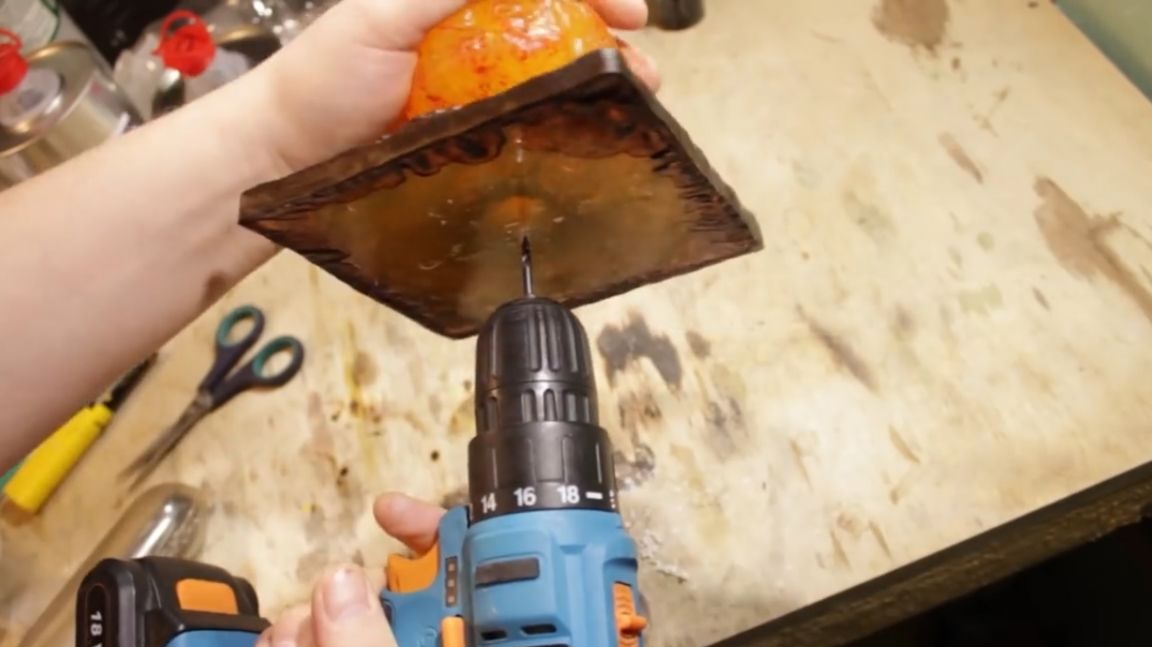
Something like that.
The LED shines up and at the same time a lot of light goes sideways and down. Oddly enough, a lot of light really goes down. Paint the bottom of the LED with white acrylic paint. White color reflects light well and at the same time isolates bare contacts. To surely remove the stray glow to the sides, glue a piece of aluminum tape. It perfectly reflects light and does not let in a single ray of light.
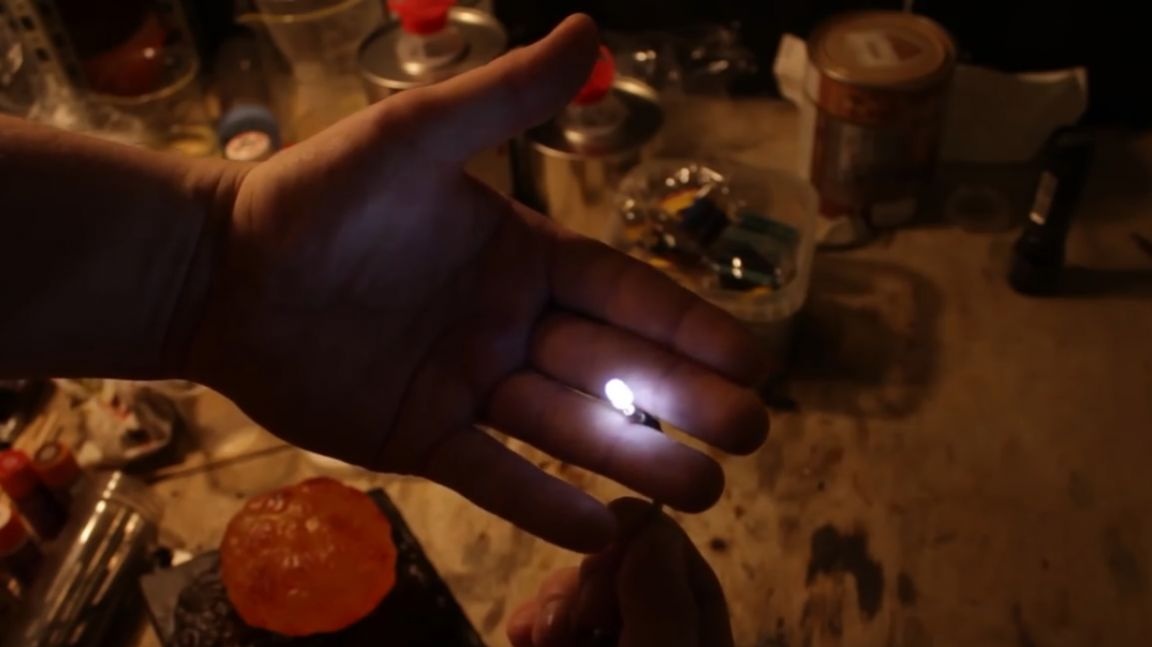

Now all the light is pointing exactly up. This LED shines cool white and gives off a slightly blue. To fix this, paint it with a thin layer of yellow paint.
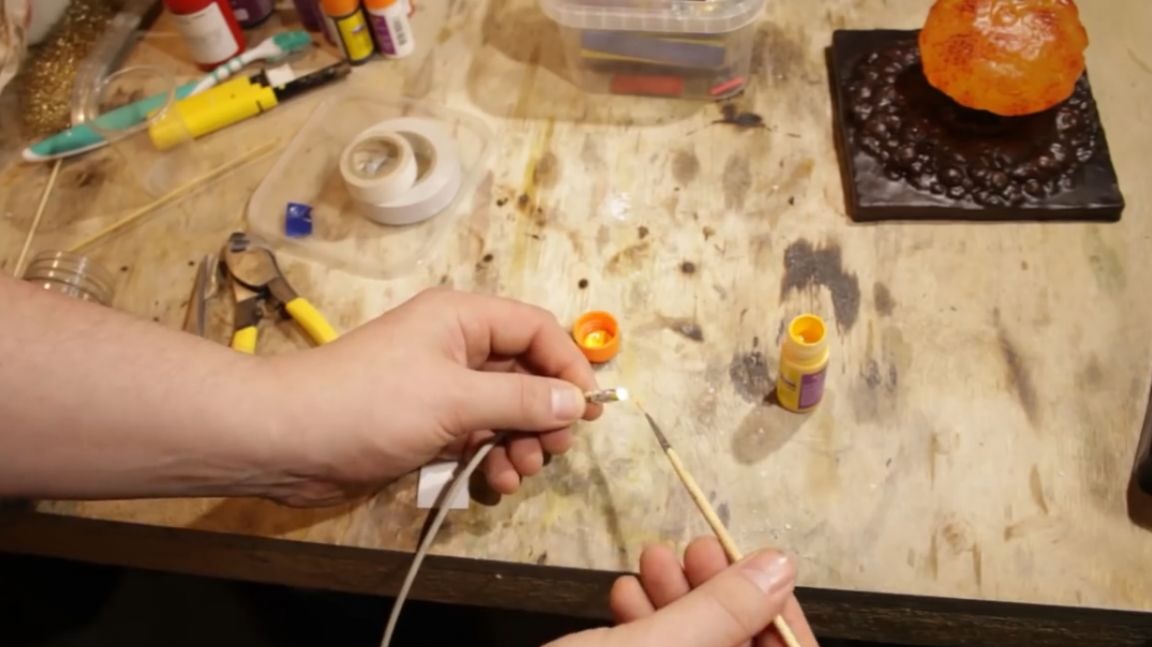
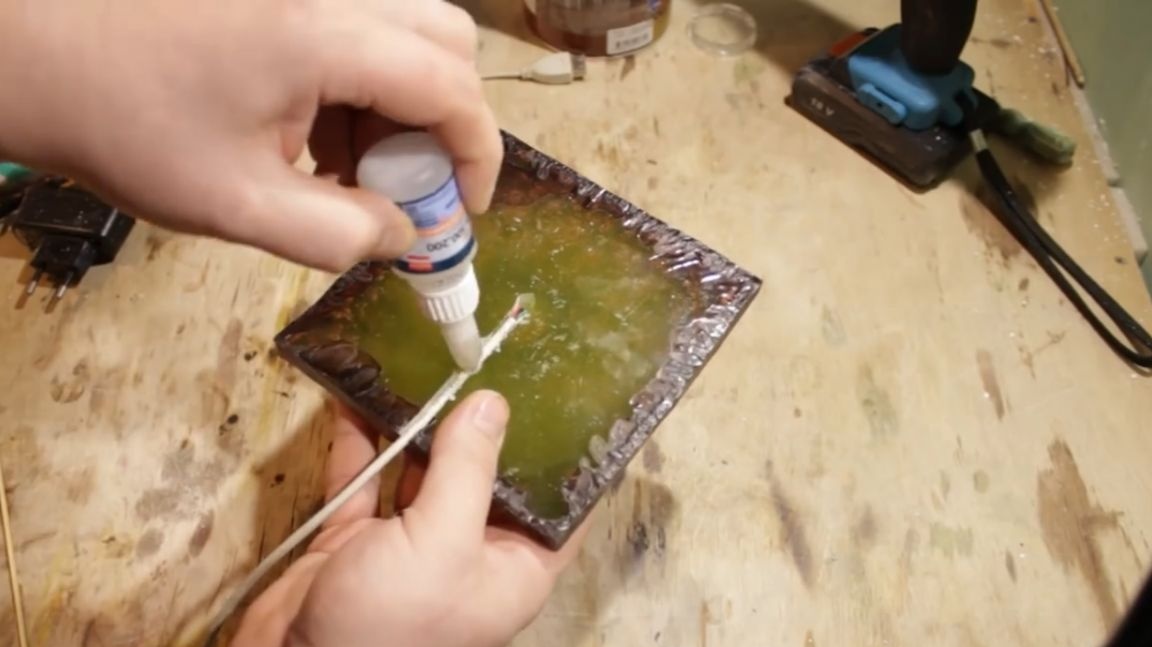
We will make the channel for the wire an engraver. In order not to spoil the dust, we cover the entire layout with its bag and tape.
After that, it remains only to insert the backlight and glue the wire with a superglue-soda method.
Well, that seems to be all set. Beauty, and nothing more. If you look closely, you can see that the dust clouds also glow a little. It is as if a nuclear flash is really shining through them.

Thank you for attention. See you soon!
Video: