

An easel (translated from German Malbrett - a board for drawing) is a specially designed stand made of metal or wood, plywood, etc., on which the artist places his work while working on it. The easel was a prototype of the stands for the manufacture of manuscript books, as well as for reading church ones. Already in ancient times, tripods similar to modern ones were used. Starting from the Renaissance, easels are already becoming indispensable attributes of artists, and on many self-portraits painters of those times imprinted themselves next to them. Some of these devices were made of metal or expensive wood, richly decorated with carvings, inlaid with precious stones. They were not only faithful helpers to painters, but also a real decoration of the interior. Such instances of antique easels, in themselves, were works of art.
Today, there are quite a few types of easels - three- and four-legged, transformers, easel, floor and table. In size, there are easels - small, medium and large, according to purpose - field, studio, portable, folding, universal. Easels are made of wood and metal.
Practice has shown that the three-legged easel options are still not very good, especially if you take into account, as a rule, their flimsy design - they are quite light and not too stable. They are easy to knock over with an awkward movement. This applies to desktop tripods even more - they are smaller and even lighter. So, preference is given to the “four-legged” design.
Some easels clamp the subframe, securing it, including the upper edge, with a special adjustable clamp. Many easels, however, are much simpler and do not have such fasteners - a stretcher with a canvas, simply stands on an inclined surface of the easel and does not disappear anywhere only due to its weight.
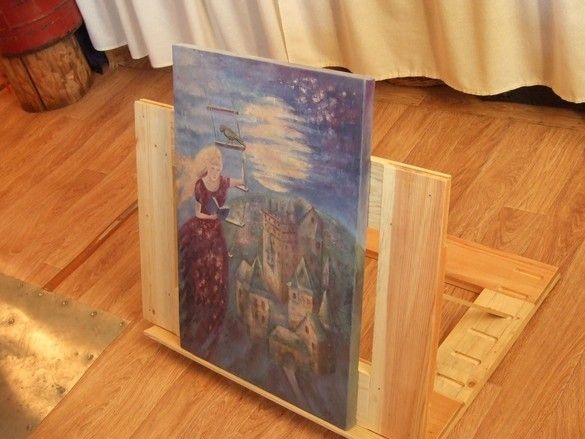
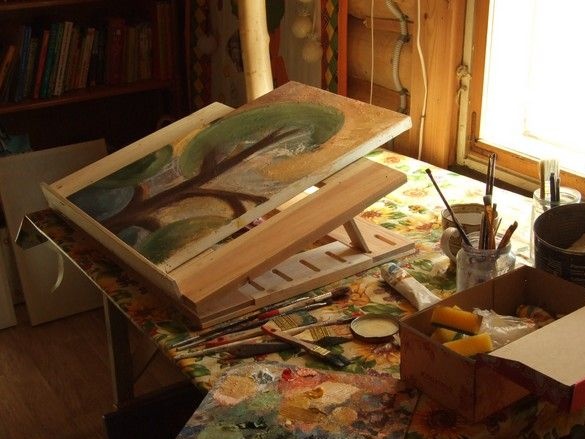
For the artist's wife, a simplified desktop easel was made. The requirements were as follows - the ability to install the A2 format on a stretcher, a relatively heavy and stable structure that does not fidget around the table, and the possibility of folding for storage.
Actually, the prototype of my design was the daughter’s vulgar student stand.
So, the supporting plane is the sole, the plane on which lies the work and emphasis for it.Hinge to all this stuff folded into 2D for storage. The interchangeable emphasis between the planes for adjusting the inclination, which is easier.
What was used in the manufacture.
Tools, equipment.
A set of carpentry tools, several large clamps, a long flat ruler or a flat rail. Measuring tool. Were used - a circular saw, a small planer with accessories, a pendulum saw, but manual analogs can also be dispensed with. For the manufacture of grooves for emphasis, a manual milling machine was needed. A screwdriver, a small angle grinder came in handy. A reliable extension cord will not hurt, when working with a power tool, it is advisable to use protective equipment - a transparent face shield (glasses), protective headphones. If a protective and decorative coating is required - plus a brush, dishes.
Materials
In addition to wooden blanks for our easel, we needed - PVA carpentry glue, fasteners. A pair of small hinges, like simple door hinges, but smaller. If necessary, a protective and decorative coating - coatings, rags.
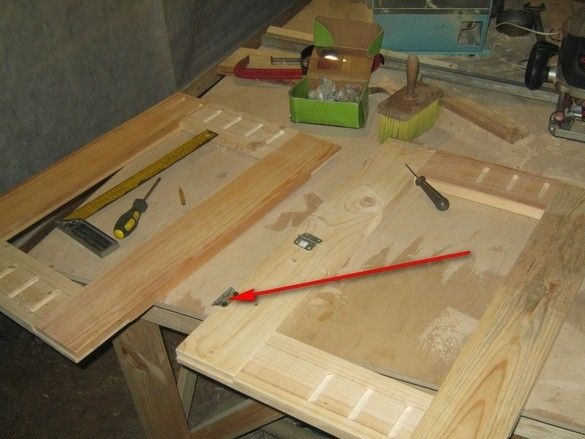
So. The blanks for my easel were made, which became unnecessary support elements of the kitchen desktop. They were made somewhat hastily, and after that, the design of the table was improved and the supports became different. The same ones became unnecessary. Nevertheless, they were made quite carefully, the blanks for them were good, without large flaws, coniferous boards. It was a pity in the stove, we were waiting in the wings.
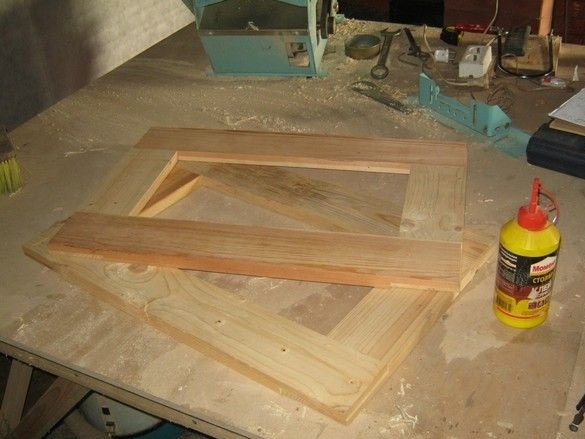
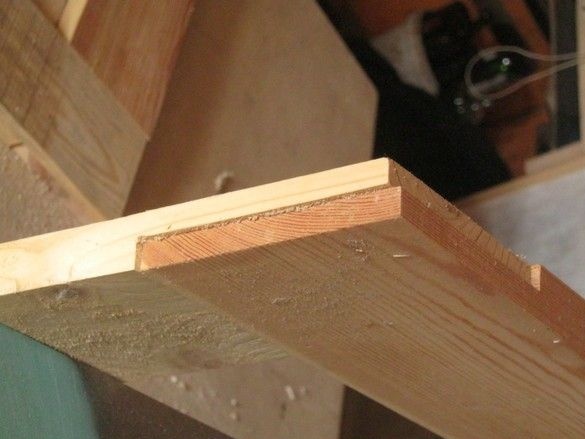
In the manufacture from scratch, these elements probably do not need to be made so wide, rather narrow bars connected “in half-wood” in the corners assembled in two frames. Nevertheless, my workpieces turned out to be very massive, which I suppose is not usual for modern easels. A large mass for such a non-portable fixtures it is very convenient - it does not fidget on the table, the risk of tipping over with a random push, it also has a minimum. The corners of the boards of my frames were also connected “to the floor of a tree” on the joinery PVA and additionally fastened with several screws. The “wood floor” at the ends of flat and thin blanks was milled. Manual milling cutter, straight wide grooving cutter. This is most conveniently done on the milling table. The protruding parts of the screws are cut flush with an angle grinder.
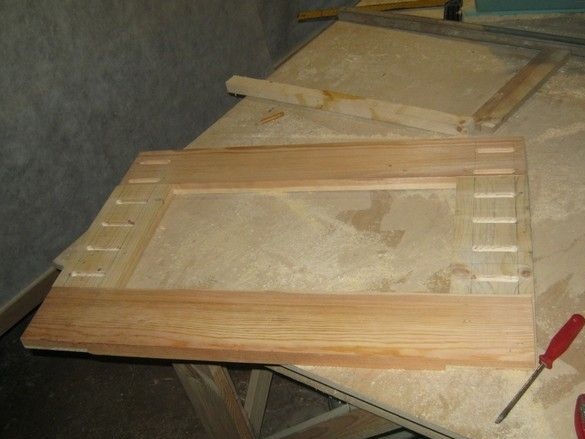
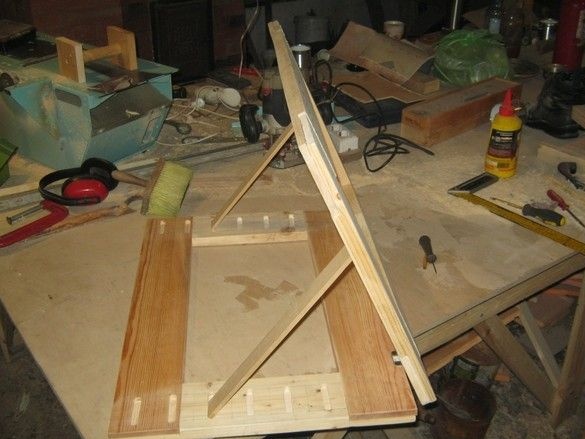
It was decided to connect two identical frames with hinges and arrange a support between them (frames), with variable points for an emphasis. This will fix the subframe mounted on the easel, at a convenient angle. The emphasis, it was decided to make the simplest, so as not to complicate the design, they were made two - at the edges. The stops are fixed in shallow nests. There are a number of them (nests) - with a certain step, on the “sole” and on the tiltable frame. Their combination allows you to adjust the angle of inclination over a fairly wide range.
Grooves-nests, after careful marking, were milled. A manual milling machine with a straight groove mill was used. The depth of the groove is about 10mm.
Each groove was milled under the “ruler” - a piece of thin board with a smooth, planed edge. A persistent surface on a milling cutter is a “flat” on its supporting platform.
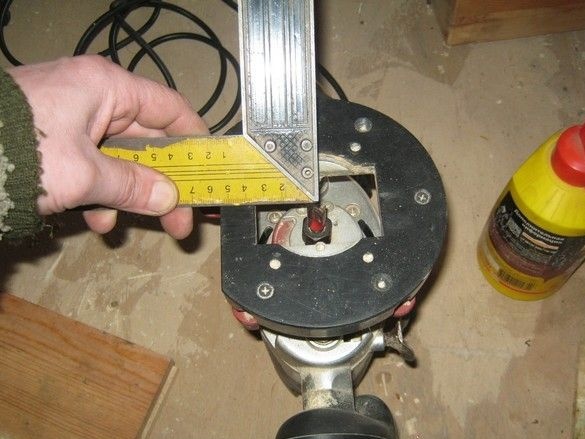
The distance from the spindle axis to the milling support surface must be accurately measured. This distance is delayed, each time, from the marking of the axes of the grooves. On it (distance), a guide ruler is fixed with clamps. Turns on the milling machine should be set so that when milling there are no significant vibrations and resonances, while the tree in the place of the cut does not burn, however, the latter is often also a consequence of blunt cutting edges of the milling cutters.
After milling all the grooves on both frames, the latter were sanded using several numbers of the grinding skins, from large to smaller.Sanding should be used after the completion of milling operations - grains from the skins get stuck in the pores of the wood and the processing of such surfaces with a power tool greatly reduces the resource of knives and mills.
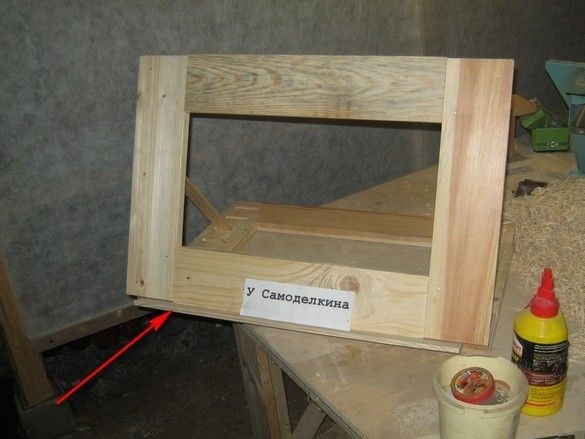
The frames were fastened with two small hinges, recesses were not made for them - loads along the axis, like the door ones, are not here, they were fastened simply with small self-tapping screws. Places for screws were marked with a pencil or an awl, a small hole was drilled into which fasteners are tightly screwed.
Then, on the front frame I made a step-limiter - the bottom of the stretcher with the canvas rests on it. Sawed off a non-thick slat, sawed off to size, sanded, marked out places for fasteners. I drilled 1.5 mm holes in the rail for small cloves, flopped some glue, nailed it in place.
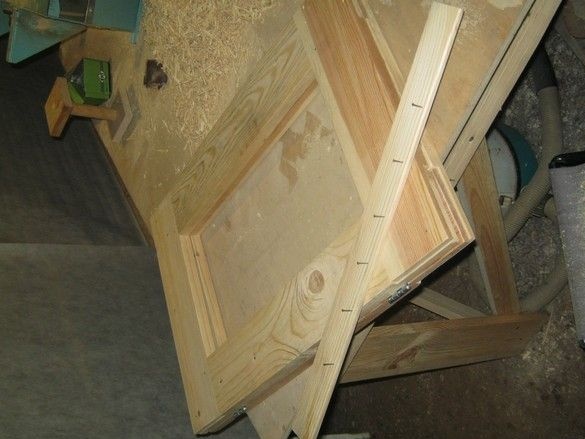
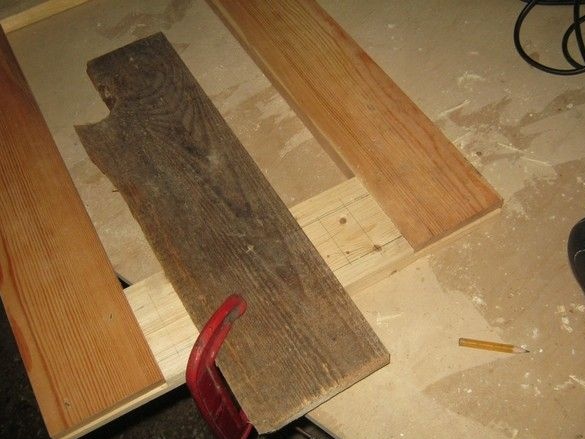
The length of the supports was determined experimentally, "empirically", if scientifically. In a word, he took a thin, not very necessary rod, broke offhand and tried it on, if the maximum minimum angle of inclination is too big, a little sawed, and so on. According to the results of the experiment, I decided on the size and sawed two thin wide slats from a birch plank, and sanded them. We determined the length, the width is slightly less than the width of the nests where the ends of the stops are inserted, the thickness so that in any position the end of the stop reaches the bottom of the socket without being pinched by its walls.
My easel was not painted or varnished - I decided that the artist would still paint with oil paints, so it will even be more colorful, but if the easel needs a coating, then it's time to do it. Primer with diluted varnish, intermediate sanding with a finely rubbed sandpaper after drying and two or three layers of varnish, also with intermediate sanding. For wood - crafts, of furniture and others like that, I really liked the Finnish varnish “Yalo”, matte. It gives a surface very similar to waxing. Very beautiful.
As if everything. My wife was very pleased - with the usual, outdoor easel, for standing work, the desktop version is also in demand. After some time of use, we decided on another “mode” that is extremely convenient for the “operator” - a very small angle for opening the frames of the easel. Moreover, standing almost above him, the position of the hands is such that you can work for a long time without severe fatigue. For this position of the easel, two more short stops were made, similar to the standard ones.