

Part 1. System Description, gas trap
Part 2. The bubbler
The articles offered to the reader describe a stationary device for carburizing liquid fuel (gasoline). The resulting combustible mixture is used to power a table-top glass-blowing burner and allows dispensing with balloon and main gas. The main advantage of feeding the burner with gasoline vapors is the increased flame temperature in comparison with propane and especially natural gas. A stationary carburetor device, unlike simple analogues used in denture and jewelry, has a rather complex device, but provides increased efficiency, safety and ease of use.
A more complete justification and detailed description of the nodes have been described previously, as well as manufacturing bubbler and gas traps. Consider the last immediate component - a buffer tank or a gasoline condenser.
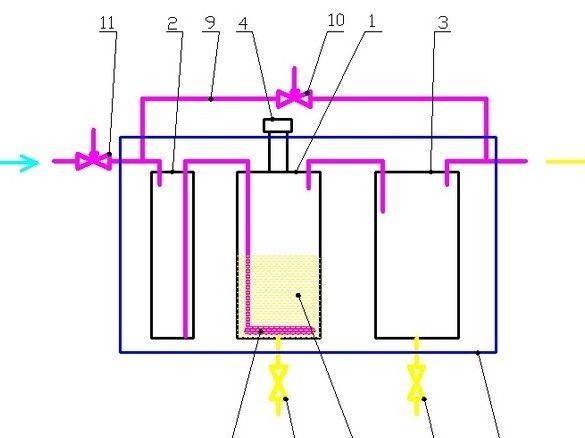
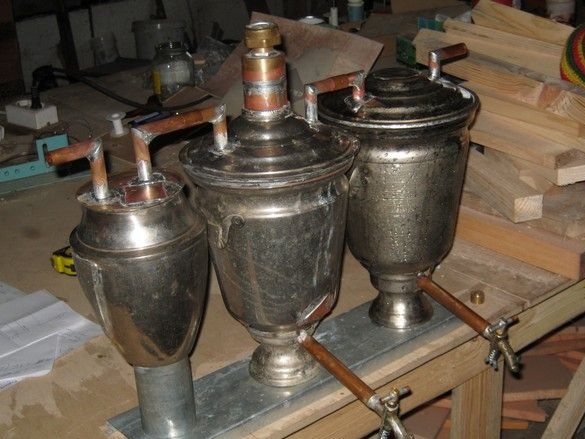
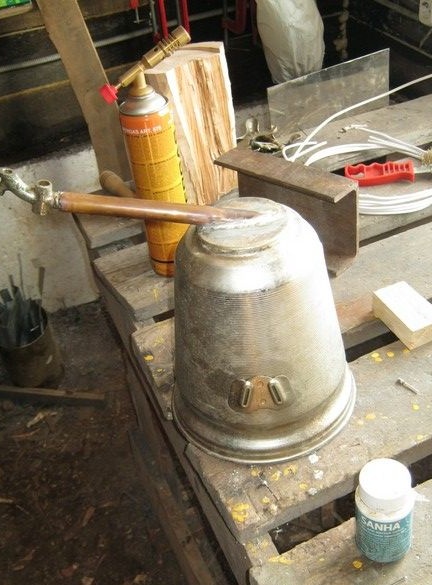
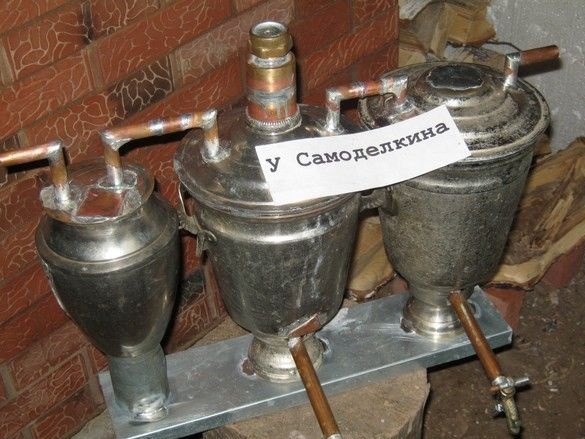
Let me remind you - buffer tank 3, has the same dimensions as tank 1. It has two sealed short tubes in the lid. One of them delivers the combustible mixture from the tank 1, according to the second, the mixture goes to the burner. Tank 3 serves as a buffer for trapping drops, partial condensation and collecting gasoline if its evaporation in tank 1 is too rapid. This happens when filling in fresh gasoline. In the lower part of the tank there is a drain valve 8 for draining condensed gasoline. This gasoline is of quite good quality and can be returned to tank 1.
So, our capacitor is made from the same 4-liter electric samovar as the bubbler. The billet samovar is somewhat more battered - chrome plating exfoliates in places, therefore, every soldering place has to be cleaned more thoroughly, cleaning off the layer of chromium and the copper sublayer, to the mother brass.
What was needed for work.
Tools, equipment.
All connections were made by soldering - you need a small gas burner. Set of bench tools. Medium size abrasive sanding pad for sanding soldering spots. For an accurate cut of copper tubes it is convenient to use an end pendulum saw, or a miter box with a hacksaw for metal will do. It came in handy electric grind, bench vise.
Materials
In addition to the samovar itself, scraps of sheet copper and brass, copper tubes of 15 mm, 6 mm diameter were used. Tin-copper solder No. 3, flux to it. Brush.
The samovar was dismantled first, using penetrating grease - to turn away the acidified and rusted fasteners, I had to tinker. TEN picked out painfully, in fragments, but nothing, managed. In general, the work is very similar to making a bubbler.
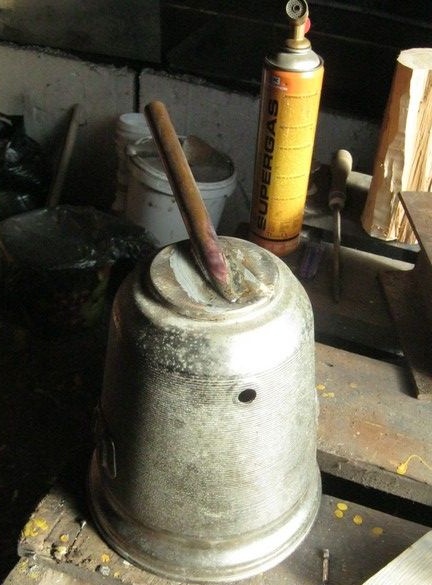
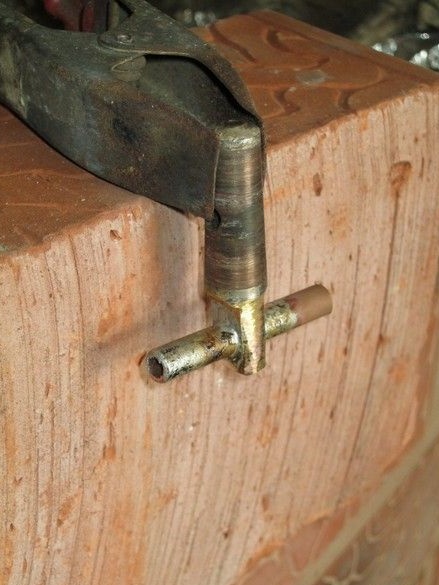
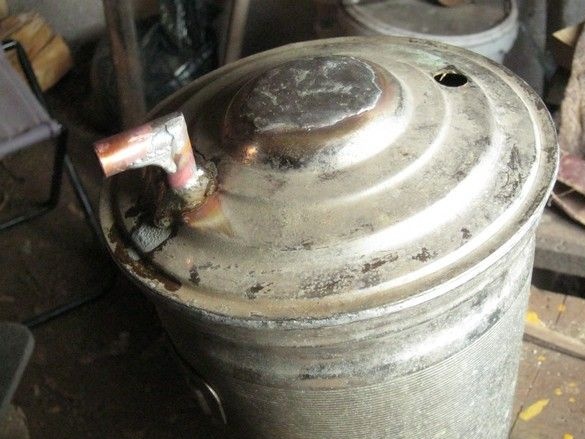
On the end saw, I made an oblique cut on a copper tube with a diameter of 18 mm, so that it covered both holes at the bottom of the samovar tank, from a standard heater. The cut is such that the tube is slightly inclined from the tank. After thorough stripping, coated with flux paste and soldered. Immediately, I sawed off a piece from a standard cork samovar faucet - shortened it, and with the help of a stripped copper wire, made a winding in several layers on the faucet nozzle so that it entered tightly enough into the free end of the drain pipe. Flux, soldering. I washed off the flux residues with water. By the way, you should not linger too much with this - the flux is acidic and if you leave the unsoldered solder for a few days, you cannot wash the entire flux without a trace.
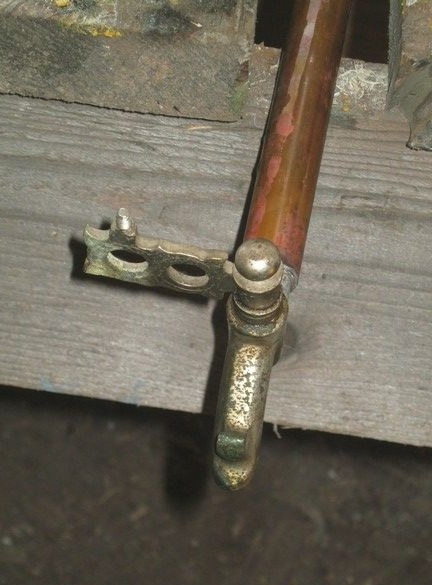
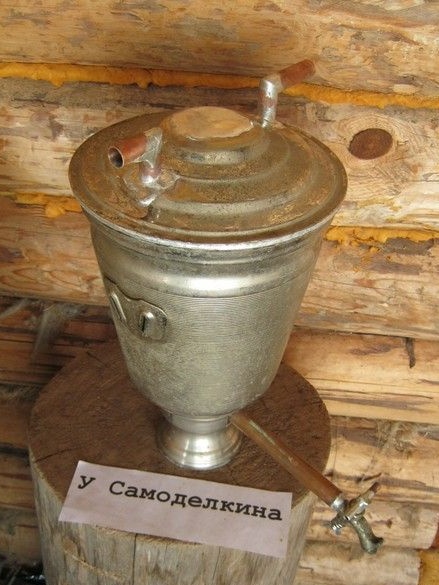
The regular “plug” of the crane, or rather, its handle, was likewise a bubbler, which was given a somewhat less gingerbread-samovar look. The lace handle is sawn off with a hacksaw for metal, the remaining handle is turned on an electric sharpener with the formation of two flat platforms. A hole was drilled on them, into which a piece of a copper 6mm tube was soldered. Yes, with any kind of fuss with a crane of this kind, you should avoid fixing the crane on the working cone of the “plug” - even small scuffs on it can give a difficult leak. Among other things, the faucet was slightly modified - the cork is spring-loaded and rotates tightly, with some interference - which was acceptable for boiling water in a samovar, it can be dangerous in a buffer tank with gasoline. The refinement was reduced to soldering a long M5 screw into the cork, for which a blind deep hole was drilled in the cork. The screw entered it tightly enough. After soldering and removing flux residues with water, the screw was shortened to the required length, sawing off the excess with a hacksaw for metal.

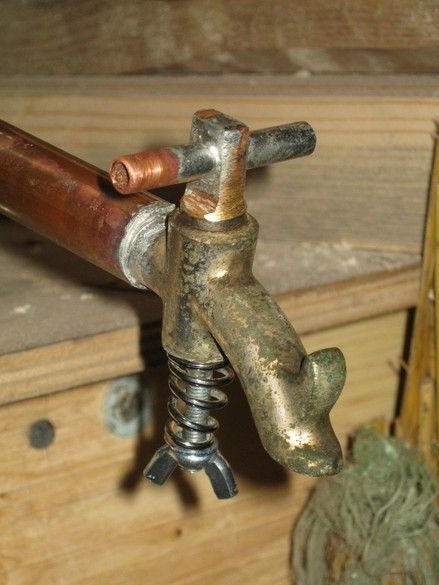
Modified crane assembly - an M5 washer is placed under the wing nut, the spring is a miracle how good it came from a small powder fire extinguisher. When making a crane, I looked back at a similar one on a bubbler - from the box of the finished device, they would stick around and if they were made significantly different, it would not be beautiful.
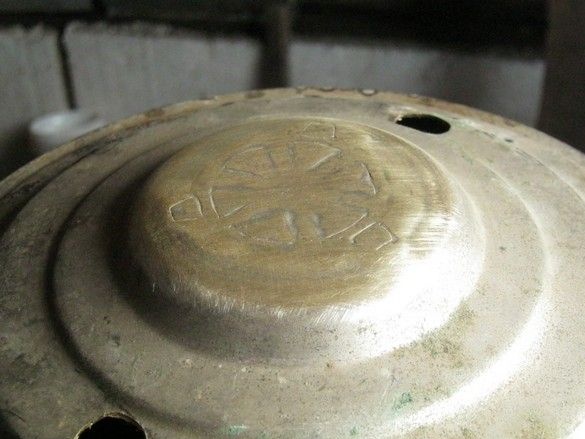
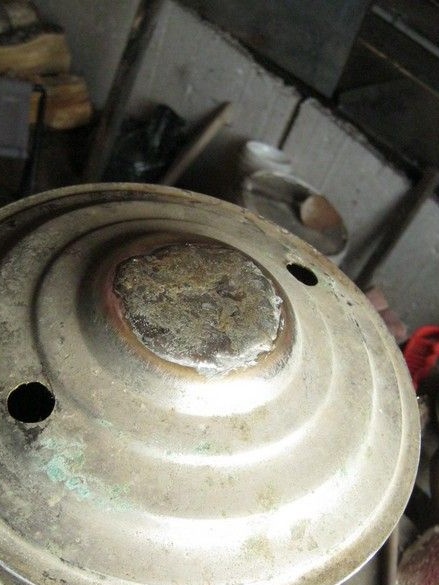
It's time to solder the hole from the regular outlet tap of the samovar. The place around is carefully cleaned, a piece of copper sheet of suitable thickness is selected, flux, soldering, washing of acid residues are applied.
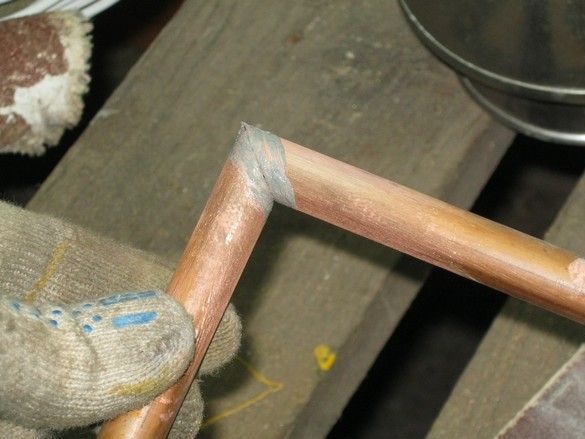
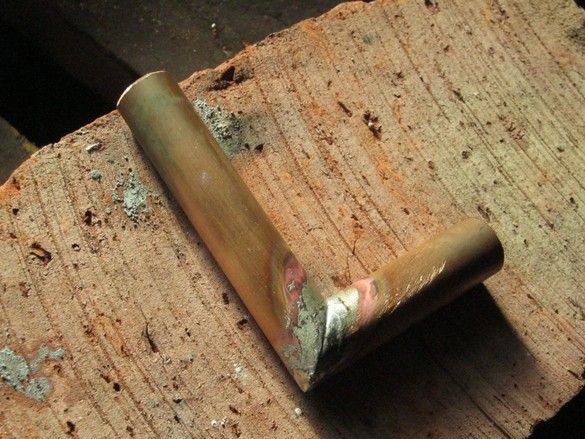
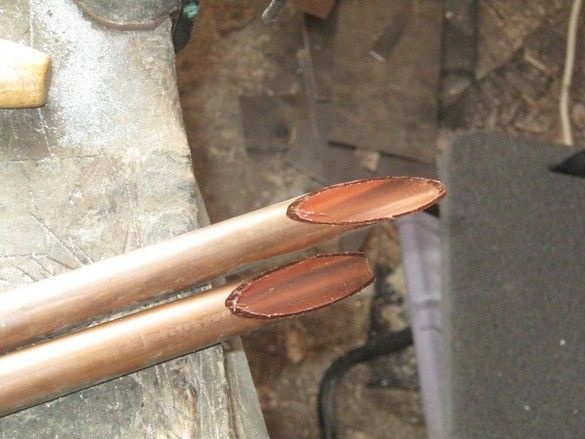
The capacitor has the simplest design of the insides, two short nozzles are soldered into its cover, one is the inlet, a little longer than the outlet. I made both 90 degree pipes in advance - the ends of the workpieces of copper tubes with a diameter of 15 mm were cut at an angle of 45 degrees on the end saw, with a small feed - the copper heats up very much and can melt the plastic parts of the table. Sawing should certainly be done with goggles or a shield - metal shavings are much heavier than wooden - fly apart much further and with considerable force. I cleaned the cut ends of the tubes, applied flux paste and folded it on a red brick, welded it with a torch, and washed off the flux residues with water.
He placed the tank on a part of the standard stand of the samovar donor, while in the stand it was necessary to mark and cut a hole for the drain pipe with a thin abrasive disk of the angle grinder. After fitting and fitting, the touching edges were cleaned, fluxed and soldered at three points.
He prepared the lid of the samovar tank - made holes for the passage of pipes - after marking, I drilled the holes with a large drill, such a diameter that a round file with a small notch passes. He brought the holes to the desired diameter, trying on a piece of pipe. Rolled bent notches for steam exit and fixing the "superstructure" for the teapot. Inverted, on the anvil, with a small hammer. You can pre-anneal. After a thorough cleaning, the place with cuts was sealed up - it applied a flux and, warming with a gas burner, it was filled with a thin layer of solder.
He thoroughly cleaned the adjacent surfaces on the lid and the tank, applied flux to the soldering place, and soldered the lid. It is convenient to do this by turning the tank upside down.
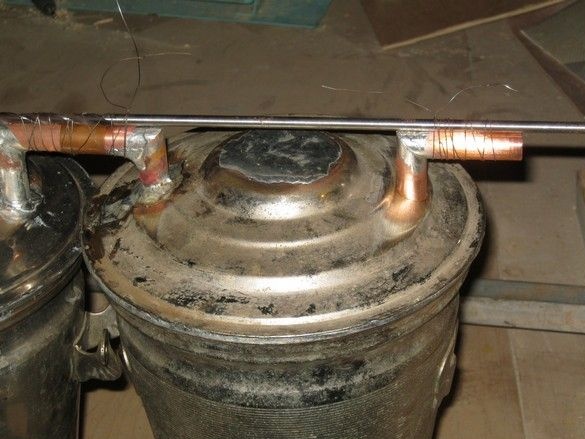
I soldered the inlet pipe-corner into the condenser tank, focusing on the output pipe of the previous tank - bubbler. At the same time, docked them, placing them next to it on a flat surface. I specified the length of the pipes in place, cut off the excess. Having previously cleaned the parts at the soldering points. After technological assembly, applied flux, soldered. The second outlet pipe was installed similarly. So that both pipes are on the same axis, at least in some approximation, fixed them on a flat metal rod, wrapped with a thin wire. Pre-cleaned rations places, coated with flux, soldered with a burner. Launched flux residues, including from the inside of the tank.
It's time to dock all three containers in a single ensemble. Previously, when determining the height of the nozzles, the vessels were tried on to each other, therefore, only the length of the joints was clarified. The fixed handles of the samovar, of which the bubbler is made, had to be slightly bent to the sides, in a word, the vessels are as close as possible to each other, meanwhile, the narrowed lower part of the bubbler will allow the heating wire with a sensor to be wound and insulated on it. The length of the pipes is specified in place, the excess is cut off. Connections are made by standard couplings - parts of a copper water supply, they were available.
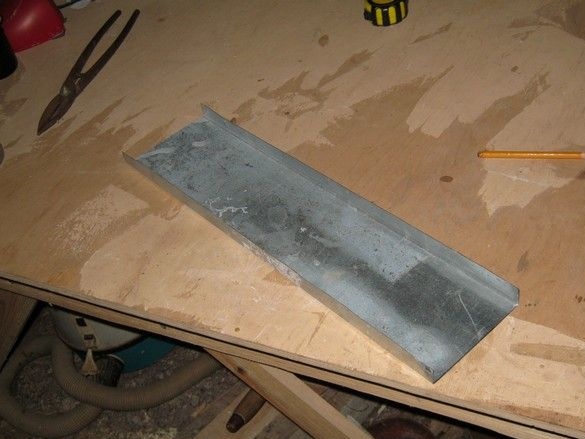
After soldering, the containers should be fastened along the bottom edge. To do this, I made a nest of galvanized steel roofing - marked it on a piece of iron with a simple pencil, cut it with scissors for metal, bent the edges, holding the edge of the workpiece between two boards, and fixed it with clamps. He put our samovars on it, outlined rations with a pencil. I cleaned, applied flux, soldered each stand at three points. Launched from the remains of flux.
The design turned out to be very tough. I did not deny myself the pleasure of picking up water and fiddling, gurgling, imitating various situations - it works perfectly, who would doubt it.
The logical work at this stage of manufacturing and soldering a bypass with a faucet and connecting threads and nozzles has been transferred to plugging the entire device into a sandbox - you need to try on the spot so as not to miss.
The ending follows.