

In nature, there are many dangerous gases without color and odor, such as: methane, propane, carbon monoxide and many others. And the reality is that two deep breaths will be enough to lose consciousness and suffocate in a few minutes. If you have a gas stove installed at home, there is garage with a car, and in the country there is stove heating, or there is a deep basement, then today's homemade product will definitely come in handy.
Indeed, gases such as methane, propane and carbon monoxide are colorless and odorless. But when used in everyday life, special impurities are added to them so that we can smell the nasty smell of gas.
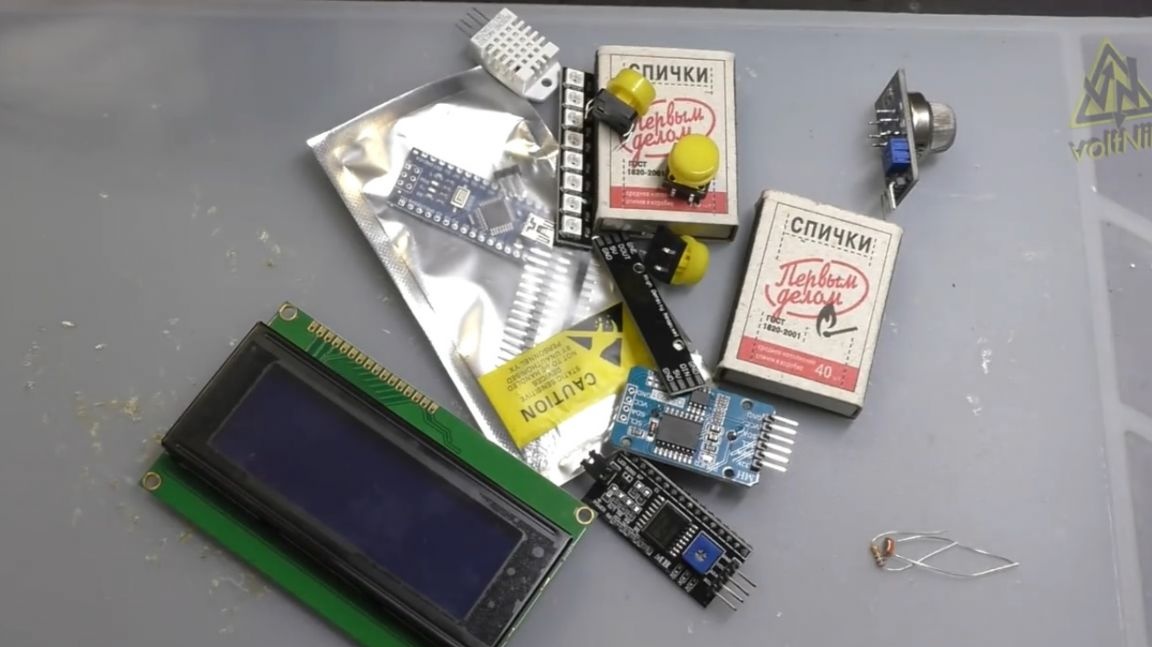
To build you will need:
1. Programmable platform Arduino Nano;
2. A box of matches, and preferably two at once;
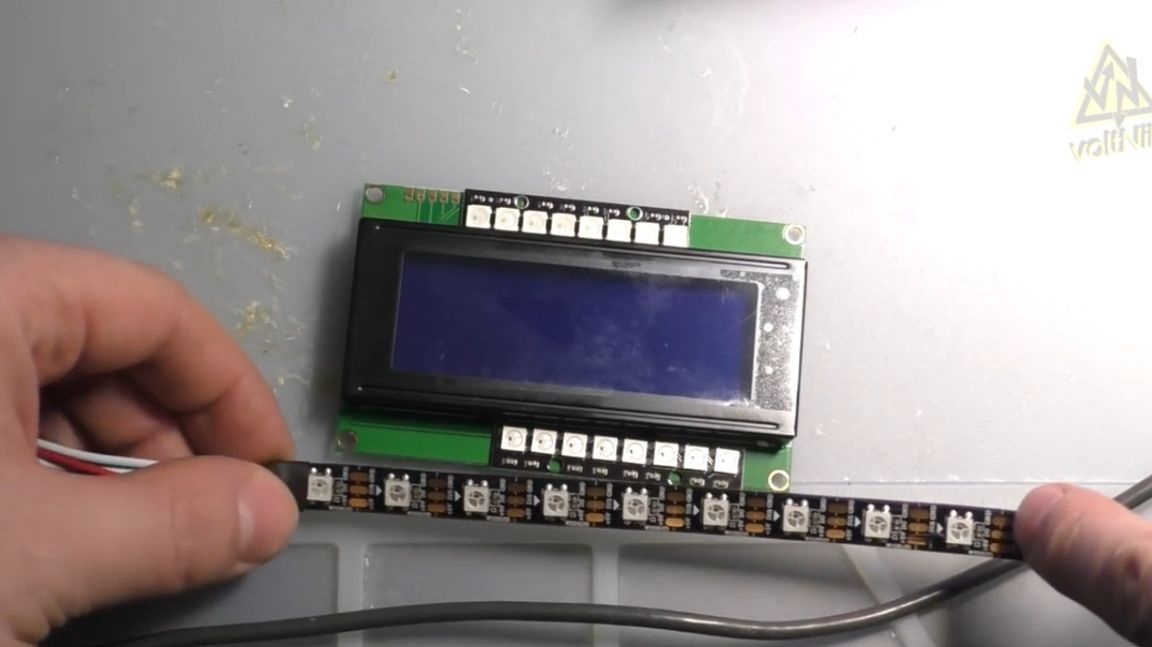
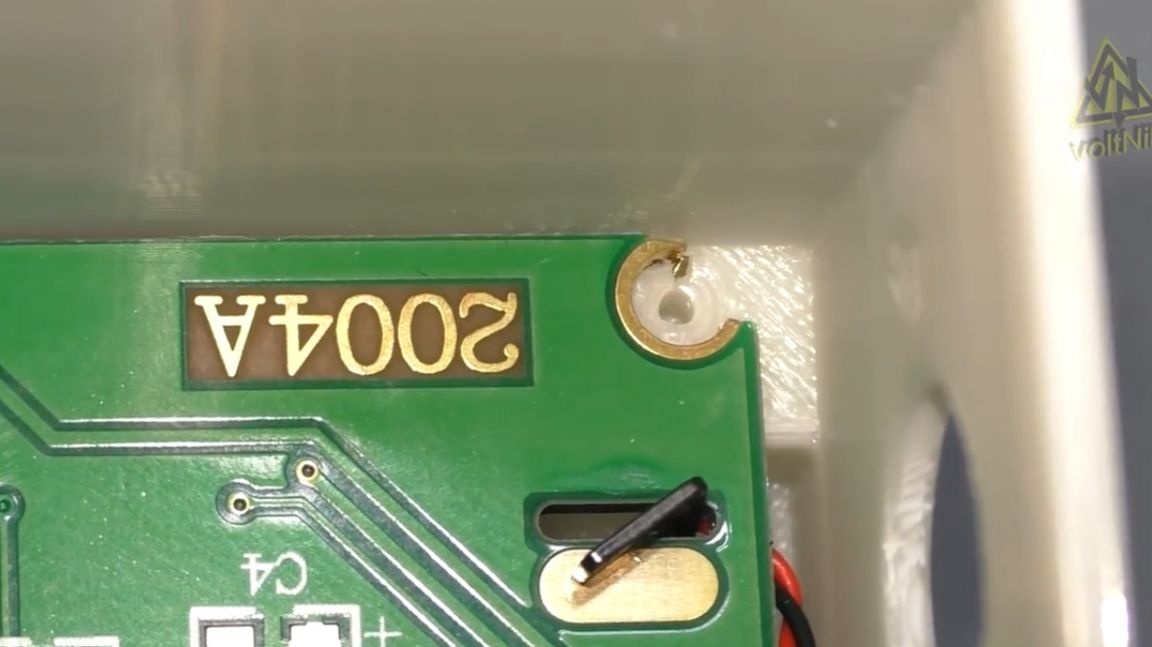
3. 2004 LCD screen with I2C module, it is sealed on the back of the screen;
4. Real-time clock module DS1302;
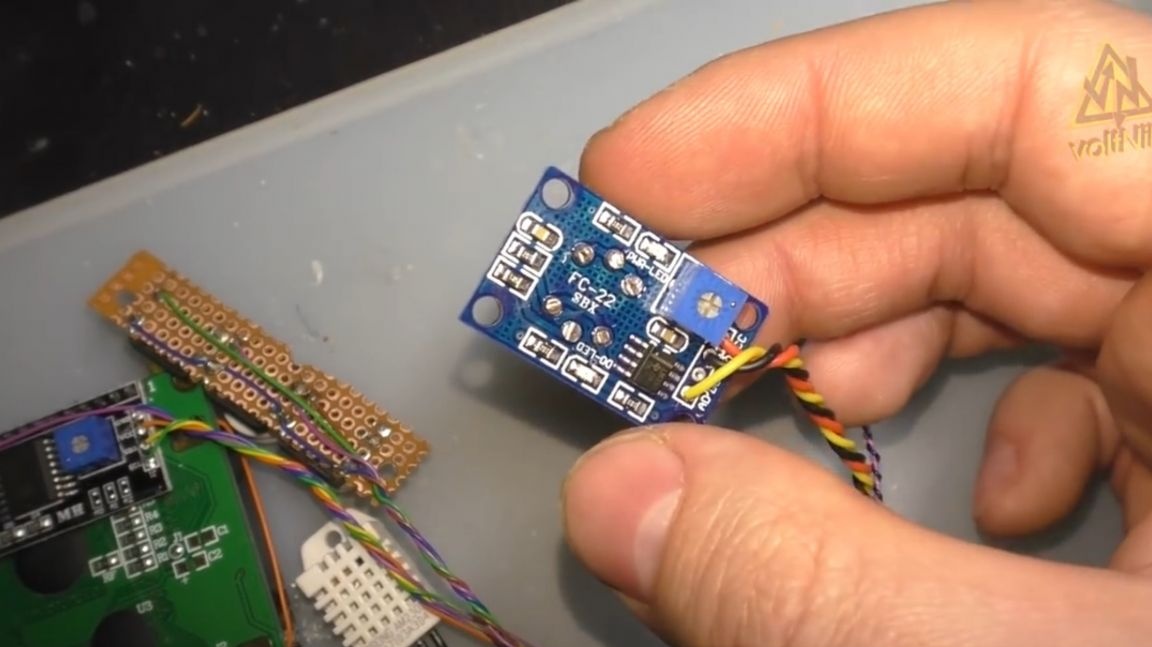
5. Smoke detector MQ-2;
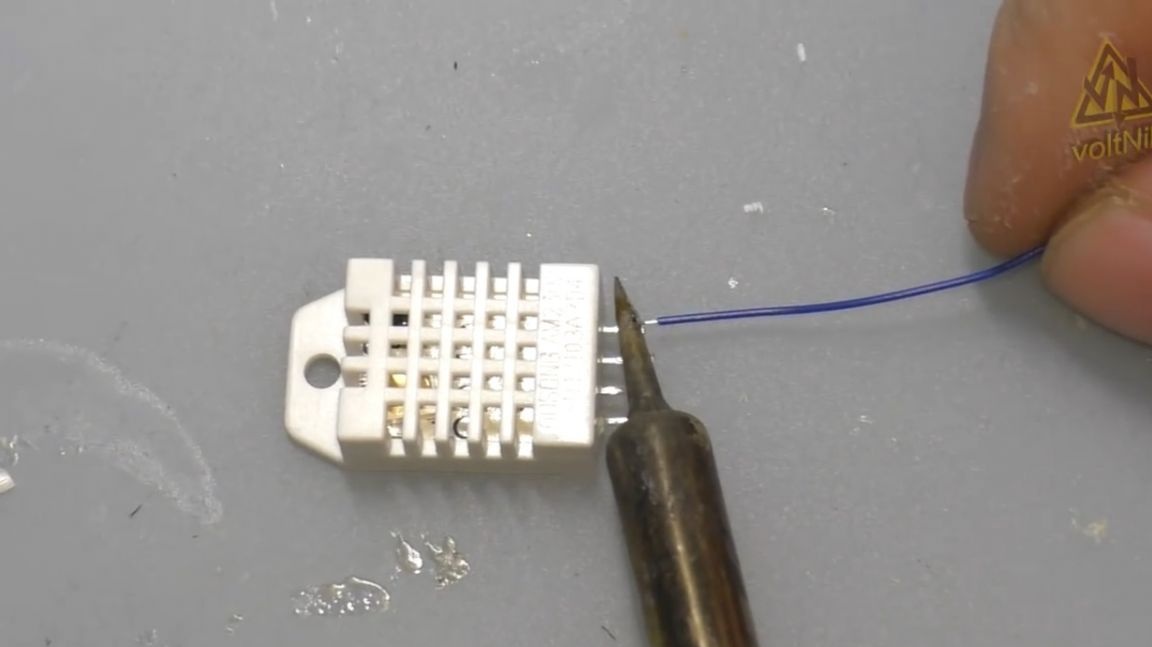
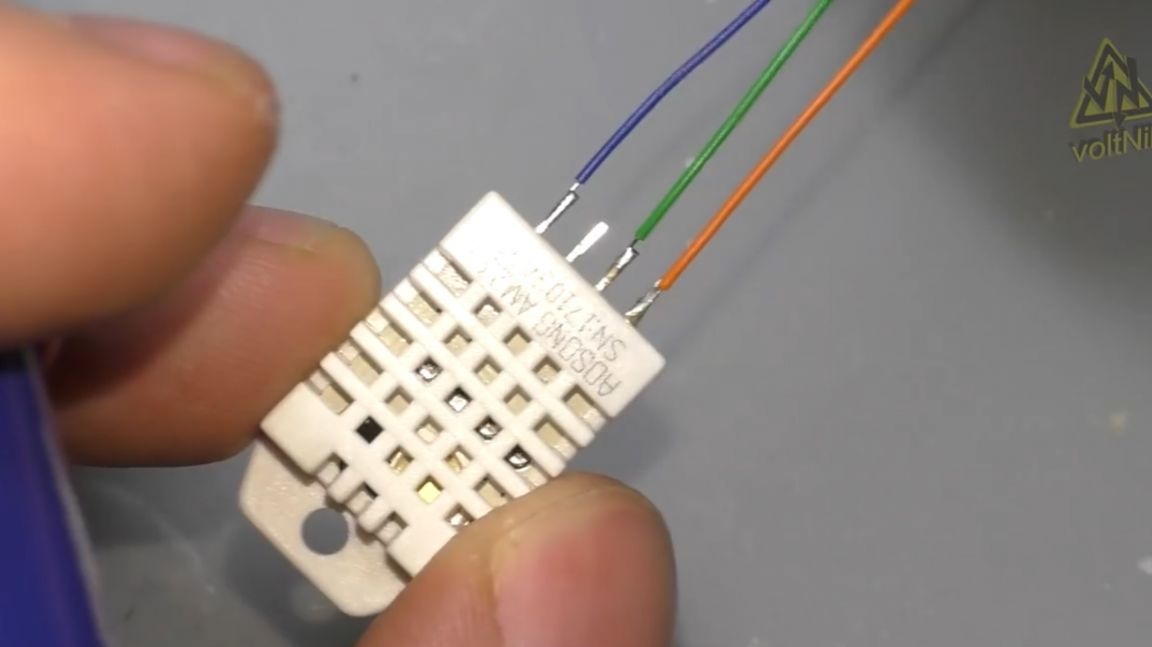
6. Temperature and humidity sensor DHT22;
7. Two lines of controlled LEDs WS2811;
8. Photoresistor and 10 kΩ resistor;
9. Piezodynamic;
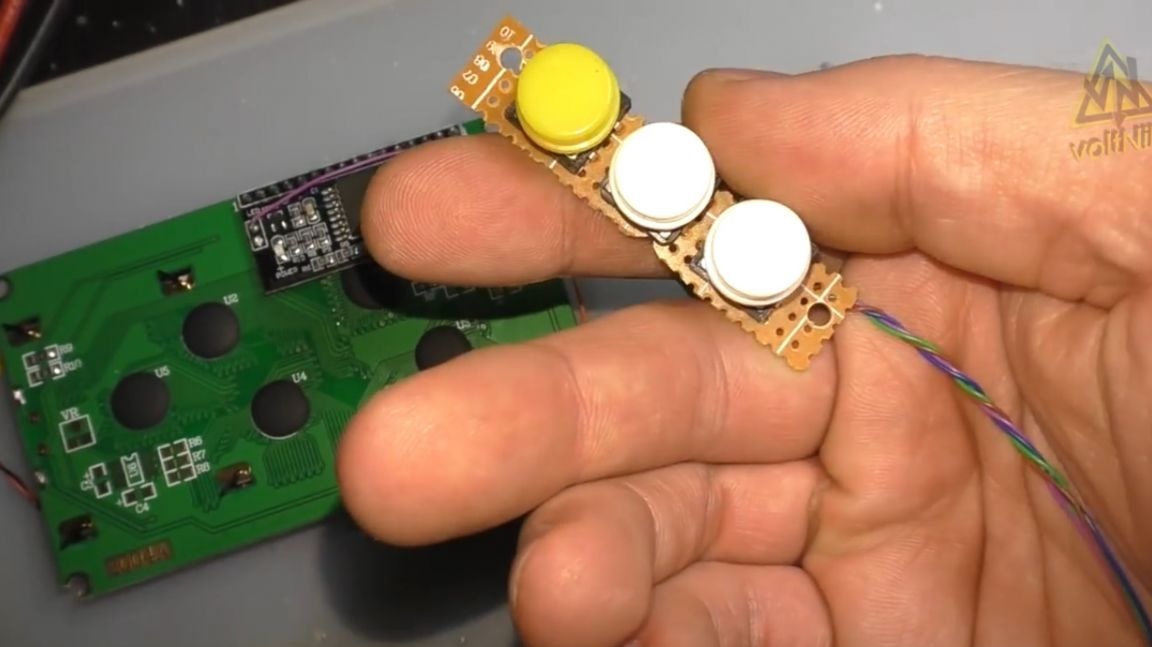
10. Chinese buttons 3 pieces.
If you decide to repeat this project, then for convenience, links to all components are already in the description of the original video (link to it at the end of the article).
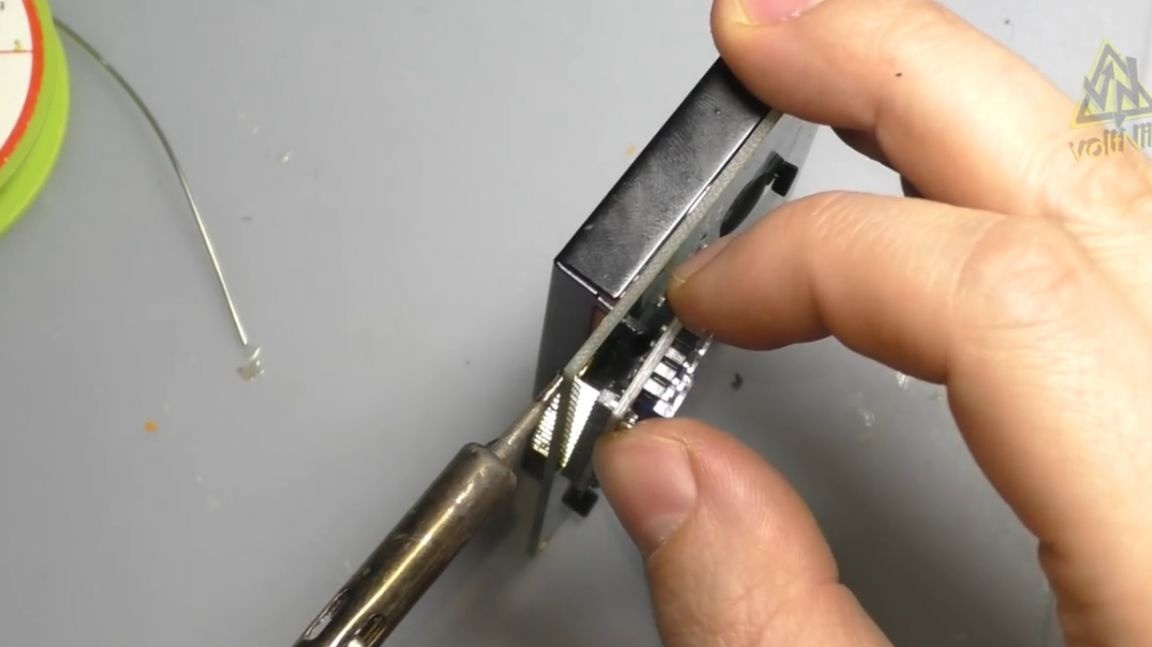
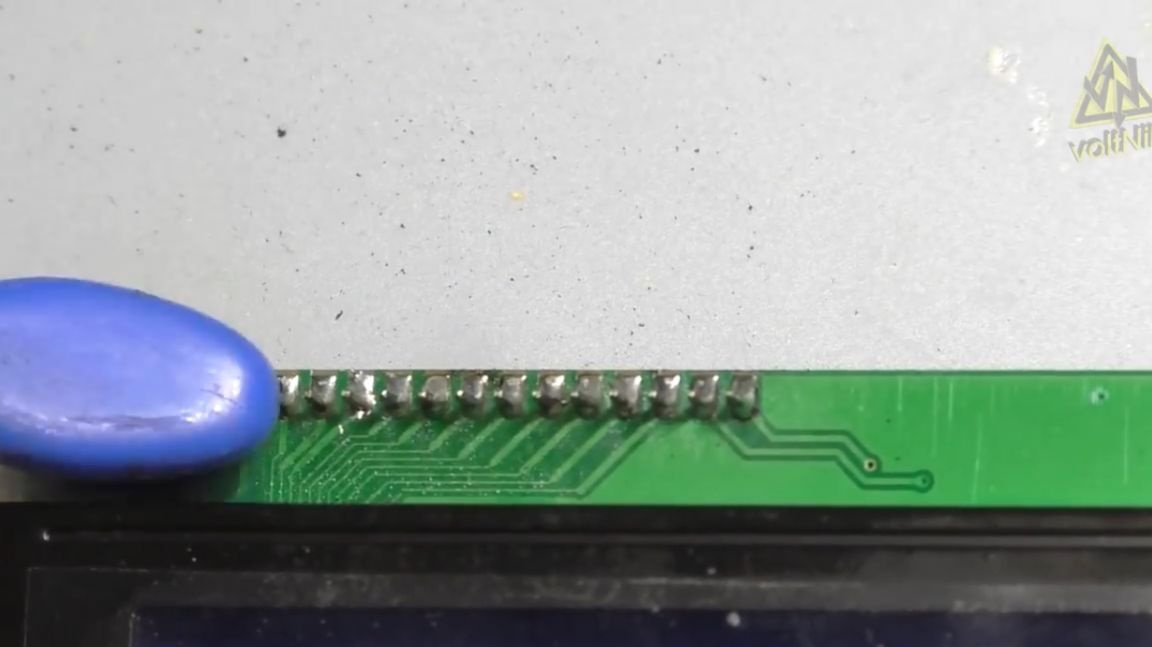
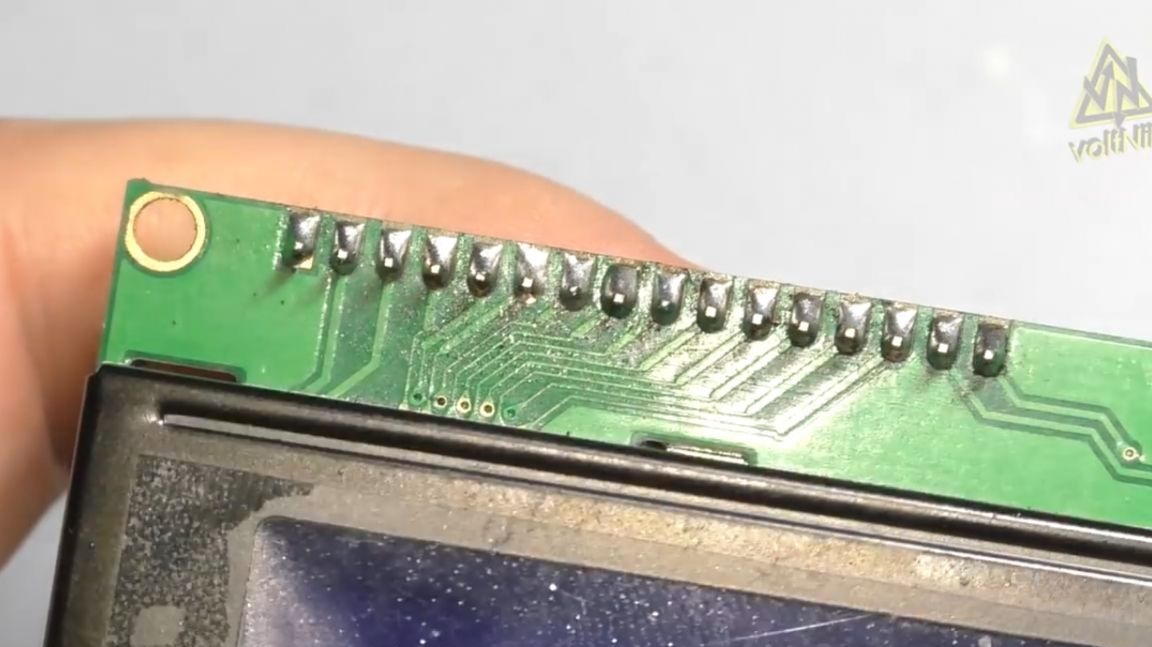
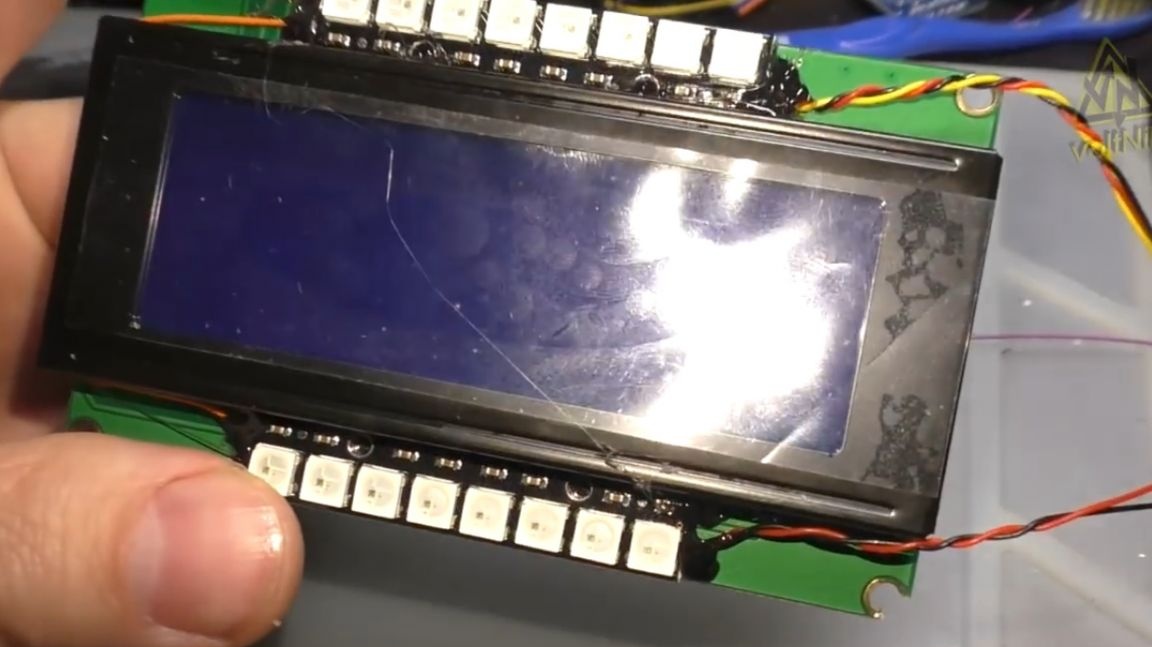
We start by soldering the I2C module to the screen. First contact first. Then we align the two boards in parallel and solder all the other contacts.
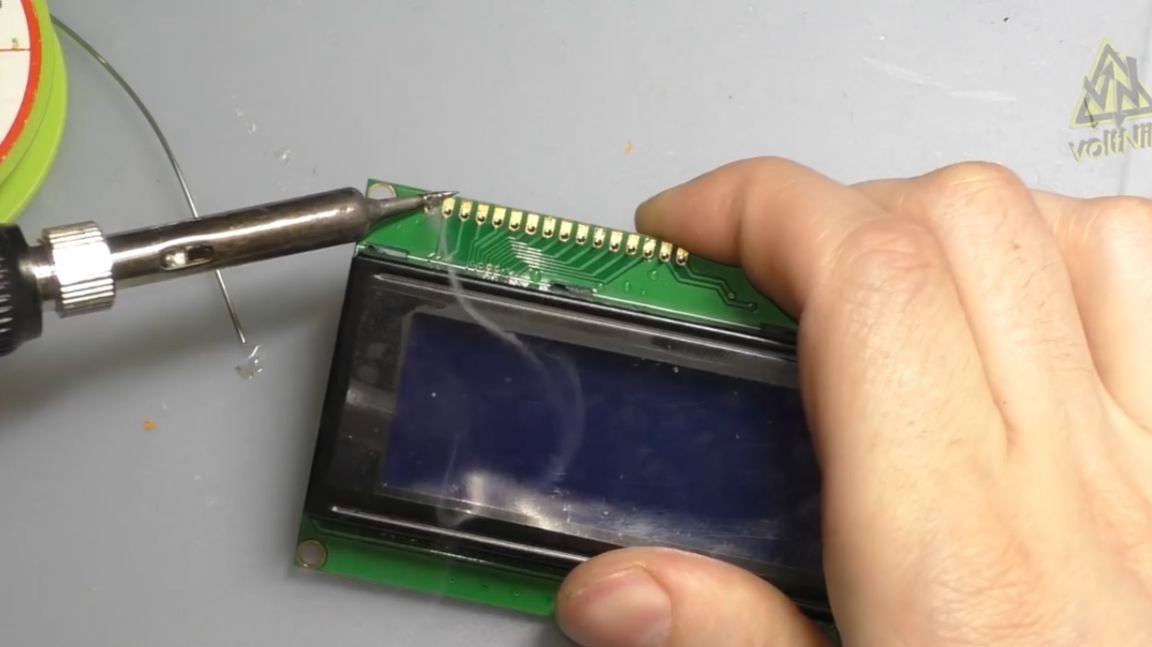
The author uses flux, so cleaning is a must.
Then he collects the project on a breadboard, with the aim of setting up, checking operability, as well as for testing various gas sensors. They are interchangeable, so instead of one, you can easily install the other. The author also downloads the firmware to Arduino for its further modification.
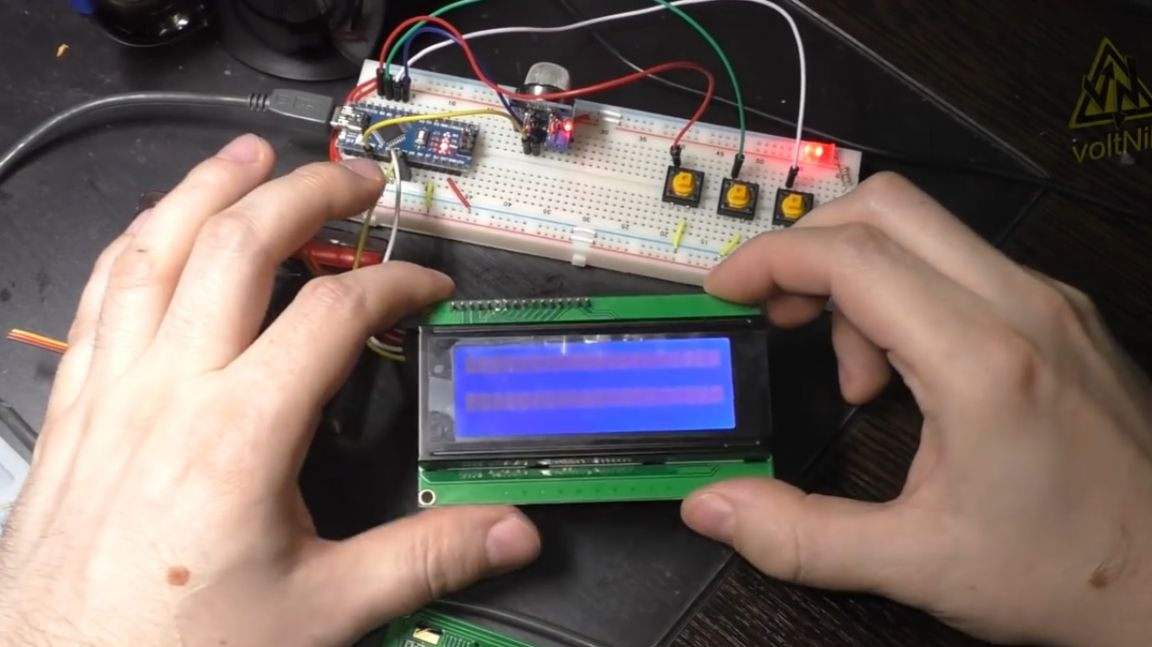


The module connection diagram has the following form:
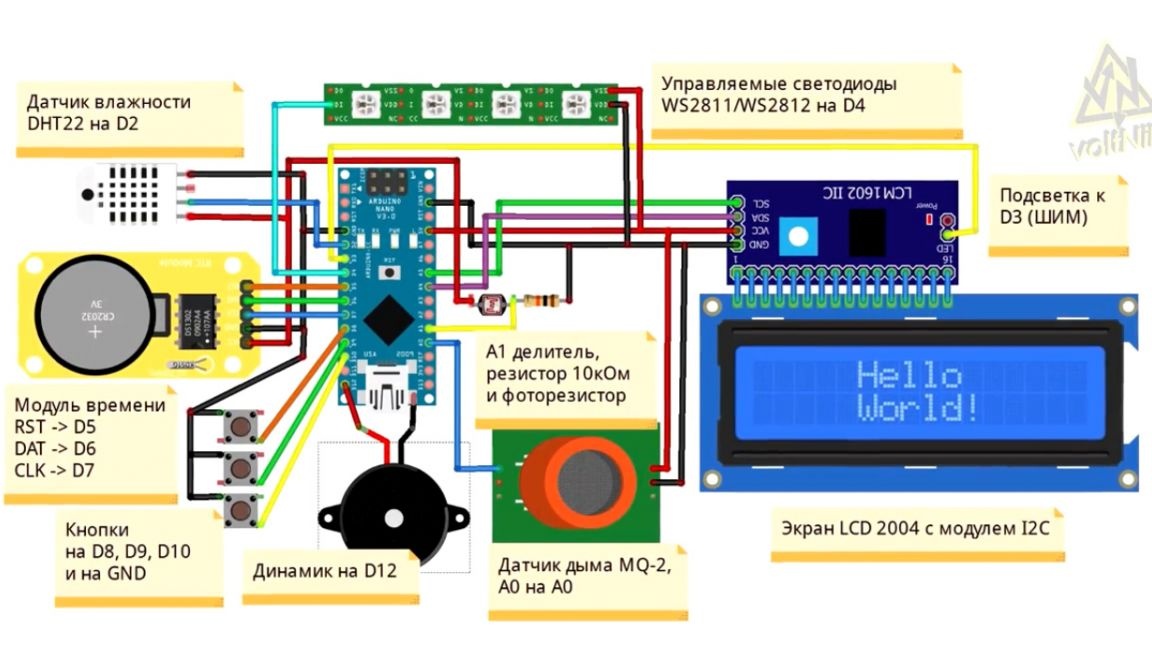
There are no special difficulties and nuances here. There is only a trick to connecting the backlight to the Arduino. The jumper from the I2C module must be removed and the wire sealed there. All module power comes from 5 V, so everything is simple here.
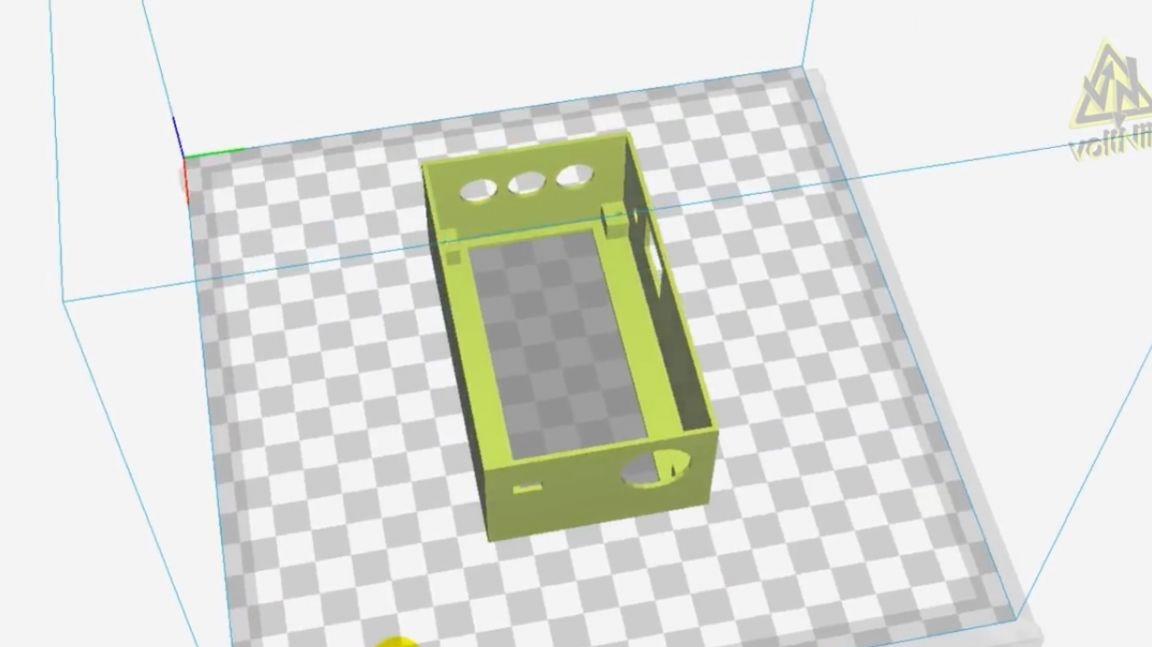
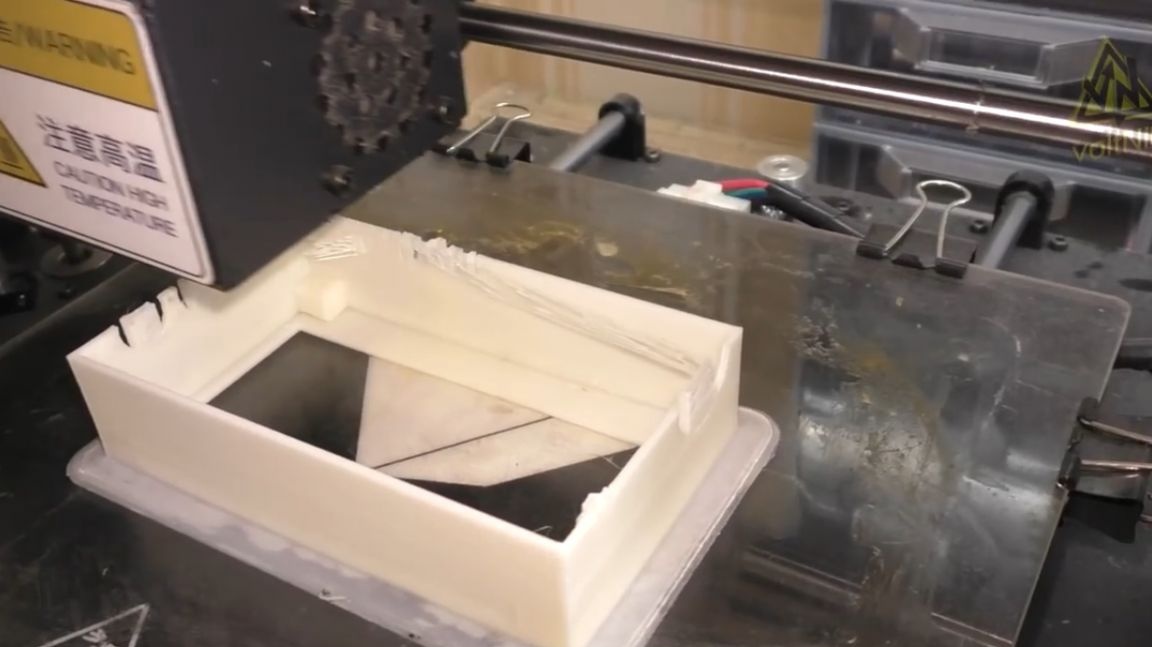
Next, the author prepares a draft case for printing on a 3D printer, and immediately prints it with white plastic.
LEDs should shine beautifully through such a translucent plastic. The author first wanted to place the LED panels the entire length below and above the screen, but, firstly, the strips were longer, and secondly, the high density of the LEDs themselves would create a high current consumption.You can of course use a tape, but here the density is lower and only 6 LEDs will fit, and the author did not have more dense tapes. Well, in general, this is at your discretion. You can do it your own way.
In this homemade work, the author decided to install panels of 8 LEDs above and below the screen. I connected them in series with a signal wire, but I divided the power. Note that the project uses WS2811 controlled LEDs.
Do not confuse them with 4-pin RGB color LEDs. They won’t fit here.
The case is finally printed and ready. Delete the stroke and support. And after acetone, it became glamorous and glossy.
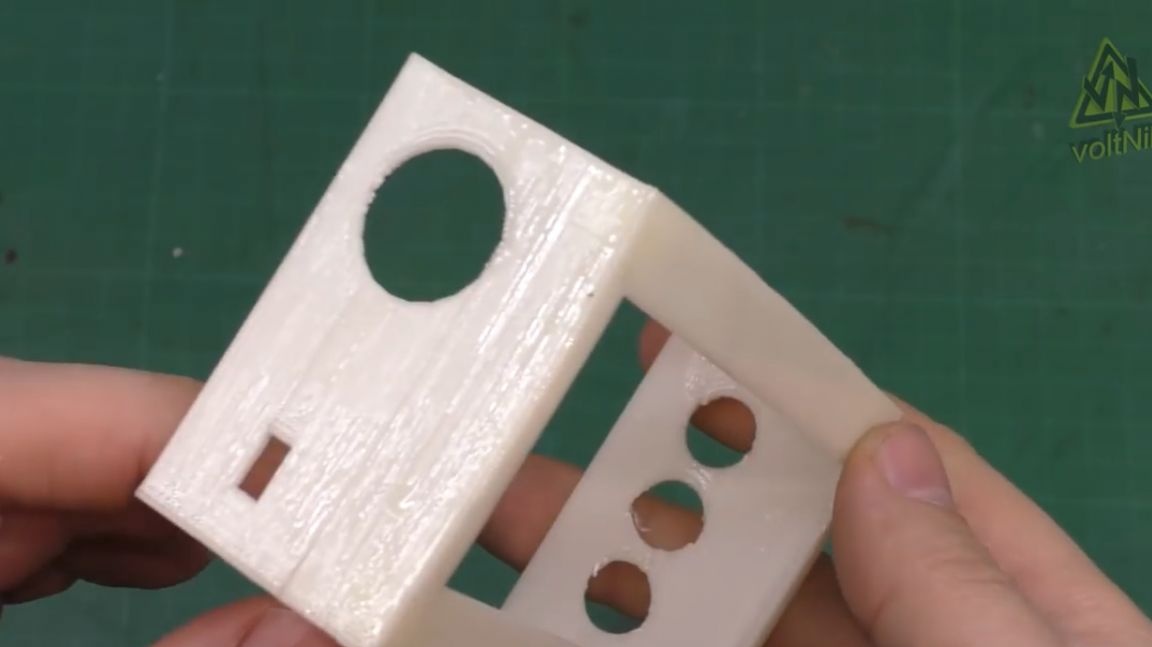
If anyone does not like the print quality, then yes, it is draft here with a layer difference of 0.3 mm. You can put 0.1 mm, then it will be like cast, but then you have to wait longer.
Fitting.
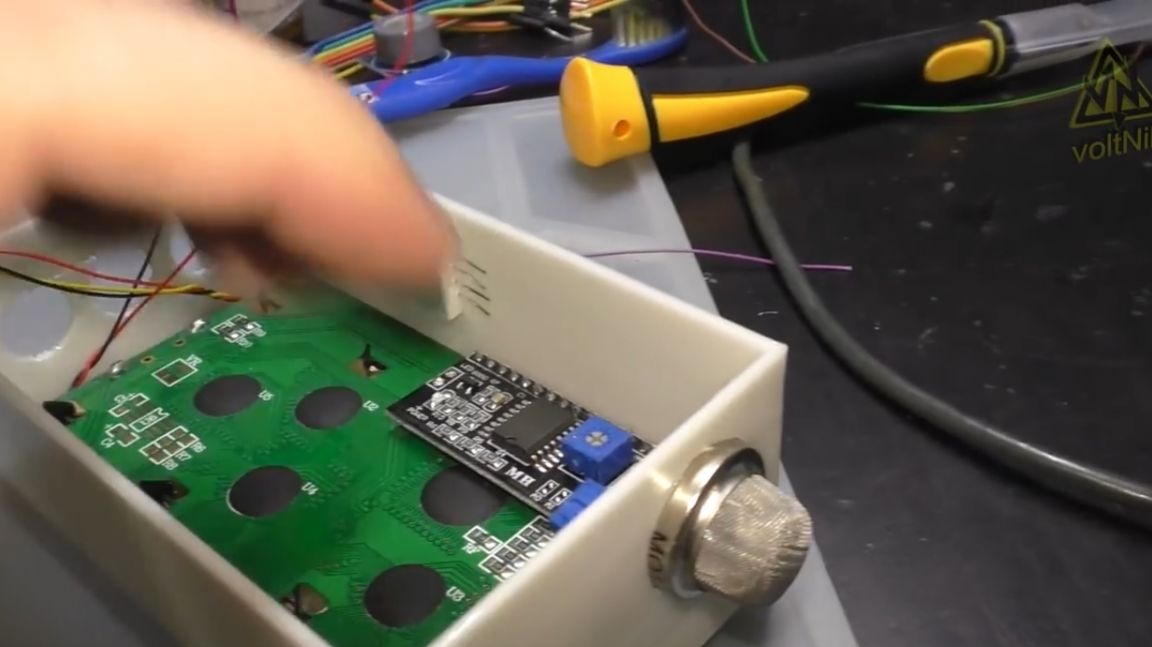
The modules came to their seats: screen, smoke sensor and humidity sensor.
The following is a lengthy process of soldering thin wires to all components.
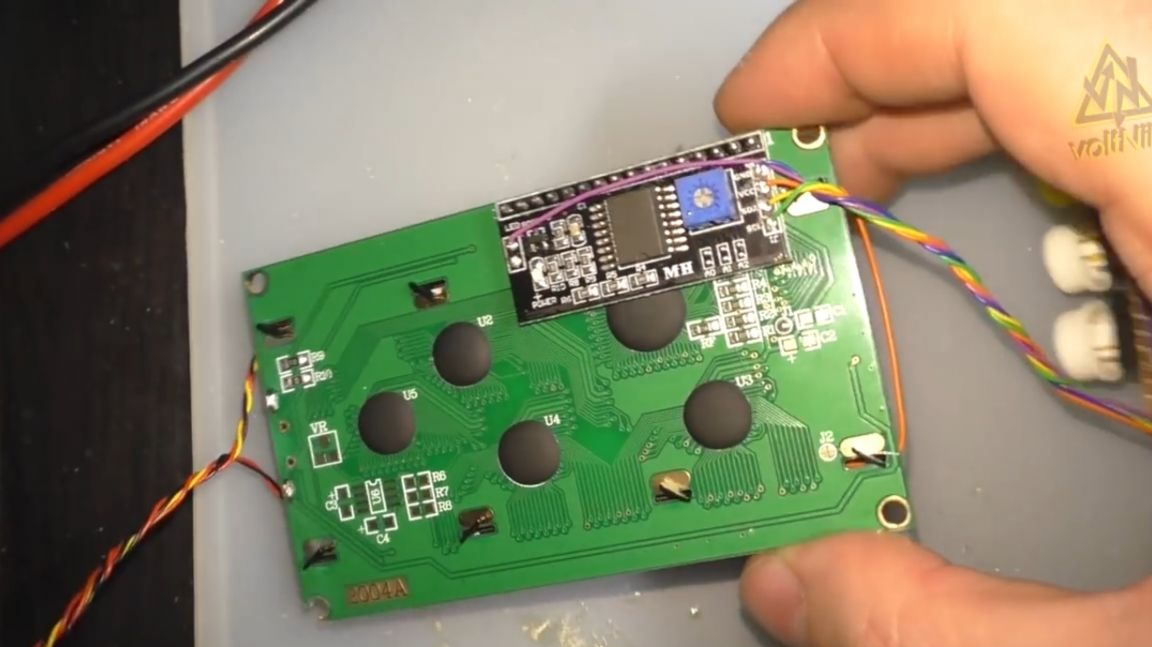
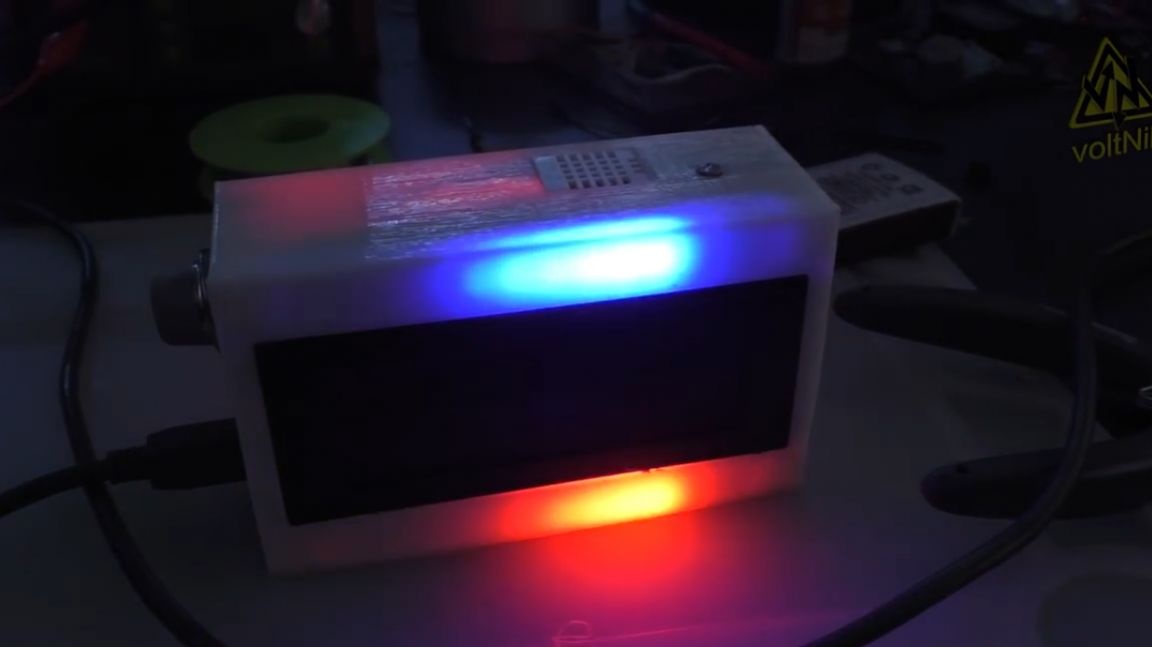
As a result, we got such a screen. Separately, pay attention to the purple wire in the center, this is the adaptive screen backlight.
Buttons the author placed on a cheap breadboard. The common here is blue, and the colored ones are the outputs from the buttons.
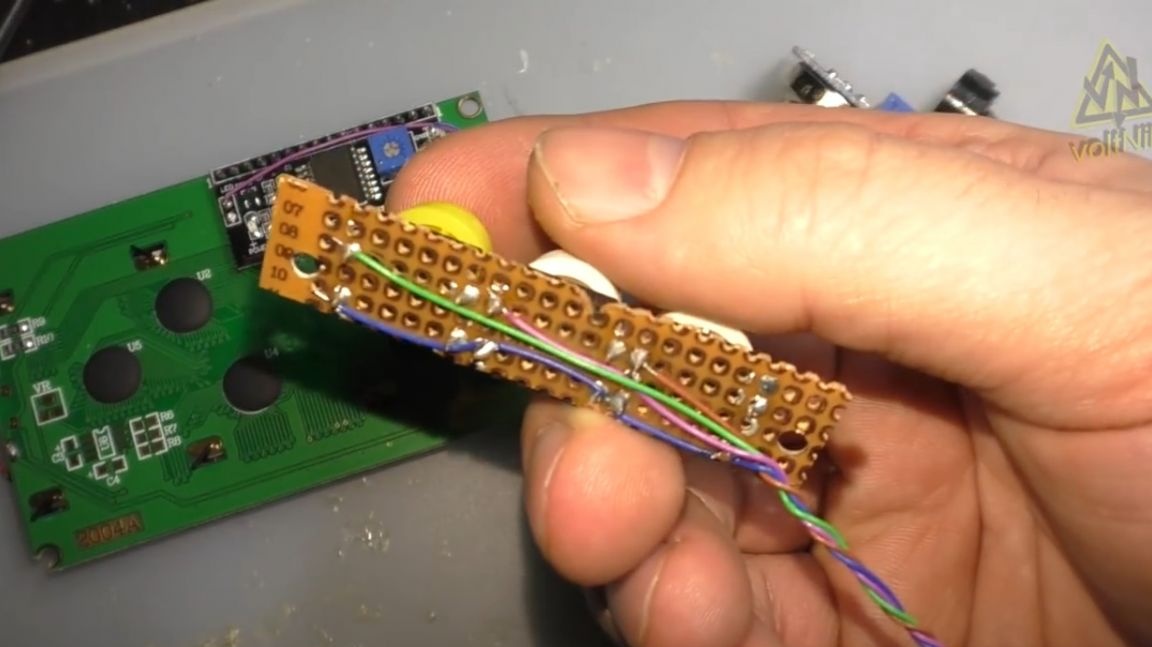
He also placed the photoresistor and resistor on the breadboard. Be sure to twist the wires into a pigtail, so they will not break and there will be no pickups.
The smoke detector, by the way, needs to be connected with a stranded wire, thicker, it will constantly eat about 110 mA for heating.
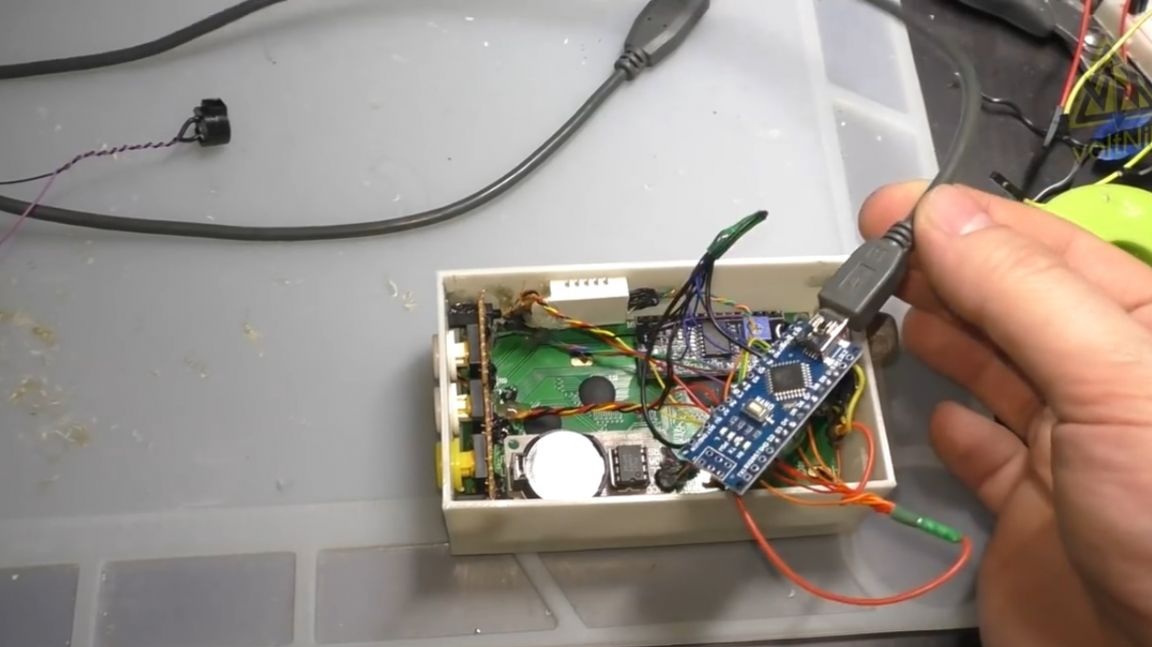
Now it remains only to solder all this on the Arduino. We fasten the housing screen to self-tapping screws, the counter holes are already provided for in 3D printing.
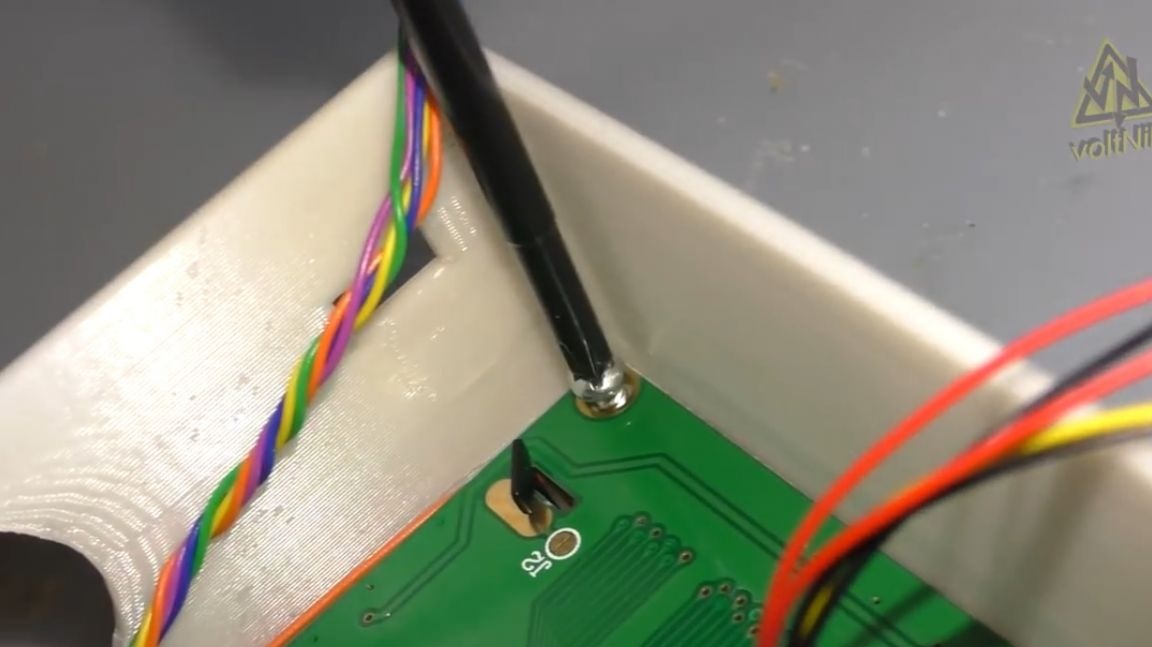
We fix all the modules into place. Of course, this can be done with racks and screws, but the author preferred hot melt. Wires in the soldering places are also filled with hot glue. This will protect them from kinks and pulling, and you from a long search for a broken connection.
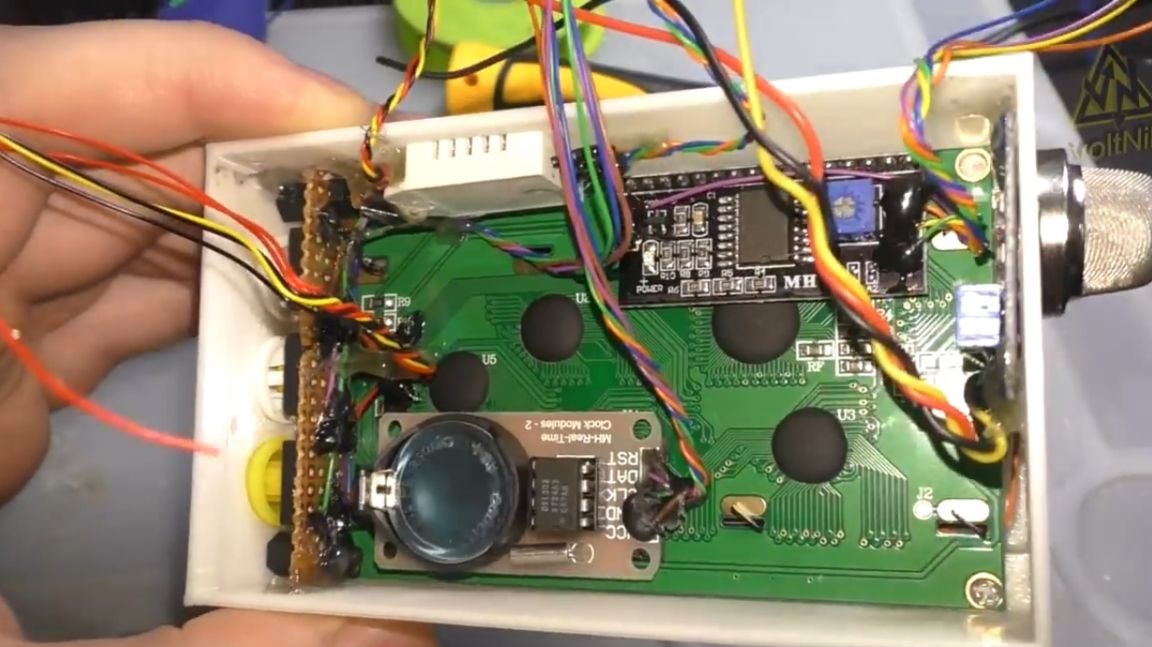
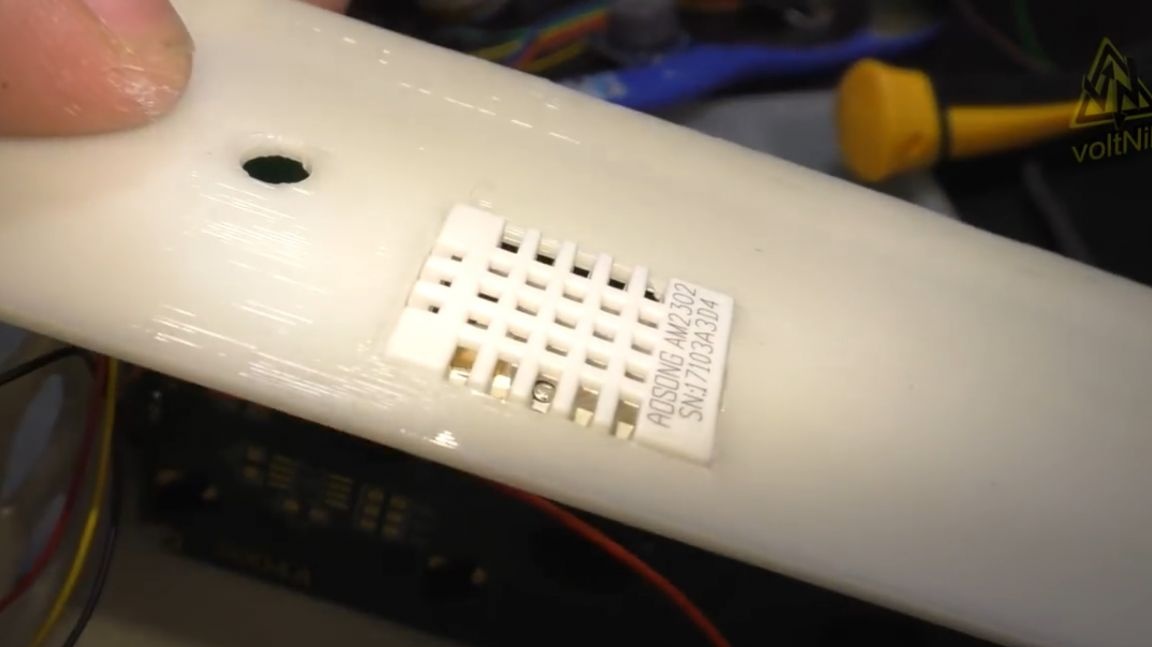
On top are a humidity sensor and a photoresistor. A smoke sensor is sticking to the left of the case.

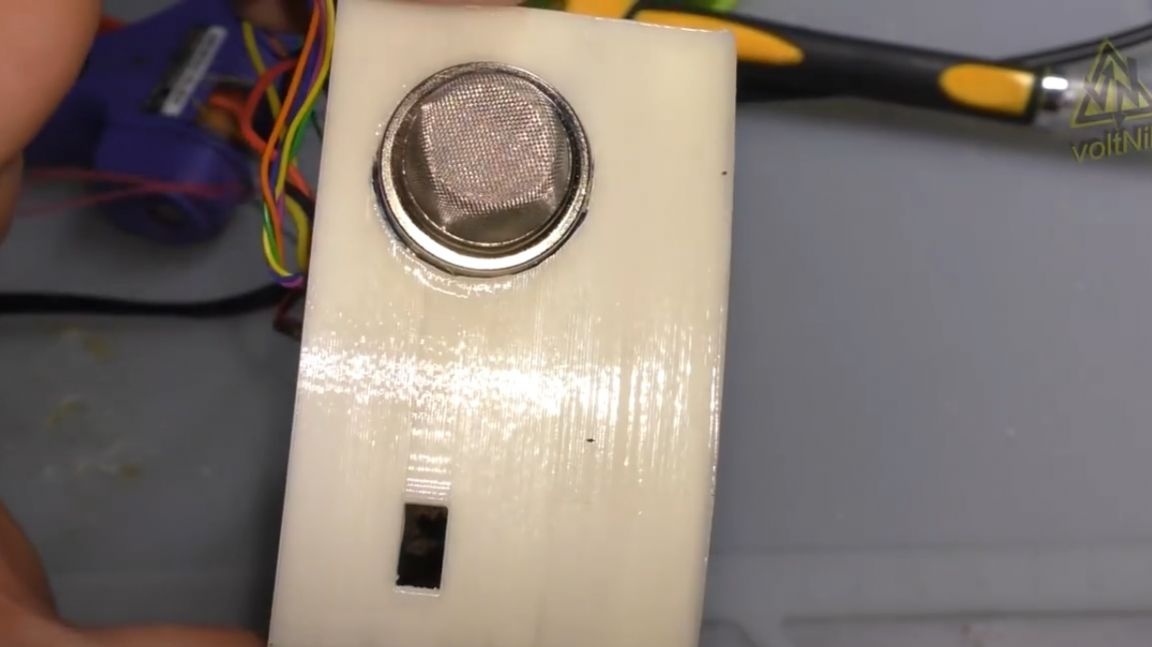
In general, in the right way, for a quick response, the gas analyzer should hang under the ceiling. That is, it needs to be carried out on a long wire or sculpted somewhere on a chandelier. In the event of a fire, smoke first builds up and this will allow the sensor to fire earlier and faster.
After installing all the modules in their place, we got such a bundle of wires.
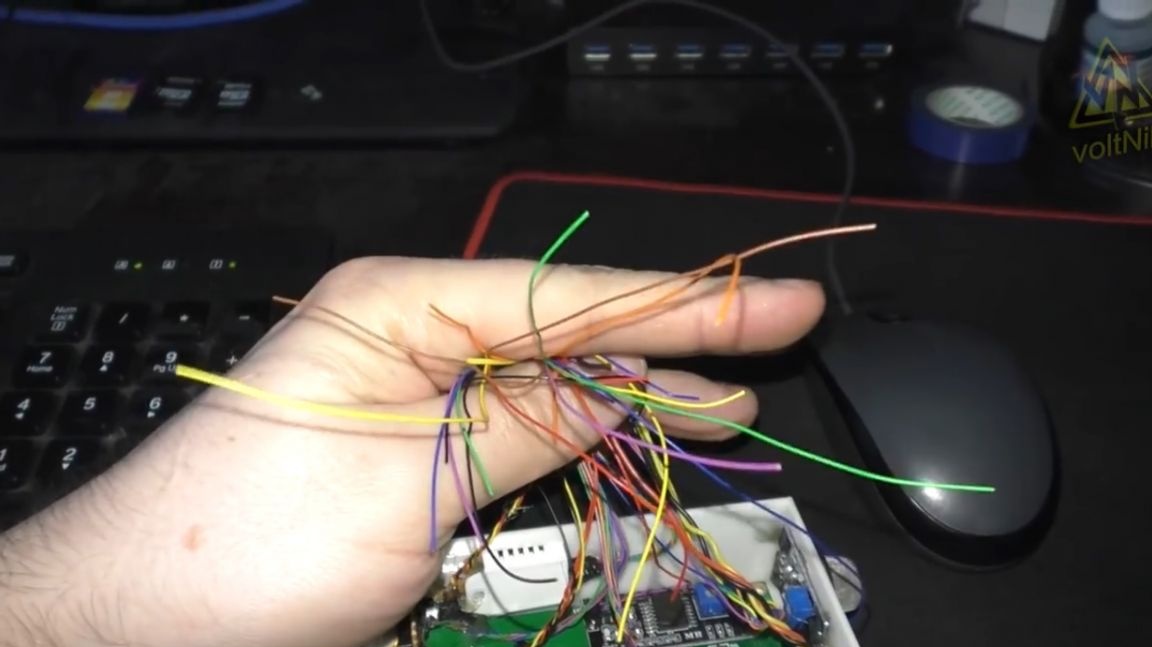
They need to be soldered on the Arduino.

Now all that’s left is to combine all the pros and cons.
So what, the clock is assembled. Before turning on, you must definitely ring for a short circuit, otherwise it will be insulting. But note, in this case, the multimeter will beep, as a heating element with a low resistance is installed inside the smoke detector. Therefore, for testing, it is better to use a laboratory power supply and a wire with a usb connector.
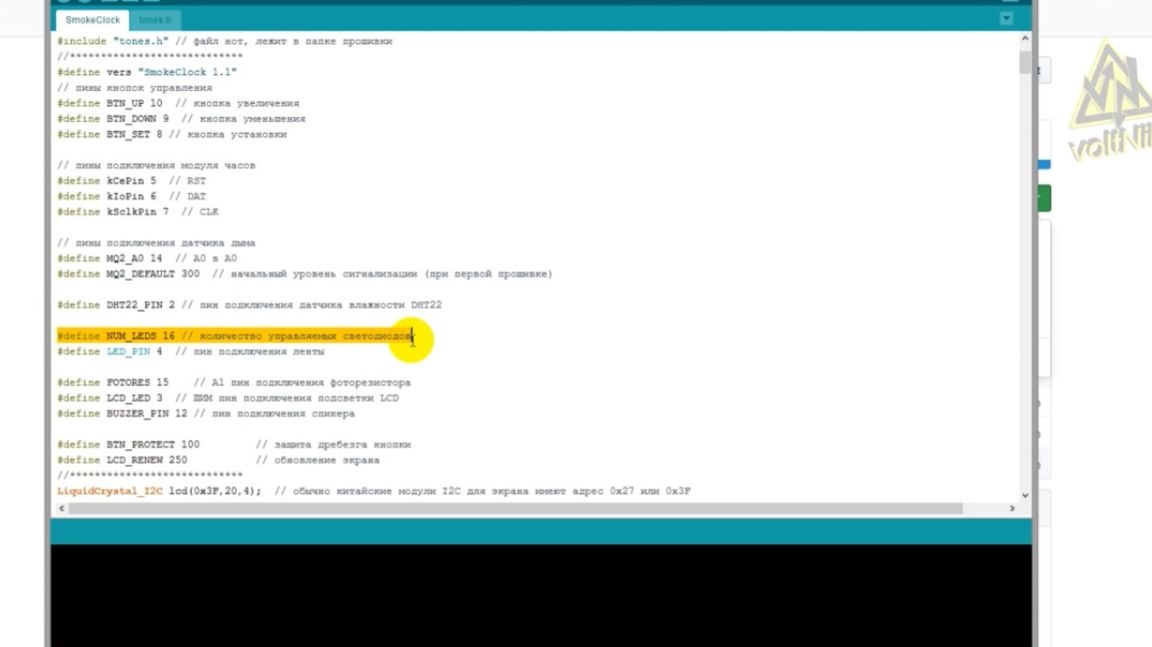
On the project page (link in the description of the author’s video) download the archive with firmware. It also contains files for 3D printing of the case on the printer. Unpack, install the libraries and open the firmware file.
The code turned out to be large, but the author tried to comment it out well. At the very beginning are the settings and connection pins of the modules. The only thing you may have to change is the number of LEDs specifically in your backlight (this is the NUM_LEDS parameter, the author is set to 16).
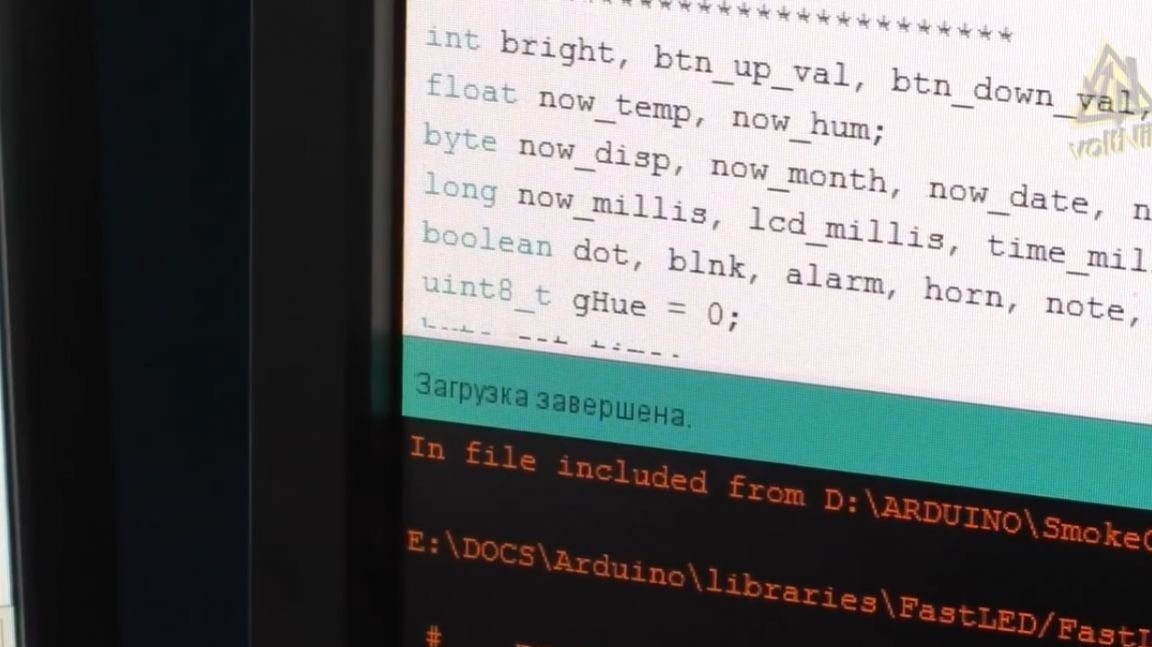
After the necessary editing of the settings, you can load the firmware into the microcontroller.
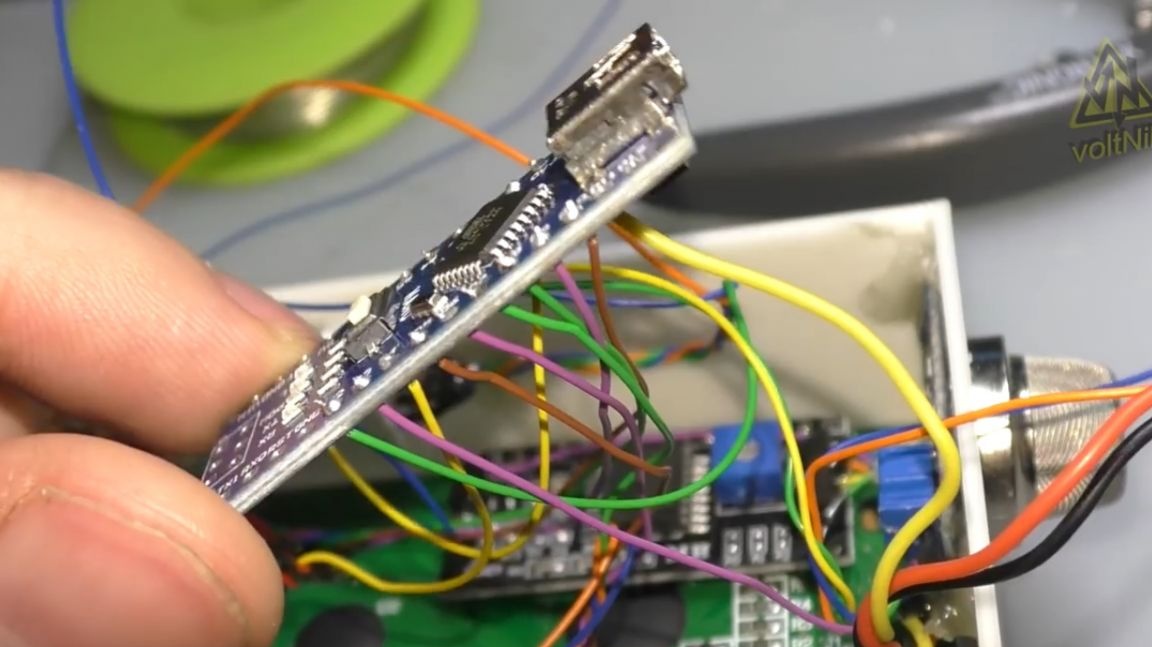
Now we lay the wires and install the Arduino in its place.
During normal hours, the backlight shimmers in rainbow mode.
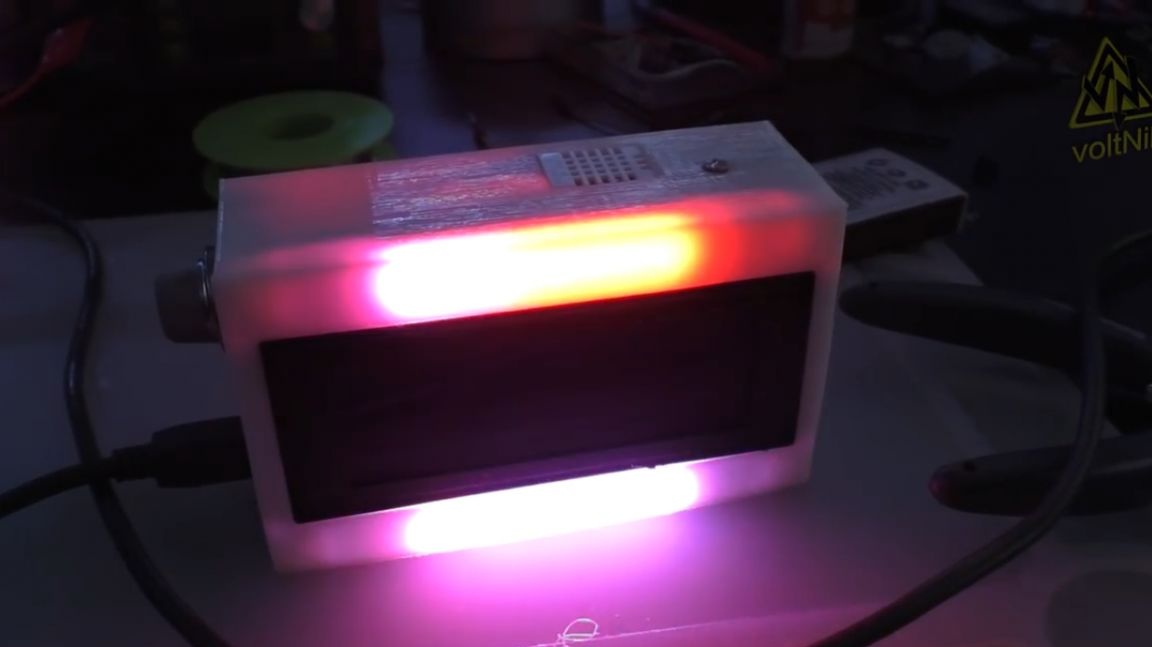
But of course, its modes can be modified and changed to others, at your discretion.
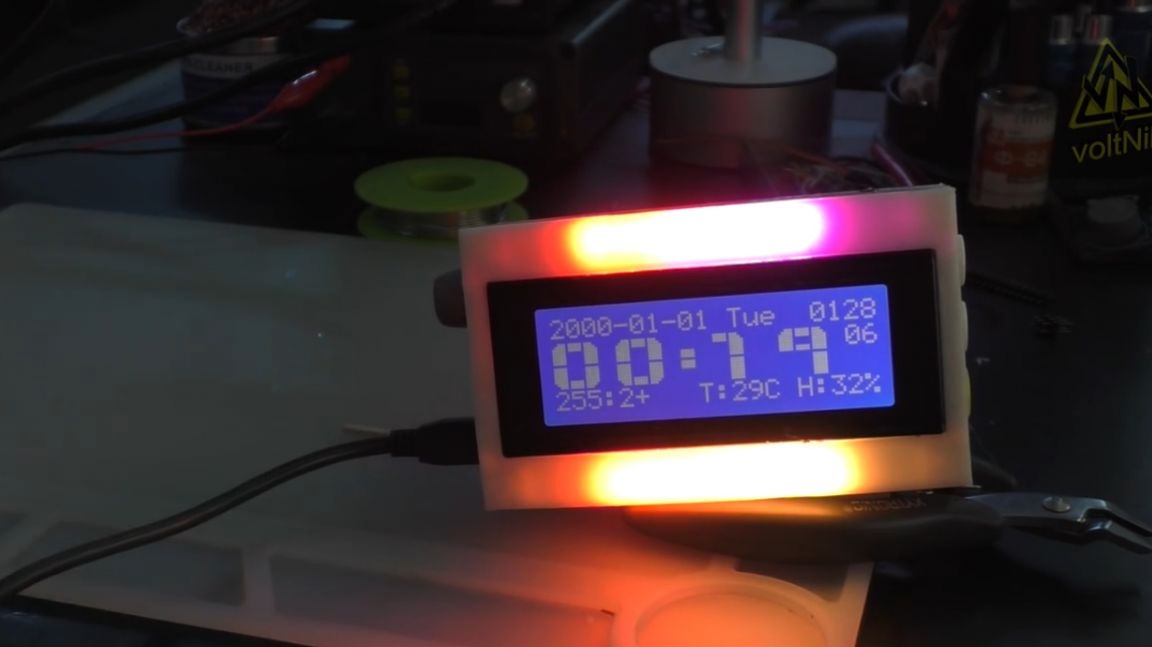
By setting the clock.
On the right side there are three control buttons: plus, minus and bottom yellow (this is the setting).

We press it once and go into the setup mode.Here you can change the hours, minutes, synchronize seconds, set the alarm (+ at the end indicates the alarm is on or off). Next is the installation of the year, month, day and day of the week.
The last value of 300 is the smoke detector threshold. It can be changed in steps of 50. The author recommends leaving 300.
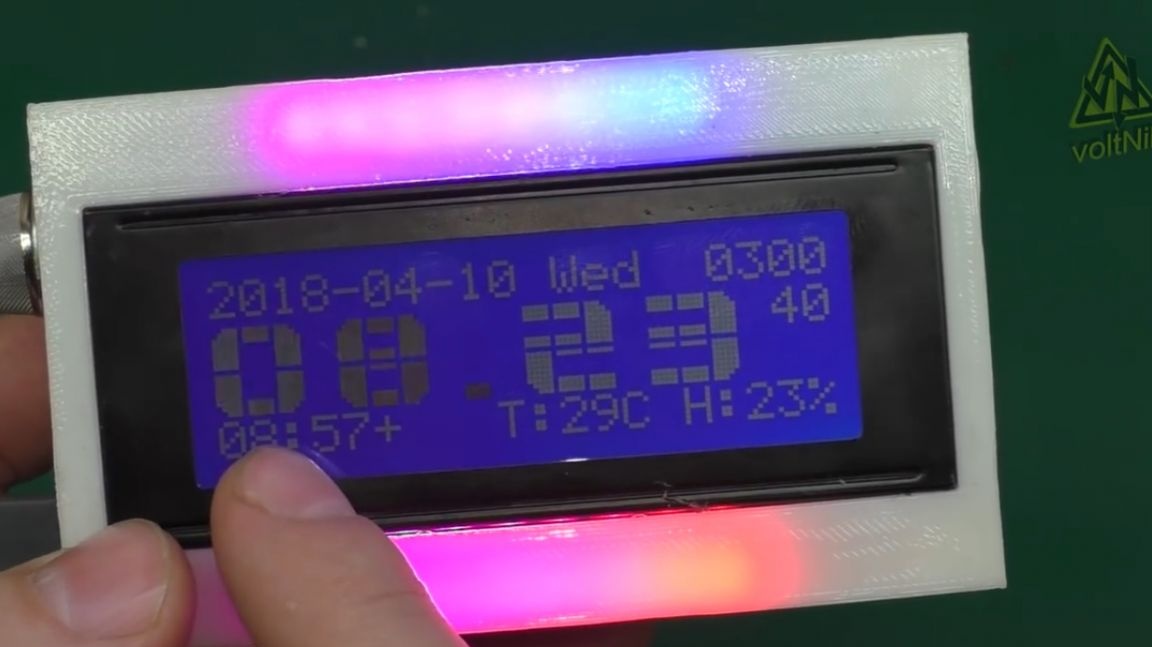


The next press of the yellow button exits the settings, while all parameters are recorded in non-volatile memory and are not reset even if the power is turned off.

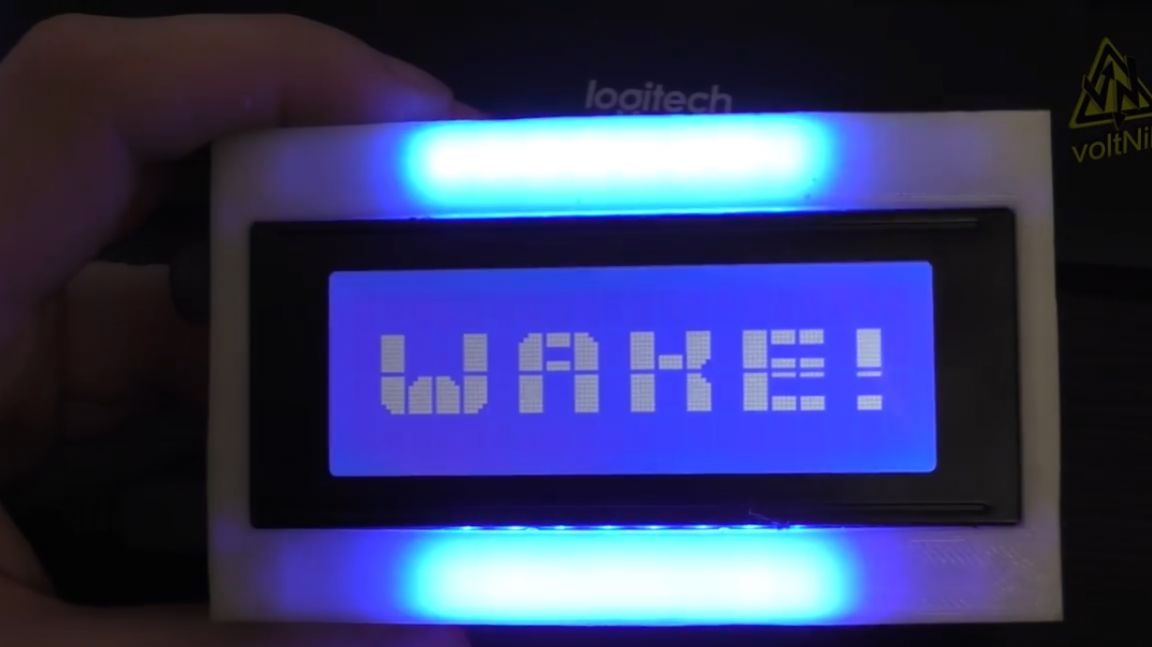
The clock has an alarm clock. It can be set to wake you up in the morning. And when it works, the clock will flash blue-green, and WAKE will be displayed on the screen.
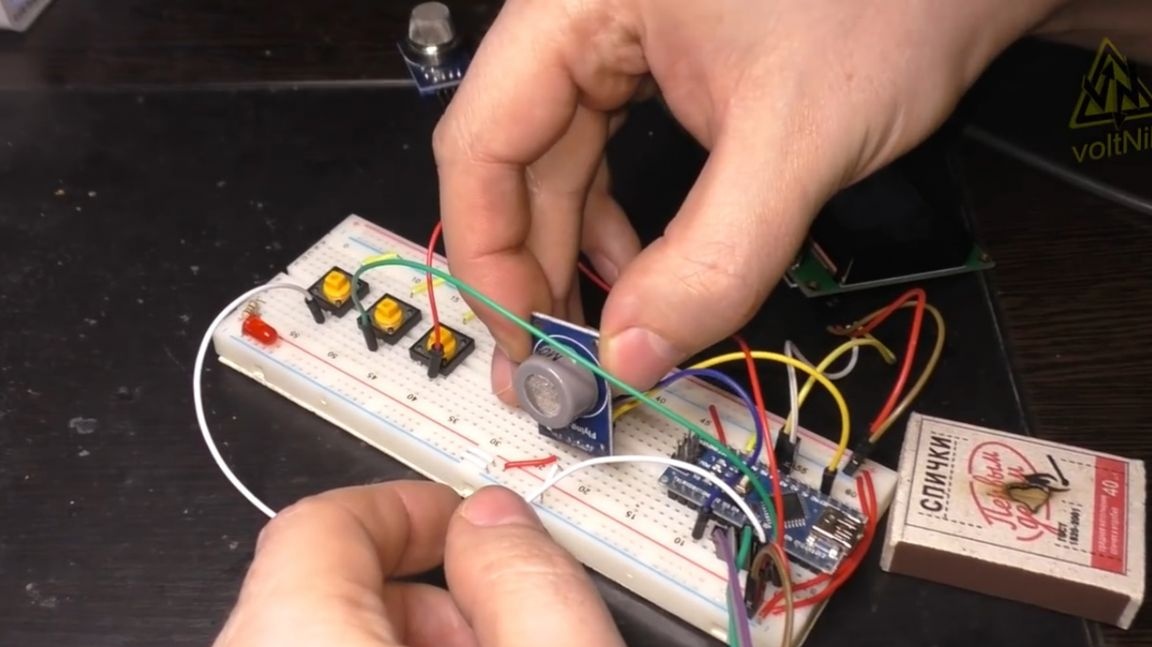
Let's check how the smoke detector works.
The numbers in the upper right corner show the value from the smoke detector.
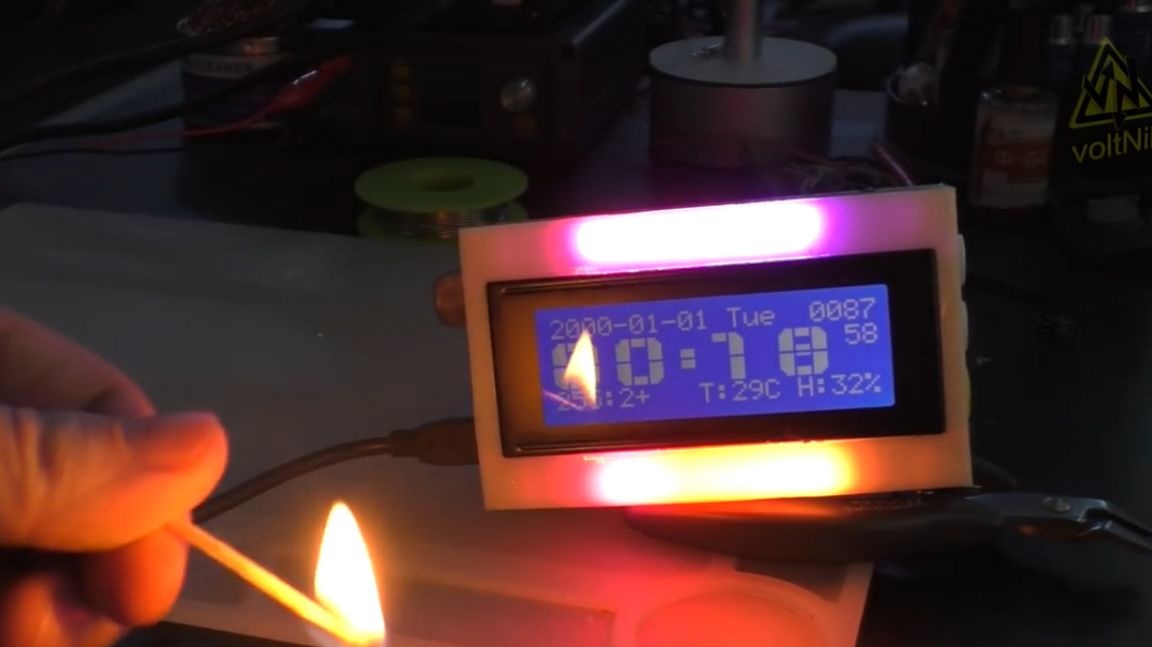
So the first match did not enter, we take the second.
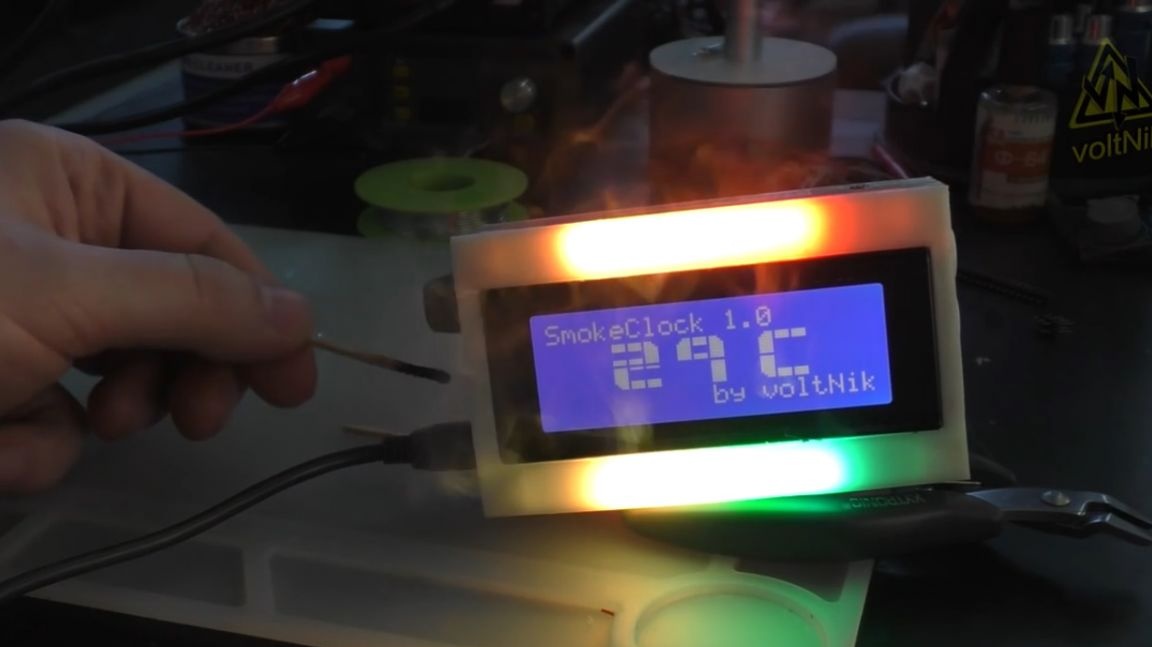
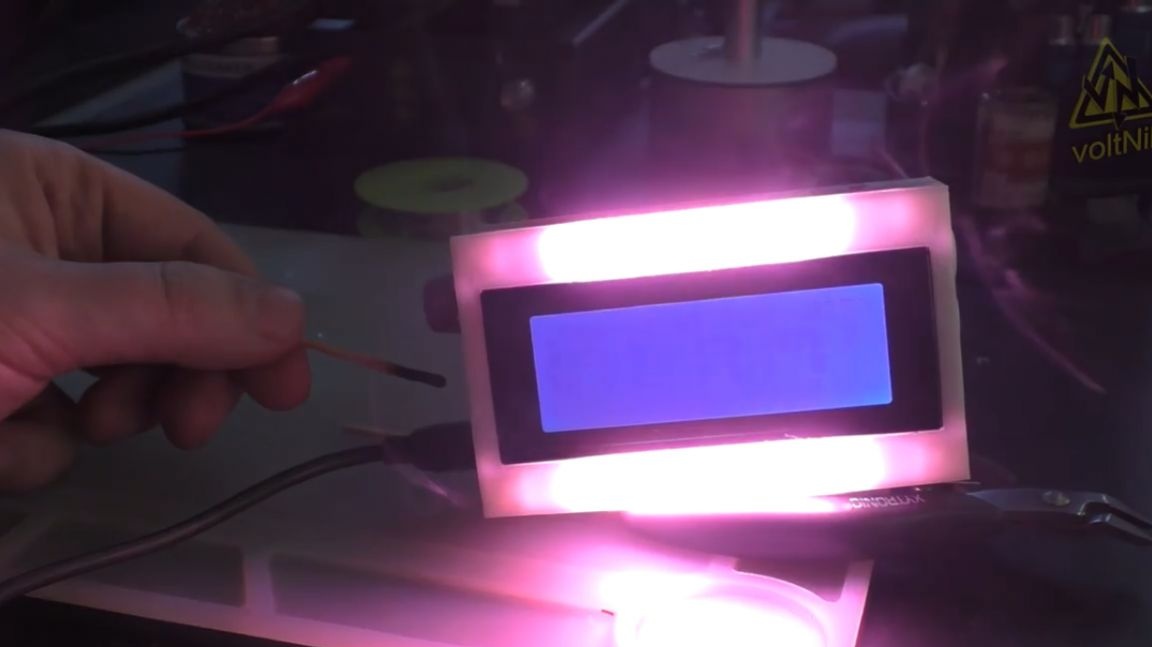
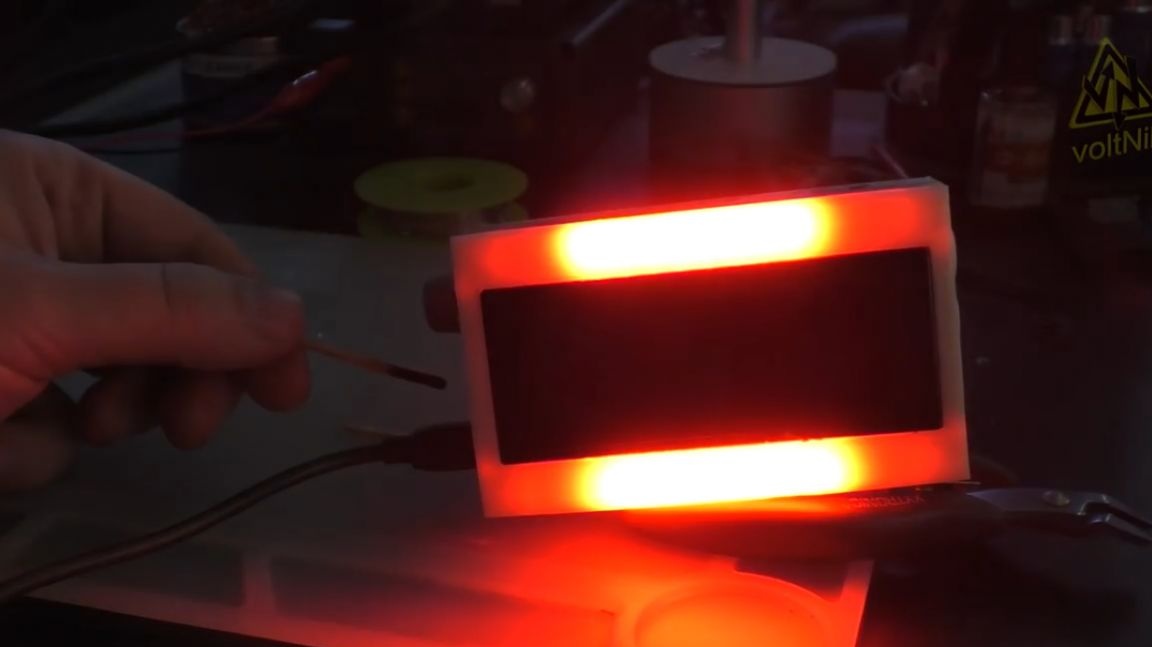
And now it worked.
As a result, we made a cool watch with a cool dynamic backlight and with a smoke and gas sensor. They can not only wake you up, but also warn you of the danger in the presence of methane, carbon monoxide or smoke. They also show the current temperature and humidity in the room. Power comes from the usb port through the Arduino platform itself. A watch will be useful both at home in the kitchen, in the garage, and in the country, wherever there is a chance of poisoning.

The gas sensor itself can be used absolutely anything - they are interchangeable. You also set the threshold for their operation yourself. According to the experience of the author’s experiments, 300 units are the optimal value.
Thank you for attention. See you soon!
Video: