

Hello! I bring to your attention an entertaining under the tree, made with your own hands from improvised materials. On the one hand, it’s just a toy, a souvenir, and on the other, it’s a serious thing, which requires some knowledge and skills in such fields of science as astronomy, geography, mathematics and physics. We will talk about an ancient device for determining the time - a sundial, which everyone probably heard about, some even saw, someone might even have done. I think there’s no need to describe in detail the principle of operation and the design of stationary clocks, everything is described in great detail on the Internet, I will focus only on a few details and features.
To build this design, we need:
1. Plywood 3-ply 4 mm
2. Compass with a dry arrow
3. Brass sheet 1 mm thick.
4. Copper wire ø 0.8-1mm.
The tool kit is as follows:
1. Hacksaw
2. Very sharp knife
3. The jigsaw is ordinary (not electro)
4. Drawing instrument (compass, protractor, ruler, etc.)
5. Scissors for metal
6. Soldering iron
7. Set of files
8. Construction hair dryer
9. Sandpaper of various grain sizes
10. If desired, the apparatus for burning
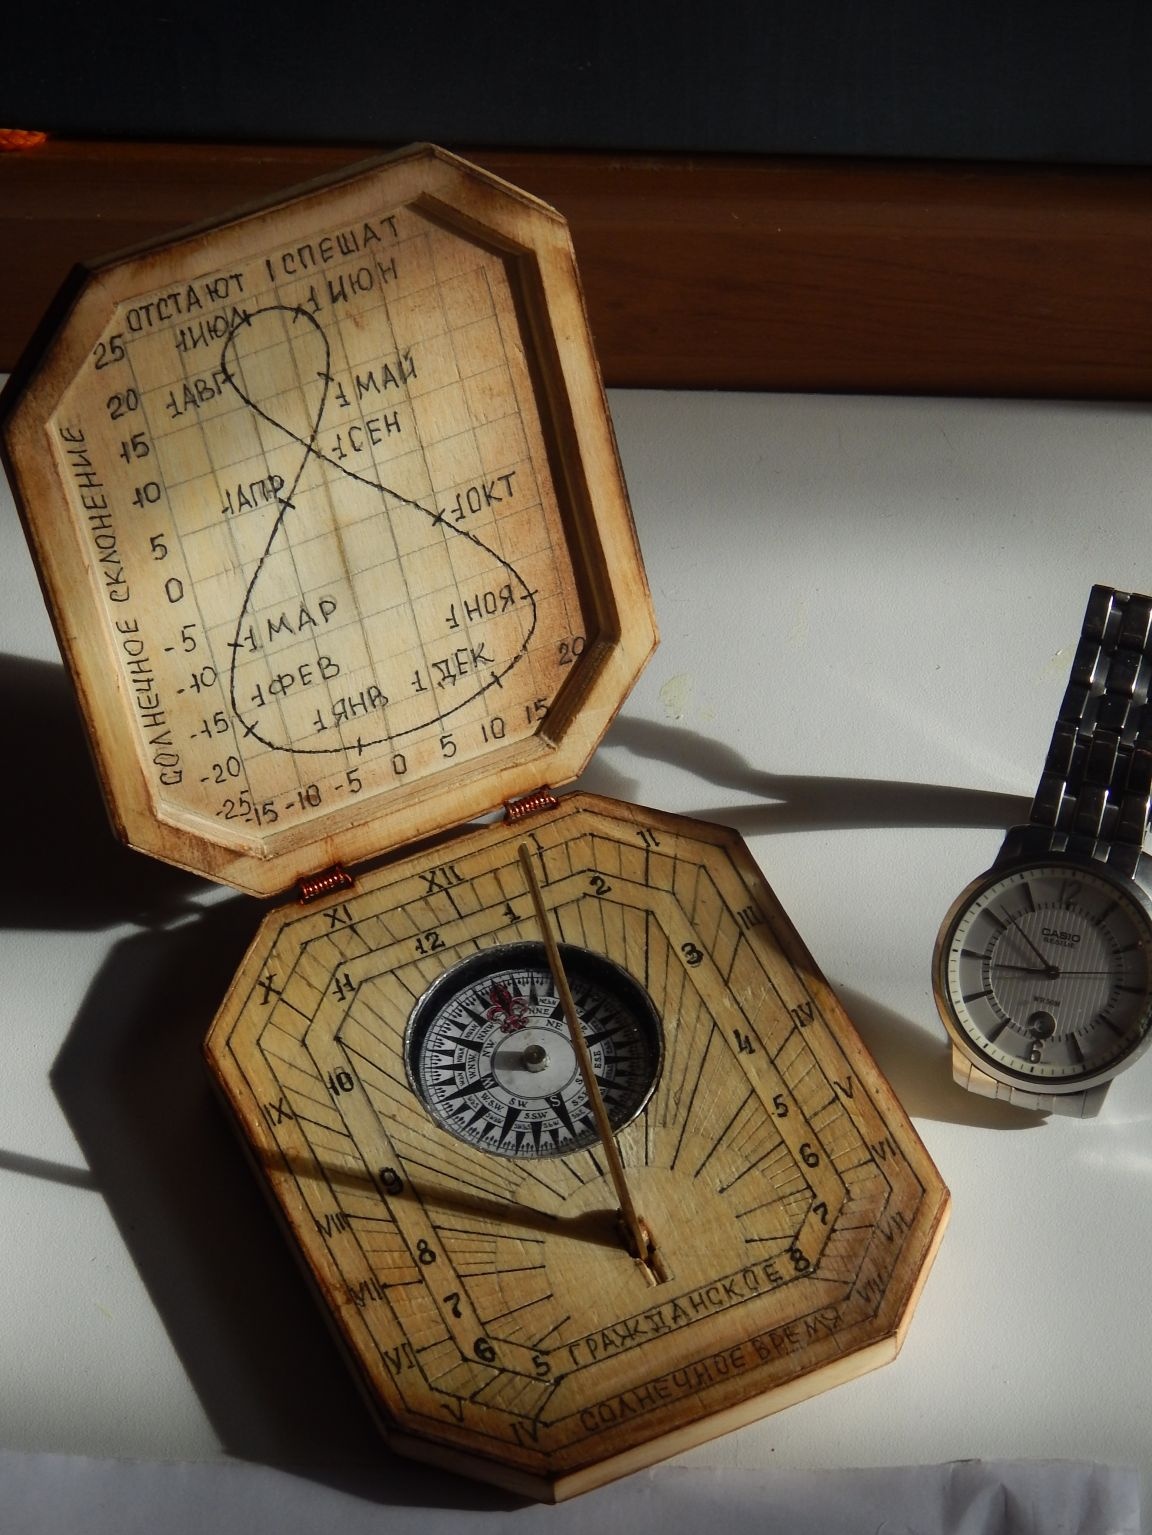
From the title of the article, it already becomes clear that this device is mobile, that is, portable, which needs to be oriented relative to Earth coordinates to determine the time, namely: the midday line of the clock should coincide with the direction of the meridian. For this, a compass was installed in the design. By the way, this watch will correctly show the time only in the area whose coordinates were used in the calculations. The longitude of the place determines the angle of inclination of the gnomon (clock hands) and the time division of the cadran (dial), and the latitude is important for the correction of local time to the time zone (civil time).
Our watches will consist of the following elements:
1 compass. For a more accurate orientation of the north direction, the watch uses a slightly modified ordinary arrow compass. The refinement consists in the fact that the compass card is glued directly to the arrow, and not just glued, but with the correction of magnetic declination (for our area this is 11 °, which can give an error of about an hour)
To start, I took apart the compass into its components:
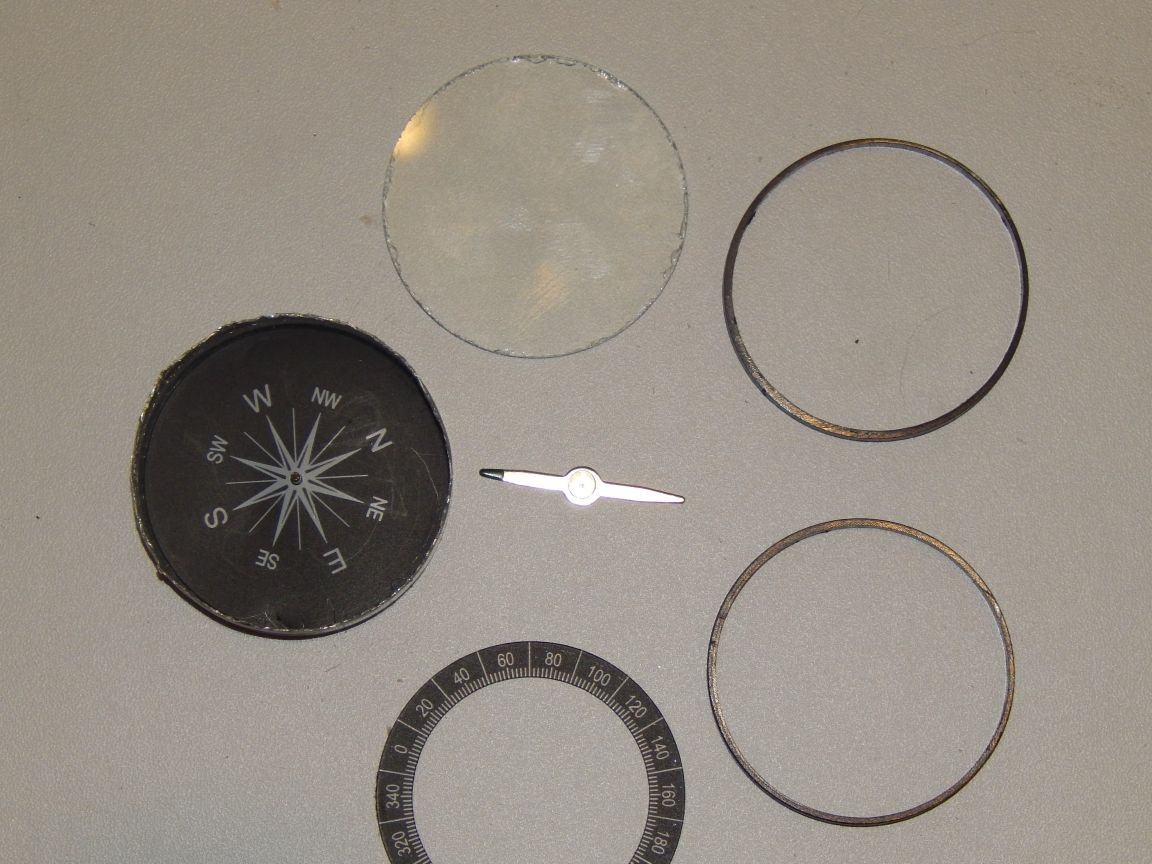
I liked the drawing of the card just downloaded from the Internet, printed it in the right size on photo paper and pasted it onto the arrow taking into account the magnetic declination, since there was already a graduation on the card
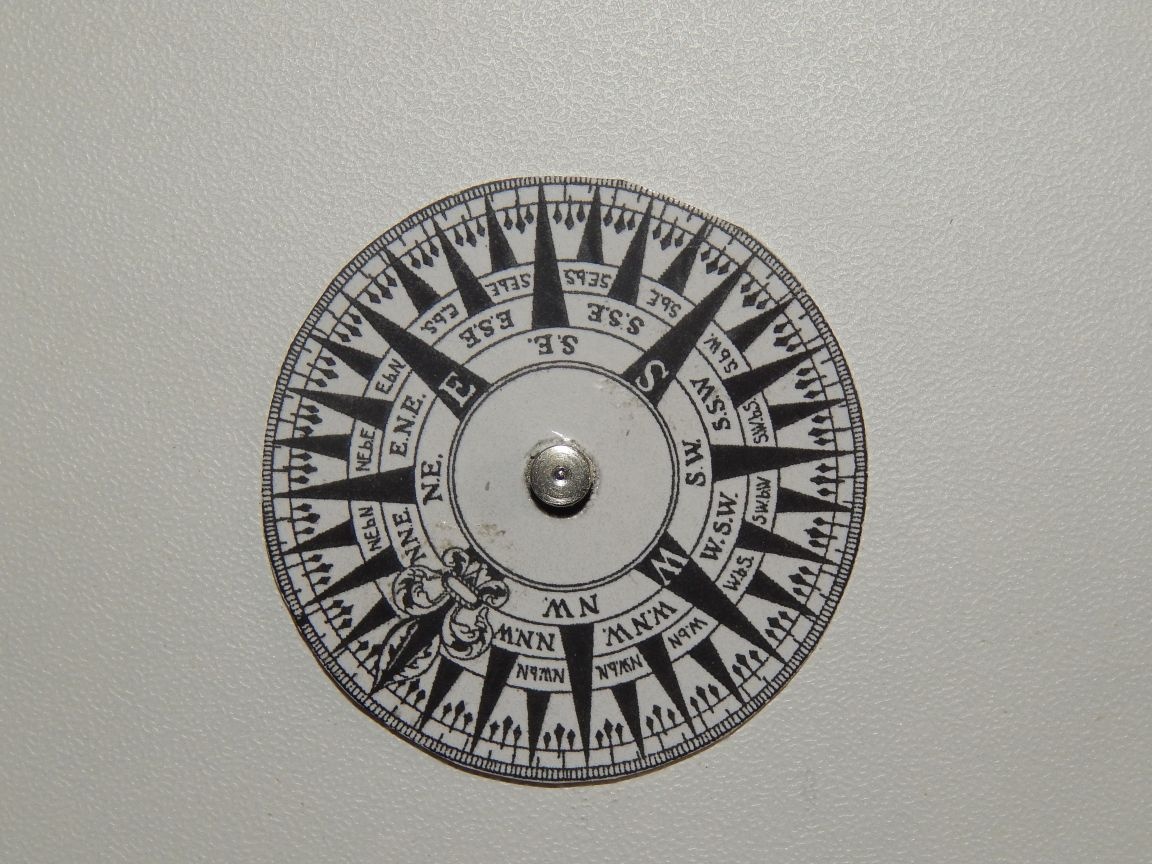
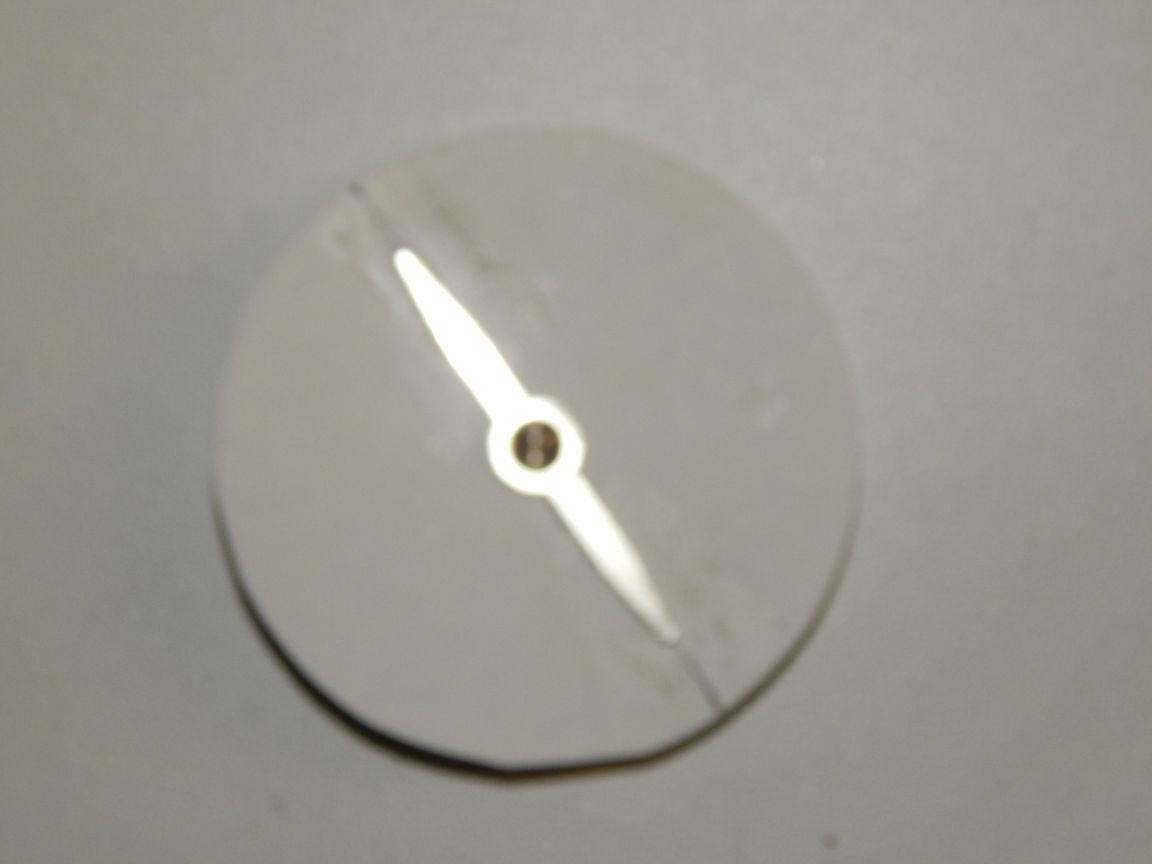
With balancing, I had to tinker with sanding the back side.
And another function of such a compass card, in addition to indicating the direction to the north, works as a level for setting the clock plane in a horizontal position. Of course, it would be better to establish an additional bubble level, but for lack thereof, I decided that setting the horizontality on the card would be enough for a souvenir toy, no one would check the chimes on them.
2 cadran (dial) a horizontal watch differs from an equatorial one in that the angles between the hour markers are uneven. For horizontal sundials, the marking of the frame can be done in three ways:
- First way the easiest, but not accurate, you just need to set the clock, strictly orienting it, and then make a mark on the frame every hour and thus mark the entire dial. It is better to do this on days when the correction of the equation of time is close to zero (see "Analema"). And such hours will be shown already given civil time, taking into account the amendment in longitude.
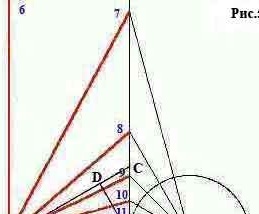
- Second way - marking using geometric constructions, it needs a pencil, a protractor and a compass.
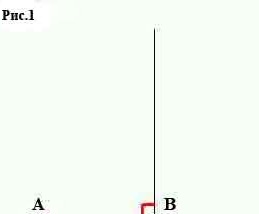
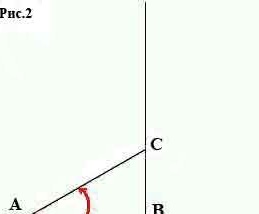
We draw two mutually perpendicular lines and mark point A.
From which we draw the AC line so that the angle of the CAB is equal to the latitude of our area.
From point B draw a perpendicular to line AC and denote by point D
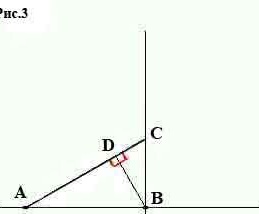
Next, from point B draw a circle of radius BD to the intersection with line AB, and mark point O. Now, using this point as a center, draw a circle of radius OB, and divide it into sectors of 15 °, extending each ray to the BC line. The points of intersection of the rays with the line will determine the hour markings of our watches.
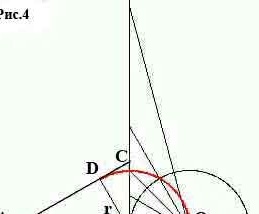
Connecting these points with point A, we get half the dial, or rather its quarter, since the hour lines from 6 to 12 are symmetrical to the lines from 12 to 18 relative to the AB axis, and the marks from 18 to 6 hours (let's call them night) are symmetrical to daytime.
- Well, finally, the third method is trigonometric or calculated. We determine the angles of the time lines by the formula: tan α = sin φ x tan t
Where α is the clock angle on the frame
φ- latitude of the place
t- time period expressed in degree measure (from the calculation of 1h-15 °)
For example, for my case, the angle between the lines of 11 and 12 hours will be sin57 ° x tg15 ° = 0.8386x0.2679 = 0.2247, which corresponds to 12.6 °, which is why, I repeat again, the compass card is adjusted for the magnitude of the magnetic declination ( 11 °).
Half-hour and quarter-hour lines are quite simple to mark out by dividing the hour section.
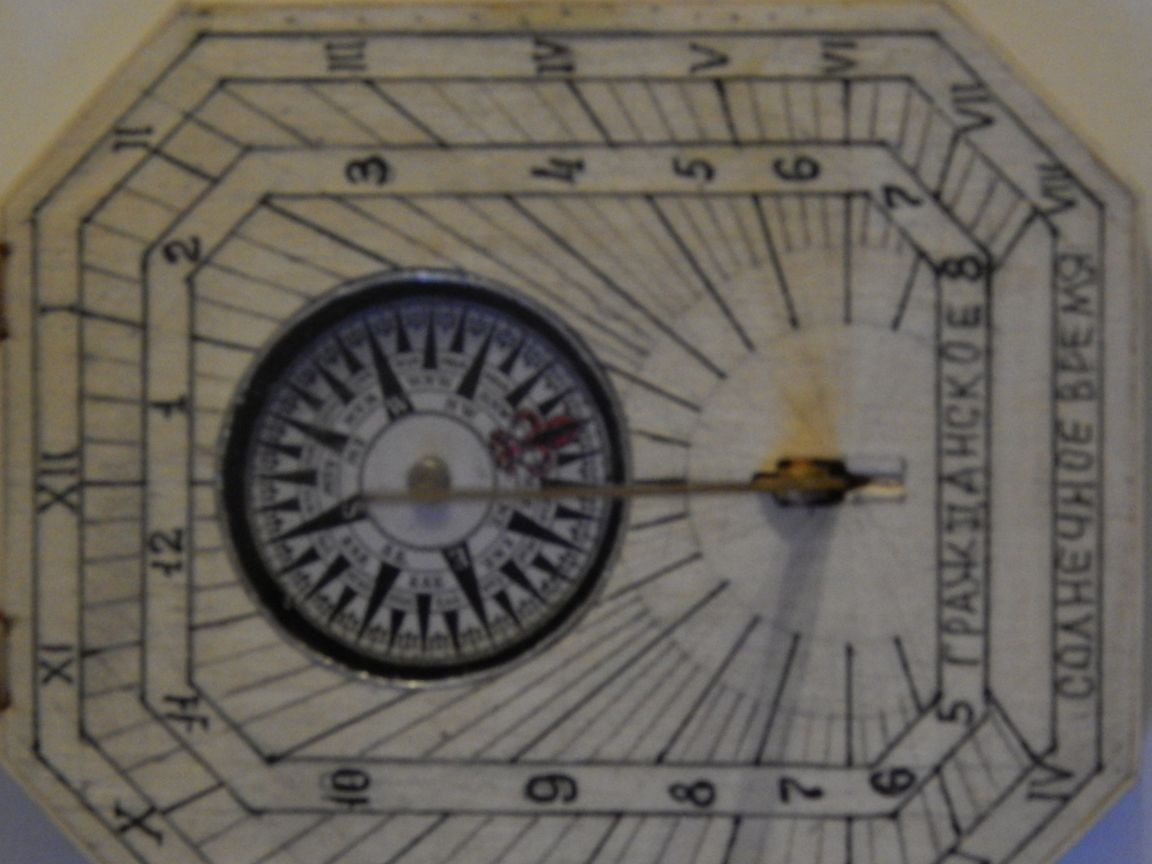
So, in one of the last two ways, the cadran was marked by us. The resulting markup will show us the local average time, which differs from the standard (civil) time by an amount that depends on the longitude of the place of observation.
As you know, the countdown comes from the Greenwich Meridian (GMT), and then after 15 ° the time zones change. For Moscow time (MSK), the time zone is GMT +3, but this is also relative to the true solar time, for example, the difference between the true and standard time in Moscow is 29 minutes 40 seconds. This means that when the chimes on Red Square beat midnight, true midnight on sunny time will come only in half an hour. In my area, the difference is 31 minutes, so the divisions are shifted by half an hour. Here is how it looks on the finished product:
3 Gnomon (arrow), by definition, must be folding. The task was to withstand the angle of latitude and the verticality of the installation plane. Of course, you can simply lay it on its side, but in this case the dimensions were small and the gnomon seemed to be lost on the plane of the clock, so it was decided to make this part lifting. In this case, both the length can be increased to the required proportions, and the verticality is maintained within acceptable limits (the gnomon’s play is within 1 °), and the angle of latitude is set by grinding the heel of the gnomon, which does not change subsequently.
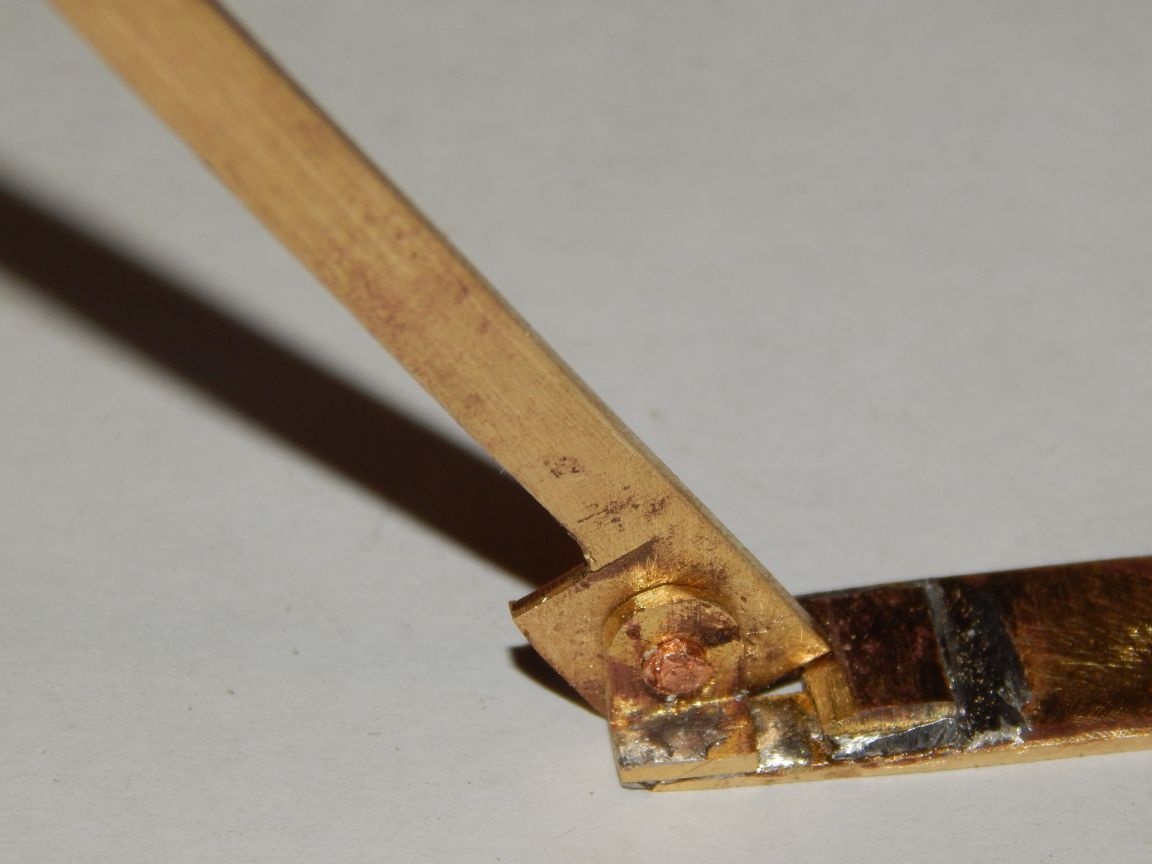
Details are made of 1mm brass. The choice of material is due to the fact that it must be non-magnetic, so as not to deceive the compass, and is well succumbed to soldering with soft solders.
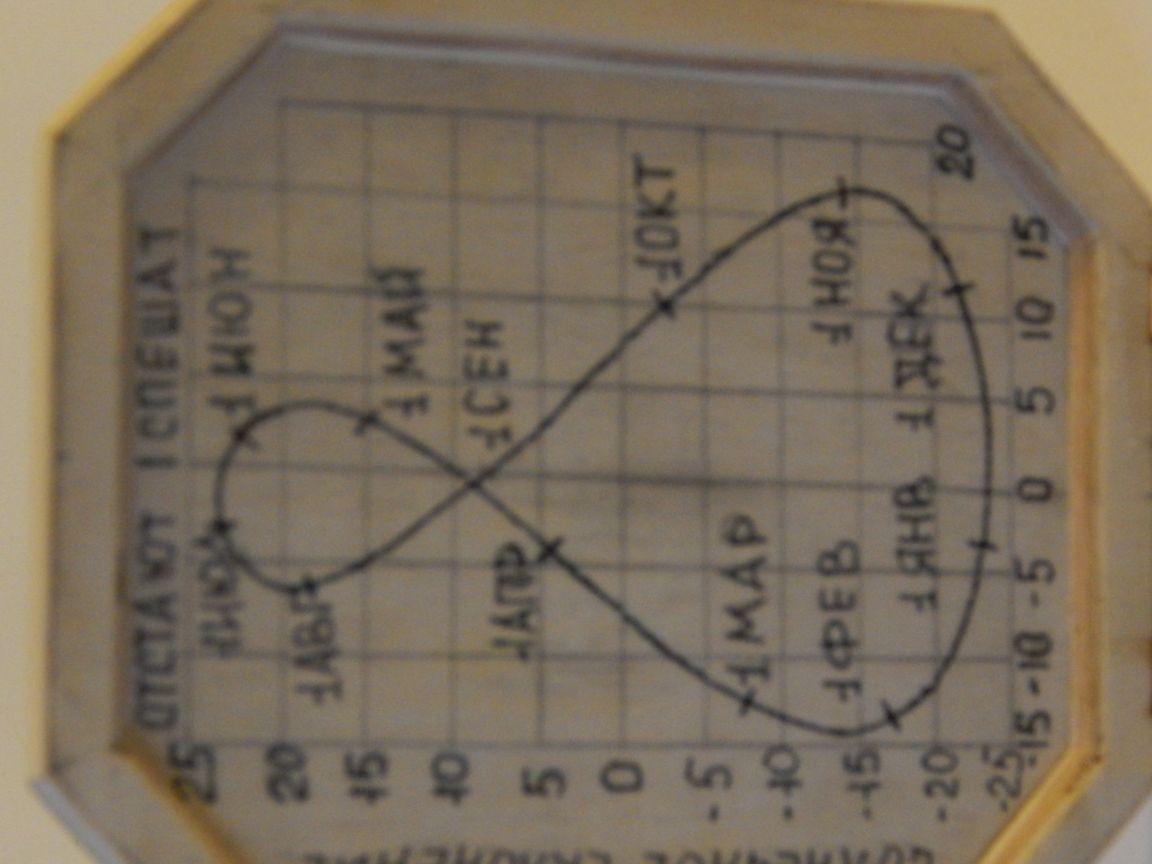
4 analemma (Greek ανάλημμα, “base, foundation”) is a curve connecting a series of consecutive positions of the central star of a planetary system (in our case, the Sun) in the firmament of one of the planets of this system at the same time of the day during the year (Wikipedia).
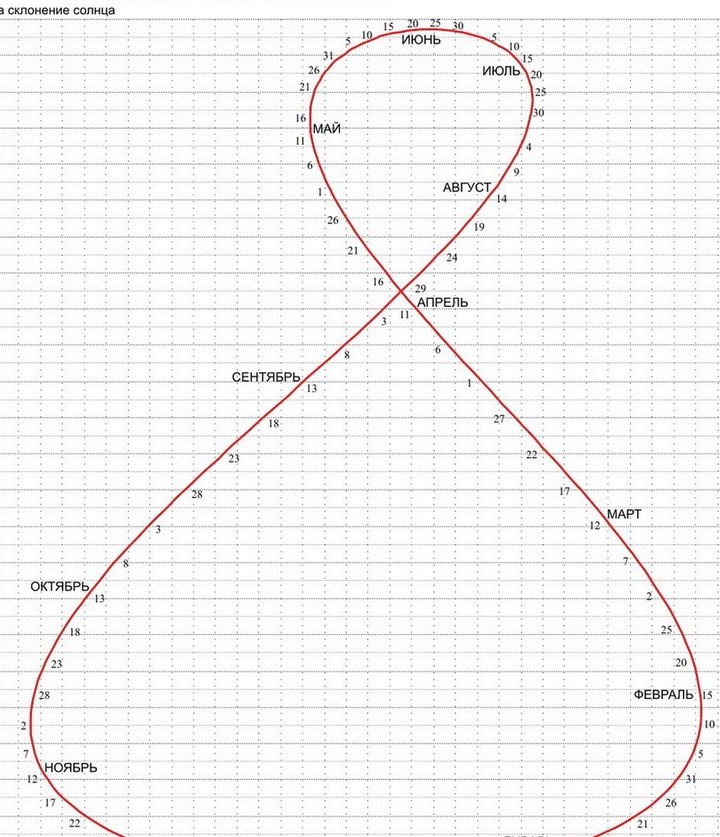
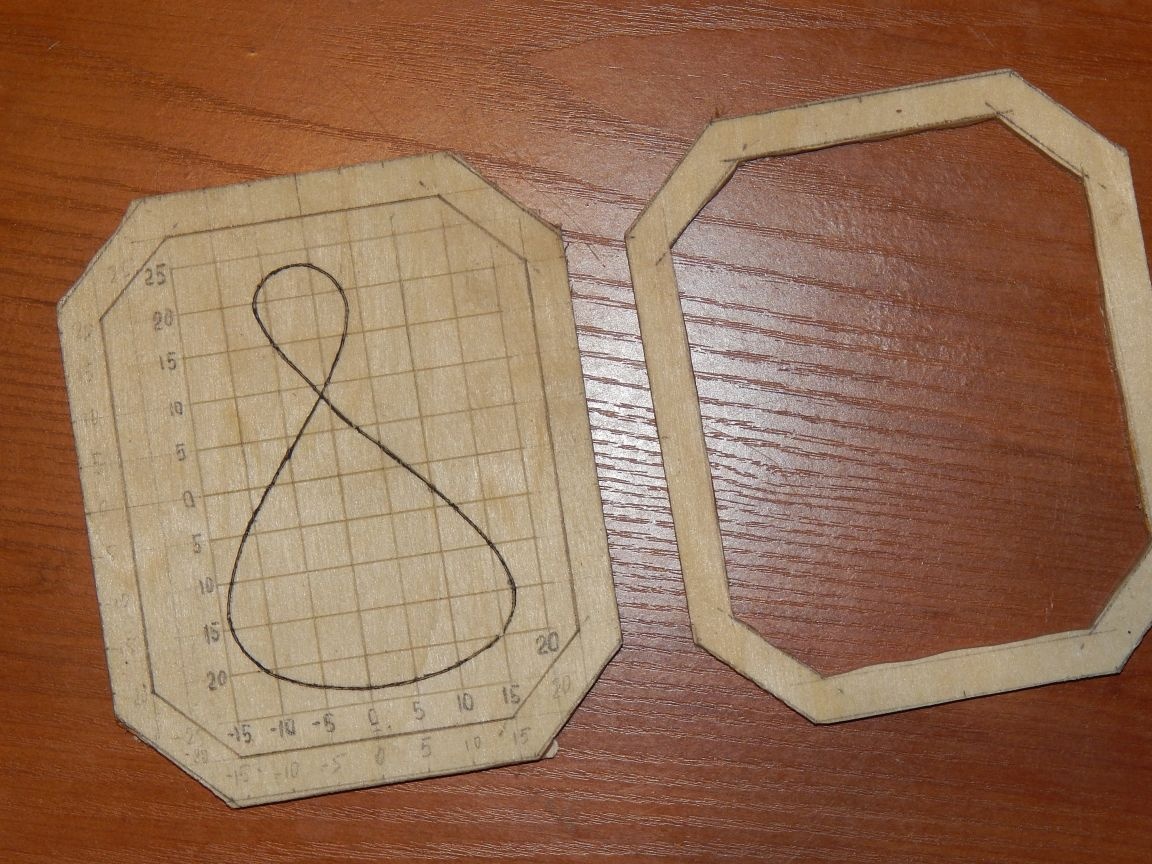
In other words, this curve shows how much our watches are in a hurry or behind relative to the average time. For example, in October, the Sun is at its zenith 16 minutes earlier, and in February 14 minutes after noon on average annual time. This phenomenon is associated with the ellipticity of the orbit and the inclination of the axis of the Earth. We will not go into details, it is important for us to know how many minutes on which day you need to add or subtract from the readings of our sundials in order to relatively accurately determine the time. To do this, we will place this beautiful squiggle on the inner surface of the lid.
Now we collect all of the above together.
We will conditionally divide our device into two parts — the actual sundial and the lid (we have a pocket one, so they will look like a cigarette case). From a sheet of plywood we cut five rectangles 100x120 mm in size.
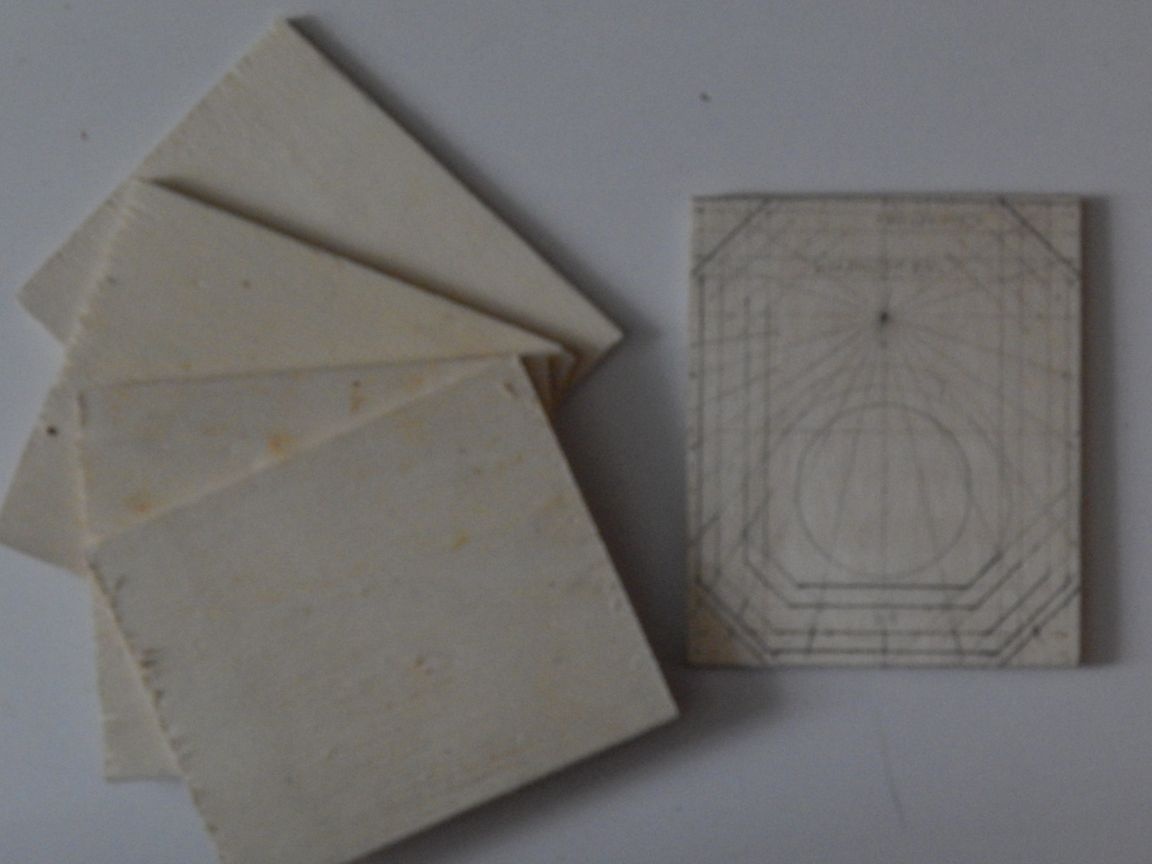
For workpieces, cut corners of 15 mm. on each side, as can be seen on the details of the cover:
To install the gnomon and compass, we cut holes in the cadran blanks on the back side and the substrate following it. We deepen the Gnomon so that the axis of its rotation lies in the plane of the cadran, cutting off one layer of plywood (it is slightly more than 1 mm.).

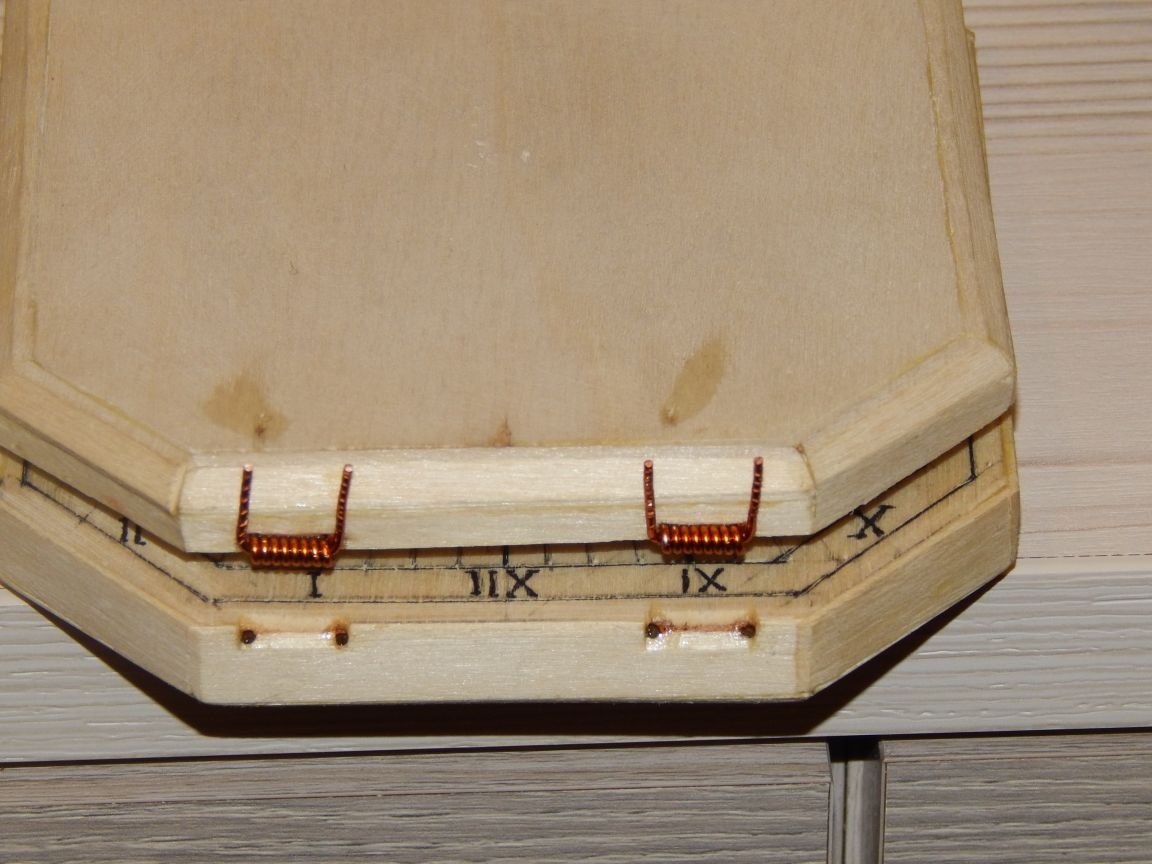
We glue the parts, then, as in a joke, carefully process the file, and to be more precise, end parts are glued with veneer from the same plywood and processed with sandpaper. The hinges connecting the cover to the body are made of copper wire and glued with epoxy.
Well, then we are engaged in decorating so that our craft does not look like a simple plywood box, on the lid we stick a stylized drawing of the Sun
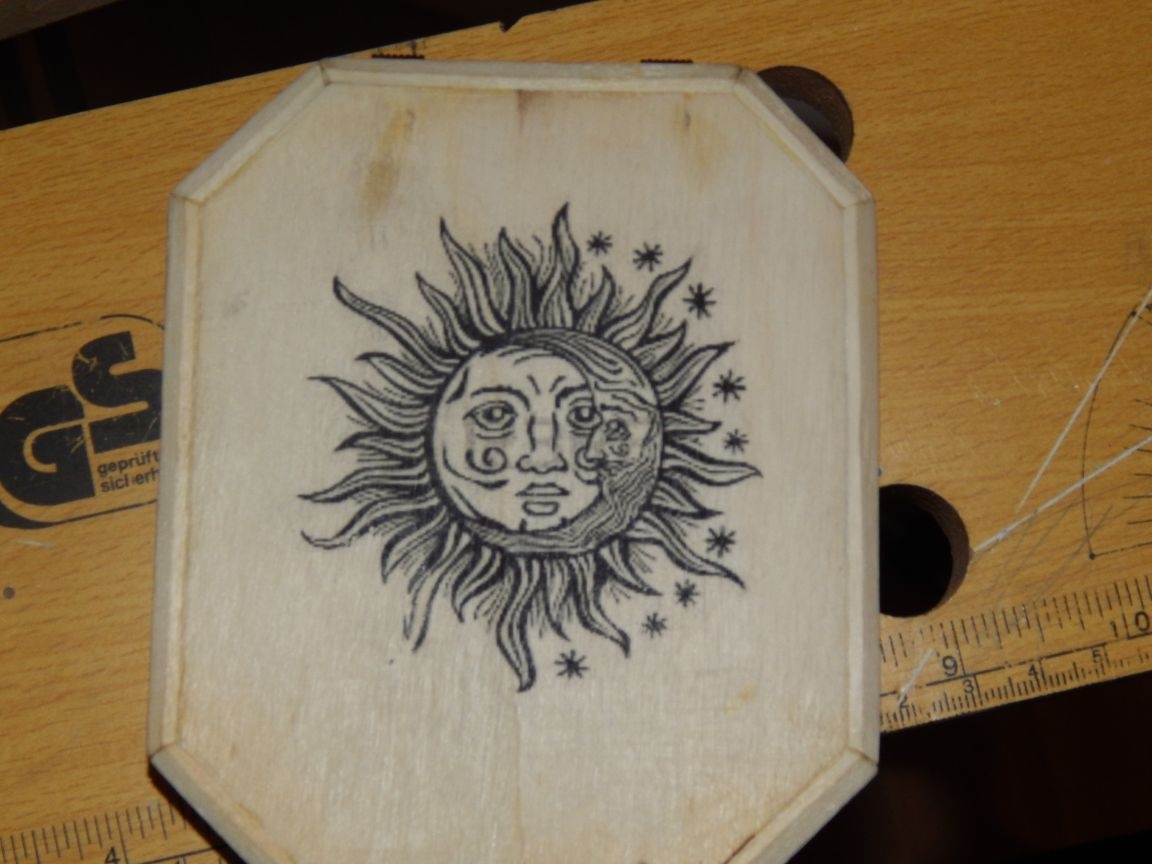
And to give an old look we will process the product with a hairdryer. As a result, we get just such a toy for adults.
Conclusion It seems to me that such a gift for a teenager is much more interesting and useful than any new-fashioned gadget bought in a store (all the more so you won’t be surprised). At least this thing makes the brain work, but if curiosity wakes up to learn more in the sciences, it will be just wonderful.
But how to use the watch: