

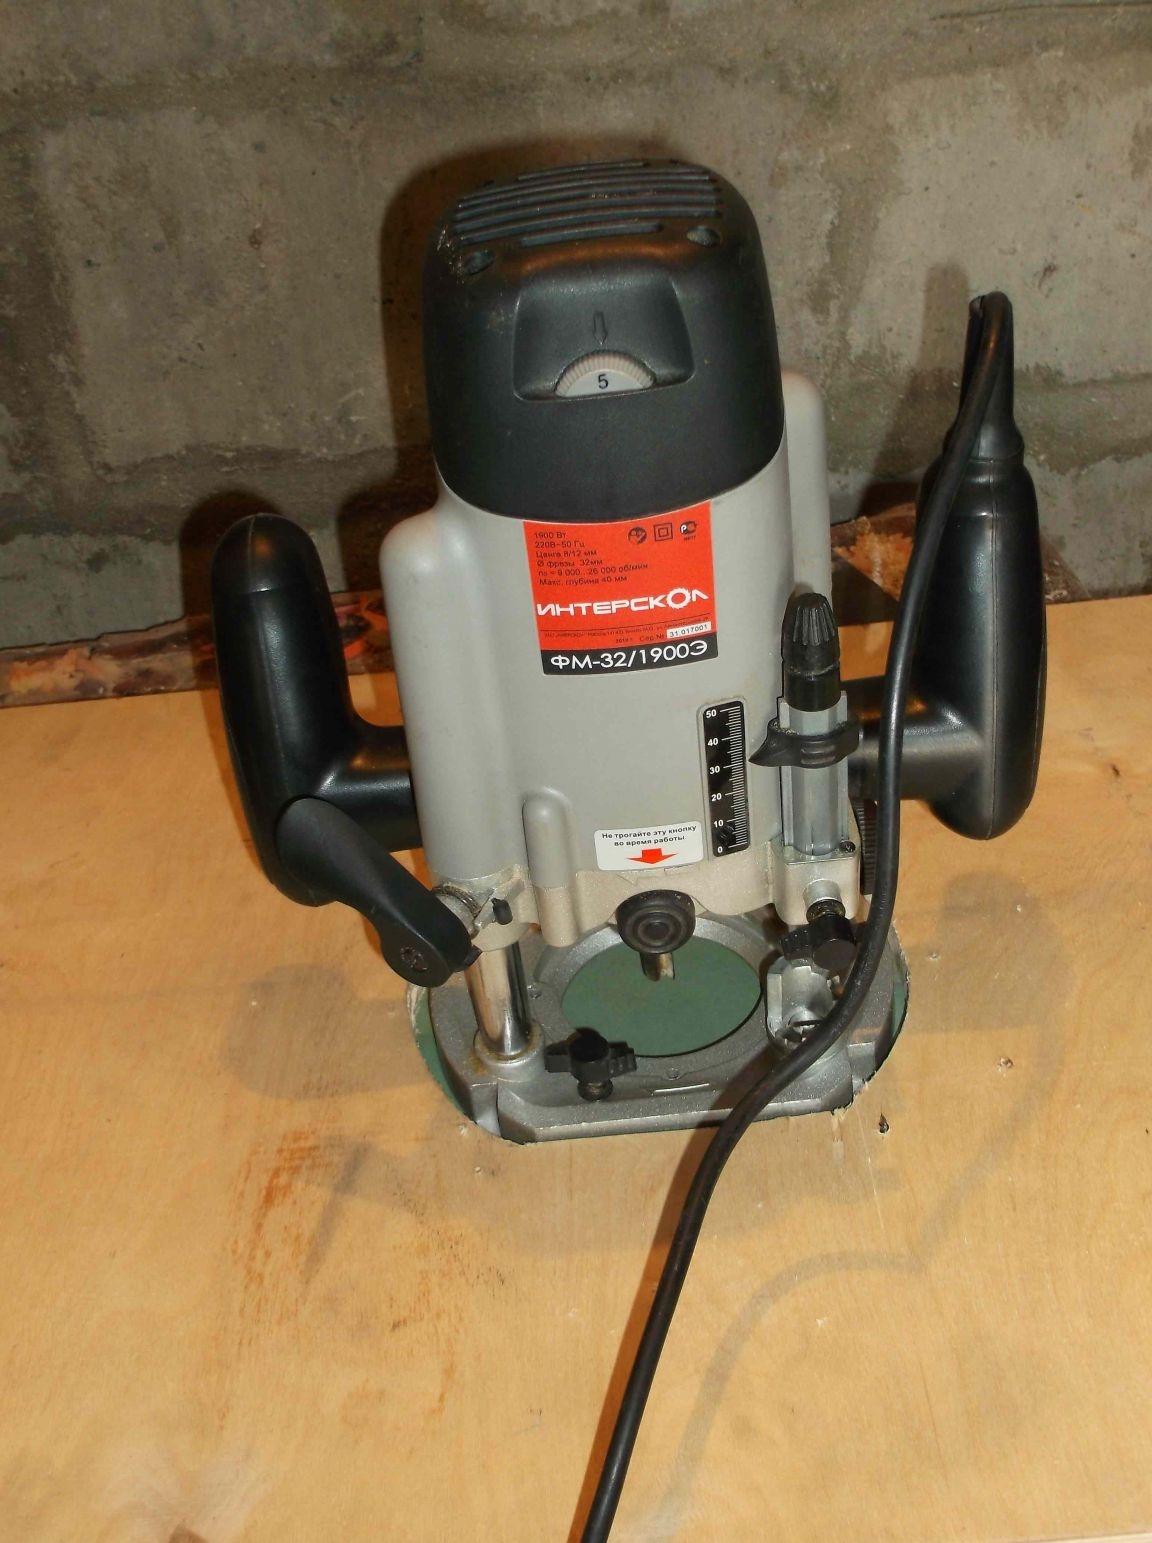
Hello everybody! The simplest milling table for home use can be made do it yourself virtually no financial investment and having a minimal set of power tools. Of course, expect from such homemade maximum functionality and quality is not worth it, but for performing simple tasks and for a beginner it’s a very suitable tool. The desire to make something similar arose a long time ago and the Interskol FM-32 / 1900E hand milling machine purchased in the distant past was looking forward to it. I have no experience in this direction, so do not judge strictly, advice and criticism are welcome.
After monitoring the World Wide Web and considering many options, I decided to make for the first time the simplest and most inexpensive, in my opinion, table for a manual milling cutter.
Materials and tools for manufacturing:
Plywood 18 mm.
Sheet steel 2 mm thick.
Stud 12 mm, nuts
4 bolts 4 * 80 and 8 nuts
2 bolts 8 * 80, washers, wing nuts.
Self-tapping screws.
Plug, socket, circuit breaker and box.
PVA wire 2 * 1.5 - 3 meters.
Instruments:
Milling cutter
Jigsaw
Drill
Bulgarian
Welding machine (if possible)
Corner measuring
Drill
Round file
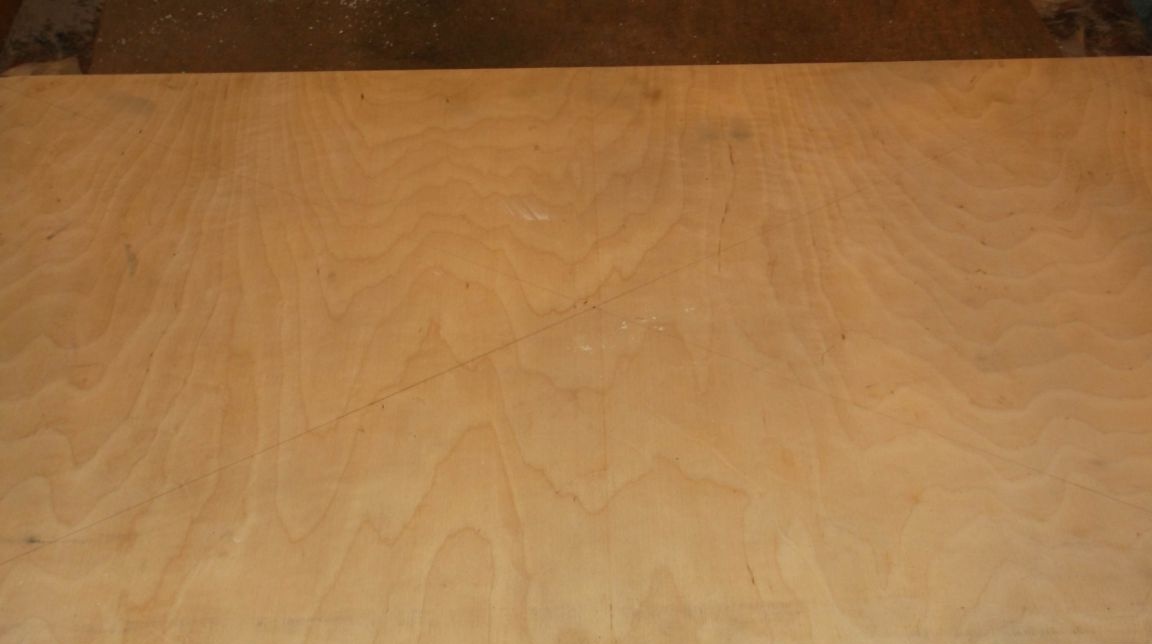
First you need to determine the size of the work surface. There are many options on the Internet with completely different sizes, and in this case, the main problem is the material from which the table is made. It can be thick plywood, chipboard or similar material, the main thing is that the surface is smooth and quite rigid. A piece of birch plywood 1500 * 450 * 18 mm was left after repair, and from this trimmed and made the basic elements of the table. In this embodiment, the working surface has dimensions of 80 * 44 cm. From the rest of the plywood, I subsequently made a parallel stop and an elevator for the milling cutter.
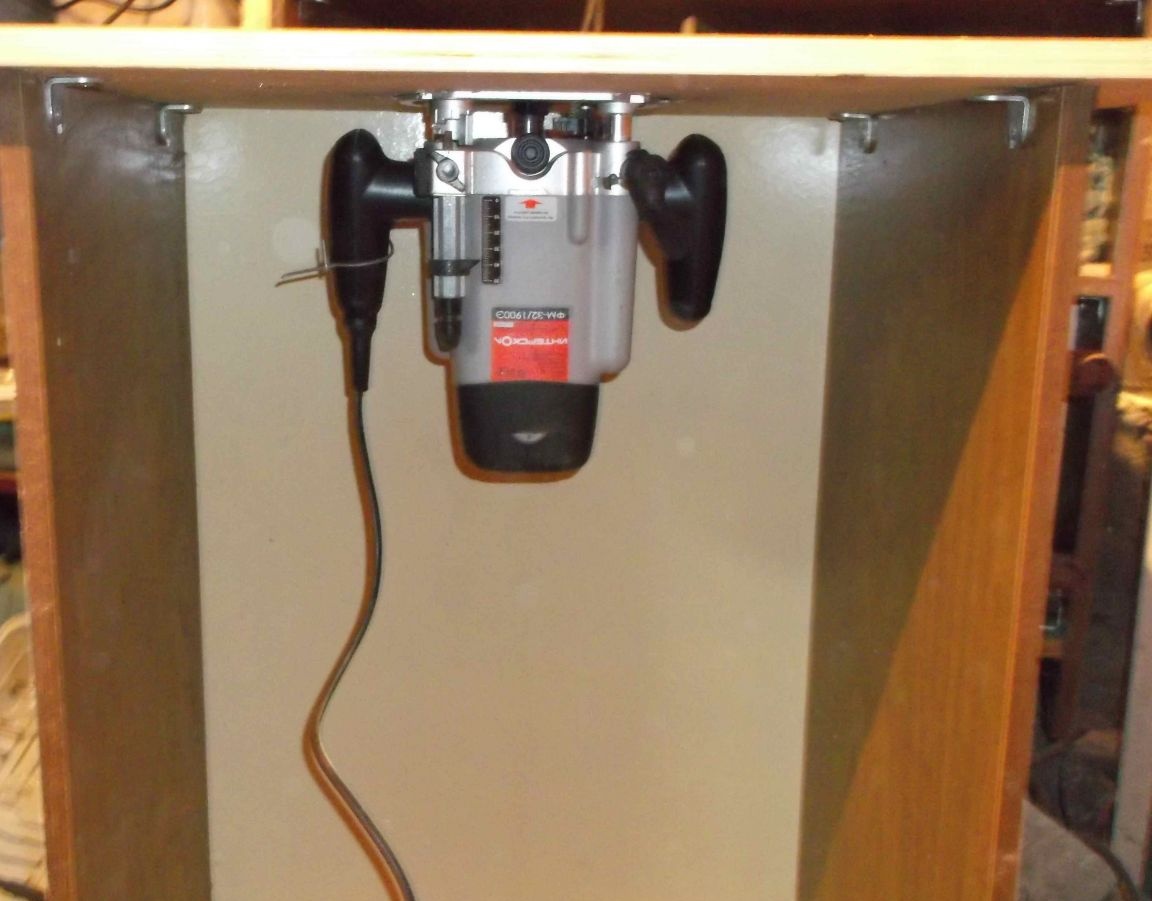
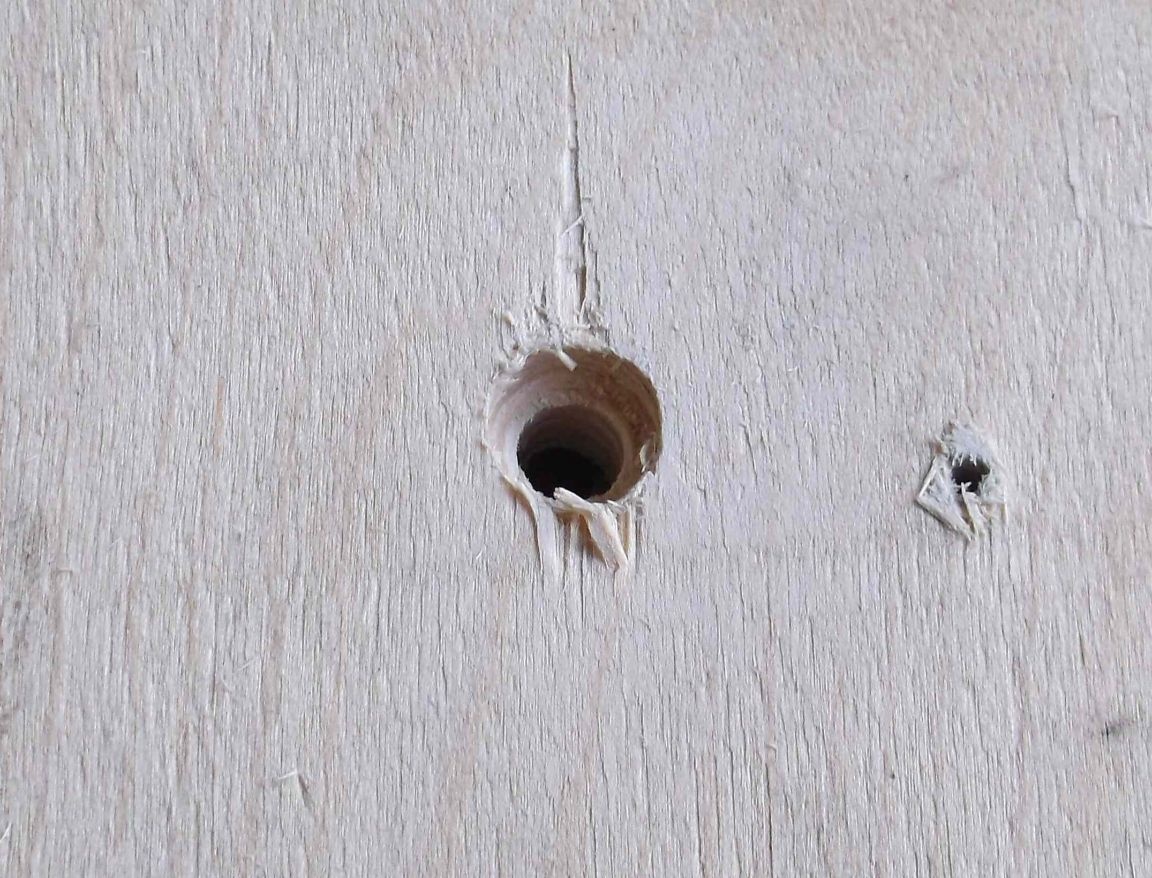
I removed the sole from the hand milling cutter with the help of which I marked out and sawed the end-to-end contour with the help of a jigsaw. The hole in the countertop made a little more than the sole, so that the milling cutter plate freely entered.
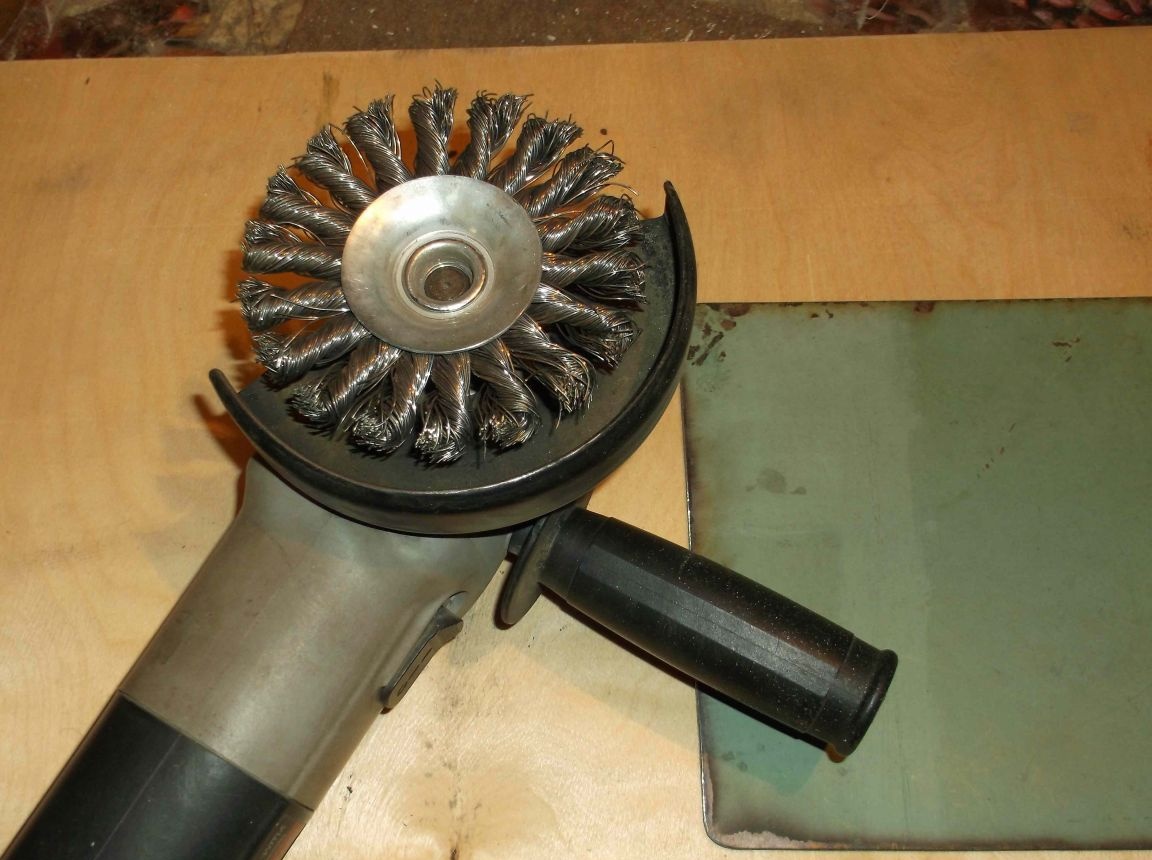
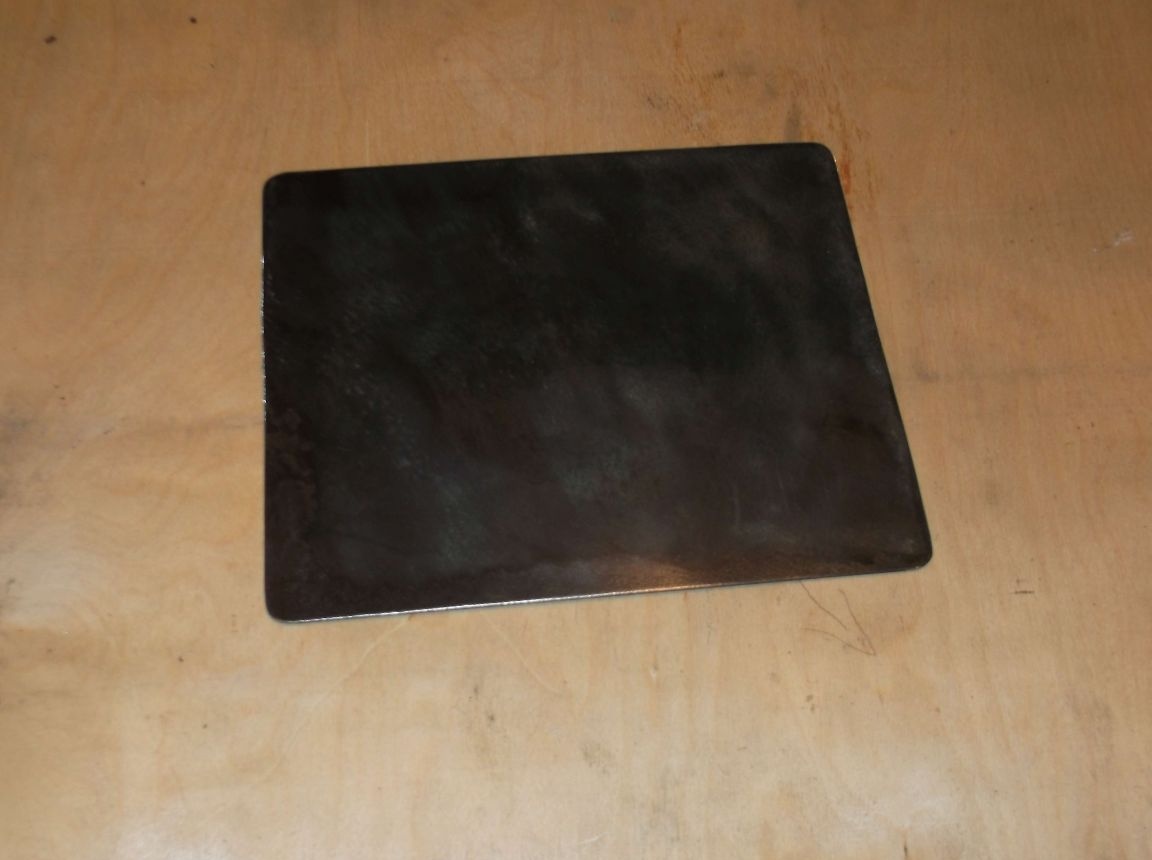
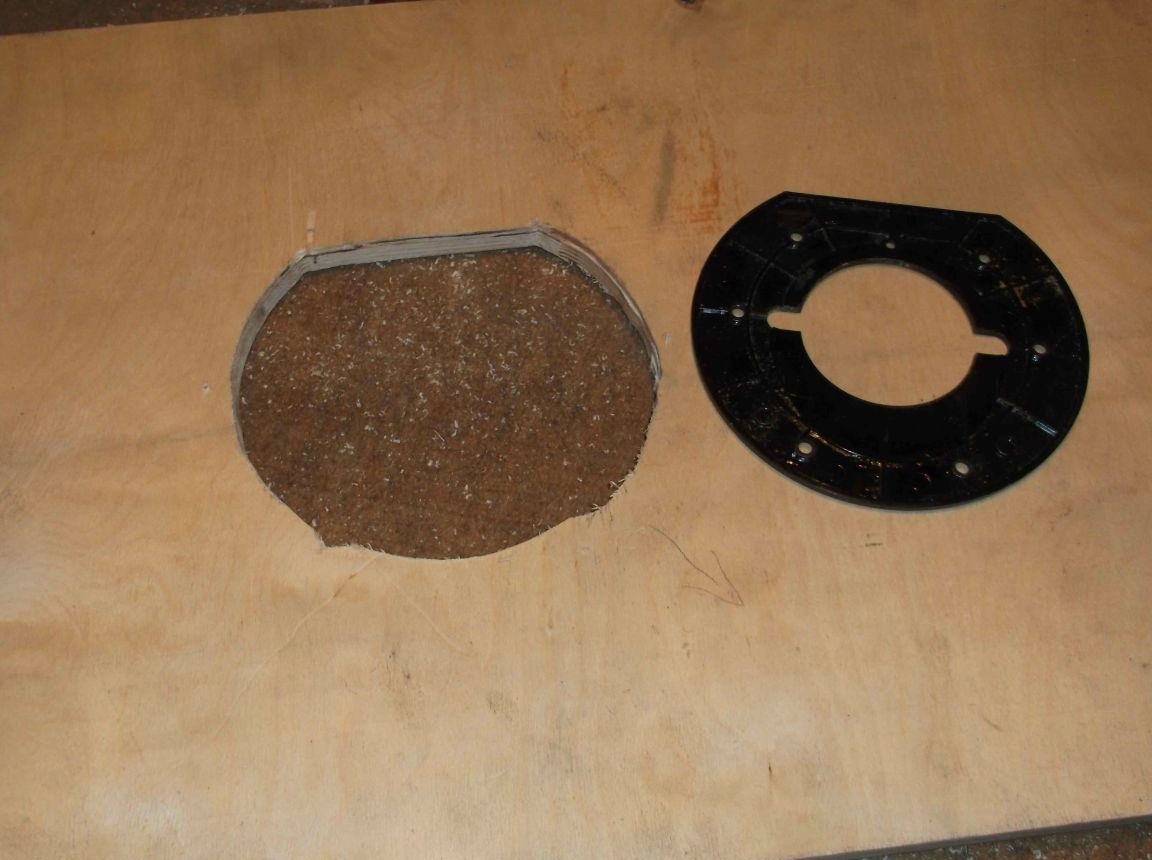
As a future steel plate, I sawed a rectangle from sheet steel 2 mm thick, which is about 3 cm on each side more than the sawn contour in the table. Since the iron was not used new, a peeling nozzle on the grinder helped get rid of the old paint. Iron in 2 mm. this is what was available but in my opinion it is better to use 3 mm.a sheet with a flat plane, dents and bends are not allowed.
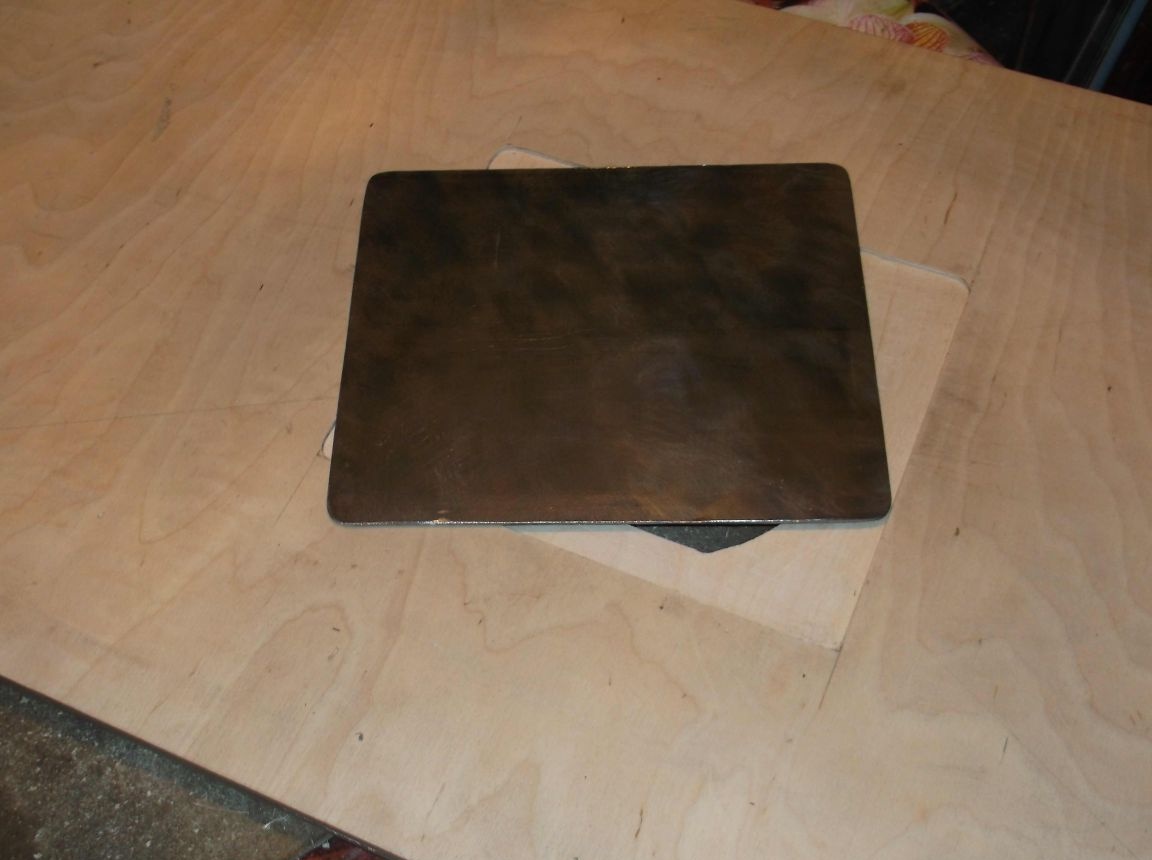
On the countertop, I marked the contour of the steel plate and with the help of a still manual milling cutter drowned the future sole flush. Perhaps, due to a lack of experience, it was impossible to perfectly milling precisely and during installation it was necessary to adjust it to the same plane, using the linings under the plate made of scraps from a plastic bottle.
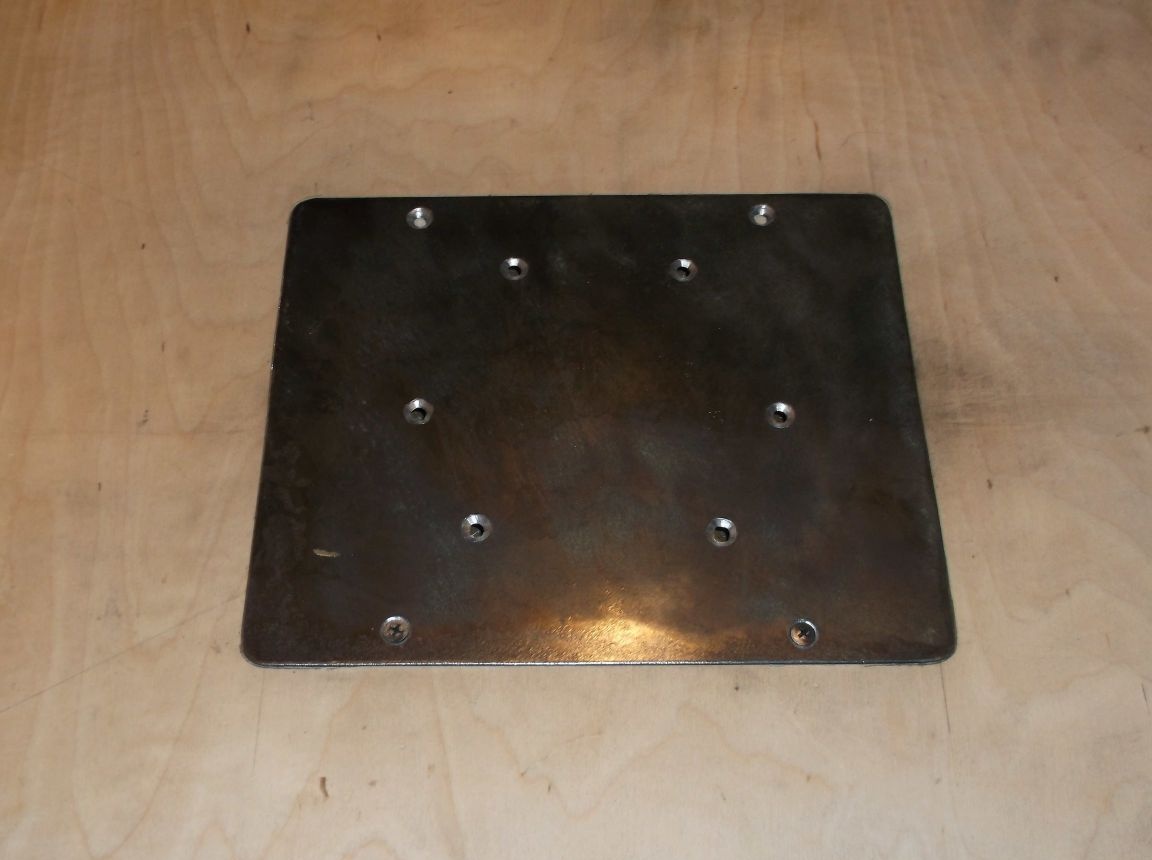
Marked and drilled holes for mounting to the router. I drilled all the holes with a drill of a larger diameter, so that the hats of bolts and self-tapping screws fastening the plate to the milling cutter and to the table were flush.
He fixed the milling cutter and marked the center of the future hole for the milling cutter. At this stage, several questions arose, namely what diameter to make a hole for the cutters and whether it is worth making a composite plate for the possibility of installing large mills. I decided to abandon the sectional plate, as this complicates this design, and the initial goal was to make a simple milling table. The diameter of the hole for the cutter, it was decided to make a little larger than the largest cutter, which was available, namely 32 mm in diameter. Most likely, this will be enough for this table, and in case of urgent need to use larger diameter cutters, you will have to make another steel plate or improve the existing one. I drilled a hole with a small diameter drill around the outer circumference with subsequent processing with a round file - this is the most time-consuming stage.
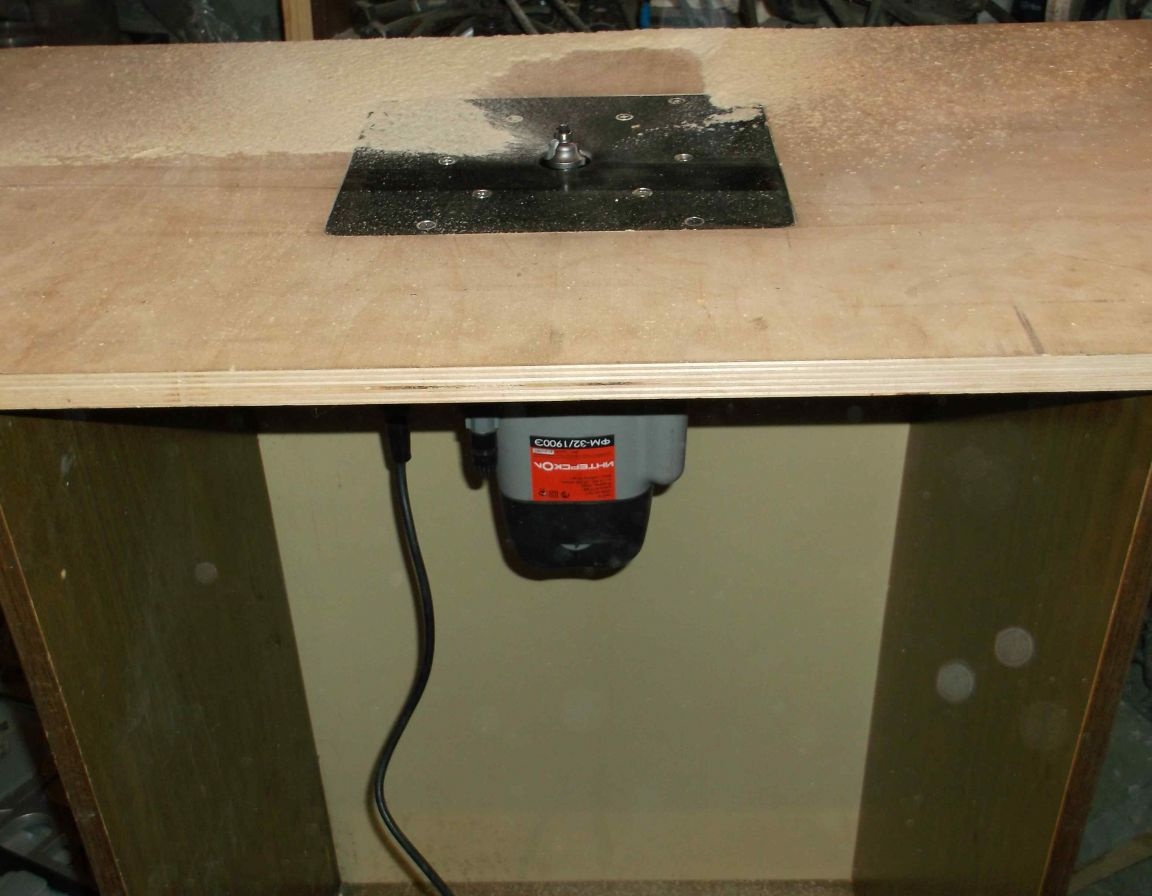
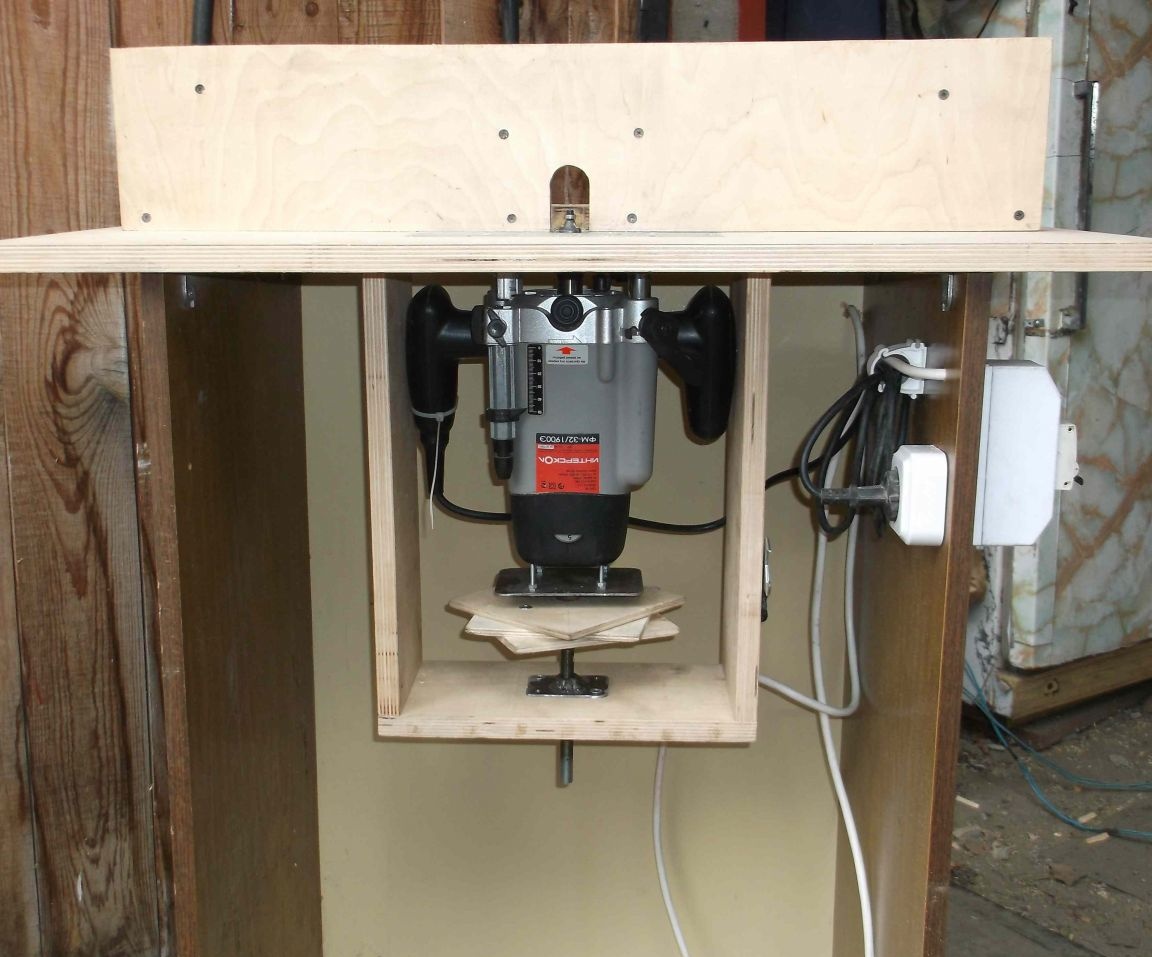
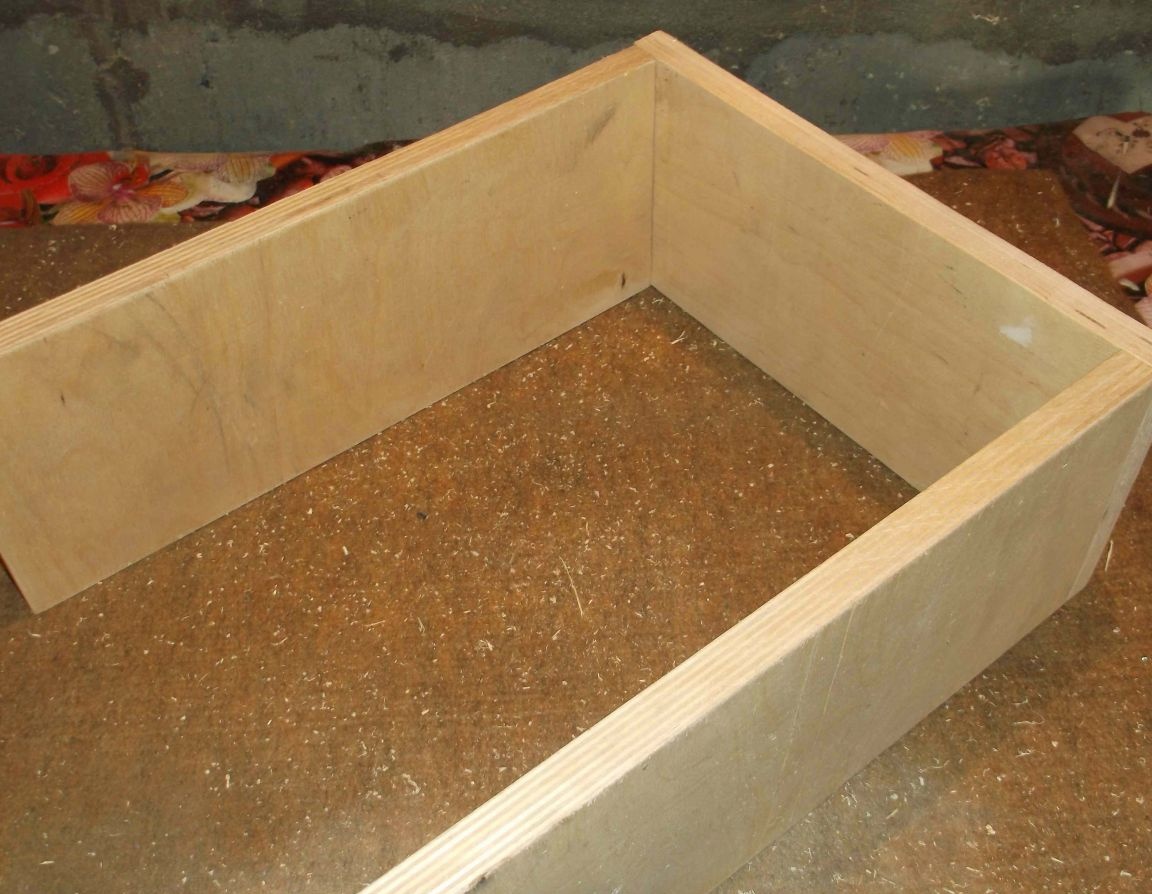
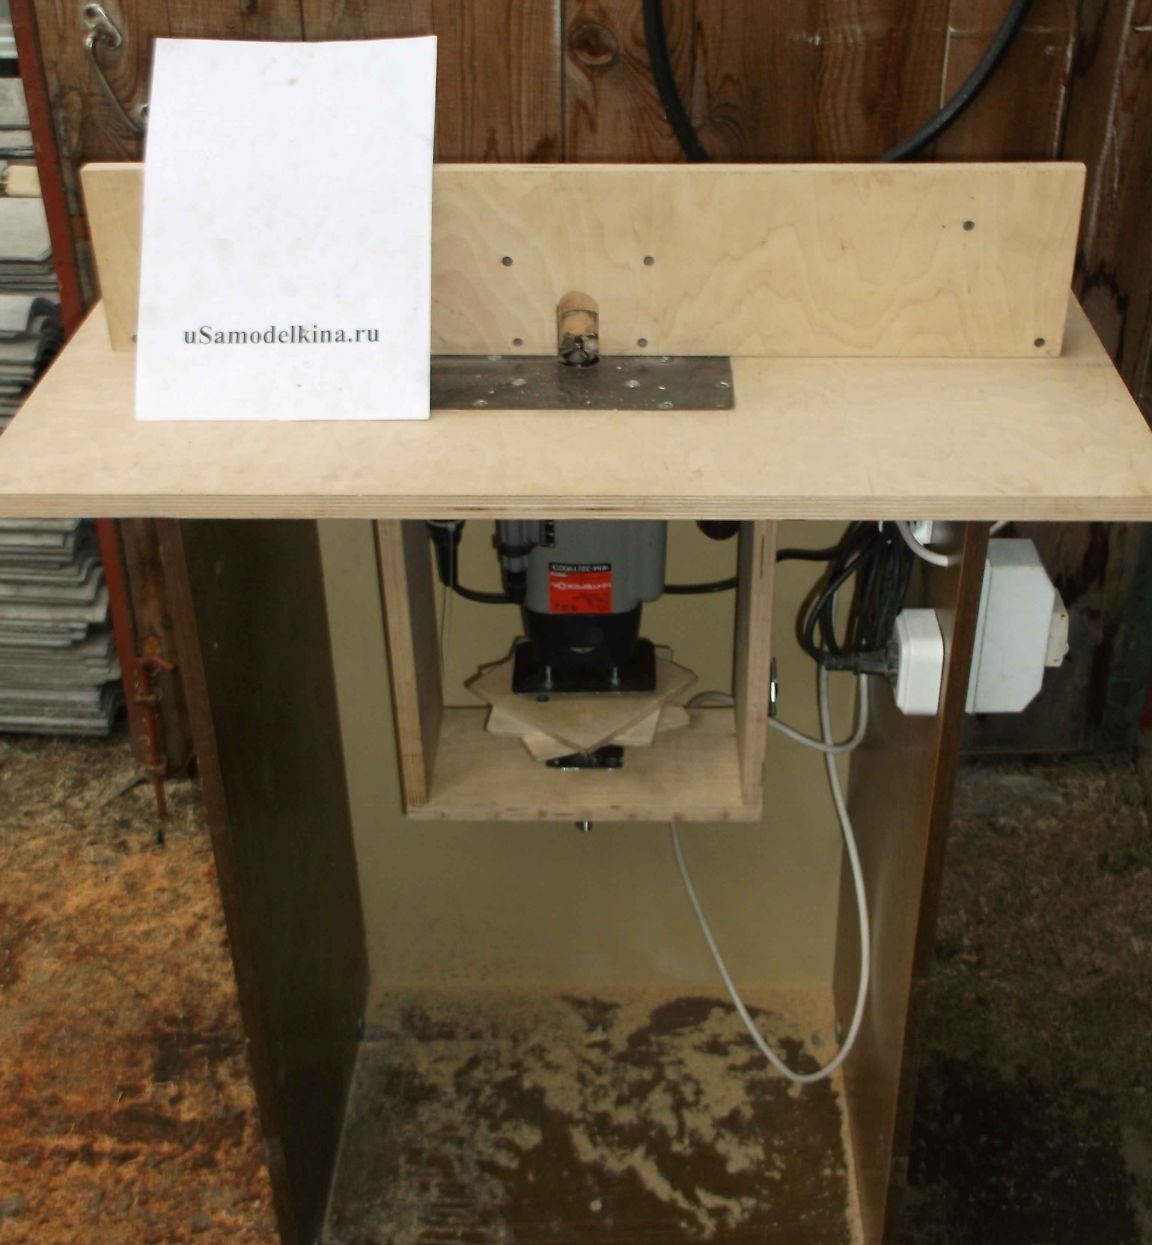
As the base for the table, I used a mezzanine from the old wall, after removing the sidewall and putting it on its side. The dimensions of the cabinet: height - 90 cm, width - 55 cm, depth - 42 cm. Having installed the countertop with a milling cutter, I could not resist and made a test run. After the test, the desire to finish the table intensified.
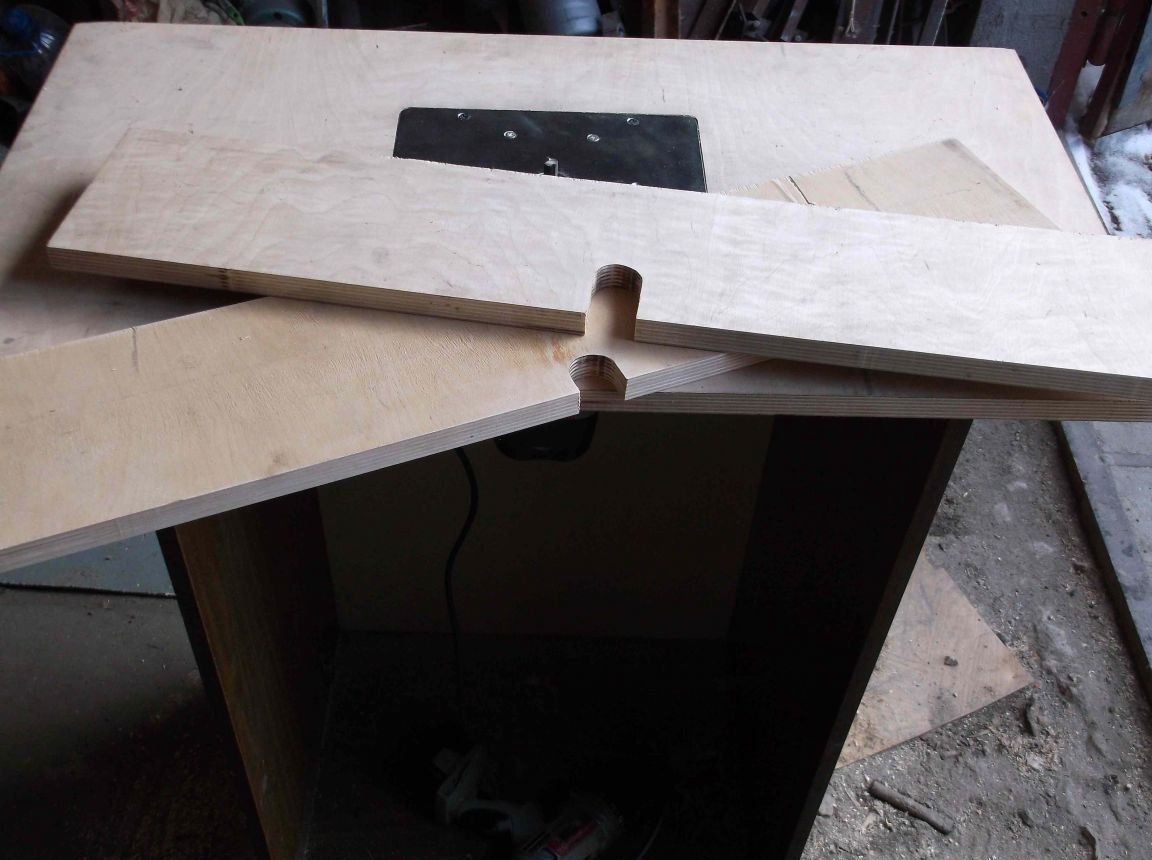
Next, he began to manufacture a parallel stop. To do this, from the remaining piece of plywood sawed two strips of 72 cm long, 14 cm wide. The ends of the strips that will be joined together must be perfectly flat. To do this, with the help of a guide ruler and a milling cutter, he trimmed these faces. I cut out the grooves for the milling cutter in the center strips with dimensions slightly wider than the holes in the plate and slightly higher than the full reach of the cutter.
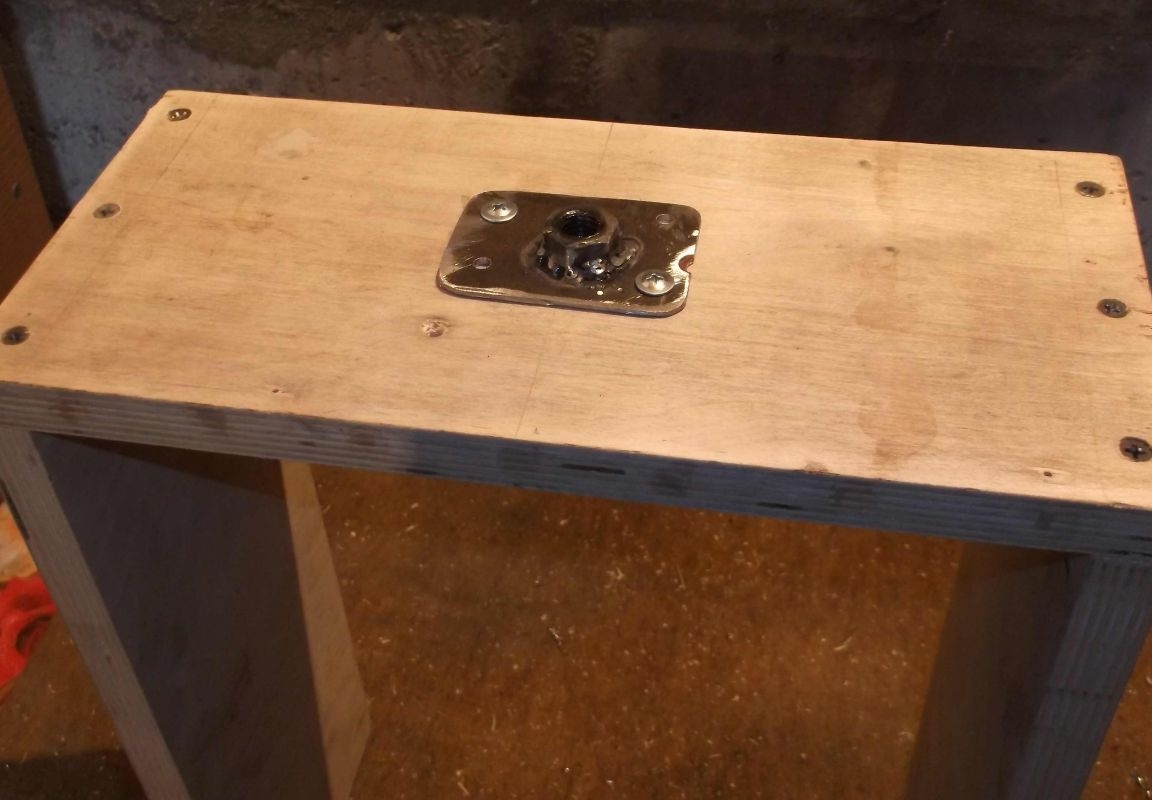
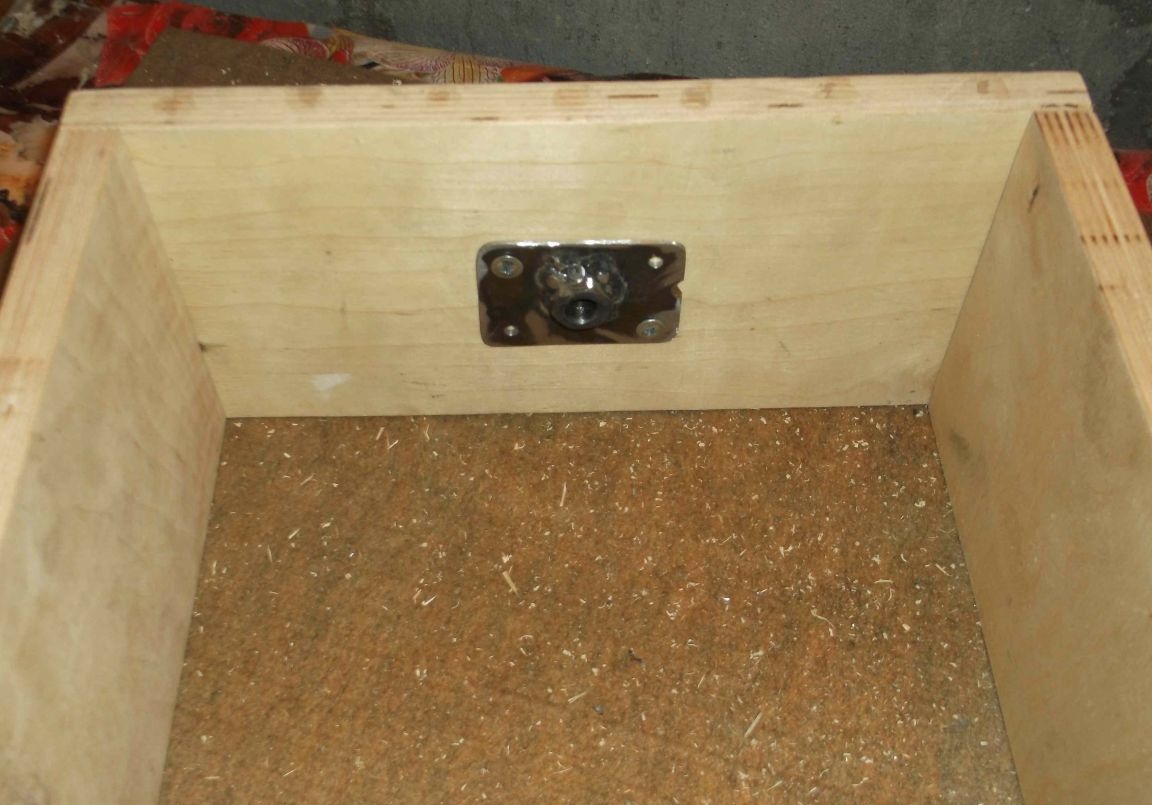
To move and fix the parallel stop at the base, I made cuts for an 8 mm bolt. set the stop so that it would completely overlap the hole for the cutter and in the far edge of the cuts of the base drilled holes in the countertop.

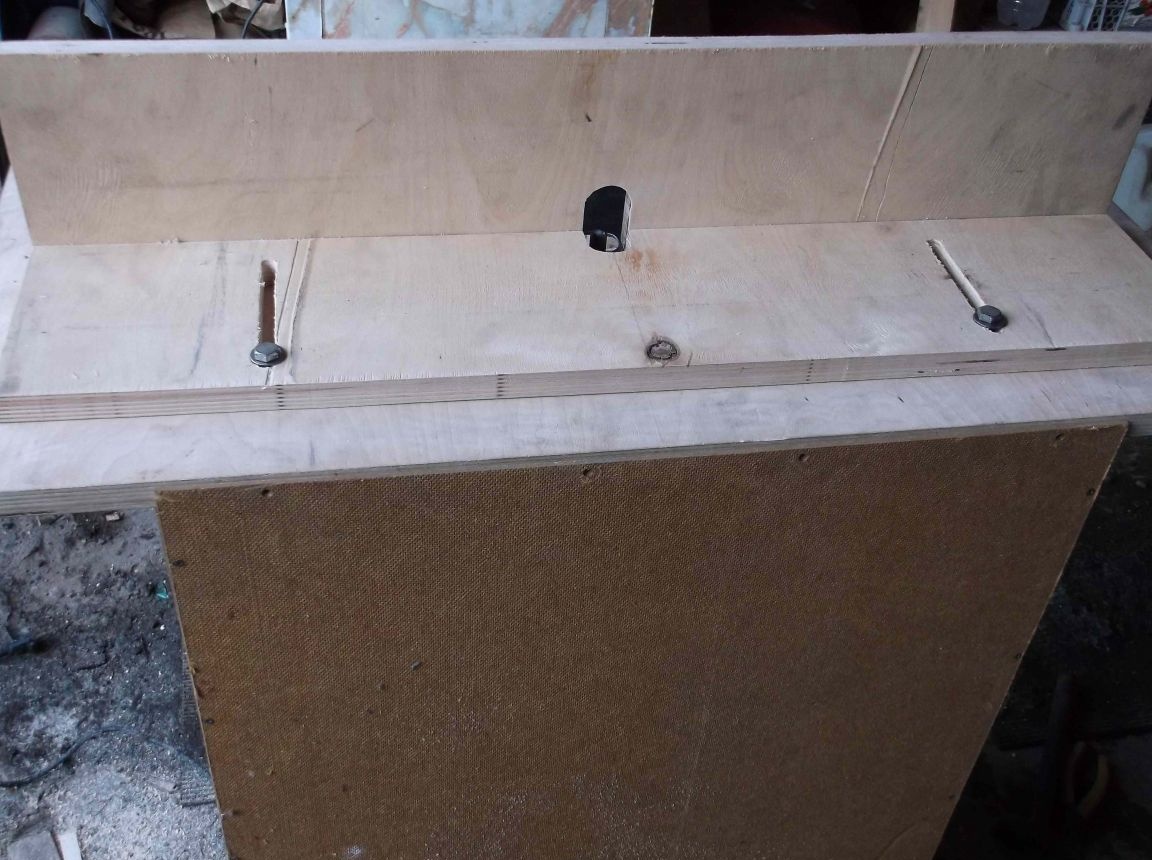
On the underside of the countertop, I drilled a hole for pressing the nut into the body of the countertop. This is to prevent the nut from spinning.
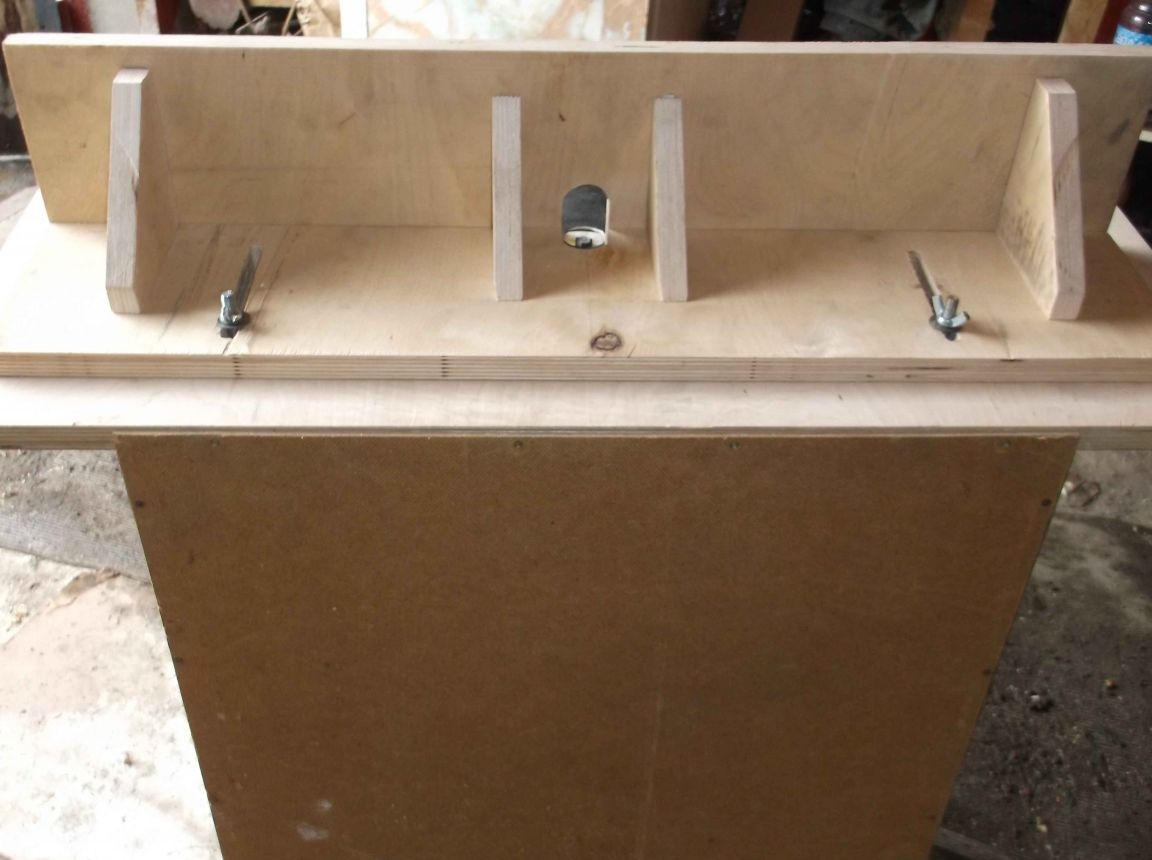
After that, for convenience, instead of nuts, I pressed bolt caps onto the table, and instead of nuts, I installed “lamb” on top of the washers. He connected the stop strips at an angle of 90 degrees and reinforced with stiffeners from the same plywood.
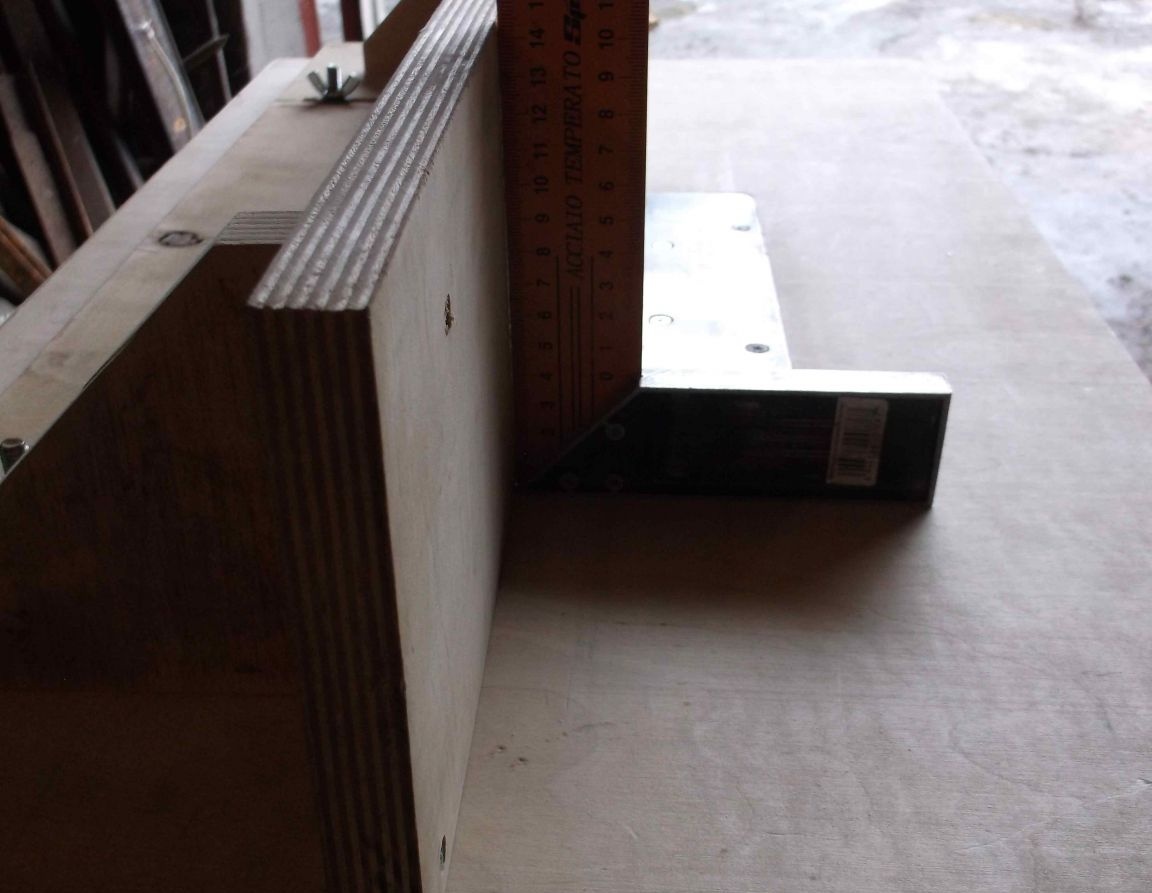
The initial level parallel emphasis is ready, it remains only to check the correctness of the installation of the angle of 90 degrees, I initially did not match a bit. To adjust the angle under the mounting corners, he placed thin linings.
The next step is the elevator for the router. Initially, three versions were considered: with upper adjustment, with adjustment with the help of a car jack, and with the help of a threaded rod. With the upper adjustment - a convenient option, but requires a change in the design of the router and the most time-consuming, and since this is a trial version, I had to refuse. The extra car jack was not available, therefore, the second version also disappeared. I started implementing the third version.
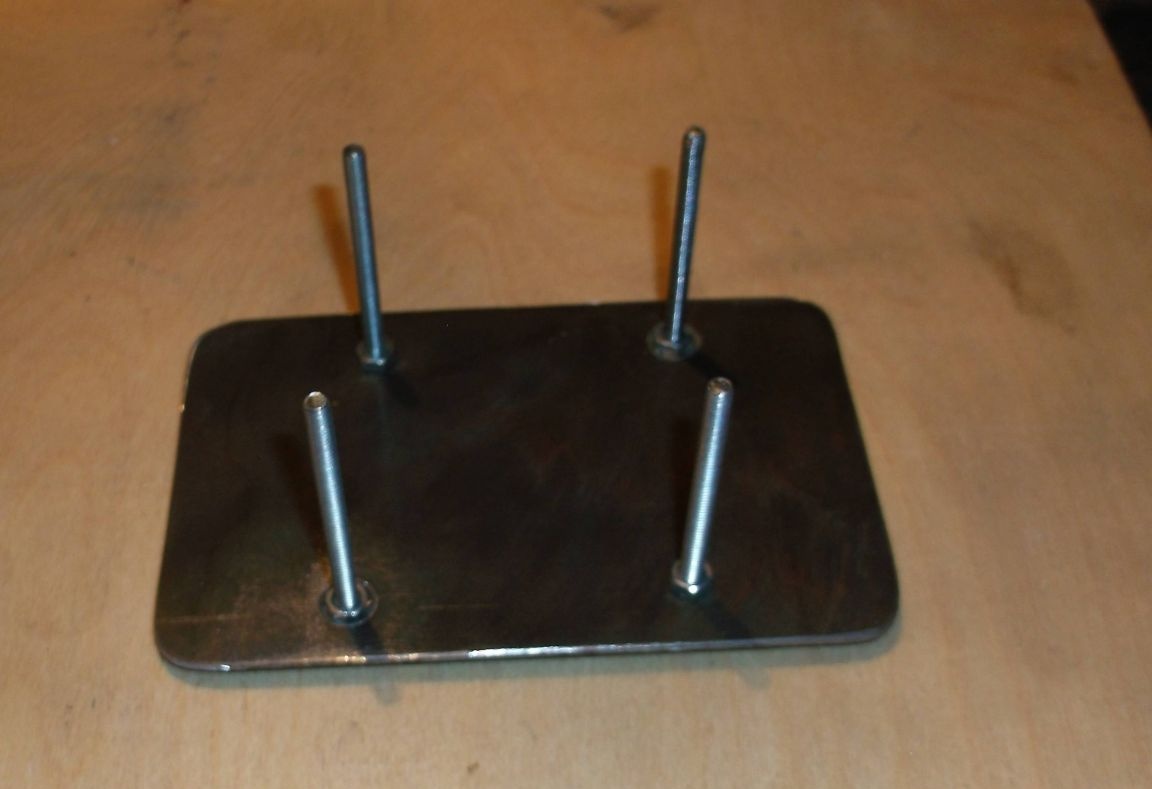
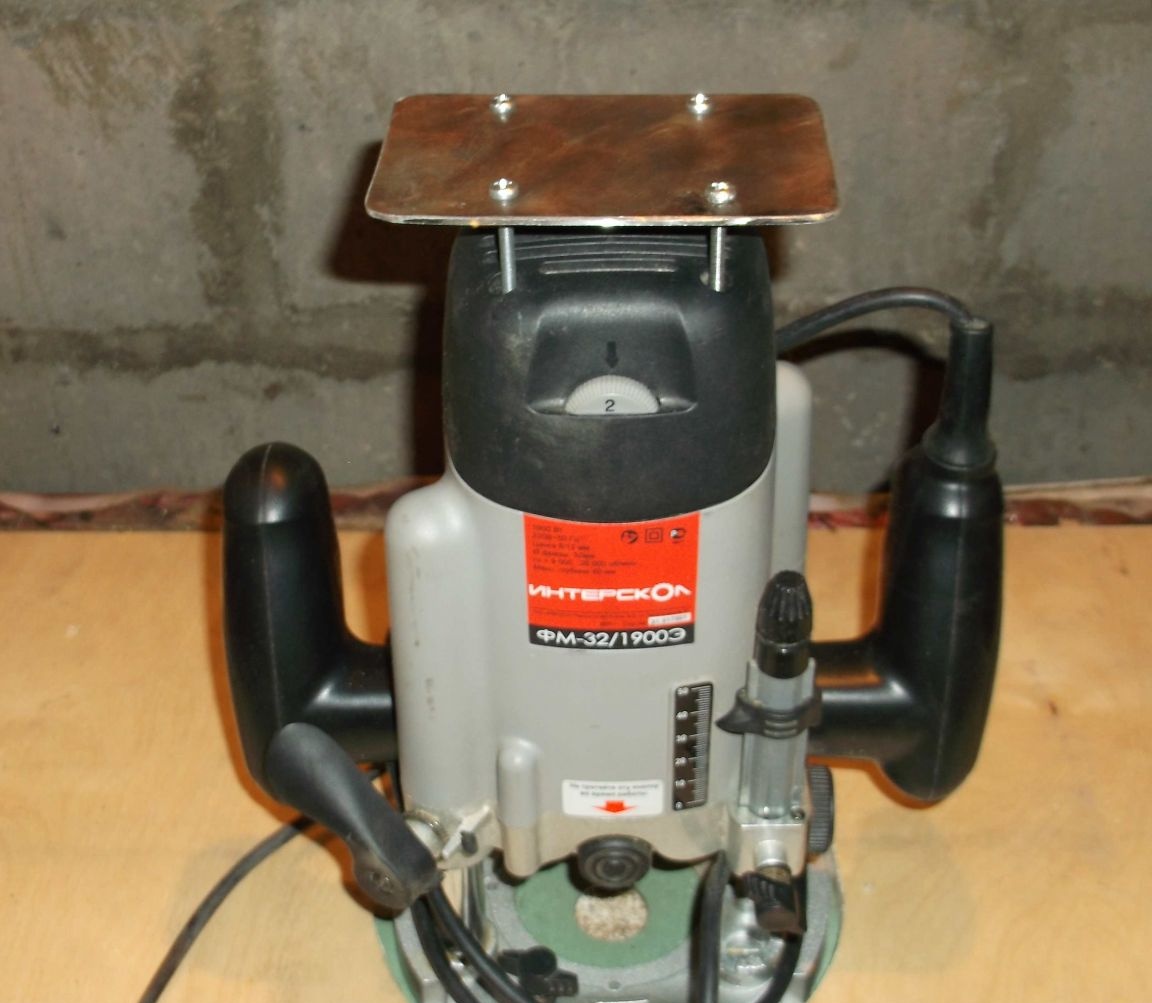
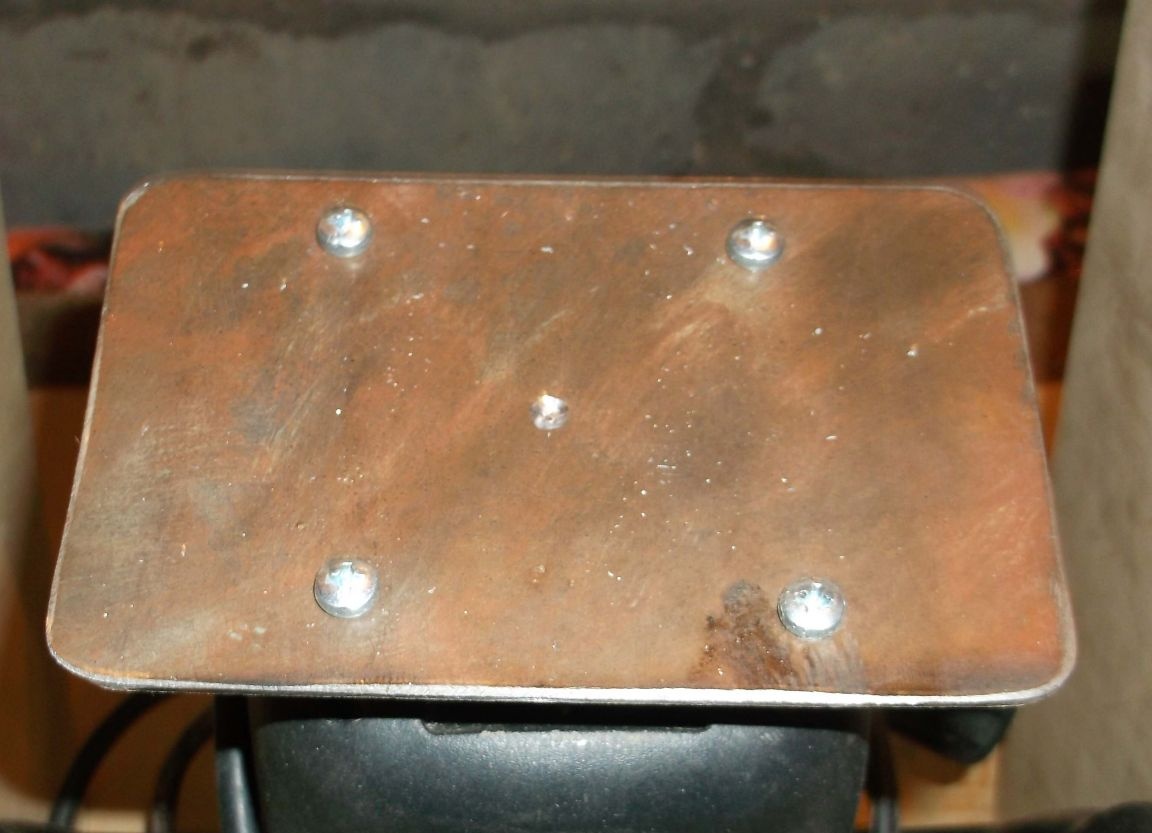
The pusher for the milling cutter made a 2 mm sheet of iron a little larger than the back cover of the milling cutter, four long 4 mm bolts and 8 nuts for fixing. As you can see in the photo, the load is evenly distributed on the four mountings of the rear cover of the router and provides a ventilation gap between the tool cover and the base of the pusher.
The emphasis for the elevator was made from the same plywood with the dimensions: height - 38 cm, width - 30 cm, depth 14 cm. As a fixed part of the threaded elevator, I used nuts welded to small areas of 2 mm sheet metal. and fixed on both sides of the lower part of the emphasis using self-tapping screws.
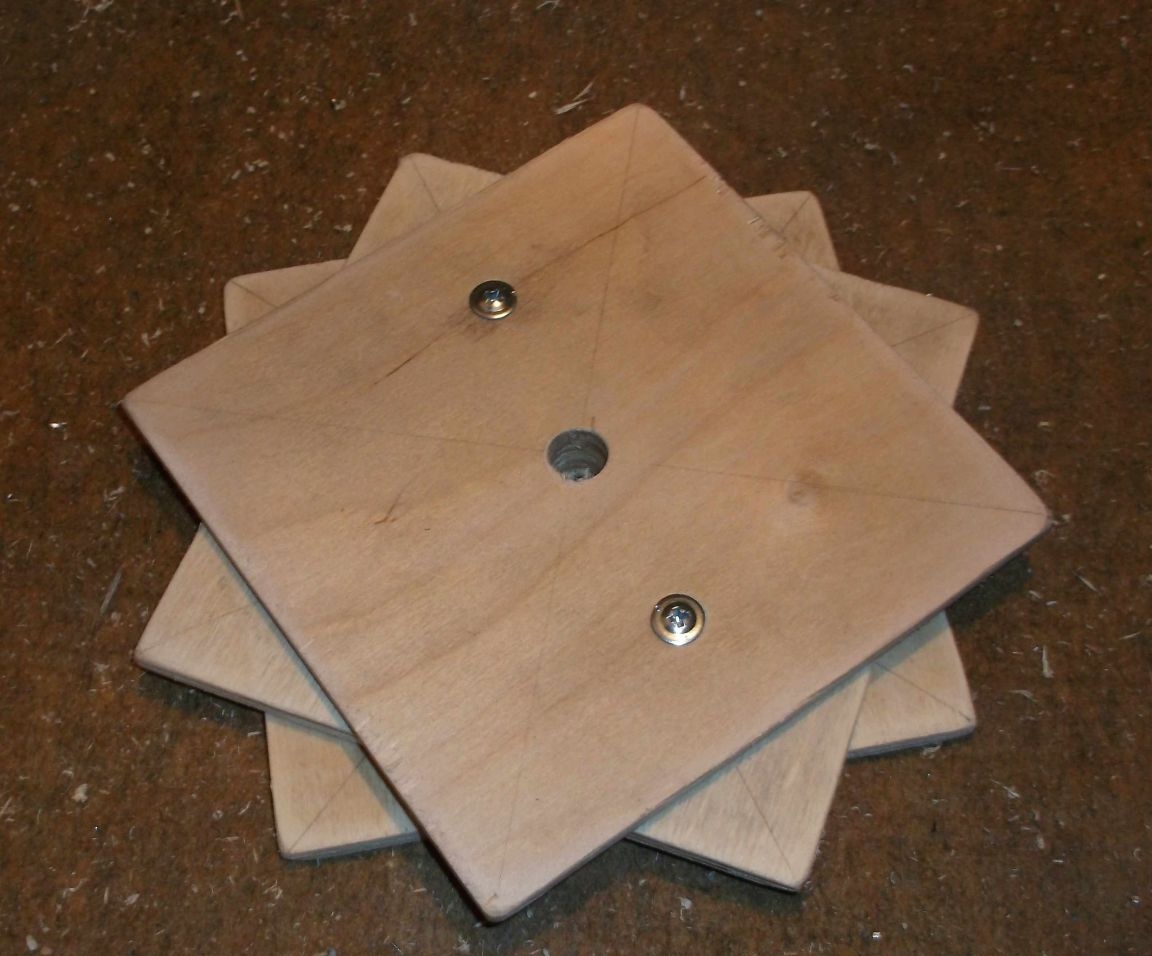
The rotation of the stud is carried out not by a familiar disk, but by a stacked polygon made of plywood squares. So, in my opinion, easier and more convenient. Plywood used five-layer, although three-layer plywood is quite enough.
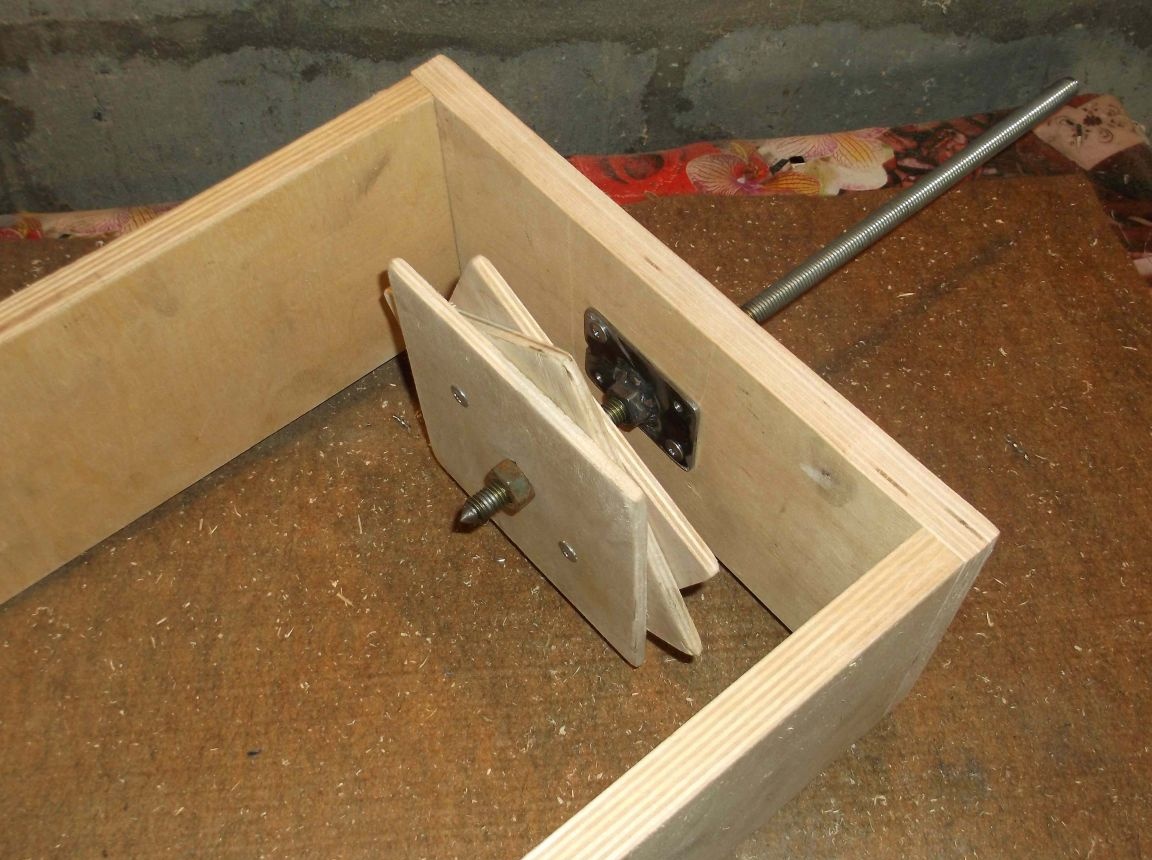
The multifaceted disc is fixed motionless on the stud with two nuts on both sides. To reduce friction on the base of the pusher, the pin was ground under a cone.
On the pusher at the point of contact with the pin, I drilled a bit with an 8 mm drill to self-center the pin cone. The thread and cone of the stud were greased with lithol.
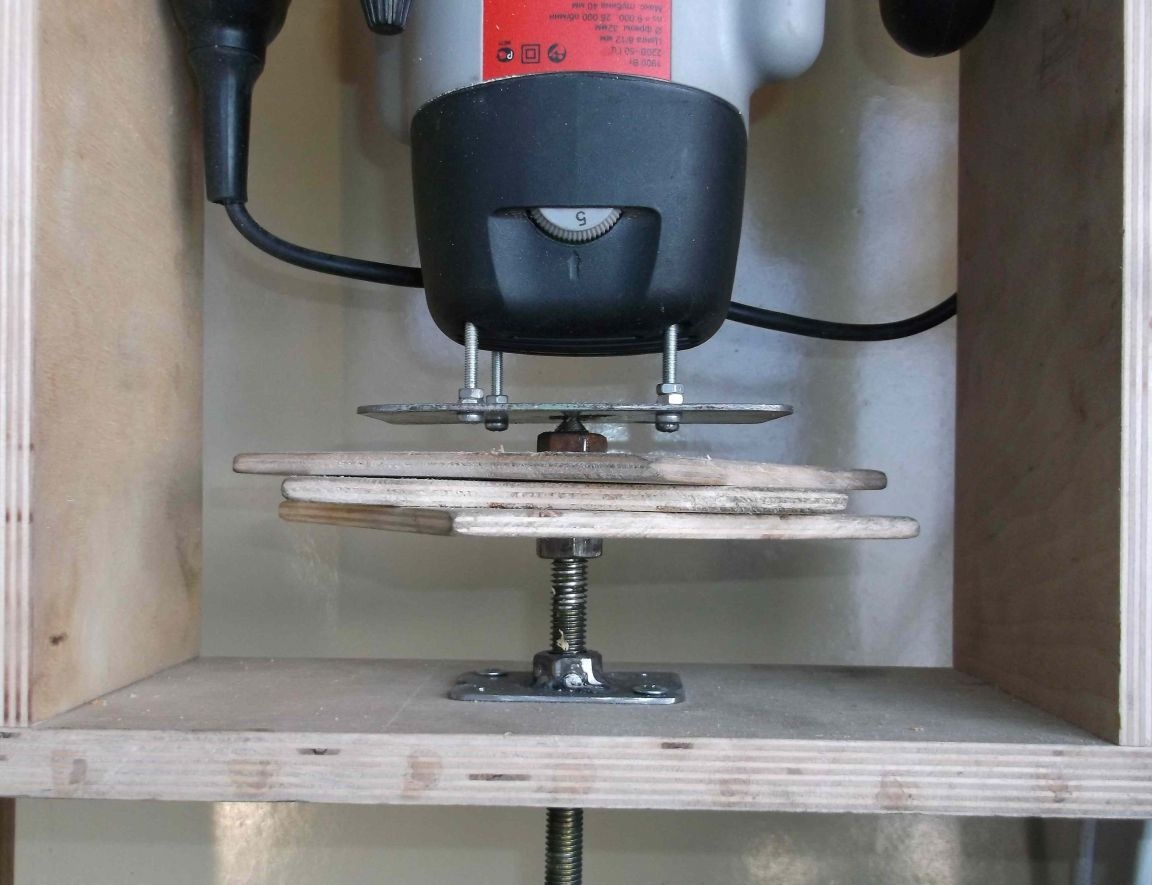
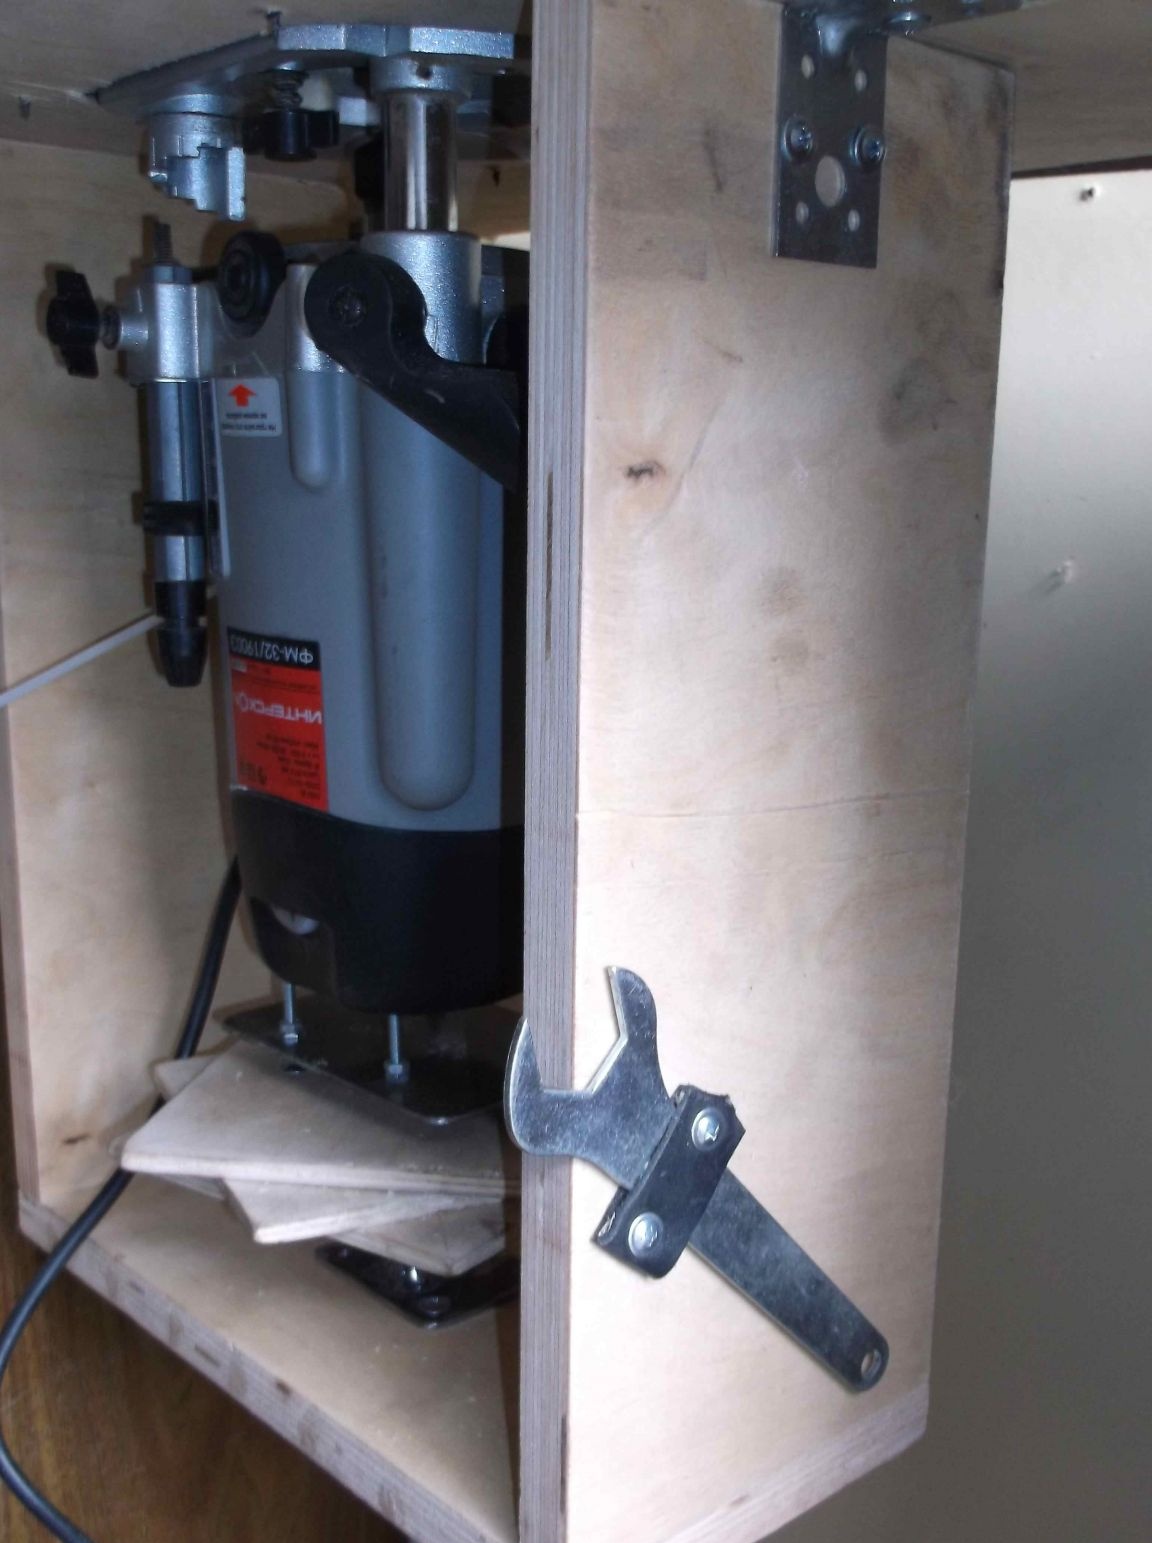
The elevator frame was fixed to the table with the help of corners. On the skeleton of the elevator with two self-tapping screws, I fixed a strip of leather with the help of which the key for changing the cutters is attached. Checked in work - the milling cutter is regulated smoothly and precisely.
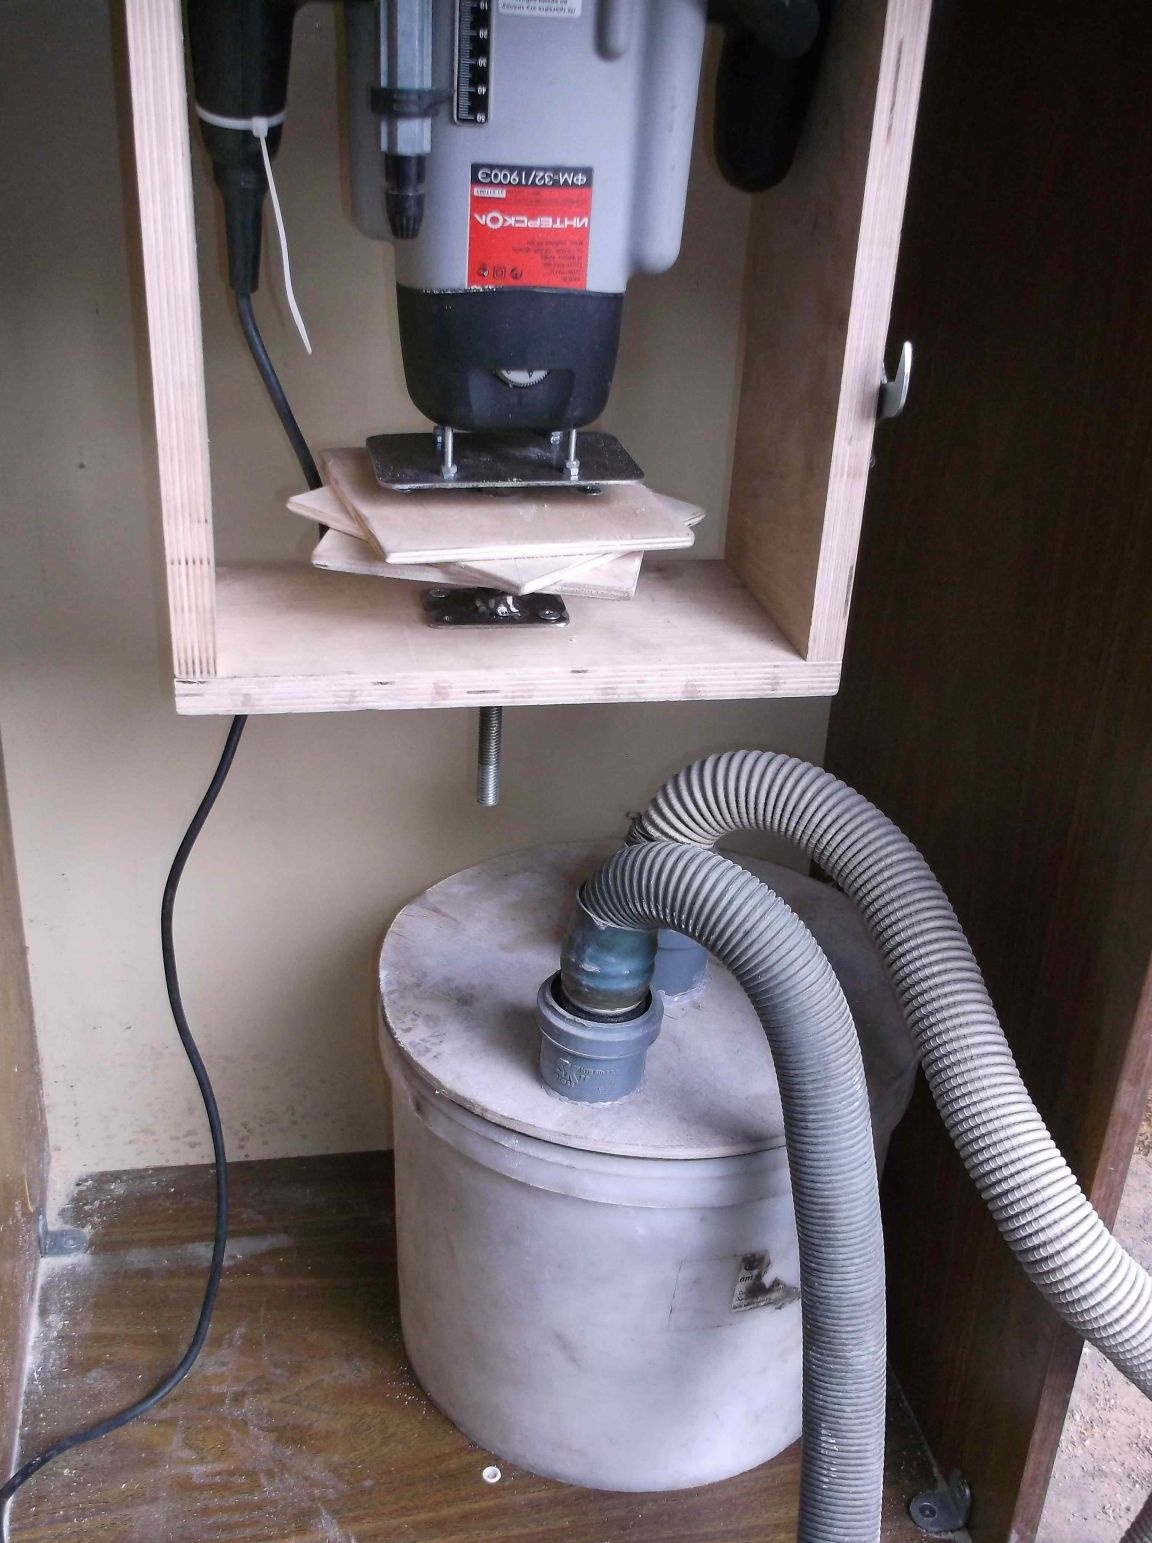
At the bottom of the table there is enough free space for installing the "cyclone", but more on that another time, and now it remains to finish the electrician. The milling cutter power button was fixed in the on position with a screed.
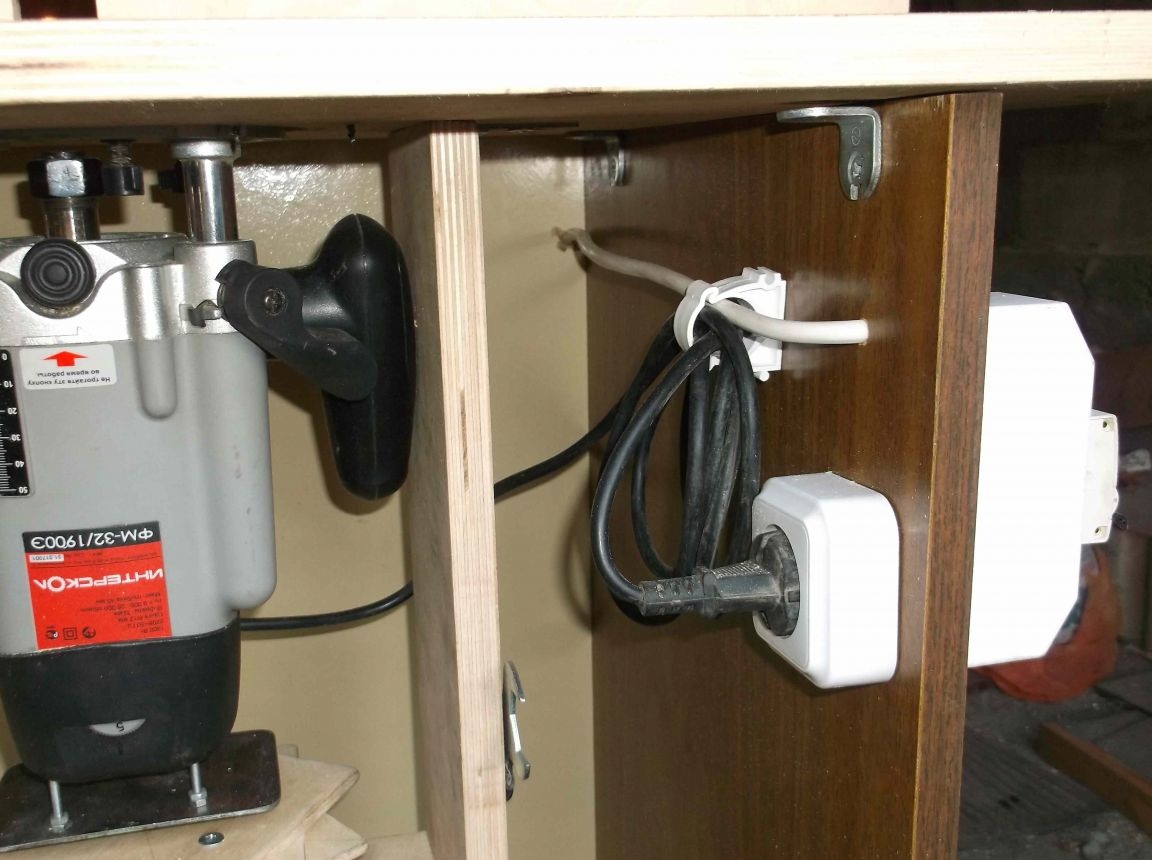
To turn the milling cutter on and off, I used a two-pole machine mounted on the outer side wall of the table. I decided to refuse a simple switch, since the contacts of the switch are not designed for switching a milling cutter with a power of almost 2 kW and, in the future, the inclusion of a vacuum cleaner is also possible. An automatic machine is the simplest solution, given that several pieces were dusted in personal stocks, and a plug with a socket is also from personal stocks.
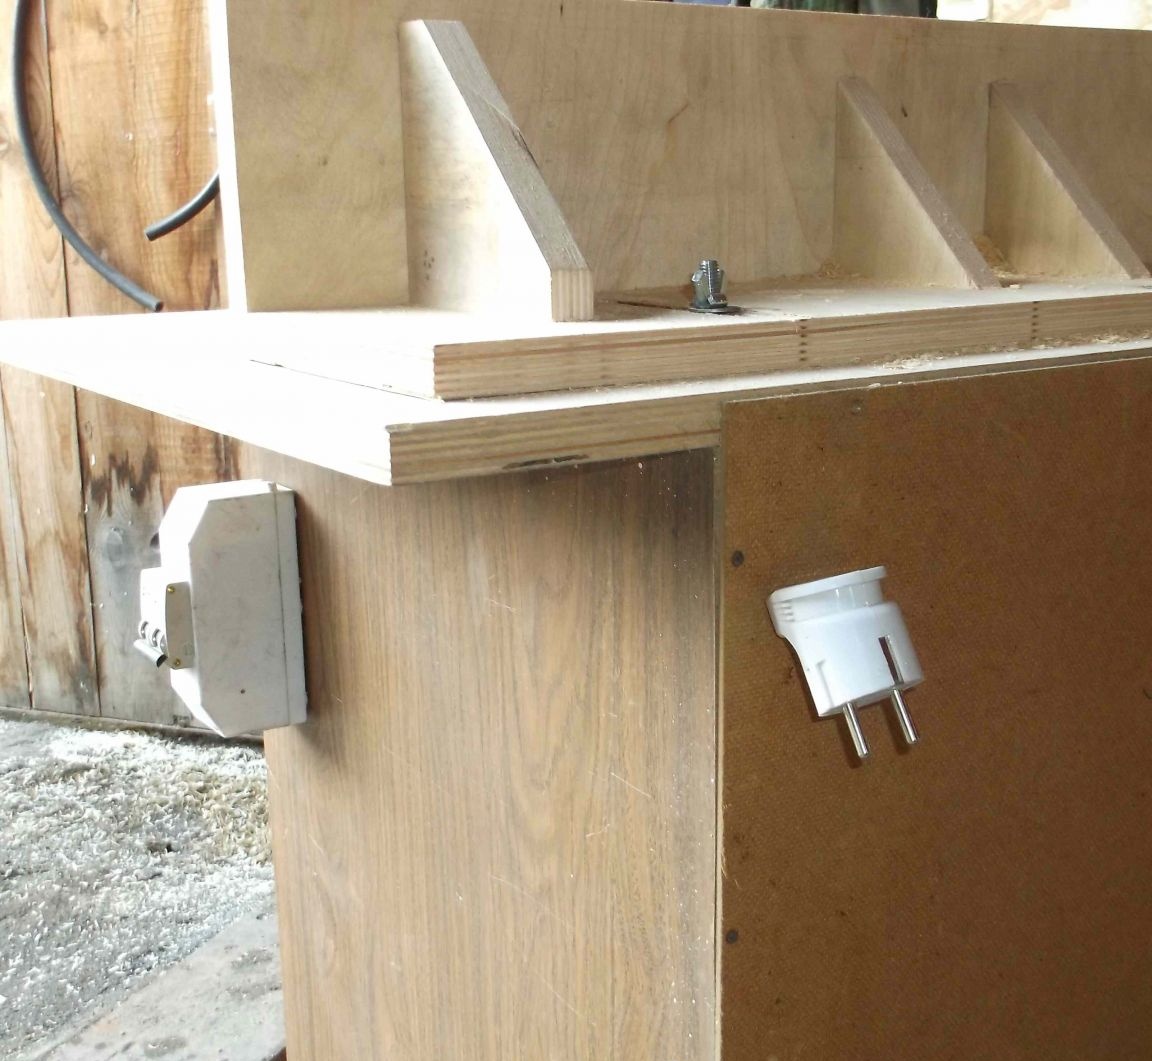
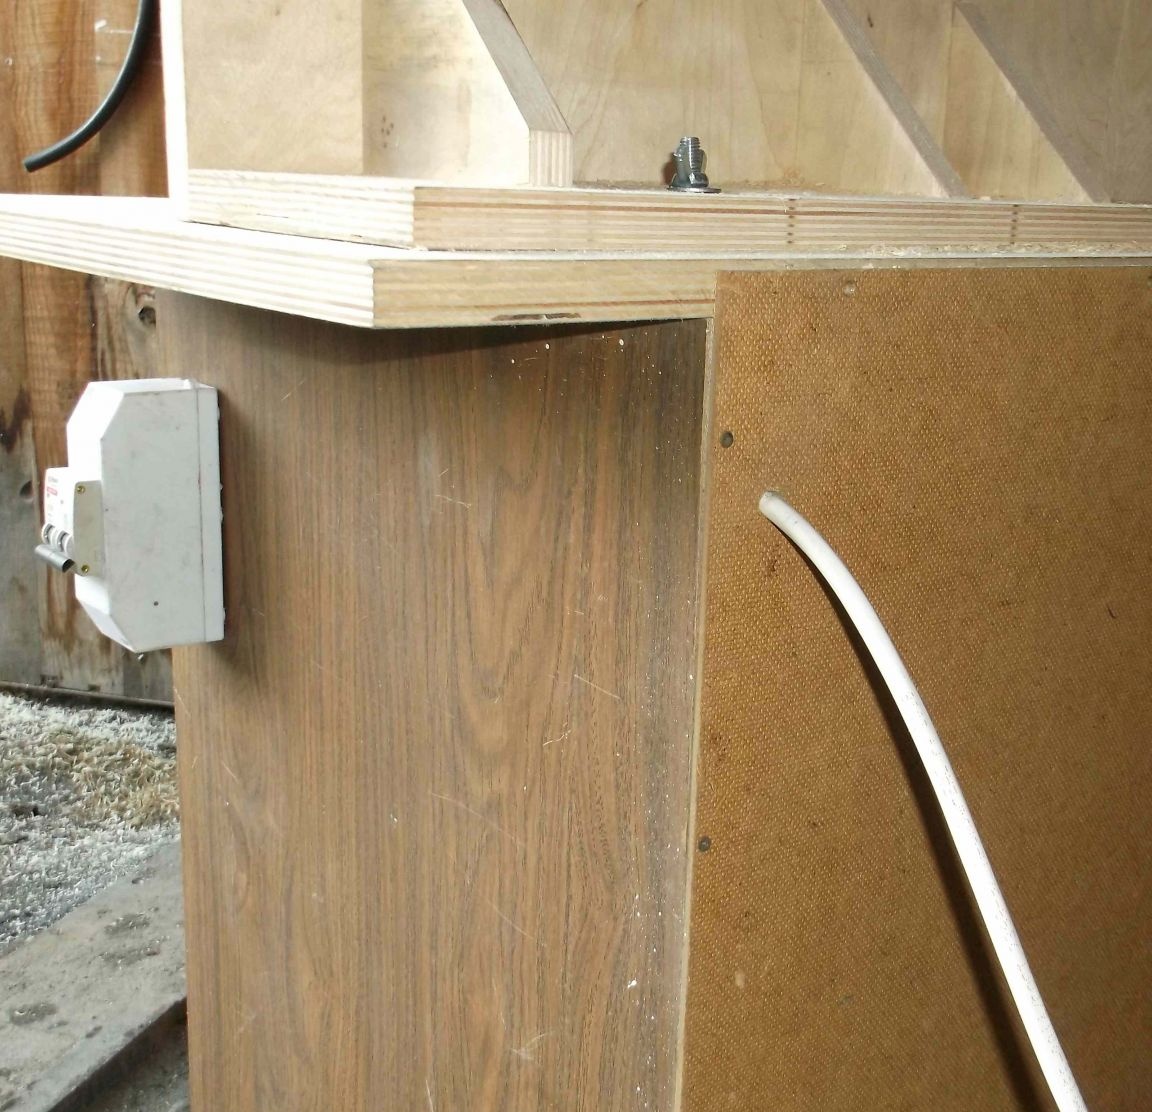
The cable for connecting the milling table can be hidden inside the table and, if necessary, pulled to the desired length. Since the height of the table is 90 cm, and this is already a bit tall, I decided not to do the legs and limited myself to small heaps of dense rubber at the corners of the base.
Summing up, I want to say that for the entry-level level it’s not even bad at all. Personally, this home-made cost me practically no financial investments (not counting the milling cutter itself). To increase the functionality, it is possible to supplement with various clamps, stops, guides. If you work indoors, then you need to equip this homemade vacuum cleaner, but in general it is a completely working option.