
Today I will show you the basics and talk about basic knowledge that will help you cast your first product. You will also see the process of modeling, casting, machining, forging rings in size and blackening brass. And all this in one article.
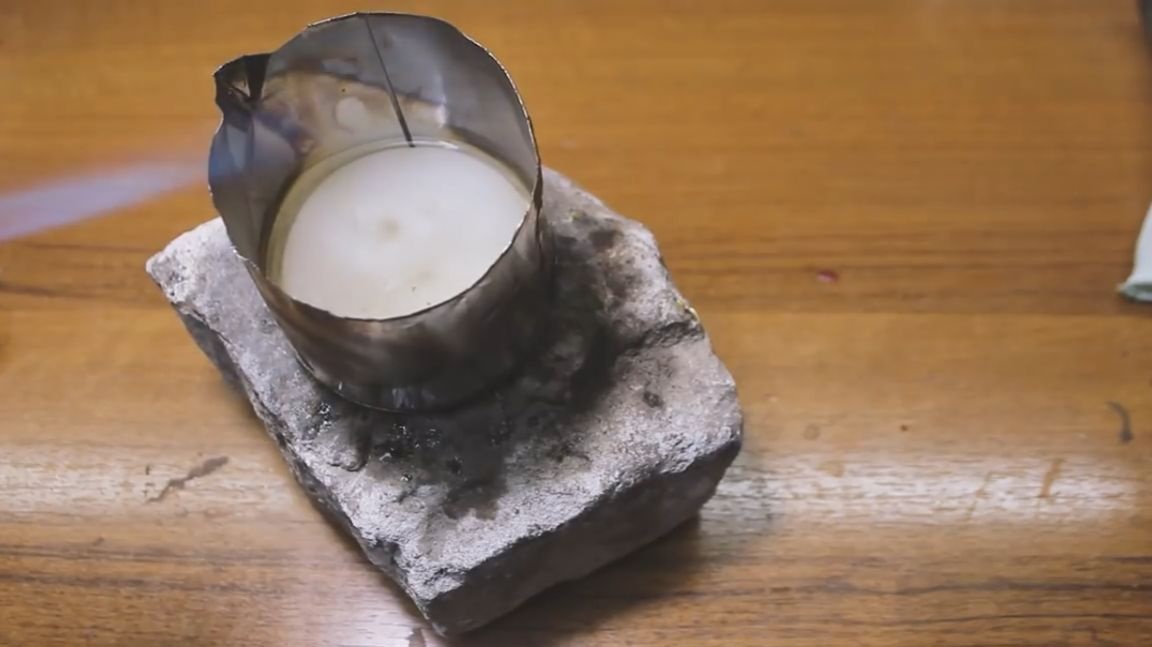
The master specially, whenever possible, used the most accessible materials and tools that may not be entirely suitable, but nonetheless work. Therefore, do not rush to say that there is jewelry wax for modeling, this is not about that. To make model rings, the author took the most ordinary candle paraffin and melting it with a burner, collected in a tin can.
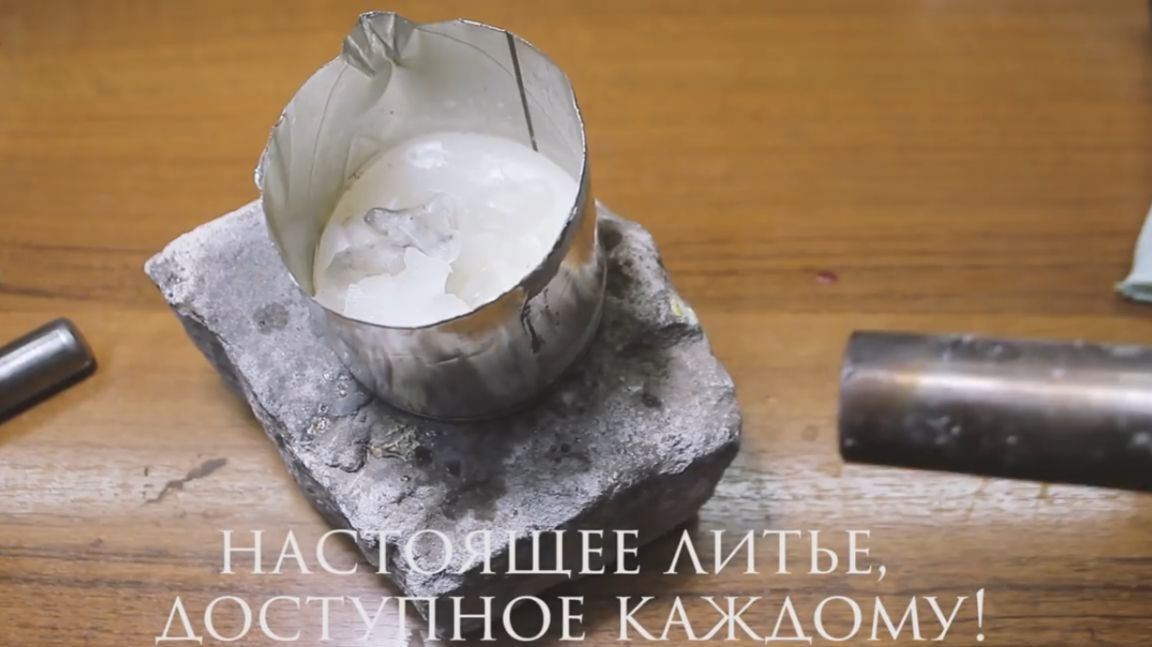
After melting, it remains liquid for a very long time, and plastic during curing. Hardening, paraffin is still loose and brittle. This is clearly one of the worst material for modeling, but again, this is a budget, affordable option.
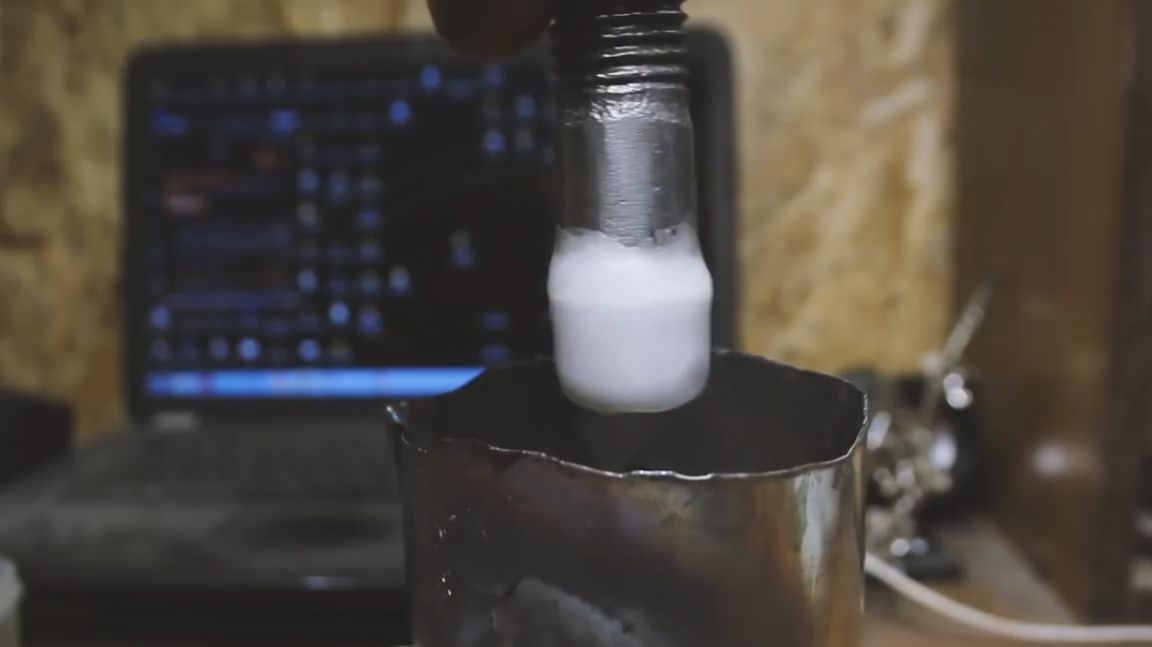
For the ring model, we need the M20 bolt. This bolt is approximately the size of the fingers of the author. Since the bolt is cold, when it comes into contact with paraffin, it quickly hardens and adheres to it. This is in our hands, so we dip the bolt into the molten paraffin, and over and over again build up the shrunken layer.
After waiting a little while the paraffin has cooled, we proceed to modeling. To do this, remove the excess material with a simple scalpel or any other scratching and cutting object.

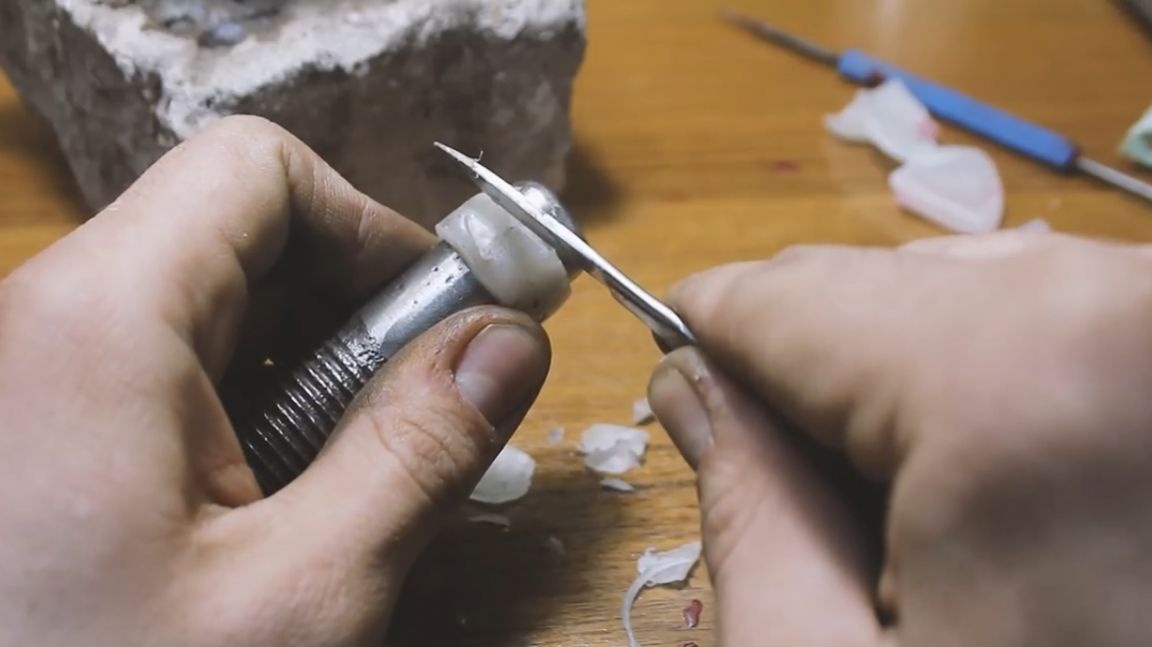
But how will we deposit paraffin onto the ring when it is incredibly fluid and unpredictable? It turned out to be much simpler. In the process, the master realized that paraffin remains plastic for a long time and it is possible to deform it like plasticine. And so it happened. He simply blinded the desired shape of the ring and continued. True, walking with a soldering iron would not hurt in order to fuse the blinded borders. But the master decided not to do this. Later, on castings, this will appear in the form of marriage, but not so bad that you could not wear this ring.
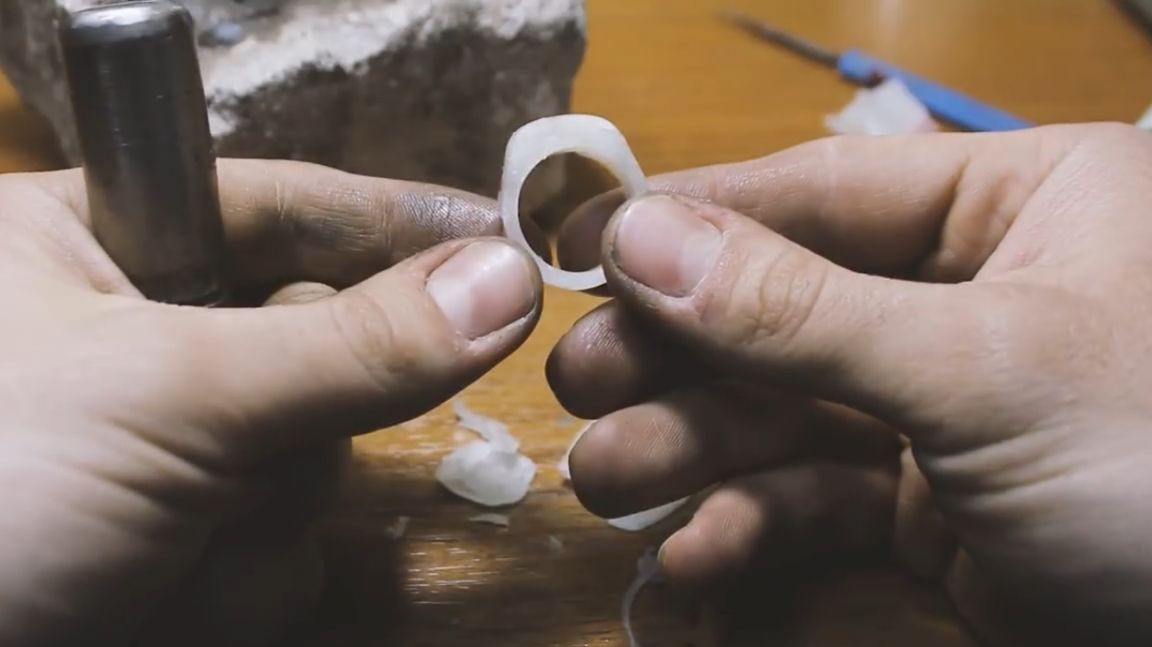
Now we need to process the stuck model. The master decided to do this on sandpaper, but he doesn’t remember if it was forty or sixty, but it was definitely very rude. And again, for good reason. The fact is that a large grain of sandpaper leaves a deep mark on paraffin and gives it a texture. Therefore, carefully walking along the front of the ring with rough sandpaper, we will leave the resulting texture for casting.Since paraffin could fail at any moment, the craftsman decided to leave the finishing work for the brass casting.
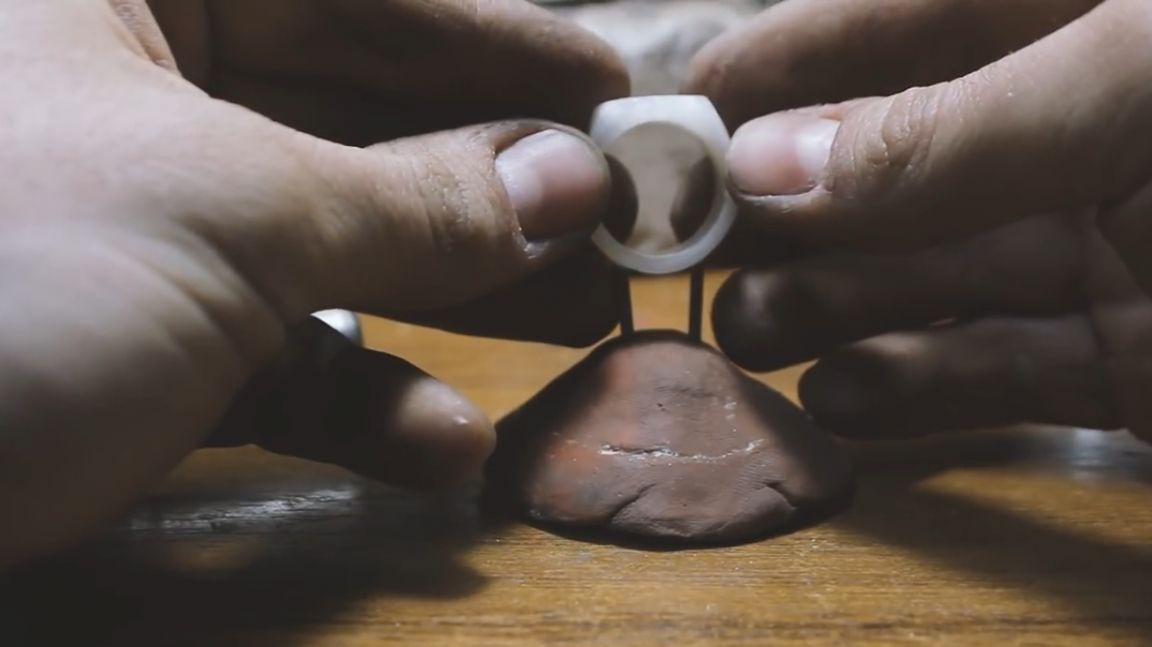
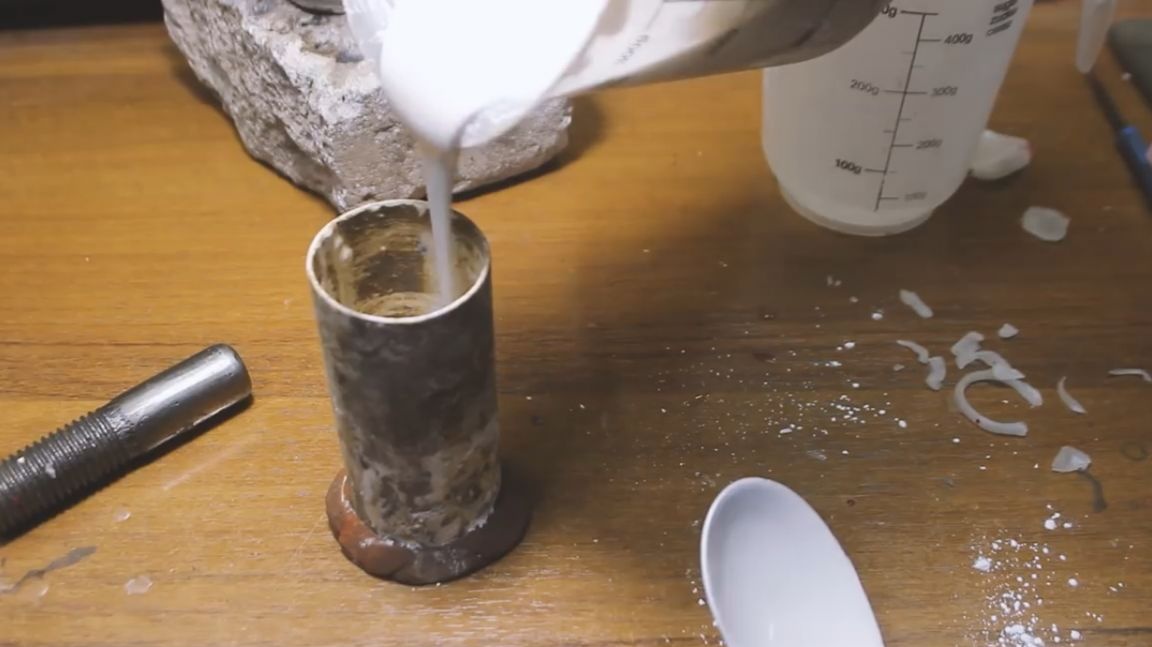
Set the model aside and prepare the bases for fixing the model. The simplest thing is to make it out of clay. We knead it and sculpt a hemisphere into which we will install sprues in the future and in the future this sphere will become a kind of pocket for melting metal before pouring. Therefore, do not make the sphere too flat. It is necessary that all molten metal fit in it. By the time of casting, you will understand everything and see for yourself how it looks.
As a flask (a metal mandrel for pouring the molding sand), you can take the most ordinary metal pipe, for example, in a plumbing shop there should be pieces of a suitable size.
We will make sprues from 2 nails. We bite off the excess with nippers and install them in our plasticine sphere.
After installing them, we somehow need to attach the paraffin model to the metal gates. To do this, the author decided to take the burner and slightly heat the nails, and then lean the ring against them. Hot nails will easily melt the paraffin and go deep into the model.
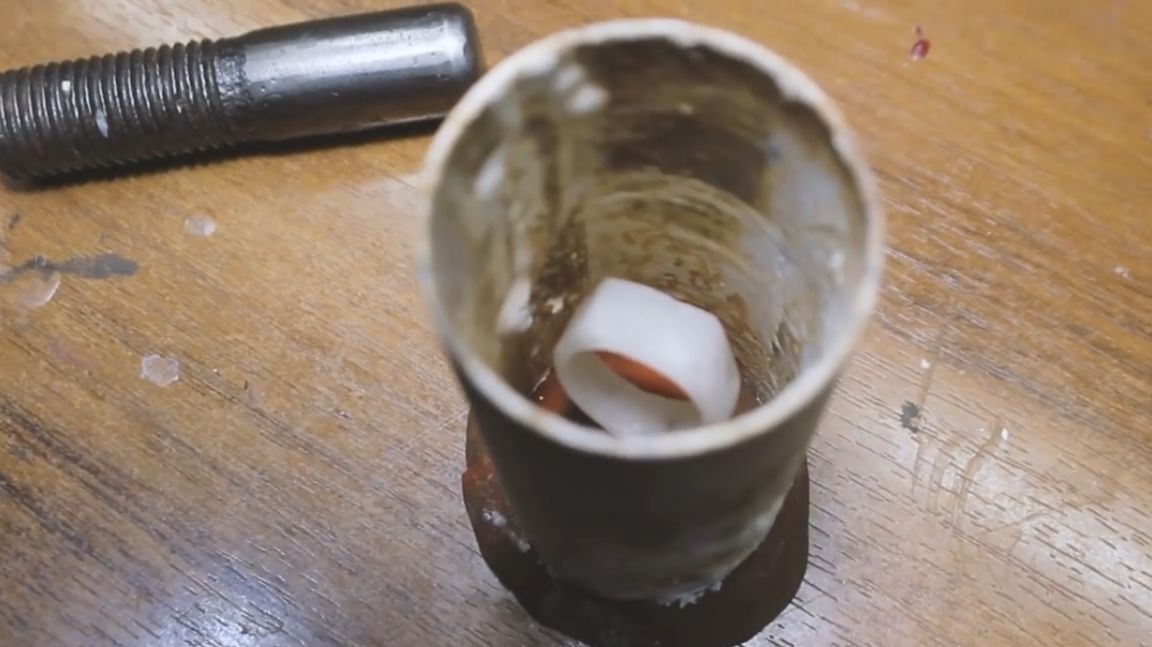
In this position, we need to reliably hold the structure until the nails cool down. The reliability of this method is sufficient so that the ring does not fall off until the moment of pouring the molding sand. But the author still did not dare to tap the flask with his fingers after molding to reveal possible air bubbles from gypsum. Therefore, it was necessary to pour gypsum in a very thin stream in order to avoid the possibility of marriage as much as possible. Lack of hurry will get rid of these bubbles.

And actually, it turned out pretty well.
When the gypsum gets stronger, you can clean the form from the influx, and separate the clay with gates.
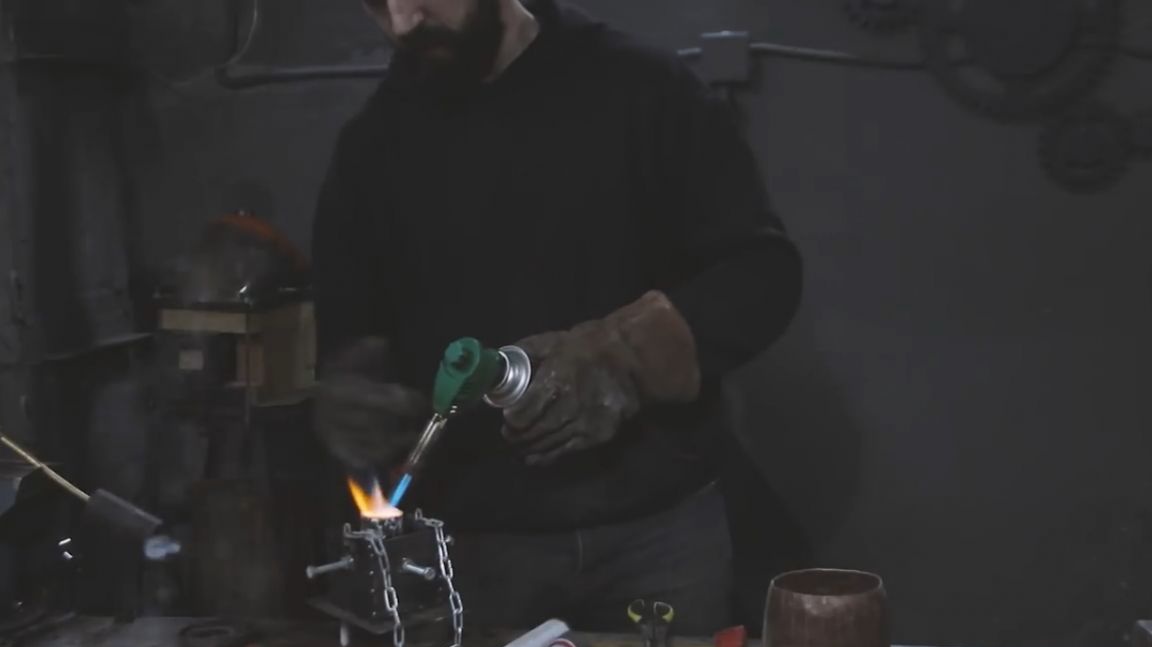
Now comes the most crucial moment - the moment of calcination of the form. In the instructions for the molding material, there is a card with a calcination cycle of 15 hours. But since this goes against the knee technology, it is fair to reduce this time to 40 minutes.
This is bad and wrong, but still possible. The main thing here is to give a smooth heating first, so that the water from the gypsum begins to evaporate, and the paraffin begins to smoothly melt and flow out. The master used a roof burner for this, since he had it. You can do with a household burner, or you can start with the most ordinary oven, it will be more correct. Just do not forget to put the form in the gates down into some pan so that there is where to drain the paraffin.
Pour metal into home conditions can be in several ways: using potatoes, clay, or any other dense moisture-containing material. But the author did not master this method, so he will pour metal using a manual centrifuge.
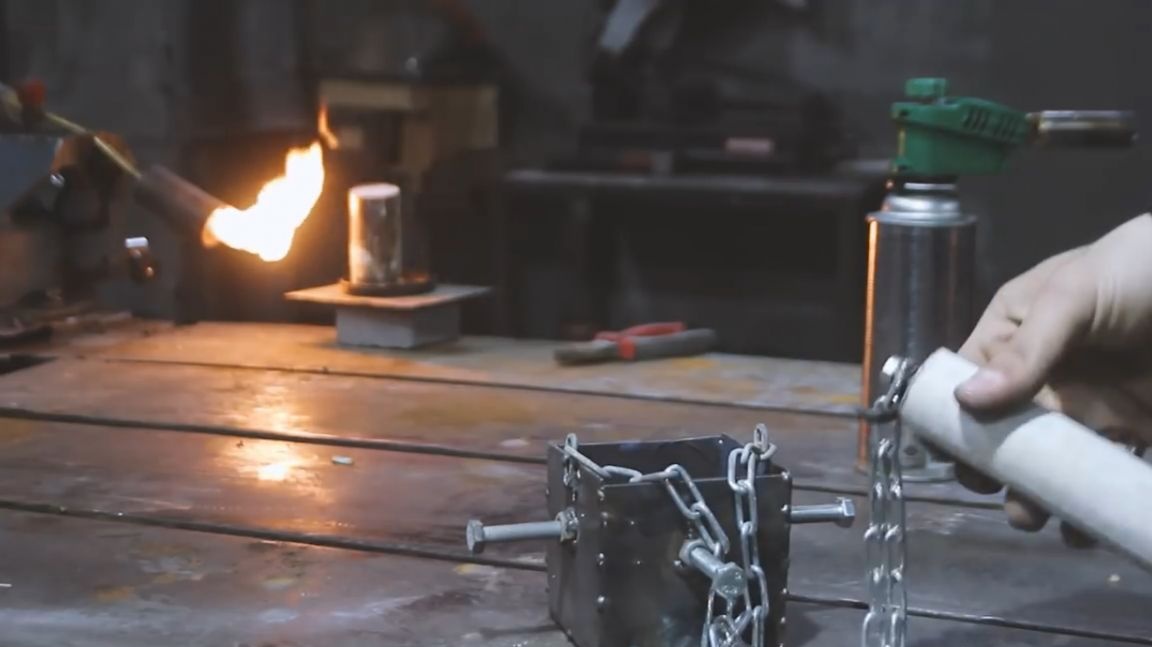
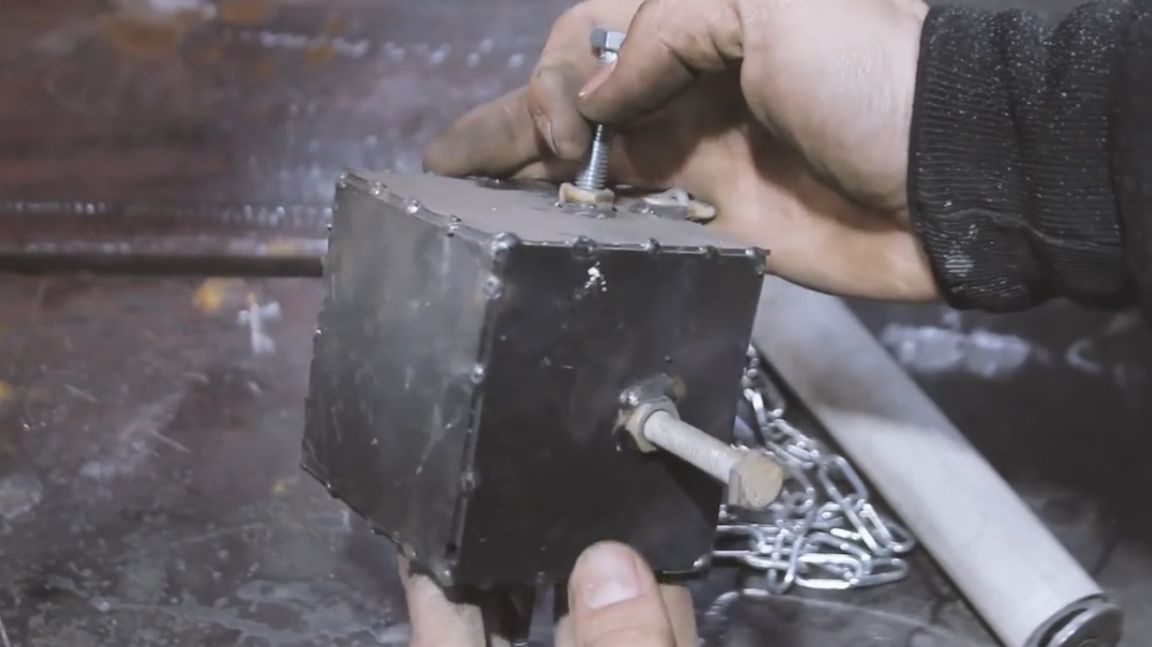
It looks like a glass with four bolts (for a more reliable fixation of the flask), chains and handles made of PVC pipes with bearings inside (for continuous unhindered torsion).
The author cooked this thing himself, but you can do, for example, with a metal mug.
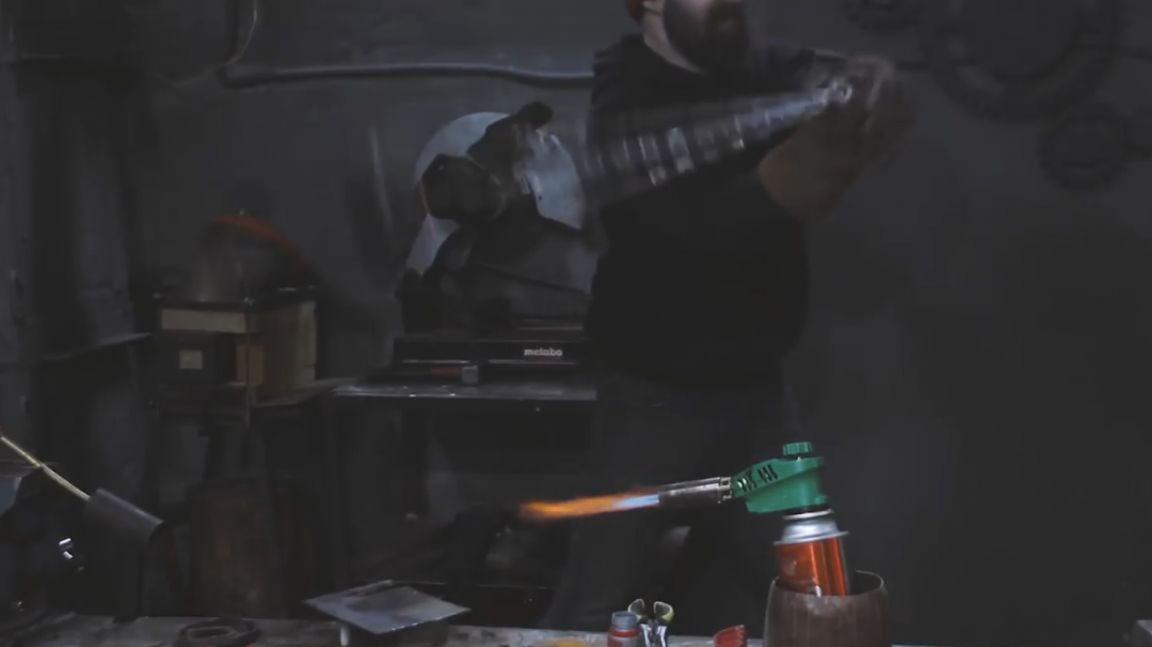
We warm the shape to red and get ready for pouring brass. As a source material, you can take brass plumbing fittings. They are great for this. Well, or if you are bolder, you can immediately pour silver or even gold. There is no metal limit in knee technology.


In the smelting process, it would be nice to sprinkle the melt with brown. It can be bought at radio stores.
The metal has melted, and you can gently take a position while continuing to maintain the high temperature of the flask. Then, with a confident movement, we remove the burner to the side and begin to wave this “Satan tape measure” that there are forces.
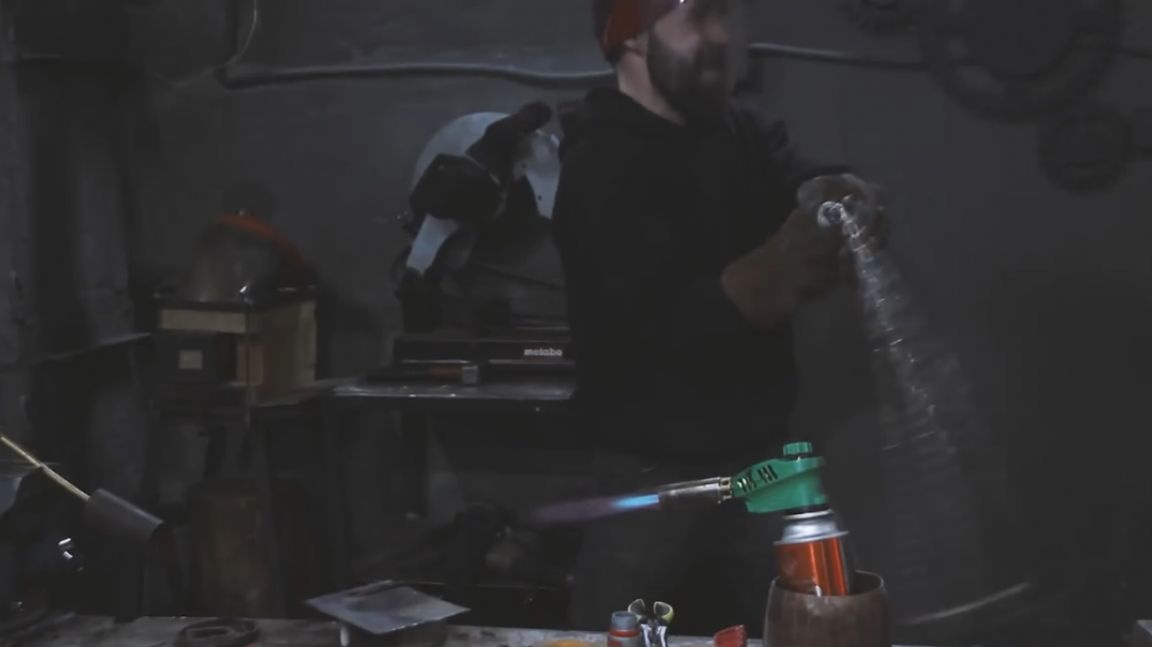
Satan’s tape measure because once the author awkwardly jerked the glass and molten metal spilled over the entire workshop.So keep this in mind and do not neglect safety measures and protective equipment. Mastering the potato method is clearly safer.
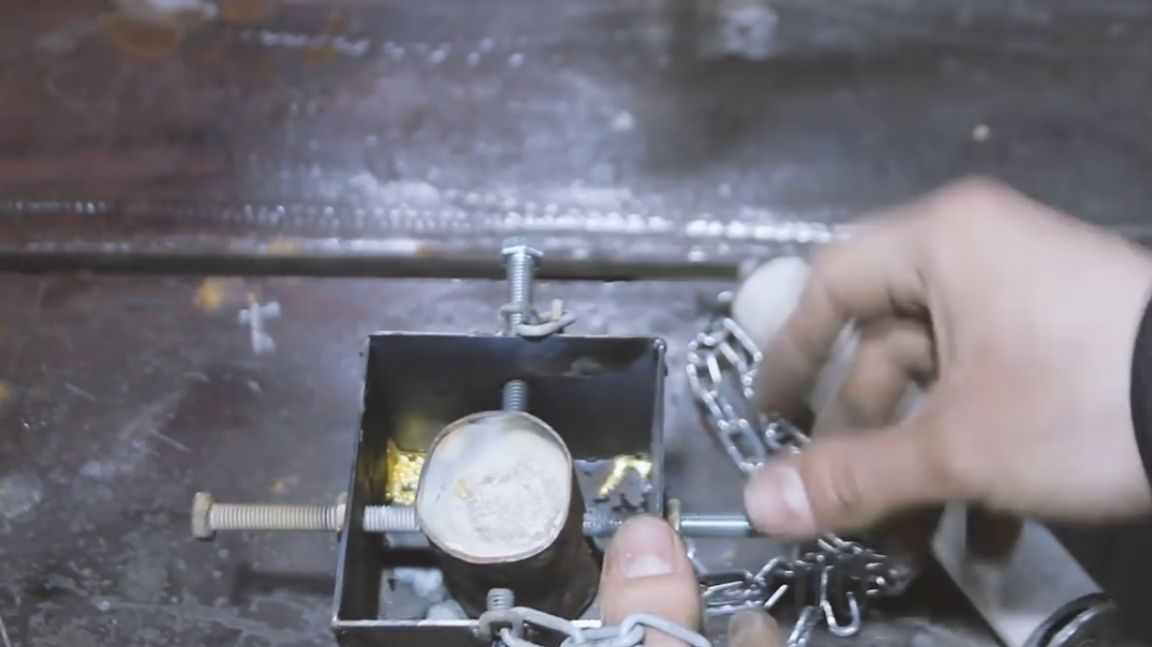
We wait a minute or two and throw the flask into a bucket of water.
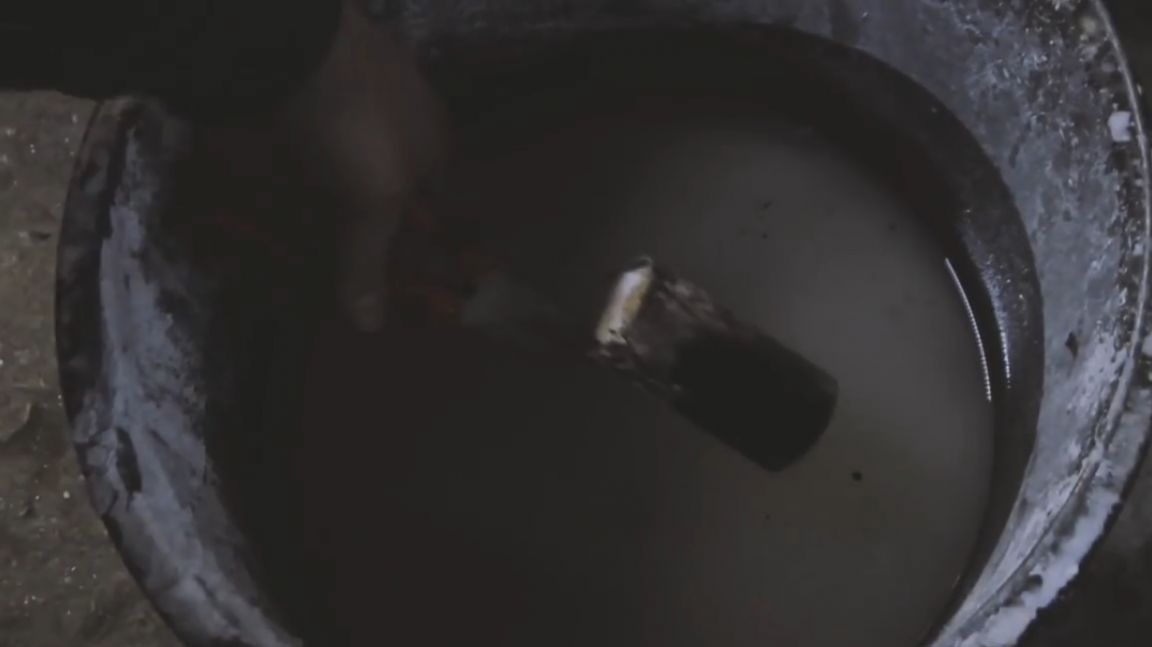
From this mass is destroyed and frees the casting. Well, the casting was a success, everything spilled as it should.
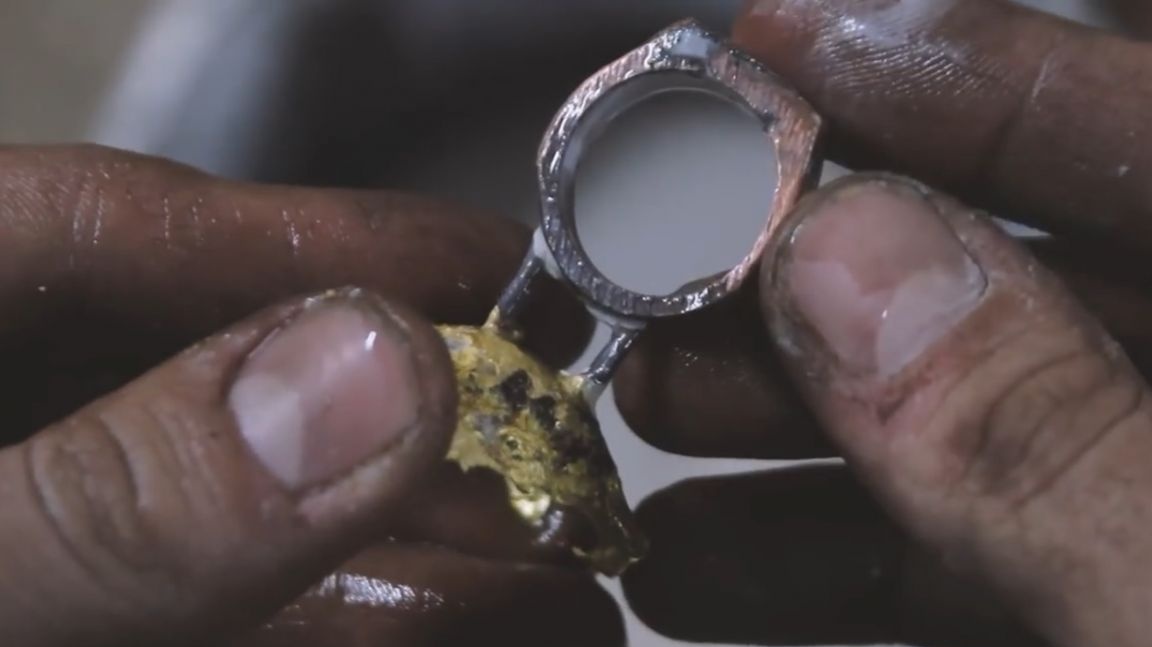
Now we need to process the ring. The author did not take the drill, but cleared everything with the help of files and sandpaper. Everything is real, but the difference is only in time and labor intensity of classes.
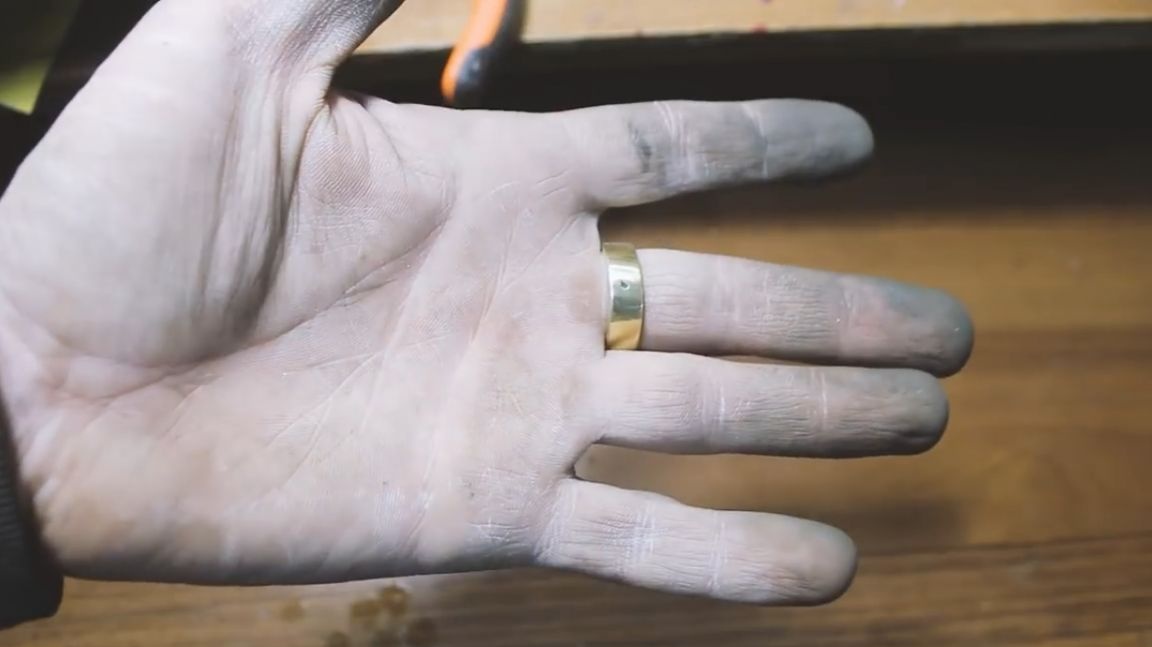
After roughing, the author decided to try on the ring, but it turned out that it does not quite fit.
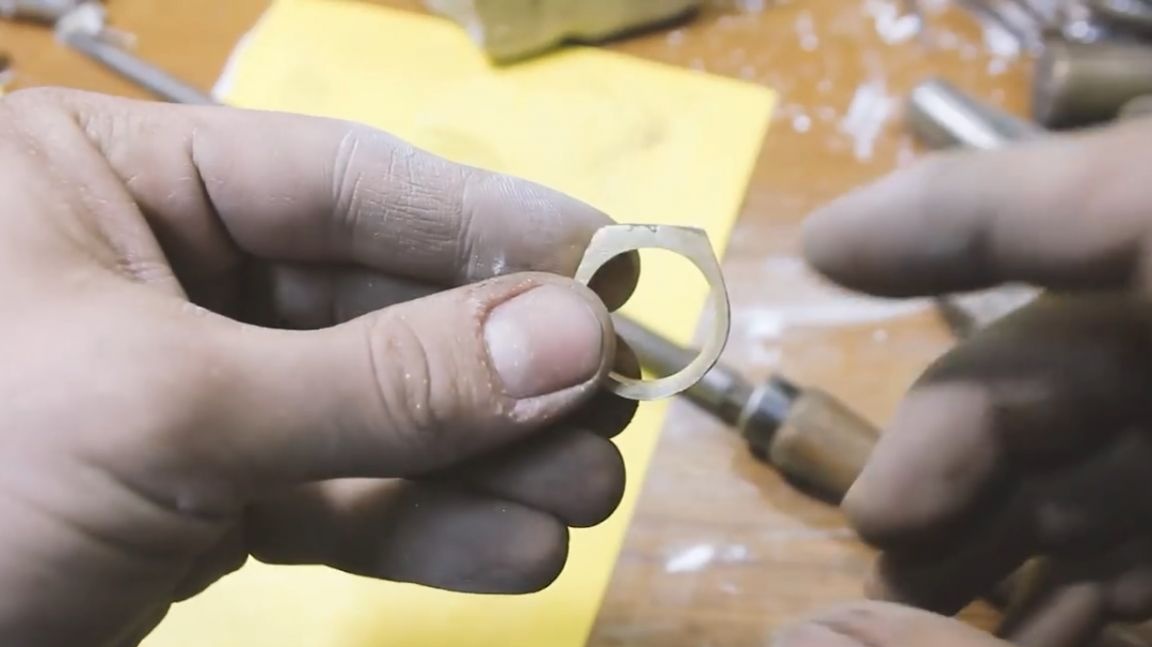
But there is a fairly simple technology to solve this problem. Since the walls of the ring are quite thick, you can simply squander it with a file. Or make it more interesting. For this, we take the same bolt m20. As you can see, after casting the ring gave a slight shrink. It hardly sits on a bolt. We push as much as we can and pick up the hammer.
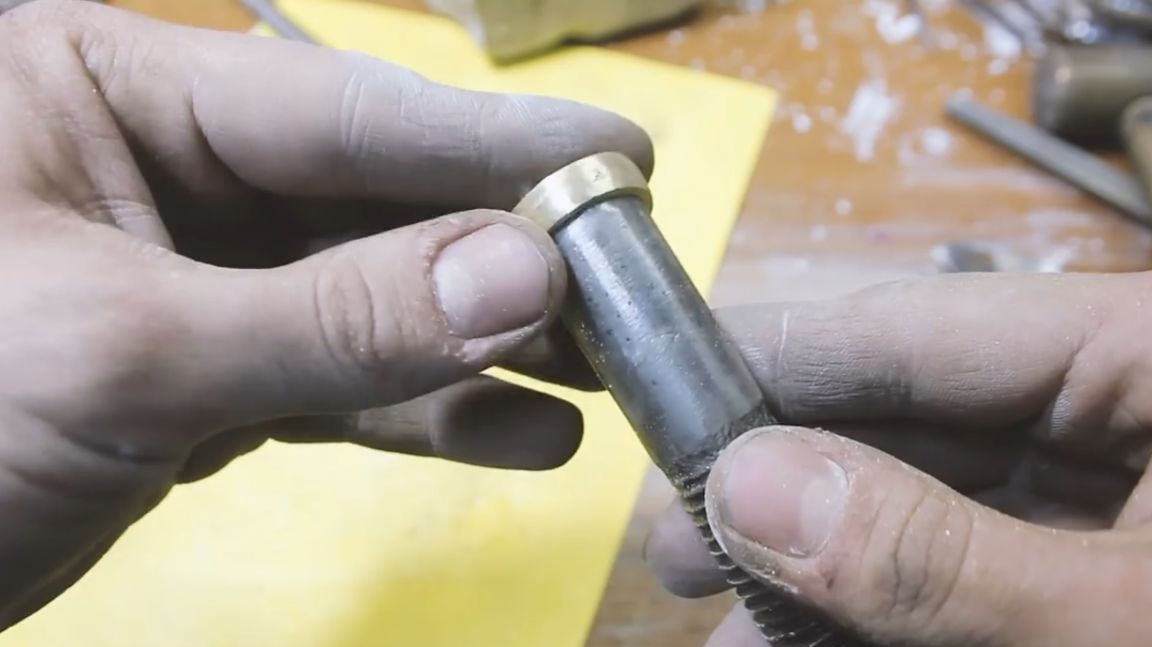
We begin to tap on the area of the ring shank. Especially do not overdo it, the metal lends itself perfectly to stretching in this way.
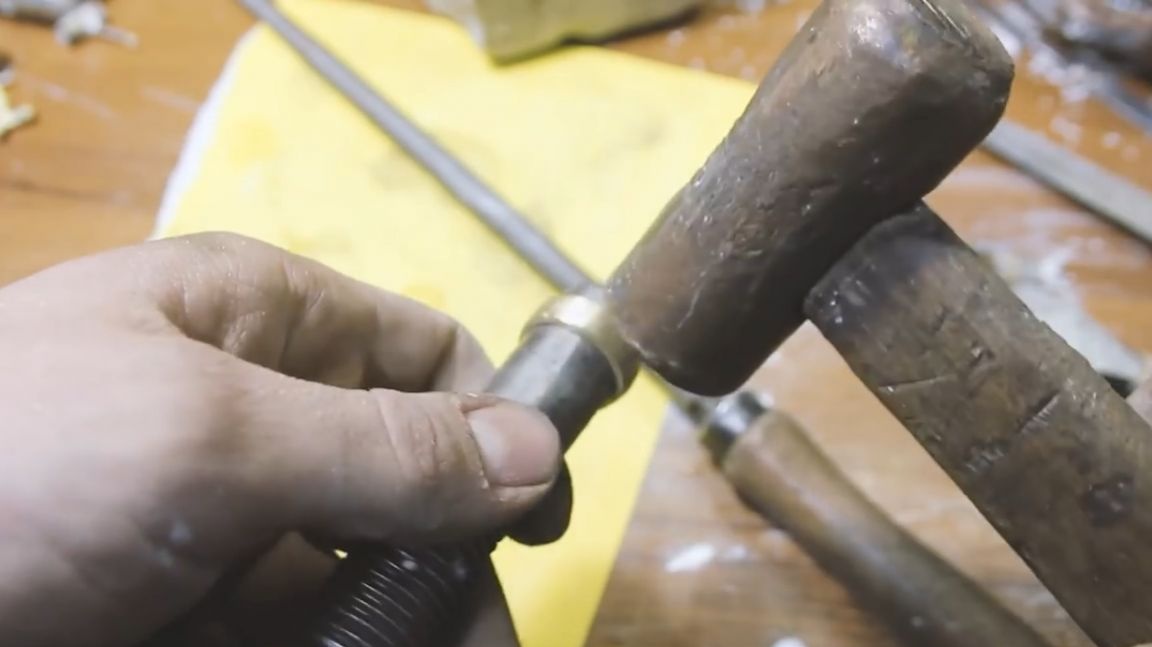
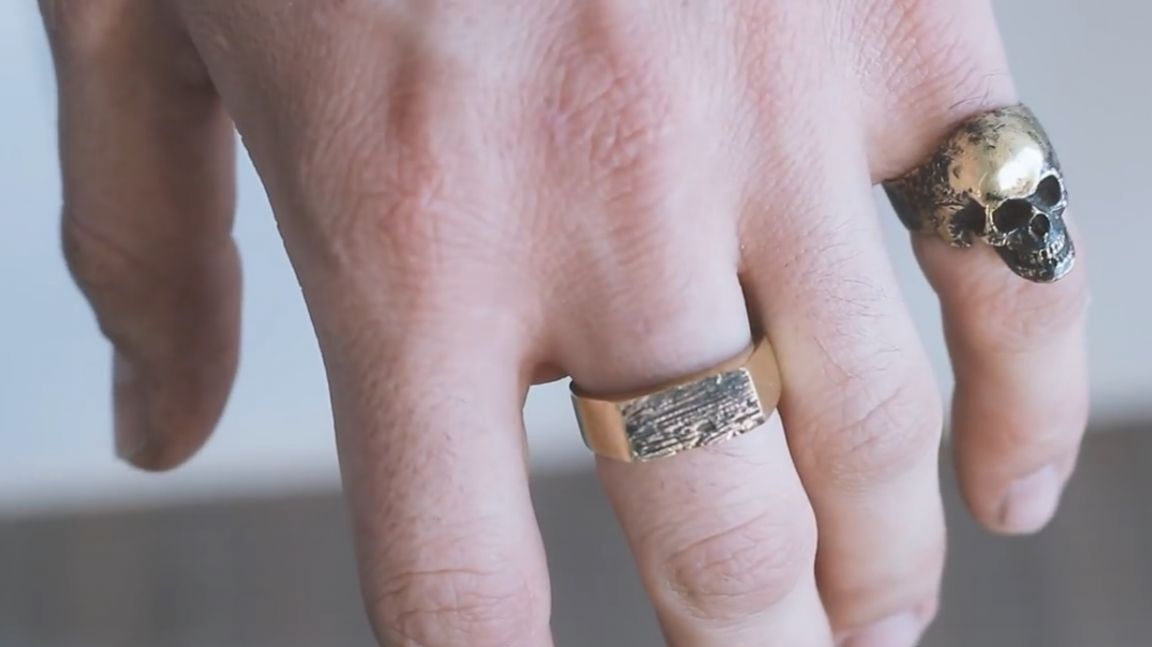
Now the ring sits perfectly on the finger.

At the end of grinding the ring, you can blacken its front part in order to give visual depth to our relief left by a large grain of sandpaper. For this we need pharmacy sulfuric ointment. We put a thin layer on the brass surface, which we want to blacken and heat the ring. We warm until all the ointment burns out and after it does not remain a dry matte surface.
After blackening, polish the ring again, but already with the finishing abrasives and enjoy the result.


As stated at the beginning, the ring spilled perfectly. All defects that you can notice were obtained at the modeling stage. Therefore, in a good way, it is better to use more processable materials. After all, the better prepared the model, the less will have to work with it after casting.
Thank you for attention. See you soon!
Video: