
The master of carpentry and any other work or the owner of a personal plot sometimes needs to cut a log. And more often you have to do it alone. Goats can help in this case. And if they are not? There is a choice: to make goats; put something under a log; look for any other support; leave the log on the ground, turning it further as it is sawed. But the author gets out of the situation and offers his own version of the solution to the task: he invents (or recalls what he saw) device. It looks in the form of the letter “A”, and whether it will be the first in functionality in its class - we understand by following the manufacturing process.
Tools used by the author:
1) a pencil;
2) a square;
3) a chisel;
4) clamps (3 pcs);
5) a screwdriver or screwdriver;
6) mallet;
7) hand saw.
Materials:
1) a wooden beam 1, 9 m long, 6 cm wide and 4 cm high;
2) screws in the amount of 8 pcs;
3) carpentry glue.
Manufacturing process:
Step one. Preparation of parts and groove marking.
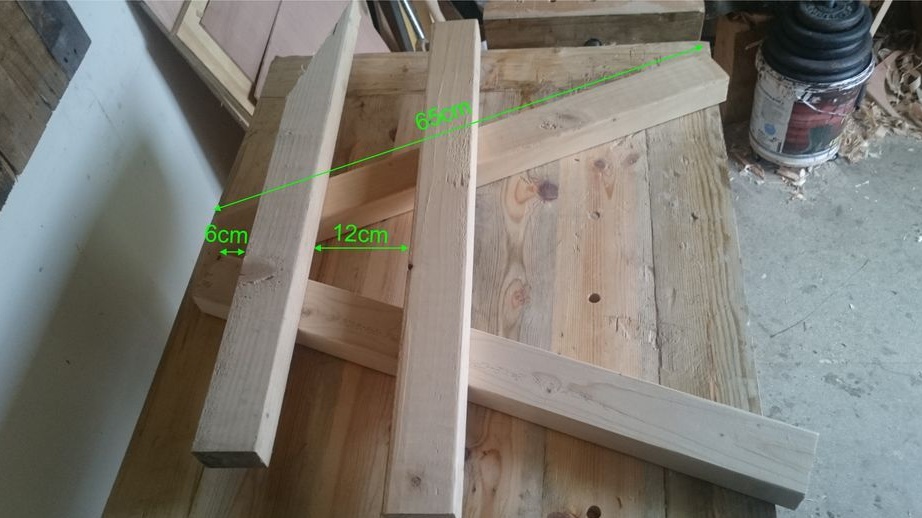
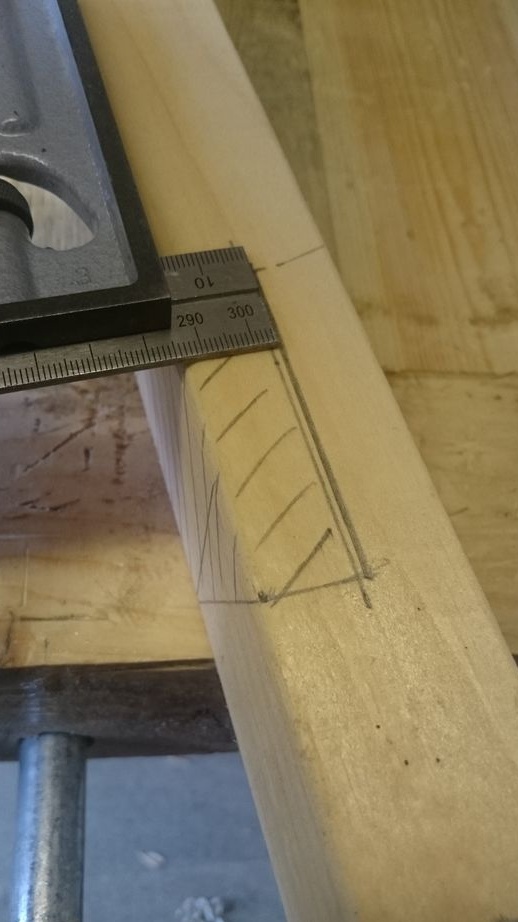
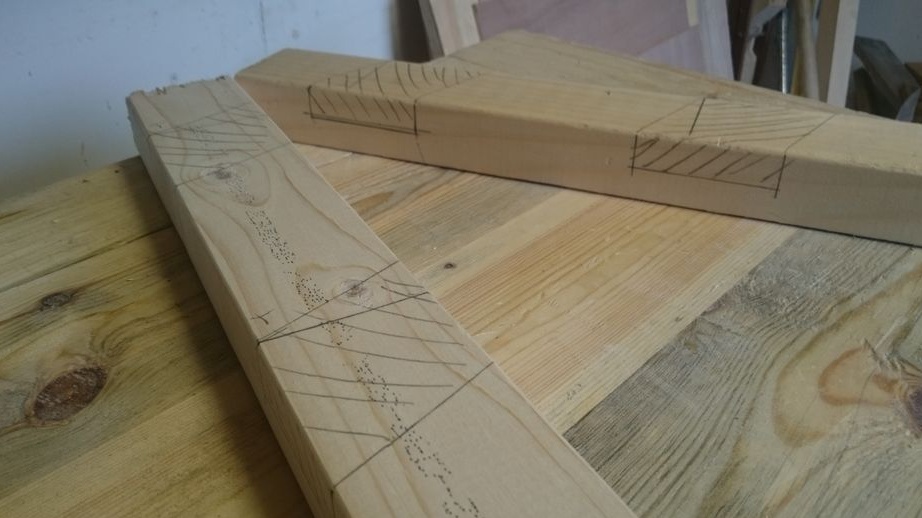
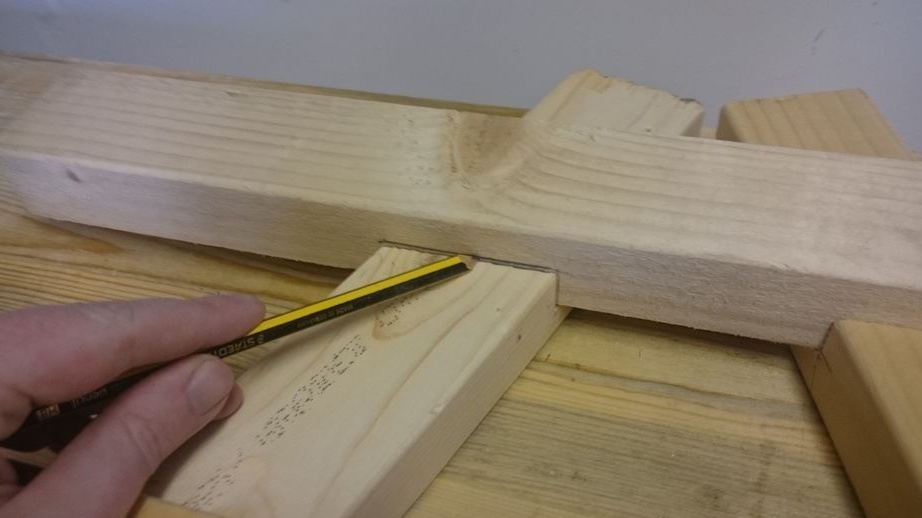
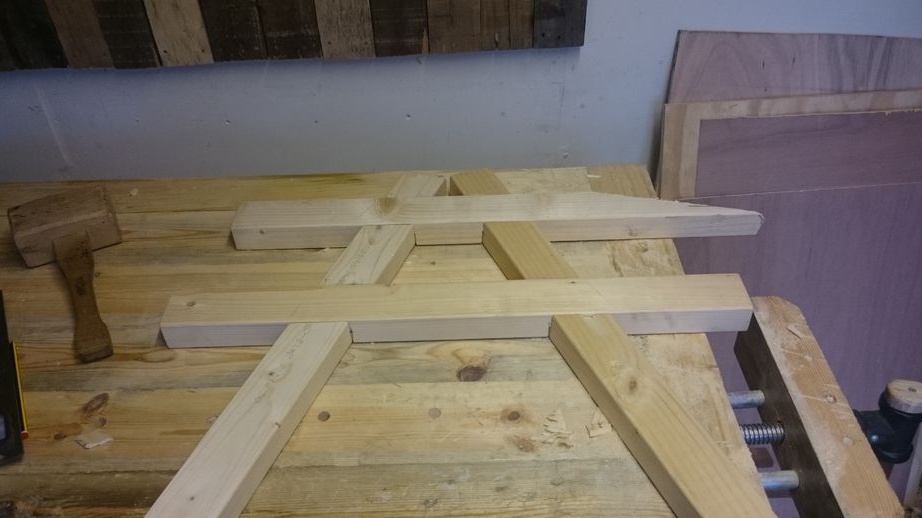
We start with the preparation of supports and cross members of the structure. To do this, cut the beam into four parts. The length of the supports is 65 cm. The crossbars are arranged so that the upper one is 6 cm from the upper inner edge of the end face of each support. Whereas the distance between the crossbars themselves is 12 cm. The angle between the supports should be chosen at your discretion, but if you choose too large , you run the risk of hitting the ground with a saw, because the structure will be tilted close to the earth's surface. In general, you need to find a middle ground when choosing an angle. Next, draw a pencil along the borders of contact of the crossbeams and supports. The inner shaded area is the place where the grooves will be located, the depth of which is equal to half the thickness of the bars, i.e. two centimeters.
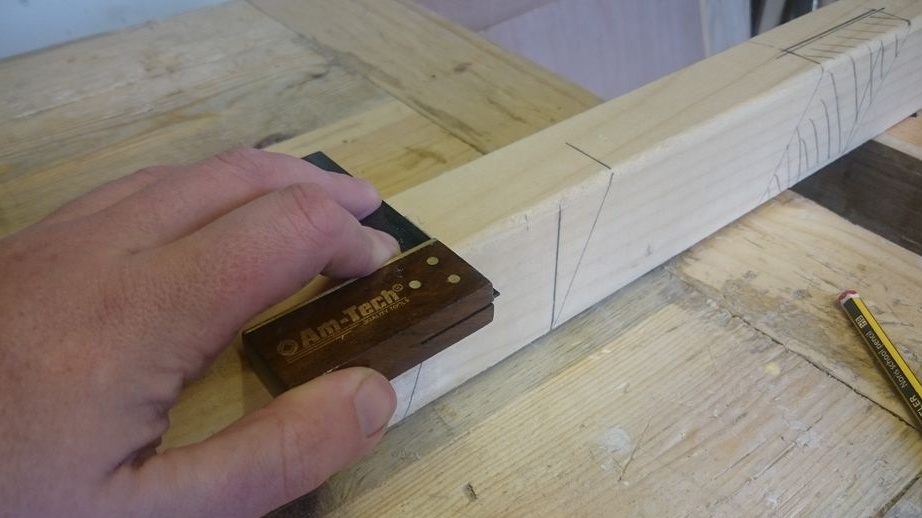
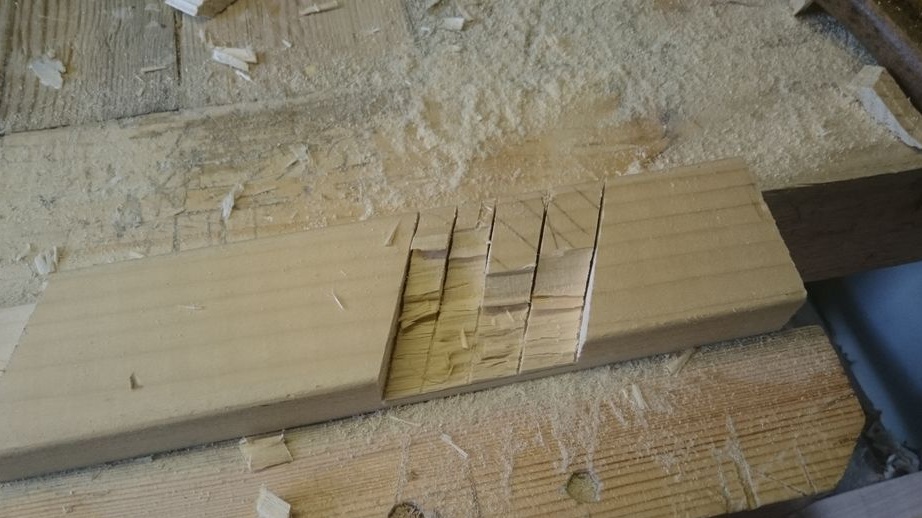
Step Two Removing the grooves.
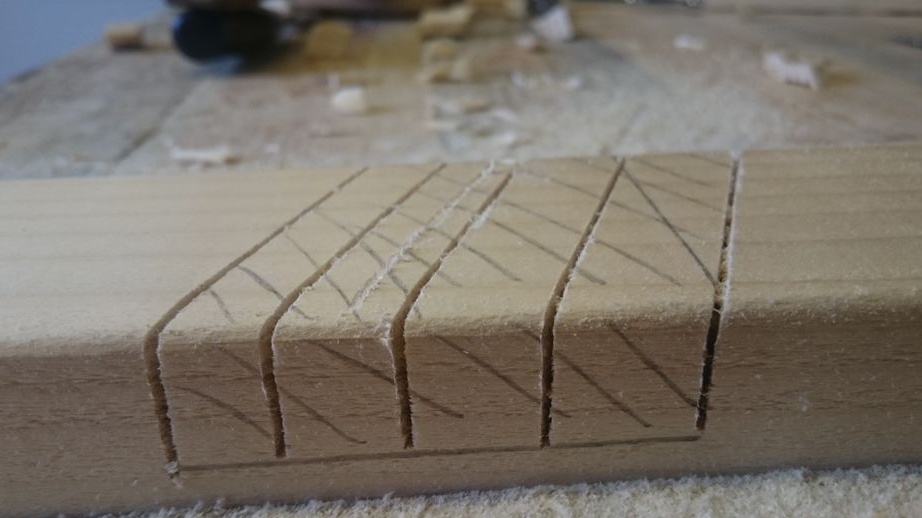
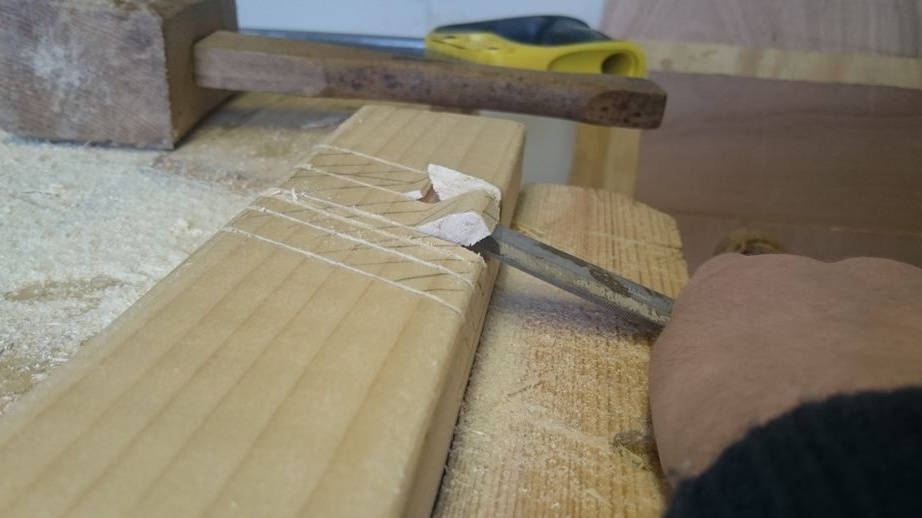
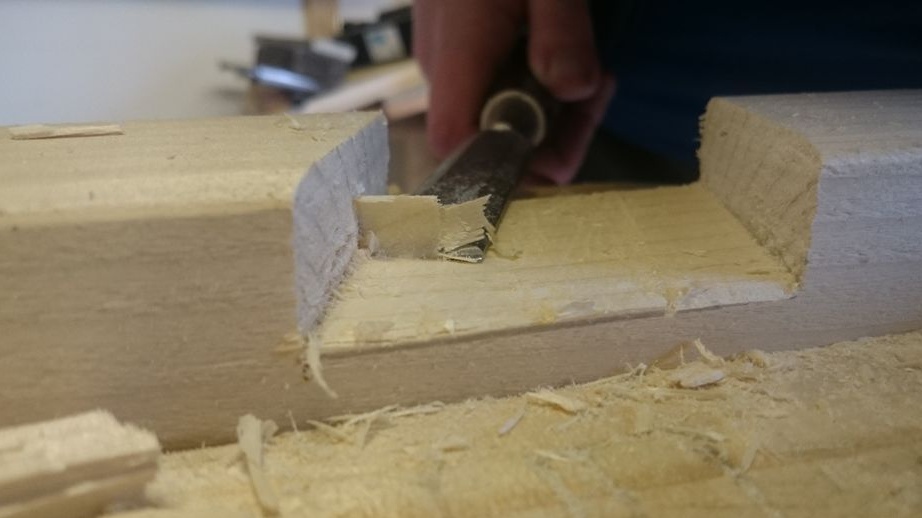
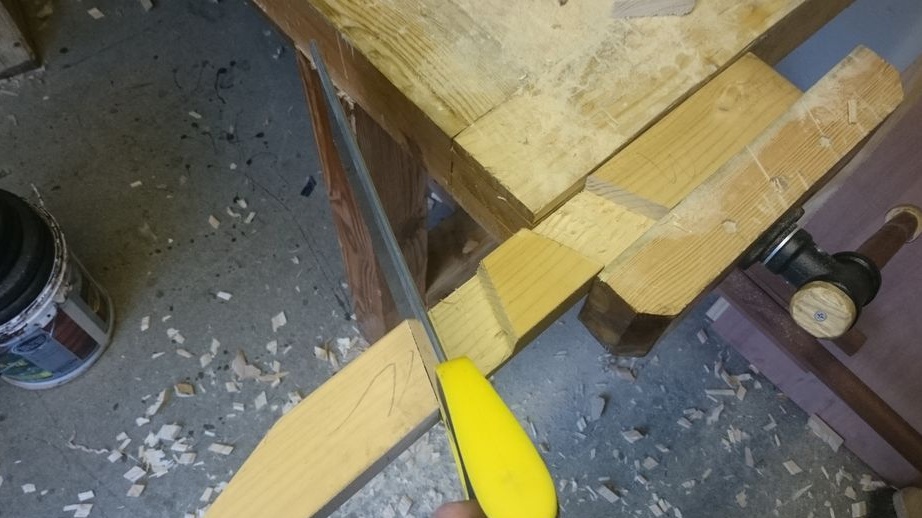
We saw through the edges of the grooves (on the crossbars) with a wire saw, as well as their inner part, not reaching the line where the depth ends: it will be easier to remove unnecessary volumes in the future; besides, cuts will not allow a possible chip (since wood has features in the arrangement of fibers) to move further and change the dimensions of the groove. With a chisel, roughly and sequentially remove the sawn sections, then more accurately bring the groove to the desired state. It is not ideal to smooth the surface ideally: roughness will serve as an additional fastening element when gluing.Next, we insert the crossbeams with the resulting grooves into the lying supports, circle with a pencil and hollow out the unnecessary parts. After working with a chisel, we clamp the crossbars in the workbench and saw off the excess part of the bars along the outer edges of the grooves.
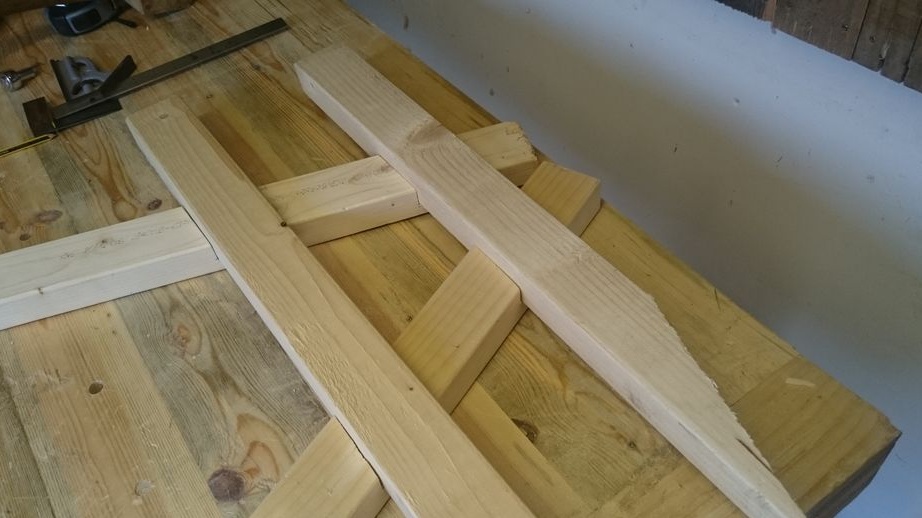
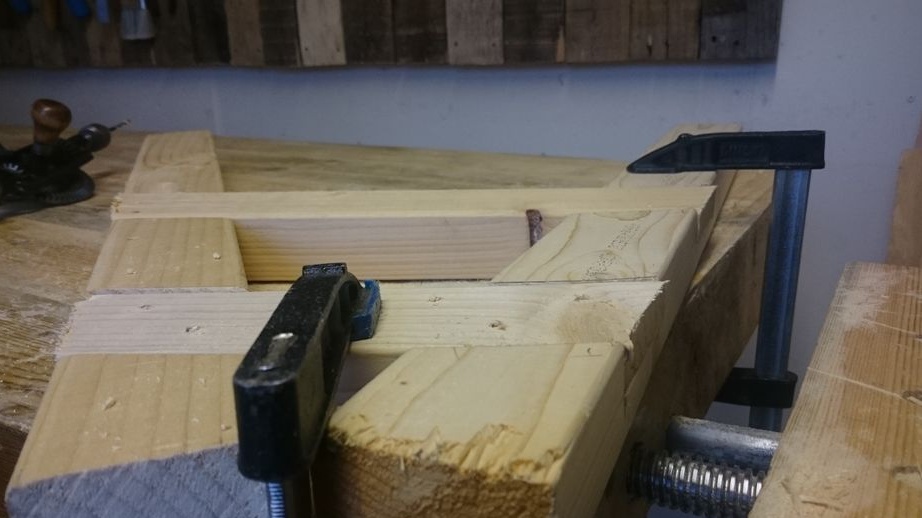
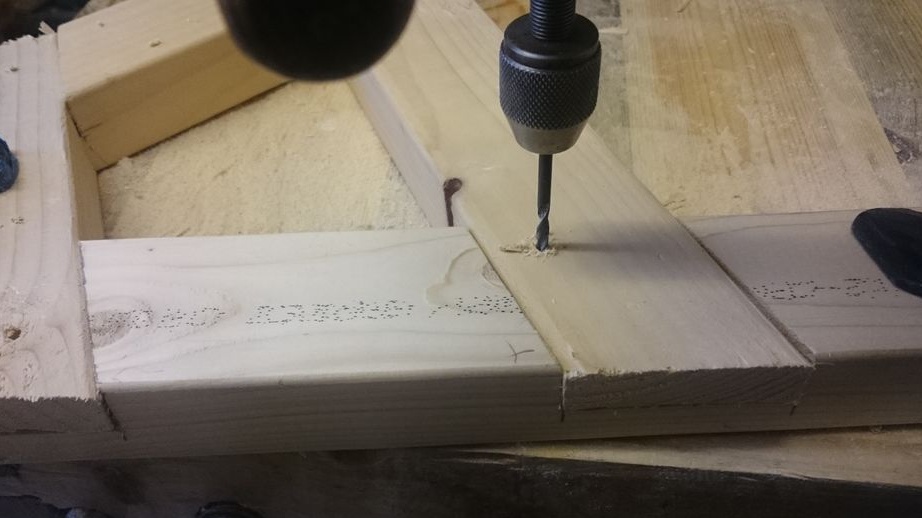
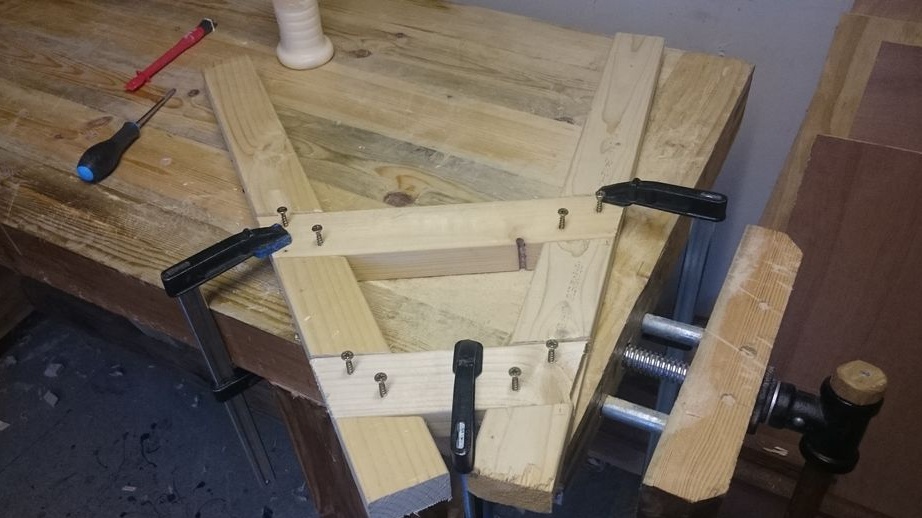
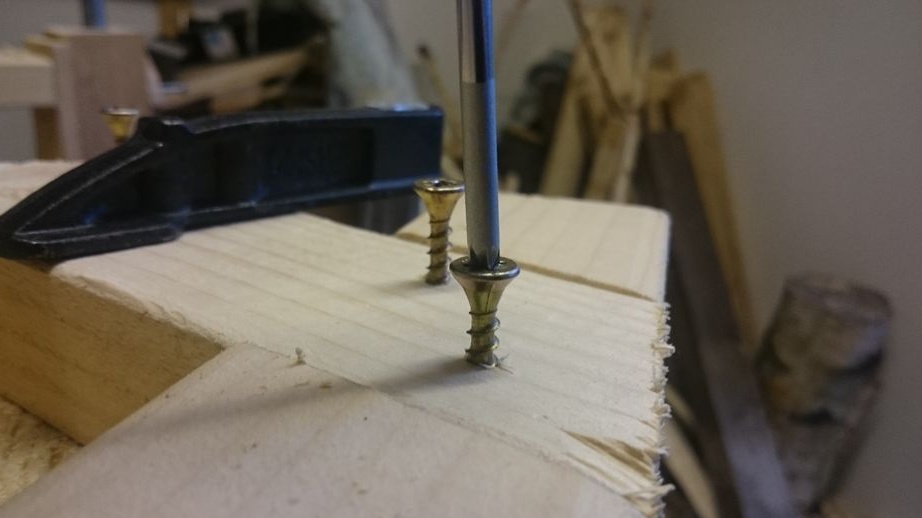
Step Three Drilling, gluing and fastening.
Now all the construction details are ready for assembly. We put them on the corner of the workbench and fix them with clamps. We outline places for screws. Drill eight holes. As the author notes, at first he did not completely tighten the screws, and only then began to lubricate the joints of the parts with carpentry glue. Until it is dry, screw the screws to the limit. In principle, the device is ready. The author admits that it would be more correct not to use the product immediately and let the glue dry, thereby cementing the structure. But impatience and curiosity overtake common sense.
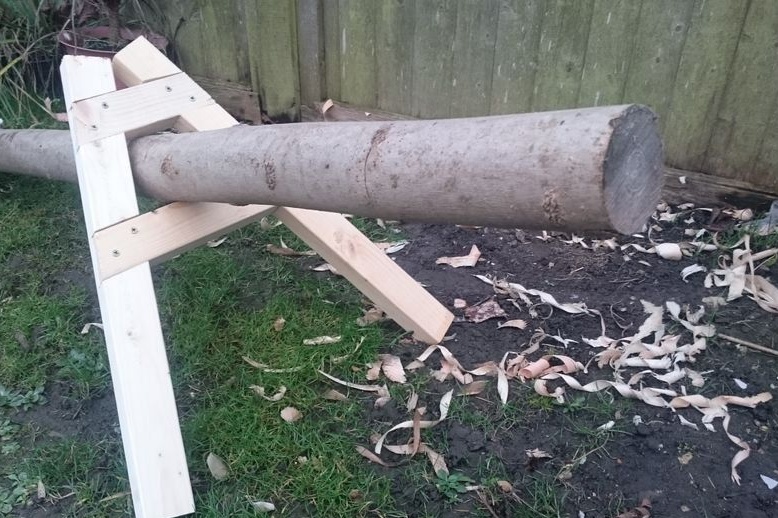
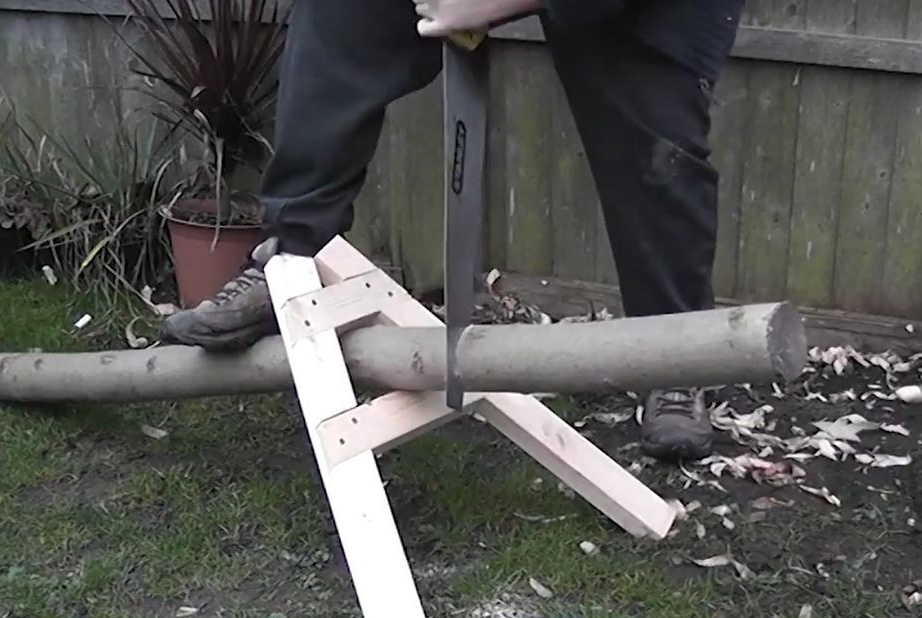
Step Four Testing fixtures.
We find some kind of not too thick log, insert it into the window of the device for a length sufficient for free sawing. With one foot we press on the log in order to give it (and with it the structure) a stable position. And saw off the chock.
Conclusion
It turned out pretty simple, but functioning device. For logs of certain diameters, appropriate distances between the crossbars are needed. You can also cut boards and timber. Putting the product against the wall and pointing to it, it will be inexcusable to ask the other inquisitive with a smug look: “But will you guess what it serves?”.